Before you attempt to use the system on regular PID mode, you'll want to calibrate your temp probe and probably do an auto-tuning cycle of the PID parameters so that you have good control of temps.
You are using an out of date browser. It may not display this or other websites correctly.
You should upgrade or use an alternative browser.
You should upgrade or use an alternative browser.
Electric burners - Any builders out there?
- Thread starter CidahMastah
- Start date

Help Support Homebrew Talk - Beer, Wine, Mead, & Cider Brewing Discussion Forum:
This site may earn a commission from merchant affiliate
links, including eBay, Amazon, and others.
CidahMastah
Well-Known Member
- Joined
- Nov 12, 2010
- Messages
- 4,201
- Reaction score
- 46
Before you attempt to use the system on regular PID mode, you'll want to calibrate your temp probe and probably do an auto-tuning cycle of the PID parameters so that you have good control of temps.
Thanks for the tips walker. I didn't see anything about clibrating the probe in the manual. I will have to dig in again and look.
Just curious, is the probe calibrating crucial to running a manual mode test?
Here is the auto tune procedure. What is the purpose of the autotuning? Any recc on whether I should use AT 1 or AT 2? I guess I thought that setting the parameters meant I wouldn't ahve to autotune.
The auto-tune can be started in two ways. 1) Set At=2. It will start
automatically after 10 seconds. 2) Set At=1. Then you can start the auto-tune
any time during the normal operation by pressing the A/M key. During auto
tuning, the instrument executes on-off control. After 2-3 times on-off action,
the microprocessor in the instrument will analyze the period, amplitude,
waveform of the oscillation generated by the on-off control, and calculate the
optimal control parameter value. The instrument begins to perform accurate
artificial intelligence control after auto tuning is finished. If you want to exit
from auto tuning mode, press and hold the (A/M) key for about 2 seconds
until the blinking of "At" symbol is stopped in the lower display window.
Generally, you will only need perform auto tuning once. After the auto tuning
is finished. The instrument will set parameter “At” to 3, which will prevent the
(A/M) key from triggering auto-tune. This will prevent an accidental repeat of
the auto-tuning process.
CidahMastah
Well-Known Member
- Joined
- Nov 12, 2010
- Messages
- 4,201
- Reaction score
- 46
For the Probe callibration:
4.10 Input offset “Pb”
Pb is used to set an input offset to compensate the error produced by the
sensor or input signal itself.
For example, if the controller displays 5 ºC when probe is in ice/water mixture,
setting Pb=-5, will make the controller display 0 ºC.
8.3 Poor Accuracy
Please make sure calibration i s done by immersing the probe in liquid.
Comparing the reference in air is not recommended because response time of
the sensor depends on its mass. Some of our sensors have response time
>10 minutes in the air. When the error is larger than 5 °F, the most common
problem is an improper connection between the thermocouple and the
controller. The thermocouple needs to be connected directly to the controller
unless a thermocouple connector and extension wire is used. Copper wire or
a thermocouple extension wire with the wrong polarity connected on the
thermocouple will cause the reading to drift more than 5 °F.
I.e.
place probe in ice water and see the temp reading. Adjust Pb as needed to get your reading.
Thanks for the tips walker. I didn't see anything about clibrating the probe in the manual. I will have to dig in again and look.
Just curious, is the probe calibrating crucial to running a manual mode test?
If you want your temp readings to be accurate, you will need to calibrate the probe. They usually have some amount of error on them.
For example: my probe reads 1.3*F too high. In ice water, the probe will read 33.3*F and in boiling water it reads 213.3*F.
You can program this error into the PID and it will account for it on displays and during operation. After entering the amount of error offset, my PID now displays 32*F in icewater and 212*F in boiling water.
If you just want to test that you can heat and boil water, then the probe error is somewhat irrelevant, but if you intend to heat to a specific temp, then you'll want to find out what the error is and account for it in the PID programming.
In the online manual for your PID, the parameter is called "Input Offset" and is shown as "Pb" on the PID display when you are cycling through options.
CidahMastah
Well-Known Member
- Joined
- Nov 12, 2010
- Messages
- 4,201
- Reaction score
- 46
If you just want to test that you can heat and boil water, then the probe error is somewhat irrelevant, but if you intend to heat to a specific temp, then you'll want to find out what the error is and account for it in the PID programming.
It would be nice to have it reading the right temp so when I heat strike water it can be pretty darn close.
Thanks for the input - I will definitely callibrate the probe - looks very easy to do once I get some ice water in it.
CidahMastah
Well-Known Member
- Joined
- Nov 12, 2010
- Messages
- 4,201
- Reaction score
- 46
Walker - any personal experience with the auto-tuning? What are the advantages of using it?
It would be nice to have it reading the right temp so when I heat strike water it can be pretty darn close.
Thanks for the input - I will definitely callibrate the probe - looks very easy to do once I get some ice water in it.
I would suggest taking a small cup and packing it full of crushed ice. Fine crush and pack it in the cup. Then just add enough water to make it like that road slush that turns all grey in the winder. Stick the probe in that to calibrate at 32*F.
Walker - any personal experience with the auto-tuning? What are the advantages of using it?
I have had mixed results, but my PID is a cheap-o Chinese PID. The autotuning can take a while to complete on mine and I ended up manually massaging the auto-tuned parameters afterwards because I didn't like the way the damn thing was behaving (overshooting).
I don't know if Auber's auto-tune algorithms are better or not, but I can't see how they would be worse.
CidahMastah
Well-Known Member
- Joined
- Nov 12, 2010
- Messages
- 4,201
- Reaction score
- 46
Thanks for the tips on callibration!
I guess as far as PID's go, the auberin one is at least cheap in price, quality is to be assessed Am I correct in assuming that the auto tuning is a sort of optimization, if you will, of performance of the device based on your parameter settings? i.e. it adjusts some of the parameter settings, if it interprets them as less efficient, based what the fuzzy logic thinks will be the most efficient settings?
I guess it shows I am a total newb at this PID thing Asking all these gd questions
  What can I say,... inquiring minds want to know haha
I guess as far as PID's go, the auberin one is at least cheap in price, quality is to be assessed
I guess it shows I am a total newb at this PID thing
during auto-tuning, the PID basically tries to learn about your system. things like
- if I kick on the heat, how long does it take before I see the temp start to increase
- if I turn off the heat, how long does it take before I see the temp STOP increasing
- if I kick on the heat for a short burst, how much effect on the temp does it cause
- if I don't do anything, how fast does the system lose heat
- etc
- etc
- etc
It gathers information about how your system behaves and then uses that to configure some of it's parameters so that it can better handle your system.
CidahMastah
Well-Known Member
- Joined
- Nov 12, 2010
- Messages
- 4,201
- Reaction score
- 46
So auto tuning is something that I should do during say a strike water heat or something? Or is it something I do prior to actual use. Sounds like the auto tuning has to be done on the substance that you are attempting to heat.
I could see why the auto tuning may cause overshooting if the fuzzy logic doesn't compensate for the heating curve of a liquid. I know the heating curve for water bringing it from say 33F to a boil is supposed to be constant, but my anecdotal experience seems contrary to that. i.e. it seems like the heating of the liquid struggles until it gains a sort of thermal mass, and then it sling shots the temp up a bit faster.
I wonder if the fuzzy logic compensates for this appropriately (probably depends on the quality of the PID).
Then again my anecdotal recollection of time vs. temp increase could be way off I usually am having a home brew when I am taking wort up to a boil!
I could see why the auto tuning may cause overshooting if the fuzzy logic doesn't compensate for the heating curve of a liquid. I know the heating curve for water bringing it from say 33F to a boil is supposed to be constant, but my anecdotal experience seems contrary to that. i.e. it seems like the heating of the liquid struggles until it gains a sort of thermal mass, and then it sling shots the temp up a bit faster.
I wonder if the fuzzy logic compensates for this appropriately (probably depends on the quality of the PID).
Then again my anecdotal recollection of time vs. temp increase could be way off
don't over-think this. You will probably only have to autotune it one time, and then never mess with that again.
You are planning to to a wet-test of everything before really using it, so I would wet-test it with a normal amount of water, like you would have in there on brew day.
- Calibrate the probe in ice water.
- Then install it in your kettle and put your water in.
- Using default PID parameters, let the PID heat the water up to some set-temp.
- Enter auto-tune mode as you get close to that set-temp (I guess this is mode is AT=1 according to the text you pasted earlier).
- Let the auto-tune finish. be patient and don't interrupt it. it might take a while.
After that, you should be good to go for tuning.
I would then suggest trying to heat water to 300*F or something impossible and let the PID start boiling the water. You can then check that your probe is accurately reading 212*F when it's boiling.
Switch over to manual mode and play around with controlling the boil strength.
You're done then.
CidahMastah
Well-Known Member
- Joined
- Nov 12, 2010
- Messages
- 4,201
- Reaction score
- 46
don't over-think this.
Who me?! ha - guilty!
Thanks for the run down - I will follow your suggestions.
I think I will brew propane Sat, then Sunday cut my holes and do the wet test. I was hoping I could just charge in and use it Sat. Probably pays to do a wet test with water, not wort.
Will let you know how it goes

CidahMastah
Well-Known Member
- Joined
- Nov 12, 2010
- Messages
- 4,201
- Reaction score
- 46
G-damn boys - did the maiden voyage today on a rye IPA - awesome a couple tweeks needed but all is good - will post some pics later
CidahMastah
Well-Known Member
- Joined
- Nov 12, 2010
- Messages
- 4,201
- Reaction score
- 46
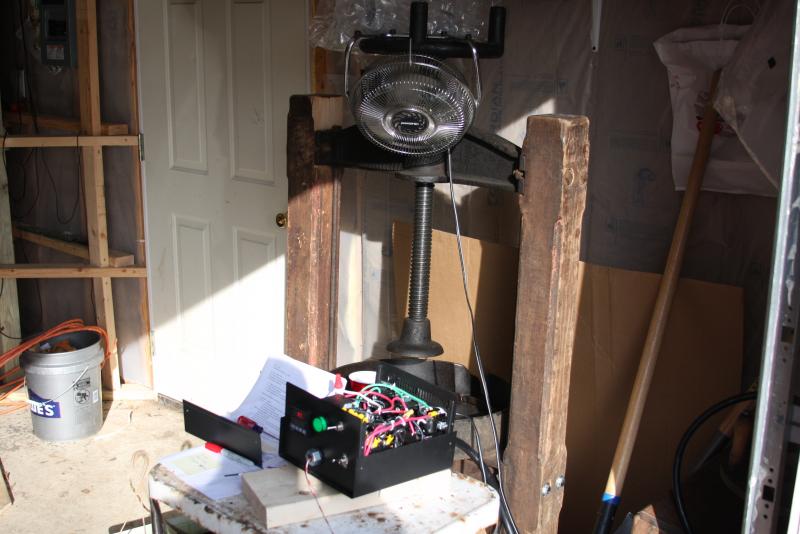
So I will start with the pics of the holes - thanks for the advice. These holes were super easy to make clean. I used Bobby's tips on can of oil and dipping the bit:

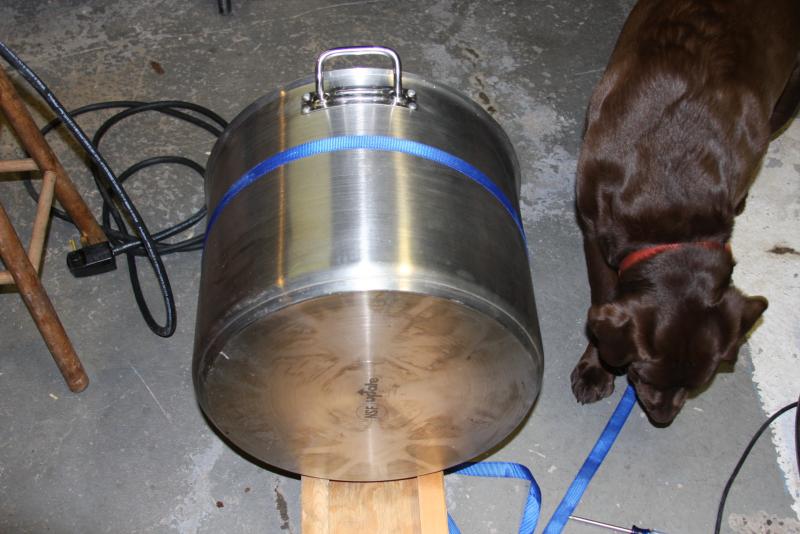

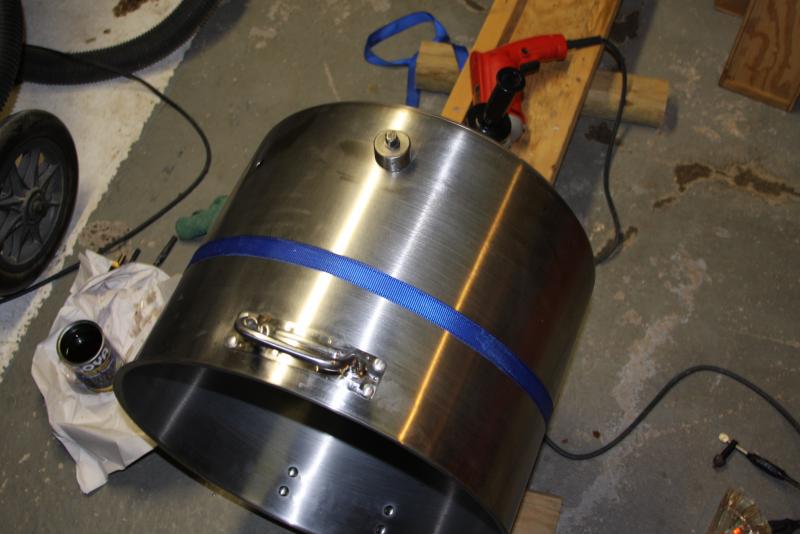
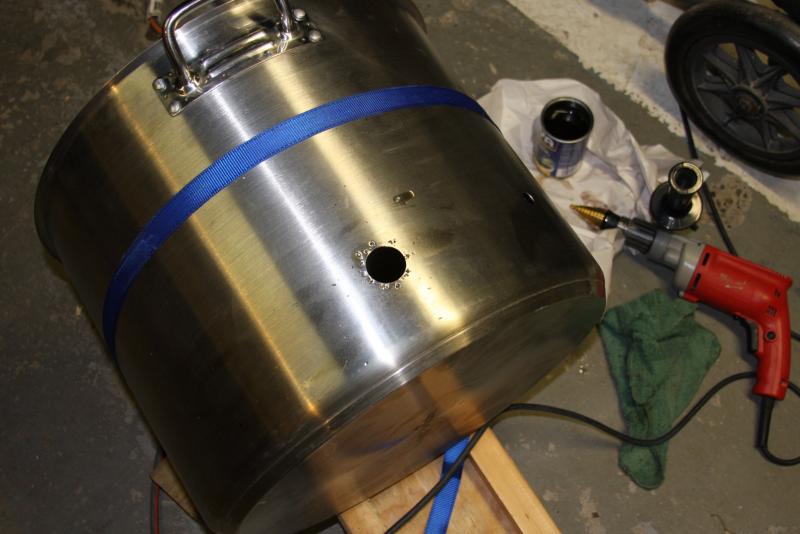


CidahMastah
Well-Known Member
- Joined
- Nov 12, 2010
- Messages
- 4,201
- Reaction score
- 46
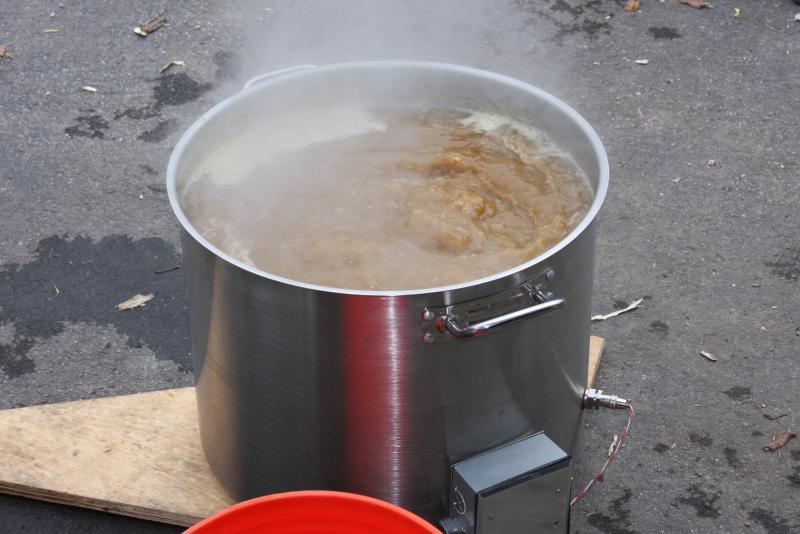
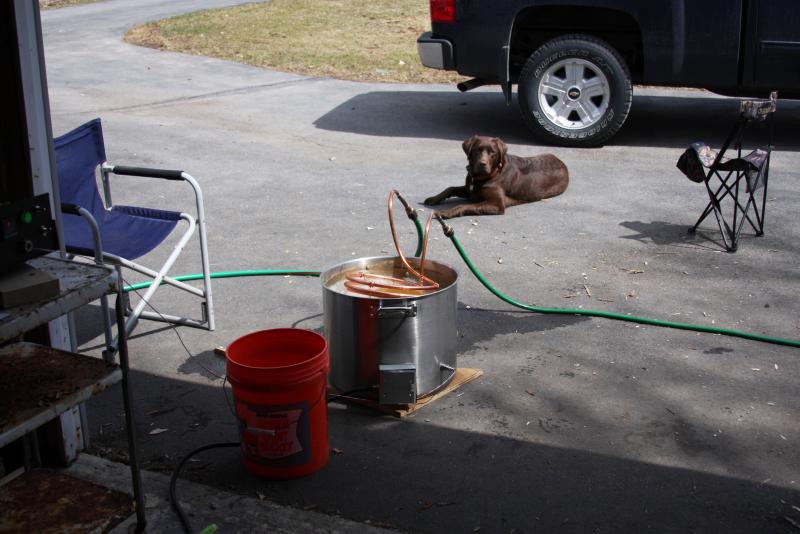
And now for some brewing shots:
The pot, my buddy and a curious neighbor and my good pup,
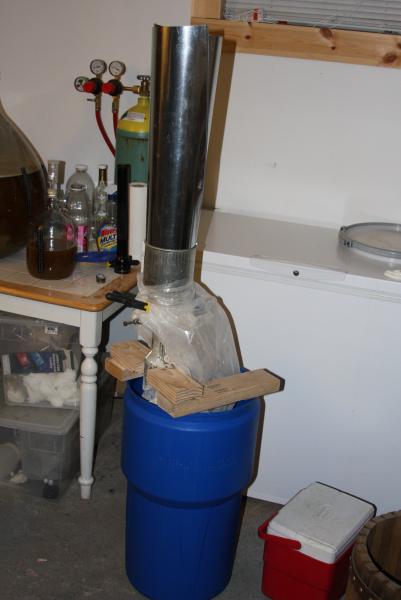
And for Walker,..
Didn't want you bragging about how ugly your set up was without showing you my ghetto-tastic "grain silo" - HA (last pic)! Works great thought takes two fillings for most double batches. I am guessing between 12-15lbs of grain in the silo.
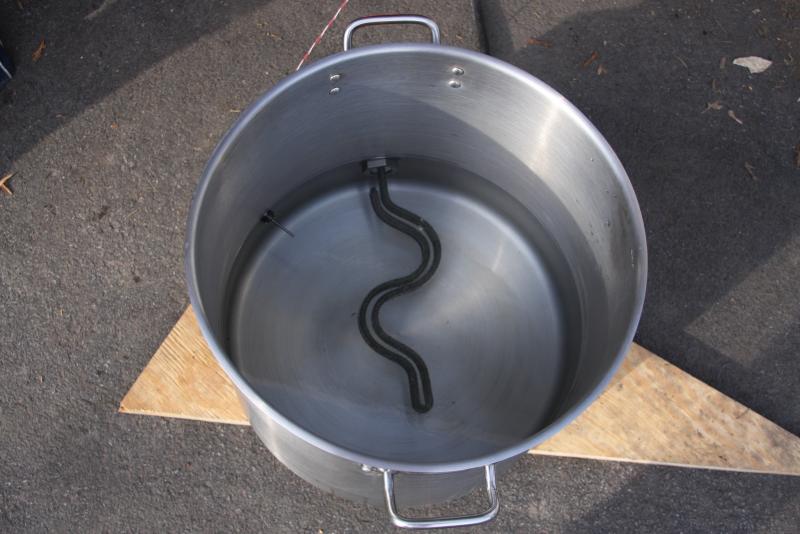


CidahMastah
Well-Known Member
- Joined
- Nov 12, 2010
- Messages
- 4,201
- Reaction score
- 46
And off to check on my mash - just decided to give it a second run today!
sweet. now put a fan in the box and put the lid back on!
congrats, man...
congrats, man...
CidahMastah
Well-Known Member
- Joined
- Nov 12, 2010
- Messages
- 4,201
- Reaction score
- 46
sweet. now put a fan in the box and put the lid back on!
congrats, man...
Will do!
Shot the heat sink with a temp laser and the hottest it got with no fan was 190F. That said, the 5500w element is perfect for a 10 gallon batch, but it is not a ripper of a boil, which is actually good. However this set up would not be ideal for a 15G batch (you would probably need more power). I ran a 90 minute boil with 14G start volume and it gave a nice boil, as you see in the pictures.
Instead of having to adjust with the percentage in manual mode, I need to keep the element at 100% for the full boil. It will be interesting to see how the element fairs for its life cycle.
All said I am VERY happy with it.
- Joined
- Nov 18, 2008
- Messages
- 2,058
- Reaction score
- 25
Will do!
Shot the heat sink with a temp laser and the hottest it got with no fan was 190F. That said, the 5500w element is perfect for a 10 gallon batch, but it is not a ripper of a boil, which is actually good. However this set up would not be ideal for a 15G batch (you would probably need more power). I ran a 90 minute boil with 14G start volume and it gave a nice boil, as you see in the pictures.
Instead of having to adjust with the percentage in manual mode, I need to keep the element at 100% for the full boil. It will be interesting to see how the element fairs for its life cycle.
All said I am VERY happy with it.
I'm not sure where you are located, but I think you might benefit from getting the kettle off the ground. I know you have a piece of wood under it, but it just seems that the blacktop could be acting as a massive heat sink.
Ed
CidahMastah
Well-Known Member
- Joined
- Nov 12, 2010
- Messages
- 4,201
- Reaction score
- 46
I'm not sure where you are located, but I think you might benefit from getting the kettle off the ground. I know you have a piece of wood under it, but it just seems that the blacktop could be acting as a massive heat sink.
Ed
I put that piece of plywood under the pot for a test run - will come up with something more permanent later. However the plywood should have been an excellent insulator from the driveway.
It was like a fall day temp when I brewed - so jean and sweatshirt temps.
Are you saying you think the element should be performing better than it is?
Ed and onthekeg jumped in before I could, but I am surprised at the comments you made on boil strength, too. I just made a 10 gallon batch Friday night and I've got 5500W in my kettle. I had no problem boiling over 13 gallons of liquid (3 times in fact), and I wasn't running the element at 100%.
It might have to do with the shape of your kettle. I use a converted sanke keg, so my kettle is taller and narrower than that short fat kettle you have. You have more surface area through which to lose heat.
Some insulation around the outside of the pot will probably help considerably.
It might have to do with the shape of your kettle. I use a converted sanke keg, so my kettle is taller and narrower than that short fat kettle you have. You have more surface area through which to lose heat.
Some insulation around the outside of the pot will probably help considerably.
CidahMastah
Well-Known Member
- Joined
- Nov 12, 2010
- Messages
- 4,201
- Reaction score
- 46
Ed and onthekeg jumped in before I could, but I am surprised at the comments you made on boil strength, too. I just made a 10 gallon batch Friday night and I've got 5500W in my kettle. I had no problem boiling over 13 gallons of liquid (3 times in fact), and I wasn't running the element at 100%.
It might have to do with the shape of your kettle. I use a converted sanke keg, so my kettle is taller and narrower than that short fat kettle you have. You have more surface area through which to lose heat.
Some insulation around the outside of the pot will probably help considerably.
I bet that you are right on insulating the kettle. The top is very wide, and I lose about a gallon of water to vapor off per 30 minutes of boil.
Is that metallic bubble wrap from home depot heat safe at high temps? If not, maybe I could scrap an old towel and then wrap the pot in that insulator.
I don't know how the unit would run at 90%, I mean based on my readings I should be getting 238V at max draw.
Ideally I would like to run the element at less than 100%, to extend the life of the element.
I didn't have a problem with teh boil, it just wasn't an @ss ripper of a boil. Definitely did the job though.
Thanks for the suggestions guys.
CidahMastah
Well-Known Member
- Joined
- Nov 12, 2010
- Messages
- 4,201
- Reaction score
- 46
I'm wondering if your PID is actually letting it go 100% or if its around 90% when its wide open. My element will totally explode the wort out of the kettle if I leave it at 100%
I checked the PID and the reading was A 100; which equals 100 percent load on the element. Were you thinking the reading is incorrect?
The insulation ("reflectix") states that the max temp is 180*F, but I use it on my kettle and it seems to work fine. It doesn't melt or anything.I bet that you are right on insulating the kettle. The top is very wide, and I lose about a gallon of water to vapor off per 30 minutes of boil.
Is that metallic bubble wrap from home depot heat safe at high temps? If not, maybe I could scrap an old towel and then wrap the pot in that insulator.
I don't know how the unit would run at 90%, I mean based on my readings I should be getting 238V at max draw.
In manual mode, the voltage is not going to be reduced for controlling boil strength. It's the amount of on/off time that is adjusted. A setting of 75% would mean that the element is fully on (238V applied) for 75% of the time and then fully off (0V applies) for 25% of the time. It cycles back and forth between on and off in an endless loop.
CidahMastah
Well-Known Member
- Joined
- Nov 12, 2010
- Messages
- 4,201
- Reaction score
- 46
So at 75% your load is 100% - hm, I misunderstood that. With the cycling on and off like that you are able to maintain a consistent boil?
Thanks for the info on reflectix - I bought a roll but never used it for the mashtun. I am interested to see if there is any real value to putting it on the pot. I guess it would mean less element wear and tear.
Thanks for the info on reflectix - I bought a roll but never used it for the mashtun. I am interested to see if there is any real value to putting it on the pot. I guess it would mean less element wear and tear.
Yes, because the interval of time over which the cycling happens is very small. Like 2 seconds or something.So at 75% your load is 100% - hm, I misunderstood that. With the cycling on and off like that you are able to maintain a consistent boil?
75% power would be 1.5 seconds on, 0.5 seconds off.
CidahMastah
Well-Known Member
- Joined
- Nov 12, 2010
- Messages
- 4,201
- Reaction score
- 46
Gotcha - well I am sure there is an advantage to anything less than 100% on time for 60-90 minutes. Looks like there is some fine tuning in the mix. (not to mention my fan installation tweak).
Thanks!
Thanks!
- Joined
- Nov 18, 2008
- Messages
- 2,058
- Reaction score
- 25
I put that piece of plywood under the pot for a test run - will come up with something more permanent later. However the plywood should have been an excellent insulator from the driveway.
It was like a fall day temp when I brewed - so jean and sweatshirt temps.
Are you saying you think the element should be performing better than it is?
I wouldn't consider wood an excellent insulator.
If you're in a sweatshirt, the ground is probably still pretty cool. I could see it sucking the heat out of your kettle, just like the heatsink you put on your SSR. Next test, you might just get it off the ground a bit even if you just sat it on a couple strips of wood. I also agree with Walker that some insulation should help.
CidahMastah
Well-Known Member
- Joined
- Nov 12, 2010
- Messages
- 4,201
- Reaction score
- 46
I wouldn't consider wood an excellent insulator.
If you're in a sweatshirt, the ground is probably still pretty cool. I could see it sucking the heat out of your kettle, just like the heatsink you put on your SSR. Next test, you might just get it off the ground a bit even if you just sat it on a couple strips of wood. I also agree with Walker that some insulation should help.
Perhaps excellent is stretching it a bit. However it is a "good" or average insulator (better than black top
Just the same - point taken. The entire system could benefit from some insulation of some sort, all the way around. Especially since I have such a fat boy stumpy pot. Not sure what your boil off rates are, but I think a gallon an hour seems higher than the keggle users (or more narrow styled pots).
The next project in line is our brew stand, but I can come up with a better temporary place for the boil pot for the next round -
thanks for the tips
- Joined
- Nov 18, 2008
- Messages
- 2,058
- Reaction score
- 25
Perhaps excellent is stretching it a bit. However it is a "good" or average insulator (better than black top).
Just the same - point taken. The entire system could benefit from some insulation of some sort, all the way around. Especially since I have such a fat boy stumpy pot. Not sure what your boil off rates are, but I think a gallon an hour seems higher than the keggle users (or more narrow styled pots).
The next project in line is our brew stand, but I can come up with a better temporary place for the boil pot for the next round -
thanks for the tips
I use a keggle for my boil kettle and lose about 1.5 gallons in a 60minute boil.
Part of that is evaporation, part is contraction from cooling. Environmental conditions will also play a role in your loss... On a cool, dry, windy day you will lose more. After a couple uses, you'll get it tuned in I'm sure.
Ed
CidahMastah
Well-Known Member
- Joined
- Nov 12, 2010
- Messages
- 4,201
- Reaction score
- 46
oop - i meant a gallon per half hour - so i am .5 gallon plus on keggle users.
bruin_ale
Well-Known Member
I'm about where Ed is.. 1.5gal per hour. I just did a 5 gallon batch on Sat and have it at I think 65% during the boil - which is quite vigorous. I haven't tried a 10 gallon batch yet, so not sure how it'll do but given how quickly/easily it brings 7.25 gallons (for a 5 gallon batch) to a boil I'm sure it can do it easily. Takes 20 minutes to get to a boil, I turn the boil on as I'm drawing off my 1st batch sparge and it's boiling about the time I finish the second sparge. I setup my BCS to do that part automagically, I have a boil process that I just click when i want it to start ramping up. Starts at 100% and monitors the boil kettle temp til it hits 206 or something like that and then switches to duty cycle.
- Joined
- Nov 18, 2008
- Messages
- 2,058
- Reaction score
- 25
oop - i meant a gallon per half hour - so i am .5 gallon plus on keggle users.
You lost a bit more than I usually do but you were outside on a cool day.
I don't think you're too far off.
Keep in mind, all you are boiling off is water... it's cheap. Once you know how your system is going to behave, you can add water preboil if needed. Or, you could even add water midway through the boil if you think you are going to be low on your final volume. The problem with adding during the boil is that you will likely lose the boil, but I think this is better than adding post boil because the added water will be sanitized.
Ed
CidahMastah
Well-Known Member
- Joined
- Nov 12, 2010
- Messages
- 4,201
- Reaction score
- 46
I'm about where Ed is.. 1.5gal per hour. I just did a 5 gallon batch on Sat and have it at I think 65% during the boil - which is quite vigorous. I haven't tried a 10 gallon batch yet, so not sure how it'll do but given how quickly/easily it brings 7.25 gallons (for a 5 gallon batch) to a boil I'm sure it can do it easily. Takes 20 minutes to get to a boil, I turn the boil on as I'm drawing off my 1st batch sparge and it's boiling about the time I finish the second sparge. I setup my BCS to do that part automagically, I have a boil process that I just click when i want it to start ramping up. Starts at 100% and monitors the boil kettle temp til it hits 206 or something like that and then switches to duty cycle.
So I am not that far off you guys. I usually shoot for 11g batches, start boil volume of 13g. After I chill the wort I let it sit for a couple minutes to let the trub settle down a bit, I try to leave the tale end hop matter in the BK.
It is scary how repeatable my boil off has been. But repeatability is what I am shooting for!
Thanks for the system comparisons guys.
from my perspective, I am glad it works as is for now. Knowing I can optimize the performance with some changes is very encouraging. It would be nice to lessen the electricity usage.
How do you guys clean your element? noticed mine had some caked on hard to get off stuff on it. Any suggestions?
bruin_ale
Well-Known Member
Mine is usually pretty clean.. I go over the inside of the BK with an oxyclean sponge to clean the walls and then rinse it out with the hose. I cool in a plate chiller and I put the hops in a hop spider, so there's not much in the way of particulate to get stuck on the element.
CidahMastah
Well-Known Member
- Joined
- Nov 12, 2010
- Messages
- 4,201
- Reaction score
- 46
Might be a combination of free hopping, my hard mineral filled well water or running the element constantly for an hour or more.
I think I will do time trials next time I brew.
i.e.
a. how long to heat strike water
b. how long to take wort to a boil from mash tun. etc.
I think I will do time trials next time I brew.
i.e.
a. how long to heat strike water
b. how long to take wort to a boil from mash tun. etc.
CidahMastah
Well-Known Member
- Joined
- Nov 12, 2010
- Messages
- 4,201
- Reaction score
- 46
Liking the hop spider idea
Still wish I could find a cheap stainless screen though. I use to use muslin sacks, and got a plastic sparge bag. Just a pain to clean, they get discolored, look dirty as....
Still wish I could find a cheap stainless screen though. I use to use muslin sacks, and got a plastic sparge bag. Just a pain to clean, they get discolored, look dirty as....
- Joined
- Nov 18, 2008
- Messages
- 2,058
- Reaction score
- 25
So I am not that far off you guys. I usually shoot for 11g batches, start boil volume of 13g. After I chill the wort I let it sit for a couple minutes to let the trub settle down a bit, I try to leave the tale end hop matter in the BK.
It is scary how repeatable my boil off has been. But repeatability is what I am shooting for!
Thanks for the system comparisons guys.
from my perspective, I am glad it works as is for now. Knowing I can optimize the performance with some changes is very encouraging. It would be nice to lessen the electricity usage.
How do you guys clean your element? noticed mine had some caked on hard to get off stuff on it. Any suggestions?
I rinse everthing I can from the MT & BK.
Then starting in the HLT, I heat ~5 gallons of water with oxyclean to about 120f. I circulate for a while & pump through my RIMS heater to the MT, Circulate for a while and pump to the BK, circulate for awhile & dump. In each vessel, while the warm oxyclean is present, I use a green scotch brite type pot scrubberto kinda hit any build up. My elelments cleanup pretty easy with the oxyclean & scrubber. After the oxyclean, I follow the same process with fresh water and then with SaniClean.
Ed
Similar threads
- Replies
- 10
- Views
- 697
- Replies
- 4
- Views
- 738

