
jfkriege
Well-Known Member
Desires for this project:
1. Batch sizes from 2.5-10 gallons
2. Small footprint
3. Able to brew indoors all year round
4. Simple
5. Transition to all grain brewing
6. Majority stainless steel parts
7. Under $1000
After researching on these forums for about 9 months, and continuing to develop my brewing with extract brewing, the phase 1 portion of the build is complete.
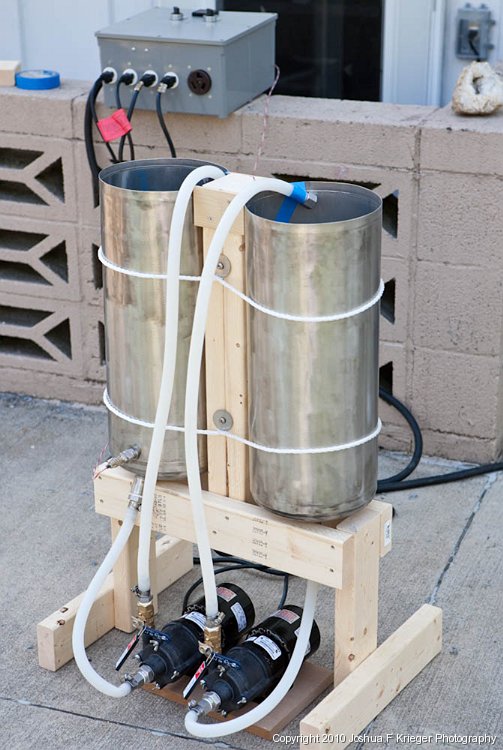
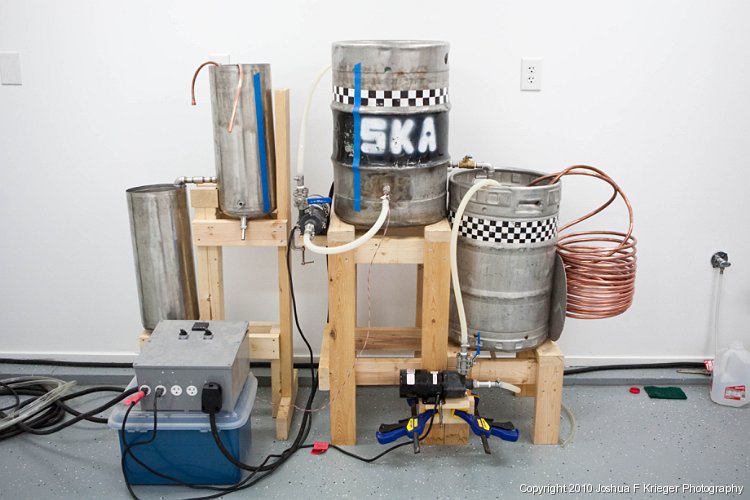
To meet desire 1, I decided that I was going to have two systems running off of a common control box. In order to minimize the footprint of the system I went with a modified version of a brutus 20e setup. The electric system allows me to keep things simple and brew indoors.
I have broken the build into two phases. The first phase is to make an operational 2.5 gallon system. Once the kinks are worked out, I will move into phase 2 and build out a second two tanks (15.5 gallon keggles) which will share the control box and expand my options to 5 and 10 gallon batches.
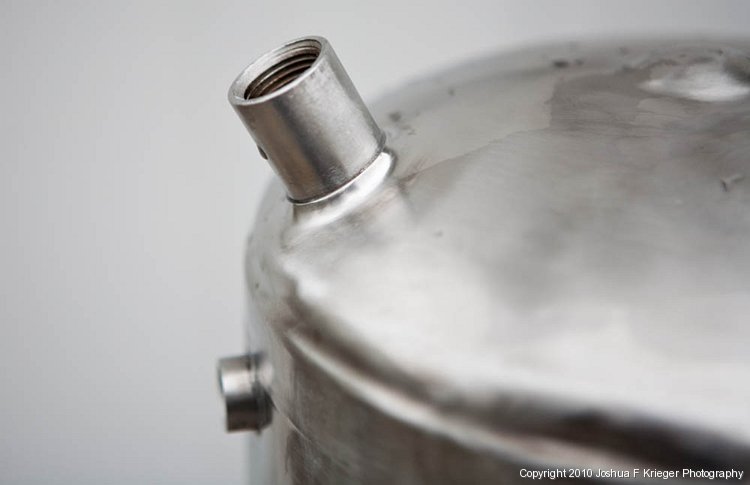
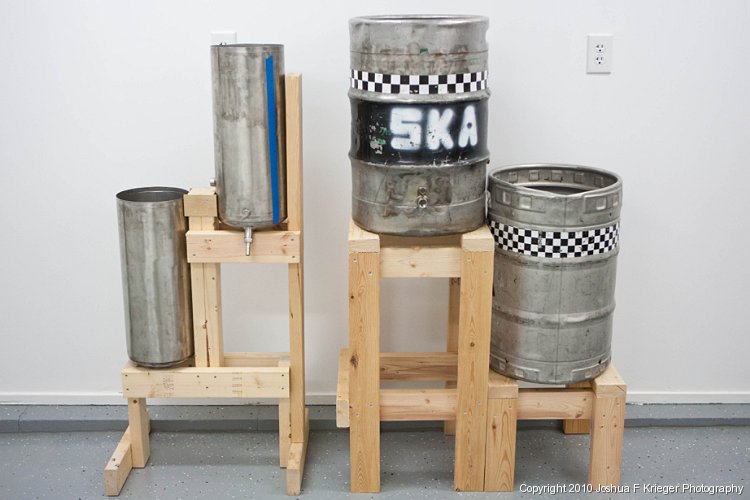
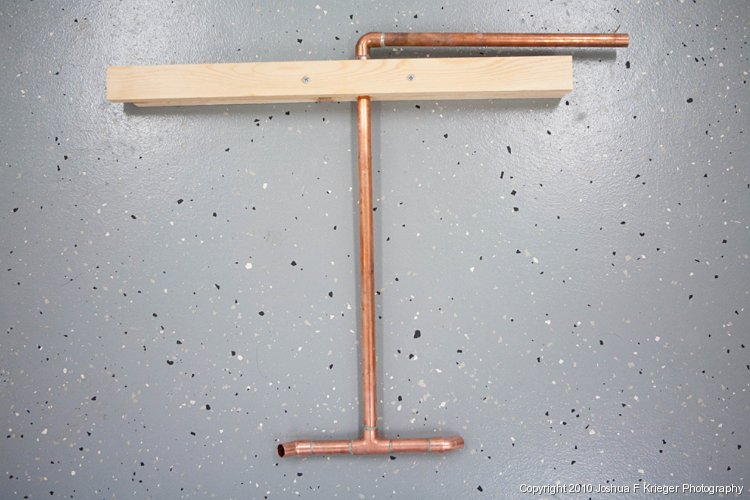
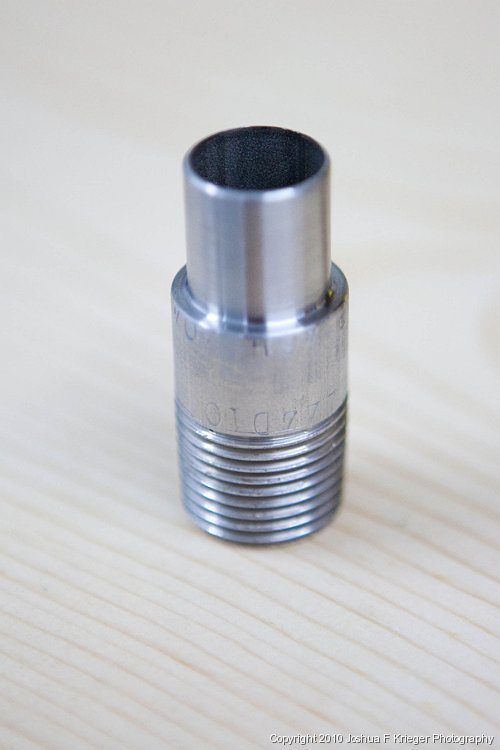
Phase 1 started with deciding what kind of tanks I wanted. I knew I wanted stainless steel, but things were a little too expensive for the build to buy new pots. In the end, I made the kettle and the MLT out of Cornelius kegs that were going to the scrap yard. I cut the top off and removed the rubber bottom (a huge pain in the ass) to make my tanks. Fittings are all stainless steel and are inserted using a variant of GreenMonti’s keg tool. Once the fittings were in place I used some StayBrite #8 to solder them in place. It worked beautifully. On the boil kettle, I also used the StayBrite solder to attach the two 1“ NPS nuts to the kettle. The keg tanks are small enough that using them like everyone else does was not going to give me a good seal. The drain for the BK is off to one side to allow for draining after a whirlpool. It is a full coupler to allow me to screw in different height tubes and vary the amount of things I leave behind.
Tank 1 after taking off the top and bottom
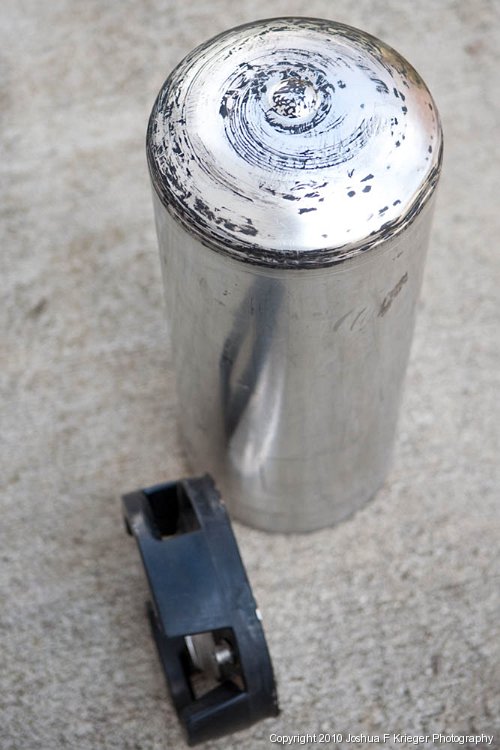
Keg tool on its first run
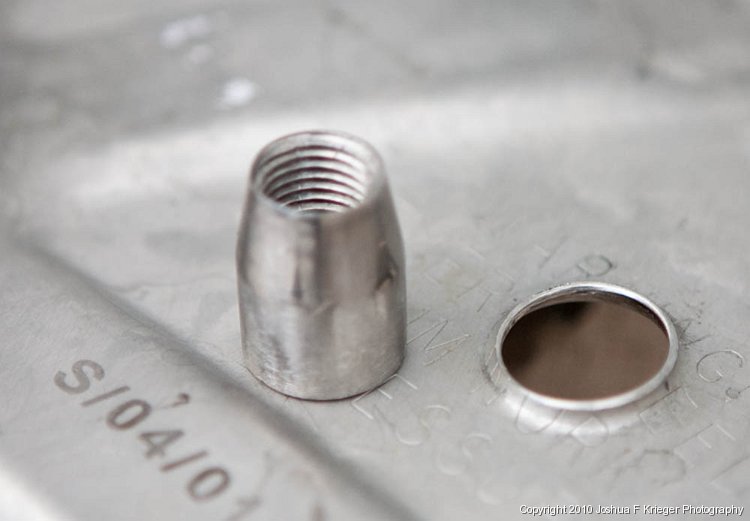
The drain port for the BK and the 1/4" NPT RTD port
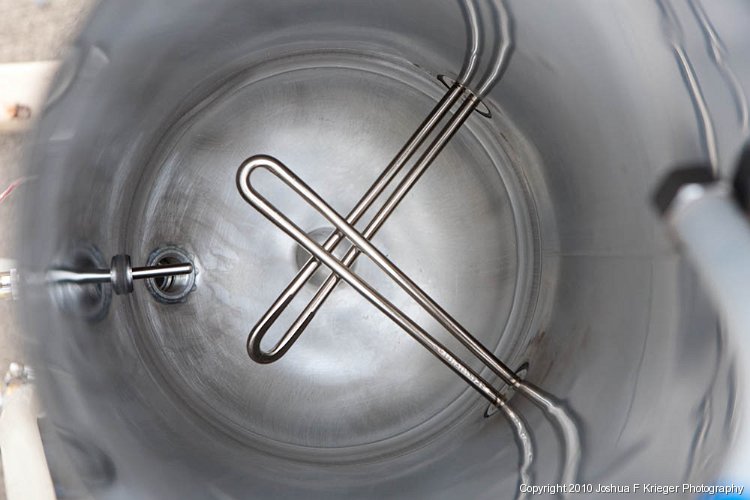
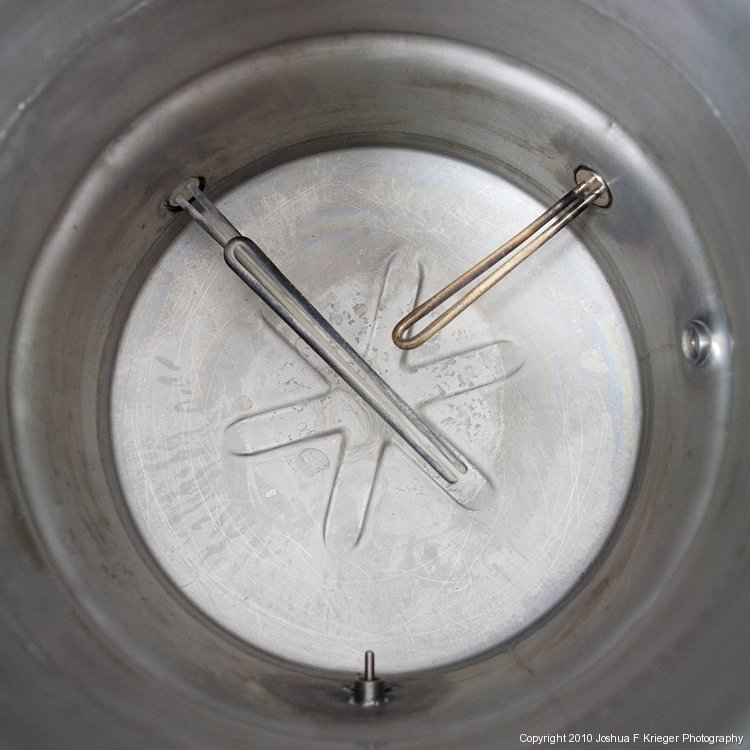
The two 1500W elements (two were used because neither could be over 7.5" long).
Inside of the BK
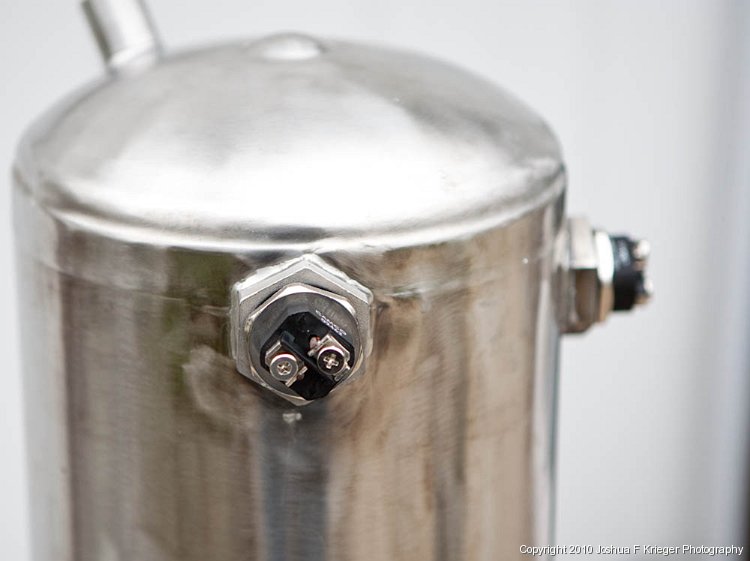
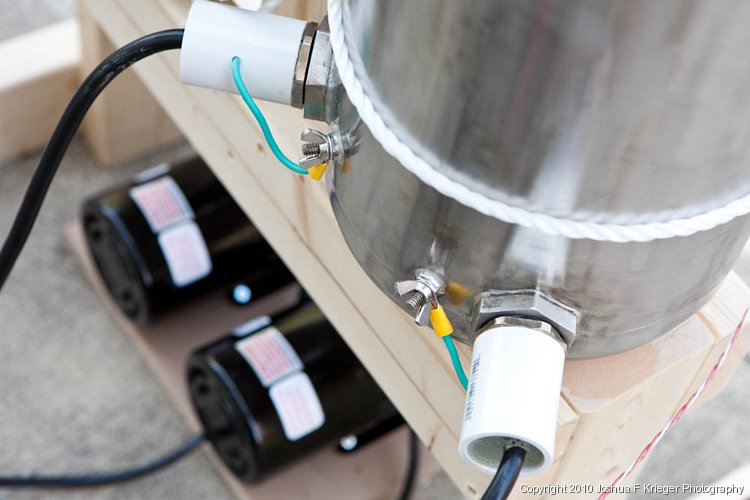
Potted elements and the grounding posts. The two pumps are in the background.
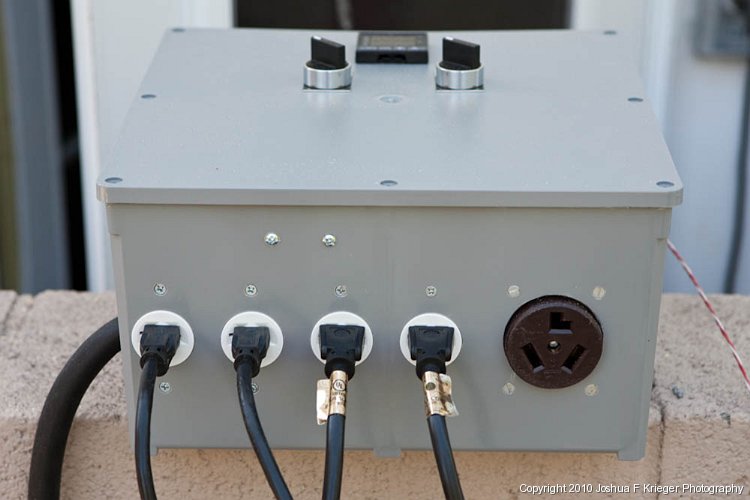
Electric box: PID and two pump switches up top. Two 120V elements on the left, two pumps next to them, and a 240V outlet for phase 2. The cord coming in and the GFCI circuit it attaches to are rated for 240V 50A.
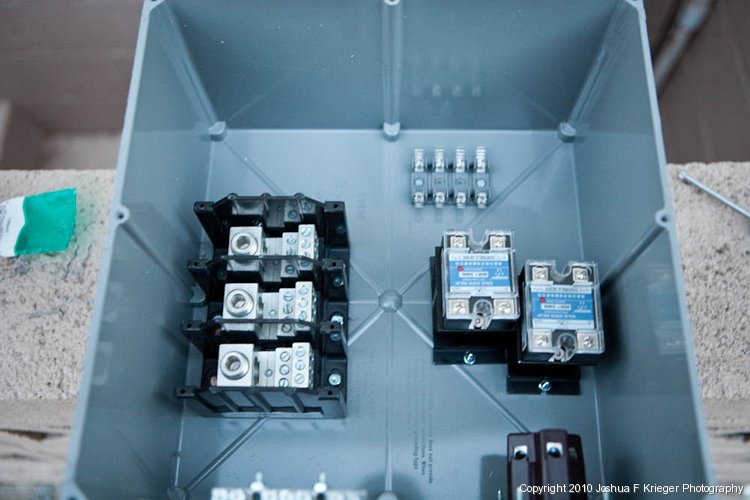
Control box internal layout before the wire nest went in
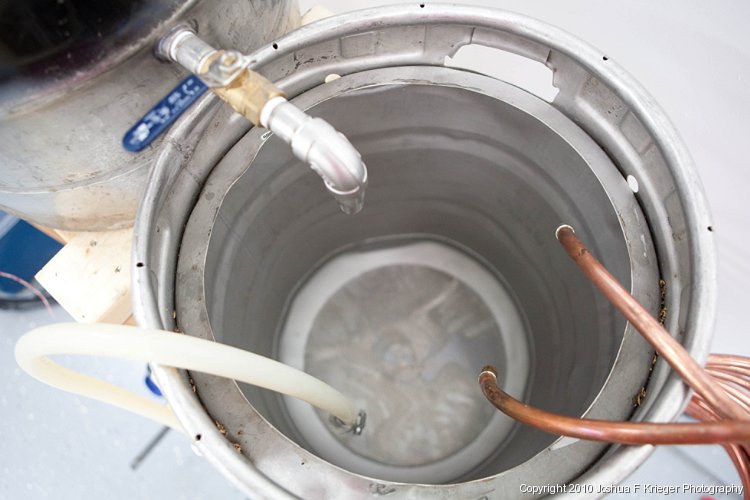
The MLT was constructed in the same way with a center drain as the only fitting. JayBird made a custom false bottom for the system and it is a perfect fit and excellent work.
A brew day goes as follows:
1. Setup the brewery. This takes about 5 to 7 minutes from totally torn apart to ready to fill.
2. Put all of the water into the BK and heat to mash in temperatures. With 3 kW this takes about 20 minutes. The PID controller works like a charm after tuning. I usually measure out things at this point.
3. Recirculate the MLT back onto itself until clear. I typically do this for about 3 minutes and it runs beautifully clear.
4. Cross recirculate keeping 1 gallon in the boil kettle, using the BK as a sort of RIMS system. The last iodine test I did had this at about 40 minutes for an American Amber. Since it is cross recirculating, I don’t really worry about much.
5. When conversion is complete, pump everything into the BK. I then unhook the hose on the bottom of the MLT and let it continue draining into a mason jar under the system to collect everything. The amber that just got done had a grain absorption of .04 qts/lb.
6. Boil as normal. I switch into manual and it works like a charm.
7. Cool the wort using a mixture of hose water and then ice in the MLT while whirlpooling. I start out with hose water and then switch to pumping ice water around the IC from the MLT and back in the top.
8. Whirlpool. I pull out the IC and whirlpool for just a minute and then cap it and leave it for 30 minutes. Last time I did this I got some break material, but left a whole lot of it behind.
9. Pump into the fermenter . Pretty easy.
This is during the first full wet test of the system and tuning of the PID
The American Amber that I did as my first all grain batch and my first batch on the new system was a 4 hour brew day after clean up. It was a nice easy day and nothing went terribly wrong. My one comment is that it will take some tuning of my skills to get a really constant volume in the boil kettle given that I am balancing two pumps. This was much easier on the second batch. I also determined that I am running about a 5F differential between what I set the boil kettle at and what the grain bed is. Mash out is achieved from 154 in about 10 minutes. I also now measure volume using marking on the tank and an excel spreadsheet that takes the marking and the temperature and gives me the volume. the silicone hoses are used as the sight gage. If I hold one up, the water inside the tube equalizes with the internal level; it works well and fast without an additional port or tube.
I don’t have the spreadsheet in front of me right now, but total system cost for phase 1 came in between $800 and $900 including the pound of StayBrite 8 and the tools I didnt have, which for the electric system is not too bad in my opinion.
The overall footprint of the system without the control box is 20"x14" and it is 3' tall. It is light enough that I can easily pick up the entire assembled rig and move it around.
I will be able to complete phase 2 for $150. I just need to go and find $150 now. Phase 2 will work exactly the same way but be made out of two 15.5 gallon keggles. It will probably happen this fall after I renovate the garage to become my brewery. When the garage is done, I will also probably redo the stand to something that looks a little nicer and brings the system up a little higher. The two tank sets will be setup next to each other and the pumps and control box placed in the middle to be shared. For now, though, it works well and is fun to use.
Just thought I would share…
1. Batch sizes from 2.5-10 gallons
2. Small footprint
3. Able to brew indoors all year round
4. Simple
5. Transition to all grain brewing
6. Majority stainless steel parts
7. Under $1000
After researching on these forums for about 9 months, and continuing to develop my brewing with extract brewing, the phase 1 portion of the build is complete.
To meet desire 1, I decided that I was going to have two systems running off of a common control box. In order to minimize the footprint of the system I went with a modified version of a brutus 20e setup. The electric system allows me to keep things simple and brew indoors.
I have broken the build into two phases. The first phase is to make an operational 2.5 gallon system. Once the kinks are worked out, I will move into phase 2 and build out a second two tanks (15.5 gallon keggles) which will share the control box and expand my options to 5 and 10 gallon batches.
Phase 1 started with deciding what kind of tanks I wanted. I knew I wanted stainless steel, but things were a little too expensive for the build to buy new pots. In the end, I made the kettle and the MLT out of Cornelius kegs that were going to the scrap yard. I cut the top off and removed the rubber bottom (a huge pain in the ass) to make my tanks. Fittings are all stainless steel and are inserted using a variant of GreenMonti’s keg tool. Once the fittings were in place I used some StayBrite #8 to solder them in place. It worked beautifully. On the boil kettle, I also used the StayBrite solder to attach the two 1“ NPS nuts to the kettle. The keg tanks are small enough that using them like everyone else does was not going to give me a good seal. The drain for the BK is off to one side to allow for draining after a whirlpool. It is a full coupler to allow me to screw in different height tubes and vary the amount of things I leave behind.
Tank 1 after taking off the top and bottom
Keg tool on its first run
The drain port for the BK and the 1/4" NPT RTD port
The two 1500W elements (two were used because neither could be over 7.5" long).
Inside of the BK
Potted elements and the grounding posts. The two pumps are in the background.
Electric box: PID and two pump switches up top. Two 120V elements on the left, two pumps next to them, and a 240V outlet for phase 2. The cord coming in and the GFCI circuit it attaches to are rated for 240V 50A.
Control box internal layout before the wire nest went in
The MLT was constructed in the same way with a center drain as the only fitting. JayBird made a custom false bottom for the system and it is a perfect fit and excellent work.
A brew day goes as follows:
1. Setup the brewery. This takes about 5 to 7 minutes from totally torn apart to ready to fill.
2. Put all of the water into the BK and heat to mash in temperatures. With 3 kW this takes about 20 minutes. The PID controller works like a charm after tuning. I usually measure out things at this point.
3. Recirculate the MLT back onto itself until clear. I typically do this for about 3 minutes and it runs beautifully clear.
4. Cross recirculate keeping 1 gallon in the boil kettle, using the BK as a sort of RIMS system. The last iodine test I did had this at about 40 minutes for an American Amber. Since it is cross recirculating, I don’t really worry about much.
5. When conversion is complete, pump everything into the BK. I then unhook the hose on the bottom of the MLT and let it continue draining into a mason jar under the system to collect everything. The amber that just got done had a grain absorption of .04 qts/lb.
6. Boil as normal. I switch into manual and it works like a charm.
7. Cool the wort using a mixture of hose water and then ice in the MLT while whirlpooling. I start out with hose water and then switch to pumping ice water around the IC from the MLT and back in the top.
8. Whirlpool. I pull out the IC and whirlpool for just a minute and then cap it and leave it for 30 minutes. Last time I did this I got some break material, but left a whole lot of it behind.
9. Pump into the fermenter . Pretty easy.
This is during the first full wet test of the system and tuning of the PID
The American Amber that I did as my first all grain batch and my first batch on the new system was a 4 hour brew day after clean up. It was a nice easy day and nothing went terribly wrong. My one comment is that it will take some tuning of my skills to get a really constant volume in the boil kettle given that I am balancing two pumps. This was much easier on the second batch. I also determined that I am running about a 5F differential between what I set the boil kettle at and what the grain bed is. Mash out is achieved from 154 in about 10 minutes. I also now measure volume using marking on the tank and an excel spreadsheet that takes the marking and the temperature and gives me the volume. the silicone hoses are used as the sight gage. If I hold one up, the water inside the tube equalizes with the internal level; it works well and fast without an additional port or tube.
I don’t have the spreadsheet in front of me right now, but total system cost for phase 1 came in between $800 and $900 including the pound of StayBrite 8 and the tools I didnt have, which for the electric system is not too bad in my opinion.
The overall footprint of the system without the control box is 20"x14" and it is 3' tall. It is light enough that I can easily pick up the entire assembled rig and move it around.
I will be able to complete phase 2 for $150. I just need to go and find $150 now. Phase 2 will work exactly the same way but be made out of two 15.5 gallon keggles. It will probably happen this fall after I renovate the garage to become my brewery. When the garage is done, I will also probably redo the stand to something that looks a little nicer and brings the system up a little higher. The two tank sets will be setup next to each other and the pumps and control box placed in the middle to be shared. For now, though, it works well and is fun to use.
Just thought I would share…


")
