Introducing...AutoBrew

Homebrew Talk - Beer, Wine, Mead, & Cider Brewing Discussion Forum

Help Support Homebrew Talk - Beer, Wine, Mead, & Cider Brewing Discussion Forum:

This site may earn a commission from merchant affiliate links, including eBay, Amazon, and others.

YeasternStar

Supporting Member
HBT Supporter
Joined
Nov 22, 2011
Messages
41
Reaction score
6
Location
Gaston
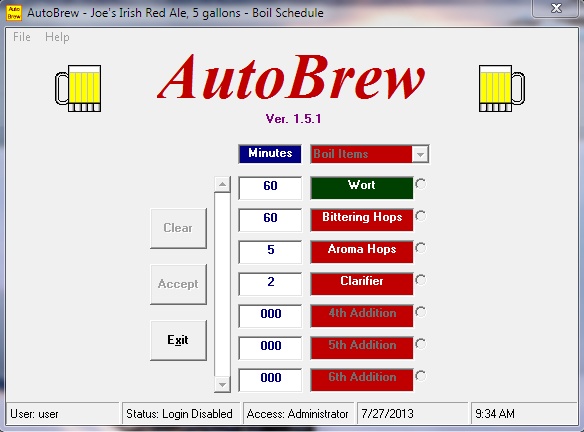
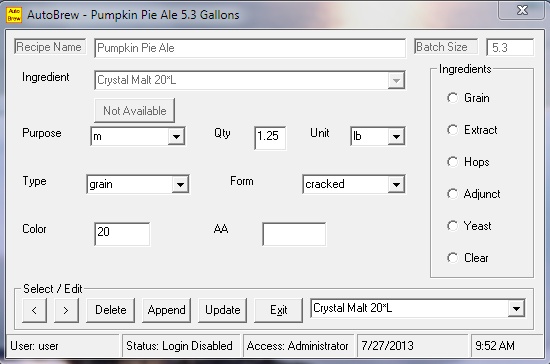
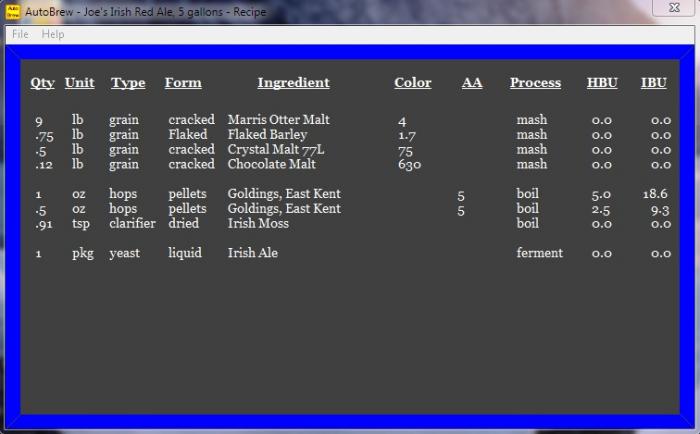
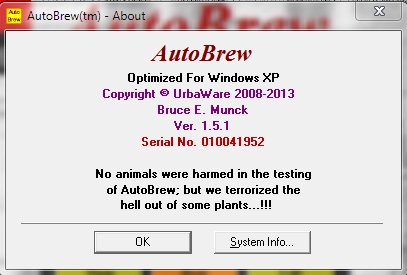
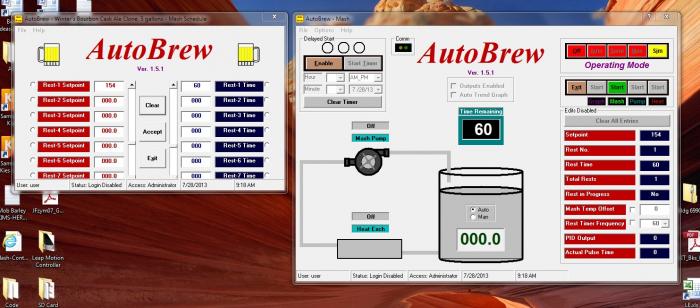
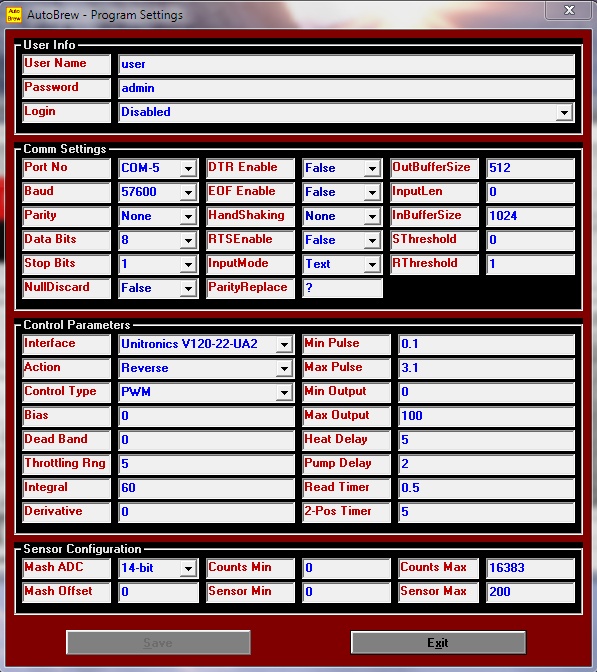
I started a project about five years ago and have had it substantially finished for a year now. What I ended up with is a software program that controls a mash pump and mash heater, reads the mash temperature and controls my RIMS. I wanted the program to be fairly universal so that it could be used with various microcontrollers and PLC's, so I wrote a process control class that allows my program to do the actual controlling while using the microcontroller/PLC as a simple I/O module. I am posting some screenshots here. This was used last Fall to brew an attempt at a Winter's Bourbon Cask Ale and the mash temperature controlled to +/- 0.2 degrees Fahrenheit with minimal loop tuning. My RIMS is a Sabco Brewmagic which necessitated my learning some ladder logic to configure the PLC to work as an I/O module instead of controller. I have also written a program for a Basic Stamp II and one for an Arduino to allow them to work with my program and both do work. The program is called AutoBrew for the time being and has too many functions for a short write-up. Perhaps I can do a You Tube video even though I'm not much of a narrator.

Desktop 7-27-2013 9-06-59 AM-737.jpg


Desktop 7-27-2013 9-34-53 AM-333.jpg


Desktop 7-27-2013 9-32-33 AM-335.jpg


Desktop 7-27-2013 9-33-39 AM-530.jpg


Desktop 7-27-2013 9-34-02 AM-471.jpg
 
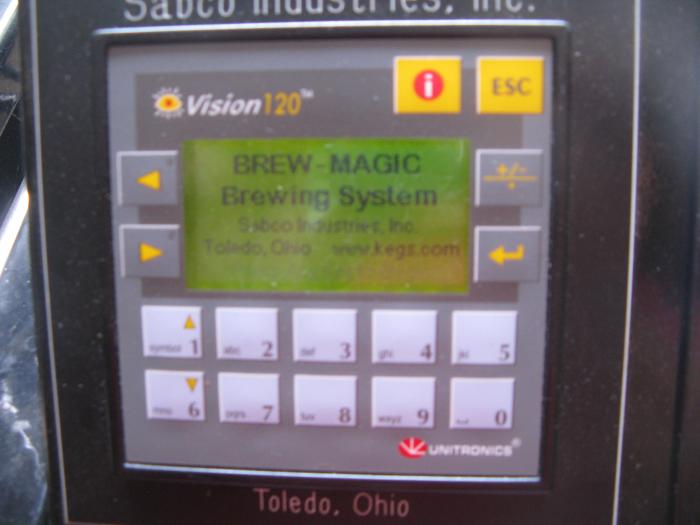
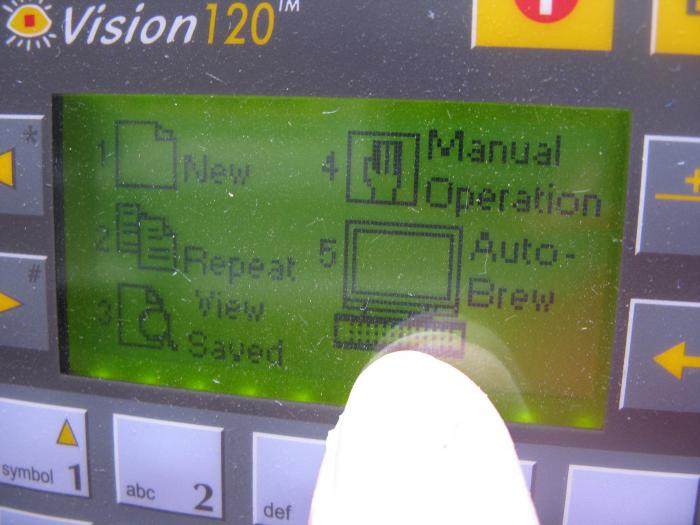
Here is a picture of my Sabco along with a shot of the PLC screen showing the additional choice for AutoBrew. As you can see, I can still use the Sabco in its normal mode if I want to. However, AutoBrew makes it so easy to store recipes, mash schedules and boil schedules on my PC and recall them for brewing that I probably won't use the standard control method anymore except for the sake of comparison. In the near future I plan to experiment with using an Arduino as the I/O for the mash on the Sabco, replacing the Vision-120, to see if there is any noticeable difference in precision. Since AutoBrew does the actual controlling I don't expect much, if any, change. The beauty of all this is that this program along with a BS-II, Arduino, or just about any microcontroller, along with an inexpensive thermistor or Dallas sensor and some interfacing relays could be used to control a pump and heater with great accuracy for virtually any sort of brewing rig and wouldn't cost very much money. I know...using a Vision-120 for simple I/O is a huge waste of capability, and I wouldn't suggest anyone buy one for this purpose, but an Arduino can be had for about $20.00 or a BS-II for about $50.00 and either one should be just as suitable as a PLC for this purpose.

IMG_3136.jpg


IMG_3132.jpg


IMG_3134.jpg
 
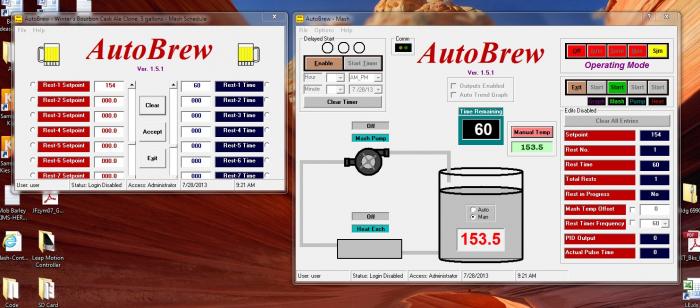
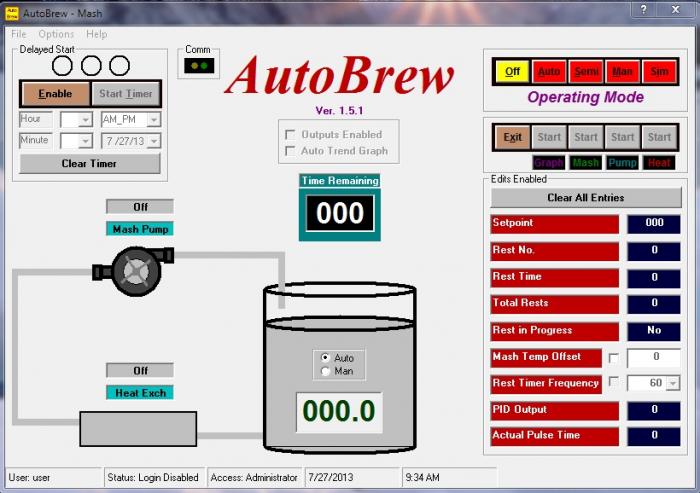
Here are some pictures of a simulated brew session in various stages of completion. I included simulation mode mostly for performing tests as development proceeded, but it can also be used as a demo mode so it's staying. The first picture shows the mash screen along with a loaded mash schedule. Notice that the boxes on the mash screen have been updated with the schedule values. This is all done automatically.

Desktop 7-28-2013 9-11-18 AM-107.jpg
 
The first picture shows the mash screen with simulation mode selected. The start mash button is highlighted indicating the system is ready to begin. The second picture shows the mash temperature overridden and a manual value entered. This is invaluable for verifying system response to changing mash temps and a great way to demonstrate how things work. The third picture shows the system as a mash is begun. The pump is running but the heat has not started yet. The rest has not officially begun since the system is still checking the mash temperature and comparing it to set-point. The mash temperature must be within three degrees of set-point for the rest to officially start and the countdown timer will not begin until that condition is met. The fourth picture shows the heat in operation and the rest in progress now shows yes. Looking at the PID output and actual pulse time will indicate that the heat is cycling. If the PID output is zero the heat will remain off, if PID is 100 the heat will be on constantly. Anything between 0 and 100 will have the heat cycling proportionally. Without a video it can't be shown that the heat is cycling on and off based on the PWM value and the pump graphic is rotating, but that is what is happening. The fifth picture shows the brew in progress and the timer has counted down a few minutes. In a real brew the mash temperature would be responding to the heat and the PID would be responding to the temperature which would cause the system to reach equilibrium. Once the timer reaches zero the mash is automatically stopped unless a multi-step mash is employed. With a multi-step mash the next set-point and time values would be entered and the system would wait until the mash temperature is within three degrees before performing the step. I have incorporated audible prompts and a real-time graph which saves all the graph data to a file for later study. There is also a delayed brew function which couldn't possibly be used with a Sabco but would be great in a system with automatic gas valves.

Desktop 7-28-2013 9-18-44 AM-772.jpg


Desktop 7-28-2013 9-21-03 AM-243.jpg


Desktop 7-28-2013 9-23-28 AM-459.jpg


Desktop 7-28-2013 9-24-30 AM-157.jpg


Desktop 7-28-2013 9-38-42 AM-998.jpg
 
WileE and Pratzie

Thanks for the nice comments. This has been a labor of love for me and it's working really well. I work construction and don't get to brew as much as I'd like so this has been my substitute. I'm in the de-bugging mode right now and the thing is getting better and better. It is sooo much easier to type recipes in on a keyboard instead of those tiny PLC buttons and you can change your recipes easily too. I will add some pictures of the boil process soon.
:mug:
 
Was there an open source driver you used or did you write your own driver? You really went all out on the program, did you just used visual studio?

I have kind of gone the same route, I used advancedhmi as the driver and prebuilt classes to build a HMI. I have it to where the PLC still runs the interlocks and pid routines, but i just write and monitor word files for the temperature control and times, and toggle bits.

You write programs and work with PLCs much with construction?

Looks great, not to mention its matched up with a great system. You'll brew lots of great beer with it.
 
The driver for the Vision-120 is supplied by Unitronics in their free VisiLogic software. There was some older information on their website that made it appear that you could use standard calls from mscomm32 to interface with their PLC's, but I found that only some of the commands would map properly and I eventually gave up and used their proprietary driver. I wrote the program with Visual Basic 6.0 since it was what I had. I have run AutoBrew on everything from Windows 95 to Windows 7 with no problems, haven't attempted Win-8 yet.

I am a controls technician at work but we don't use PLC's, we work with Jace's and other LON-based systems. I had to learn a bit of ladder, though, to modify the Sabco program so I could access the inputs and outputs. I also had to learn enough C to do the Arduino program so it would make its inputs and outputs available across the RS-232 network. My future plans are to add more capability so I can operate multiple pumps, valves, sensors, and have a more fully automated system. But for now I'm concentrating on working out the bugs (it works great for me because I wrote it, but someone unfamiliar who inputs some wrong info might crash it).

I appreciate you stopping by for a look. I will add more pictures as I go along. Perhaps during a real brew session.
 
One of the concerns I had early on was the effect PWM would have on relays with the amount of opens and closures adding up rapidly. My solution was to offer both PWM and 2-position control as options. There would be far fewer contact cycles with 2-position control, but would that type of control be good enough? During testing I tried it both ways and found little to no difference in precision. If I were using mechanical relays there is no way I would choose PWM, but with solid state relays I feel safe. I do believe that with some judicious loop tuning PWM would prove superior to 2-position, but both give very good control.:)
 
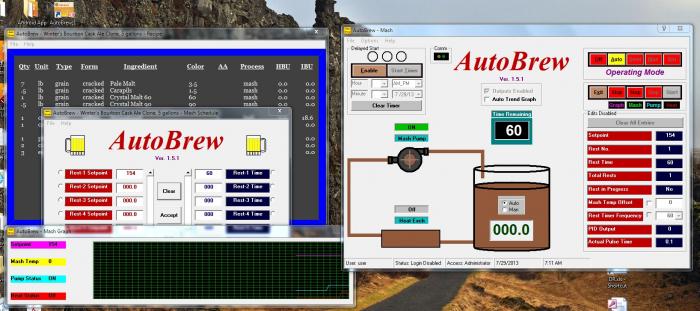
This is how a mash would look with both recipe and mash schedule loaded and with the real-time trend operating. You'll notice that in this picture the mash tank looks darker...well, that's intentional. When the recipe is loaded during a mash or boil the wort color is determined by the SRM value calculated by the recipe; with no recipe loaded the color becomes that of a light lager. This is intended to give a vague idea of how the beer will look when it's completed. The real-time graph shows the current rest set-point, the mash temperature (in this case it's zero since nothing is being read), the pump status and the heat status. The values continually scroll, but they don't actually disappear since they are saved to a file and can be examined more closely later on.

Desktop 7-29-2013 7-11-28 AM-886.jpg
 
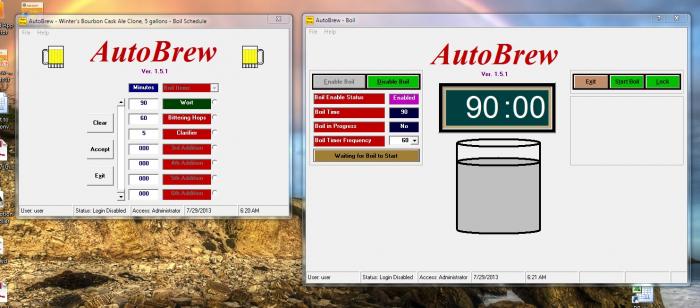
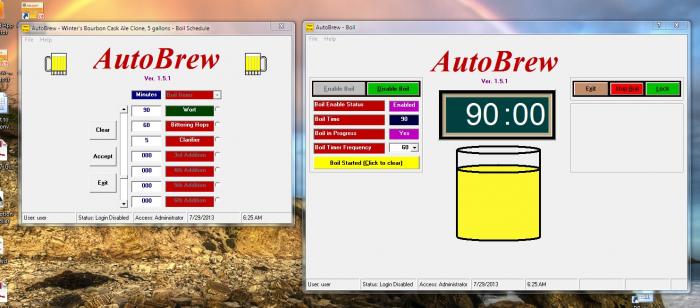
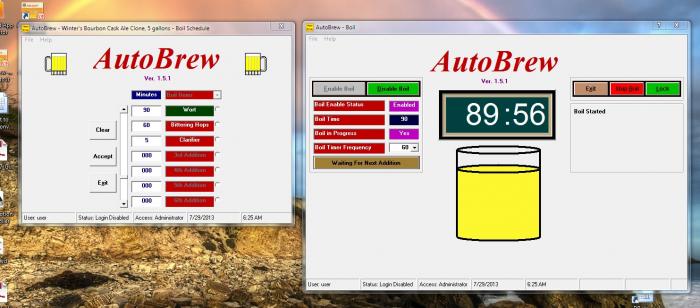
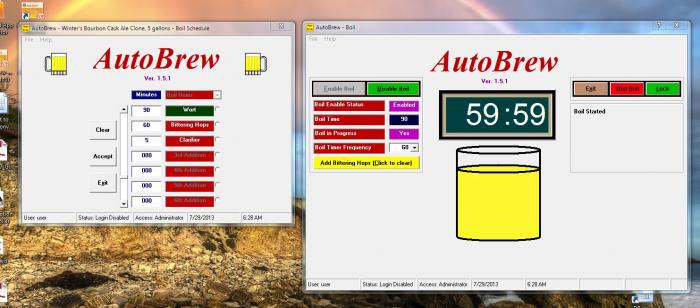
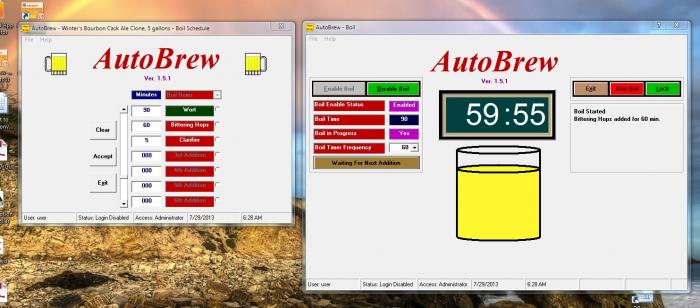
First off, the boil thing is only a glorified timer; not really needed at all. It keeps track of what should happen and what has happened, but does nothing else. I have incorporated voice as well as visual prompts to help if I miss seeing something. The voice prompts are synthesized and sound a bit robotic but the enunciation is not bad. I have even included ten minute warnings so that in an actual boil session you would hear "Add bittering hops in ten minutes", "Add bittering hops now", "Add aroma hops in ten minutes", etc.; pretty cool if you like such things. The square area on the right side of the screen acts as a scratchpad and lists each action as it is annunciated so you always have a visual of where things stand. The long button at the bottom of the left side is the annunciator and helps by turning yellow when something needs to be annunciated.

Desktop 7-29-2013 6-21-00 AM-555.jpg


Desktop 7-29-2013 6-25-49 AM-548.jpg


Desktop 7-29-2013 6-25-53 AM-892.jpg


Desktop 7-29-2013 6-28-51 AM-355.jpg


Desktop 7-29-2013 6-28-55 AM-241.jpg
 
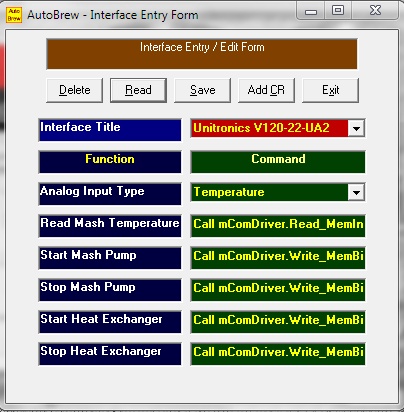
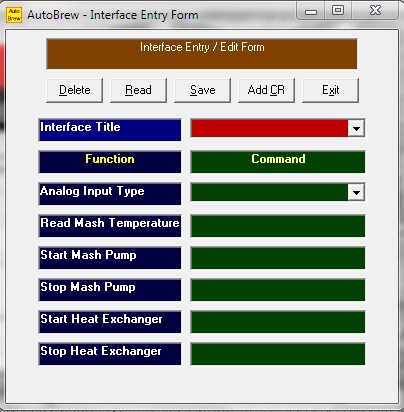
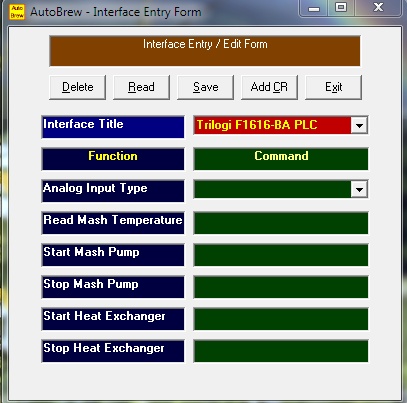
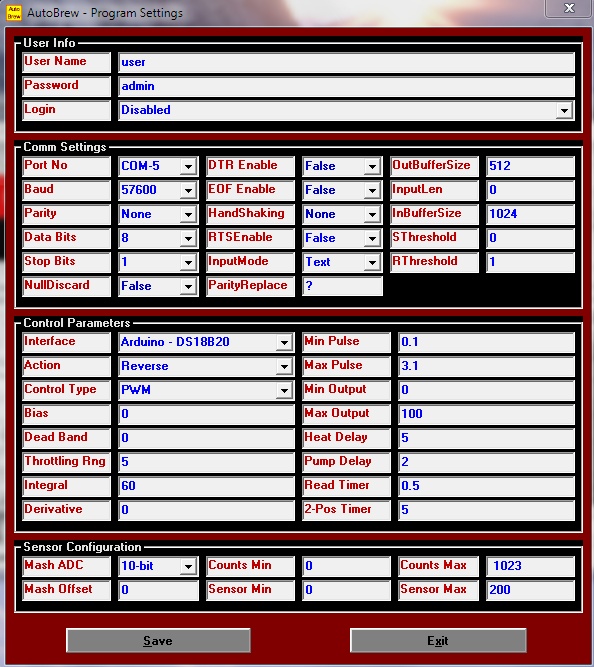
AutoBrew stores user settings so they don't have to be entered every time the program is started. This makes it possible to add a number of interfaces to the database and switch between them as desired. To add a new device you start with the Interface Entry Form. Type in a name for your device, select either temperature or counts as the analog type and then enter the commands necessary to make your device perform the various functions. I have included a couple of screens here to show how the entries might look for different devices. The entries for the Arduino are only valid if using the program I wrote for it since someone else might decide on a different approach. Once an interface has been saved it can be called up from this form for editing or from the Program Settings Form for use in the program. If you look closely the Arduino is using a Dallas temperature sensor which is why it sends a temperature across instead of counts. I incorporated the sensor info into the interface name to make it easy for me. If a device sends counts across they will be converted based on the entries at the bottom of the Program Settings Form.

Desktop 7-27-2013 9-37-30 AM-991.jpg


Desktop 7-27-2013 9-38-39 AM-869.jpg


Desktop 7-27-2013 9-38-51 AM-257.jpg


Desktop 7-27-2013 9-36-27 AM-67.jpg


Desktop 7-27-2013 9-40-28 AM-379.jpg
 
Here a stored interface has been selected by the combobox and then the Read button was clicked to load its settings. This makes it easy to review and or edit the stored entries and store the changes if desired. The Add CR button adds a carriage return to the end of the entries if needed by the interface.

Desktop 7-29-2013 8-31-47 AM-347.jpg


Desktop 7-29-2013 8-31-54 AM-619.jpg
 
Cheers! If you have enjoyed looking at AutoBrew a tenth as much as I enjoyed engineering it then this overview is a success. It was a great learning experience for me, having never attempted a program of this complexity before. I had to learn VB-6, ladder logic, C for the Arduino, RS-232, animation techniques, and a lot of other things; all of which added to the length of time this project took me to complete. There are thousands upon thousands of lines of code here and I encountered a lot of roadblocks along the way, but persistence paid off and now I have the program I wanted. I can use it with my Sabco, or I can use it with almost anything else with no code changes needed (devices requiring proprietary drivers excepted). Bug squashing is proceeding at a good pace and AutoBrew should be quite robust very soon.
:mug:
 
CWShrad83 and Cheez;

Glad you like it! It works as well as it looks, too. Being able to click on a recipe and having it control the mash automatically is something I wanted from day one. The rest of it got added as I programmed. At some point I had to force myself to stop adding features and get on with finalizing what I have.

Cheers!:mug:
 
AutoBrew stores user settings so they don't have to be entered every time the program is started. This makes it possible to add a number of interfaces to the database and switch between them as desired. To add a new device you start with the Interface Entry Form. Type in a name for your device, select either temperature or counts as the analog type and then enter the commands necessary to make your device perform the various functions. I have included a couple of screens here to show how the entries might look for different devices. The entries for the Arduino are only valid if using the program I wrote for it since someone else might decide on a different approach. Once an interface has been saved it can be called up from this form for editing or from the Program Settings Form for use in the program. If you look closely the Arduino is using a Dallas temperature sensor which is why it sends a temperature across instead of counts. I incorporated the sensor info into the interface name to make it easy for me. If a device sends counts across they will be converted based on the entries at the bottom of the Program Settings Form.

Great work!
It takes a lot of time to do a great project like yours.
I have done it.
My toy brewery has multiple displays, the control room uses a touch screen only.
A few pics. http://s238.photobucket.com/user/ClaudiusB/library/Brewing for dummies?sort=6&page=1

Cheers,
ClaudiusB
 
ClaudiusB,

I followed your link and looked at your brewery. You've got a great setup! Very comprehensive, well thought out and executed. You've obviously spent a lot of time on the programming and know firsthand the sorts of things that can and do go wrong and make you want to scream. But in the end, when it's up and running and you're enjoying a brew, the frustration is just a memory that you get to smile back on. My brewery will probably never be as large as yours is, but I do expect to modify my Sabco so that it is fully automated and then update AutoBrew to handle the additional equipment. Thanks for sharing your pictures!!!

:ban::)
 
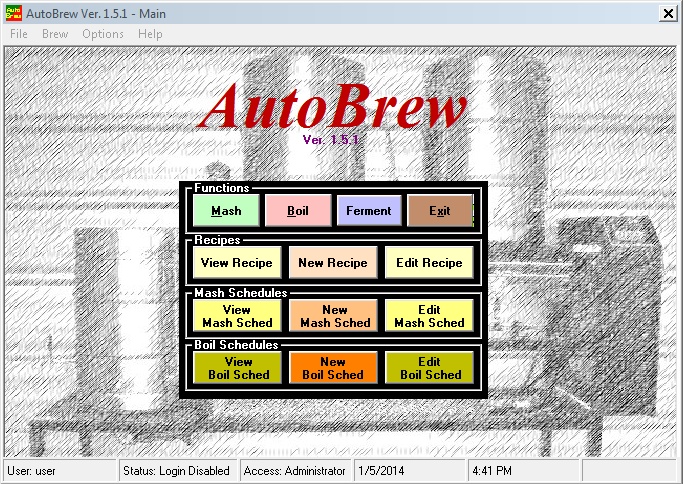
I recently added additional logic to AutoBrew to handle fermentation, diacetyl rest and lagering. Tested with an Arduino (as an I/O platform only) with one-wire sensors and a relay shield. Works great! While the fermentation module could be used to control wort chilling I am going to make that a dedicated function in my next revision. One other function to be added is temperature control for beer serving tanks. AutoBrew has progressed far beyond my original plans and is becoming a turn-key control system. Programming for the Arduino is minmal and is only for making the requisite inputs and outputs available to AutoBrew and for setting up the one-wire network for the sensors. AutoBrew does all the hard work, and does it very well! I recently (early November, 2013) brewed a holiday ale. AutoBrew maintained the mash temperature at +/- 0.5 degree F during the mash using the two-position control option. Using PWM can keep it at +/- 0.1 degree, but the heat exchanger relay gets a pretty big workout when doing this level of control. While it's nice to know it can do it, it's rarely needed.

Desktop 1-5-2014 4-41-34 PM-622.jpg


Desktop 1-5-2014 4-41-56 PM-36.jpg
 
I've been off of here for a long time and have made some tweaks to AutoBrew during that time. I would like to make the source code available free, but I'm not sure of the best way to do this. I could put it on GitHub and hope to get some folks interested in modifying and improving it, but how many people still have VB-6 lying around? It's too big of a project to attempt porting it to .Net or some other language. Besides, it works pretty well as it is. I could compile an install package for people without VB-6, but having the source code would be far superior since bugs are inevitable in a program of this size. All suggestions will be considered and I hope to have this available before too long. I would almost have to write a book to cover all the functions in AutoBrew as it grew way beyond what I envisioned. I have a partial help file written; however, people with better writing skills could do a much better one. If anyone with a copy of VB-6 is a home-brewer and interested in this kind of automation, give me a shout. Maybe we can come up with the right method of making this available to everyone who wants it.
 
Back
Top