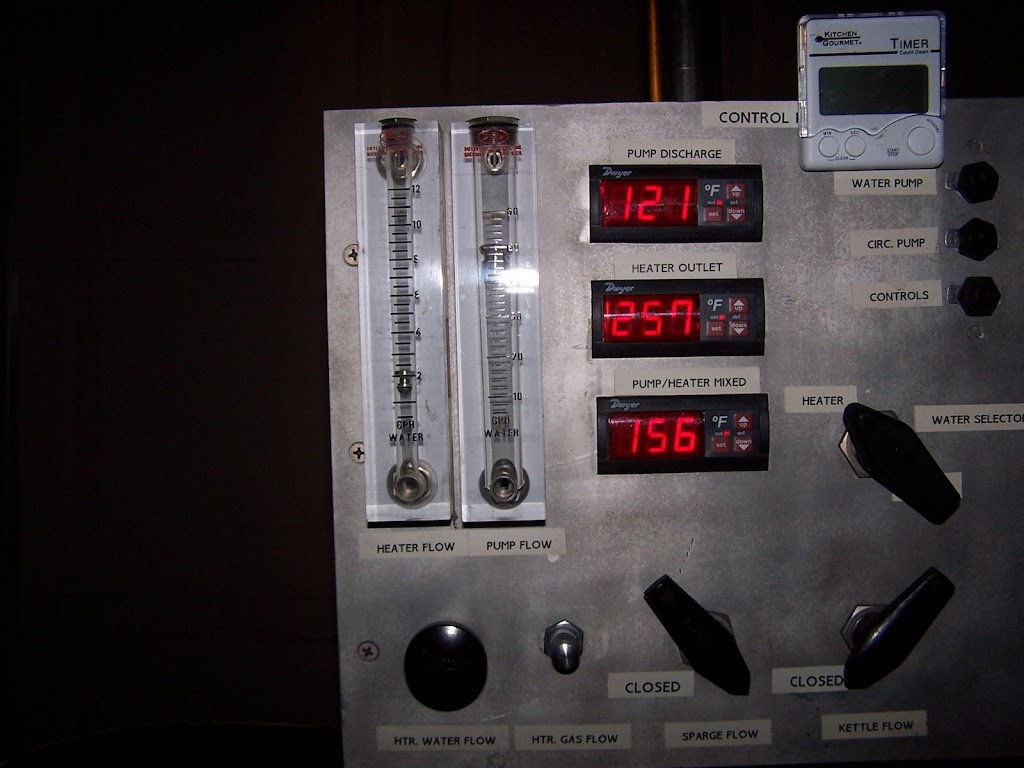
After an hour and a half, it was finally up to temperature. I let it build just over 10 psi, then vented a little. I was surprised at the amount of steam generated. After playing a bit with the valve (it was just too fun!), I opened the valve and let the pressure drop to 9 psi - that took a little over a minute. It recovered back to 10 psi in just a few minutes. I decided to turn the heat off and see how long it would take to vent all of the steam. It took over 10 minutes!!!
Before I post any more about this project:
WORKING WITH STEAM IS EXTREMELY DANGEROUS!
Unless you are completely confident in your understanding of how this system works and your ability to fabricate, weld, and test it, DO NOT ATTEMPT THIS!!!
Ok, now for the particulars:
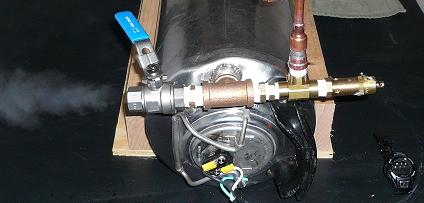
The boiler is a single handle corny keg I got at
www.homebrewing.org. I removed both fittings, welded the "IN" side shut, and welded a stainless 1/2" female coupling to the "OUT" side (it didn't matter which side).
I removed the relief valve from the keg lid and welded a patch in place of its fitting. I drilled a 1-1/4" hole in the lid (hole saw) and tack welded a 1-1/4" panel nut (from a local electrical supplier) to the bottom side of that hole to accomodate the heating element. If you look closely, you can see where I modified the lid latch with a piece of the dip tube from the keg. I needed a wider latch handle that would fit around the heating element.
The heating element was an eBay find. It's a 240V 6000W element, which gives me 1500W at 120V with a 12.5A current draw. I replaced the foam o-ring on it with a nitrile o-ring that seals better.
For the plumbing:
1/2" stainless ball valve -
www.austinhomebrew.com
Pressure gauge - local Sears department store
1/4" copper fittings/adapters - local Lowes plumbing department
Brass adapters/tees/quick disconnect - Lowes also
Solenoid valve and pressure sensor - eBay
Stainless coupler and 15 psi relief valve -
www.mcmaster.com
The plumbing functionality is detailed better in
this post.
The idea for the whole project was stolen almost entirely from
this thread. Brewman did the legwork and math. He has a system like it -
here are his pictures.
I plan on controlling this system digitally.
Here is the thread about that.
Still to be done:
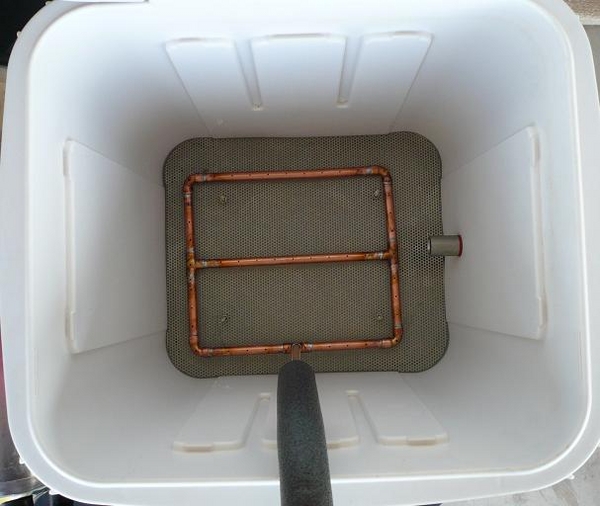
3/8" copper tubing to a manifold in my cooler mash tun (insulated with foam pipe insulation)
Finalize digital control software
Also, I don't plan on using it exactly the way I did tonight. I just wanted to see how long it would take to heat cold water to ~240 degrees F. I plan on boiling 4 gallons of water over my big natural gas burner, adding that to the boiler, then heating it the rest of the way electrically. That should take less than half the time.
I plan on using this system to step mash 15 gallon batches. If you're looking for something a little smaller and/or easier and/or potentially safer,
try this link.


")