Got wood...now with pictures!

Homebrew Talk - Beer, Wine, Mead, & Cider Brewing Discussion Forum

Help Support Homebrew Talk - Beer, Wine, Mead, & Cider Brewing Discussion Forum:

This site may earn a commission from merchant affiliate links, including eBay, Amazon, and others.

Pombe

Well-Known Member
Joined
Oct 31, 2008
Messages
62
Reaction score
1
Location
Canadia
The wooden rig is near completion and I wanted to post up a few new pictures to track our progress to date. I'd started this thread:

https://www.homebrewtalk.com/f51/got-wood-189818/

but was unable to change the post title to reflect the addition of...PICTURES!!

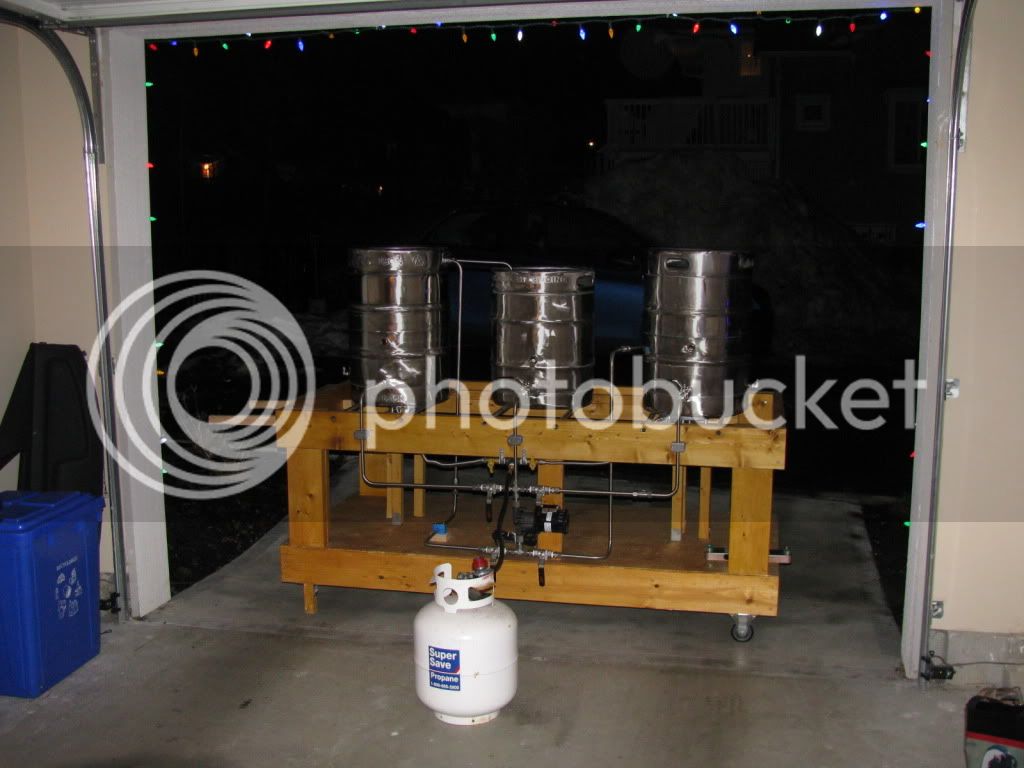
From the last post, we've started to hard plumb the lines for the brewery:

IMG_1294.jpg


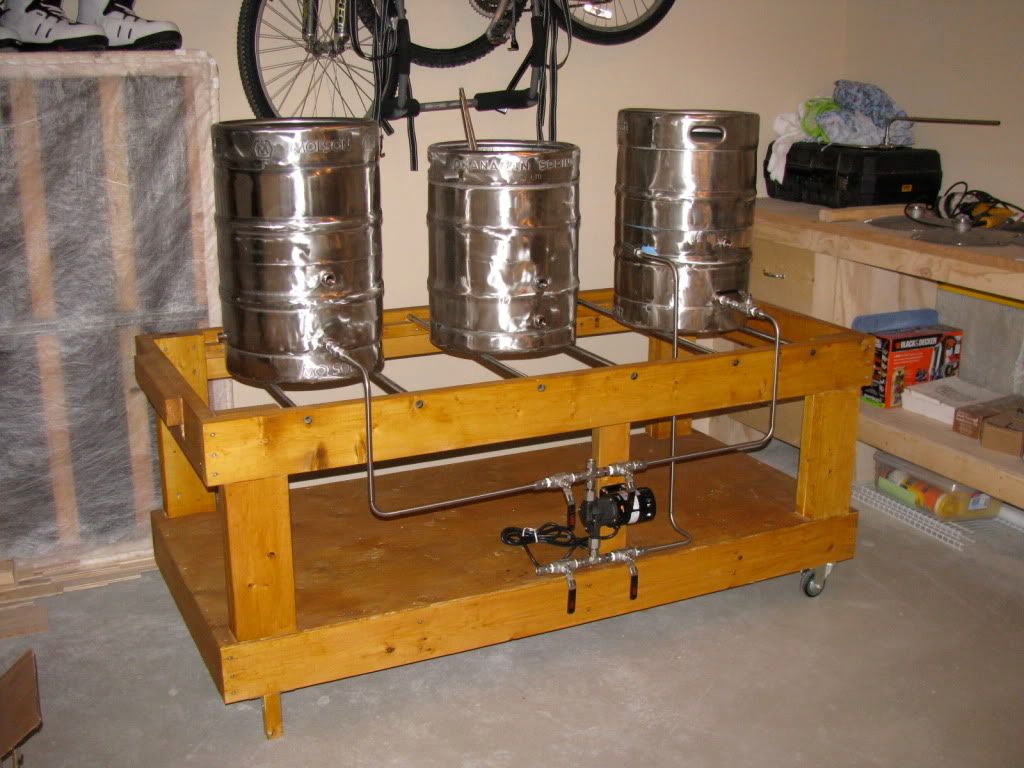
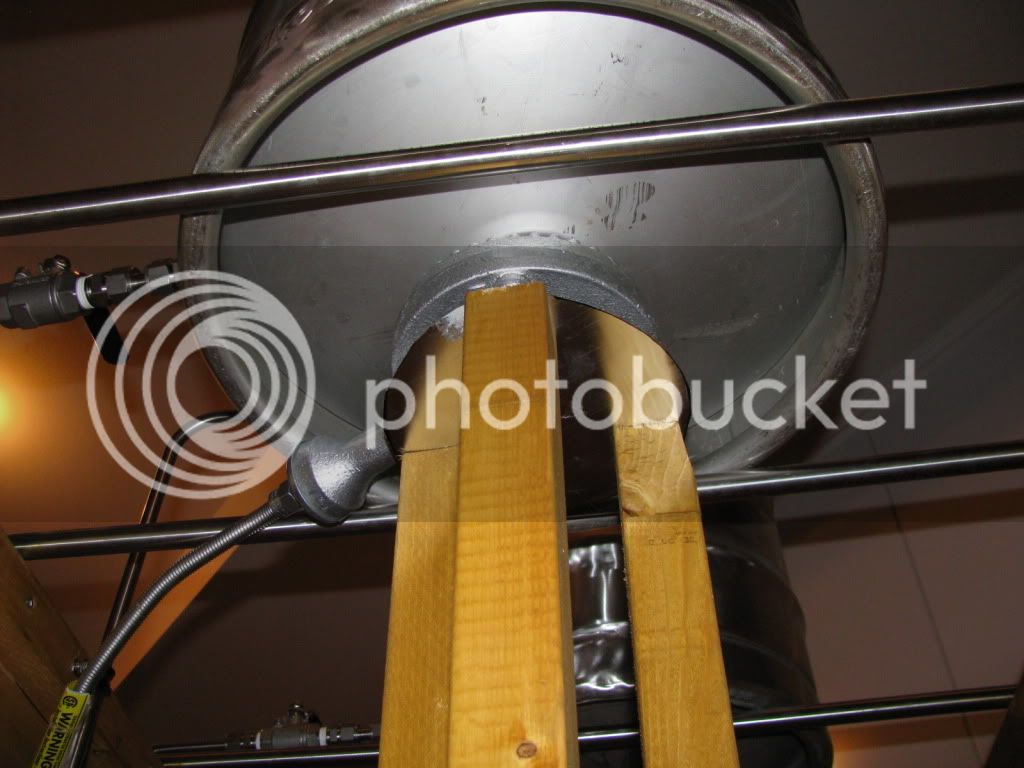
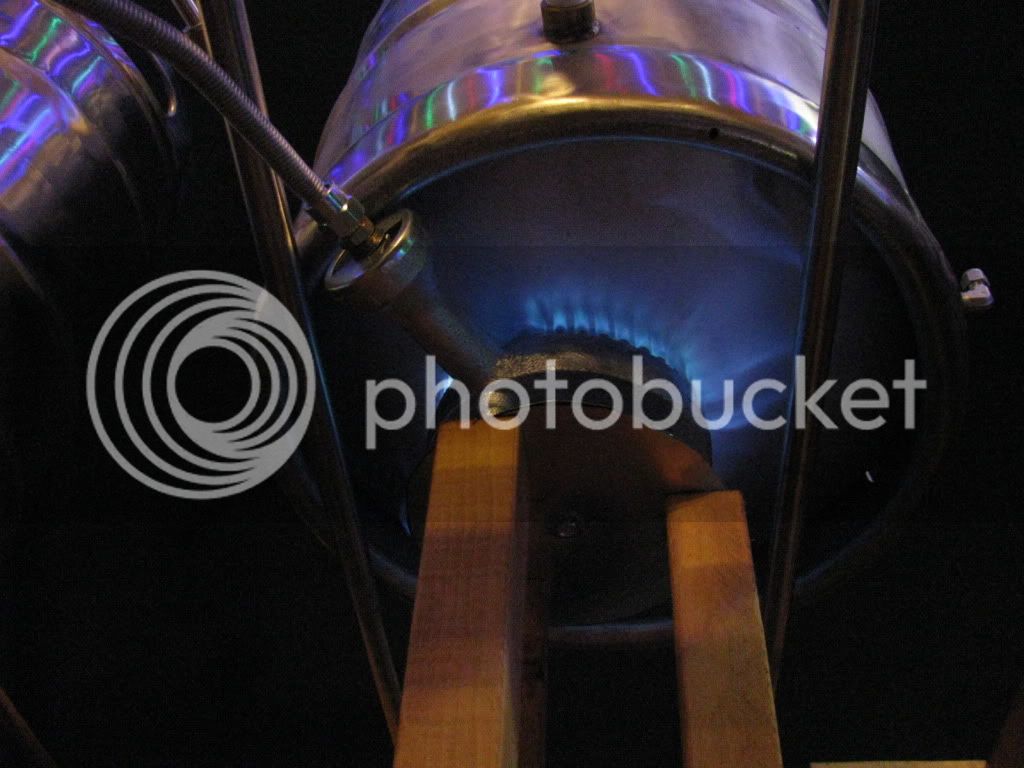
My buddy is a carpenter and did much of the work responsible for the framework we're building on. We thought about heat spill from the burners and possible charring issues. I'm hoping that our spacing - fore and aft - should negate any potential fire hazards.

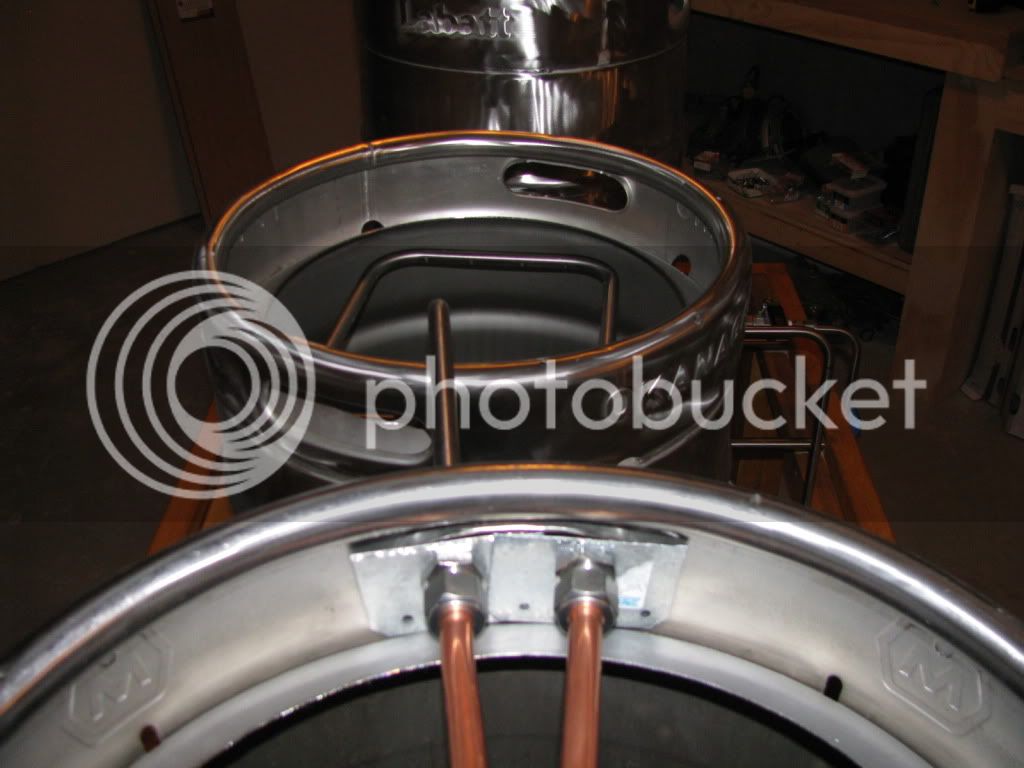
All fittings are Swagelok, we're using Sandvik tubing and full port FNPT ball valves from Ohio Valve Co.

IMG_1295.jpg


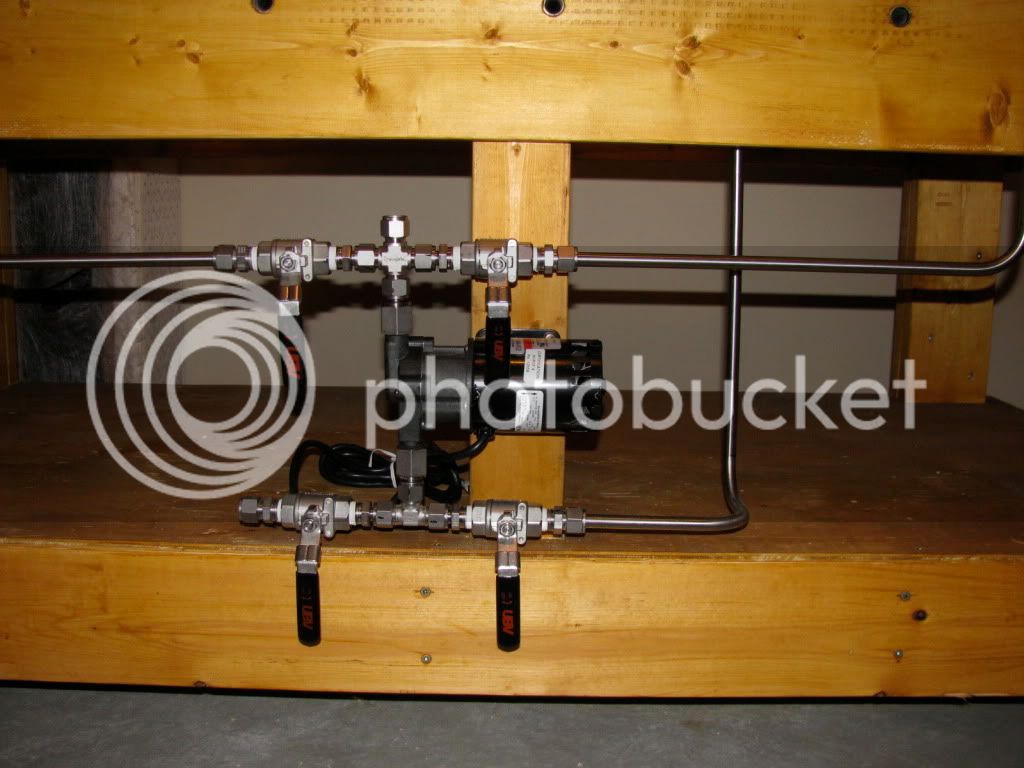
Tubing is 1/2" OD and all bends were made with a hand tube bender (1-1/2" R). The process is quite simple, three inlets from each vessel into one pump, two outlets to the HERMS coil and BK whirlpool.

IMG_1296.jpg


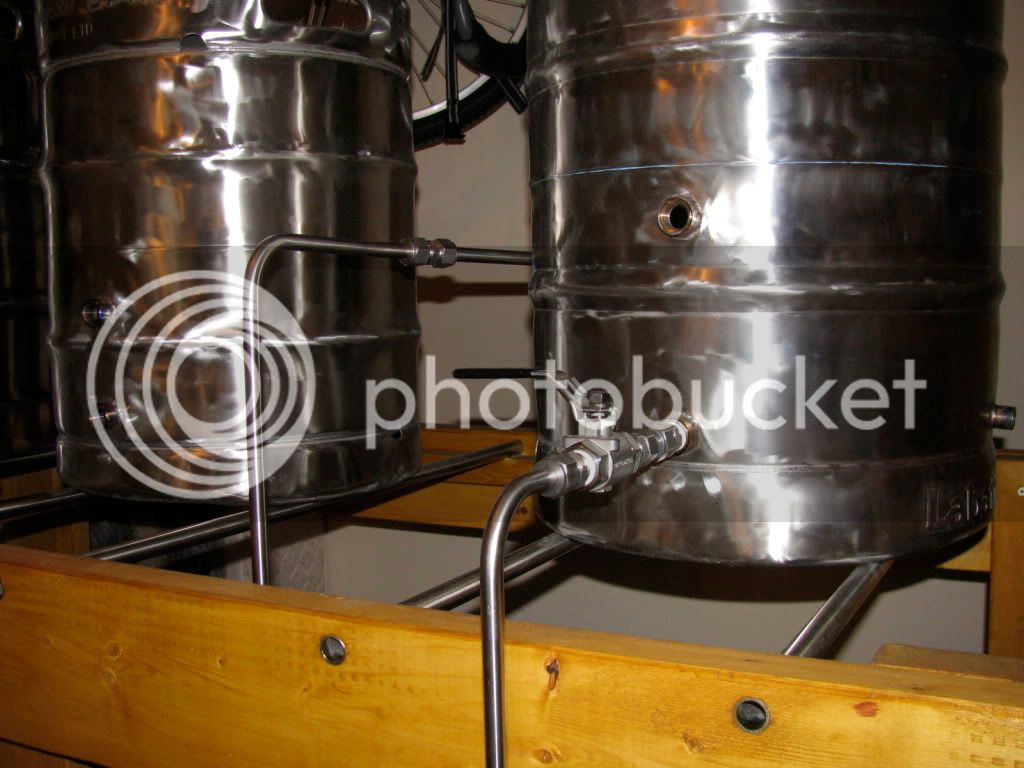
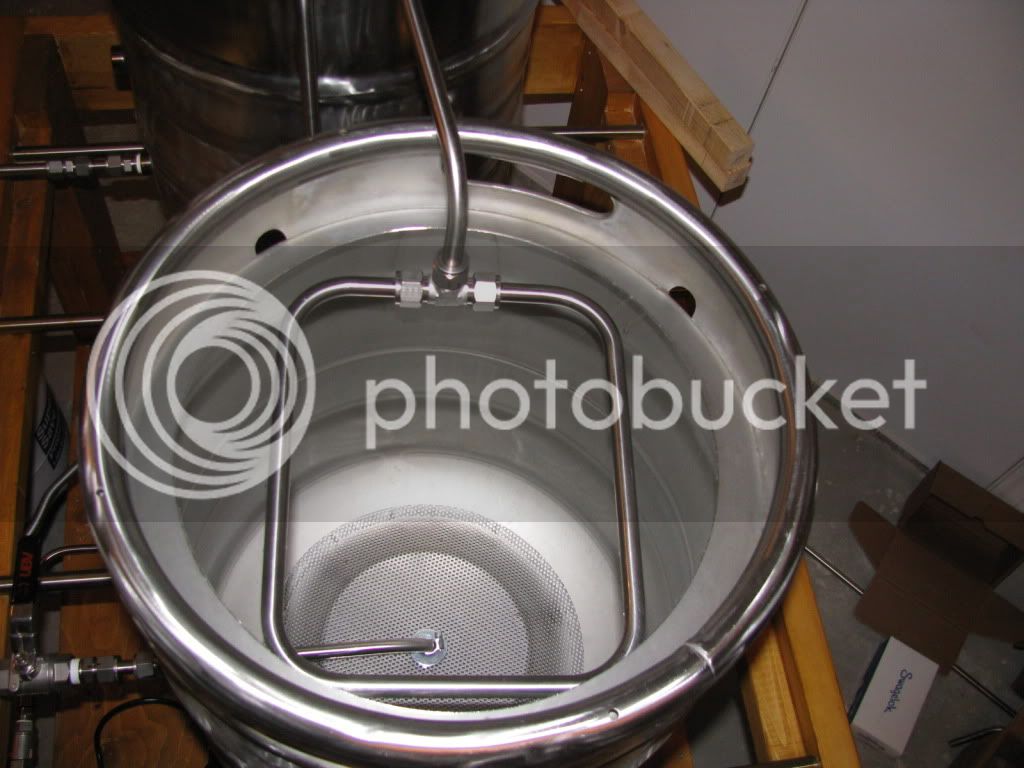
We're going to interrupt the BK return line to the pump with a tee and valve to accommodate a Shirron plate chiller. We are using just one Falsie in the Mash Tun; the HLT and BK have just been plumbed with dip tubes.

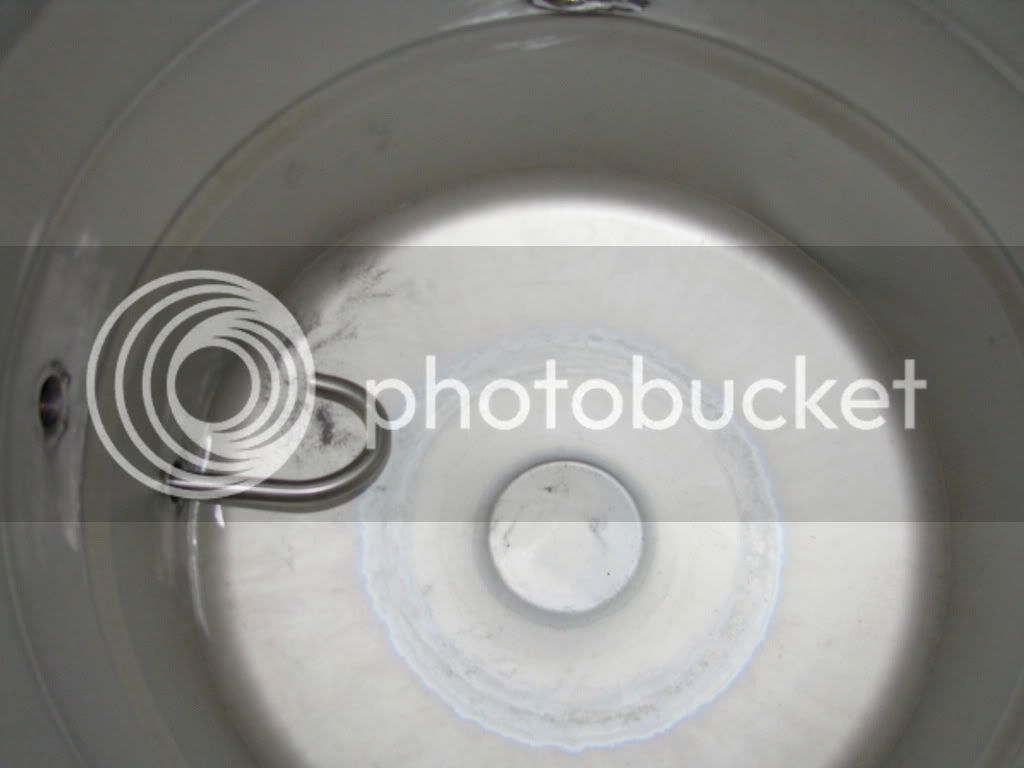
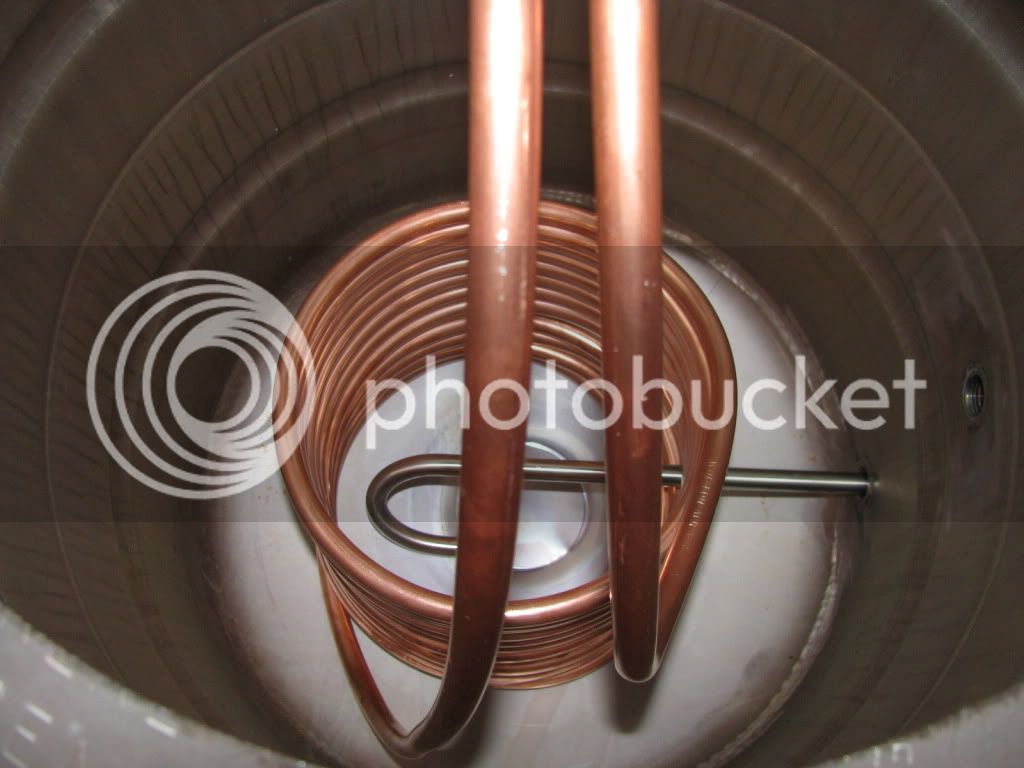
The HLT dip tube has been elongated to help support the HERMS coil:

IMG_1298.jpg


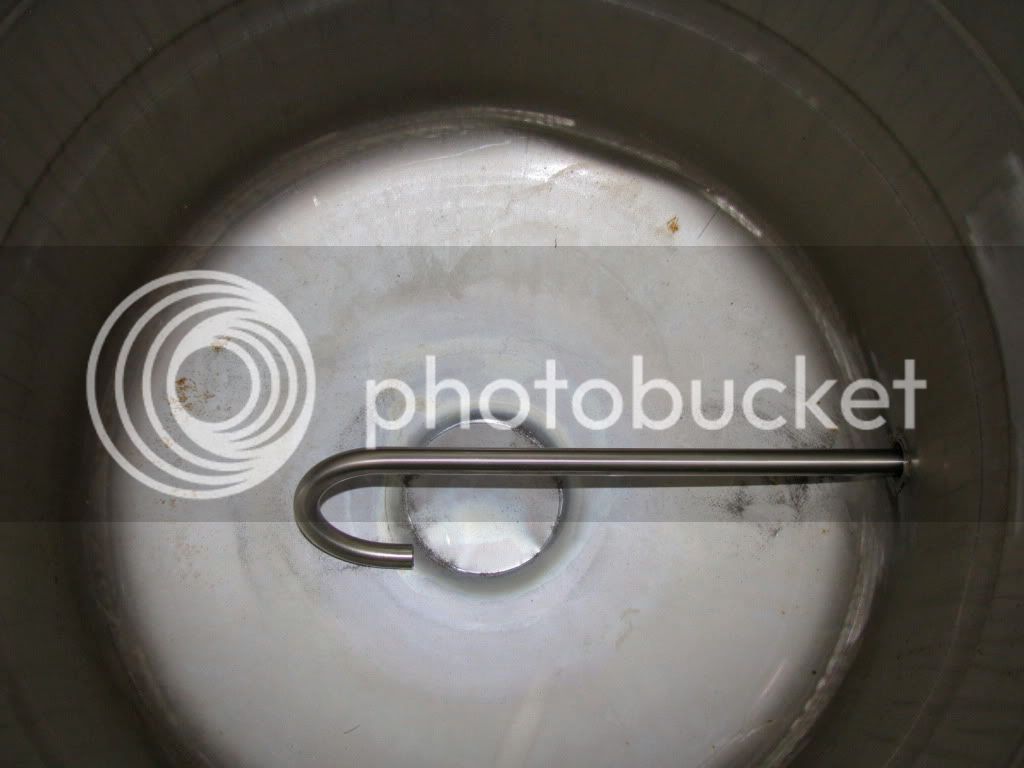
The BK dip tube has been butted as close the the side wall of the keggle in hopes of taking advantage of the centrifugal force from the whirlpool:

IMG_1297.jpg


Otherwise, we just need to pick up some copper for the HERMS coil, bend a few more lengths of tubing for the final plumbing, fix up the sight glasses for both HLT and BK, affix our Brewmometers to each vessel and mount/plumb the burners; should be up and running in the next week.

Super pumped to be near the end of the build. We're so ready to brew with this thing!
 
Nice looking setup.. couple questions though..

The pump inlet appears to be on top, I find it much easier to prime if pump inlet is on bottom with a waste gate/port on top of the pump just prior to the ball valve. You may suffer priming issues if this is correct.

For the cost of all that swaglok, wouldn't it have been cheaper to look at SS diverter valve as opposed to the ball locks and the Tee's?
 
Thanks for the questions JTrainer!

To start with, I did some research on the forum with respect to March pump inlet/outlet orientation. I found that there were cases where the inlet was above the outlet and there were no issues with priming so long as the valve off the outlet was also open. All vessels that are feeding into the inlet will have significant head volumes to help with priming. If there are any issues, we've got some ideas to retrofit with a simple bleed valve to help with priming.

I actually work for Swagelok so the fittings, tubing and valves were not extremely expensive for us. The majority of the cost was in things like the pump, chiller etc.

Cheers!
 
Very nice setup. Are you using one of those polishes peddled at gun shows? I always see this guy with a super shiny keg at my local show in Las Vegas.
 
Very nice....I like the contrast between SS and wood. The round tubing you're using to support the kegs will make cleanup much easier than using angle iron. I couldn't tell from your other thread, what kinda burners did you go with, and how did you mount/shield them? That was a major challenge when I built my wooden rig.
 
Steve - Thanks for the props, we were inspired by your original to produce our own! That, and we have no welding skills between us.

For the burners, we're using 70k BTU burners from AgriSupply:

http://www.agrisupply.com/burner-cast-low-presure-multi-hole-/p/40282/cn/5400001/

We kept the low pressure orifice for the HLT but switched to a high pressure orifice for the Brew Kettle. Both will be using liquid propane.

To mount the burners, we basically built a stilt-pod for each. The burners are directly below each vessel, spaced about a 1/2" from the bottom. Each burner has a circular Aluminum shield below to prevent scorch. In our testing, we've found that the flame/heat is nicely distributed along the dish bottom of each keggle and the keg wall prevents heat dissipation nicely. We've run two test burns, both 15 minutes fully open, and have noticed minimal heat transfer to both the frame of the rig as well as the stilt-pod. I've got some pictures of this but I'll have to upload them.

I'll update the thread later tonight with the additional pictures!
 
We installed our brewmometers and sight glasses tonight and did a full process dry run with water. No leaks, and better yet, the pump worked flawlessly in the vertical orientation. Just needed to open both inlet and outlet valves and wait a few seconds before turning on the pump!

Here's some more pictures snapped from the weekend:

HERMS Coil installed

IMG_1305.jpg


HERMS Coil to Sparge Arm

IMG_1306.jpg


IMG_1307.jpg


Burner Stilt-Pod

IMG_1308.jpg


IMG_1311.jpg


IMG_1309.jpg


Just a few little finishing touches needed before Sunday brew day. We're brewing a simple, yet hoppy pale ale to get out legs on this system. It will also be out first full AG session so wish us luck!
 
This is great! I'm planning on doing a very similar build and was wondering what the total height is with keggles and if you've had any problem with the wood charring. I'm 5'11" so I'll be making mine short enough to be able to look down into the kettles while also making it tall enough to store the keggles on their side underneath.

Does anyone see anything wrong with plumbing the propane with copper? Copper with a nice wood finish will look pretty sexy.


The size of the rig, from the base to where the kegs sit is 30". It's nice that our mash tun, which is the center vessel, is only a 50L keg so we've got plenty of room to look over.

Did some more finishing touches last night...calibrated sight glasses and plumbed the line to our plate chiller. Two more sleeps till brew day! It's like Christmas came early!!
 
I want to build a similiar brewery, and will be very interested to hear how this turns out. Since you are just over the water from me I may need to get some advice on suppliers etc. :mug:

I will be following this thread with great interest...:ban:
 
I want to build a similiar brewery, and will be very interested to hear how this turns out. Since you are just over the water from me I may need to get some advice on suppliers etc. :mug:

I will be following this thread with great interest...:ban:

WCH,

If you need anything, just PM me!

Cheers,
G
 
As we have only tested an all-out burn for 15 minutes, our findings are inconclusive. However, during the 15 minute burn, we were able to bring a small volume of water to a vigorous boil and exerience no fatigue/excessive hotness to the tubing. Additionally, the wooden frame was not affected at all. It is a full 6 inches away on each side from the heat source.

We're doing a full batch Sunday so I guess we'll see what happens. I'll be sure to post some updates!
 
We installed our brewmometers and sight glasses tonight and did a full process dry run with water. No leaks, and better yet, the pump worked flawlessly in the vertical orientation. Just needed to open both inlet and outlet valves and wait a few seconds before turning on the pump!

Here's some more pictures snapped from the weekend:


IMG_1309.jpg


Is it possible to take a pic a little closer to look at line routes and gas valving? And left to right the kettles are.....

I'll take some more pictures this weekend to offer some better detail. For now, left to right we have the HLT, MT and BK.
 
Any updates? How'd the brew day go?

Probably not so good or we would have heard something by now. I'm guessing there may have been some overheating/scorching issues with the mash tun. I say this as I have been through that myself in the past. Just really a guess though. Hopefully all went well.
 
Just to ease the minds of my fellow homebrewtalk friends, we did not burn down the neighbourhood, quite the opposite in fact. There was no scorching issues whatsoever and we were able to get up to strike temps in about 40 minutes from cold start.

While there were no issues with scorching, and overall I was really happy with how the day progressed, we did run into a huge problem. Our whirlpool effect that we were hoping would centralize the hops/trub, didn't work quite as planned. We ended up bunging up the whole system, pump, tees etch spent hops and trub. Needless to say, we were not able to operate our plate chiller and really had no backup plan for cooling. At the end of the day, we racked hot wort as carefully as possible to two carboys and let cool overnight.

We pitched yeast Sunday December 5th, and just bottled on Wednesday. As a result of the frantic end to the brew session, I completely forgot to measure our SG :( But, our measured FG was right on the money! Beer tasted pretty good going into the bottle, should be ready 2-3 weeks.

I think we will be giving lil' Sparky's hop bag a go for our next brew session as everything else ran very smoothly. Even manually controlling our burners/pump to keep mash temps consistent was much easier than I was made to believe. It only took us about an hour to remove the plugged lines and clean out the head of the pump which was a relief.

I'll post some more pictures from the brew day shortly!
Thanks for the concern :mug:
 
I'm putting together a simple 1 keggle, 1 cooler system.. I am planning on using a false bottom in the BK for trub.. I have no way (other then manual stirring) to whirlpool at this time...

Do you think a full false bottom on the BK would have prevented the clogging?

I imagine that a false bottom and whirlpool system would help even more..

Do any of you use a false bottom on your boil kettle? Is this a good/bad idea?
 
Back
Top