lextasy23
Well-Known Member
So, I figured it was high time that I started my own basement brewery thread. We just bought the house a couple weeks ago, and I have given myself a conservative "deadline" to have the project completed by a year from now.
I've been slowly hoarding equipment in my storage unit, and I've got most of it ready to go:
5' and 6' Stainless work tables (from a closed restaurant - currently sitting in wit2003's shed brewery)
7-1/2' 3-bay Stainless sink (Craigslist)
2 15.5-gal pots
Cooler Mash Tun (may upgrade to a third pot in time - I was given it from a buddy/member here who went from home brewery to having beer on the shelves in local liquor stores, so it has a sort of history, story, and slight sentimentality)
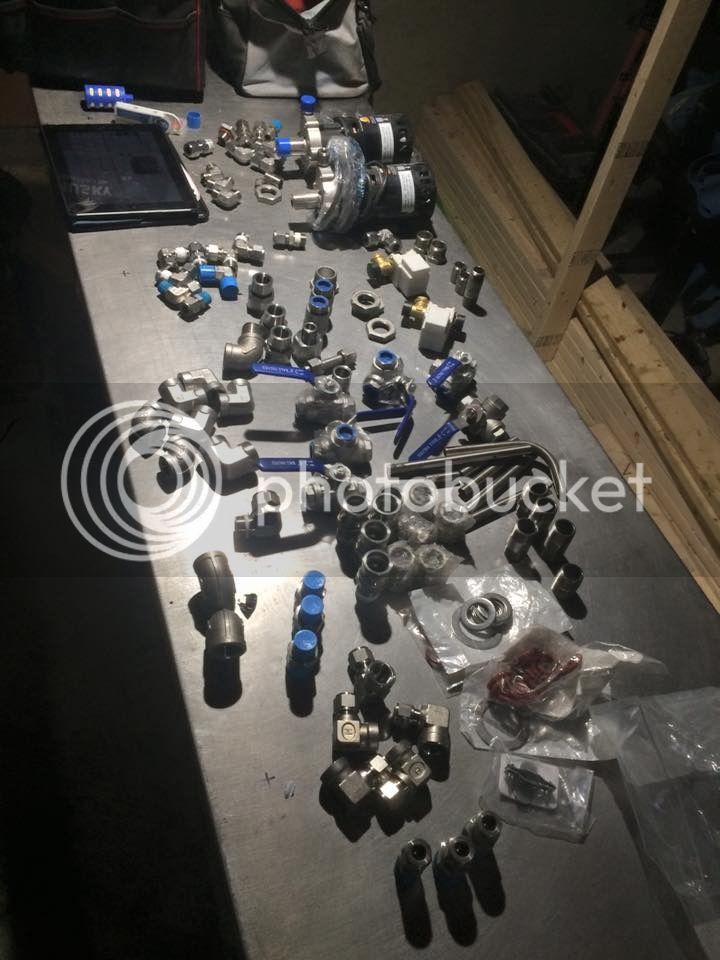
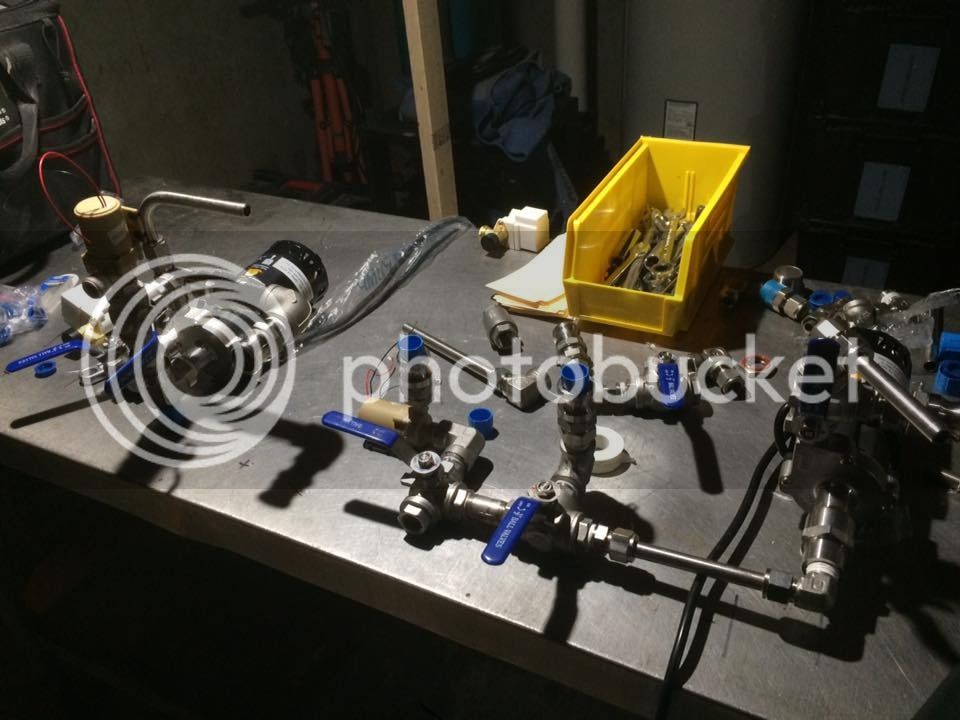
TONS of stainless fittings and valves.
2 stainless Chuggers (bought exclusively with Amazon credit card points and gift cards!)
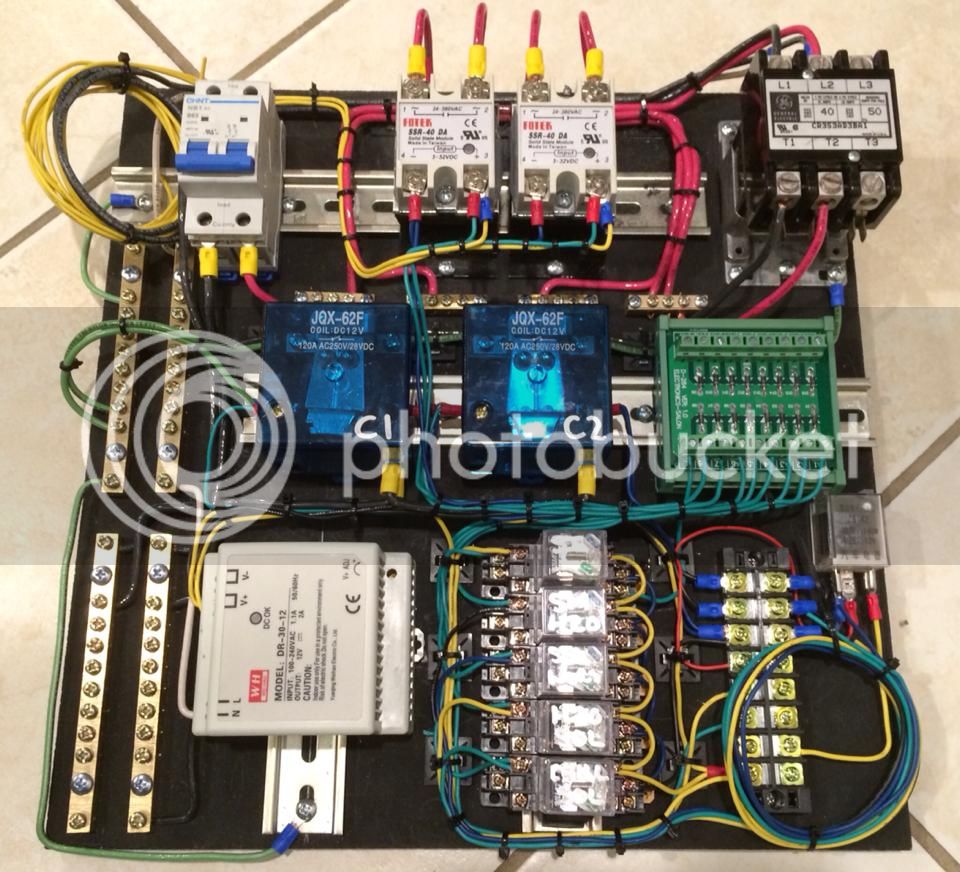
I built the brew panel over the course of the last year, entirely from scratch. The "low current" devices are out of China from eBay, and the devices that carry the heavier loads, and all the 240v components are name-brand American devices (breaker, contactor, SSRs, etc).
Brew Panel:
Started as an idea, inspired by Kal @ TEB, and I took it and ran with it to make it my own. I do have a thread just for that here.
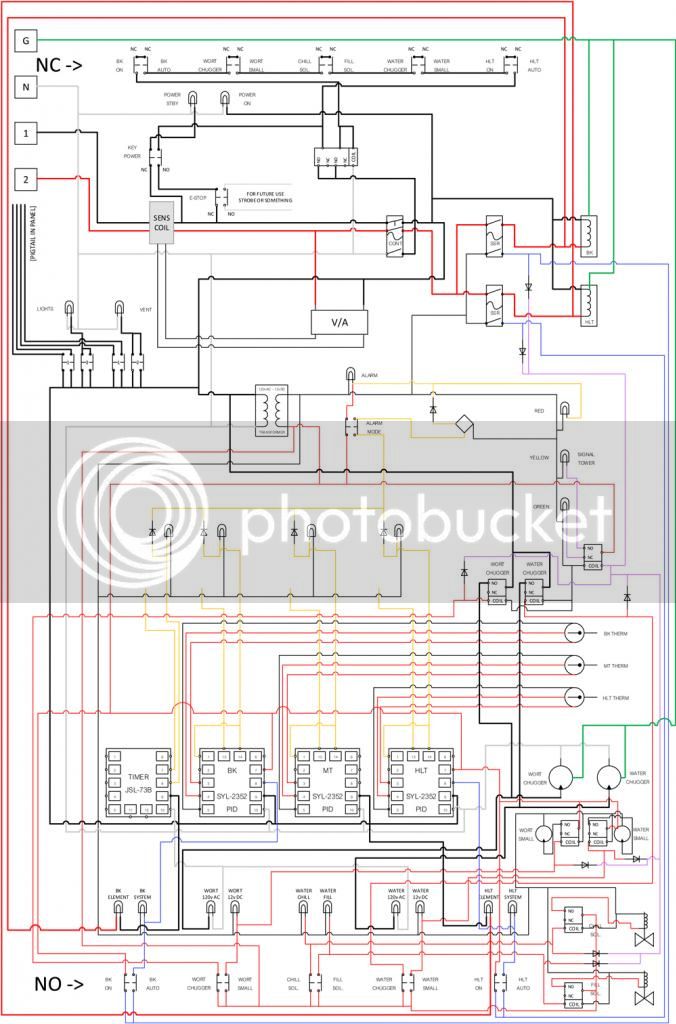
Here's the final schematic I used to build it:
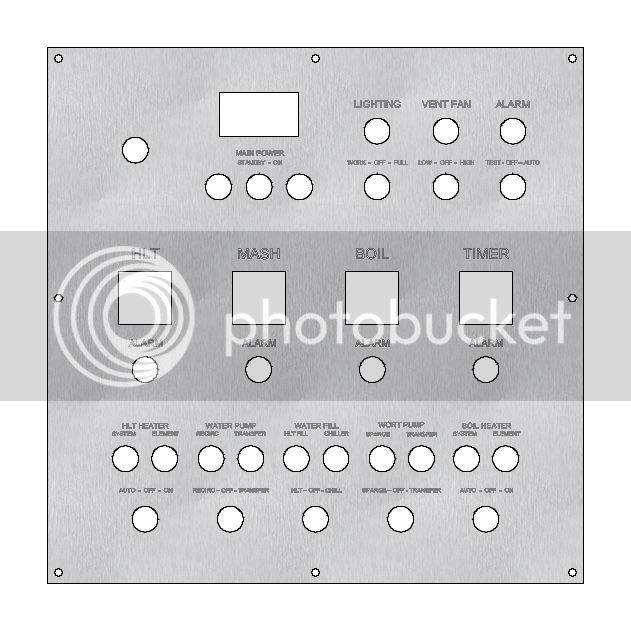
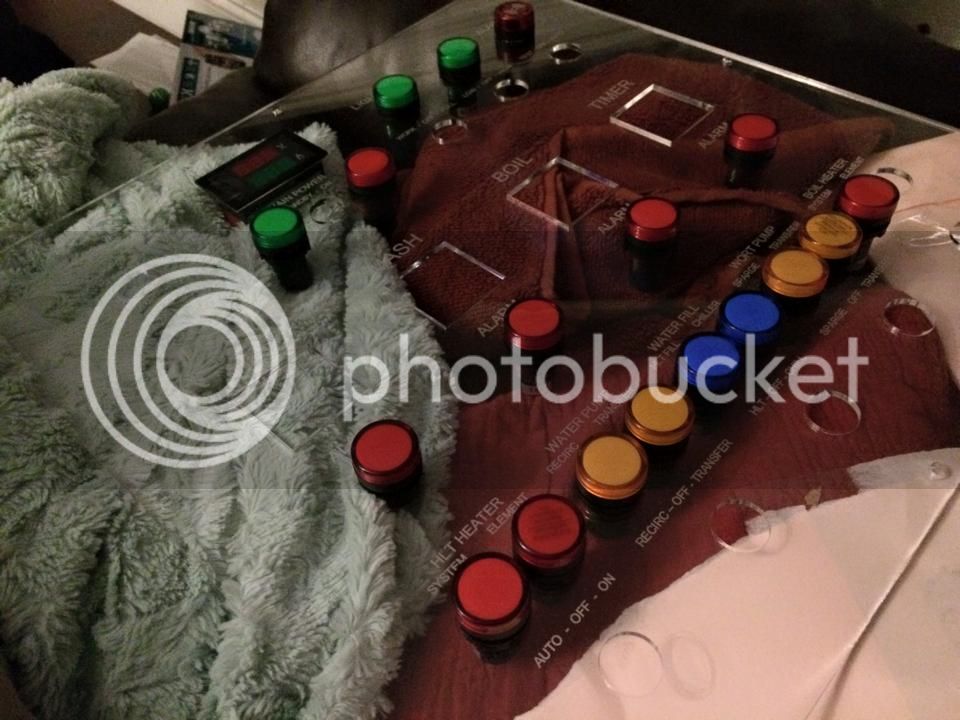
The cover I had laser cut and reverse engraved out of thick Plexiglas:
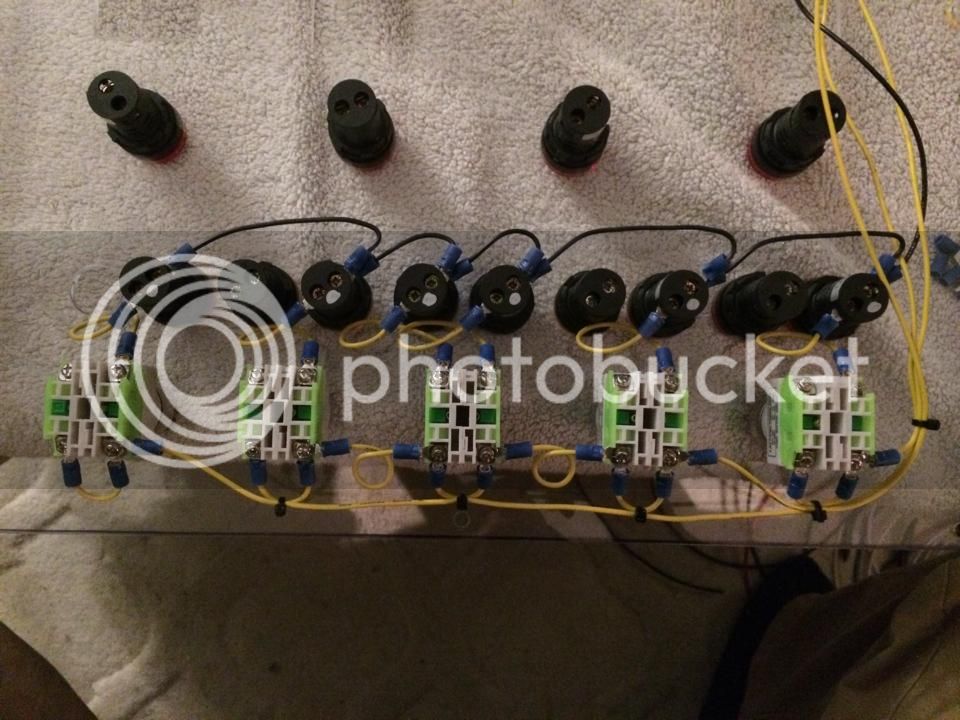
Here it is throughout the process:
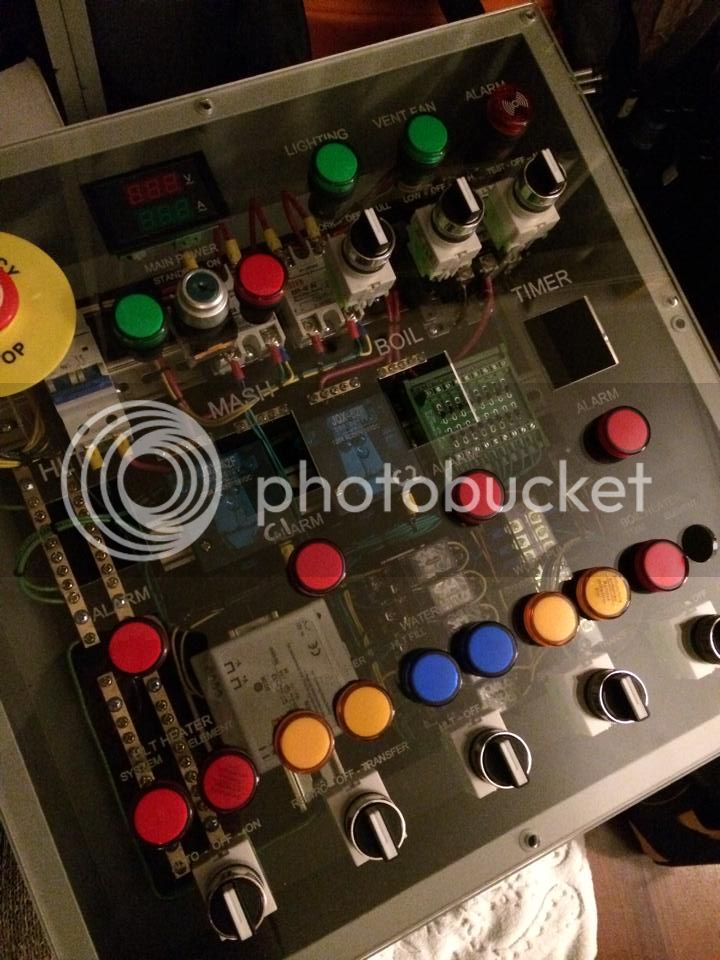
I did LED side lighting to illuminate the engraved lettering on the PlexiGlas, you'll see that in the video better than I can describe it. It is connected to 120v only (so no volt/ammeter, and no heater functionality), and I apologize for the fingerprints and dust... It needed a cleaning then.
[ame]https://www.youtube.com/watch?v=I8-ZPSt-w2I[/ame]
The controller has since been outfitted with Auber PIDs (with their new matching timer), and a Kal-inspired Safe-Start circuit (with my own twist). I also added some safer features like having the e-stop be a NC switch for the main contactor, rather than having it NO and close to essentially short out and trip the breaker. That's bad news and could arc or flash or worse...
The Brewery:
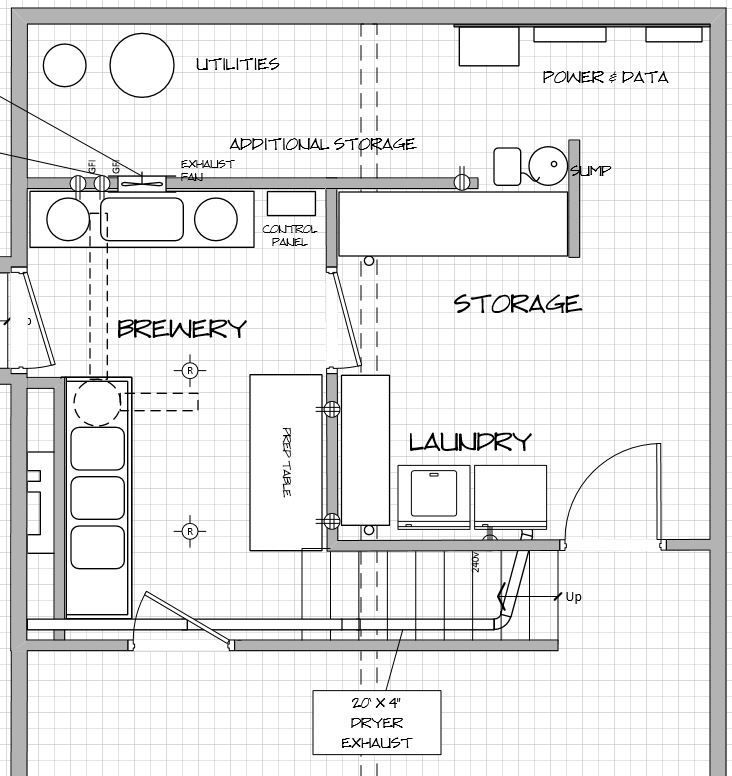
So as I mentioned, we recently bought our new house. The "agreement" was that she could pick the curtains and paint colors and whatever other crap she wants to fill the house with, and I get the basement (which is already half finished) and my upstairs office (which is the only room yet to be unpacked). You can imagine my excitement - I get free reign to build a brewery, and I don't have to pick out curtains or paint colors. lol
Here's the plan:
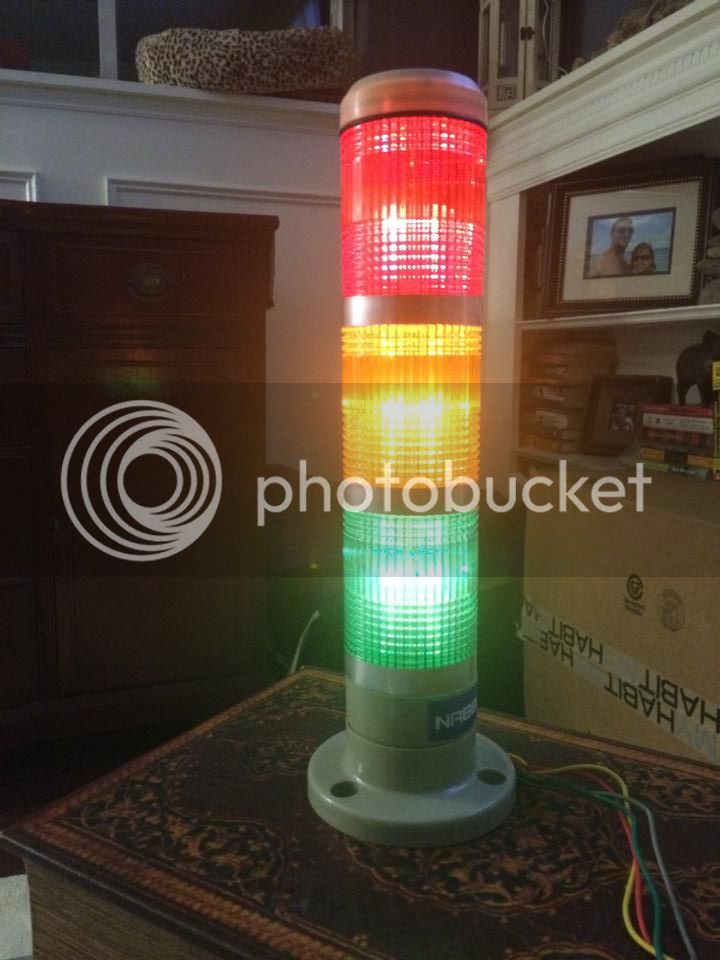
This guy will go on the mantown side of the brewery, to indicate brew status:
Here's what I have in that space now:
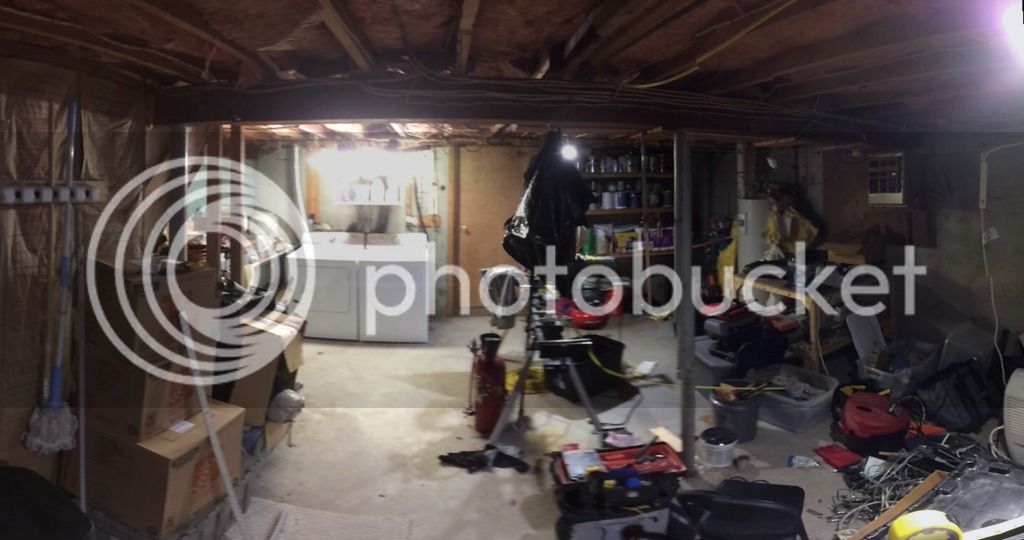
The brewery will be basically from the left rear of the picture, to halfway through that shelf of paint, towards you to about a foot shy of the pole, and back to that left wall. There will be a door towards you so I can make a straight shot through the brewery with large things that need to come into the basement, and another door on the left - all glass - that leads to mantown and the bar area.
My plan is to first relocate the laundry to where I have it depicted in the floor plan above. My cousin is an electrician, and I have a buddy from High School who's a plumber. Between them and the fact that I'm an unlicensed handyman who knows what he's doing (lol), I figure that ought to be easy. My cousin is actually in the middle of replacing our 200a panel. I had him replace the mains from where the pole terminates at the top of the house, the meter, and the line to the panel. The panel and all parts are in the basement now and he'll be back soon to wrap that up. Point is, dryer and brewery will be on brand new circuits on a brand new panel.
My system will actually use 4 pumps and two burners that can run simultaneously, if you wanted to do a double brew day (we certainly have before). two are your standard chugger, and two are 100c rated 12v DC food-safe recirculator pumps - they'll keep the mash flowing at a low speed, and keep the HLT water recirculated so there's no heat layering in the pot. They're also a LOT quieter than chuggers. The chuggers will be almost exclusively for transferring.
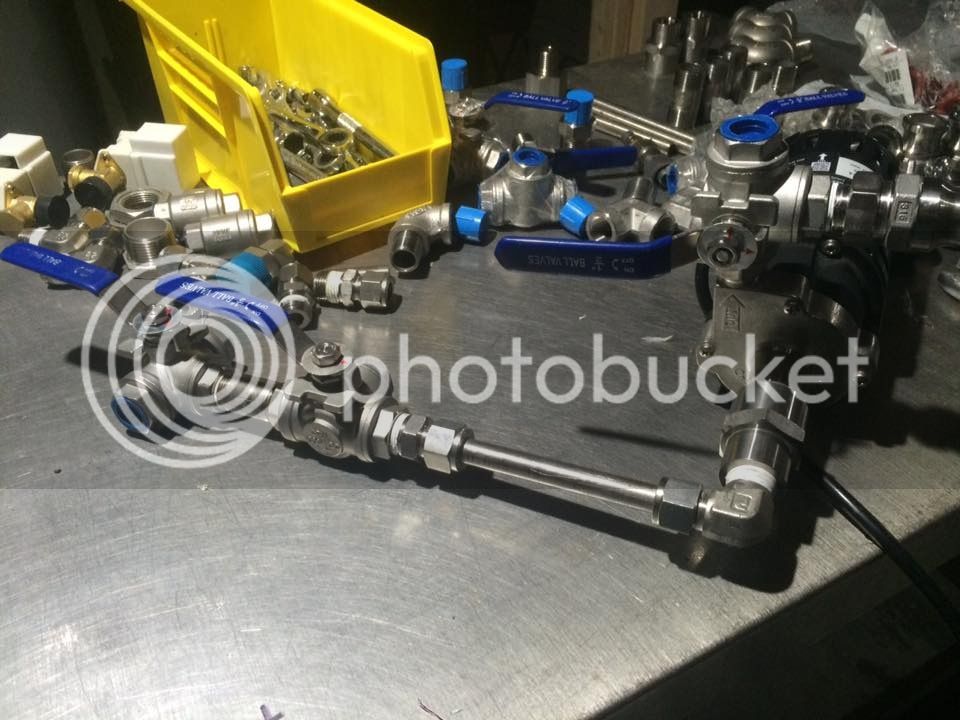
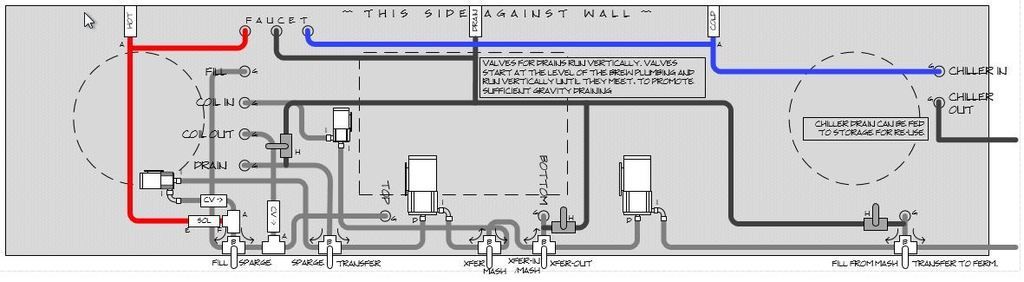
I also added another custom touch... I have all 3-way valves (five of them), so there will be no swapping hoses during brew day. Connect everything up, then it's just a matter of turning switches on the panel, and valves on the brew table. I have that all planned out in a schematic, and my plan is to fabricate it out of CPVC first, test operation, then convert the CPVC to 1/2" stainless tube with compression fittings. I have lots of those too.
Here's the diagram:
In the end I want to make a manual too. That part would be just for fun mainly, but realistically it would have all the electrical and mechanical diagrams, valve operation, panel operation, troubleshooting, etc... "Not sure how to make beer? Here, read this and go make beer..." sort of thing lol.
Well like I said, I thought it was high time I started my build thread. I just couldn't bring myself to starting a brewery thread before I even owned a house to build a brewery in (though that didn't stop me from saving up gear for the last few years!)
I've been slowly hoarding equipment in my storage unit, and I've got most of it ready to go:
5' and 6' Stainless work tables (from a closed restaurant - currently sitting in wit2003's shed brewery)
7-1/2' 3-bay Stainless sink (Craigslist)
2 15.5-gal pots
Cooler Mash Tun (may upgrade to a third pot in time - I was given it from a buddy/member here who went from home brewery to having beer on the shelves in local liquor stores, so it has a sort of history, story, and slight sentimentality)
TONS of stainless fittings and valves.
2 stainless Chuggers (bought exclusively with Amazon credit card points and gift cards!)
I built the brew panel over the course of the last year, entirely from scratch. The "low current" devices are out of China from eBay, and the devices that carry the heavier loads, and all the 240v components are name-brand American devices (breaker, contactor, SSRs, etc).
Brew Panel:
Started as an idea, inspired by Kal @ TEB, and I took it and ran with it to make it my own. I do have a thread just for that here.
Here's the final schematic I used to build it:
The cover I had laser cut and reverse engraved out of thick Plexiglas:
Here it is throughout the process:
I did LED side lighting to illuminate the engraved lettering on the PlexiGlas, you'll see that in the video better than I can describe it. It is connected to 120v only (so no volt/ammeter, and no heater functionality), and I apologize for the fingerprints and dust... It needed a cleaning then.
[ame]https://www.youtube.com/watch?v=I8-ZPSt-w2I[/ame]
The controller has since been outfitted with Auber PIDs (with their new matching timer), and a Kal-inspired Safe-Start circuit (with my own twist). I also added some safer features like having the e-stop be a NC switch for the main contactor, rather than having it NO and close to essentially short out and trip the breaker. That's bad news and could arc or flash or worse...
The Brewery:
So as I mentioned, we recently bought our new house. The "agreement" was that she could pick the curtains and paint colors and whatever other crap she wants to fill the house with, and I get the basement (which is already half finished) and my upstairs office (which is the only room yet to be unpacked). You can imagine my excitement - I get free reign to build a brewery, and I don't have to pick out curtains or paint colors. lol
Here's the plan:
This guy will go on the mantown side of the brewery, to indicate brew status:
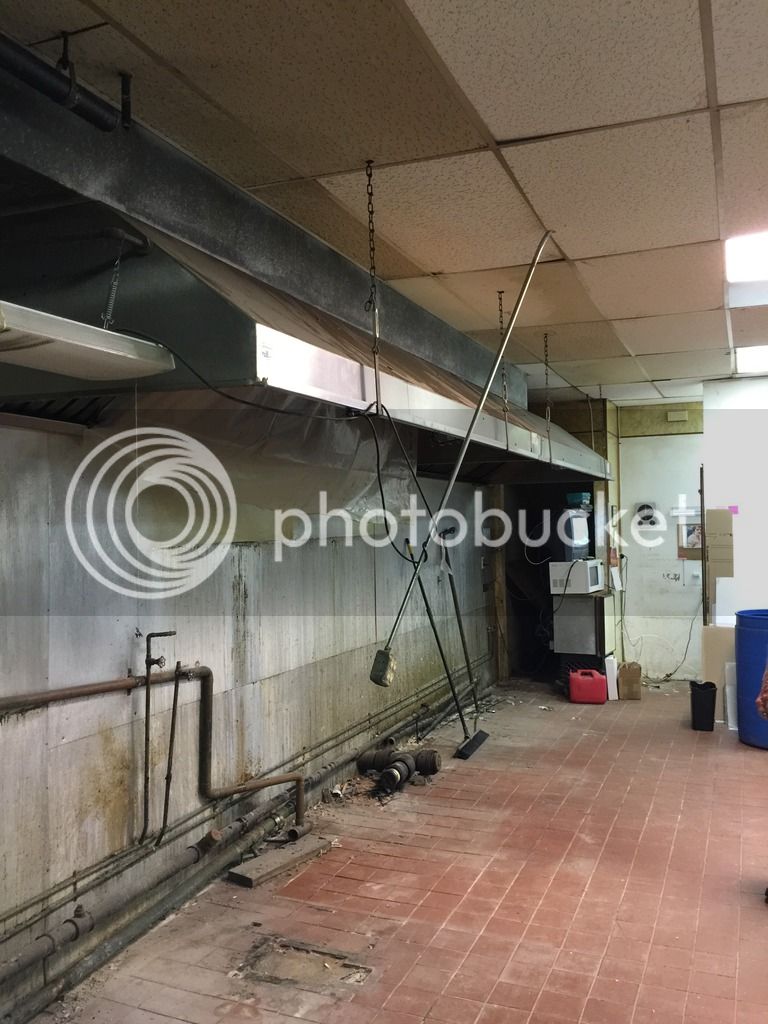
Here's what I have in that space now:
The brewery will be basically from the left rear of the picture, to halfway through that shelf of paint, towards you to about a foot shy of the pole, and back to that left wall. There will be a door towards you so I can make a straight shot through the brewery with large things that need to come into the basement, and another door on the left - all glass - that leads to mantown and the bar area.
My plan is to first relocate the laundry to where I have it depicted in the floor plan above. My cousin is an electrician, and I have a buddy from High School who's a plumber. Between them and the fact that I'm an unlicensed handyman who knows what he's doing (lol), I figure that ought to be easy. My cousin is actually in the middle of replacing our 200a panel. I had him replace the mains from where the pole terminates at the top of the house, the meter, and the line to the panel. The panel and all parts are in the basement now and he'll be back soon to wrap that up. Point is, dryer and brewery will be on brand new circuits on a brand new panel.
My system will actually use 4 pumps and two burners that can run simultaneously, if you wanted to do a double brew day (we certainly have before). two are your standard chugger, and two are 100c rated 12v DC food-safe recirculator pumps - they'll keep the mash flowing at a low speed, and keep the HLT water recirculated so there's no heat layering in the pot. They're also a LOT quieter than chuggers. The chuggers will be almost exclusively for transferring.
I also added another custom touch... I have all 3-way valves (five of them), so there will be no swapping hoses during brew day. Connect everything up, then it's just a matter of turning switches on the panel, and valves on the brew table. I have that all planned out in a schematic, and my plan is to fabricate it out of CPVC first, test operation, then convert the CPVC to 1/2" stainless tube with compression fittings. I have lots of those too.
Here's the diagram:
In the end I want to make a manual too. That part would be just for fun mainly, but realistically it would have all the electrical and mechanical diagrams, valve operation, panel operation, troubleshooting, etc... "Not sure how to make beer? Here, read this and go make beer..." sort of thing lol.
Well like I said, I thought it was high time I started my build thread. I just couldn't bring myself to starting a brewery thread before I even owned a house to build a brewery in (though that didn't stop me from saving up gear for the last few years!)


![Craft A Brew - Safale BE-256 Yeast - Fermentis - Belgian Ale Dry Yeast - For Belgian & Strong Ales - Ingredients for Home Brewing - Beer Making Supplies - [3 Pack]](https://m.media-amazon.com/images/I/51bcKEwQmWL._SL500_.jpg)