• Please visit and share your knowledge at our sister communities:
  • If you have not, please join our official Homebrewing Facebook Group!

    Homebrewing Facebook Group

Vintage 1954 Frigidaire Kegerator Build

Homebrew Talk

Help Support Homebrew Talk:

This site may earn a commission from merchant affiliate links, including eBay, Amazon, and others.
Lol, Bob!
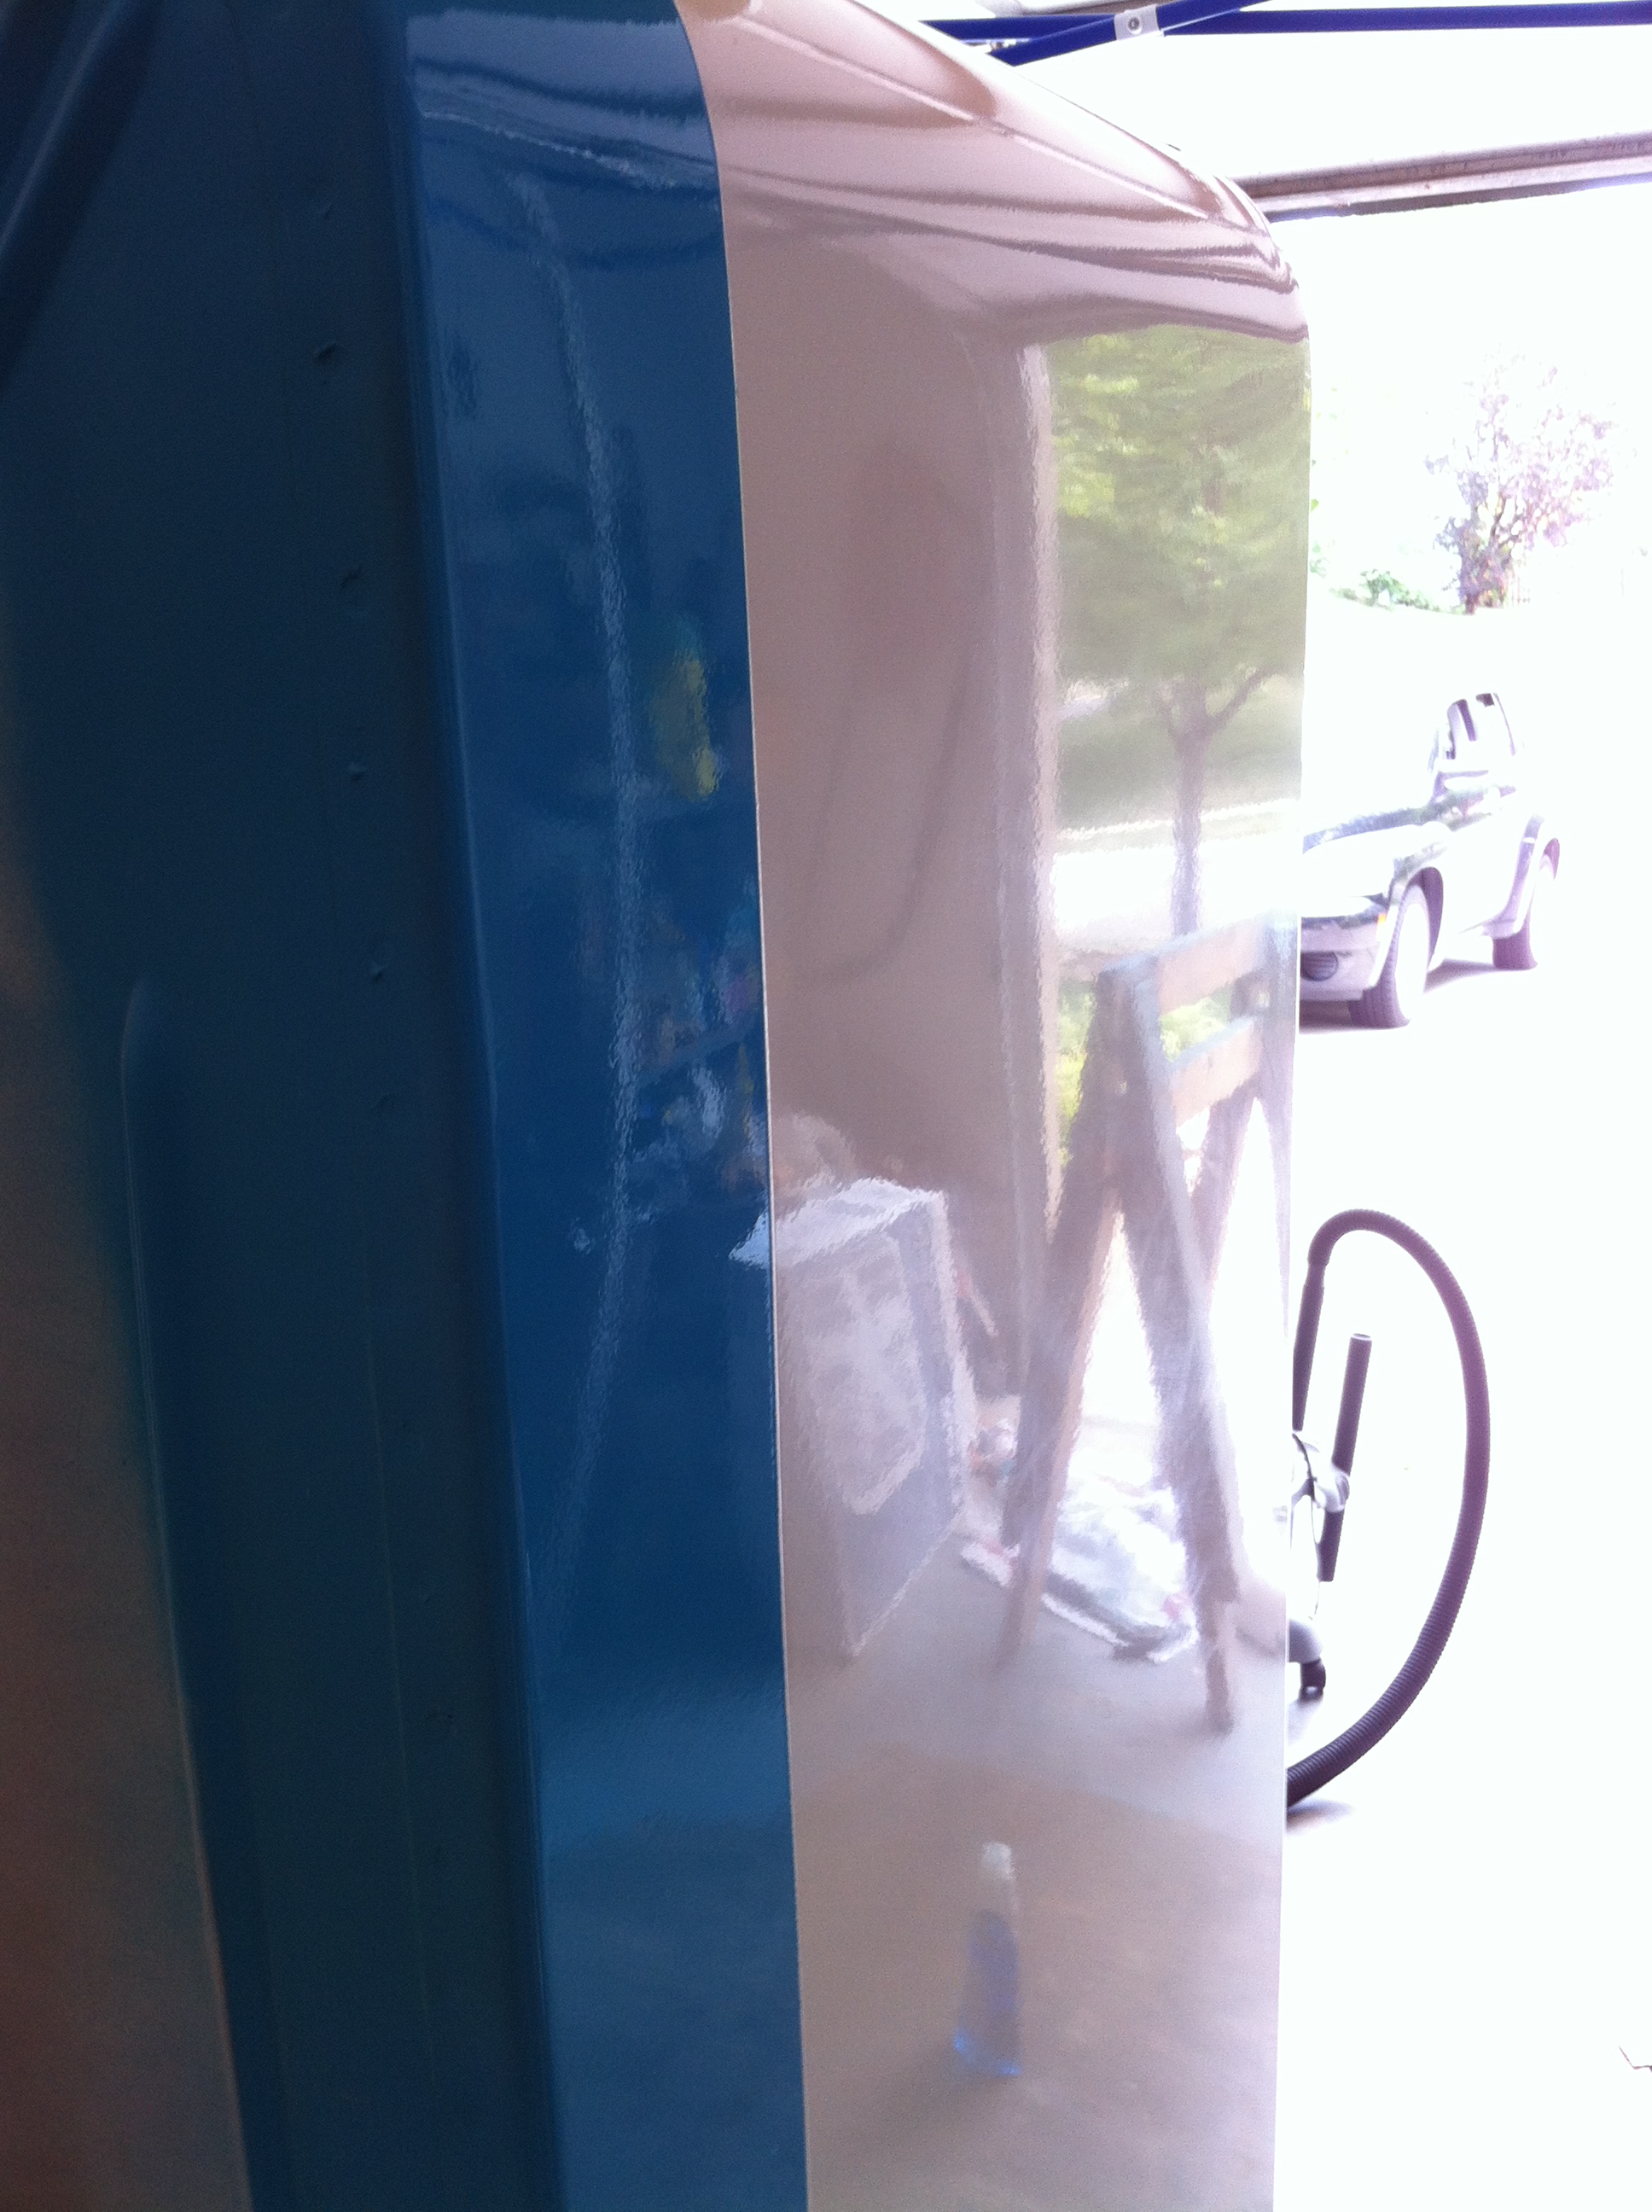
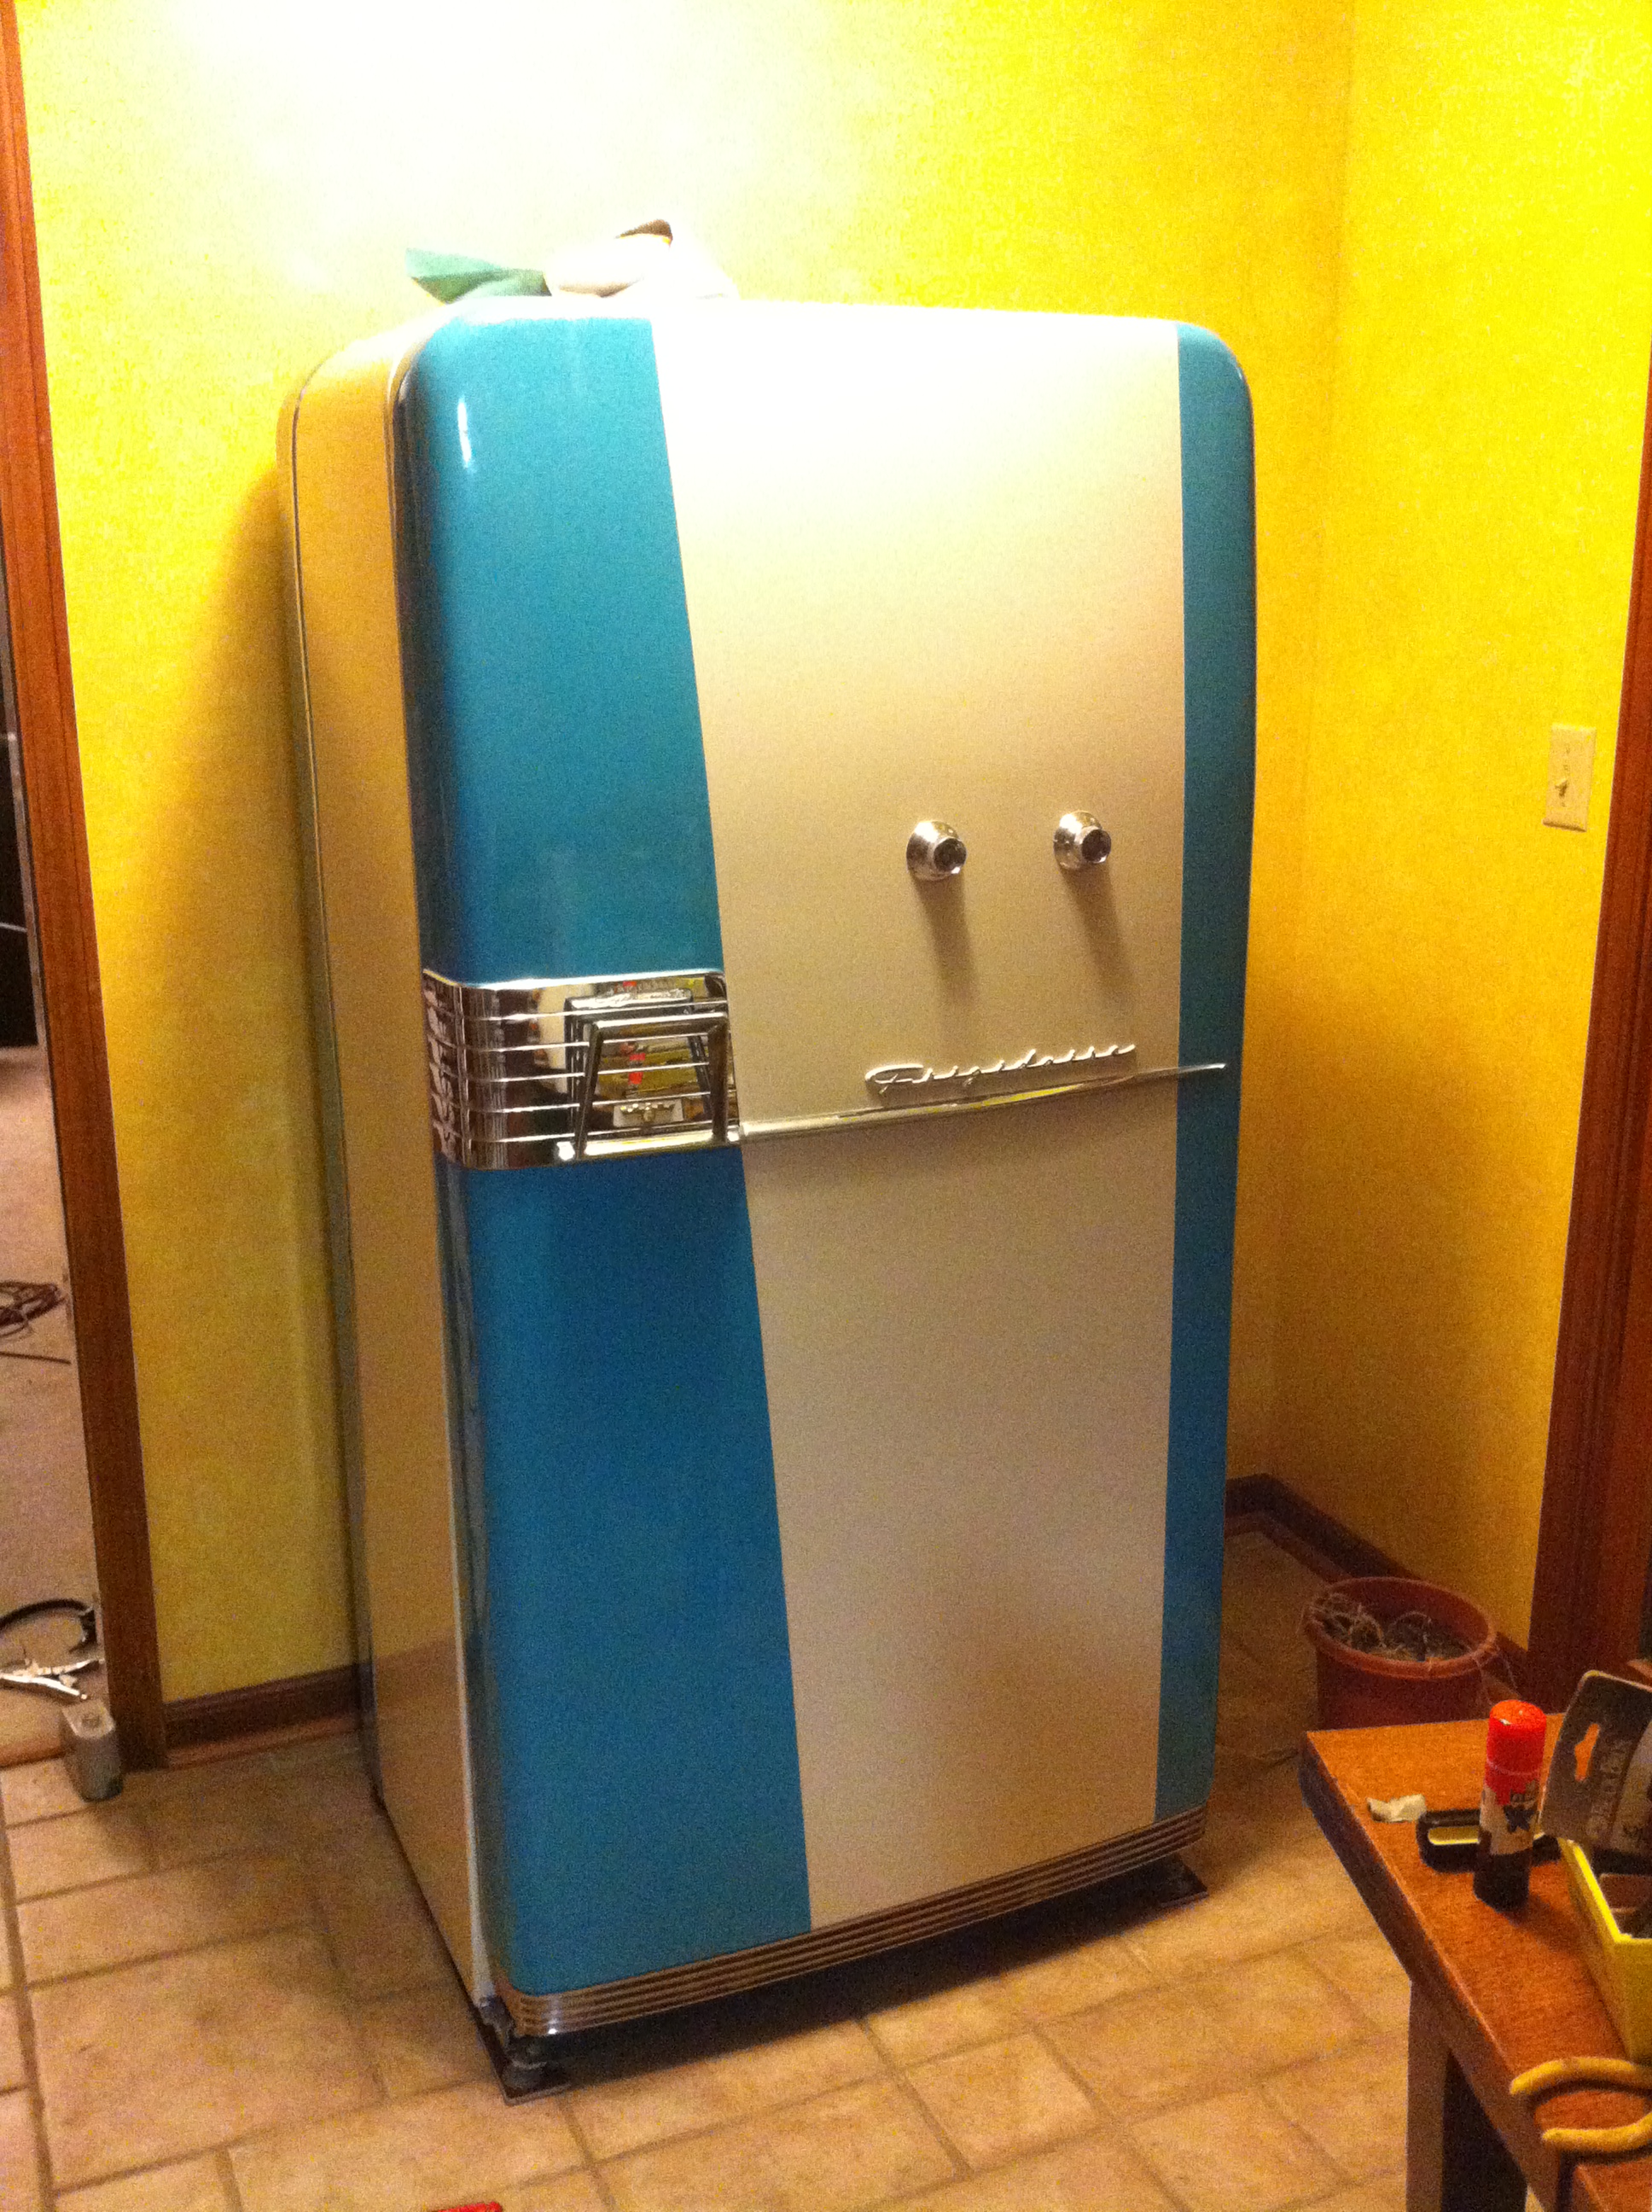
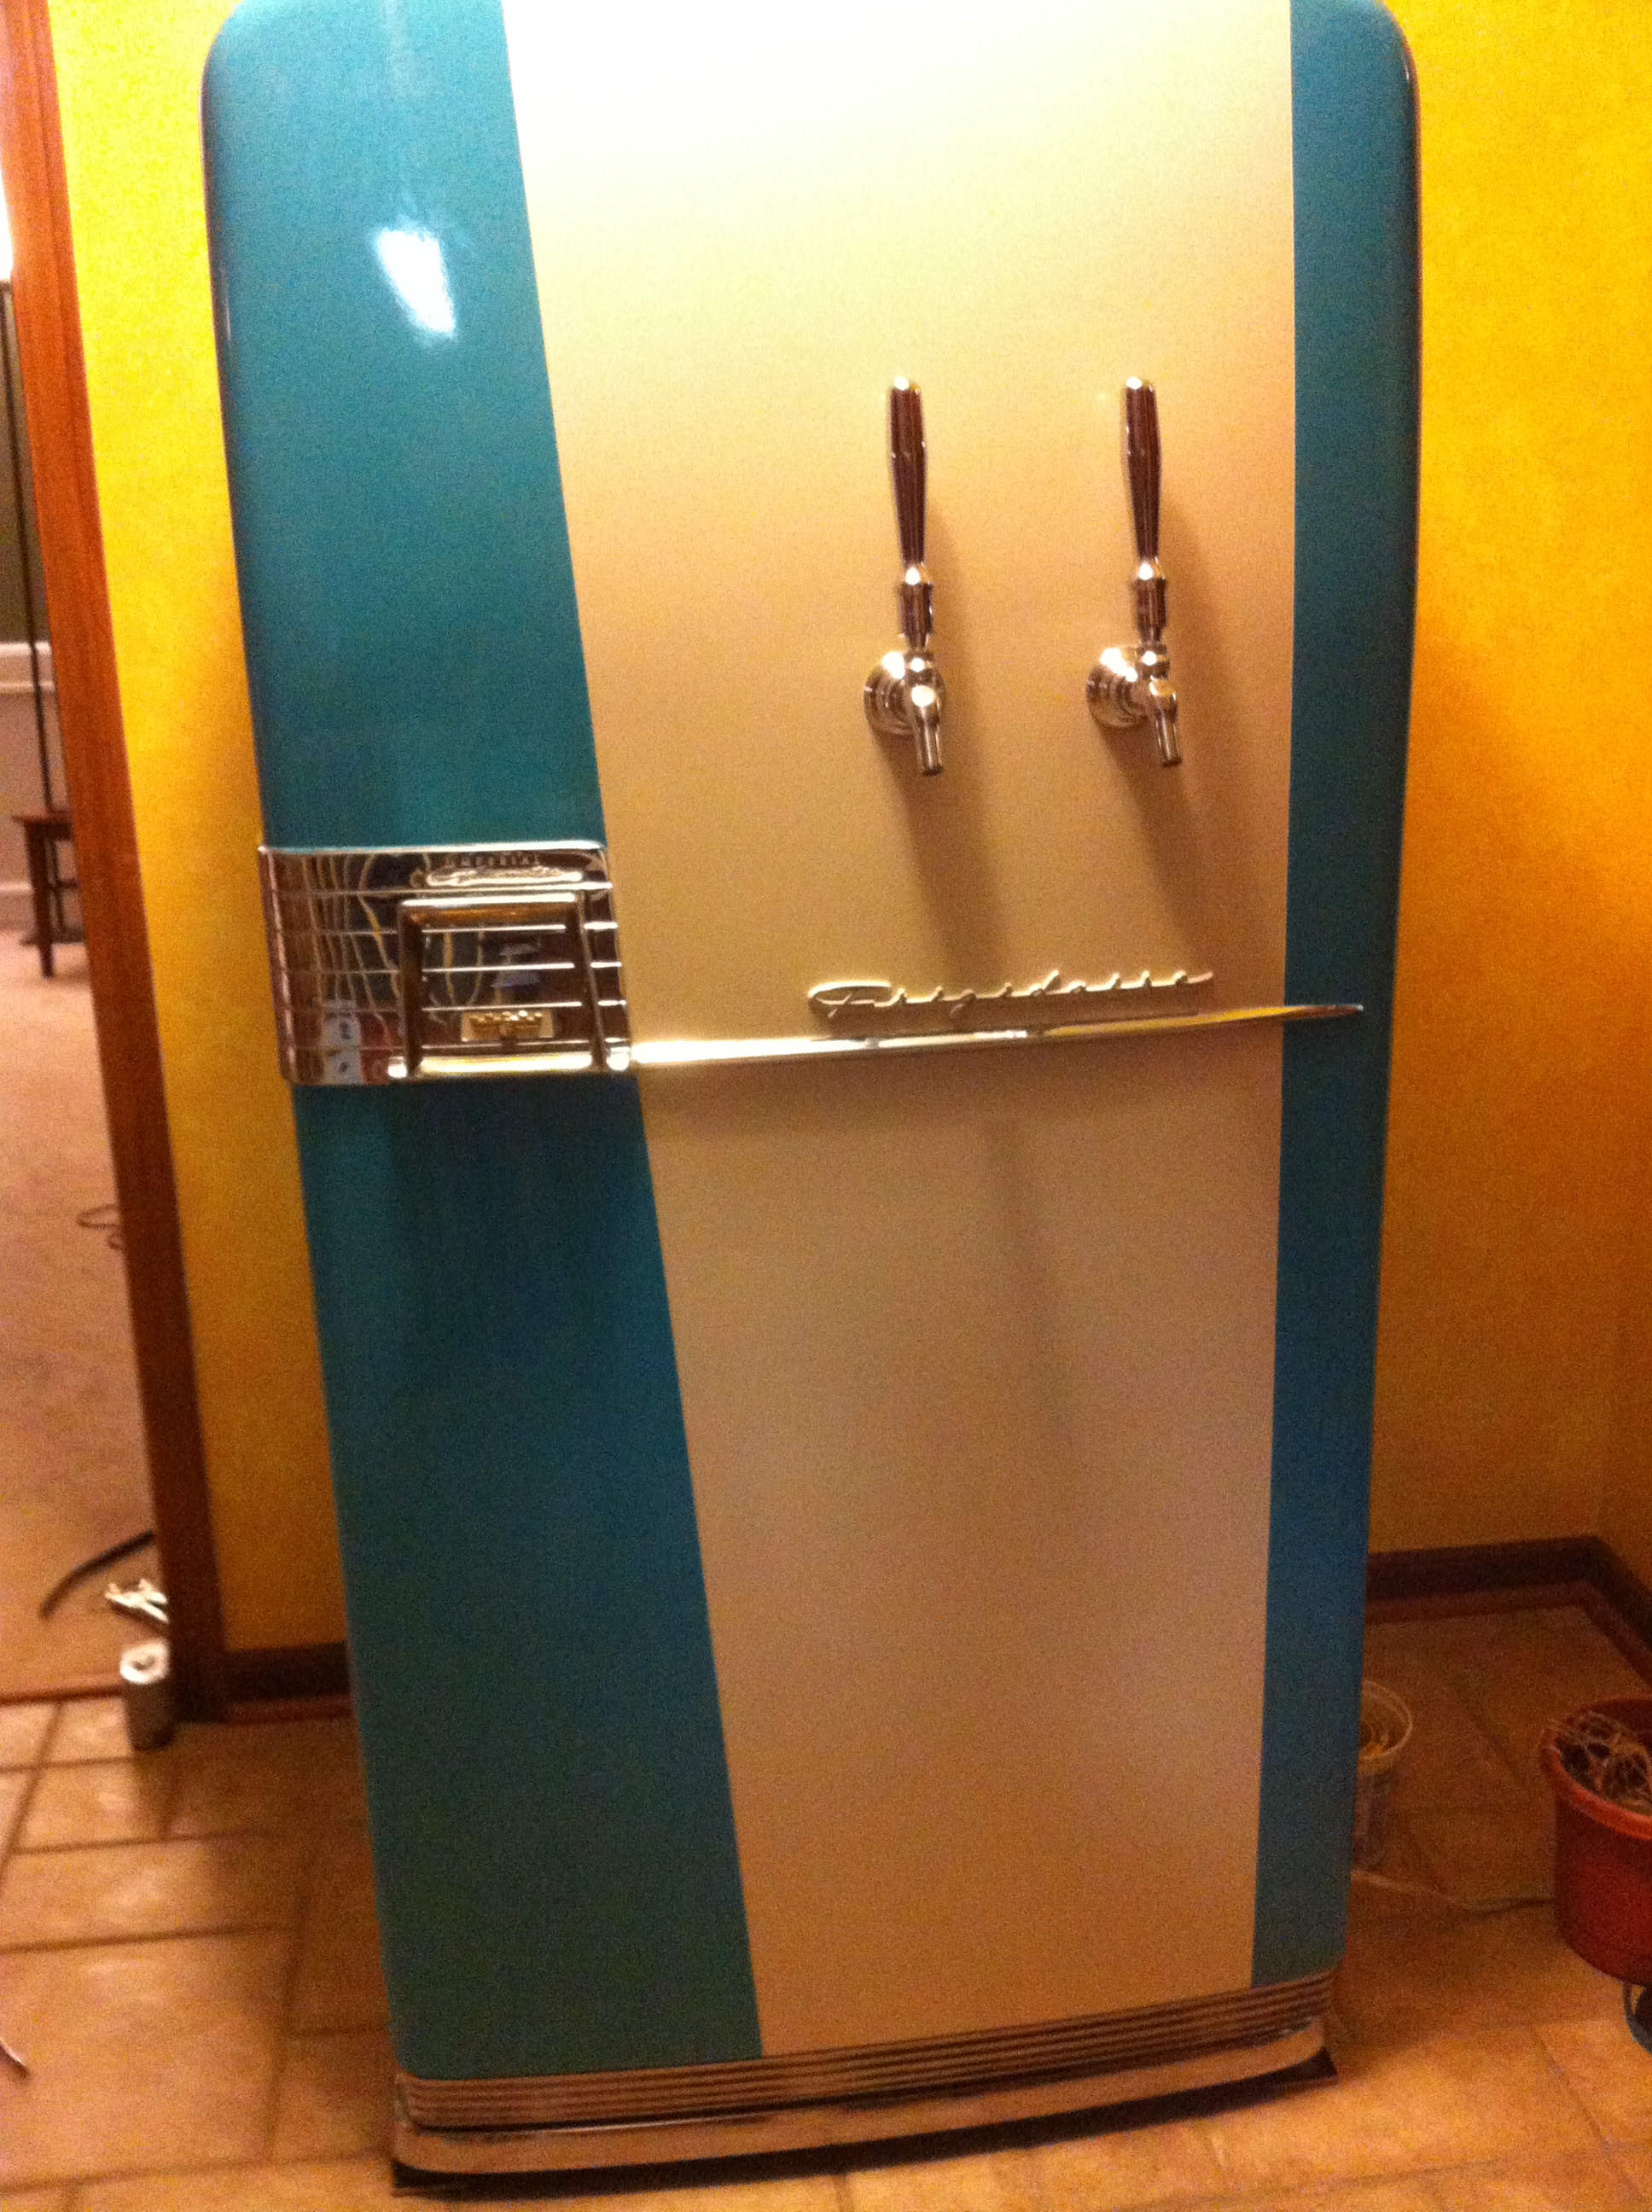
Actually, by the time you wrote that, I already had the door wet sanded and was running to the stores to get new stuff. When I pulled it out after work, it was a no-brainer that I would be re-doing the blue. There were some thin spots and some drips (in those tight areas of the paint booth).
SO:...
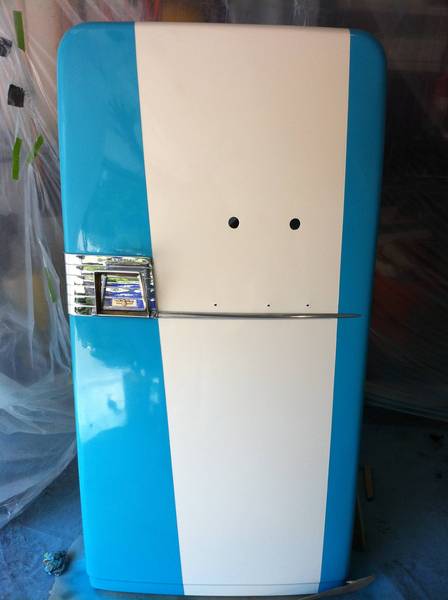
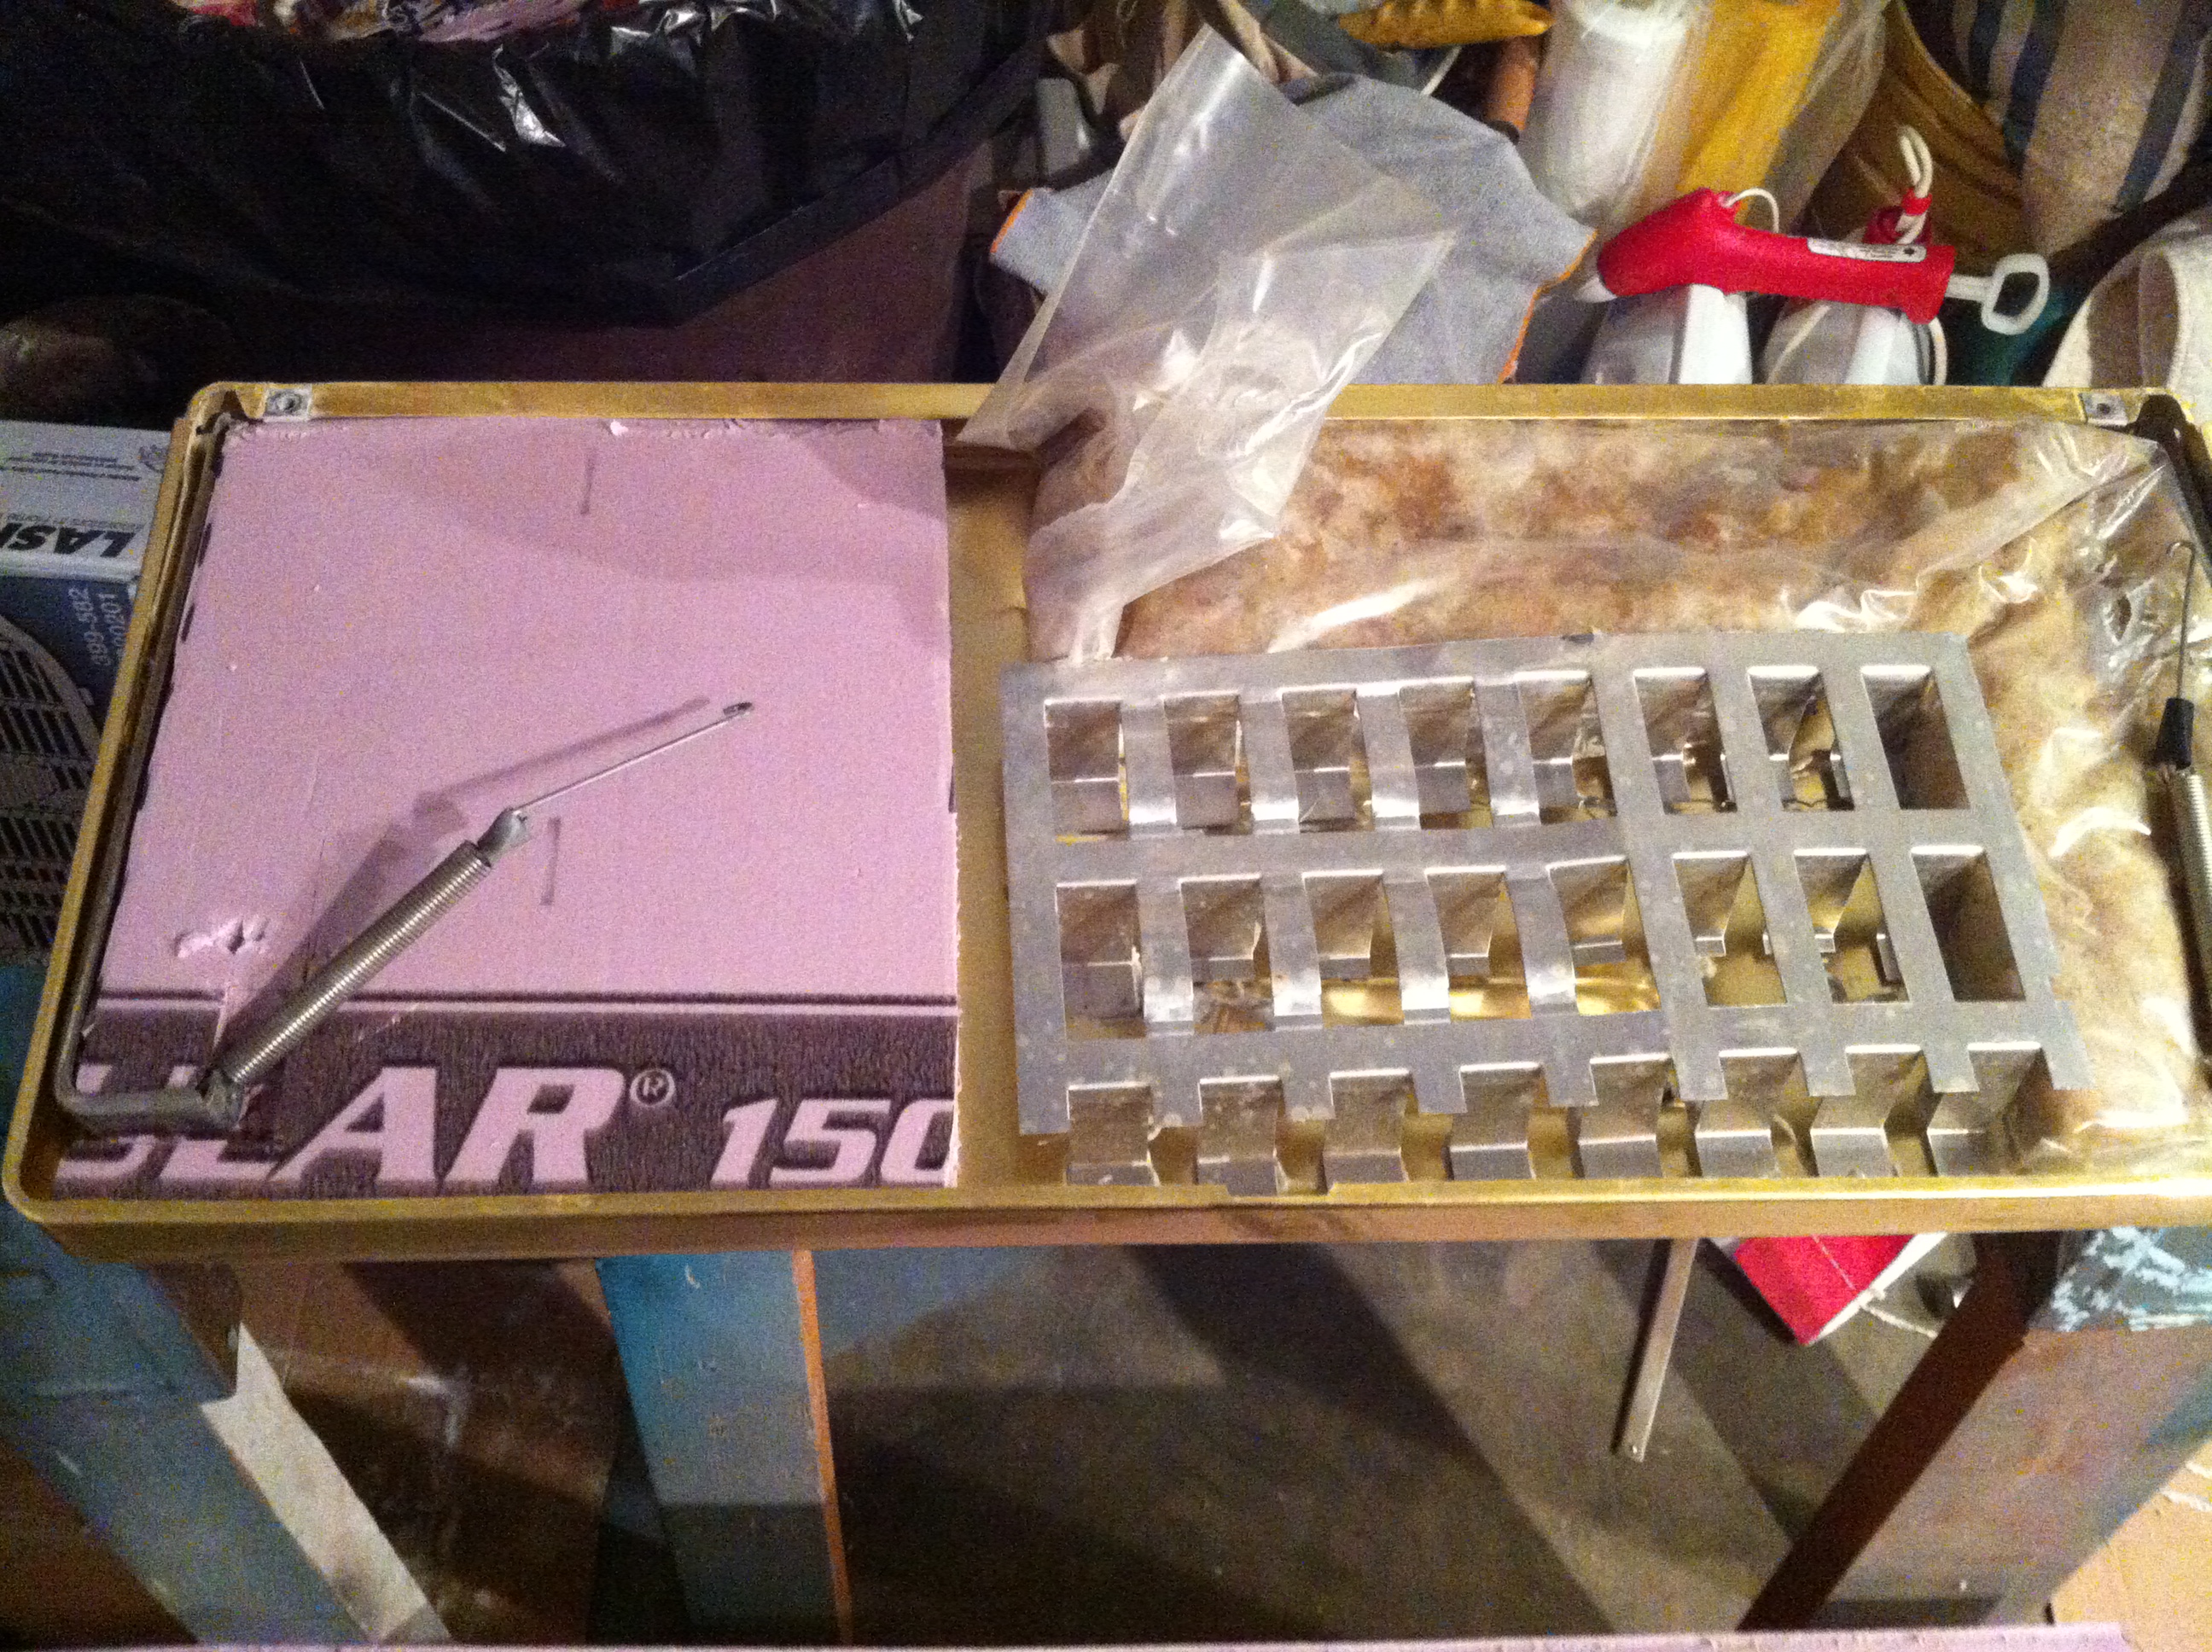
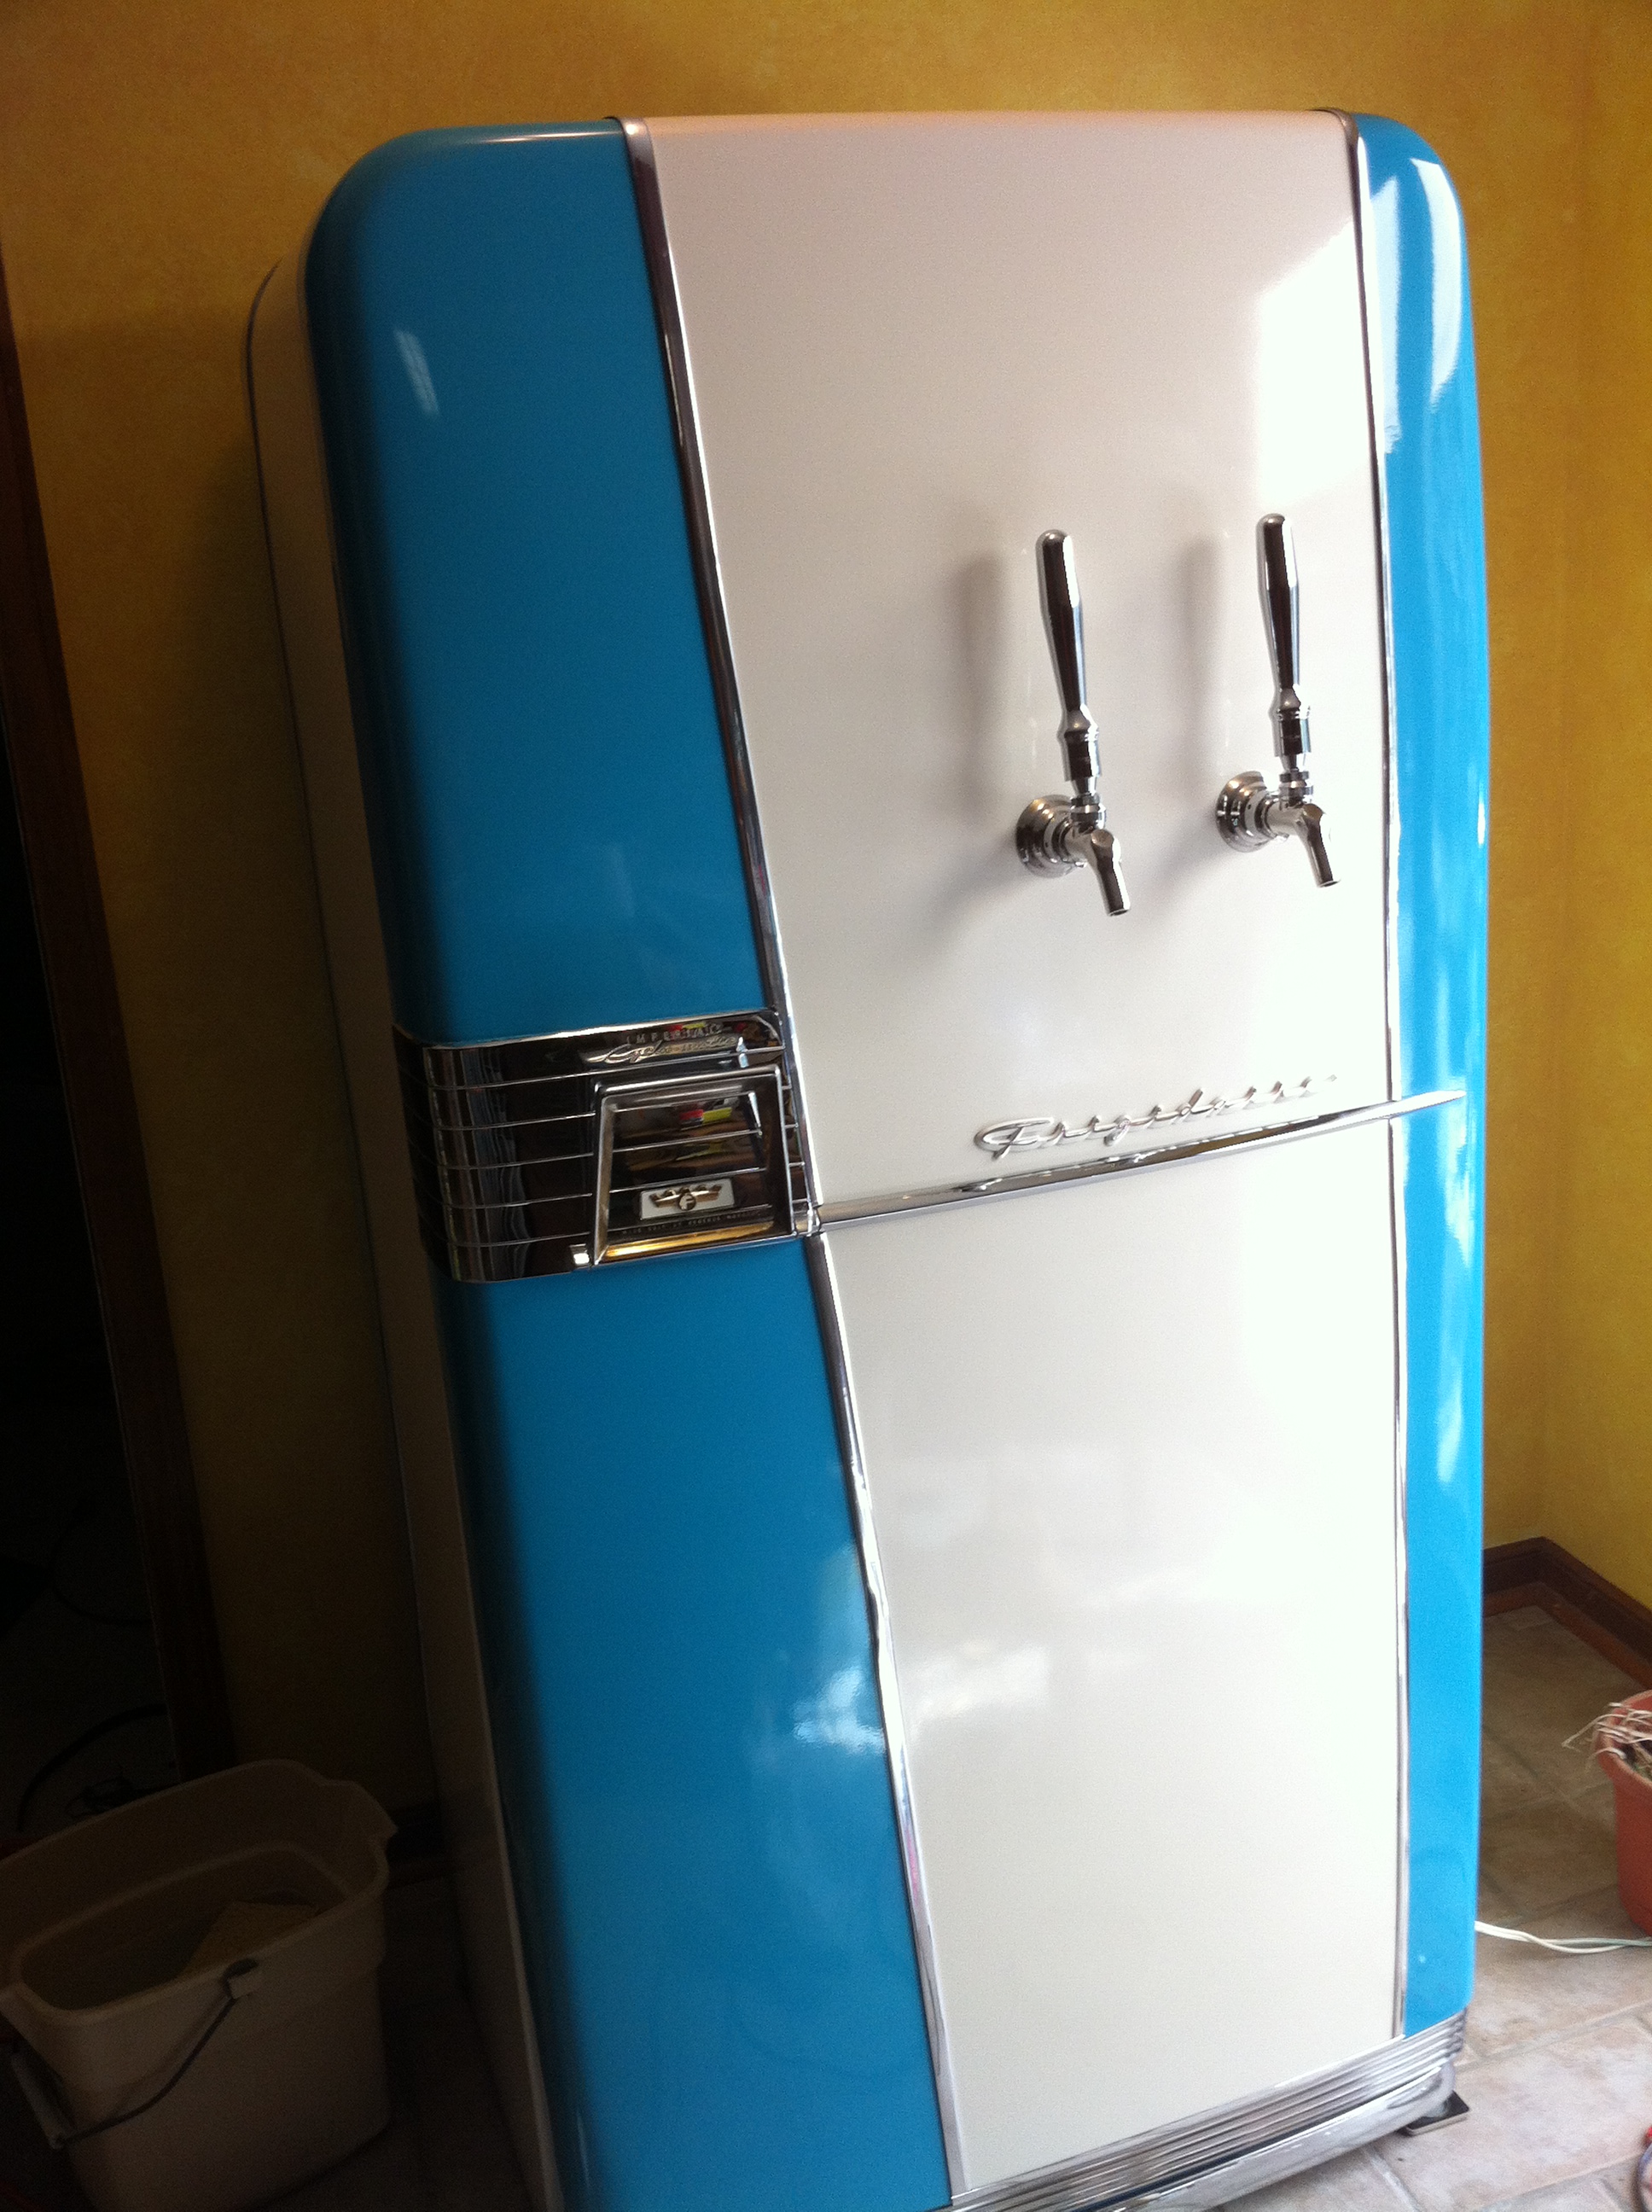
Fridge door with the aqua wet sanded and ready to try again:
IMG_06392.JPG


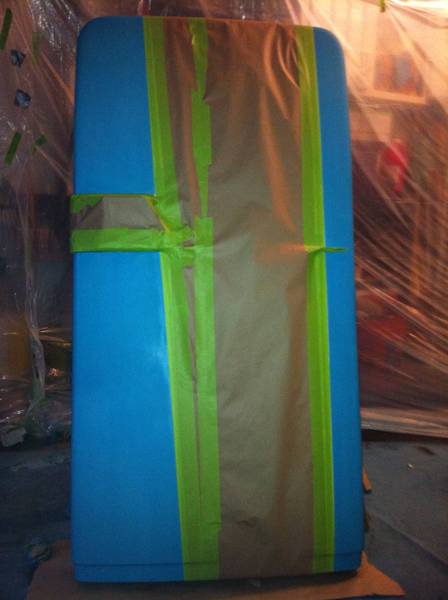
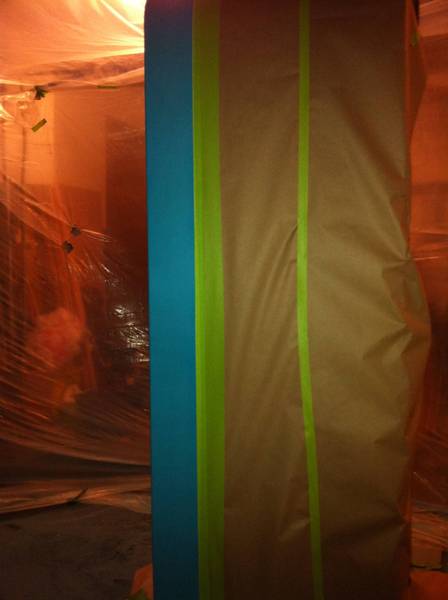
Re-masked the door and main fridge using automotive masking tape this time. I also covered the entire fridge this time, as drift from the aqua lingered in the air and landed on the uncovered part of the fridge last time (and since I have no intention or need to repaint the appliance epoxy off-white portion, I'm covering everything:
IMG_0641.JPG

IMG_0642.JPG


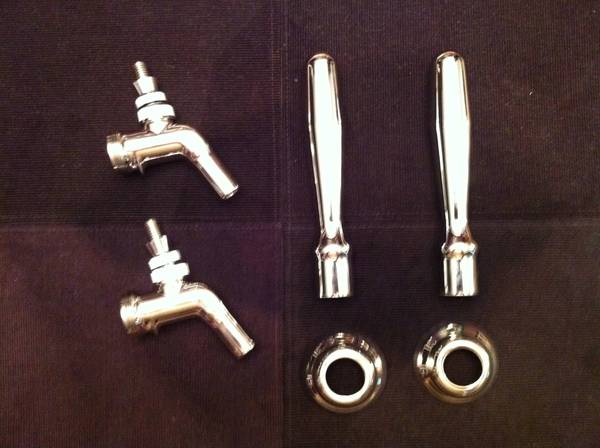
But look what else arrived while I was at the store getting automotive tape, new aqua paint, and clear coat:
IMG_06401.JPG


With everything ready, I'll paint tomorrow after work!
 
OK, maybe before work...
(are you starting to understand my impatient nature?)
Here's the door, repainted. It's blurry, but so's my vision this early and after 2 coats of aqua and 3 coats of clear.
IMG_0644.JPG


But on the plus side, I won't be tempted to remove the masking too early this time; I'll have to wait til after work. :)
 
The trick to pulling tape doesn't have much to do with wet or dry paint, it really is about patience. I un-taped complete cars wet and dry and sometimes **** happens. Your best bet may be to cut the edge with a razor before you pull the tape, and make sure to pull away from the blue. Nicely done with the green 3M btw. It's pricey stuff but good. Lookin good.
 
True, perkins98; I scored the edge when I pulled the masking off from the off-white part and everything was fine. Though I also waited longer than 45 minutes that time... ;-)
All the same, I hope work goes by fast (I hope that even when there's nothing waiting for me at home, though...).
 
OK, I removed all the masking, and here she is:
IMG_06451.JPG


One problem: there was still a little bit of issue with the taped portion. Much less than on the blue, but I'm done playing this ping-pong game. I think this is faint enough that some 1500 grit wet sanding or scratch remover-grit creme followed by buffing/polishing will take it out enough that it won't show by the time the chrome is on. Now, the off-white area is just the appliance epoxy, no clear. Will that affect my little scheme to buff out the light tape marks?
 
Hi

A lot depends on exactly what the boundary looks like. Ultimately you will want clear coat over the whole thing.

How about a nice hand done pinstripe at the boundary?

Bob
 
carlisle_bob said:
Hi

A lot depends on exactly what the boundary looks like. Ultimately you will want clear coat over the whole thing.

How about a nice hand done pinstripe at the boundary?

Bob

Nice choice on the pin stripe! That looks awesome.
 
Well, I currently have chrome strips on order for the boundary. for such a long run, I don't think I could get a good straight pinstripe line. Plus, I'm going with the cars of that era: chrome separating colors, and then some more chrome... :)
 
a nice 50's gold pinstripe about 3/8" wide would be great between the white/blue border
 
a nice 50's gold pinstripe about 3/8" wide would be great between the white/blue border

Hi

Gold, silver or maybe black with a few red threads in it....

If the boundary gets covered in chrome, don't sweat it. If not then you need to work something out.

Bob
 
Today is a good day.
I decided to try to soften out the slight remaining tape marks in the off-white appliance enamel, so I took some 2000 grit and wet sanded until it smoothed out. Since that dulled the finish there, I went ahead and wet sanded the whole thing with 2000 grit, followed by Meguiar's Machine Glaze on a 6" foam polishing pad attached to my trusty Makita (bought it in college, and it's still cranking away. But I digress...).
Here is the door after buffing and wiping off the film:
img_0648-55263.jpg


... and a view to enjoy the shine ...
img_0649-55264.jpg


Here's a similar shot along the side of the fridge body:
img_0652-55267.jpg


There are still a few spots where the tape marks show but they're close enough to the boundary that's going to have chrome that they're a non-issue. Plus, I didn't want to risk going too deep and through the paint.
SO: I flipped on the TV as I'm posting this and Chitty Chitty Bang Bang is on. This song is playing: "From the ashes of disaster, grow the roses of success." Fitting, I think.
(and shut up; it's a classic.) :fro:

I deem painting DONE!

Time to go brew my Cream Ale. :ban:
 
Hi

Boy that looks good !!!

You sure you don't want to put at least one clear coat over the whole thing?

Yea, I know it's *wonderful* to say "I'm done with the spray paint". I'd love to get my garage back as well. Maybe someday. I's 11AM so back to the fresh ground coffee ...

Bob
 
You sure you don't want to put at least one clear coat over the whole thing?

Yea, I know it's *wonderful* to say "I'm done with the spray paint". I'd love to get my garage back as well. Maybe someday. I's 11AM so back to the fresh ground coffee ...
Lol, I hear you, Bob.
I'm going to go with the extra strength in the appliance epoxy enamel I've encountered in the past, coupled with my knowledge of myself (the more I over-work something past a certain point, the more I start to mess it up), and call it good. I'd have to wait 3 or 4 more days to put that final coat on anyway (can't re-coat the appliance epoxy until after a week if you don't do it within 1/2 hour), and then I'd need to rough everything back up, apply, and then re-buff everything. I've also decided that I don't want to get it to where I'm afraid for anybody to touch it--since it will be the cause of its own scuffing, etc (dispensing the substance that impairs the users' judgement)...
But we'll see. :)

So here's a new poser for you guys out there. Since I removed the butter conditioner, I now have a potential source of electricity in the door. I was going to just cap off the ends and reserve in case I or someone else ever wanted to take it back to 'before', but just for fun, any thoughts on a use for that? Example: connecting it to a micro-strip of LED lights that attach to the underside of the door, thus lighting the floor and the base shoe of the fridge...
Ready, go...
 
Hi

I think you want to wait a bit before you clear coat regardless of what the paint says on the label. The last thing in the world you want to discover is that you have a "special case" and everything has run all together....

Bob

.... who just put down another coat about 4 hours early.. do as I say / not as I do.
 
As is, I still can't find a tray I like the look of. They are all so... square. I might end up having to cut a stainless mixing bowl in half to fabricate a drip tray. If you have any luck finding something that looks good, please share!

Hey Kerber--I'm working up a tweak on my drip tray. I'm going to keep it quiet for now, in case I don't like how it turns out, but stay tuned. :)
 
OK; after some time to let the paint try and cure, etc., and beginning the build for The King and I set (I knew that was going to get in my way, hence my rush earlier), I started re-assembling this beast.
First, I needed to drill the holes for the shanks in the inner door panel. To try and figure out the best way to do this without tilting the drill, I opted to trace the shanks on the back of a piece of tape:
img_0654-55257.jpg


Then I rolled up a little piece of tape, just to stick it on the end of the shank:
img_0655-55258.jpg


I reattached the inner panel to the door with just a few screws to hold it in place. Then I stuck the shanks through the front of the door, trying to keep them as straight as possible, and using the flange to help with that. When it met the back of the inner panel, I gave it an extra little push and pulled the shank back out. The tape stayed on the back of the panel, as hoped:
img_0656-55259.jpg


A little measuring to double-check and tweak the location just a bit, and I was set to drill the holes. I couldn't have asked for better positioning:
img_0657-55260.jpg


Because I noticed how much sharper the edges of the stainless flanges are than the black plastic ones, I wanted to try and at least buffer the paint job from them a little. I cut some of that thin foam that comes around electronic equipment (TVs, stereos, etc.) to try and protect it a little:
img_0664-55261.jpg


I primed a piece of luan I had laying around and ran the shanks through the door and that, because it flexed to the shape of the door but also gave more reinforcement to the metal of the door. I then started pre-cutting pieces of 1" foam board to fit, including drilling holes for the shanks. I built these up in layers, using spray foam to fill the gaps between and around the edges of the door. I meant to get more pics of this, but it became a race with time as everything started expanding. Here's the beginning, though:
img_0665-55262.jpg


And before I knew what hit me, the whole thing was insulated and re-attached.
img_0666-55263.jpg


While that was setting up, I decided to look at the freezer door, which had one spring that had come undone. When I took it apart to fix it, I noticed the insulation there was more of the old fiber/wool stuff, sealed int plastic to keep moisture out. Great idea, until it gets a small puncture or moisture gets in. Now it was just a must generator. So I replaced it with foam board as well. Here's the first chunk replaced, and you can see some of the old stuff.
img_0667-55264.jpg


Once the foam had some time to set up, I took the screws out of the inner panel and reattached the gasket. Then I got the door reattached (a major pain with one person), and here it is in its final home:
img_0669-55265.jpg


Then I attached the Perlicks and chrome handles; that was enough for last night, and I crashed.
img_0670-55266.jpg

img_0674-55267.jpg


This morning, I buffed out another place that got a little roughed up somewhere over the last week, then attached the chrome strips to the paint borders:
img_0675-55268.jpg


So now the exterior is pretty much done, except for the drip tray. I'll post what I did there in a single post once it's done. Next, time for connections (and beer!)!
 
Looks great, man! Where did you pick up the chrome trim? Is it self adhesive or did you use some kind of glue?
 
Back
Top