
Hi folks,
I've built a very simple Immersion Wort Chiller. I start a thread on it here because... well, it may help someone like me who's not close to be a good handyman. I tried following a lot of designs and instructions, but every one failed me at some point. Some lacked instructions, some used soldering which I don't know how to do properly, and well... for others, I just couldn't find the parts.
Every parts were bought at Home Depot. It doesn't require any soldering nor special equipments. The plumbing parts are all of the brand Watts, which I think is available in every Home Depot in Canada and US as a standard.
I only do small batches (2.5 gallons), that's why I didn't buy a bigger/longer copper tube!
- 20' of copper tubing 3/8"
- 20' of vinyl tubing 3/8" (could be shorter, depending of the need...) which I splited in two.
- Adapter to hose
- 1 Watts A-660 Swivel Hose Adapter (3/4" FH x 1/2" FIP)
- 1 Watts A-828 Pipe Hex Bushing (1/2" MIP x 3/8" FIP)
- 1 Watts A-294 Hose Barb Adapter (3/8" Barb x 3/8" MIP)
- Teflon tape
- 5 hose clamps
- (Optional) Tube Bender
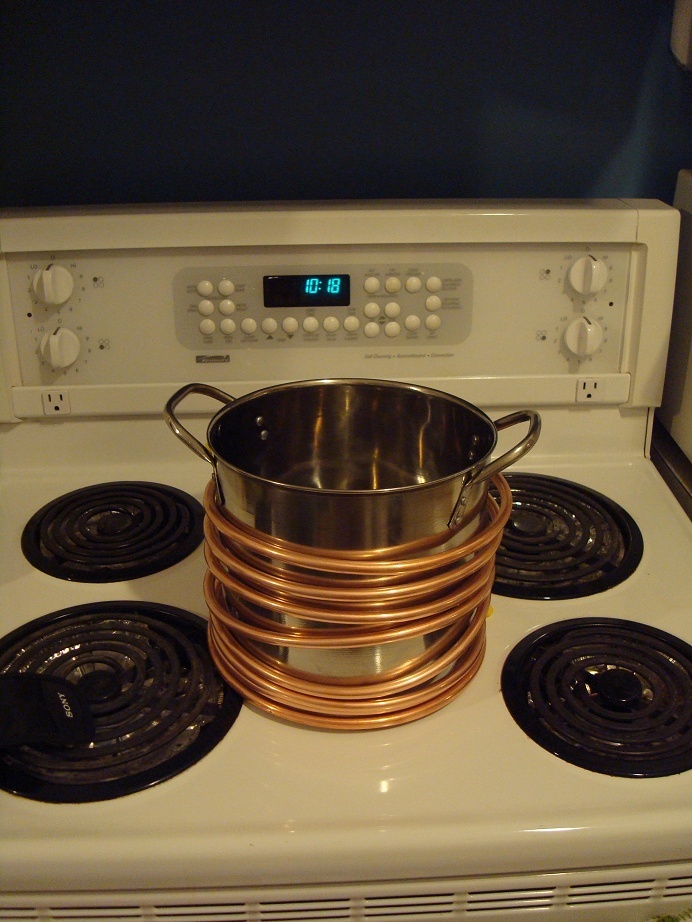
First, I wrapped the copper tube around a smaller pot than the one I use to brew. I used only my hands for everything:
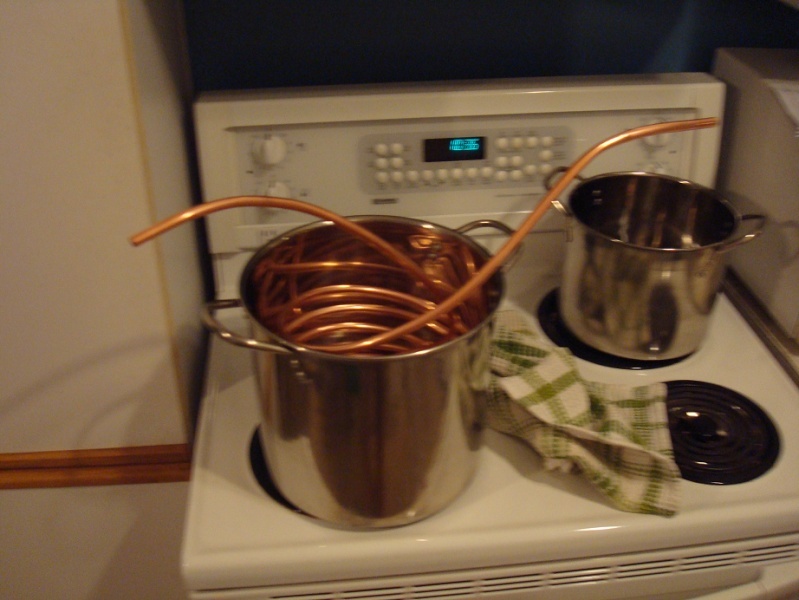
Then, I made the two ends of the copper tube come out of the top. I did it by hand, without tube bender. I just did it very slowly/carefully as to not put any undesirable kinks on my tube. Taking the lowest end of the tube and bringing it to the top with the other end is the trickiest part, but it's doable without soldering (to put an elbow). The one that begins the coil is the "WATER in" (highest one)and the one that ends the coil is the "WATER out" (lowest end). It's ugly as hell, it would probably have been better with the tube bender... but hey, it's simpler this way!
View of the interior :

The 4 plumbery parts go one in another (I put Teflon tape in every connection) (in order: Adapter to hose--Watts A-660--WattsA-828--Watts A-294) which fits into the first half of the vinyl tubing. Everything is held by hose clamps.
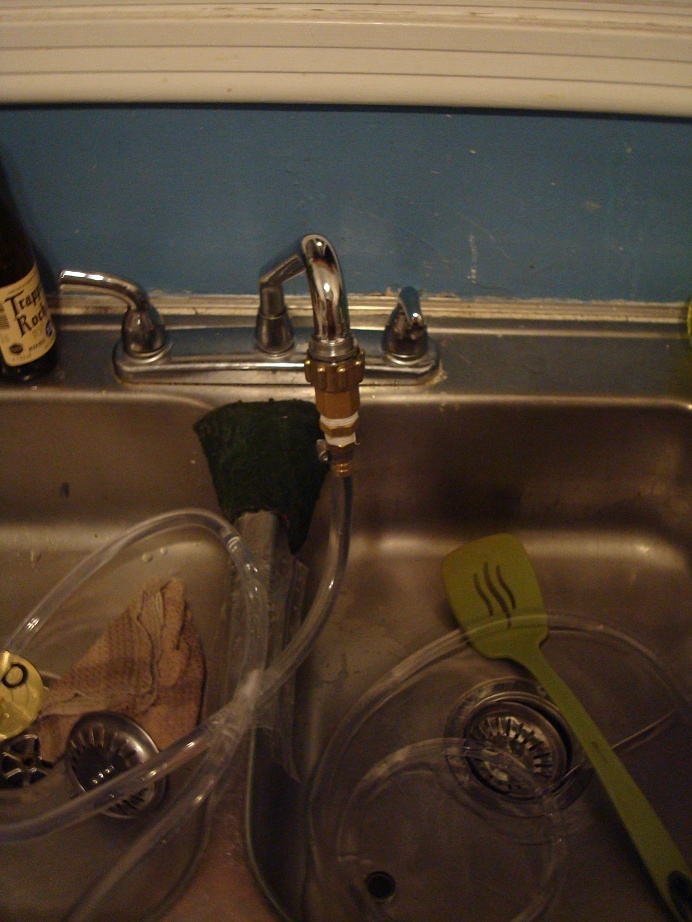
The first half of the vinyl tubing goes onto the "WATER in" part of the chiller while the other half of the vinyl tubing goes from the "WATER out" into the sink.
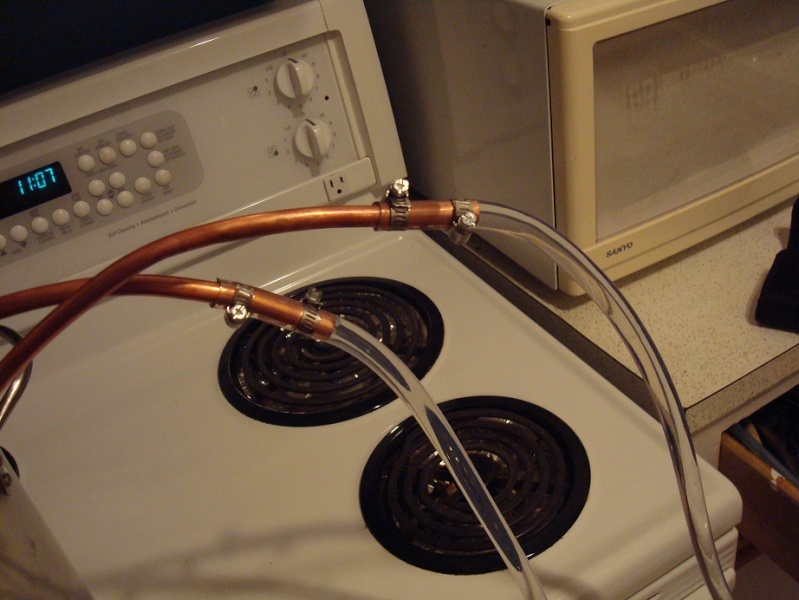
End product:
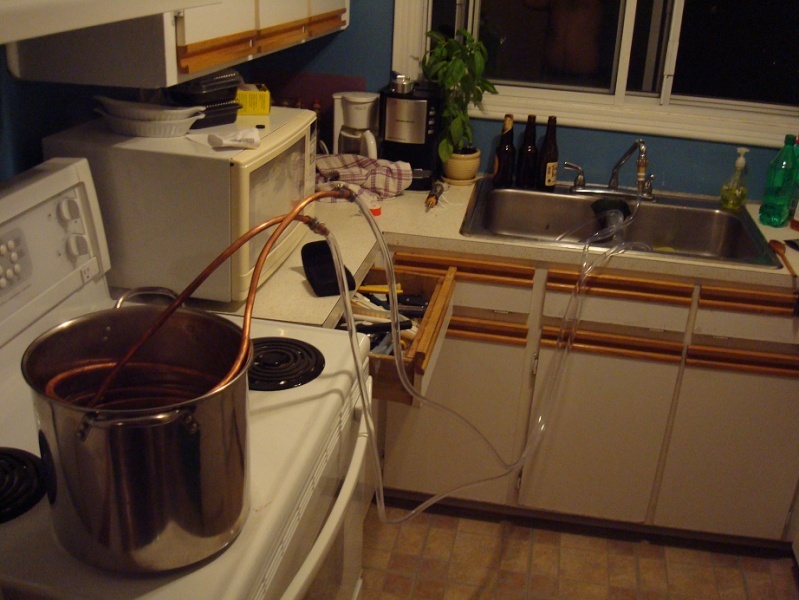
(Yeah, I really should've put a shirt... but it's too hot outside...)
P.S. My WATER in and WATER out are this high because I plan on using another kettle soon! So I took the measurements...
I've built a very simple Immersion Wort Chiller. I start a thread on it here because... well, it may help someone like me who's not close to be a good handyman. I tried following a lot of designs and instructions, but every one failed me at some point. Some lacked instructions, some used soldering which I don't know how to do properly, and well... for others, I just couldn't find the parts.
Every parts were bought at Home Depot. It doesn't require any soldering nor special equipments. The plumbing parts are all of the brand Watts, which I think is available in every Home Depot in Canada and US as a standard.
I only do small batches (2.5 gallons), that's why I didn't buy a bigger/longer copper tube!
- 20' of copper tubing 3/8"
- 20' of vinyl tubing 3/8" (could be shorter, depending of the need...) which I splited in two.
- Adapter to hose
- 1 Watts A-660 Swivel Hose Adapter (3/4" FH x 1/2" FIP)
- 1 Watts A-828 Pipe Hex Bushing (1/2" MIP x 3/8" FIP)
- 1 Watts A-294 Hose Barb Adapter (3/8" Barb x 3/8" MIP)
- Teflon tape
- 5 hose clamps
- (Optional) Tube Bender
First, I wrapped the copper tube around a smaller pot than the one I use to brew. I used only my hands for everything:
Then, I made the two ends of the copper tube come out of the top. I did it by hand, without tube bender. I just did it very slowly/carefully as to not put any undesirable kinks on my tube. Taking the lowest end of the tube and bringing it to the top with the other end is the trickiest part, but it's doable without soldering (to put an elbow). The one that begins the coil is the "WATER in" (highest one)and the one that ends the coil is the "WATER out" (lowest end). It's ugly as hell, it would probably have been better with the tube bender... but hey, it's simpler this way!
View of the interior :
The 4 plumbery parts go one in another (I put Teflon tape in every connection) (in order: Adapter to hose--Watts A-660--WattsA-828--Watts A-294) which fits into the first half of the vinyl tubing. Everything is held by hose clamps.
The first half of the vinyl tubing goes onto the "WATER in" part of the chiller while the other half of the vinyl tubing goes from the "WATER out" into the sink.
End product:
(Yeah, I really should've put a shirt... but it's too hot outside...)
P.S. My WATER in and WATER out are this high because I plan on using another kettle soon! So I took the measurements...


![Craft A Brew - Safale BE-256 Yeast - Fermentis - Belgian Ale Dry Yeast - For Belgian & Strong Ales - Ingredients for Home Brewing - Beer Making Supplies - [3 Pack]](https://m.media-amazon.com/images/I/51bcKEwQmWL._SL500_.jpg)


