Upside down Sanke keg fermentor

Homebrew Talk - Beer, Wine, Mead, & Cider Brewing Discussion Forum

Help Support Homebrew Talk - Beer, Wine, Mead, & Cider Brewing Discussion Forum:

This site may earn a commission from merchant affiliate links, including eBay, Amazon, and others.

Artifishal

Well-Known Member
Joined
Dec 1, 2014
Messages
351
Reaction score
26
I've recently gotten lucky and picked up two sanke kegs for $15 each. I'm romanticizing about using one of them as a fermenter. I've been using a 15 gallon LME drum and it is fun but very hard to clean.

I would like to use a 2 inch tri clover clamp on the normal opening then flip it upside down and cut a 12" hole in the bottom which will be the new top. I bought a replacement pot lid that is glass with silicone around the outside, and would like to apply some pressure to this to get an airtight seal. I have a diamond holesaw bit and can cut a hole in the glass to fit a stopper and an S bubbler.

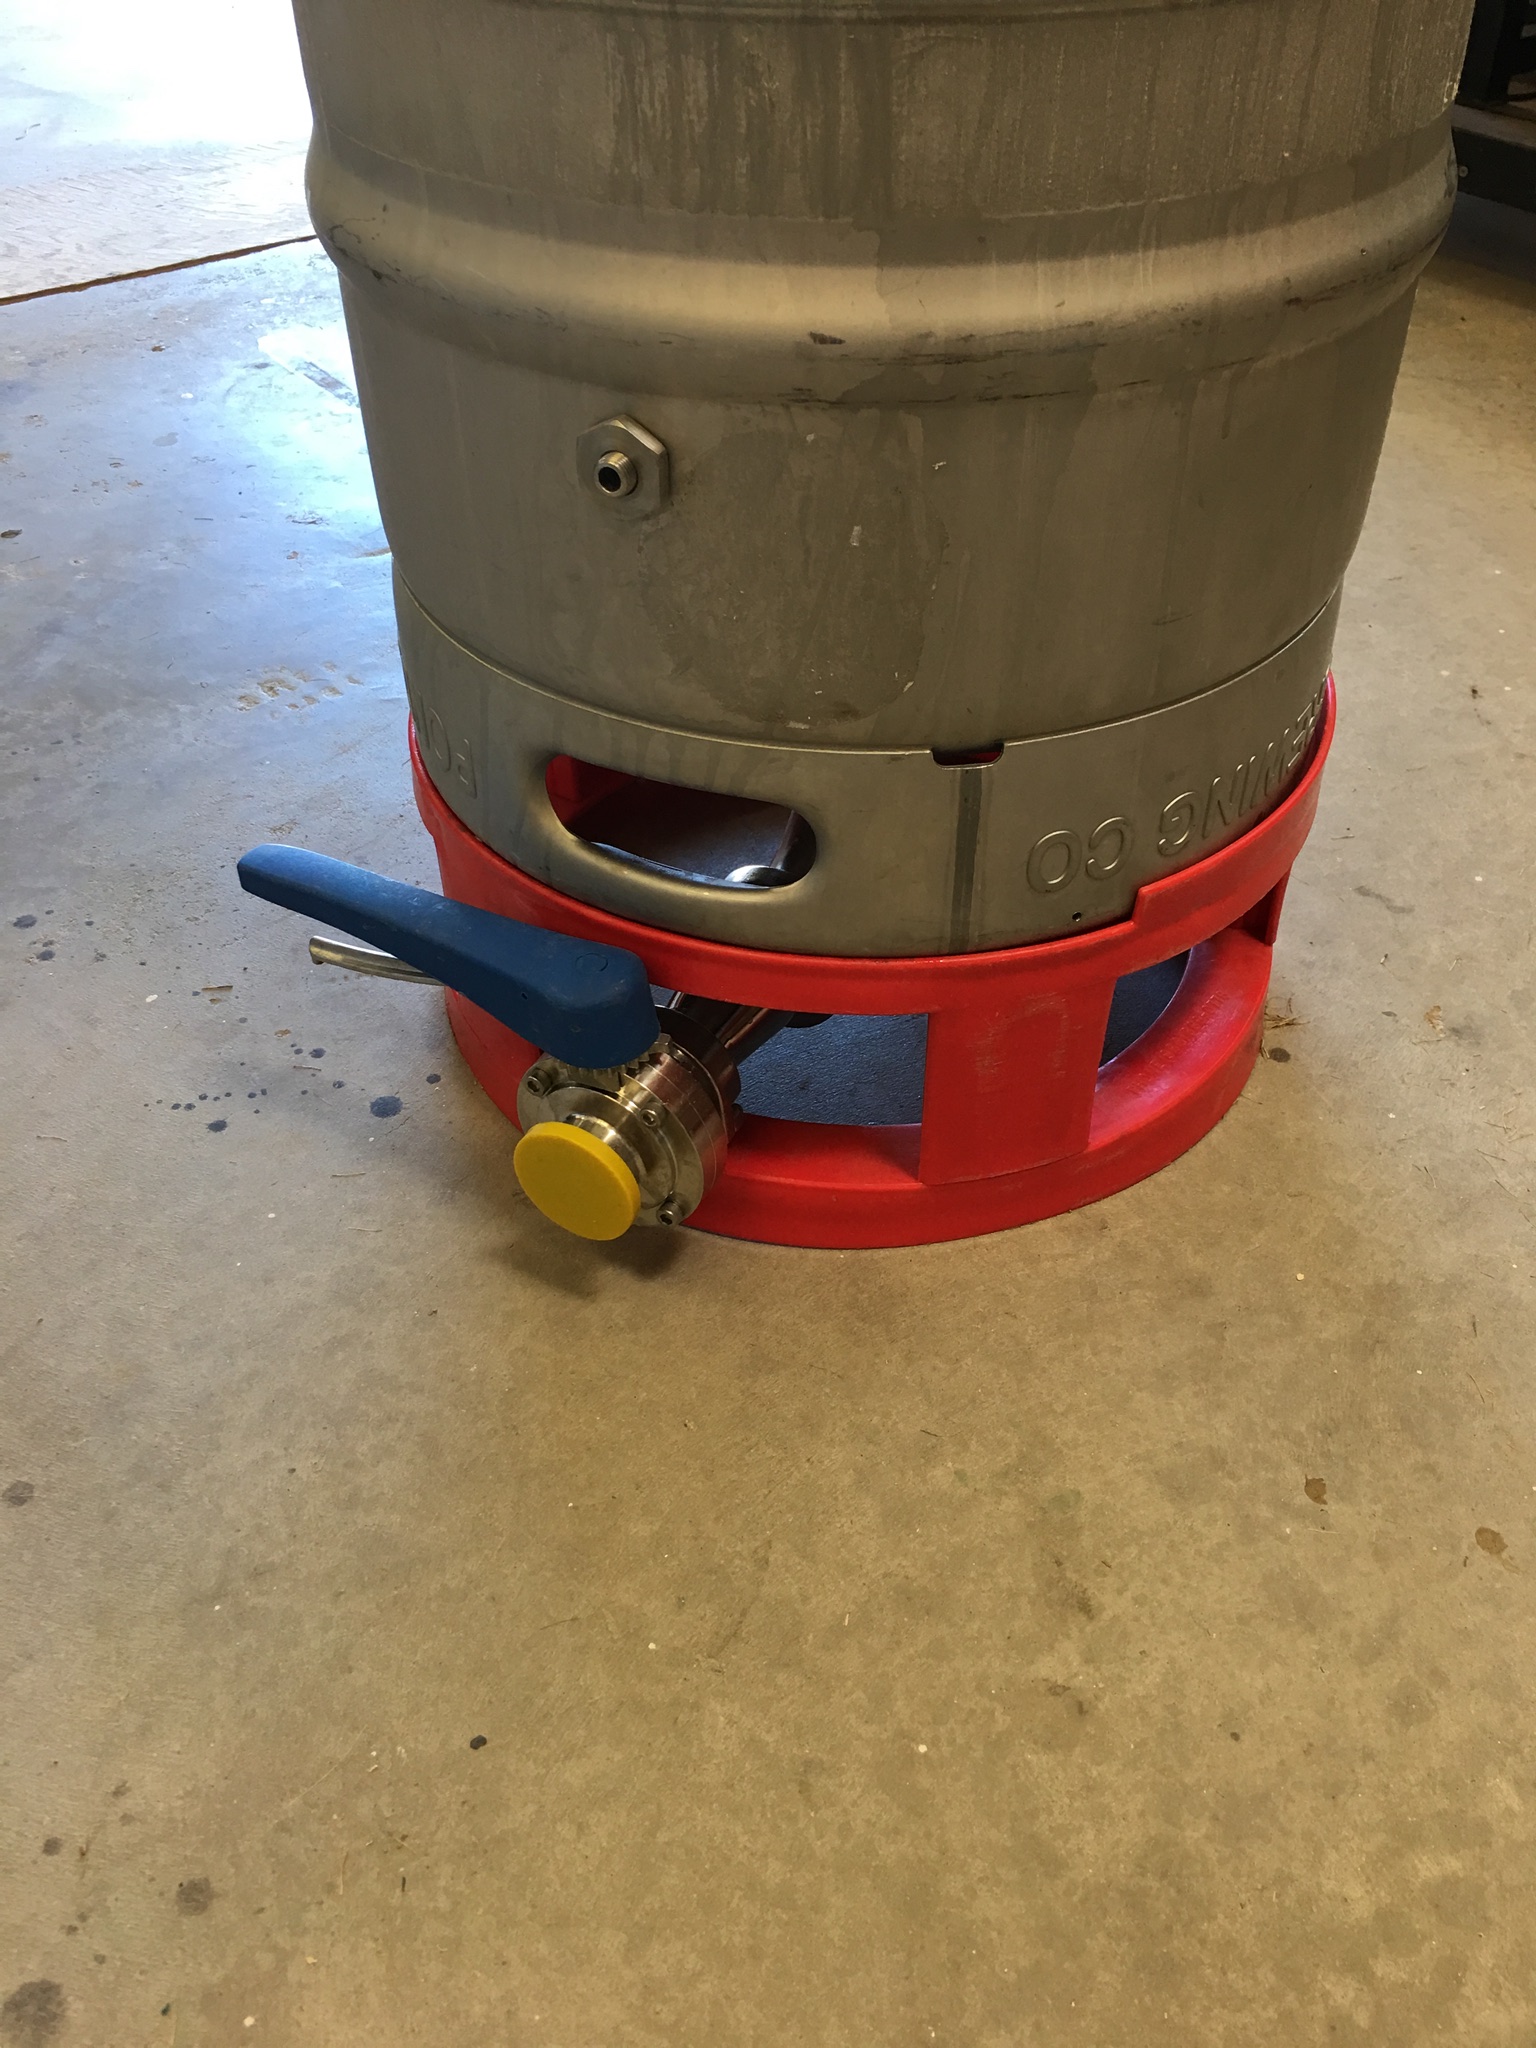
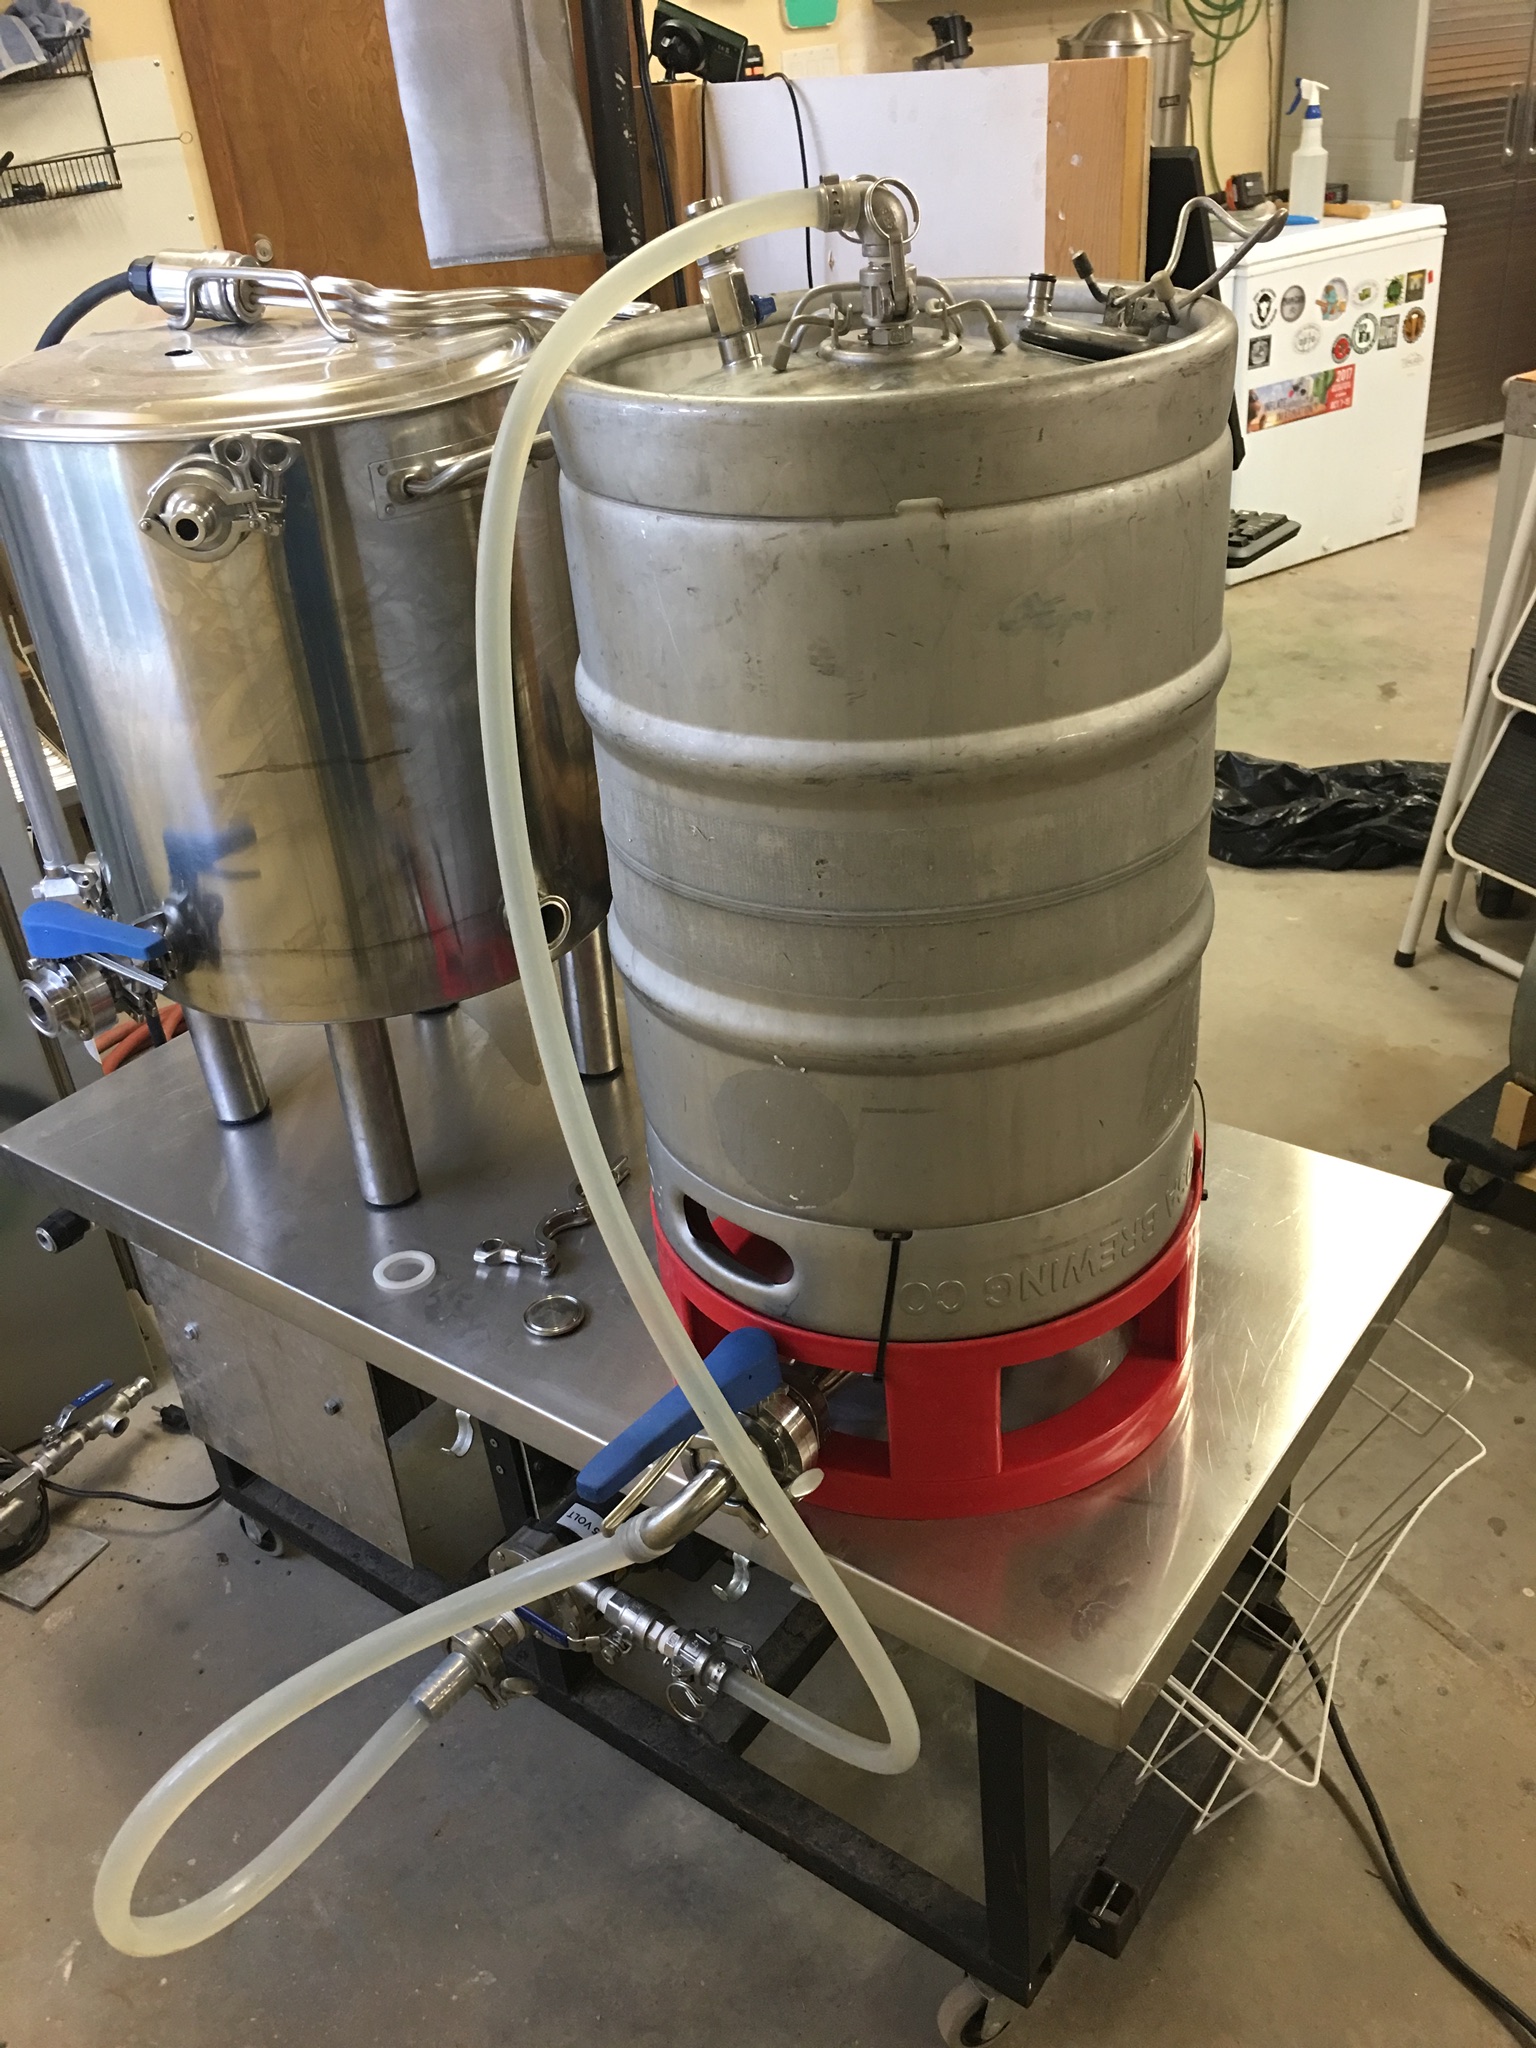
If that goes well and it is airtight the next step would be to install a valve and transfer via pushing CO2 through the hole in the top and the beer would come out the valve on the side toward the bottom into my corny kegs.

I cannot find any information on doing it this way online. Has anyone tried this? Can anyone direct me to more information on this? Thoughts?

View attachment ImageUploadedByHome Brew1447449363.588778.jpgView attachment ImageUploadedByHome Brew1447449413.962377.jpg
 
So, my first thoughts are....

Drilling the lid might not work. I believe that glass will be tempered after it was made or the fact that its borosilicate would not make it drill able. I'm not a glass guy so I don't know the exact reasons why I don't think you can drill it. Haha. I've drilled my fair share of aquariums so, I have experience with drilling glass.

The other thing with the lid, I think it might be hard to make it seal proper and be able to take pressure. When looking at pressure, you have to look at the total surface area at hand. So even if your looking at 1psi and your lid is 10 square inches in surface area. The seal has to be able to handle 10 psi in order to hold.
 
Haha, wish you were quicker to respond. I got almost all the way through with a 1" hole and POP.

I then googled it. Yup. No drilling or cutting of tempered glass.

I'm still working on the project just going to go with plexiglass instead. It does not need to hold pressure. I'm only going to use pressure to transfer the beer out. It will have a bubbler or blow off the entire time it's brewing b View attachment ImageUploadedByHome Brew1447717151.334139.jpg
 
Bummer on the glass.

I'm not following you about the pressure. If your gonna use pressure to transfer out into another keg? It's gonna have to hold pressure then. If your going up 2-3 feet in height (one keg sitting next to another keg, going from the bottom of one keg to the top of the other keg) that's gonna need about 1/1.5psi to push the beer from one to another. Minimum. Maybe not at first but at the end it will need the pressure.
 
Why not cut the top off the other kettle an inch or two larger in diameter, then gasket around it,use it as a lid and use the stock hole to stick a bung in?
Then the other is a kettle
 
Good thought. Thanks for the idea. I don't want to ruin it and I already have a keggle.
 
I made a fermenter from a discarded Sanke keg. Welded 3 legs on the bottom to raise it up, welded an 8 inch tri clover fitting on the bottom, now the top. I drilled all my holes for transfer tubing through 8 inch lid. It works great, couple of pounds of pressure transfers beer easily. I can post pics if you like, but they are on the forum somewhere.
 
I made a fermenter from a discarded Sanke keg. Welded 3 legs on the bottom to raise it up, welded an 8 inch tri clover fitting on the bottom, now the top. I drilled all my holes for transfer tubing through 8 inch lid. It works great, couple of pounds of pressure transfers beer easily. I can post pics if you like, but they are on the forum somewhere.

I'm curious about this myself.

Are you able to recover yeast under pressure?
 
With all that remaining space around the edge, why not drill two holes...one for a schrader valve and one for small stopper (drilled while fermenting, plugged while transferring).

In theory you could then use a similar lid (without the jiggler) for your lid. Same clamps in your picture should work as well.
 
I don't know what a schrader valve is but I have a lid with a hole for a drilled stopper and am going to put a ss brewtech sample valve down low tomorrow.
 
I made a fermenter from a discarded Sanke keg. Welded 3 legs on the bottom to raise it up, welded an 8 inch tri clover fitting on the bottom, now the top. I drilled all my holes for transfer tubing through 8 inch lid. It works great, couple of pounds of pressure transfers beer easily. I can post pics if you like, but they are on the forum somewhere.


Yes please
 
All that you wish can be done without ever cutting or drilling your keg. A two hole stopper thru the origininal flange or the sanke fermenter kit from whichever online store it is that makes them. Can't remember.
 
here is the fermenter I built, hope picture comes up

IMG_0238.JPG
 
The tube are 3/4 inch blow off, not really needed with all the extra headspace. A 1/4" ball valve for co2 inlet and 1/2" adjustable diptube for beer transfer. The 8 inch tri clover makes it very easy to reach in and clean it. As for the poster who asked about collecting yeast, I have not tried it, it's probably possible to get some of the yeast from the bottom, but I don't beleive the bottom is sloped near enough to let the yeast settle to the bottom.
 
The tube are 3/4 inch blow off, not really needed with all the extra headspace. A 1/4" ball valve for co2 inlet and 1/2" adjustable diptube for beer transfer. The 8 inch tri clover makes it very easy to reach in and clean it. As for the poster who asked about collecting yeast, I have not tried it, it's probably possible to get some of the yeast from the bottom, but I don't beleive the bottom is sloped near enough to let the yeast settle to the bottom.


It is very impressive. As I proceed with mine do you have any advice or anything you would have done differently?View attachment ImageUploadedByHome Brew1449322097.646728.jpg
 
I do like yours with the wheels. I wish I had handles at the top, but it is not bad to move empty and I'm not going to try it full. i ferment and transfer in the same place, only move to clean. Enjoy yours it looks like it works well.
 
I used a 1/2" stainless tube bent at a 90 degree angle. I threaded a hole in the lid and used a plastic compression fitting that was drilled out to let the tube slide down. This way I can stay above the trub.
 
This is the one I built.
 

Attachments

  • EF8A58CA-DC1B-49EA-A8DF-4FCE650827B5.jpeg
    EF8A58CA-DC1B-49EA-A8DF-4FCE650827B5.jpeg
    711.5 KB · Views: 216
  • D0D4F1EA-616C-48E3-A427-D45A35D01C69.jpeg
    D0D4F1EA-616C-48E3-A427-D45A35D01C69.jpeg
    680.8 KB · Views: 223
  • 87A5A91D-B3AE-443E-B435-6F3EFD8ED2DF.jpeg
    87A5A91D-B3AE-443E-B435-6F3EFD8ED2DF.jpeg
    570.8 KB · Views: 224
  • 81C66BE2-D844-4A6E-B59F-0179B1CC9363.jpeg
    81C66BE2-D844-4A6E-B59F-0179B1CC9363.jpeg
    741.4 KB · Views: 215
Apply masking tape across the top lip of a corny keg then rub it down/crease it with your fingernail or a metal object until you’ve cut through. You now have a stick on template that you can cut around with a small abrasive cutting wheel. Once cut out, a little edge sanding to dress it up and remove rough, sharp edges is all you need.
 
Back
Top