Upgraded MLT braid from water heater supply

Homebrew Talk - Beer, Wine, Mead, & Cider Brewing Discussion Forum

Help Support Homebrew Talk - Beer, Wine, Mead, & Cider Brewing Discussion Forum:

This site may earn a commission from merchant affiliate links, including eBay, Amazon, and others.

TANSTAAFB

Well-Known Member
Joined
May 10, 2010
Messages
2,675
Reaction score
533
Location
Western Slope
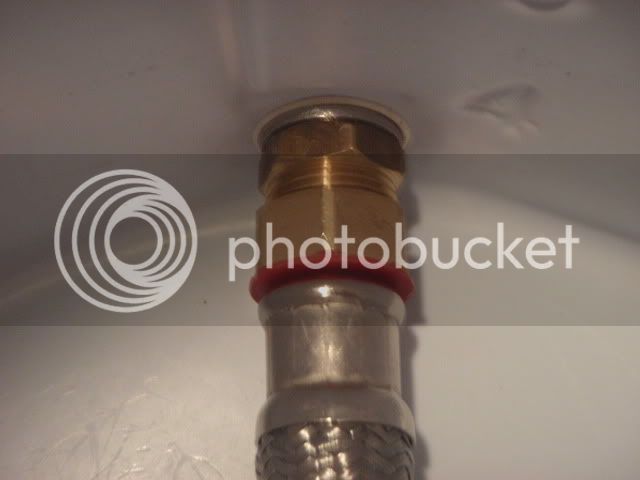
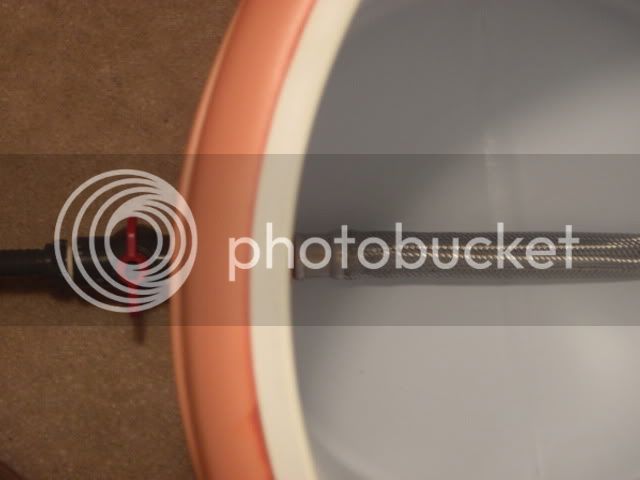
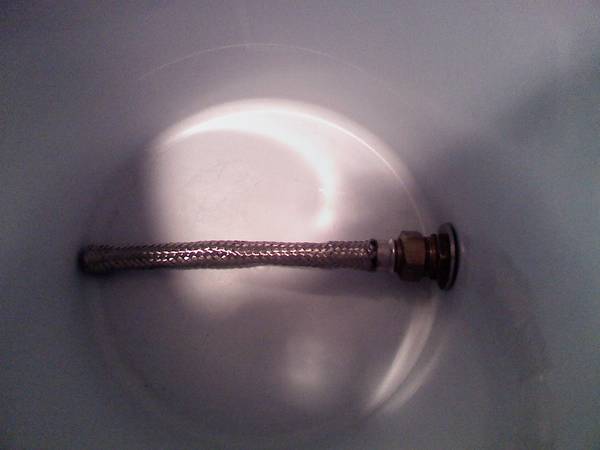
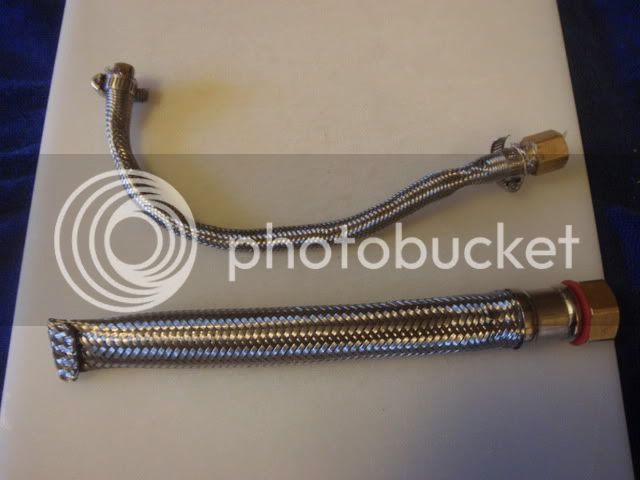
When I built my MLT (from a garage sale score $3 10gal Rubbermaid cooler) I installed a small stainless toilet flex. While it worked well for several brews, it flopped around and the braid started to seperate and I was getting pieces of husk in my wort.

I found this 3/4"x12" stainless water heater flex in my plumbing stuff. I really wanted to keep the factory end so I could easily remove from the MLT for cleaning (and it just looks cleaner!). Sooooo, I used an old bent screwdriver and a torch to melt through one side of the inside rubber hose just past the crimp fitting. Then I cut through the other side w/ my Dremel. I pushed the liner hose from the melted side until about a 1/2" stuck out, then I was able to pull w/ a pair of pliers being patient and twisting back and forth a little. By having the factory crimp intact it kept the braid fow grabbing like a Chinese finger trap!!!

045.jpg

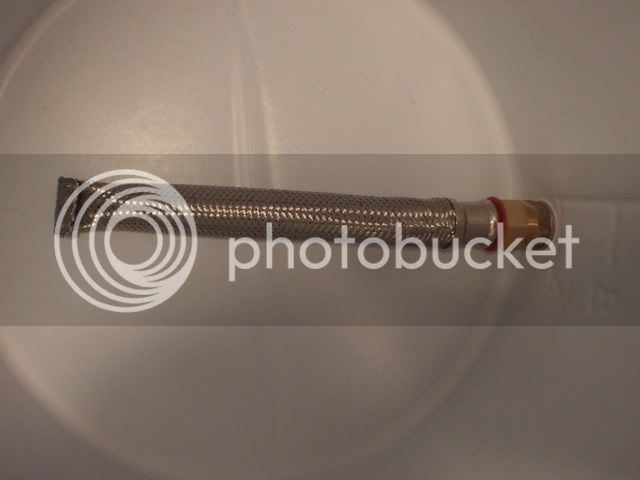
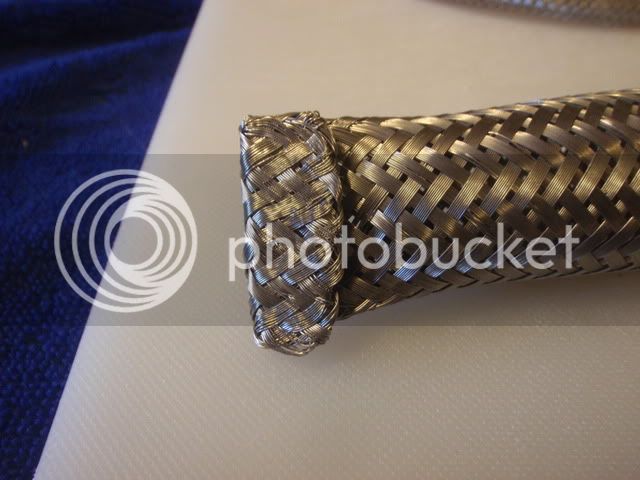
Then I just folded the end over and crimped it with vice-grips
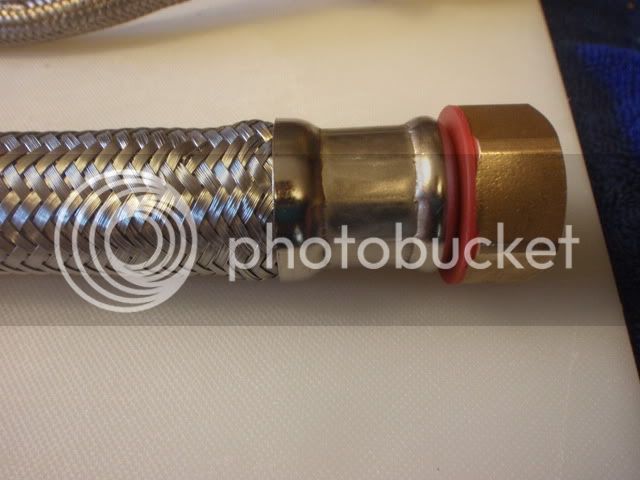
046.jpg


047.jpg
 
I used the same type of braid in my MLT. Although I removed all the factory ends. Instead I used 1/2" SS hose clamps and clamped one end to the 1/2" SS barb at the outlet, and the other to a 1/2" x 1-1/2" SS bolt. I can't wait to test it out in the Spring!
 
I used the same type of braid in my MLT. Although I removed all the factory ends. Instead I used 1/2" SS hose clamps and clamped one end to the 1/2" SS barb at the outlet, and the other to a 1/2" x 1-1/2" SS bolt. I can't wait to test it out in the Spring!

That is what I did on my old one too and it cost me way more to buy the extra fittings. I wanted to show folks that you can use the factory fitting on one side and just crimp the other and save a few bucks for ingredients.

And Spring? Get out there in the cold and brew like everyone else!!! Or do what I do and brew inside on the stove. I can do full batches on my gas stove, but you could do half batches with ease on any stove.

:mug:
 
Guessing it is stiff enough that the end won't float up into your grain bed during the mash? Or any part of it for that matter?
 
It has MUCH more structural integrity than the floppy comode supply I used before (with great success I might add!) but even that did not float. Damaging it while stirring should be less of a concern though and I can remove it easily for cleaning because it uses the rubber gasket not pipe threads to seal it. I haven't brewed with it yet, but I expect it to work better.
 
Just hope it wants to lay flat for you. How much was that part BTW?

I had it lying around (I used to be a plumber before I got smart and went back to school!!!) but I think it was $10-12. No more than $15

very slick man

Thanks man, that means something comong from someone with your DIY prowess!!! :mug:
 
TANSTAAFB said:
That is what I did on my old one too and it cost me way more to buy the extra fittings. I wanted to show folks that you can use the factory fitting on one side and just crimp the other and save a few bucks for ingredients.

And Spring? Get out there in the cold and brew like everyone else!!! Or do what I do and brew inside on the stove. I can do full batches on my gas stove, but you could do half batches with ease on any stove.

:mug:

The extra costs for the SS barb and bolt were less than $2, so it wasn't a big deal.

As for Spring, that's when my all-grain build will be complete.

Nice job on the build, though, post some pics of it installed when you get a chance.
 
The extra costs for the SS barb and bolt were less than $2, so it wasn't a big deal.

As for Spring, that's when my all-grain build will be complete.

Nice job on the build, though, post some pics of it installed when you get a chance.

Done. I will upgrade the plastic ball valve next, but it works and was CHEAP :D

Those extra brass fittings and clamps for my old braid cost me like $10 out here in the sticks :mad:

006.jpg


004.jpg


003.jpg
 
is that bit of red plastic food safe?

No clue, but I ain't a'skeared of a little red plastic!!!

Aaaand...

Speaking of food safe, make sure you pickle the brass before brewing to reduce the outer lead content.

Though I have read that and how several people have done this, I haven't treated any of the brass I have used and I am just fine and my beer tastes great! I ran a plumbing company for years and used TONS of brass on water supplies, both hot and cold that was never treated but was made to be used in plumbing...never had an issue. Again, I ain't a'skeared :cross:
 
The reason is water is ph neutral, give or take. Wort is acidic. That's why a copper immersion chiller comes out shiny and new :)

Lead is one of those things that build up in the body. It can't be eliminated naturally. Is there enough in brass fittings? I don't know, but it's also something I'd rather not find out.

There really isn't that much lead in brass, especially brass made for water supplies, and even more especially "lead free" brass made in modern times to modern standards. They don't make one batch for Texas and one batch for California!!! It's fine. Treat it if you want, won't hurt you. Don't treat it, won't hurt you.

RDWHAHB :drunk:
 
Nope. I am going to take 2 SS braids and connect them to 2 U shaped copper ends and make a hybrid manifold.

manifold.png


Tim
 
I tried. I was going to just use a plug on the end. It did not work. I actually burned through both ends, had it completely loose from the braid, could grab it w/ pliers and hemostats. I could not figure out how to get the rubber loose. It was a very thick hose. That being said, the crimp job worked great and I have read several experienced brewers' posts saying more hose is superfluous. They say the draining happens in the last few inches of of the braid.

Good luck :mug:
 
I used the same thing before making a false bottom. When I cut the first end off, I was hoping to keep the other factory end on, but the rubber went too deep into the crimp. I'd bet that you still have a good amount of rubber inside that crimp. I just cut both crimps with a grinder, pulled out the rubber, then clamped one end to the original fitting and a 1/2" copper cap in the other end.

mash-tun-filter.jpg
 
Wanted to update this after I finally got to brew with it. This worked fantastically...cranked my mill down to .034", boosted my efficiency to 83-85%, and lautered flawlessly :rockin:

I was never even the slightest bit scared of a stuck sparge and was able to open the valve wide open. I think I will try tightening the rollers a little more next time. I will be ecstatic if I can consistently hit 85% efficiency w/ minimal sparging.

Awesome :mug:
 
Been on the search for someone else only cutting one end off their braid! My route: leave your 1/2" NPT factory fitting intact, cut the other end, slide your SS sleeve half way back, or I guess you could go less as well to expose the inner tubing, and cut inner tube. Slide your SS sleeve back, crimp and done. You're left with a fairly rigid end connected to your factory fitting and a floppy SS braided screen end. Screw your 1/2" factory end into your bulkhead and DONE! No hose clamps or extra fittings needed.
 
Back
Top