The Orthocooler: a walk-in build.

Homebrew Talk - Beer, Wine, Mead, & Cider Brewing Discussion Forum

Help Support Homebrew Talk - Beer, Wine, Mead, & Cider Brewing Discussion Forum:

This site may earn a commission from merchant affiliate links, including eBay, Amazon, and others.

Orthobrewsky

Senior Member
Joined
Aug 7, 2011
Messages
428
Reaction score
106
Location
Jacksonville, AL
We've all wished for more space in the frig and we all know why. So, without further ado, here it is, as a work in progress.

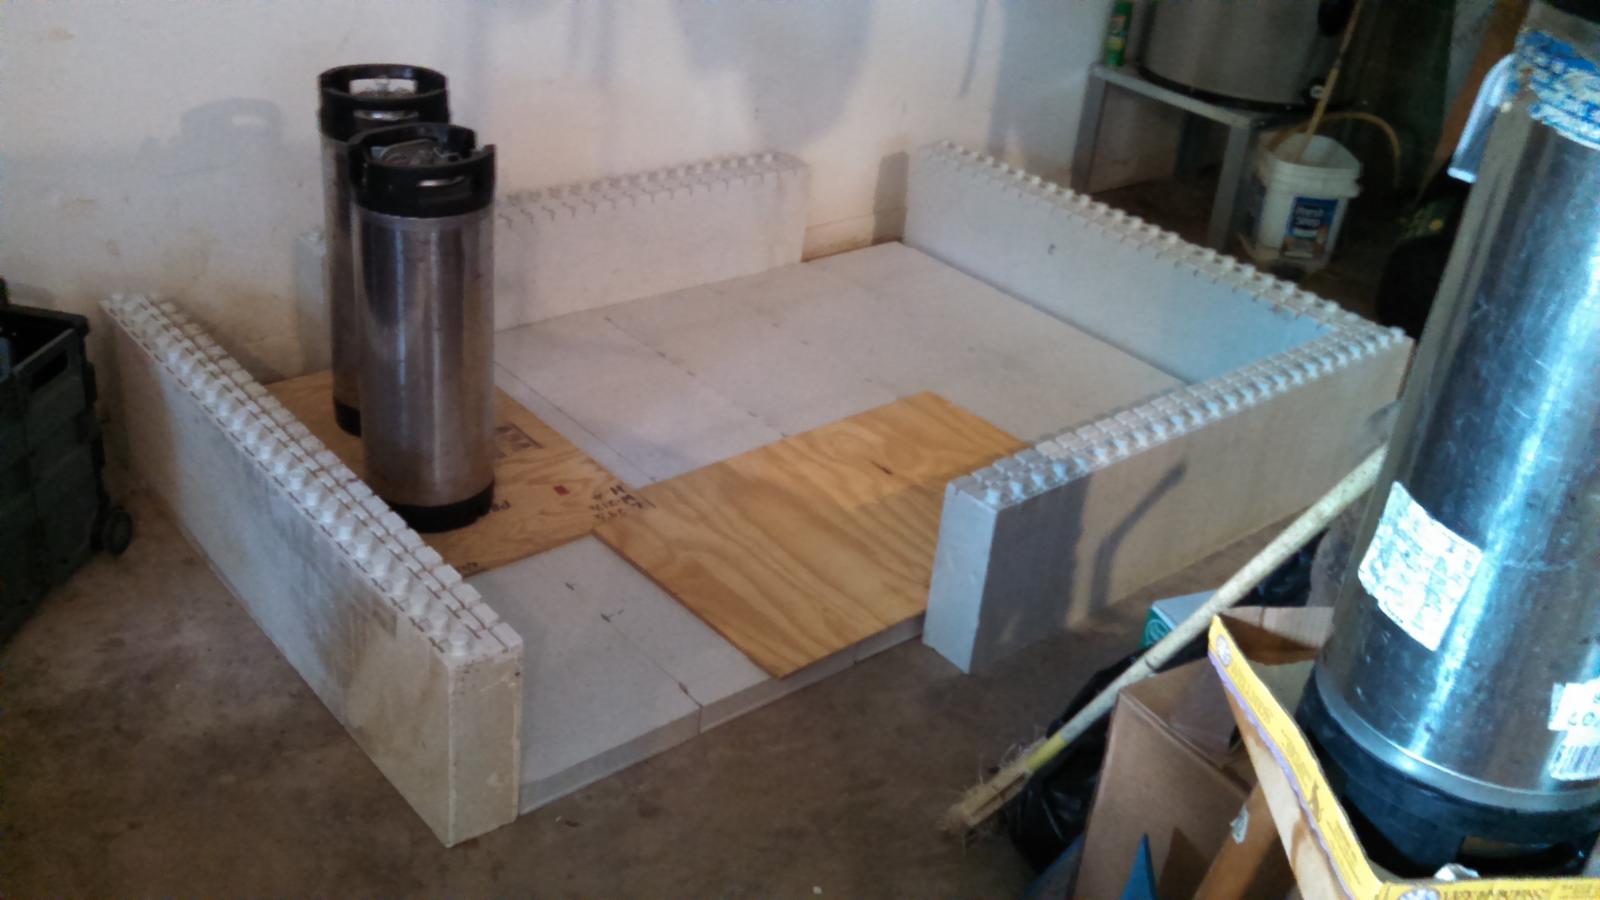
The feature which makes this different is the procurement of some cheapo insulation from a place which makes styrofoam for insulated concrete forms. They routinely produce some that doesn't quite make the specs for construction. Basically, this means that whereas I might have paid $80 for a 4 ft by 8 ft slab of insulation 4 inches thick (Foamular from Home Depot), I have paid $12 for insulation of the same dimensions. The only disadvantage is that it comes in 4 ft by 1 ft pieces which fit together like Legos, so there are small cracks in between. I'm using some spray foam in the gaps and doing vapor barrier on both sides, so it will be fine. It has a 6' x 4' floor and is a little more than 6' high inside.

Laying out the floor:

IMG_20140815_123842_938.jpg


IMG_20140815_124506_336.jpg
 
Framing the floor:


IMG_20140815_181141_763.jpg


A wall is born:


IMG_20140816_174838_590.jpg

After pondering for a while, I decided to go with one of those simple $20 interior doors from Lowe's. I had to cut it down 3", so it is now 77" by 30".


IMG_20140823_145353_035.jpg

I built both walls on the floor. I finished the back wall, because it would be up against another wall, making access difficult. Building the front wall on the floor allowed me to lay the door down on top of it to get a good, straight hang.
 
Here's a pic:

IMG_20140823_145407_187.jpg

I slipped in a vapor barrier under the floor. It was still a light structure, so it actually wasn't so hard to do.

IMG_20140826_081924_295.jpg


The styrofoam is so light and stiff, I just took some corner braces and installed them along the edges of the frame to support the middle of each "lego" on each end.

IMG_20140901_131518_937.jpg
 
These are scenes from today's work:

IMG_20140901_131540_531.jpg


IMG_20140901_131602_904.jpg


I'll be using some heat tape to trick out the thermostat, so I'll have the option of running the unit's own fan when it isn't cooling and so I won't have 10 amps going through a temp controller. That reminds me, I installed a new circuit breaker with attached outlet just for this project.


IMG_20140901_131638_191.jpg

It seems I've neglected to take pics of my air conditioner mount and another item or two of interest, so I'll post some more soon. I'll be continuing to work on it, mostly on weekends, so it may be a few more weeks before it is running.
 
Some pics of the AC mount:


IMG_20140901_173812_255.jpg

IMG_20140901_173842_445.jpg


Another wall nearly done and I'm using slide bolts in 2 places on the door to keep it tight on the weather stripping. I don't see why I would need a handle since it will be easy to grab an edge.

IMG_20140901_173916_517.jpg


IMG_20140901_212326_262.jpg


The dedicated outlet coming from the new 20 amp circuit breaker.


IMG_20140901_173940_208.jpg
 
I got a bit more done:

IMG_20140903_100114_388.jpg

IMG_20140908_084724_658.jpg

I also wired up two STC-1000 units for this. One is on the inside heating the sensor on the AC into the 70s when the STC-1000 on the outside says it's time for some cooling. I used the heat tape in one of the above pictures and am not thrilled with its power. The small piece I'm using to warm the sensor is supposed to be about .4 watts. I had trouble really getting it to do the job when the room was cold. Of course, it can be insulated, but then the insulation keeps the tape from cooling off when power is cut from it. This morning, I managed to use some styrofoam with it in such a way that it will warm up into the seventies in about 4 minutes and easily stay there, while still turning off the AC in less than minute when power is cut to the heat tape. I was holding a temp swing of 36 to 44 this morning that way. I still have a little more sealing to do and haven't put insulation on the door yet, but I wanted to see how well it was working while the garage was still hot this week before we get our big cool down this weekend.

IMG_20140908_095727_532.jpg

I left it on today with a glass of water in there and will see how it's doing when I get home.

I've ordered this to try as an alternative to the heat tape.
 
By the way, though I've got issues with the heat tape, the AC definitely has the power to cool the room. When I first turned it on, it was in the low 80s and took about 5 minutes to cool the air to the 30s.
 
I came home yesterday and the glass of water I'd left in there was at 40 degrees as I intended. Also, the pan I put below the AC to catch condensation water was bone dry, so it seems to work well.
IMG_20140908_184457_311.jpg

Before I left that morning, I thought I'd stack some styrofoam blocks against the uninsulated door to give it a little help. This was the result:

IMG_20140908_184325_050.jpg

I guess there's no harm in one day of that, but the lesson is to insulate on the inside or somehow seal insulation on the outside of a door against all moisture.

So, I glued up some bricks on the inside:

IMG_20140909_075405_449.jpg


Here's what the AC set up looks like at present:

IMG_20140909_075753_556.jpg


I've still got some finishing touches to do on this thing, like vapor lining on the inside, but it seems to be capable of doing the job. I'll report back when it's all done and I start loading it up with cold beer.
 
It's done. I did a timed cool down last night and got from 77 to 37 in ten minutes. The "about 5" for a similar cool down above was just an estimate and, at that time, I had the temp probe fully exposed. Now it is wrapped up in a wad of paper towels just so it doesn't move quite so fast.

The new GE electronic ACs have a second temp sensor clipped onto the cooling cools, apparently so that a certain coil temp will prompt the unit to cut the compressor and leave the fan on to prevent ice buildup on the fins. It probably would have done that at too high a temp for my purposes, so I moved it from the little cup on the coil to a place where it could just touch the fins. The unit has been running the fan several minutes after the compressor cuts off and then runs it for a couple minutes now and then while it remains off. This is the advantage of an electronically controlled unit.

IMG_20140910_083918_500.jpg


I mounted a $3 power strip on the door frame so I could have an easy and convenient light switch.

IMG_20140911_075518_509.jpg

I saved bits and pieces along the way and use some little bags of them to fill in the larger cracks on top of some of the walls.

IMG_20140910_083951_236.jpg

It's all done:

IMG_20140911_075457_175.jpg

IMG_20140911_074527_098.jpg
 
Awesome build!

Thanks, Sudz!

I've done a little more sealing on the outside, especially around the AC, due to condensation on the outside of the inner plastic sheeting. A lot of the duct tape I used on the outside was crappy and had to be redone. "Basic Strength Duck Tape" from Walmart was the culprit. I was open-minded about the thinness of it, but duct tape needs to be sticky and it wasn't.

Also, I was brewing Saturday at the entrance of that garage. It was rather balmy that day and, when brewing was over, I noticed my cooler door was moist around the edges, so I dried it out with a fan and gave it a good coating with some good duct tape in the problem areas. Being a cheap interior door, it needs protection from that sort of thing.

I had some extra styrofoam left, so I'm "storing" it up against the walls of the cooler. With that and the self-inflating backpacking mats I am storing on top, I'm probably averaging a good 6+ inch thickness of insulation all around.

I've just been keeping it in the upper forties lately (30+ degrees cooler than the garage) and the compressor comes on for about 4-5 minutes every hour.
 
This is a great build! I plan to make one this spring.
If you had your time back would you still use the cheaper door or would you go with something different?
 
This is a great build! I plan to make one this spring.
If you had your time back would you still use the cheaper door or would you go with something different?

I think I'd stick with the same thing. A metal exterior door has some insulation in it and would be fully weatherproof, but I could go through a few doors like I have before I hit the cost of one of those. Also, it was very lightweight, making it easy to handle. The CoolBot people recommend a pre-hung exterior door, but that would have been 6 times the expense on the door and I would have had to make it a good bit taller. I don't think we are staying in our current house permanently, so I was trying to keep things pretty cheap and lightweight. I used screws everywhere so I could break it down. Two guys could easily move one of my long walls around after detaching it from the short walls.

It's in the garage, so that's another reason to keep it small. I've got shelving along one wall that should be able to accommodate around 400 bottles while it only takes up about 4-5 square feet of the 24 square foot floor. A carboy takes up 1 square foot and a keg takes a bit less, so I feel like I've got plenty of room for my little operation.
 
Back
Top