Just thought I would post my build as I know I enjoyed looking at other peoples pictures and got many ideas along the way. Thanks to Jetlink1983 for the initial concept as my design is based on what I saw in his.
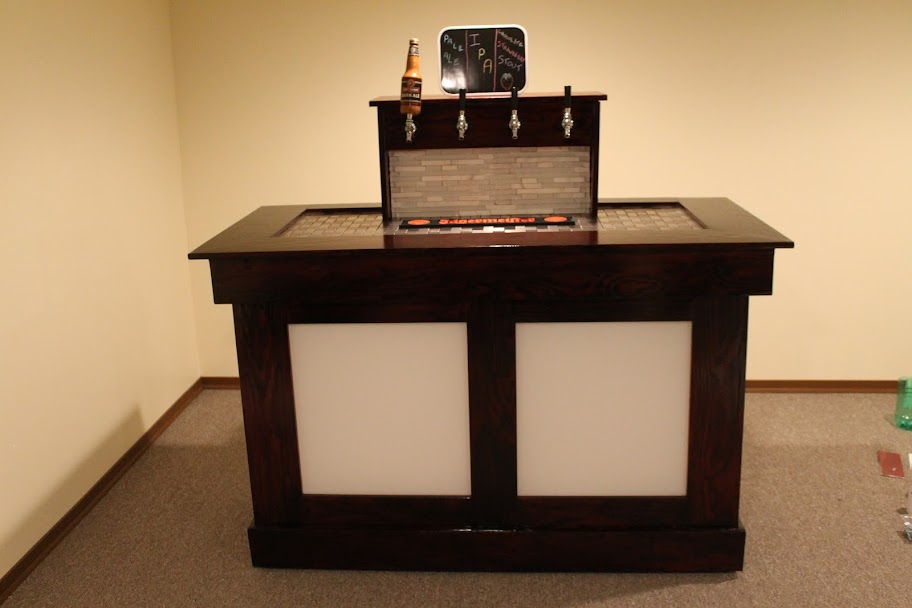
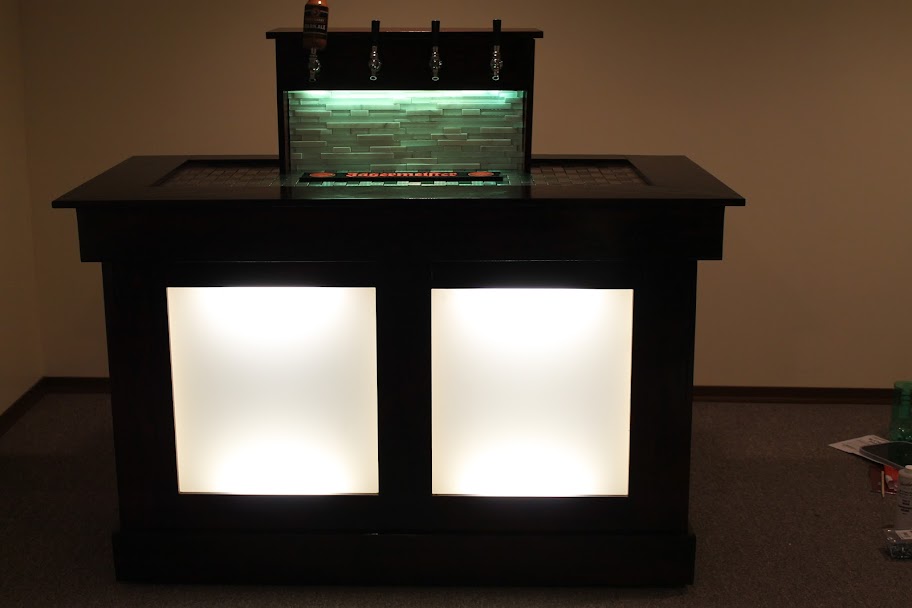
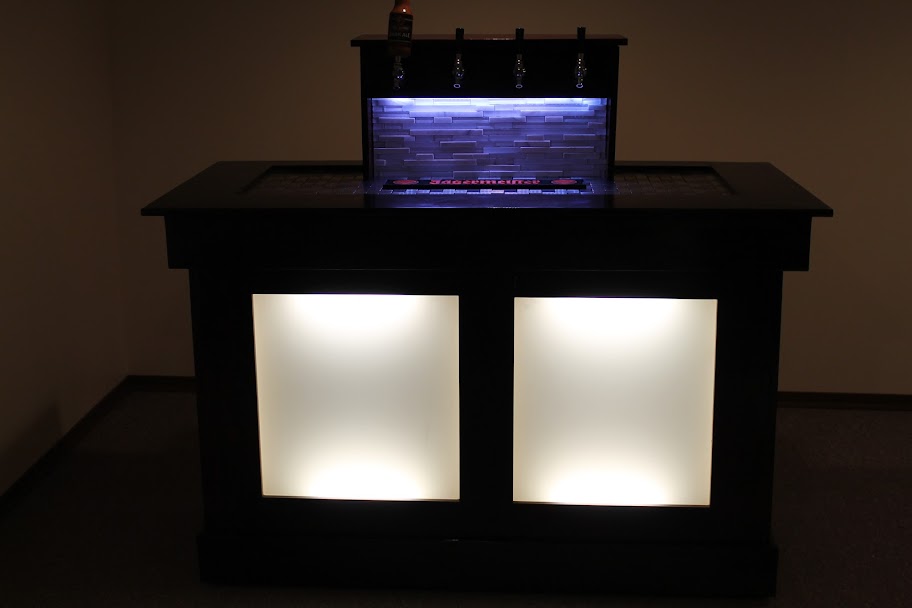
Here is the final product to wet your lips!
I purchased my freezer for $60 from our local online buy and sell...it was in good working condition, clean and the guy even delivered it, haha!
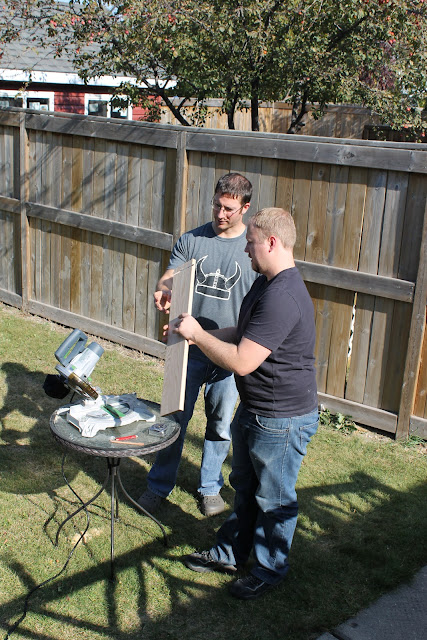
I had very little wood working knowledge going into this project but luckily had help from a friend who also is a contractor. Thank god for him or this would have been a disaster! Why call a 2x4 a 2x4 if it is 1.5"x3.5" :cross:
Sorry some of the images are blurry, half are from my cellphone camera.
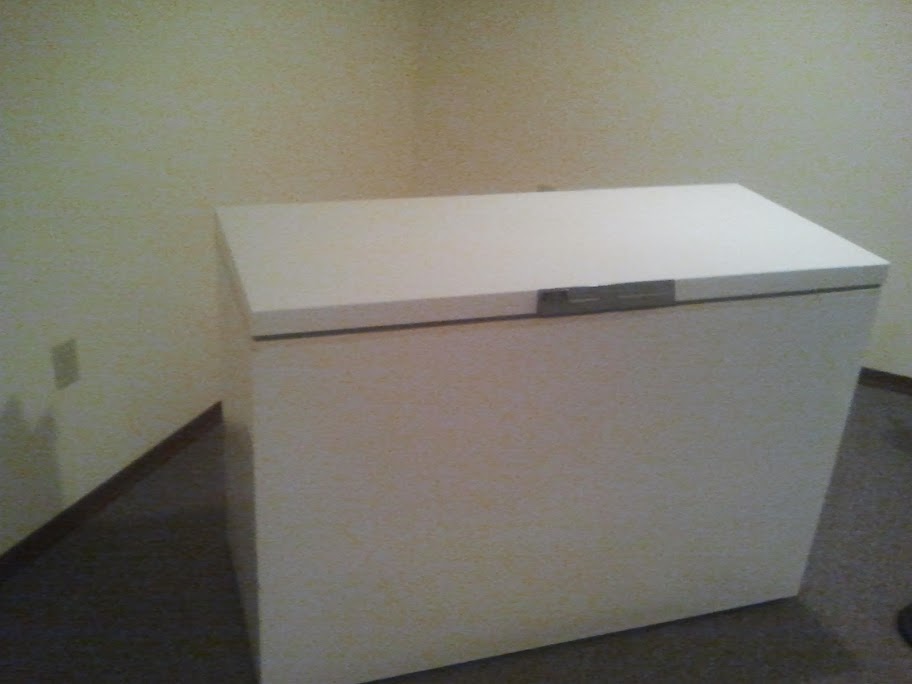
Here is what you get for $60
I also had very few tools to start...tried to buy a $99 miter saw which did not workout well! so close to cutting all the way through but not quite there. It went back right quick!
Had to find a way to get beer during the 3 month project!
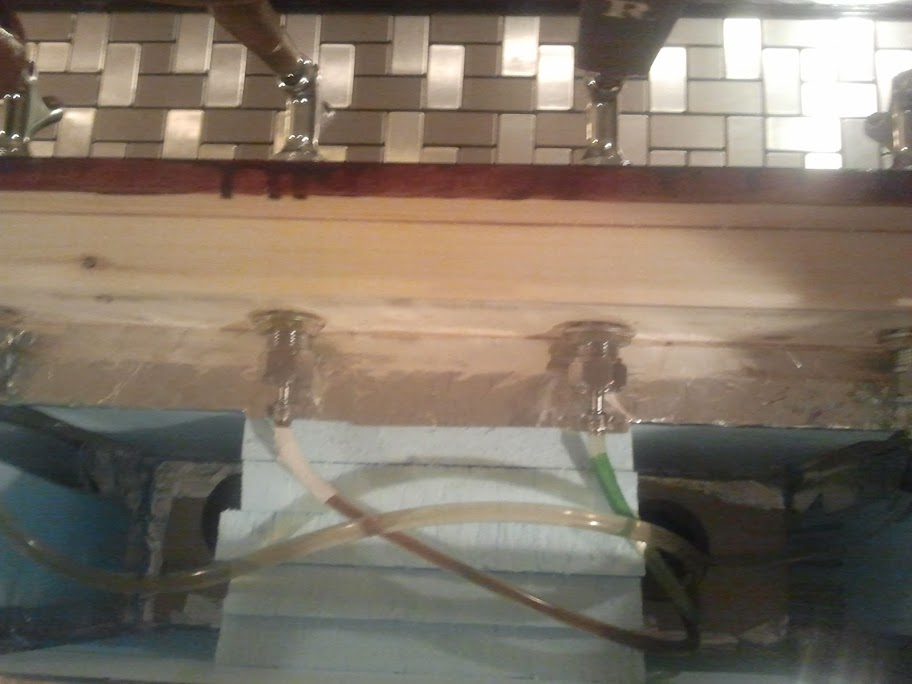
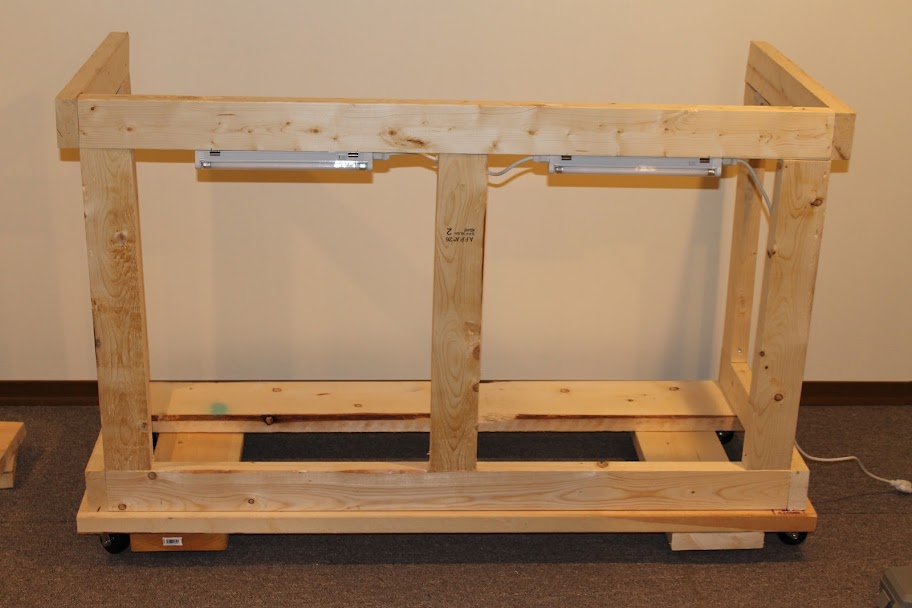
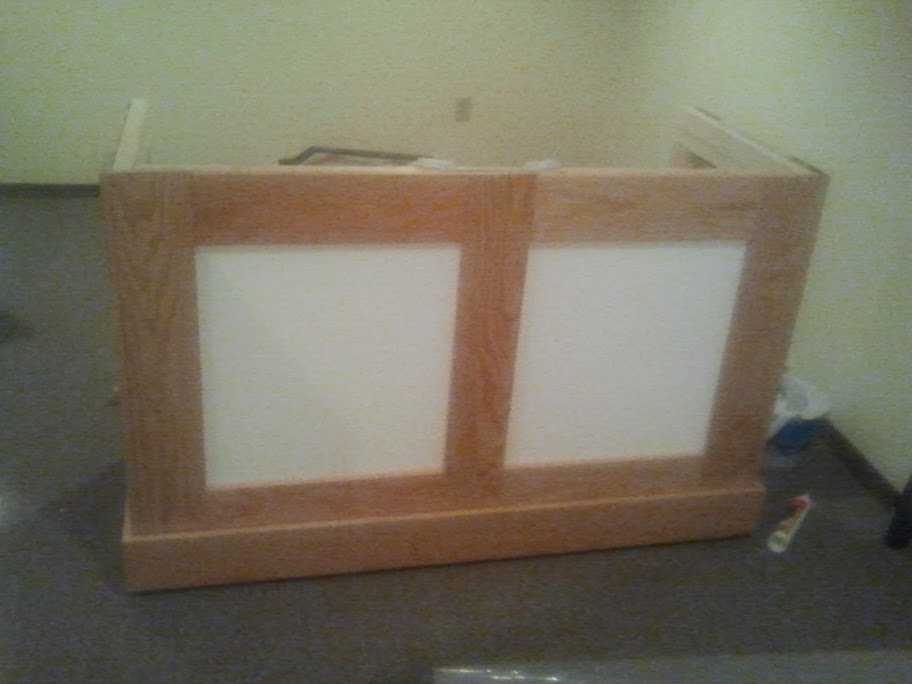
Got everything all framed up, tested how the lights would fit. left a 3/4" lip all the way around for the 1 by material to sit on. Make sure your materials are straight when you buy them! also that your framing is accurate as everything else is based on this!
Got the finish lumber put on with liquid nails as well as a nail gun for a little extra support. Another tip is to only cut 1 or 2 pieces at a time then remeasure your next cuts!
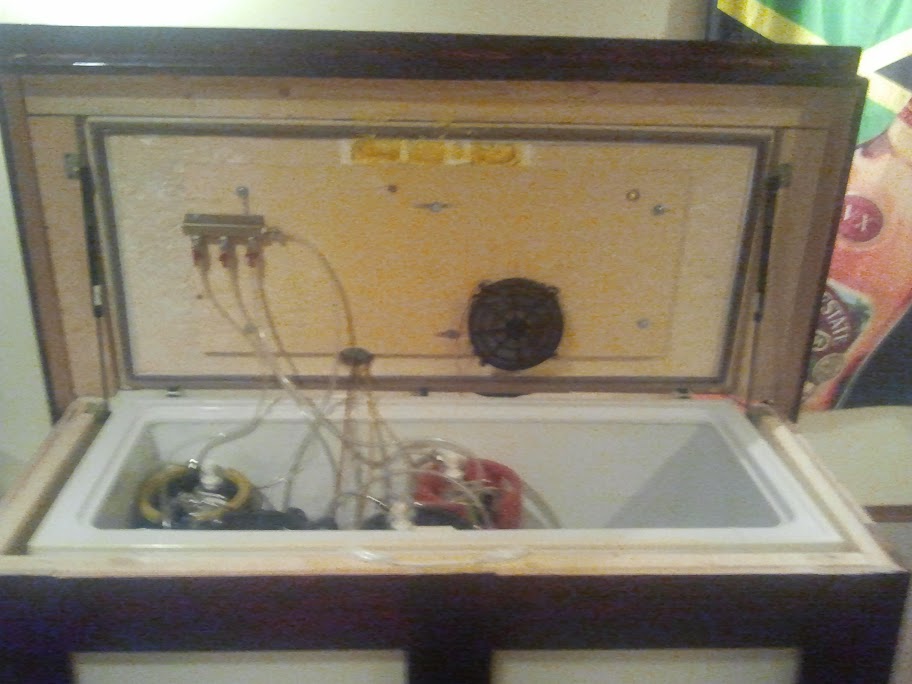
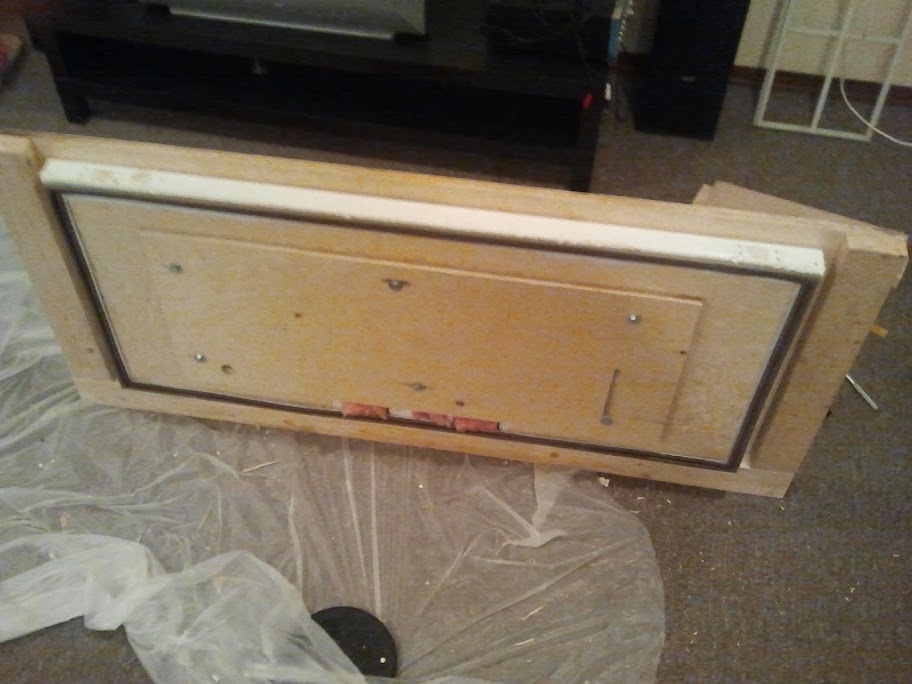
Next we started on the lid, cut off the plastic inside and wound sold foam insulation, which makes things easier. Went with a simple sandwich concept with some T-Nuts and adhesive. Added a 2x4 boarder to nail finish wood onto.
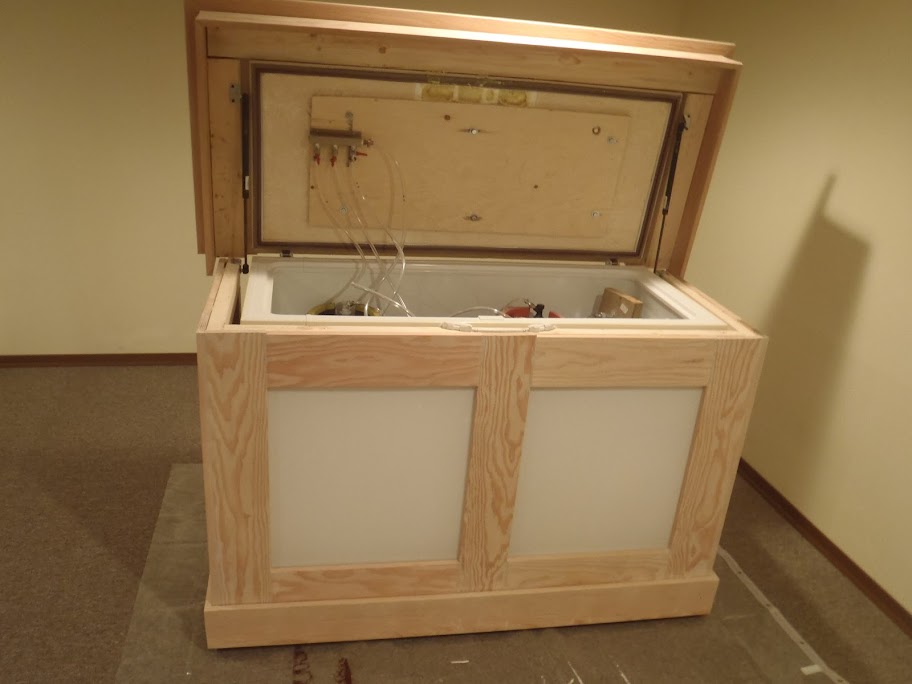
Put the freezer on the base and reattached the lid. Used 2 auto trunk air shocks I found at PrincessAuto for $10 each! I didn't plan it but the spacing just happen to work out for the shocks to fold in beside the freezer...there was some luck involved in this project
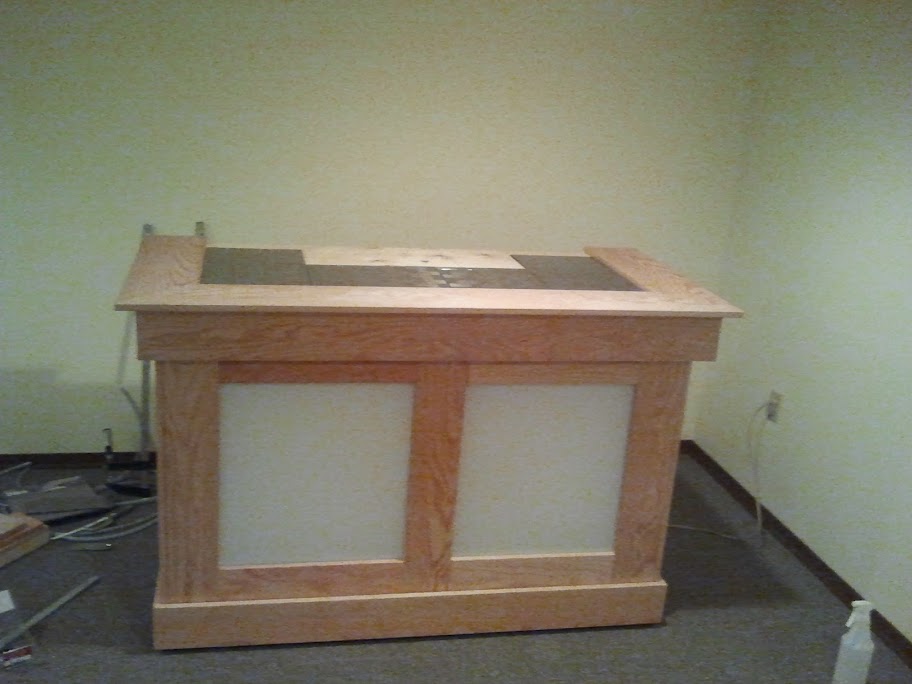
A quick dry run with the new style brushed stainless steel top I am going to use.
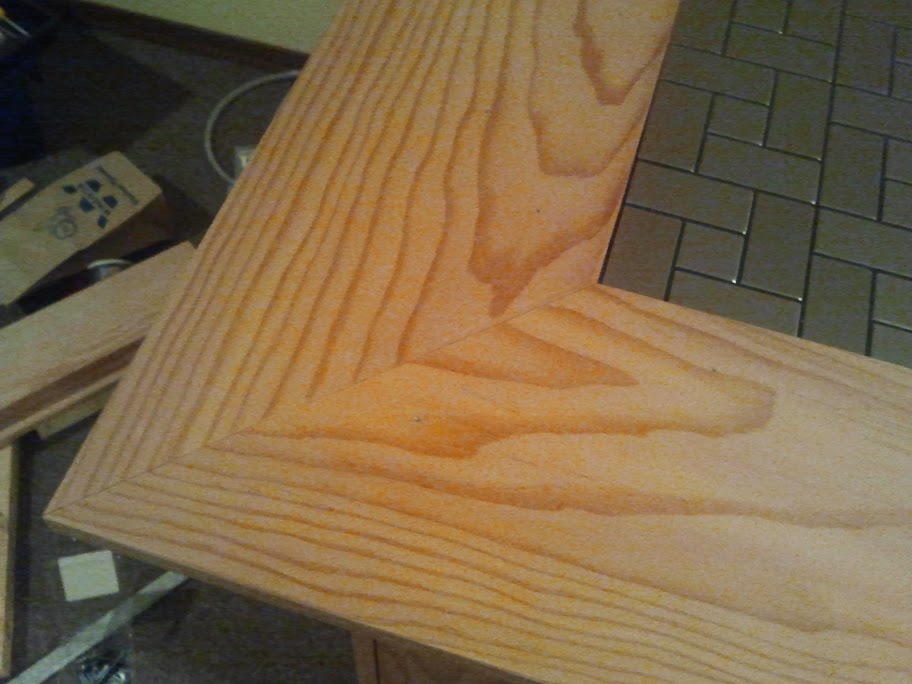
What a difference a good saw makes! perfect joints! Although I did wood-fill them later.
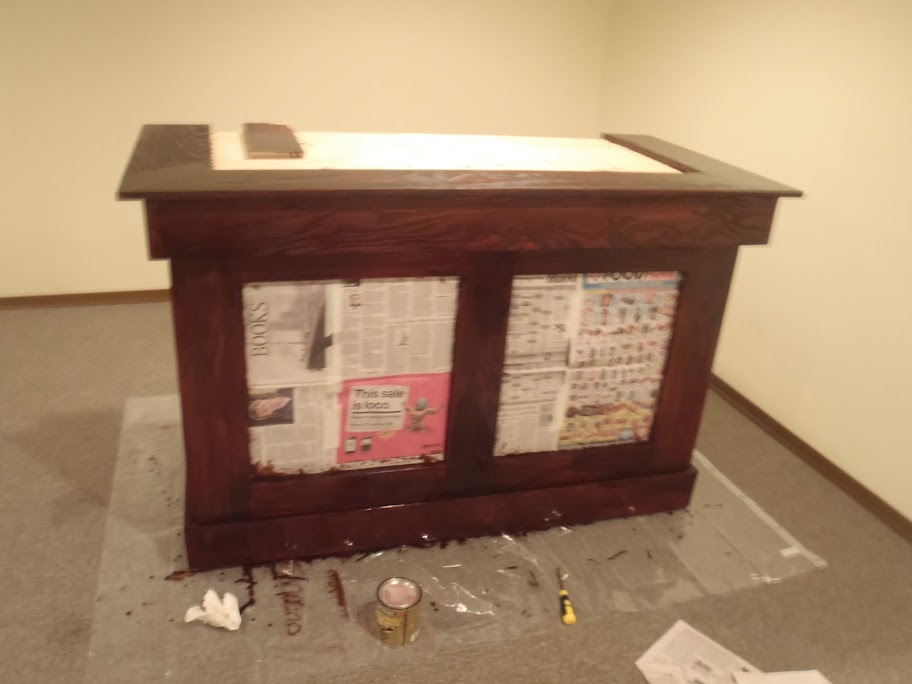
Next I decided to fill everything and stain this bad boy up. This was probably the most tedious part of the whole project.
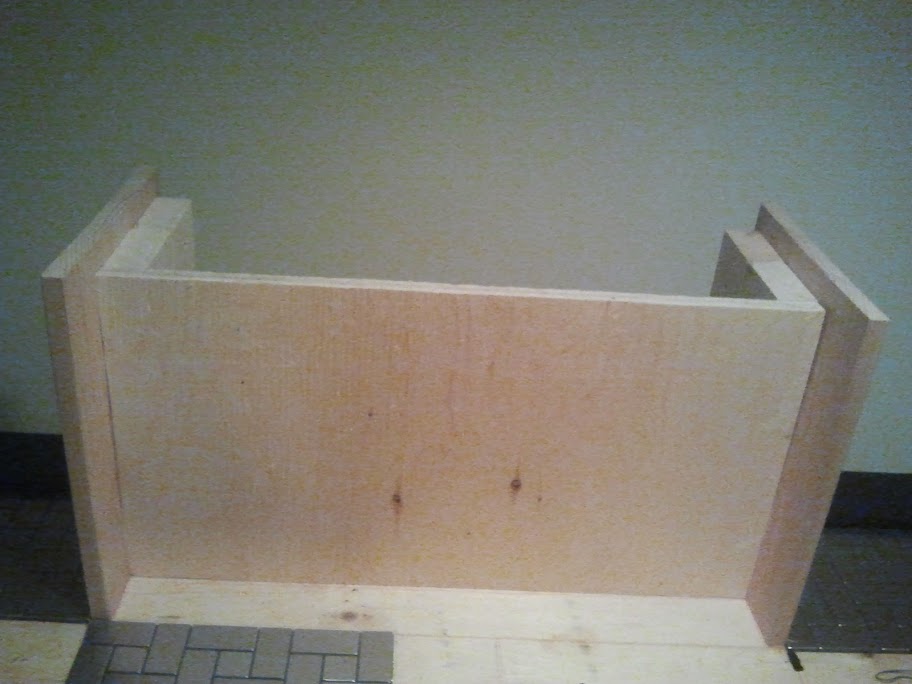
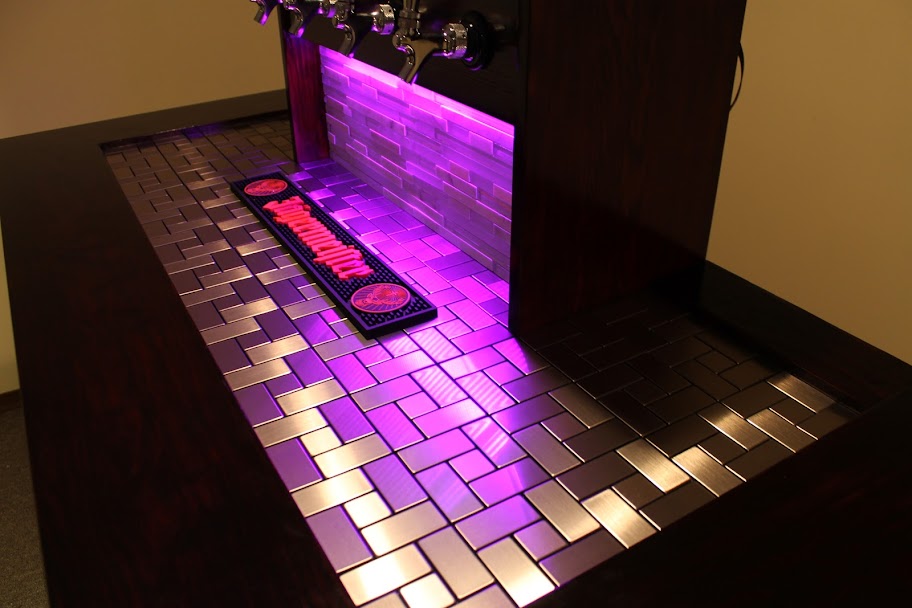
Then using the tile dry run I built the box to size. Went with 14" tall and it came out about 24" long.
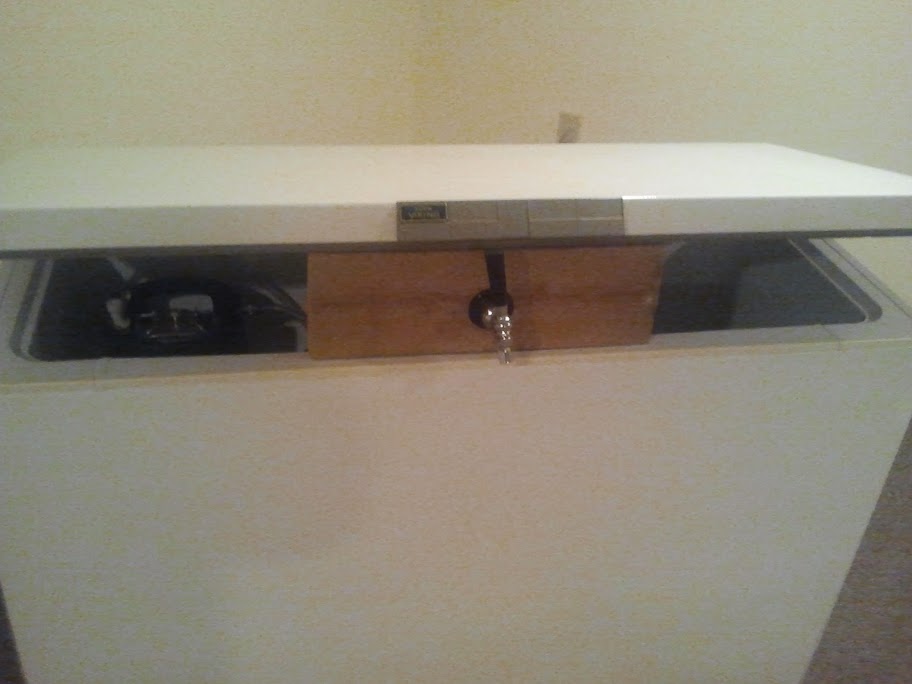
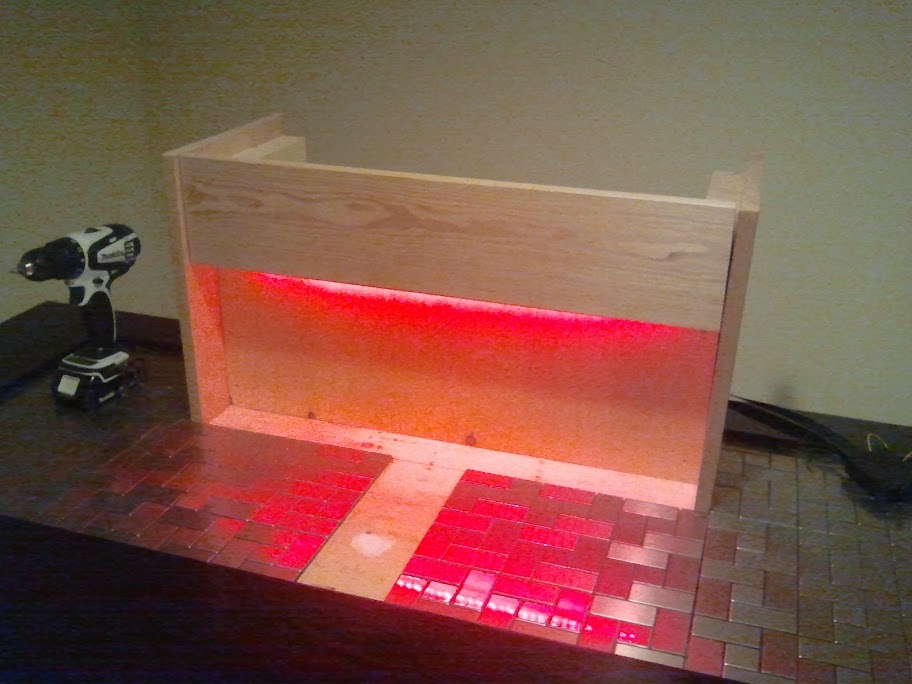
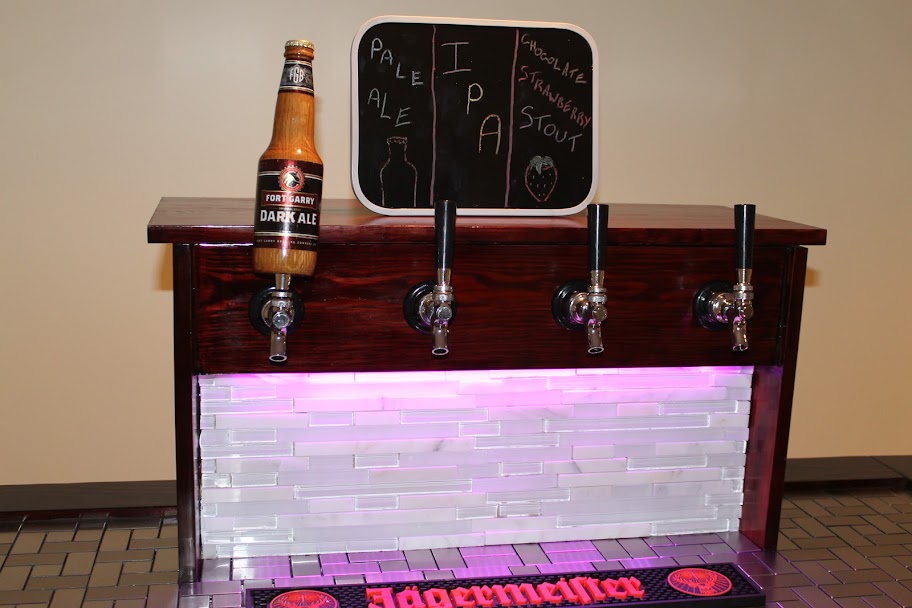
Installed an LED light from China that ran $14 and has a billion settings and is remote controlled. Oh China what will you think of next?
Skip to the final product all lit up!
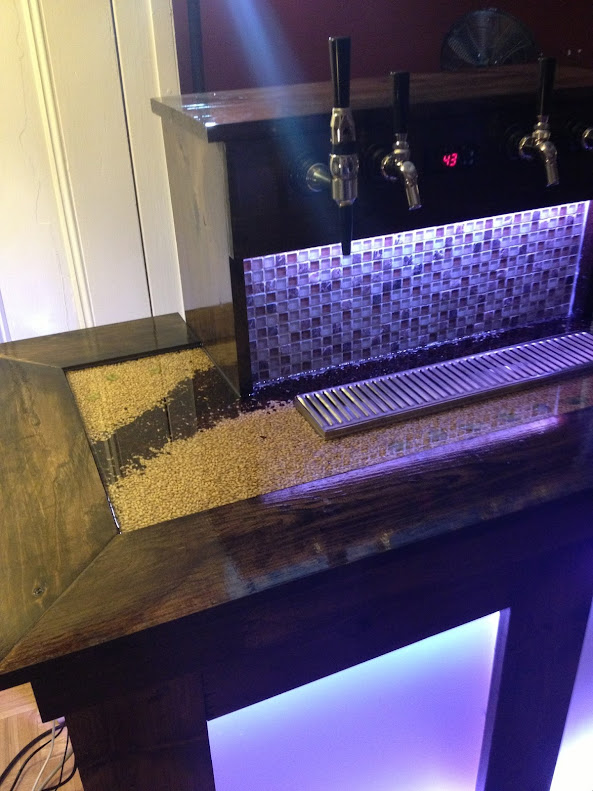
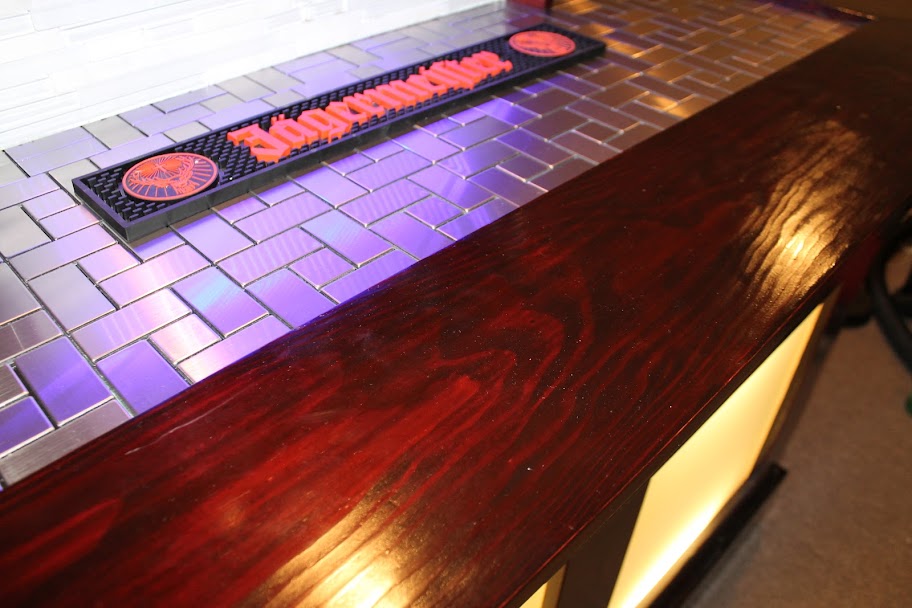
Last thing to do is to epoxy the top to protect it, as well as grout the tile.
The pictures make it look dark, but it is a nice mahogany color that still shows the wood grain. Has a nice shine that only shows at certain angles.
A closeup of the coffin box and my first tap handle given to me by the brew master at our local brewery.
That's it! 3 months and many hundreds of dollars but even swmbo is pretty impressed (not an easy feat)!
Here is the final product to wet your lips!
I purchased my freezer for $60 from our local online buy and sell...it was in good working condition, clean and the guy even delivered it, haha!
I had very little wood working knowledge going into this project but luckily had help from a friend who also is a contractor. Thank god for him or this would have been a disaster! Why call a 2x4 a 2x4 if it is 1.5"x3.5" :cross:
Sorry some of the images are blurry, half are from my cellphone camera.
Here is what you get for $60
I also had very few tools to start...tried to buy a $99 miter saw which did not workout well! so close to cutting all the way through but not quite there. It went back right quick!
Had to find a way to get beer during the 3 month project!
Got everything all framed up, tested how the lights would fit. left a 3/4" lip all the way around for the 1 by material to sit on. Make sure your materials are straight when you buy them! also that your framing is accurate as everything else is based on this!
Got the finish lumber put on with liquid nails as well as a nail gun for a little extra support. Another tip is to only cut 1 or 2 pieces at a time then remeasure your next cuts!
Next we started on the lid, cut off the plastic inside and wound sold foam insulation, which makes things easier. Went with a simple sandwich concept with some T-Nuts and adhesive. Added a 2x4 boarder to nail finish wood onto.
Put the freezer on the base and reattached the lid. Used 2 auto trunk air shocks I found at PrincessAuto for $10 each! I didn't plan it but the spacing just happen to work out for the shocks to fold in beside the freezer...there was some luck involved in this project
A quick dry run with the new style brushed stainless steel top I am going to use.
What a difference a good saw makes! perfect joints! Although I did wood-fill them later.
Next I decided to fill everything and stain this bad boy up. This was probably the most tedious part of the whole project.
Then using the tile dry run I built the box to size. Went with 14" tall and it came out about 24" long.
Installed an LED light from China that ran $14 and has a billion settings and is remote controlled. Oh China what will you think of next?
Skip to the final product all lit up!
Last thing to do is to epoxy the top to protect it, as well as grout the tile.
The pictures make it look dark, but it is a nice mahogany color that still shows the wood grain. Has a nice shine that only shows at certain angles.
A closeup of the coffin box and my first tap handle given to me by the brew master at our local brewery.
That's it! 3 months and many hundreds of dollars but even swmbo is pretty impressed (not an easy feat)!
")


![Craft A Brew - Safale S-04 Dry Yeast - Fermentis - English Ale Dry Yeast - For English and American Ales and Hard Apple Ciders - Ingredients for Home Brewing - Beer Making Supplies - [1 Pack]](https://m.media-amazon.com/images/I/41fVGNh6JfL._SL500_.jpg)