• Please visit and share your knowledge at our sister communities:
  • If you have not, please join our official Homebrewing Facebook Group!

    Homebrewing Facebook Group

The birth of Zeus. (Non typical brewstand build.)

Homebrew Talk

Help Support Homebrew Talk:

This site may earn a commission from merchant affiliate links, including eBay, Amazon, and others.
I'm considering shortening the stand or moving the legs in 2 inches lengthwise so that it fits in the bed of a short box Ford Superduty truck. They are 80 inches from the lip on the top of the front of the box to the surface of the tail gate when its closed. My stand is currently 82 inches in that dimension.

Shortening it would mean it could be moved with a short box truck with the tailgate closed. Otherwise I'd probably have to take the tailgate off, which is a pain.

Its not too late to do this. 4 cuts to shorten the whole stand 2 inches, 2 cuts to move the legs only in 2 inches on one end. It will take longer to change the drawings than make the cuts.

What say ye ?
 
Added a reversible, lowerable, removeable hanger to the stand.

Brewstand%2520drawing%2520with%2520malt%2520mill.jpeg


It has multiple functions, though it can only do one at once.

1. Its a rack to hold hoses and stirring implements.

2. Its a rack to hold a cloth malt hopper bag above a Monster Mill, also mounted to it. This will allow the monster mill and hopper to occupy only 12x19x3" when in storage. I've been dreading building the hopper for my malt mill because I don't want to have to store something big.

3. If rotated 180 degrees, it becomes a rack to hold a BIAB for the last brew kettle, though one won't be able to close the lid while it steeps, unless one finds a way to feed wires through the lid.

Its not the ideal place to mount a malt hopper because of steam off the last kettle. And one doesn't want dust where one will be filling carboys with chilled wort. But, I have limited storage space for brewing stuff and I think this is the easiest way to build a compact milling setup. And I can remove the bag from the stand as soon as I am done grinding the malt.

The hardest part would be sewing the bag. I think it would work pretty well. One would have to put the malt bucket on a chair or something to get it the right height to catch the ground malt.

Is it worth doing ?

Edit: I could also hang the brew controller display from it.

Send me your CAD file, in dxf please;)

How about some round tube to fit into your frame that can be machined to accept various hangars and such. You could cross drill the tube an use some thumb screws to lock into the height you want. I am trying to visualize your hangar apparatus in two view.
 
Seems to me it should be somewhere close to the mash tun, yet it shouldn't interfere with the path from the sink and the shelf to the mash tun and boil kettles and it needs to be away from heat and spray and it can't interfere with access to the mash tun and...

You definitely want it close. I have a pyramidal design. HLT up top, then MLT and BK on the second tier. The CP is right between the mash tun and the bk and just below the HLT. I brew with electric water heater elements so I don't have to worry about excess heat except what comes off of the bk.
 
Latest iteration. Added the pumps, chiller, a water filter, the sink has a profile and a shelf to put the malt pail on. I left the shelf off the drawing, but its still part of the design.

Its not obvious from the drawing, but the entire surface of the bottom shelf is covered in aluminum checkerplate. Lest anyone think I'm rich, I've been collecting materials to do this project for a long time. My local metal recycler sells scrap SS and aluminum for $1/lb. I stop in about once a month.

I'll probably also put a door over the area under the sink to hide the plumbing mess that is going to be under there.

I mounted the water filter upside down so that it completely drains without taking it apart when I blow out the system.

Brewstand%2520drawing%2520with%2520malt%2520mill2-top.jpeg


Brewstand%2520drawing%2520with%2520malt%2520mill2-side.jpeg


Right now the rack for hanging tools is just the 12" of square tubing that the grain bag is hanging from. Remove the grain bag (and mill, it unbolts) and you have the rack by itself.

There are a couple problems using pipe instead of square tube.

1) I have to buy 20 feet of anything I use, so the outside pipe would be expensive. It would have to be SS.

2) I can bolt the flat side of a square tube directly to the square tube of the stand with simple bolt holes. And unbolt it and stow it away, sliding it inside the long tubes of the stand. As soon as I go with round tube, I have to weld it, which increases the overall length of the stand.

3) I am leery of using set screws to hold a load, for a whole pile of reasons.

Nevertheless, I'd love to see some drawings or sketches of what you had in mind.

I'll look into sharing the CAD files later. Right now they are a mess.

Thanks for the reply.
 
I got a bit of time to work on the stand last night.

I'm trying to work on things that need to be done regardless of the design of my stand while I let the design ideas I've come up with ferment for a few days.

One such item is the caster mounts. No matter what stand I build, I'll need plates for under my caster wheels.

The bases on my caster wheels measure 3" x 4". Unfortunately, I don't have any 3" or 4" wide SS flat bar and my local SS supplier has a 20 foot minimum on that material at about $5 per foot, depending on thickness.

What I do have on hand is 2" wide SS flat bar that I bought at a metal recycler, cheap. So I cut myself 12 3" pieces and TIG welded them together with a filleted butt weld. It was a bit more work, but a lot cheaper and I got some welding practice along the way.

I'll let the pictures tell the rest of the story.

DSC_9872.JPG


DSC_9886.JPG


DSC_9891.JPG


DSC_9876.JPG


DSC_9892.JPG


FWIW, I was using the TIG function on an Everlast Power Pro 256 on DCEN at about 125 amps, pulser off, with a (dirty) 3/32 electrode and 1/16" 308 (?) filler wire. I had no trouble with warpage. The heat affected zone was very small and the penetration was very good. I was actually wishing for a larger arc and puddle.

As you can see, this material is used and highly tarnished. I'll shine these up once all the welding is done.

This was my first ever production type TIG welding, although in a past life I used to braze with oxy acetylene.
 
For those who asked, this is the cut off wheel I am using on my compound mitre saw. $12. The RPM is the important part, This one is rated at 5092 RPM. I think its meant to be used on a gas powered saw.

The other thing is the blade thickness. This one is 1/8". That removes more material and makes cutting slower, but all my cuts are straight. Some people have been complaining about non straight cuts. I wonder if they are flexing their blades.

DSC_9914.JPG


DSC_9915.JPG


The drill bits are cobalt. I hope they work well for drilling SS. I haven't tried them yet.
 
So I got a bit of time to work on this thing.

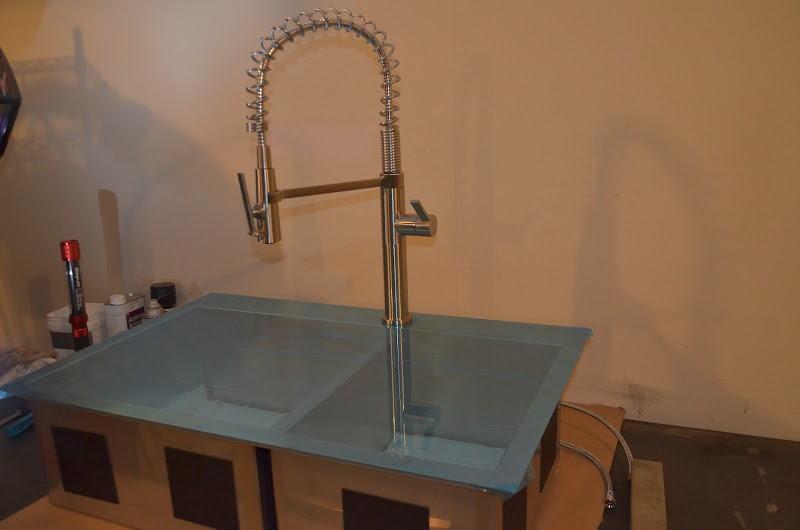
Of the best laid plans of mice and men... In the time I wasn't working on it, I stumbled on a large decently sized sink at our local Costco for $220.

DSC_9976.JPG


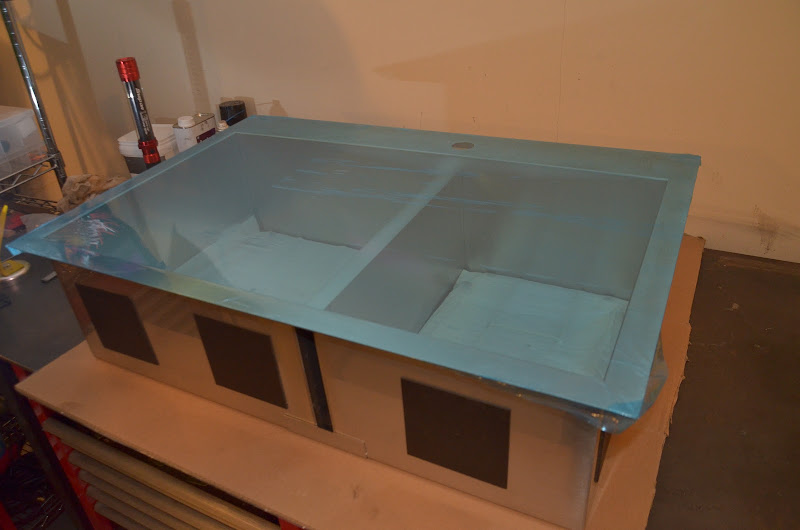
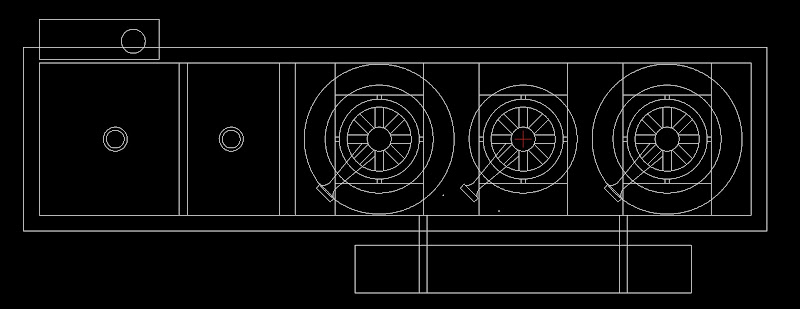
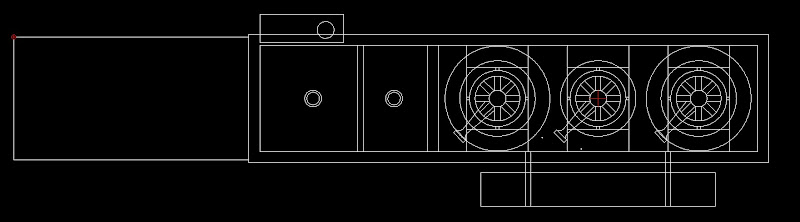
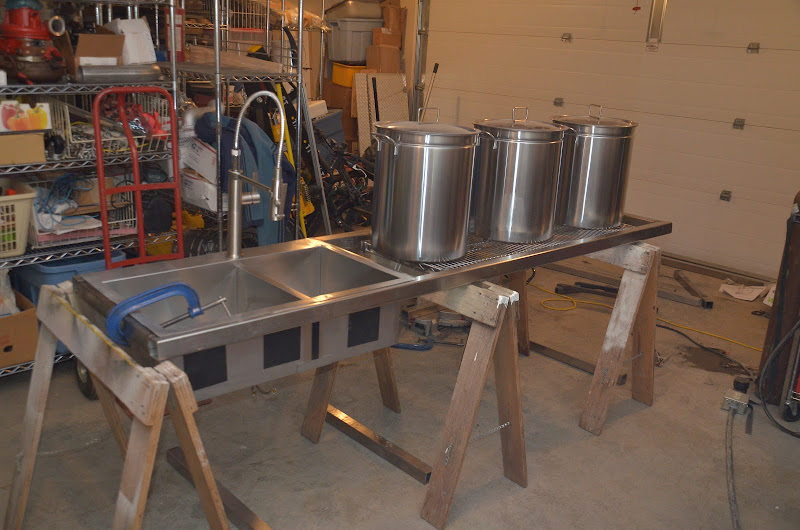
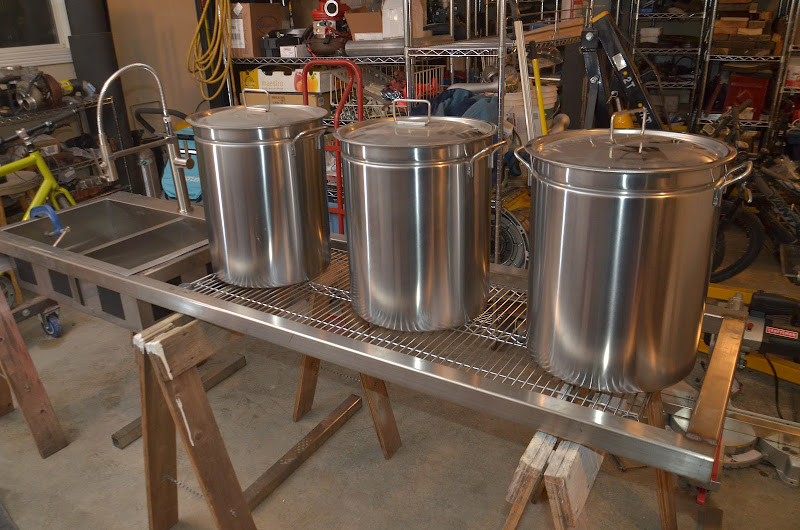
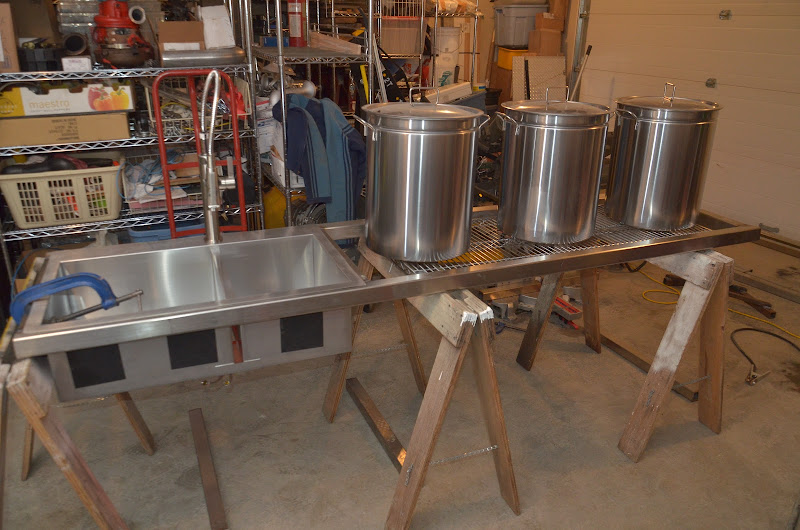
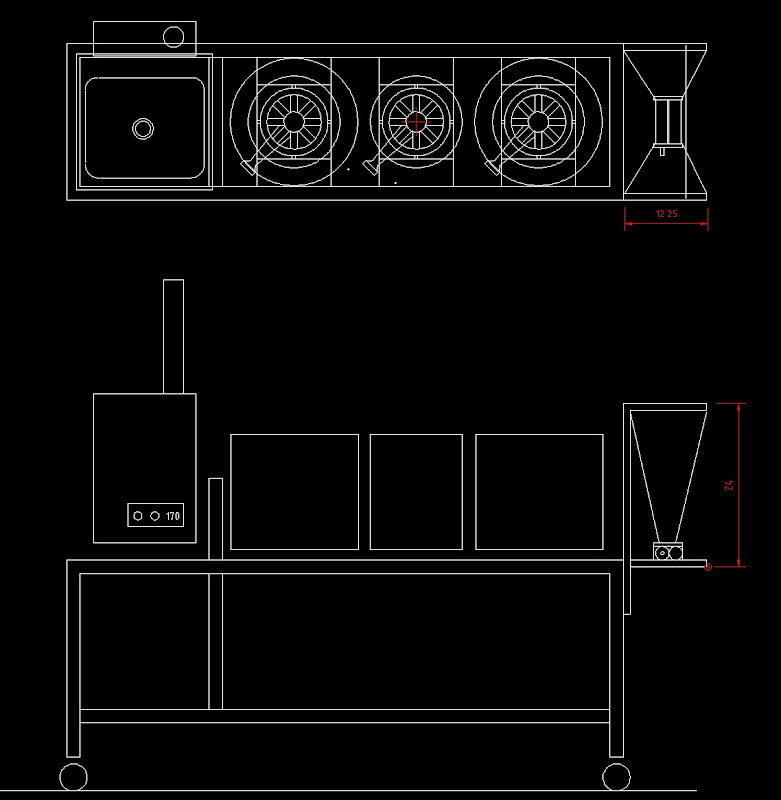
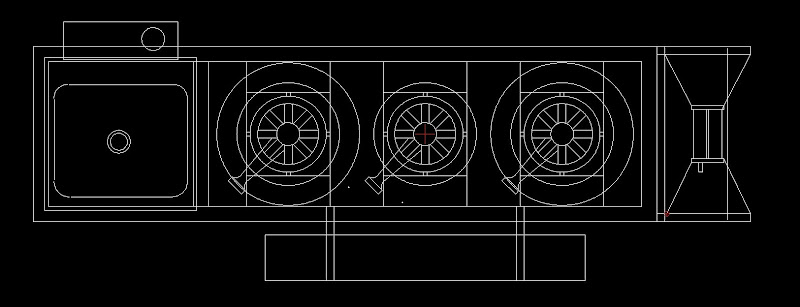
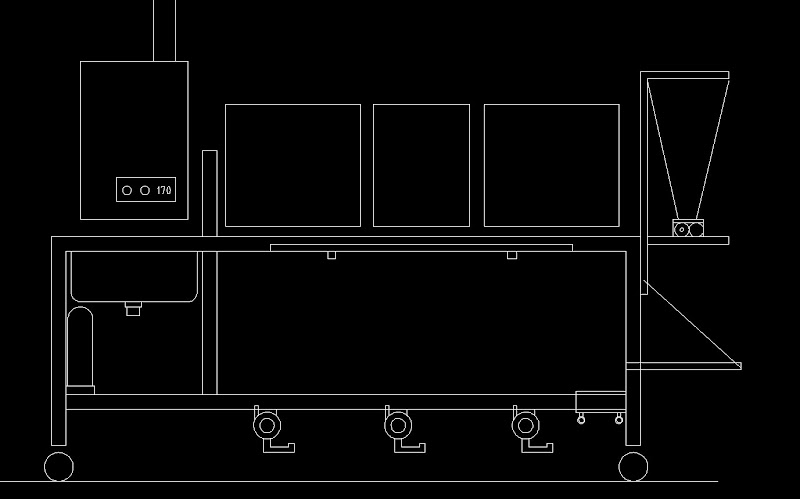
The main sink is 17x17. The side sink is 12x17. 9? inches deep. It comes with racks for the bottom of the tubs and drains.

I've been trying to get one of the medium sized restaurant sinks used, forever, to no avail. If you think $220 is a lot of money for a sink, I dare you to go sink shopping these days.

What I like about this sink is having 2 tubs (one can be for soaking or rinsing) and the tubs are flat right to the edge, so that things don't fall over if placed near the edge. And the tubs, both of them, are big enough to hold big things, like a keg upside down, draining.

Problems.

1) Cost. Luckily, I've been a good boy this year so Santa is getting it for me.

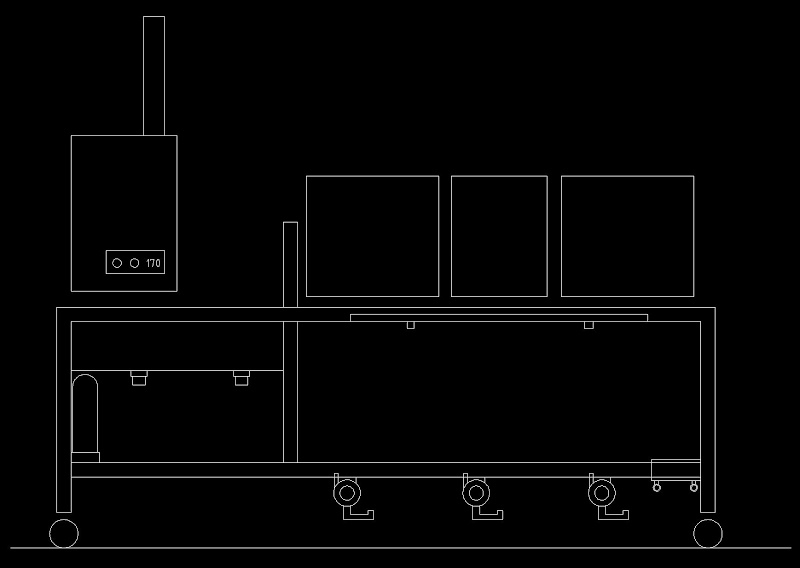
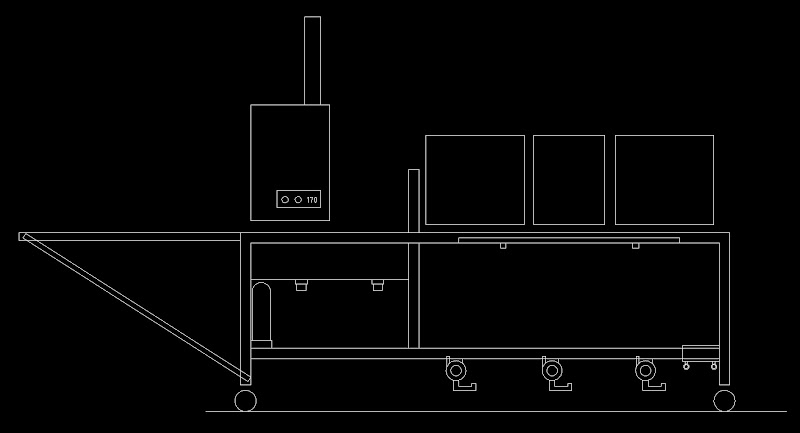
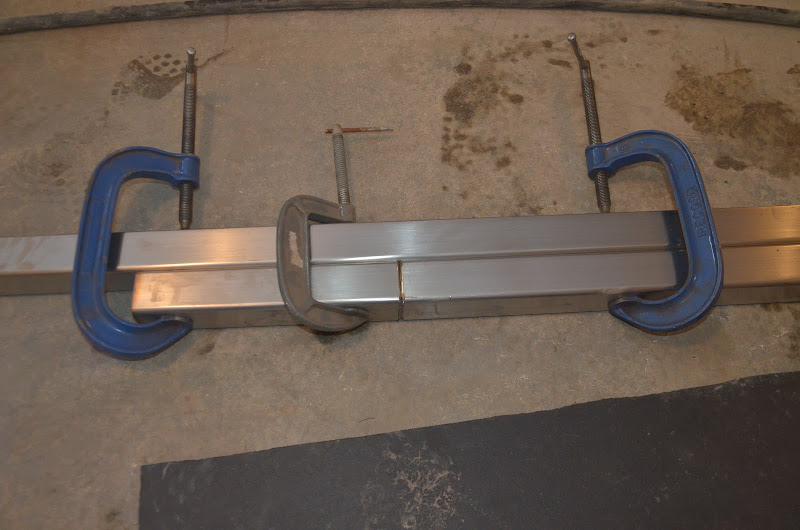
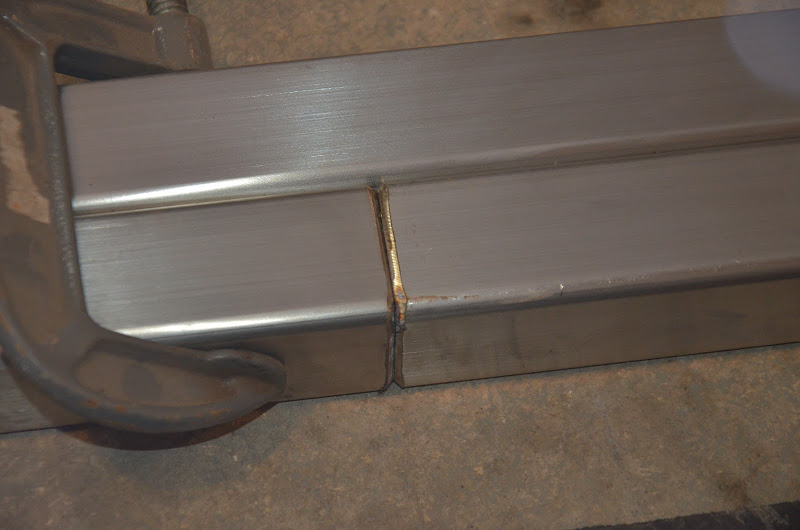
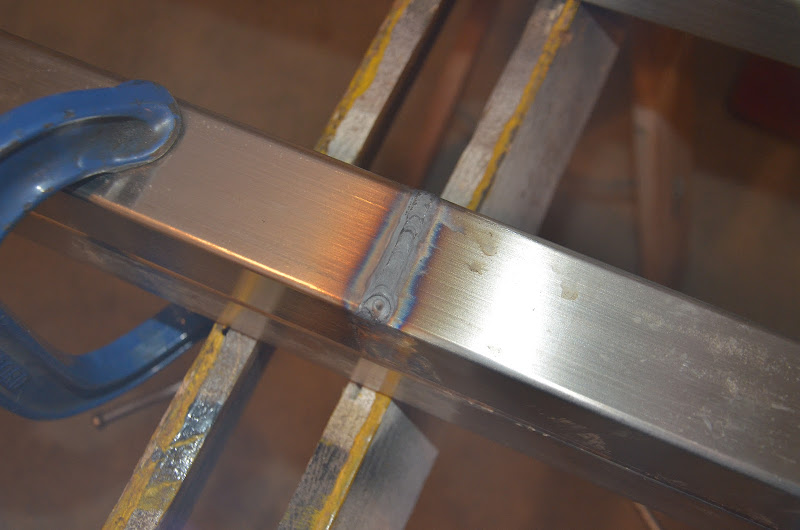
2) The stand becomes longer by about 11 inches, from 82 inches to 93 inches. So it takes up more room. I'm storing it outside, so it isn't that big of an issue, but it is getting large.

On the other hand, because the stand has hot water and burners and a sink and a shelf, its going to be able to do double duty as a food prep center if we host an event outside somewhere or on our deck.

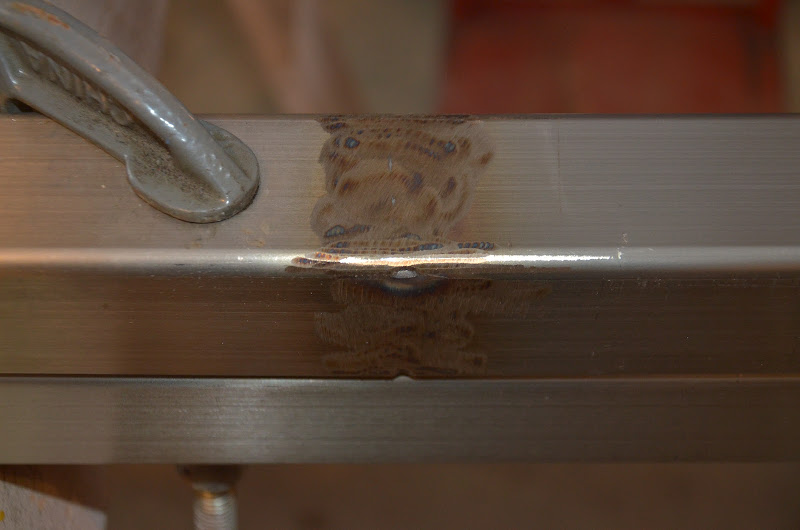
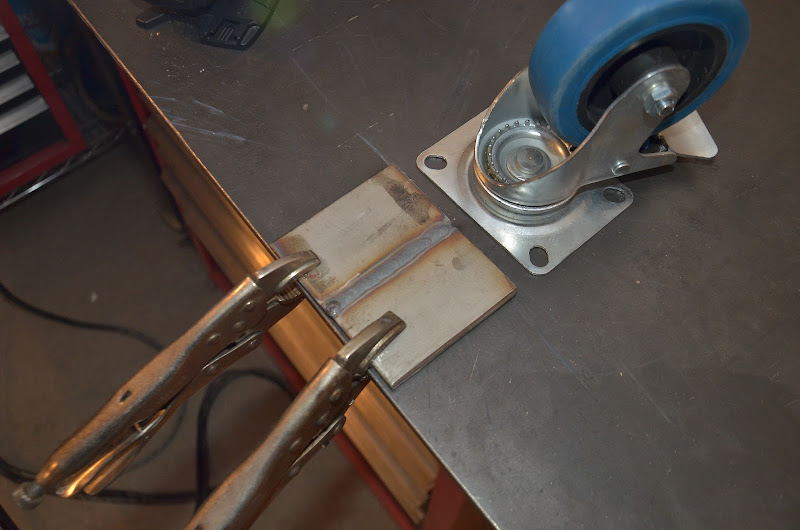
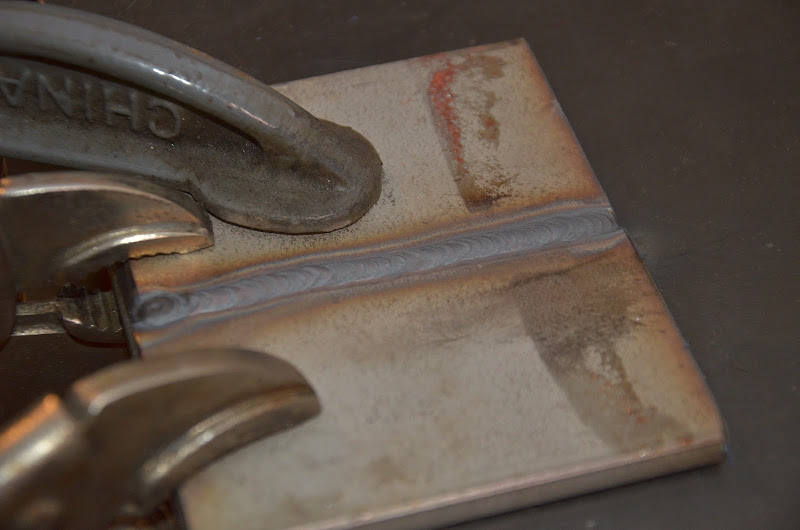
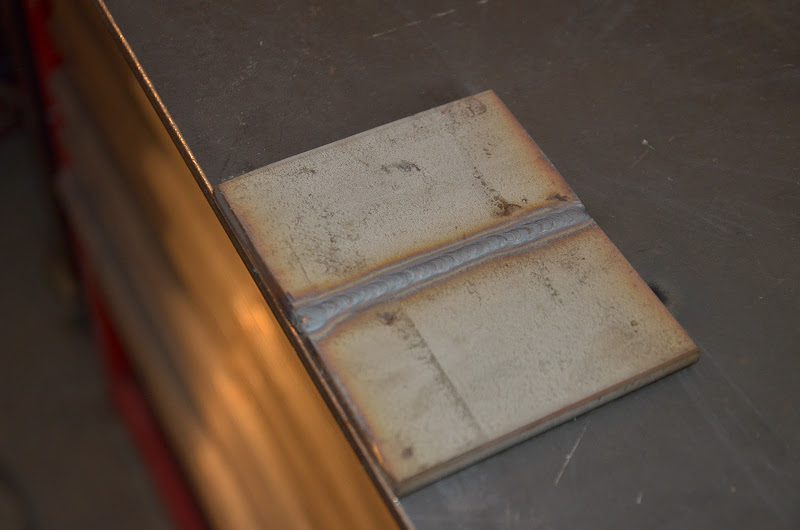
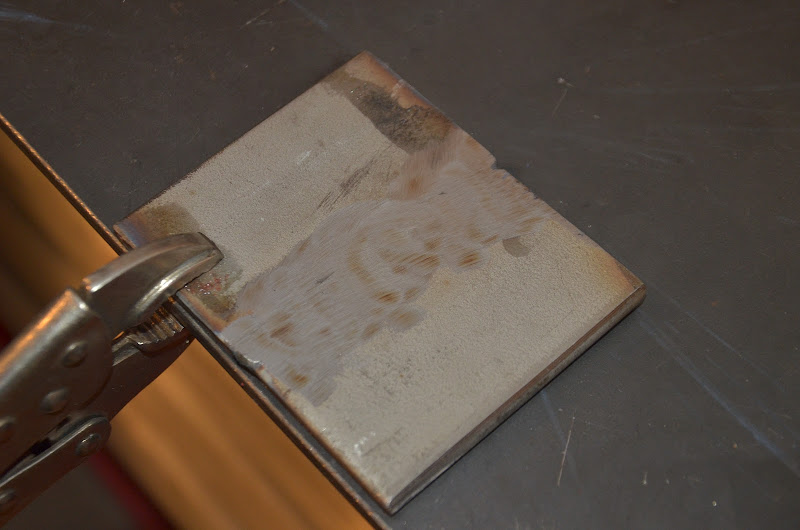
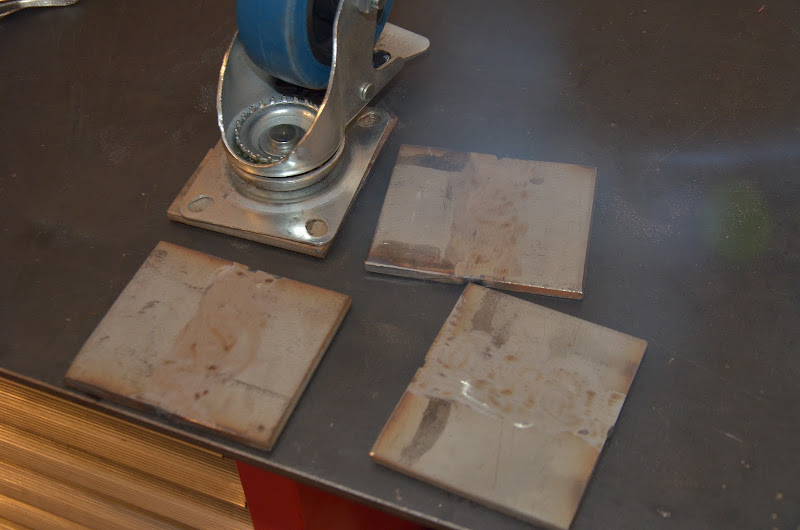
3) I need to lengthen my stand by about 11 inches, from 82 inches to 93 inches. I already cut my long pieces at 82 inches. I now have to weld 11 inches onto each of them. If I grind and polish the welds, you wouldn't be able to tell.

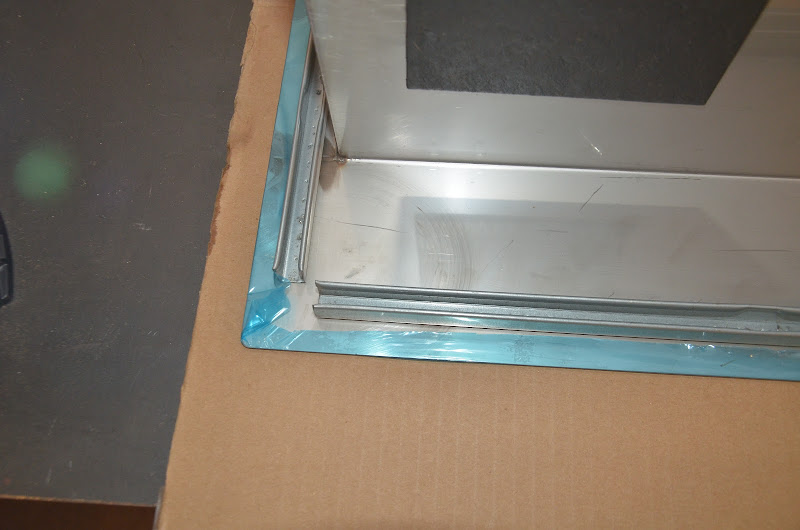
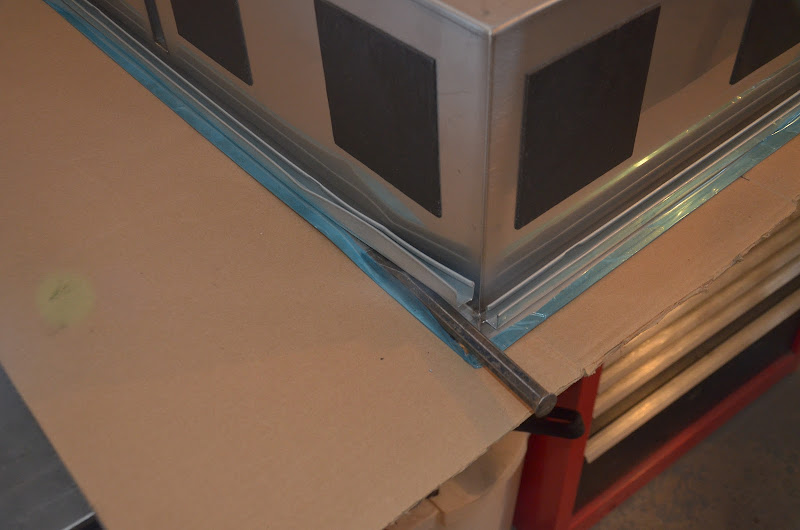
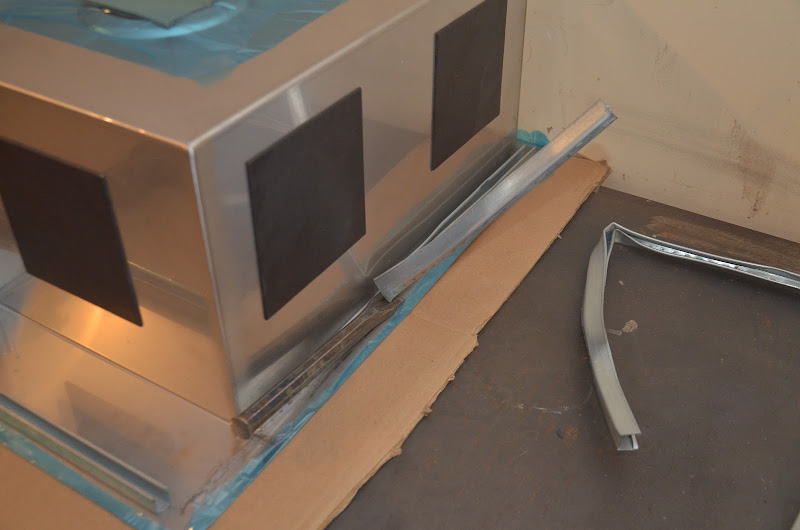
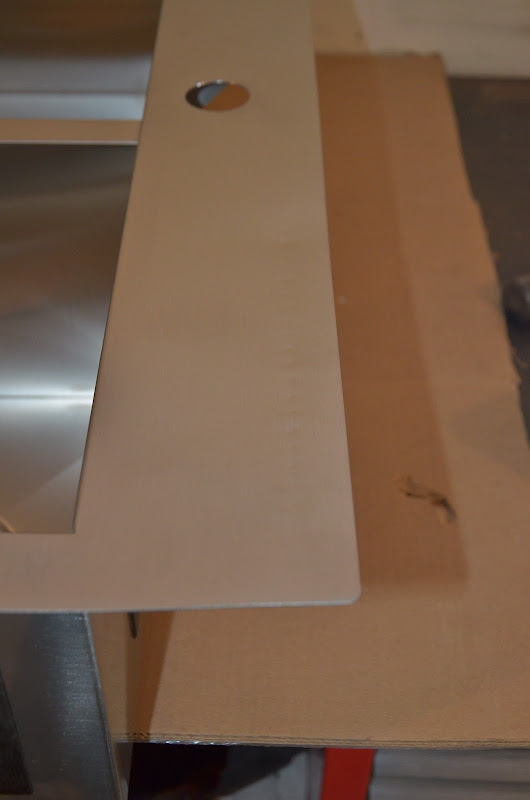
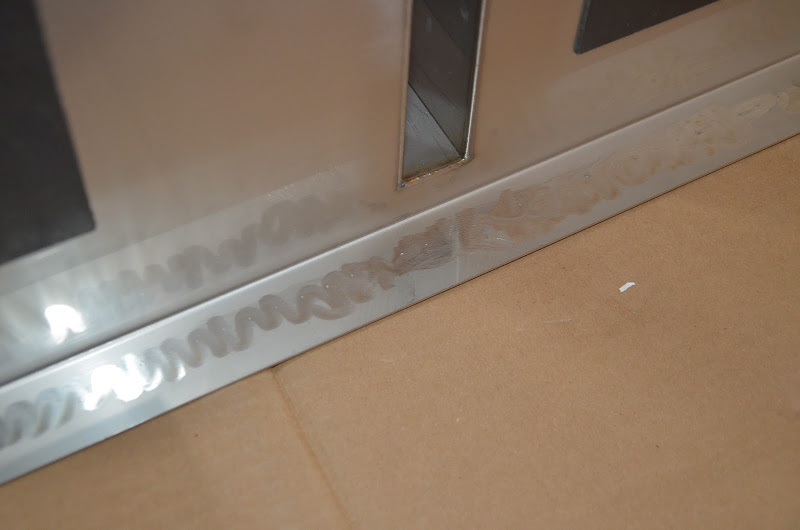
4) The sink has a mounting track under the lip that stands about 1/2" high. Its spot welded about every 3/8" to the lip. This prevents the sink from sitting flat on the SS tubing, which I would like it to do. I have no idea how I would remove it without wrecking the sink.

DSC_9980.JPG


Ideas ?

I also purchased a different fawcet.

DSC_9984.JPG


It was $135. I'll return the other one which was $80. I need to put a longer hose on this one so that it will reach right to the bottom of the sink and over into my mash tun to fill it.

I decided to upgrade these components after seeing pictures of Mr. Blichman's setup in the home brewery design article in the November 2012 issue of Brew Your Own. He, of course, uses the real, large, restaurant sink with the real restaurant fawcet. I can't afford those, but I can afford this.

My brewstand is getting expensive. But on the other hand, my wife doesn't want me brewing in the house and even if she did, I don't have a room in it to do so. This is the easiest, cheapest way to build something similar to a custom brewing room in a house without actually doing so. And if I ever do get to have a brewery room in a house, all this stuff will fit right in.
 
Looking good. You know what they say, measure twice cut once ;)

The saying should go more like "get your d@mn spec figured out before you start building anything". There were no measurement errors. There were planning errors !

I knew that I wanted a larger sink when I was doing the drawing and playing around with things. Actually, I was happy to have a sink, any sink on the stand when I was working on the drawings, but I also knew the "right" thing to do was to get a larger and better sink than what I had.

I was trying to save money by using the sink I had and I couldn't find anything better for a reasonable price and blah, blah, blah... but then I saw the new sink in Costco and asked myself why am I trying to save $200 on this project and put up with a less than optimal sink for the next 10 years ? The stand is built around the sink and its not something you can change out later on if you build it sized for the smaller sink.

Good tools generally pay for themselves if you use them.

Anyway... justify it anyway you want, or not, I splurged and got the sink.

Side thought.

I could make the sink fold down on the side of the stand when not in use and thus have a stand that is 20 inches shorter when in storage.

However, the design would get a bit messy because the hot water heater would still be mounted above the sink and it can't really be folded out of the way and the tap on the sink would stick out the side when its folded down and then mounting the folding side table gets tricky because then its mounting to a folding sink.

I think I'll just put up with the stand being 93 inches long and be done with it. At least its all stainless and plastic and its not going to rust when I store it outside.
 
Updated drawings.

Brewstand%2520drawing3-side.jpeg


Brewstand%2520drawing3-top.jpeg


Brewstand%2520drawing5-side.jpeg


Brewstand%2520drawing5-top.jpeg


Its 93" long without the shelf and 11' 4" long with it. With the grain mill attached, its 12' 4" long.

Basically, what I hope to do is back a vehicle out of the garage, wheel this in, fold it out, set up the vessels, hook up the hoses and start brewing. The stand is designed so that everything is accessible from the front, so it could be backed right up to a wall (with a gap so it doesn't start a fire) when in use, taking up as little space as possible.

Its been designed so that nothing sits on the floor while brewing, meaning that it could be moved in the middle of a brew session. My old stand had a flip out shelf that relied on a leg that sat on the floor when out. It was a pain to move in the middle of a brew session.

Its 74" from the heat shield wall beside the mash tun to the end of the shelf. 30 inches of that is sink, but its better than having no table area at all.

The longer sink is going to allow for a bit more storage room on the lower shelf. The shelf under the burners will be entirely full with vessels when in storage.

The fawcet isn't drawn, but it goes right in line with the sink divider, so its now beside the hot water heater controls, instead of in front of them, which is a good thing.

When the vessels are in storage on the lower shelf, the side shelf will sit over the burners creating a work area without folding anything out. I'm hoping with hot water and a sink its a nice set up for racking and kegging. If it is, I can do all that in the garage too, which will make my wife pretty happy.

This thing is more than a brew stand. Its also a brewing work center. Its not as nice as a dedicated room in the house, but given I don't have a room in the house its the best I can do.

The sink holds 9x17x30/231 = 19.8 gallons when full. Say 15 gallons max in use. Sink (15 gallons) + mash tun (15 gallons) + first boil kettle (10 gallons) + second boil kettle (15 gallons) = 55 gallons of usable liquid capacity on the stand. 55 x 8.33 lbs/gallon = 458 pounds of liquid, plus the gear on the stand.

That is a load of about 150 pounds per long tube. I'm glad I went with 2 x 2 tubing instead of 1.5 x 1.5 tubing.

I can't wait to use this thing.
 
I got the channels off the sink. I'll share this in case anyone runs into a similar problem.

I ended up sharpening the end of a medium sized chisel to a very fine point and then driving it between the channels and the lip of the sink.

DSC_9985.JPG


DSC_9988.JPG


It worked very well with very little metal distortion other than very small divits where the spot welds pulled before they broke.

DSC_9990.JPG


I don't know how this could have been avoided as the thickness of the chisel meant that many of the spot welds broke before the chisel edge reached them. Essentially the chisel became a tool that pulled the channels from the lip, rather than slicing the welds.

A thinner chisel may have helped, but when the chisel was actually cutting the first few spot welds, it took a fair amount of hammering to break them. Thus a smaller, thinner chisel may have not been up for the task.

The broken spot welds left tiny sharp needles on the underside of the sink lip. I had to grind them off.

DSC_9993.JPG


Other than the divits, the lip material is largely in pristine condition, though there was a tiny bit of local bending and very minor stretching. I suspect the divits could be taken out entirely with a belt sander and welding the sink edge to the stand will take out any waviness that there is.

The build continues. Now that I have my sink ready, I can actually start building the frame. Yippee !
 
Why the table top on one side? Why not half on one end, half on the other? That seems like a long walk to get things. Just a thought.
 
Why the table top on one side? Why not half on one end, half on the other? That seems like a long walk to get things. Just a thought.

I wanted a desk type area to work on for weighing hops, keeping notes, etc, as well as a washing area to set down clean things, let things dry, etc. For that purpose, I like having one larger table top rather than 2 small ones. I had a similar setup on my old brewing stand and it was great. Its very handy to have a surface "right there" to put things on. Before that, I was storing things in a tray on the ground, on the (hot) brewstand itself, on a chair, etc. It was chaos.

As far as a place to set things while brewing, the stand has a detachable tray that goes in front of the vessels to set things on. The tray is 5" x 40 inches long. Its isolated from the stand itself so it won't be hot. Its on the drawings above. i hope that tray holds a lot of the more commonly needed brewing items for me.

Things like stirring spoons, hoses, etc will hang on a hanger on the boil kettle end of the stand.

As far as being a long way to walk, its less than 8 feet from the center of the far boil kettle to the inner part of the shelf and there is a tray in front of the kettles. That is WAY better than how I used to brew, especially back in the day when I was cleaning in the kitchen and mashing and boiling in the garage and they were 40 feet and some stairs apart.

I think that putting the sink right on the stand will address and simplify the "sanitation and cleaning is 80% of brewing" aspect of a brew day. And hopefully some smart automation will address the other 30% known as "wait for the pot to get up to temp and then watch it closely for hours".

We'll see how this all plays out when I use it.

Back to welding on my stand...
 
After I cut the channel off the sink, I started lengthening the long members. (4 of them.)

Here is how I clamped them, so they would stay straight when they were welded.
DSC_9997.JPG


It worked pretty well. They were straight when I was done.

Close up of the prep, ie bevel the edges for better penetration and so that the weld doesn't stick way out.
DSC_9999.JPG


TIG welded. Not the prettiest, but good penetration and a strong weld.
DSC_0006.JPG


Rough grind down. I'll hit is with a flapper wheel and sanding disk and the joint should be more or less invisible.
DSC_0005.JPG


I'm glad that job is done.
 
I tacked welded the upper frame together to get a feel where things should go, specifically, where I need to drill holes. I'll break the welds to drill the holes and then weld it up permanently later.

DSC_0014.JPG


DSC_0016.JPG


DSC_0018.JPG


Excuse the mess in my garage. I have a few projects on the go, with lots of things currently being stored.

These are the 11 gallon vessels. I haven't bought the 20.5 gallon pots yet. They are larger in diameter, 18 7/8" versus 15", IIRC. There will be very little room between the big pots when they are used.

The pots are sitting on a piece of rack I had handy. The pots are really going to sit on grills above the burners, not the stand itself. I'm doing that so the stand doesn't get hot from being heated up by the burners.

This is the garage, cleaned up, that I will be brewing in. Its heated and insulated. I'll probably ferment in it too.

I'm not exactly sure how I am doing to hold the sink in, now that I cut off the channels. The channels had to be cut off to fit it in that frame. I just need to come up with some other way to hold it in. I was going to weld it in, but the fit is so tight that I have to remove the sink to get the nut on the faucet. So welding is probably out.

The camera angle makes it look longer than it is. It is long, but when you stand in front of it and visualize brewing activities, it isn't bad.
 
You're quite the hand at welding.. I have 15 years as a machinist but -0- welding experience. It's something that I really want to learn how to do but just haven't gotten around to.
 
I think by the time this thing is done you'll need to buy a 12' trailer for it ;)

It fits in the bed of a truck with an 8 foot bed, which I happen to have. Its going to take a couple guys to lift it up there though.
 
You're quite the hand at welding.. I have 15 years as a machinist but -0- welding experience. It's something that I really want to learn how to do but just haven't gotten around to.

Thanks.

Those are among some of the first TIG welds I've ever done. I have lots of stick welding time, but not very much MIG or TIG.

I have to say that TIG welder is the cat's meow for this project. I'm always amazed at the arc and heat control they have. It was a piece of cake welding that tubing. I was in a hurry and just throwing down whatever bead I could to get something together, knowing that they were going to be ground down. I hope to have prettier welds when I try harder.
 
How are you getting water into Zeus? Is see the hot water heater for heating water, but it isn't clear what the source of your water is going to be. Is the plan to run a hose to the nearest faucet? Is there water filtration on there that I just can not see?
 
How are you getting water into Zeus? Is see the hot water heater for heating water, but it isn't clear what the source of your water is going to be. Is the plan to run a hose to the nearest faucet? Is there water filtration on there that I just can not see?

Zeus needs a pressurized water connection to run, or at least use the hot water heater, run the sink and fill the mash tun via the manifold. This connection is provided by an RV hose connected to a cold water faucet.

Zeus could always be used without a pressurized water connection by not using the hot water heater, sink and by manually filling the vessels with water.

Zeus also has connections for compressed air, natural gas (or propane), 120VAC and discharge water.

I didn't draw these connections. They happen via a series of valves on the boil kettle side of the lower shelf. All (most) of the wiring and plumbing for the stand is located under the lower shelf.

FYI, IIRC the hot water heater needs 15 PSI to operate properly.

A big problem that I haven't resolved yet is how to have pressurized water for the hot water heater and sink but yet low pressure (9 PSI) hot and cold water for the manifold. The manifold pressures need to be low or a wrongly opened or closed valve will submit the pump head and silicone hoses to the full supply pressure (30+ PSI), something neither of them can tolerate.

I haven't spent any time diagramming or explaining this part of Zeus. I'm hoping it will become apparent when I build it.
 
It's looking awesome!
Where is the water heaters flue going to discharge?

I'm not sure how you could get low pressure hot through a water heater as that's 1 of the reasons we have them the only way I personally can think of doing it is

Getting the smallest copper cylinder possible and having a small header tank and an immersion heater in the tank and using your heater for your tap....but it wouldn't be worth it for the price of the heater and it wouldn't be portable unless you had the cylinder set up on another frame with casters connected with flexible /push fit john guest fittings, snap on snap off for storage,

Hope you can come up with a way though!
 
Or it's just came to me there are fittings called pressure reducing valves, we in the uk use them on new build houses to limit the pressure for the plastic pipe workload only thing is I'm not sure how low you can turn then down, I could phone my merchants tomorrow if that would help?
 

Latest posts

Back
Top