• Please visit and share your knowledge at our sister communities:
  • If you have not, please join our official Homebrewing Facebook Group!

    Homebrewing Facebook Group

Single Vessel Electric Build: 1.5 to 5 gallon batches

Homebrew Talk

Help Support Homebrew Talk:

This site may earn a commission from merchant affiliate links, including eBay, Amazon, and others.
Built a stand today:


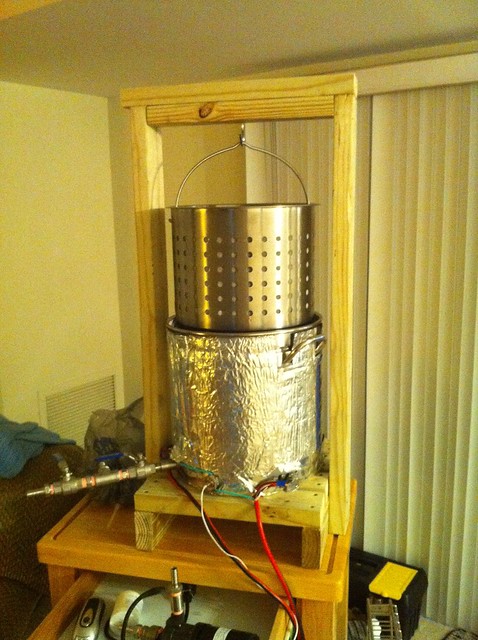
IMG_0091 by mmartz, on Flickr


One day I'll probably paint it, but not any time soon. I may also hang a piece of wood off the front and hang the pump vertical (so the input for the pump is straight up).

I also ordered 4 solenoid valves from ebay (to replace 4 of the 5 ball valves) and a plate chiller from duda diesel. The chillzilla freaked me out too much, so if someone wants to take the time to clean it, I'll sell it to you relatively cheap.

On a side note: 9/7 I'm brewing a test kit beer (PSA IPA) and on 9/11 I'm going to brew two Octoberfest beers... one a recipe I come up with, and one my friend Kyle comes up with. Kyle has helped me with some of the stuff as I went along. For my next project... I'm going to turn my kegerator into a kegbot! See: http://kegbot.org/ :ban: I'll start with just two flow sensors (I have a two tap kegerator) and a temp sensor... might eventually use RFID tags too.
 
Hey all, sorry I haven't posted in a while. Figured I should do an update/lessons learned post...

I've brewed with my rig 3 times now, and will do a fourth next weekend. I've learned most of the tricks for using it now and it's a very handy system. The ability to control it from my iPad/iphone from the living room is amazing.

Lesson learned number one: Dont put mesh inside a steamer basket. It is a PITA to clean. I can not emphasize this enough. I saw a post somewhere that someone found a place to order stainless steel mesh baskets from... THAT is what you want to use. The steamer part of the basket blocks the flow of water through the basket to clean it and stuff gets stuck in there. If you just had the mesh part it would be easy-peasy.

Thought number two (not sure how to fix this one): the piping/valves coming off the front of the kettle are a bit awkward. It's very long and bumps into things, and it's heavy... So in the long run I'm worried about it bending the kettle, messing up the seal. Next time i would probably connect a T joint directly to it and have the tubing go off to the side. Solenoid valve on one side of the T and ball valve on the other.

Lesson learned number three: invest in better quick disconnects for electronics. There is a bunch of stuff connected directly to the kettle (solenoid valves, temp sensors, etc). In order to clean the kettle... Spraying it out and dumping the rest... You need to disconnect the electronics to move it to the sink... Not very easy in the current arrangement. This could be solved by another problem in that the dip tube doesn't get everything out of the bottom. It would be better if the bottom of the kettle curved downward towards the center and either had a drain located there (preferrable and could solve number two above) or a dip tube to the center.

Thought number four: i would highly recommend insulation on the outside, it helps a lot and its cheap. The loc-line is also a very handy addition.

Lesson learned number five: pump placement is somewhat tricky and should be tried out before fixing it somewhere. I had my pump arranged vertically, but horizontally works better to get the pump primed. March pumps don't work unless they're primed.

All in all, it's a great setup. I'm probably going to buy one of those mesh baskets to replace my steamer setup... And eventually I might buy a new kettle and redo the dip tube/drainage. I'd also be curious to see of the heating elements could be mounted from the bottom (would get a better seal that way, but don't have leaks now so I'm not as worried about it.)

Cheers!
:mug:
 
Another update... I decided to follow my own lessons learned. I've purchased a new kettle and will be soldering a triclover ferrule at the bottom for a drain (per: https://www.homebrewtalk.com/f51/soldering-stainless-steel-155782/). It will be setup like this:

Ferrule (small part mounted to the bottom of the kettle) --> triclover elbow --> triclover-to-1/2" Male NPT --> solenoid valve --> 1/2" Barb --> silicone tubing --> barb/pump

At the pump outlet, I'm going to have an T-joint that has a ball valve w/barb on one side (lowest point in the system where i can drain everything) and the other side will lead to the current setup with solenoid valves/plate chiller/loc-line

The triclover fittings will allow me to disconnect everything below that first ferrule and make it nice and clean looking. Everything from the ferrule to that first barb will be mounted under my current stand. The drain will be towards the back of the kettle (facing the front) so if I can tip it back a little it should drain 99% of the water out of the kettle.

Since I'm not worried about smaller batches at this point... I'll place the heating elements and the temp sensor both in the rear and as low as practical... meaning it will look nicer in the front. On my original build I sorta messed this part up... I put the first heating element a bit too low and it took a while to get it to seal properly.

(I'd draw a picture but I'm lazy at the moment, can diagram it if someone is interested).

I also ordered a stainless steel mesh basket from anysizebasket.com I got a 13" diameter basket x 12 in high of 30 size mesh, which should fix my cleaning problem nicely. (The new kettle diameter is 15 in, so I did check that out)

Now all I need to do is figure out the quick disconnects for electronics and I'll be set!

Cheers,

:mug:
 
Update: Ordered a bunch of parts for a new control panel. It will be similar to a combination of http://www.theelectricbrewery.com/ and this post: https://www.homebrewtalk.com/f170/electric-question-153310. Same enclosure and stuff as the electric brewery's, but I will be integrating my BCS-460 with it.

The enclosure, heat sinks and switches/LEDs were purchased from ebay, and a lot of the other electrical stuff were purchased from McMaster-Carr.

I'm also still waiting on parts for the rest of my conversion. I ordered two new heating elements (these are chrome plated which should help with the rust problem).

Edit: Got the heating elements today... still waiting on the triclover fittings. I went ahead and drilled the holes for the heating elements and temp sensor. The pilot hole for the drain is below the temp sensor.


Untitled by mmartz, on Flickr

It's a similar setup to my old version, except everything is going to be in the back instead of the front.

Cheers,

:mug:
 

Latest posts

Back
Top