• Please visit and share your knowledge at our sister communities:
  • If you have not, please join our official Homebrewing Facebook Group!

    Homebrewing Facebook Group

Single Tier HERMS build

Homebrew Talk

Help Support Homebrew Talk:

This site may earn a commission from merchant affiliate links, including eBay, Amazon, and others.
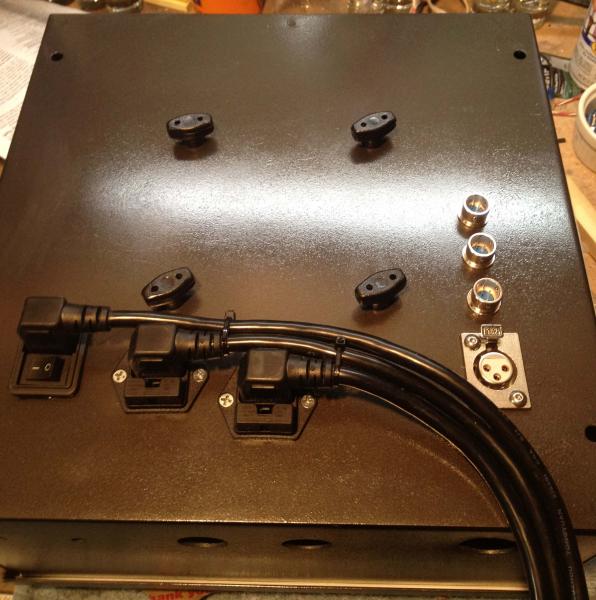
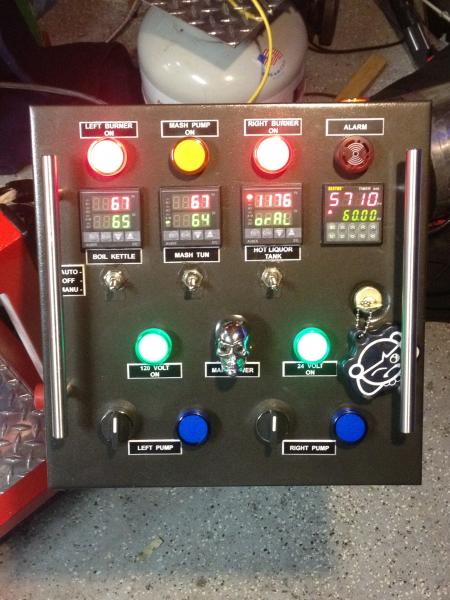
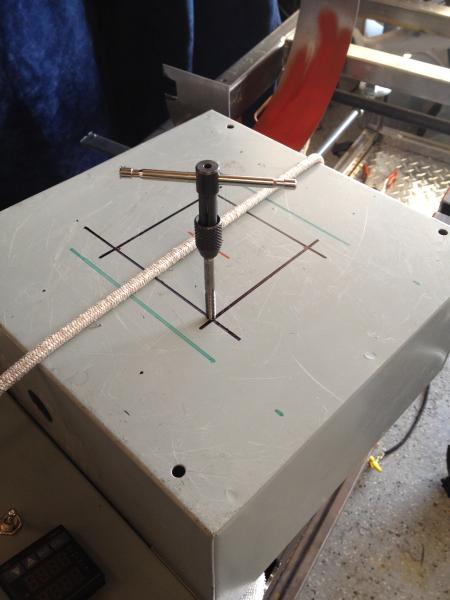
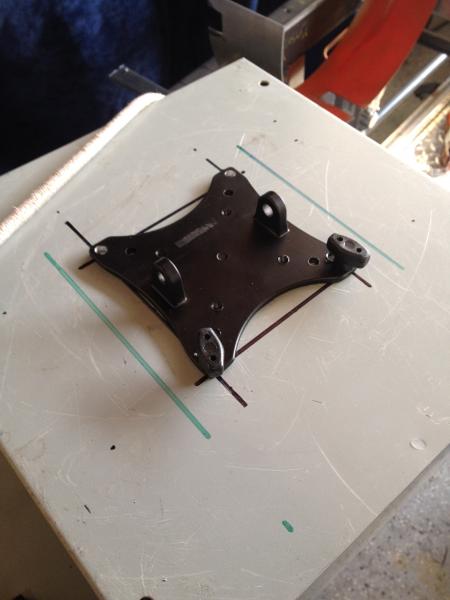
the back side of the Control panel. First I wanted to make a mount and I wanted to use a Flat Panel TV mount. I found a nice adjustable arm that was rated for 33 pounds so I tap'd the back for machine screws and attached the arm to the cart. The back of the panel has the Main power in (Switched) and the two march pumps out (fused). at the bottom I installed and XLR out to plug the Gas Valves into. The three wires in the XLR are as follows. the center pin is the 24v common. The left pin is the TH connection on the gas valve for the BK and the right pin is the TH connection for the HLT gas Valve.. The other three connectors are for the RTD's BK, MASH and HLT
iphone 379.jpg


iphone 381.jpg


iphone 508.jpg
 
Here's the flat panel mount I got. I made it easily removable by making attach with plastic thumb screws and having all the connections removable.

controlarm.jpg
 
:mug: Thanx so much.. Its all ideas I took from here and ran with them, throwing in my own creativity.. I cant wait to brew again.. Ive been idle for 3 months now..
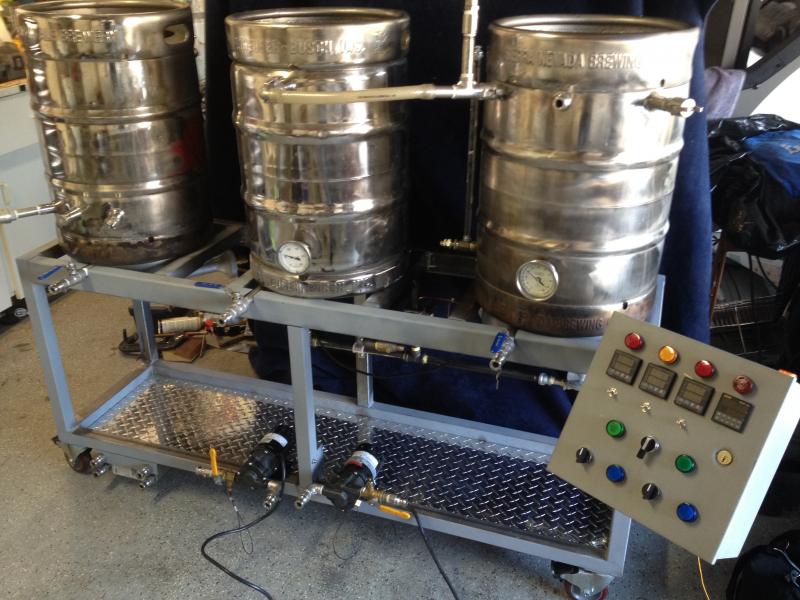
 
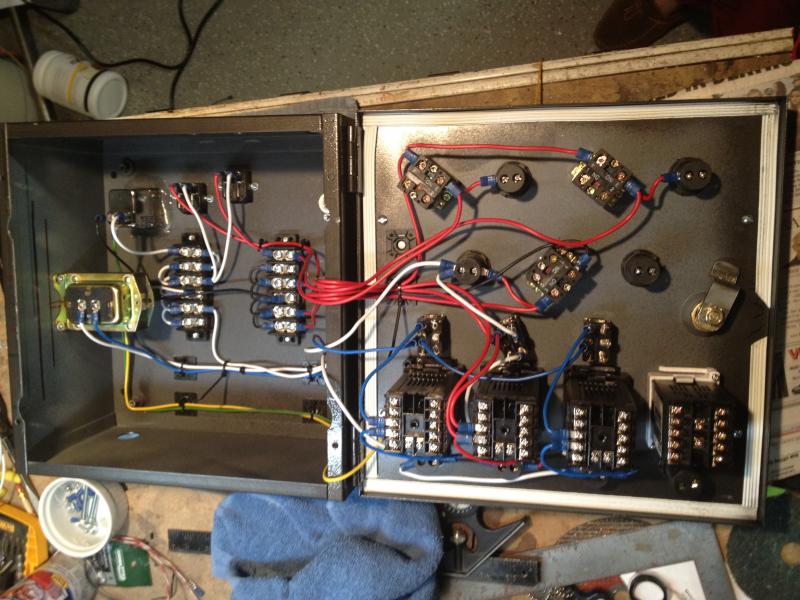
I mocked it up befor I painted the Control panel.. Next up is the wiring of the control panel.. Something Im gonna have to do a lot of research on first

iphone 390.jpg
 
Here's my youtube video of the control panel arm set up
[ame="http://youtu.be/V865XF3NFKk"]http://youtu.be/V865XF3NFKk[/ame]
 
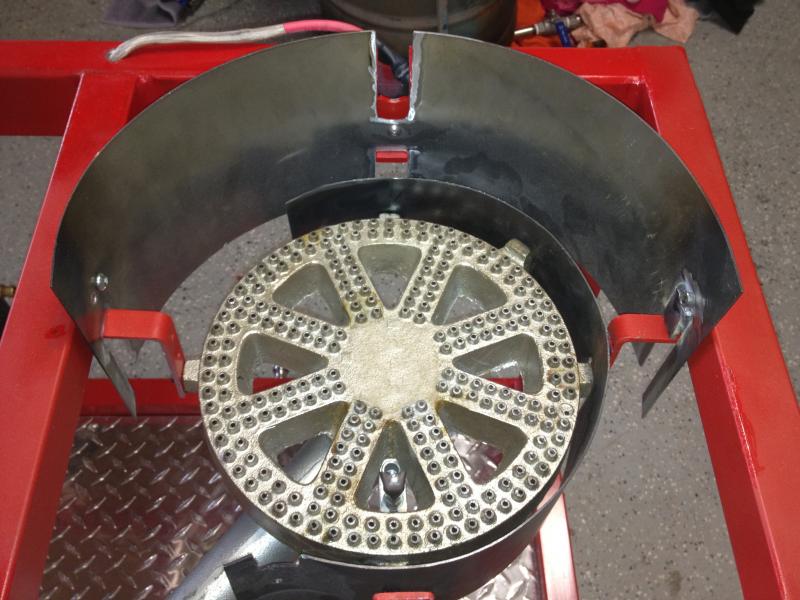
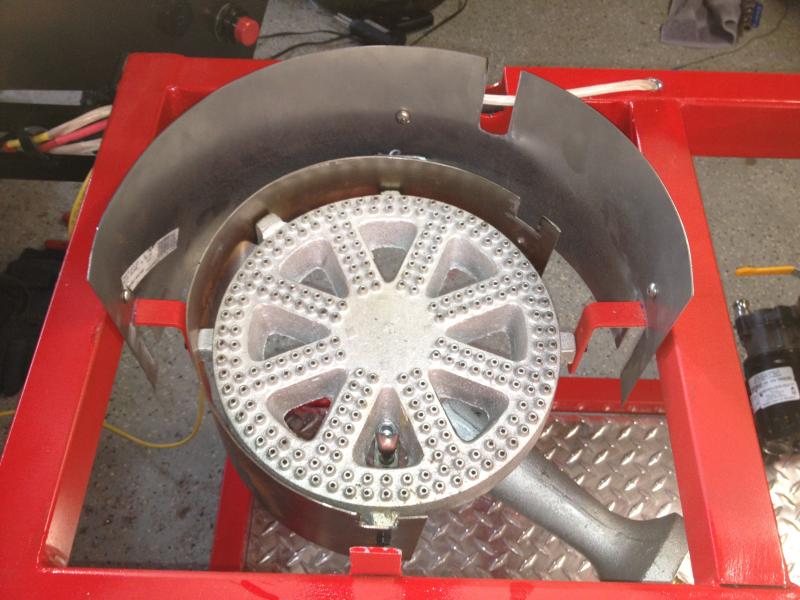
On to the Burner heat shields. I went with two because one did not protect enough. I want the exhaust gases to vent to the rear. This is not completely done but this is what I have so far. Notice the Shields go up above the deck level. thats because they fit tightly to the inside edge of the Keg bottom.. No heat can escape up those sides.. The exhaust heat is directed to the back and up. / next step is to fabricate an exhaust chute on each side.

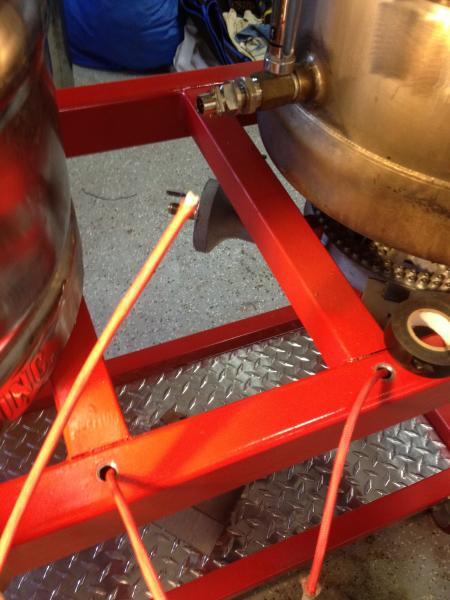
Bottom pic you can see the termination / connector to the RTD probe hanging. all wired inside the frame and color coded heat shrink tube. (Red = BK, Yellow = Mash and Green = HLT)

Iphone Camera 675.jpg


Iphone Camera 674.jpg


Iphone Camera 676.jpg
 
I ran every single wire inside the frame of the Stand. Here's the RTD Thermo connectors comming up through the front frame.. They are made using Kal's method www.theelectricbrewery.com/temperature-probes
As you can see here though I additionally covered them in a third layer. Its a product called Insultherm.. http://www.ebay.com/sch/i.html?_nkw=INSULTHERM+1200+deg.F&_sacat=0&_odkw=INSULTHERM+1200+deg.F+10+feet&_osacat=0&_trksid=p3286.c0.m270.l1313

It can handle up to 1200F. first pic is with the Insultherm on the cable. the second pic is befor I put it on.

Iphone Camera 671.jpg


Iphone Camera 669.jpg
 
drkwoods said:
Notice the Shields go up above the deck level. thats because they fit tightly to the inside edge of the Keg bottom.. No heat can escape up those sides..

CLEVER! Nice work.

Fingers crossed there are no issues with the wires inside the insulation layer getting overheated - but I love the build! Lots of great features being implemented.
 
CLEVER! Nice work.

Fingers crossed there are no issues with the wires inside the insulation layer getting overheated - but I love the build! Lots of great features being implemented.
I put the wires only in the front and front down posts. no where near anything that heats up. (since I have it designed to exhaust the heat to the rear) I tested this first.. I also mounted the heat shrouds with a fibrous fire resistant washer to reduce transfer of heat to the stand.
 
Great job so far.
Seems like you invest a lot of background work too.
 
Very nice build! I'm interested to see what you come up with for venting the gas buildup underneath the kegs. I'm having the same issue with my stand and can't figure out a way around it. My flame is very weak because of this... I was concidering using a plasma cutter to cut slots in the bottom of the keg skirt, but wasn't sure how that would effect the overall heating times...
 
I tested the idea of the two shrouds around the burner. I got great results in the front.. the rail heated up to only 100f . Which was really just warm to the touch not hot.. So Im pretty confident the wiring is gonna be fine.. But the back rail was so hot, it smoked the paint right off. I knew that was gonna happen but I wanted to see how much. So Im adding more heat shield from about 9pm to 12 noon on the clock face..So that only that one corner is left open and I can build my heat (exhaust) guide up an out from there. I also noticed that I may have to add some forced air into these burners.. Just too much yellow flame...I put a computer fan near the opening and forced air in and the flame was beautiful.. So Im gonna work that idea too
 
drkwoods said:
I put the wires only in the front and front down posts. no where near anything that heats up. I tested this first.. I also mounted the heat shrouds with a fibrous fire resistant washer to reduce transfer of heat to the stand.

Cleverer!
 
Subscribed...looking great... I may hit you up for questions when I start my build.
 
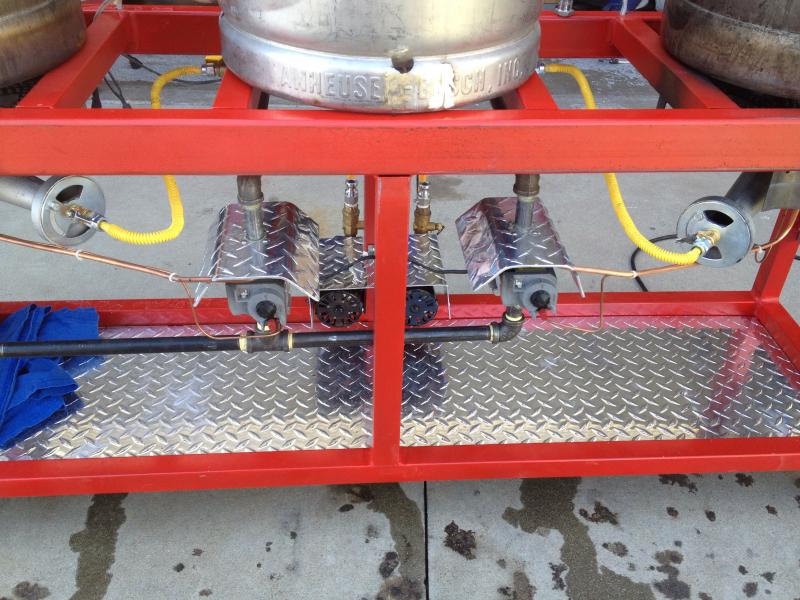
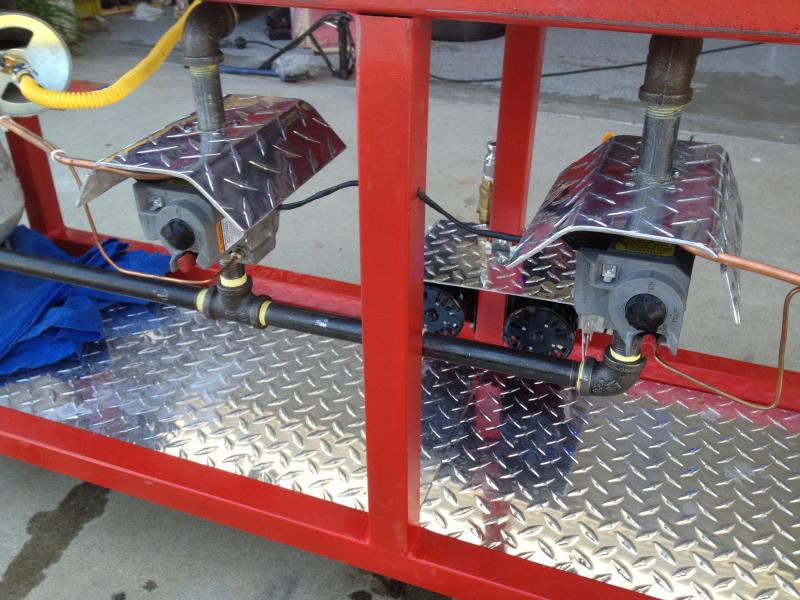
finished bending the diamond plate for the Valve protection and pump protection.. I also spend quite a bit of time routing the pilots and thermocouples so it looked clean..

Iphone Camera 777.jpg


Iphone Camera 778.jpg
 
Aw the diamond plate always looks sick but you did a really good job on the details. Looks great!

Did you get your back-rail-overheating prob knocked out? If so how'd you protect it?
 
Thanxx iijakii:mug:
As far as the back rail heat/exhaust prob, I have an idea of what I wanna try but itll be a couple days to weld that up.. i'll def show my idea after I test it and Im happy or not with it..
 
added a Video to YouTube about the first light up of the burners, enjoy
 
Last edited by a moderator:
Any chance you have a wiring diagram for your panel? Thanks a lot for including so many links, makes things very easy for those of us planning similar builds.
 
Back
Top