• Please visit and share your knowledge at our sister communities:
  • If you have not, please join our official Homebrewing Facebook Group!

    Homebrewing Facebook Group

Show your BIAB Stand/Set up

Homebrew Talk

Help Support Homebrew Talk:

This site may earn a commission from merchant affiliate links, including eBay, Amazon, and others.
Do you see much grain coming through when re-circulating?


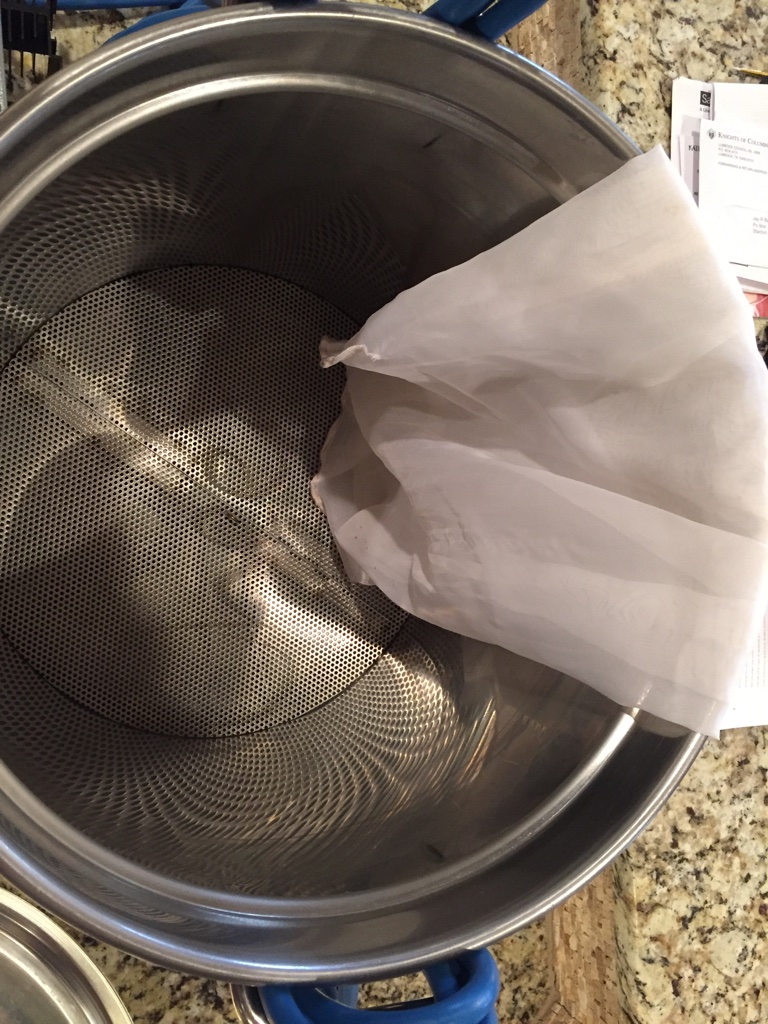
Well the amount of grain is really dependent upon your system. I crush really loose (.050 vs. .008-.010 in some BIAB systems). So my filter bed is more like a traditional system. With the way I brew I don't get any pieces of grain because of my crush and the 400 micron basket that won't let it through. Hope that helps.
 
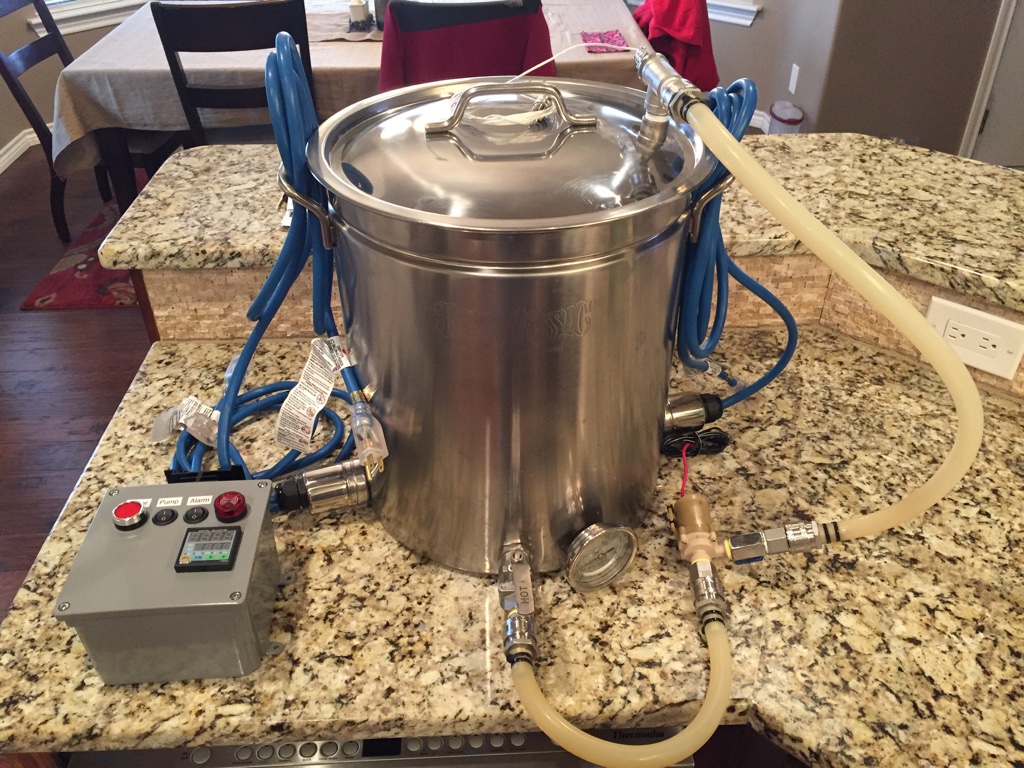
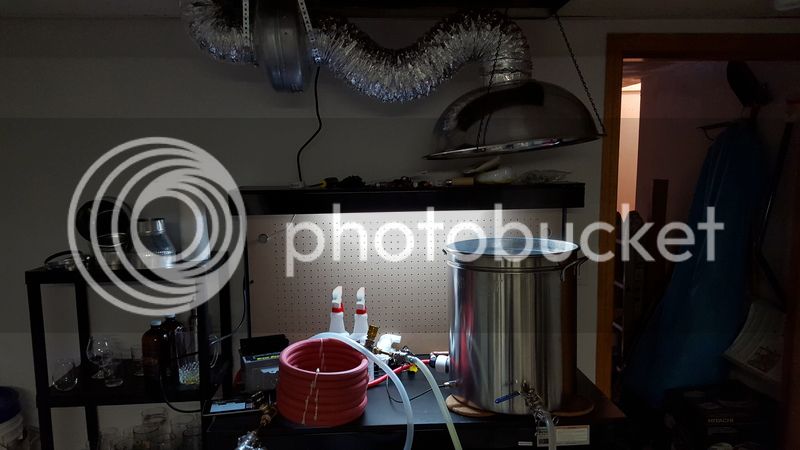
I don't know why I built this system but I did; I already own a 220v 15g BrewBoss setup.

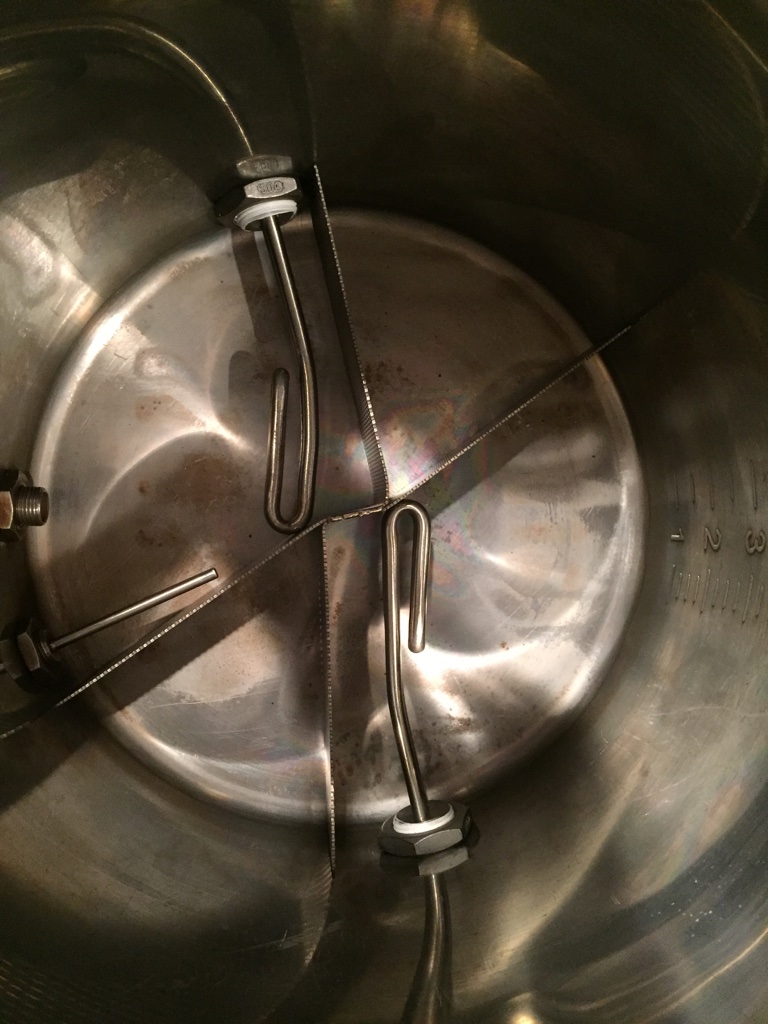
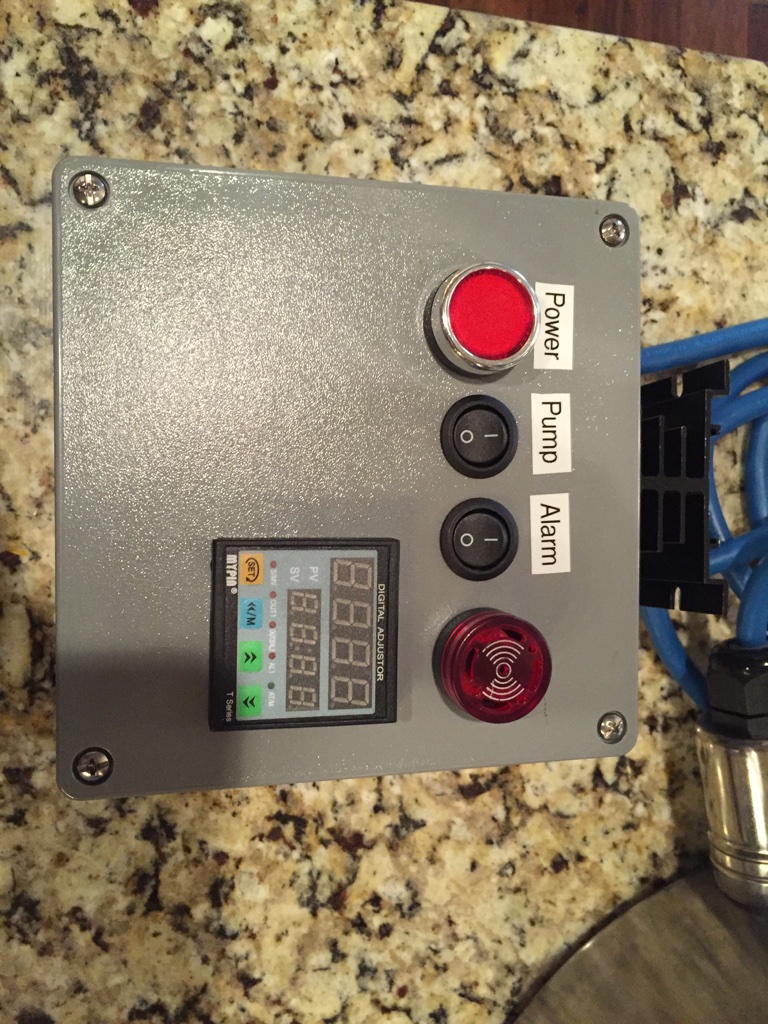
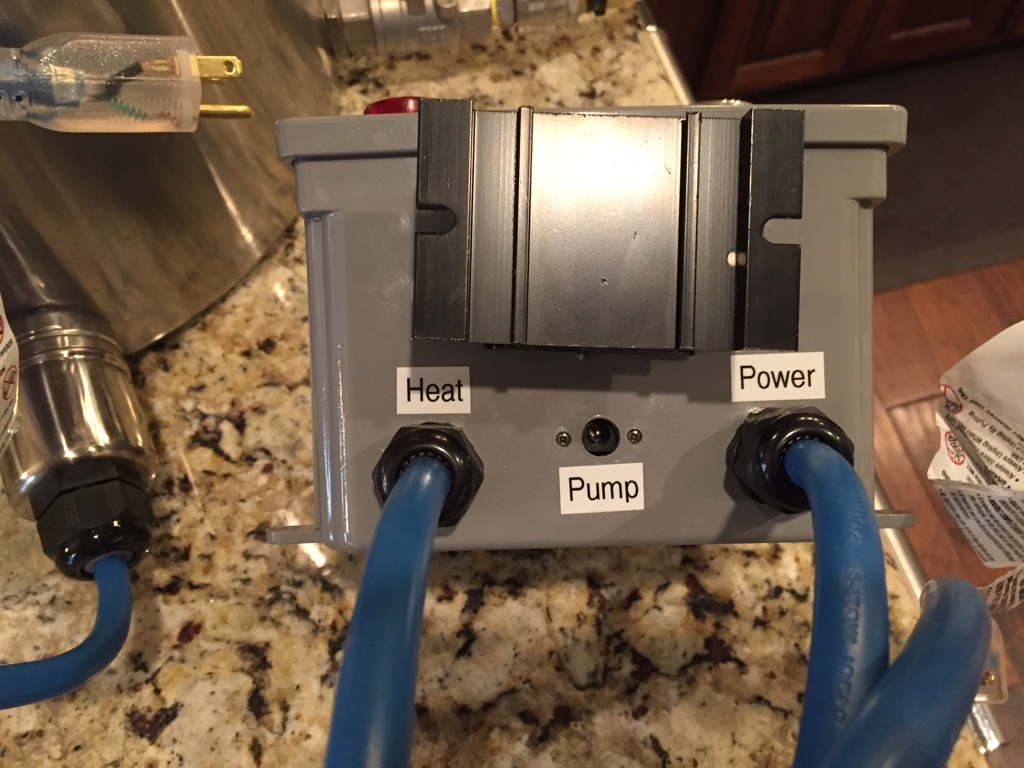
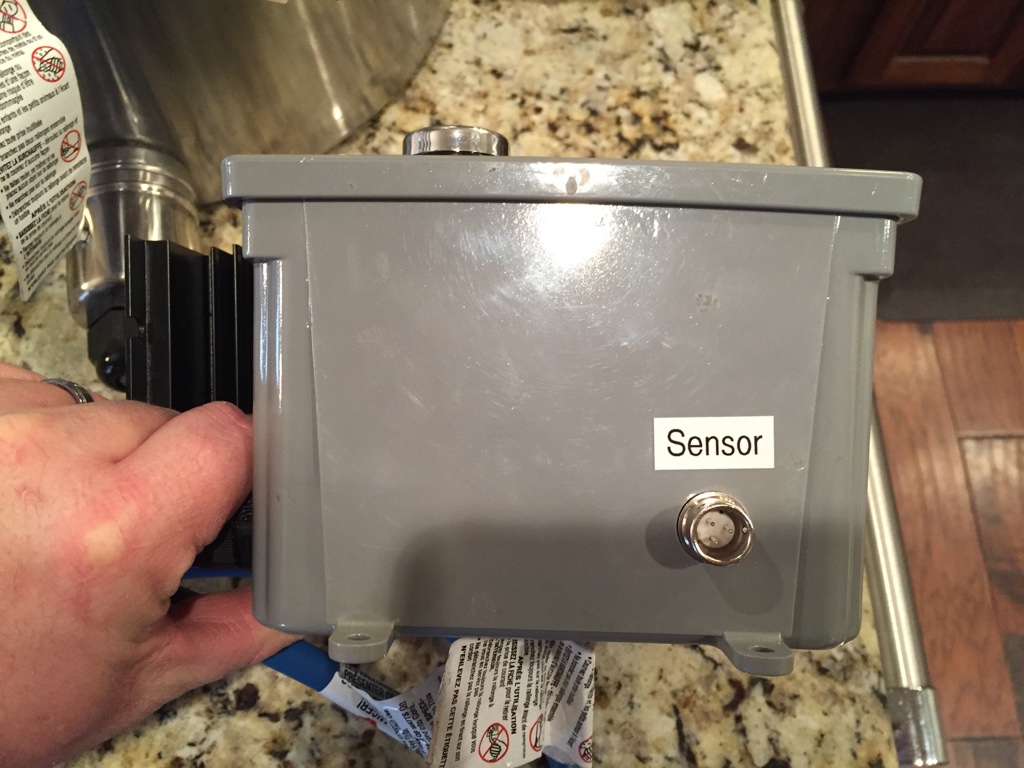
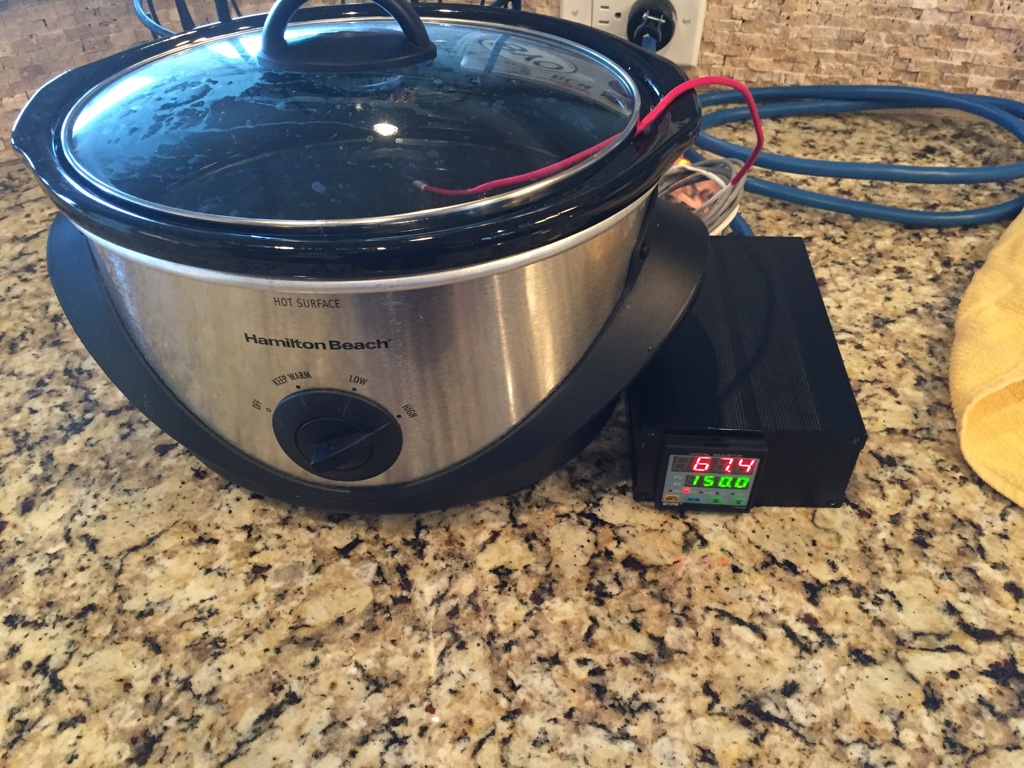
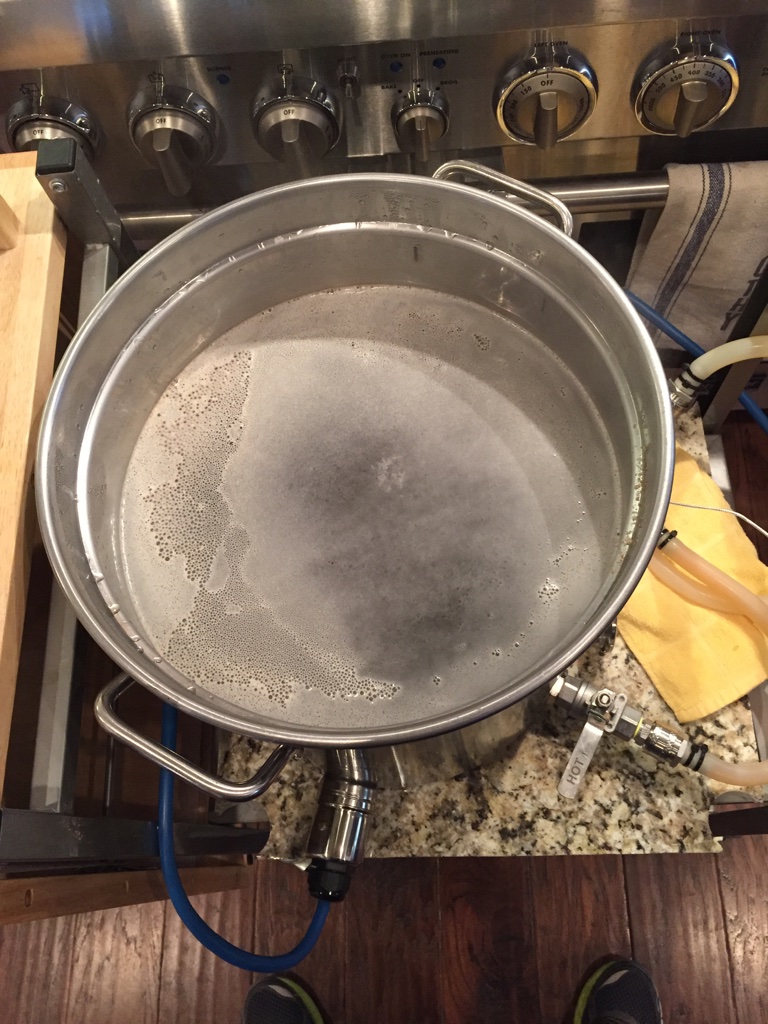
It is a dual 120v system with 1500w heaters 10gal Bayou Classic kettle, modeled after a BrauSupply system. While I was at it built a Sous Vide controller also, I was planning on running a controller for both heaters but realized it was necessary so it became a Sous Vide controller.

EDIT: Added pics of the system in use. A partial mash Session beer.

thumb_IMG_1359_1024.jpg


thumb_IMG_1360_1024.jpg


thumb_IMG_1361_1024.jpg


thumb_IMG_1362_1024.jpg


thumb_IMG_1363_1024.jpg


thumb_IMG_1364_1024.jpg


thumb_IMG_1365_1024.jpg


thumb_IMG_1355_1024.jpg


thumb_IMG_1383_1024.jpg


thumb_IMG_1384_1024.jpg
 
I don't know why I built this system but I did; I already own a 220v 15g BrewBoss setup.

Awesome build! And I agree, it is curious that you built this with a Brew Boss in hand. Is this the system that was giving you the recirculation issues? Notice any performance difference between the false bottom and the basket?

Last question. If I may ask, how much was the total cost?
 
Awesome build! And I agree, it is curious that you built this with a Brew Boss in hand. Is this the system that was giving you the recirculation issues? Notice any performance difference between the false bottom and the basket?

Last question. If I may ask, how much was the total cost?

My wife says I get bored and think up crazy things like this to build, and once I start planning I finish it. It started out as a 2.5-3gal 120v BIAB system and quickly turned into this.

The BrewBoss is the system that gave me recirculation issues, those have been resolved by grain crush mostly then added a false bottom. I have no numbers to back it up but I like the false bottoms better than the baskets. I have less flow issues with the false bottom, easier to clean than a basket, and have less drips/spills.

I've only ran one wet run/programming/boil off run and one Partial Mash through this system. Worked like a champ.

I already had the kettle and false bottom so price wasn't to bad.

Controller
PID/ssr/heatsink $45 http://www.ebay.com/itm/Manual-Auto...444060?hash=item43d8c2a65c:g:uj0AAOSwv0tVZUl~
Thermo $35 http://brausupply.com/collections/plumbing/products/1-5-rtd-pt-100-sensor
enclosure 4x4x2 $15 local hardware store
Alarm $6 http://www.ebay.com/itm/ATI-22mm-12...cator-Light-/221805674839?hash=item33a4a60157
Alarm Switch x2 $7.00 http://www.ebay.com/itm/One-On-Off-...olt-EC-1213-/171412421059?hash=item27e8f9f9c3
cord grips 8.46 http://www.ebay.com/itm/311180311734?_trksid=p2060353.m2749.l2649&ssPageName=STRK:MEBIDX:IT
3- 12ga 15ft extension cords 47.6 http://www.ebay.com/itm/111747323363?_trksid=p2060353.m2749.l2649&ssPageName=STRK:MEBIDX:IT
ac-dc converter 6.29 http://www.ebay.com/itm/161911791453?_trksid=p2060353.m2749.l2649&ssPageName=STRK:MEBIDX:IT
dc male/female power plugs 2.99 http://www.ebay.com/itm/301797603911?_trksid=p2060353.m2749.l2649&ssPageName=STRK:MEBIDX:IT
pushbutton switch 7 http://www.ebay.com/itm/291141763563?_trksid=p2060353.m2749.l2649&ssPageName=STRK:MEBIDX:IT
Total $180

Other
2 - 1500w $31 http://www.ebay.com/itm/321930407926?_trksid=p2060353.m2749.l2649&ssPageName=STRK:MEBIDX:IT
Element Enclosures $52 https://www.brewhardware.com/product_p/hotpod-ewl3.htm
qd female 1/2mpt 2x $7.95 $16 http://brausupply.com/products/copy-of-stainless-steel-quick-connect-female-to-1-2-mpt
qd male 1/2fpt 2x $7.95 $16 http://brausupply.com/products/copy-of-stainless-steel-quick-connect-male-to-1-2-fpt
qd female/barb 4x 11.95 $47.80 http://brausupply.com/products/stainless-steel-quick-connect-female-to-barb-1-2
SS T $4 http://brausupply.com/collections/plumbing/products/stainless-steel-tee-1-2-fpt
SS Nipple $5 http://brausupply.com/collections/plumbing/products/stainless-steel-1-2-mpt-x-1-2-hose-barb
24v pump $22 http://www.ebay.com/itm/Solar-DC-12...r-Pump-3M-F-/400809363445?hash=item5d521987f5
ss coupler $3 http://www.amazon.com/gp/product/B003GSL1V0/?tag=skimlinks_replacement-20
ss elbow $6 http://www.amazon.com/gp/product/B003GSKX82/?tag=skimlinks_replacement-20
ss solder kit $12 http://www.amazon.com/gp/product/B0015H6JYS/?tag=skimlinks_replacement-20
ss 1/2 npt hose barb $5 http://www.amazon.com/gp/product/B00IA7CFMQ/?tag=skimlinks_replacement-20
ss 1/2 mini ball valve $12 http://www.amazon.com/gp/product/B006VE3DPI/?tag=skimlinks_replacement-20
Total $232
Sub Total $412

44qt kettel (already have) $150 http://www.amazon.com/gp/product/B007TVYHXY/?tag=skimlinks_replacement-20
Silicon Tubing (already have) $20 http://www.northernbrewer.com/brewi...pment/tubing/1-2-id-silicone-high-temp-tubing
false bottom (already have) $125 http://www.norcalbrewingsolutions.com/store/False_Bottom_Bayou_Classic_1044.html
Total $295
Grand Total $707


Sous Vide
PID/SSR $33 http://www.amazon.com/gp/product/B0087O6T10/?tag=skimlinks_replacement-20
Wire/plugs/cordgrips Left overs from brew controller
enclosure $13 http://www.ebay.com/itm/121576973487?_trksid=p2060353.m2749.l2649&ssPageName=STRK:MEBIDX:IT
Total $46

I minimized shipping by trying to order from either the same vendors or vendors that had free shipping.
Used 2-3 different wiring diagrams from various posts here on HBT. Working on drawing up the actual one. Wishing I would have taken pictures along the road to illustrate the build.
I also wired all the 120v with 12ga wire to be able to upgrade to 20amp for 2000w elements or for a different kettle.
Now that I have found out how easy it is to solder stainless steel all my kettles will be getting soldered triclamp fittings down the road. I soldered the SS coupler to the lid.
Didn't pay attention, when ordering, but the cords are the one that have the little light in them when powered. So you can tell when the PID/SSR is firing the element. I thought it was a neat little bonus.
 
Last edited by a moderator:
I minimized shipping by trying to order from either the same vendors or vendors that had free shipping.
I try to do the same!

Used 2-3 different wiring diagrams from various posts here on HBT. Working on drawing up the actual one.
Any chance I can get a PM when that diagram is available? ;>)

Now that I have found out how easy it is to solder stainless steel all my kettles will be getting soldered triclamp fittings down the road. I soldered the SS coupler to the lid.
When I used to do appliance repair and refrigeration, I did silver solder all the time. been kind of leery about doing it on SS - any problems/stumbling blocks about Silver soldering SS that you might wish to share?

Didn't pay attention, when ordering, but the cords are the one that have the little light in them when powered. So you can tell when the PID/SSR is firing the element. I thought it was a neat little bonus.
I like that idea, never thought much about it, but that's like saving yourself a light in the control box, and it's right at the heat source!

Thanks for steering me this way - right now my decision rests between using a 240v 30A single element system and a 120v/30A dual element system - which, I think might mean that I'll have to run another #10 wire for my HERMS/Sparge pot anyways. It's a 45' run from the power box to the 'brew-room' but that's not a big deal in the long run (pardon the pun).

IOW, I'll either have to use 3 120v 2000w elements for the entire 2 kettle system, or 2 240v/4500w elements. I know the energy would probably be cheaper with the 240v elements, but I don't know if the 30A GFCI will handle both 4500w elements running at the same time. I've already bought the wire for this project, (#8 wire), but to run 50A I'd have to upgrade to #6, which would waste the long run of the #8 I've already paid for!
BTW, what the heck is a "Sous Vide" ?? I see a crock pot in the pix but I don't know if that is what you're talking about.

Just remembered one more question - How did you get a false bottom for a Bayou Classic that would fit without some space around the edges" I have an 8 gallon which is nominally 12", but with the rim for the basket, I can only get 11 1/2" in there, which will leave a space around the edges. Is your false bottom that flexible?
TIA
MT2sum
 
Last edited:
Any chance I can get a PM when that diagram is available? ;>)

Absolutely, wife gave birth so the diagram got put on the back burner.
Edit: added wiring diagram

pid wiring.png


When I used to do appliance repair and refrigeration, I did silver solder all the time. been kind of leery about doing it on SS - any problems/stumbling blocks about Silver soldering SS that you might wish to share?

Get the right solder/flux, do the proper prep work and heat as evenly as possible. Good video from Brewhardware.com on silver soldering. https://youtu.be/_NkHlDql8EU


BTW, what the heck is a "Sous Vide" ?? I see a crock pot in the pix but I don't know if that is what you're talking about.

Sous Vide is under vacuum water bath cooking. I use a PID to control the crockpot to maintain a set temp, the PID is sitting next to the crockpot. Example: Fill crockpot with water, plug it into the PID, place probe in the water, set my temp at 150 deg, take chicken breasts season them, vacuum seal them, place them in the 150deg water and leave them be for a few hours. Remove and a quick sear, tender juicy, tasty chicken.

Just remembered one more question - How did you get a false bottom for a Bayou Classic that would fit without some space around the edges" I have an 8 gallon which is nominally 12", but with the rim for the basket, I can only get 11 1/2" in there, which will leave a space around the edges. Is your false bottom that flexible?

It's a jaybird hinged false bottom. When you order he will have you get an exact measurement of your kettle diameter and he cuts it so its a tight fit. http://www.norcalbrewingsolutions.com/store/Conversion_Kettle_Bayou_Classic.html

The FB stand I modified to fit, its not perfect but it works. I'd like to get a different stand made down the road.

After it was all said and done and finding out how easy the silver soldering was I wish I would have bought the Triclover Solder radius flange hot pod from Brewhardware.com instead of the weldless/solderless. https://www.brewhardware.com/product_p/etc4s.htm

I want to upgrade all my e-kettles to the triclover hot pods, now.
 
Still a work in process. I need to get a cheap little hoist and I want to mount the pump and CFC somewhere.

20160324_130142_zpsgmti6bsk.jpg
 
Absolutely, wife gave birth so the diagram got put on the back burner.
Edit: added wiring diagram
View attachment 348396

Congrats on the newborn, hope everything is fine and mom & the little one are happy, healthy, and enjoying every minute of each other. We had 3, so I can understand how excited you folks are! :ban:

In the diagram, I only see 1 element (unless you're wiring them in series or series parallel, I forget which now becuz it's been about 40 years) - Is that the case, just showing the 'box' but actually wiring two elements?
With appliance repair, you once had to know and understand all of this electrical schematic/diagramatic stuff, but eventually you become a situation-diagnoser/parts-replacer becuz everything else is done for you!
TIA
 
Absolutely, wife gave birth so the diagram got put on the back burner.
Edit: added wiring diagram

View attachment 348396

I don't see anyway to kill the power to the element in the event of an SSR failure. The most common failure mode for SSR's is "closed," so if your SSR fails, your element will be stuck on.

Brew on :mug:
 
Also, I'd like to put something like this this into the control box to keep track of everything energy-wise - can you give me an idea of where you think that should go, in relation to the rest of the diagram - I'm thinking that it should go just after the stop switch, but that's just me, Any opinion one way or another?
 
Last edited:
I don't see anyway to kill the power to the element in the event of an SSR failure. The most common failure mode for SSR's is "closed," so if your SSR fails, your element will be stuck on.

Brew on :mug:
Seems like some are putting an electromechanical relay right after the SSR, because they fail in an 'open' position. Is that what you're getting at, or am I missing something else? What would be your recommendation?
 
Seems like some are putting an electromechanical relay right after the SSR, because they fail in an 'open' position. Is that what you're getting at, or am I missing something else? What would be your recommendation?

Yes, although I prefer to put the switch prior to the SSR (closer to the power feed.) For 240V systems you need a 2 pole switch, but for 120V you only need a single pole. Switch can be either purely mechanical (the Leviton 3032 series is good for a 240V system, but an ordinary light switch will work for 120V), or you can use an electromechanical contactor (high current relay.)

Such questions fit better in the Electric Brewing forum, where they will likely get more views by folks who can help.

Brew on :mug:
 
Congrats on the newborn, hope everything is fine and mom & the little one are happy, healthy, and enjoying every minute of each other. We had 3, so I can understand how excited you folks are! :ban:

In the diagram, I only see 1 element (unless you're wiring them in series or series parallel, I forget which now becuz it's been about 40 years) - Is that the case, just showing the 'box' but actually wiring two elements?
With appliance repair, you once had to know and understand all of this electrical schematic/diagramatic stuff, but eventually you become a situation-diagnoser/parts-replacer becuz everything else is done for you!
TIA


The second element plugs directly into the wall. I will eventually wire it to an SSR.

Run both elements full bore till I get about 5 deg to strike temp then unplug the direct wired element, and let the PID manage just the one element for the mash. After the mash plug in both elements to reach boil. Once boiling I leave the direct wired plugged in and control the boil with the second element. They are only 1500w each and not enough oomph to maintain a good boil with just one element.
 
I don't see anyway to kill the power to the element in the event of an SSR failure. The most common failure mode for SSR's is "closed," so if your SSR fails, your element will be stuck on.


Brew on :mug:


Thanks, I was wondering why most of the diagrams had switches for the element. I just thought it was a preference thing.
 
View attachment 257005
This is what I'm going to try. My setup is going to be very similar to yours. Just waiting for parts and pumps and such to get to Montana from all over the country and world.


I got one doesn't really do much more than hanging the hose back into the kettle I had higher hopes for it, if anyone wants to try it out I'd sell mine for what I have into it $10.00 shipped
 
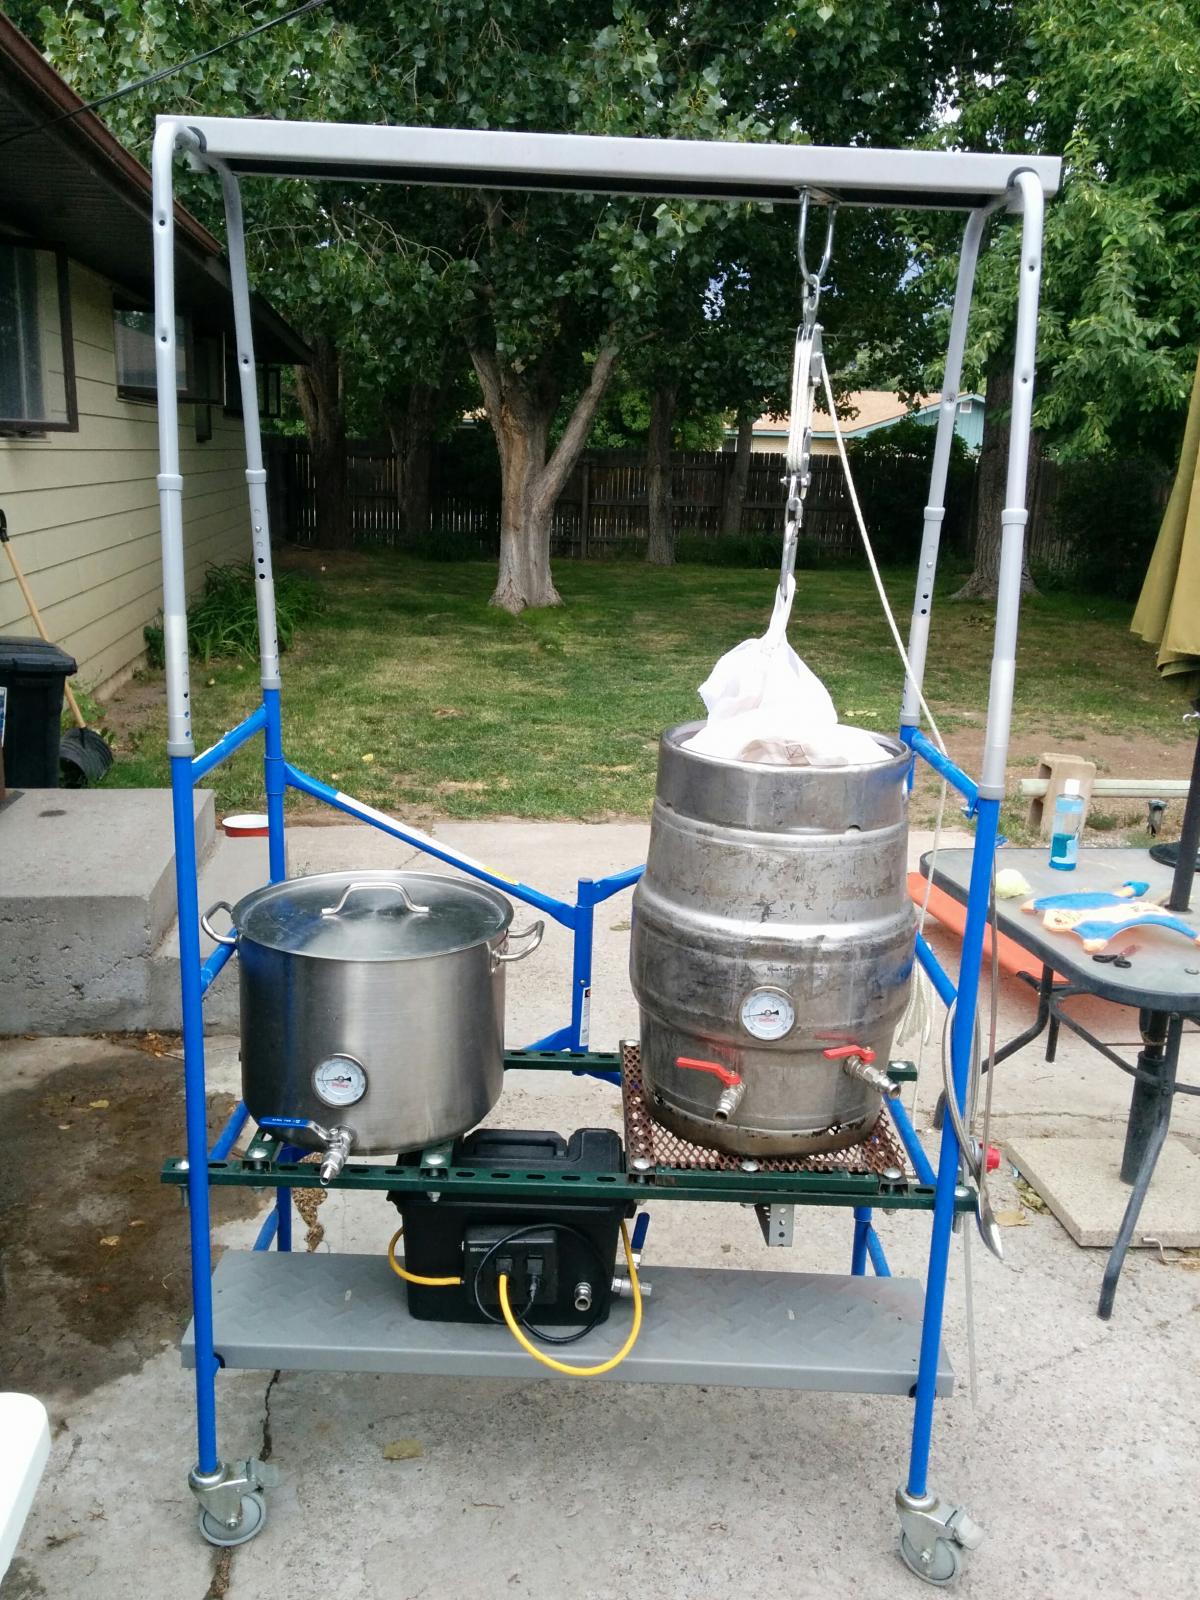
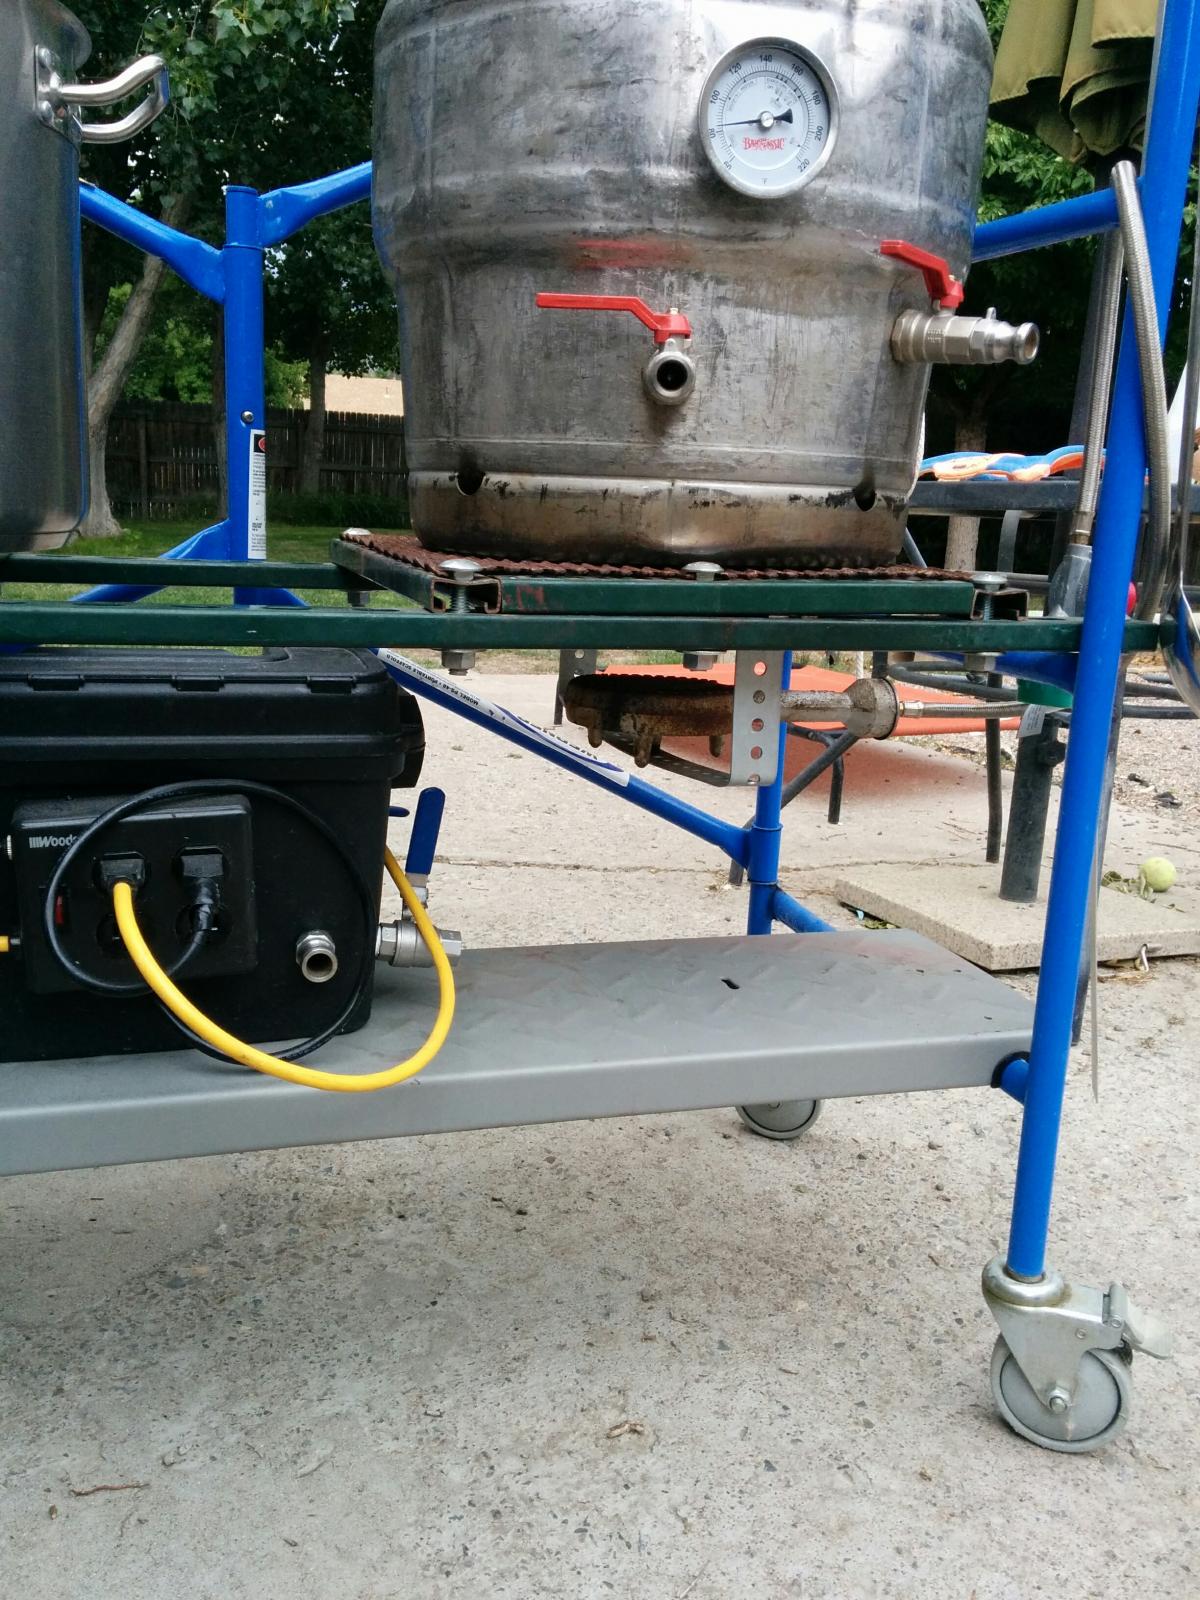
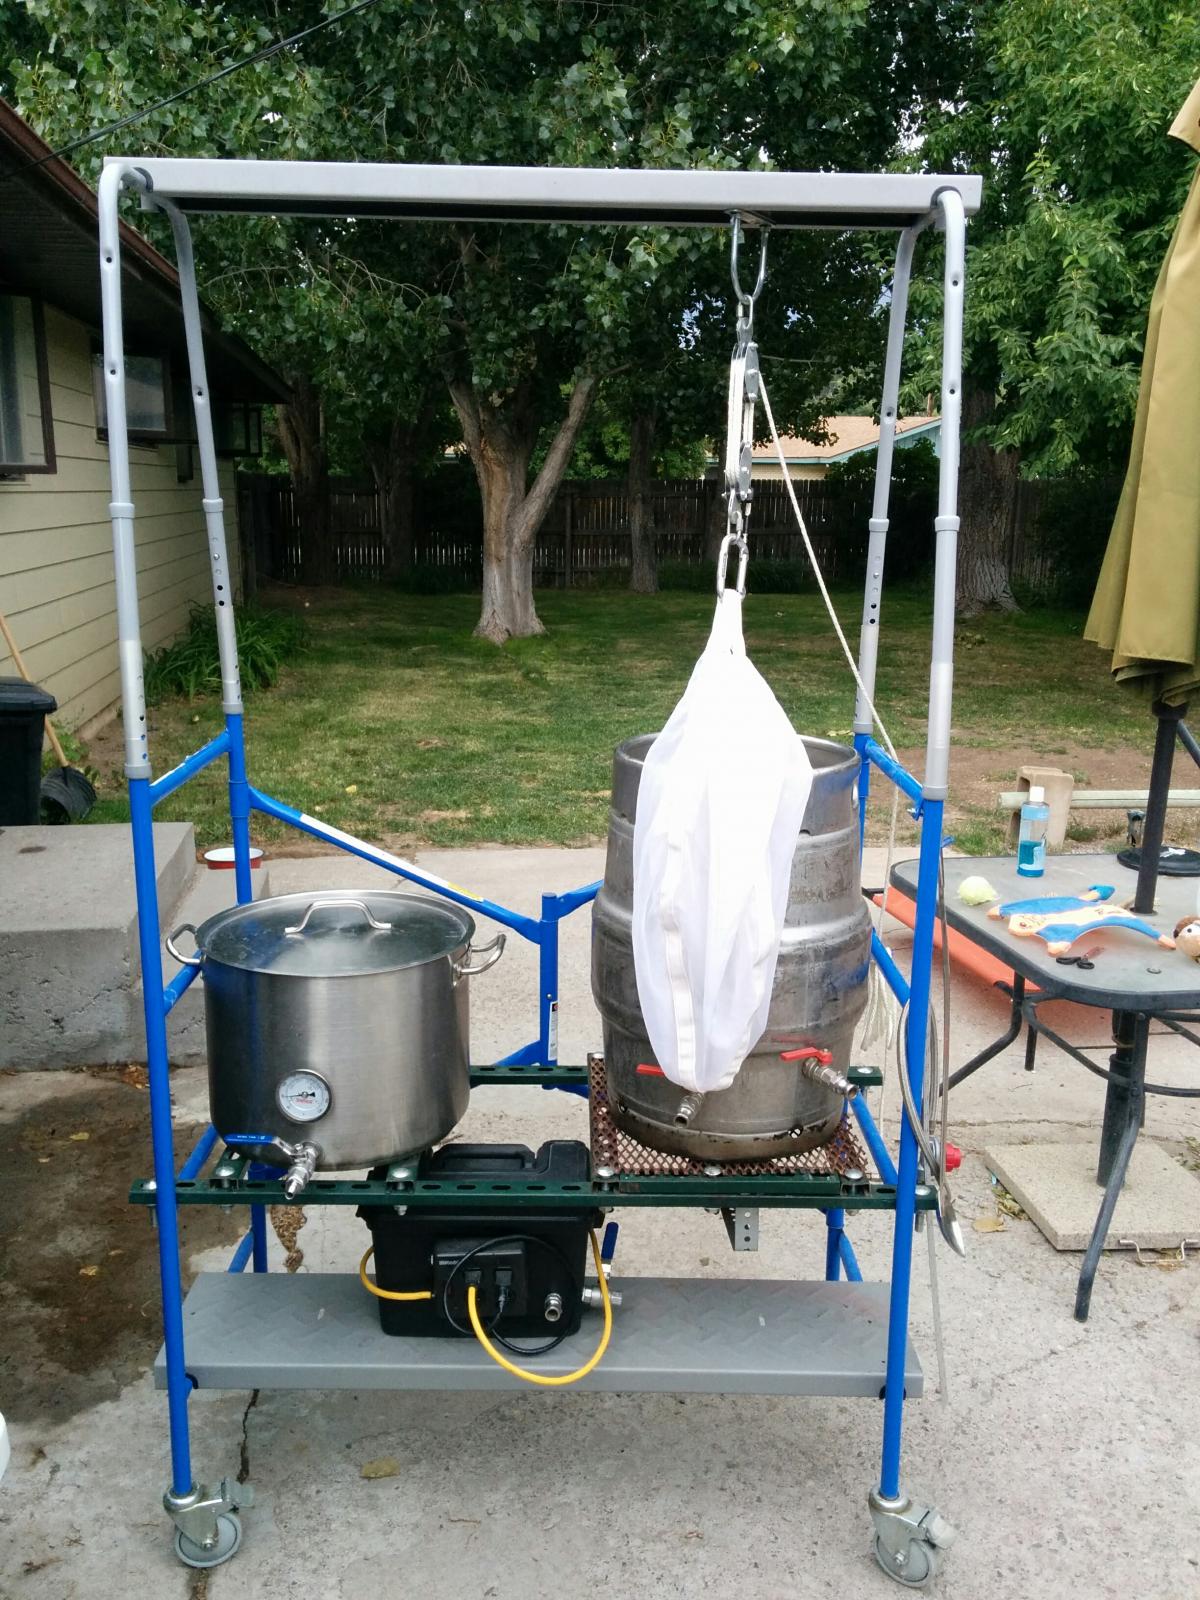
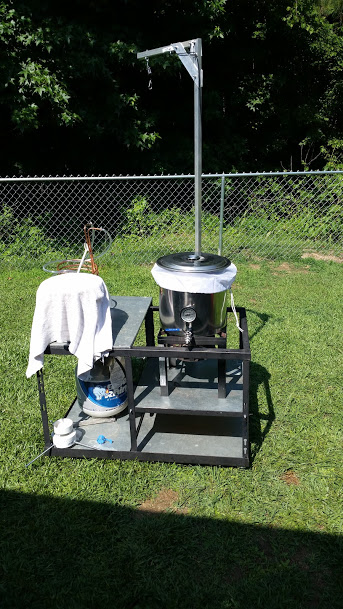
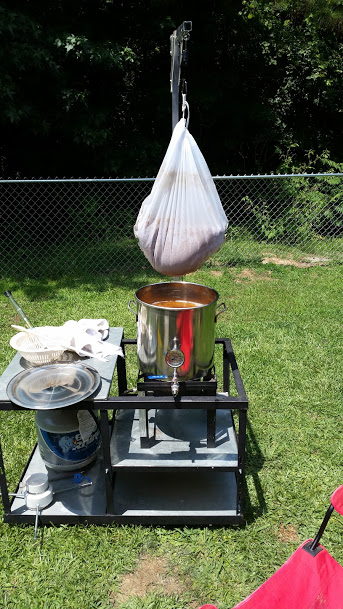
After reading tons of posts and drooling over tons of systems that I don't have the skill to build I was finally struck with a flash of inspiration. I built the strut shelf, burner mount, and pump toolbox a couple of years ago before switching to BIAB in an attempt to simplify my process. I knew I wanted a portable set up with a pulley to hoist the bag up and high enough to gravity drain into a carboy. I had some medical items lying around built out of telescoping tube material that just happened to fit over the top of the scaffold. The small scaffold shelf fit on top allowing me to attach the pulley set up, which can be repositioned over either kettle. I can't wait to brew on this... FINALLY, NO MORE LIFTING!!! If my fermentation chamber wasn't full I'd probably play hooky and brew... Slainte!

IMG_20160801_192532.jpg


IMG_20160801_192546.jpg


IMG_20160801_192619.jpg


IMG_20160801_192655.jpg
 
Went for minimum footprint on this build due to lack of storage space.
2'x2' footprint, rotating pulley arm, automated ball valves, electric heating. 5-15 gallon batches.

image-e1470398151764.jpeg


image-4-e1470398340250.jpeg


image-6-e1470398380985.jpeg


image-1-e1470398219810.jpeg
 
Every one of your builds has like 100 more parts than mine.

I have BIAB envy...

Sounds like while we are detoxing you will still be brewing after the apocalypse ;) Something to be said for gravity feed. Don't even need propane really, can probably just get good at controlling a fire... I think I need your address, or at least your post apocalypse bunker address, haha
 
Back
Top