Johnny_Duck
Member
- Joined
- May 24, 2017
- Messages
- 14
- Reaction score
- 13
Here’s mine using the thermal take fan from Amazon. Unfortunately, the throttle is no longer working and I can’t diagnose why. Oh well, time for a new build.


Ok I love that plastic ware. We have them, no more digging for a frecking lid.Nice setup! Mine is a bit less complicated and more seat of the pants. I used a new fan from MicroCenter and a plastic food storage container from Walmart. The fan is wire to a potentiometer from Radio Shack. I used a 12V transformer that I had laying around fitted to a plug from the Shack. I plan on redoing it with new controls to control the speed more accurately. The neodimium magnets are from Michael's and are epoxied to the hub of the fan.
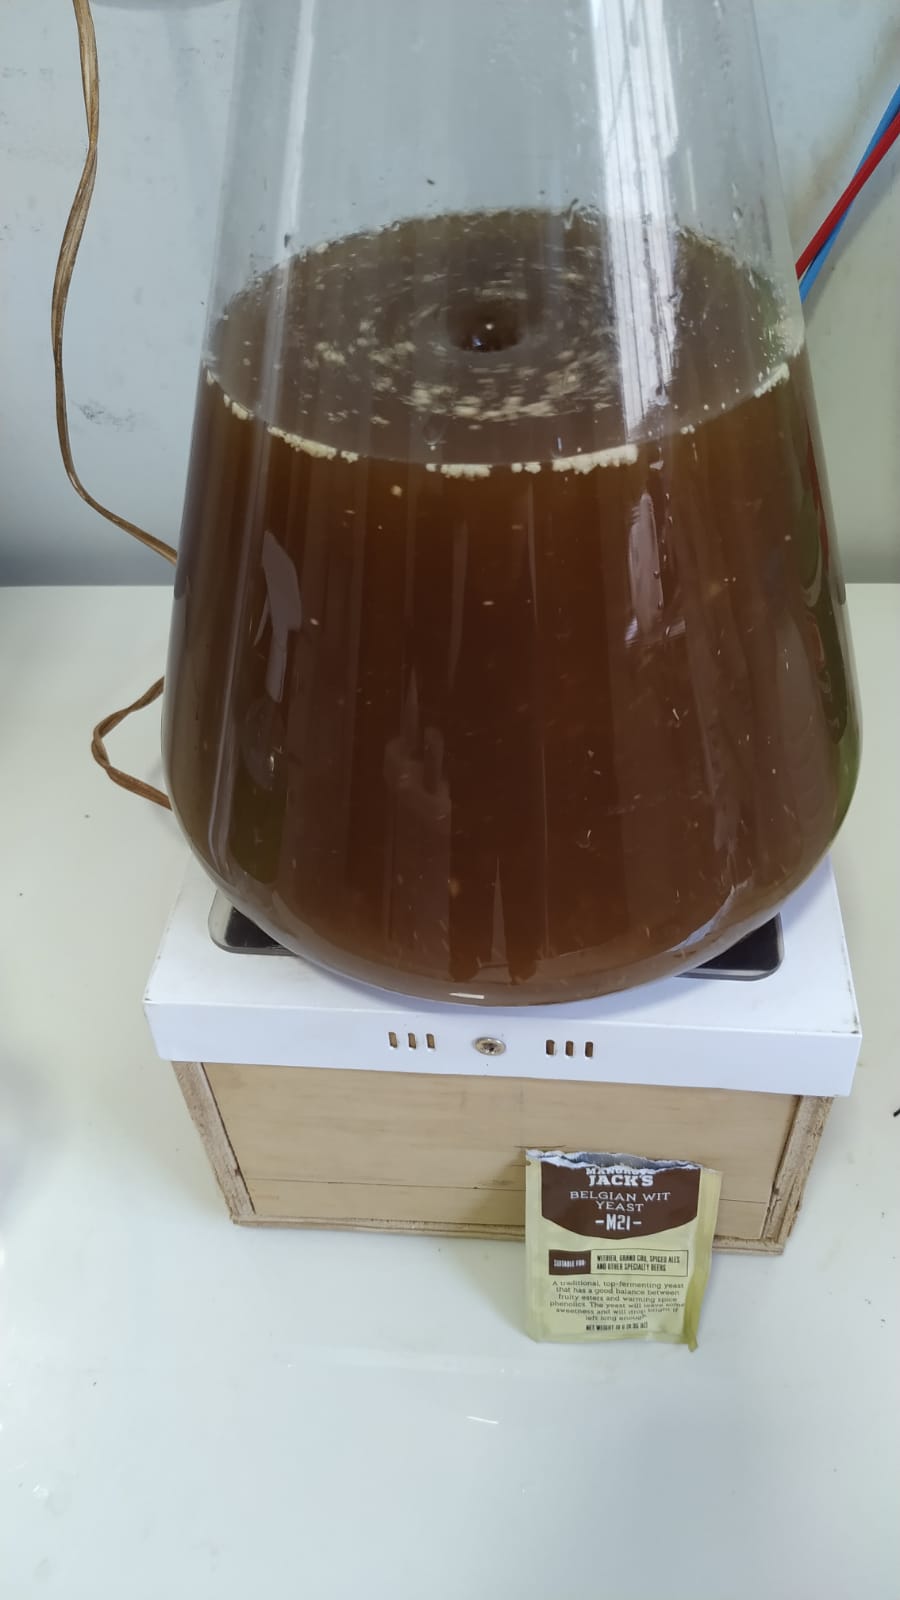
Here is a quick pic of it in action stirring up some Wyeast American Ale II for some cider:
View attachment 21122


Where's the duct tape? Looks like it works just fine.Here is my super cheap, basic stir plate. It gets the job done.
1. Get an old computer fanView attachment 581701
Wire it to a variable voltage adapter like this old one I had lying around:
View attachment 581702
Get an old hard drive and pry it open to get the magnet: View attachment 581703
View attachment 581704
Glue magnet to the center of the fan:
View attachment 581705
Put "risers" on the fan corners so that the vessel will be able to sit upon the fan without actually contacting the magnet: View attachment 581706
here is a different angle: View attachment 581707
Viola!
View attachment 581708


 it is noisy because of the bumps on the bucket):
Awesome man! I kinda want mine to break so I can build this oneView attachment 618151 View attachment 618152 View attachment 618153 View attachment 618154 View attachment 618155
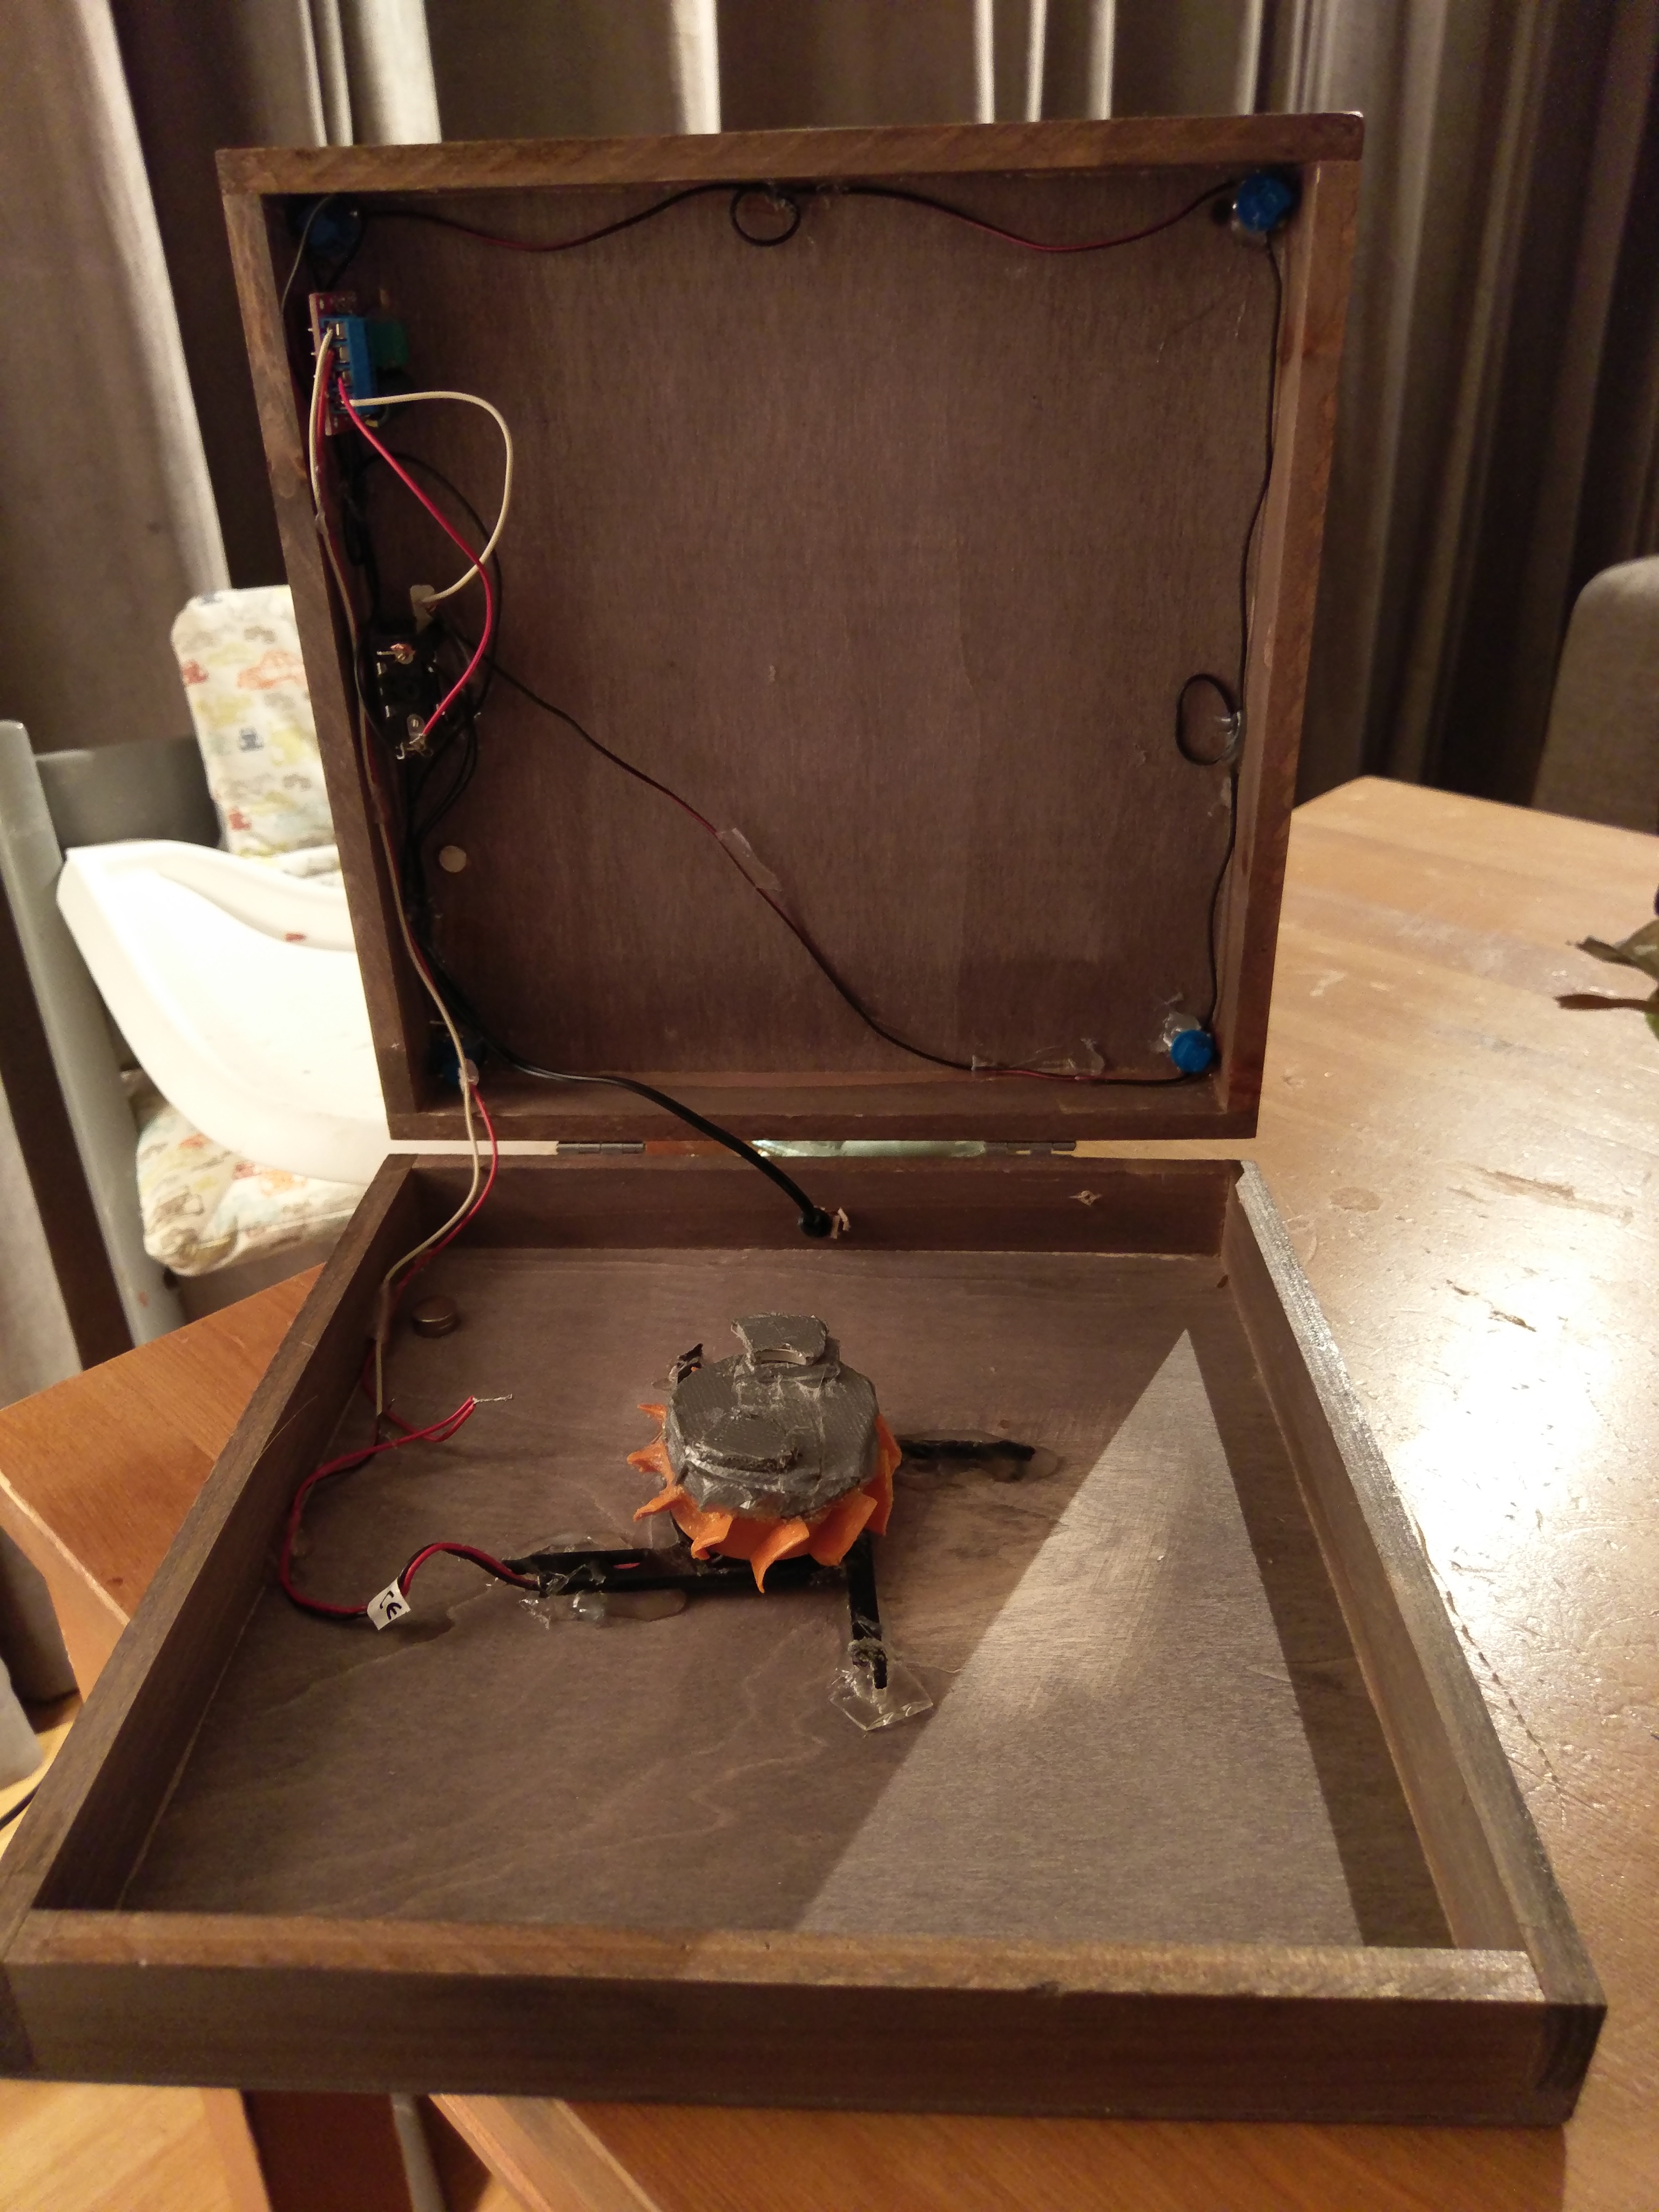
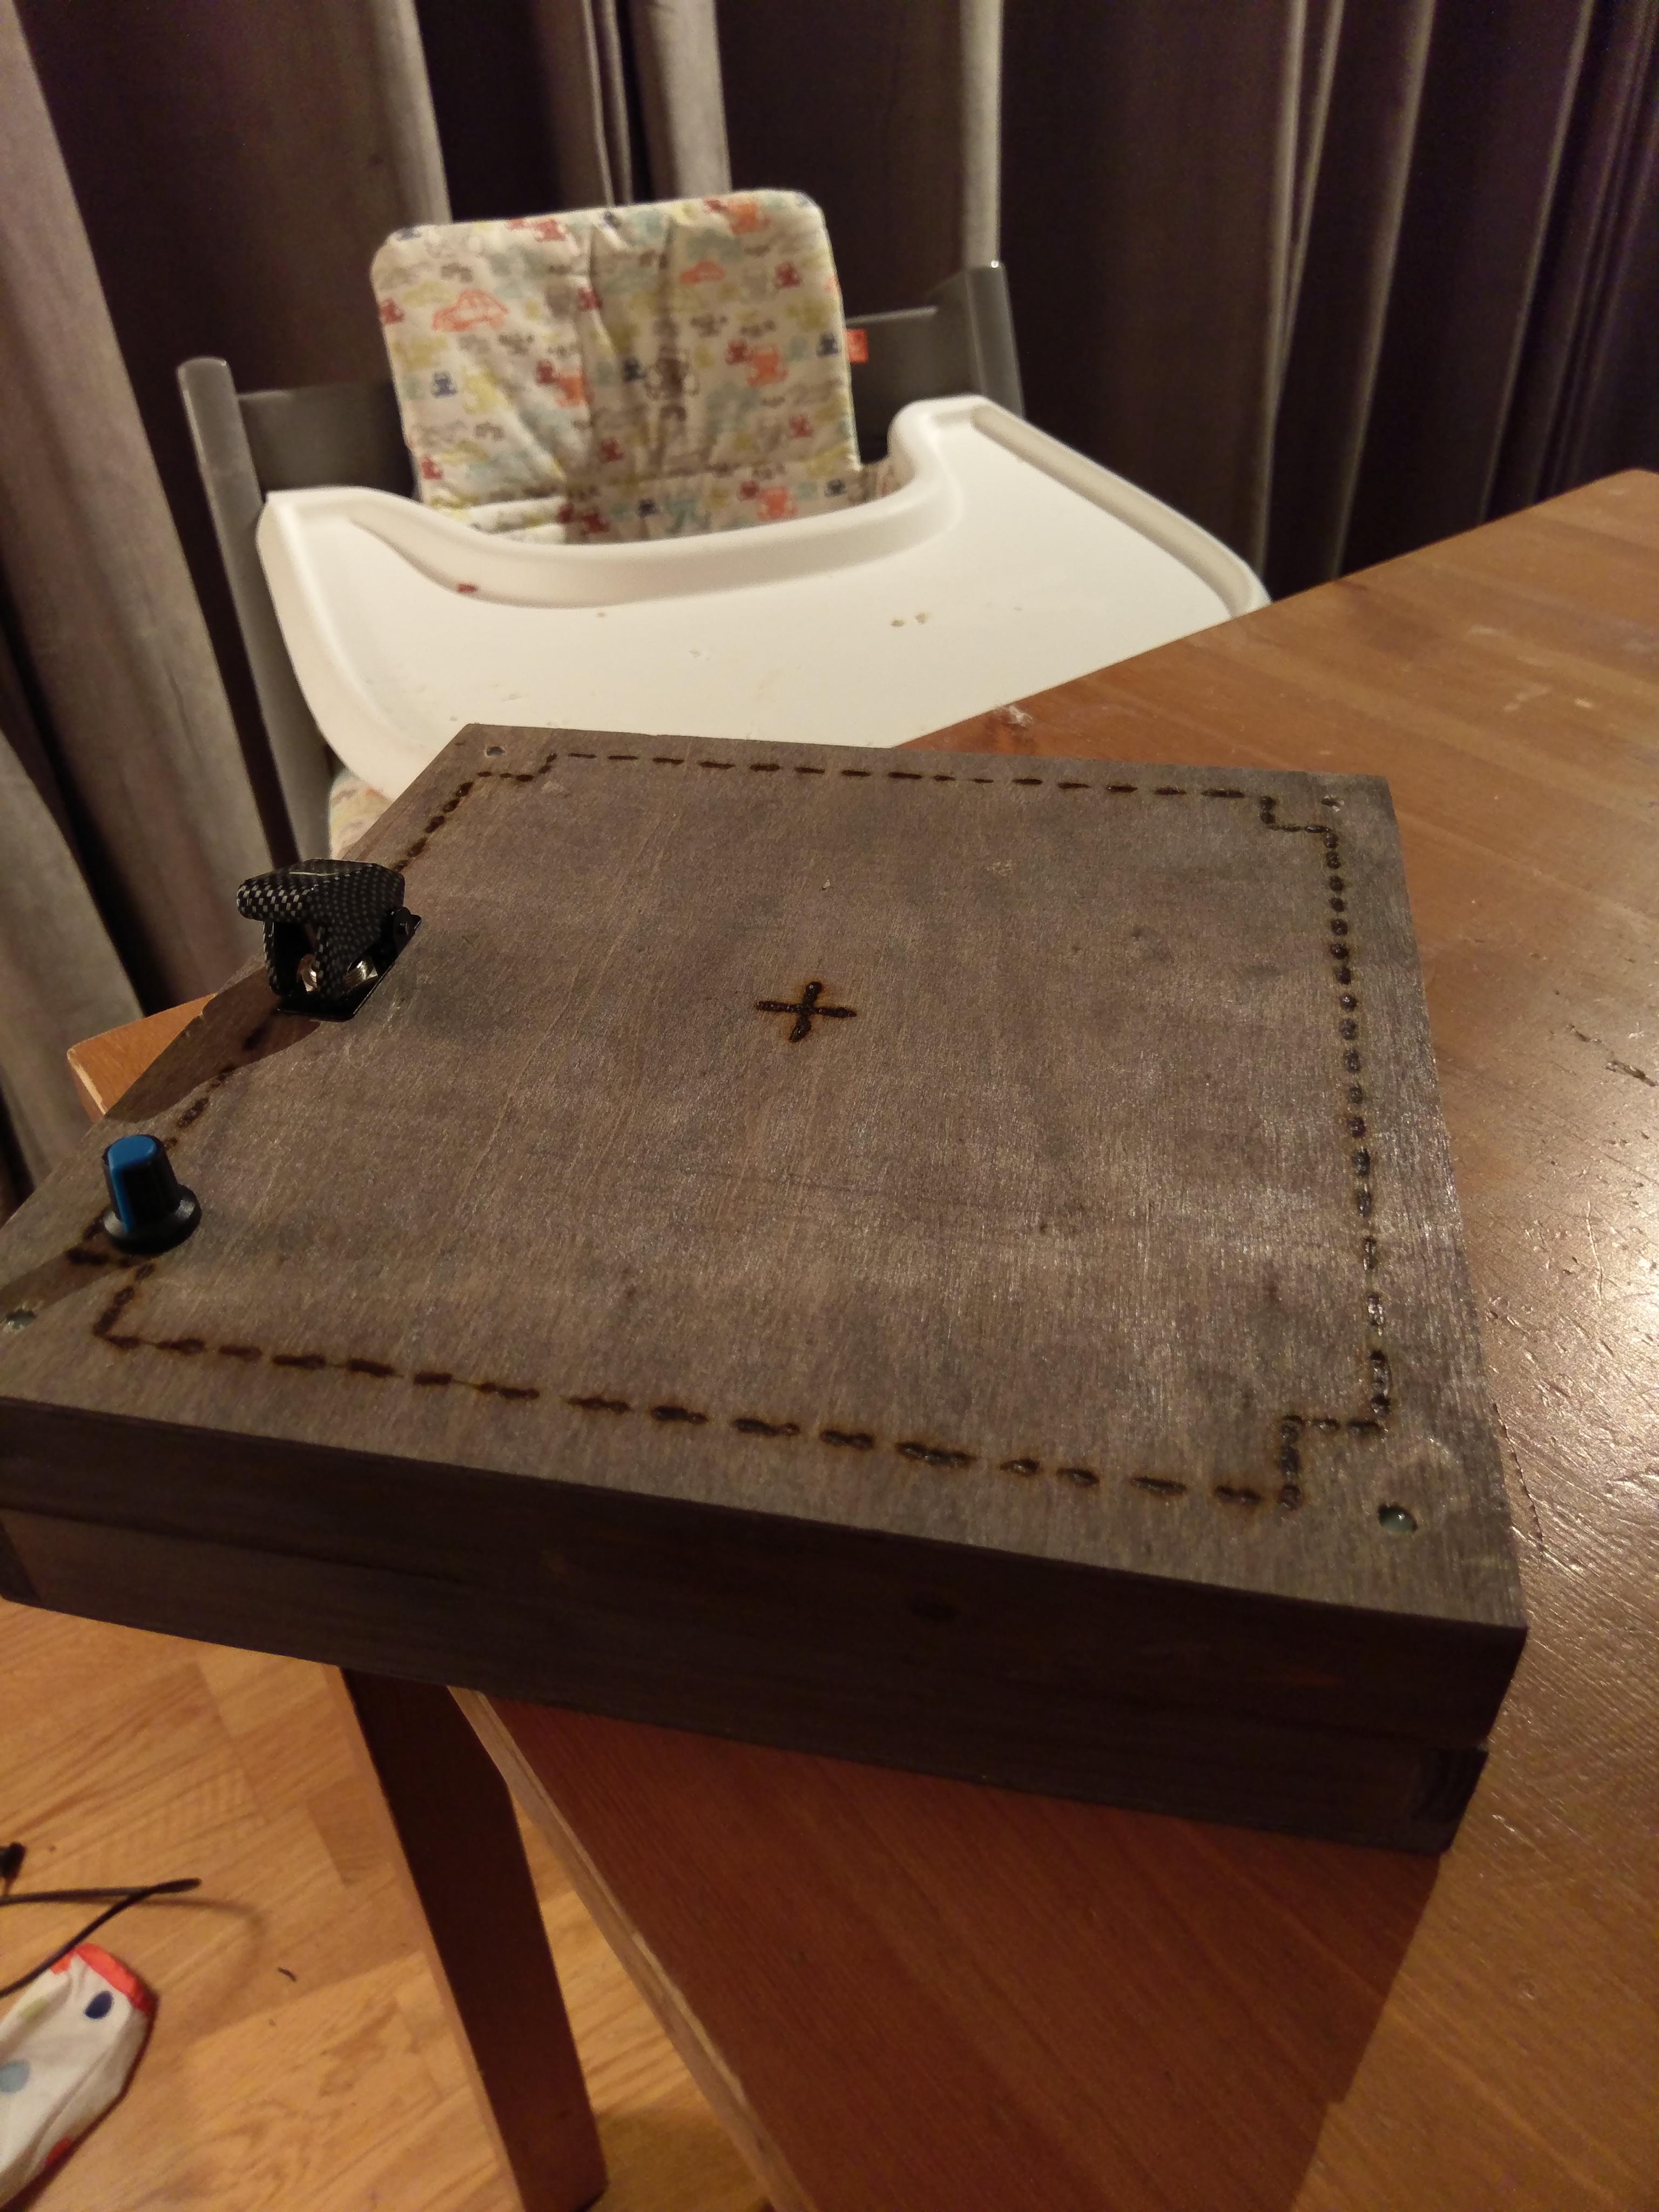
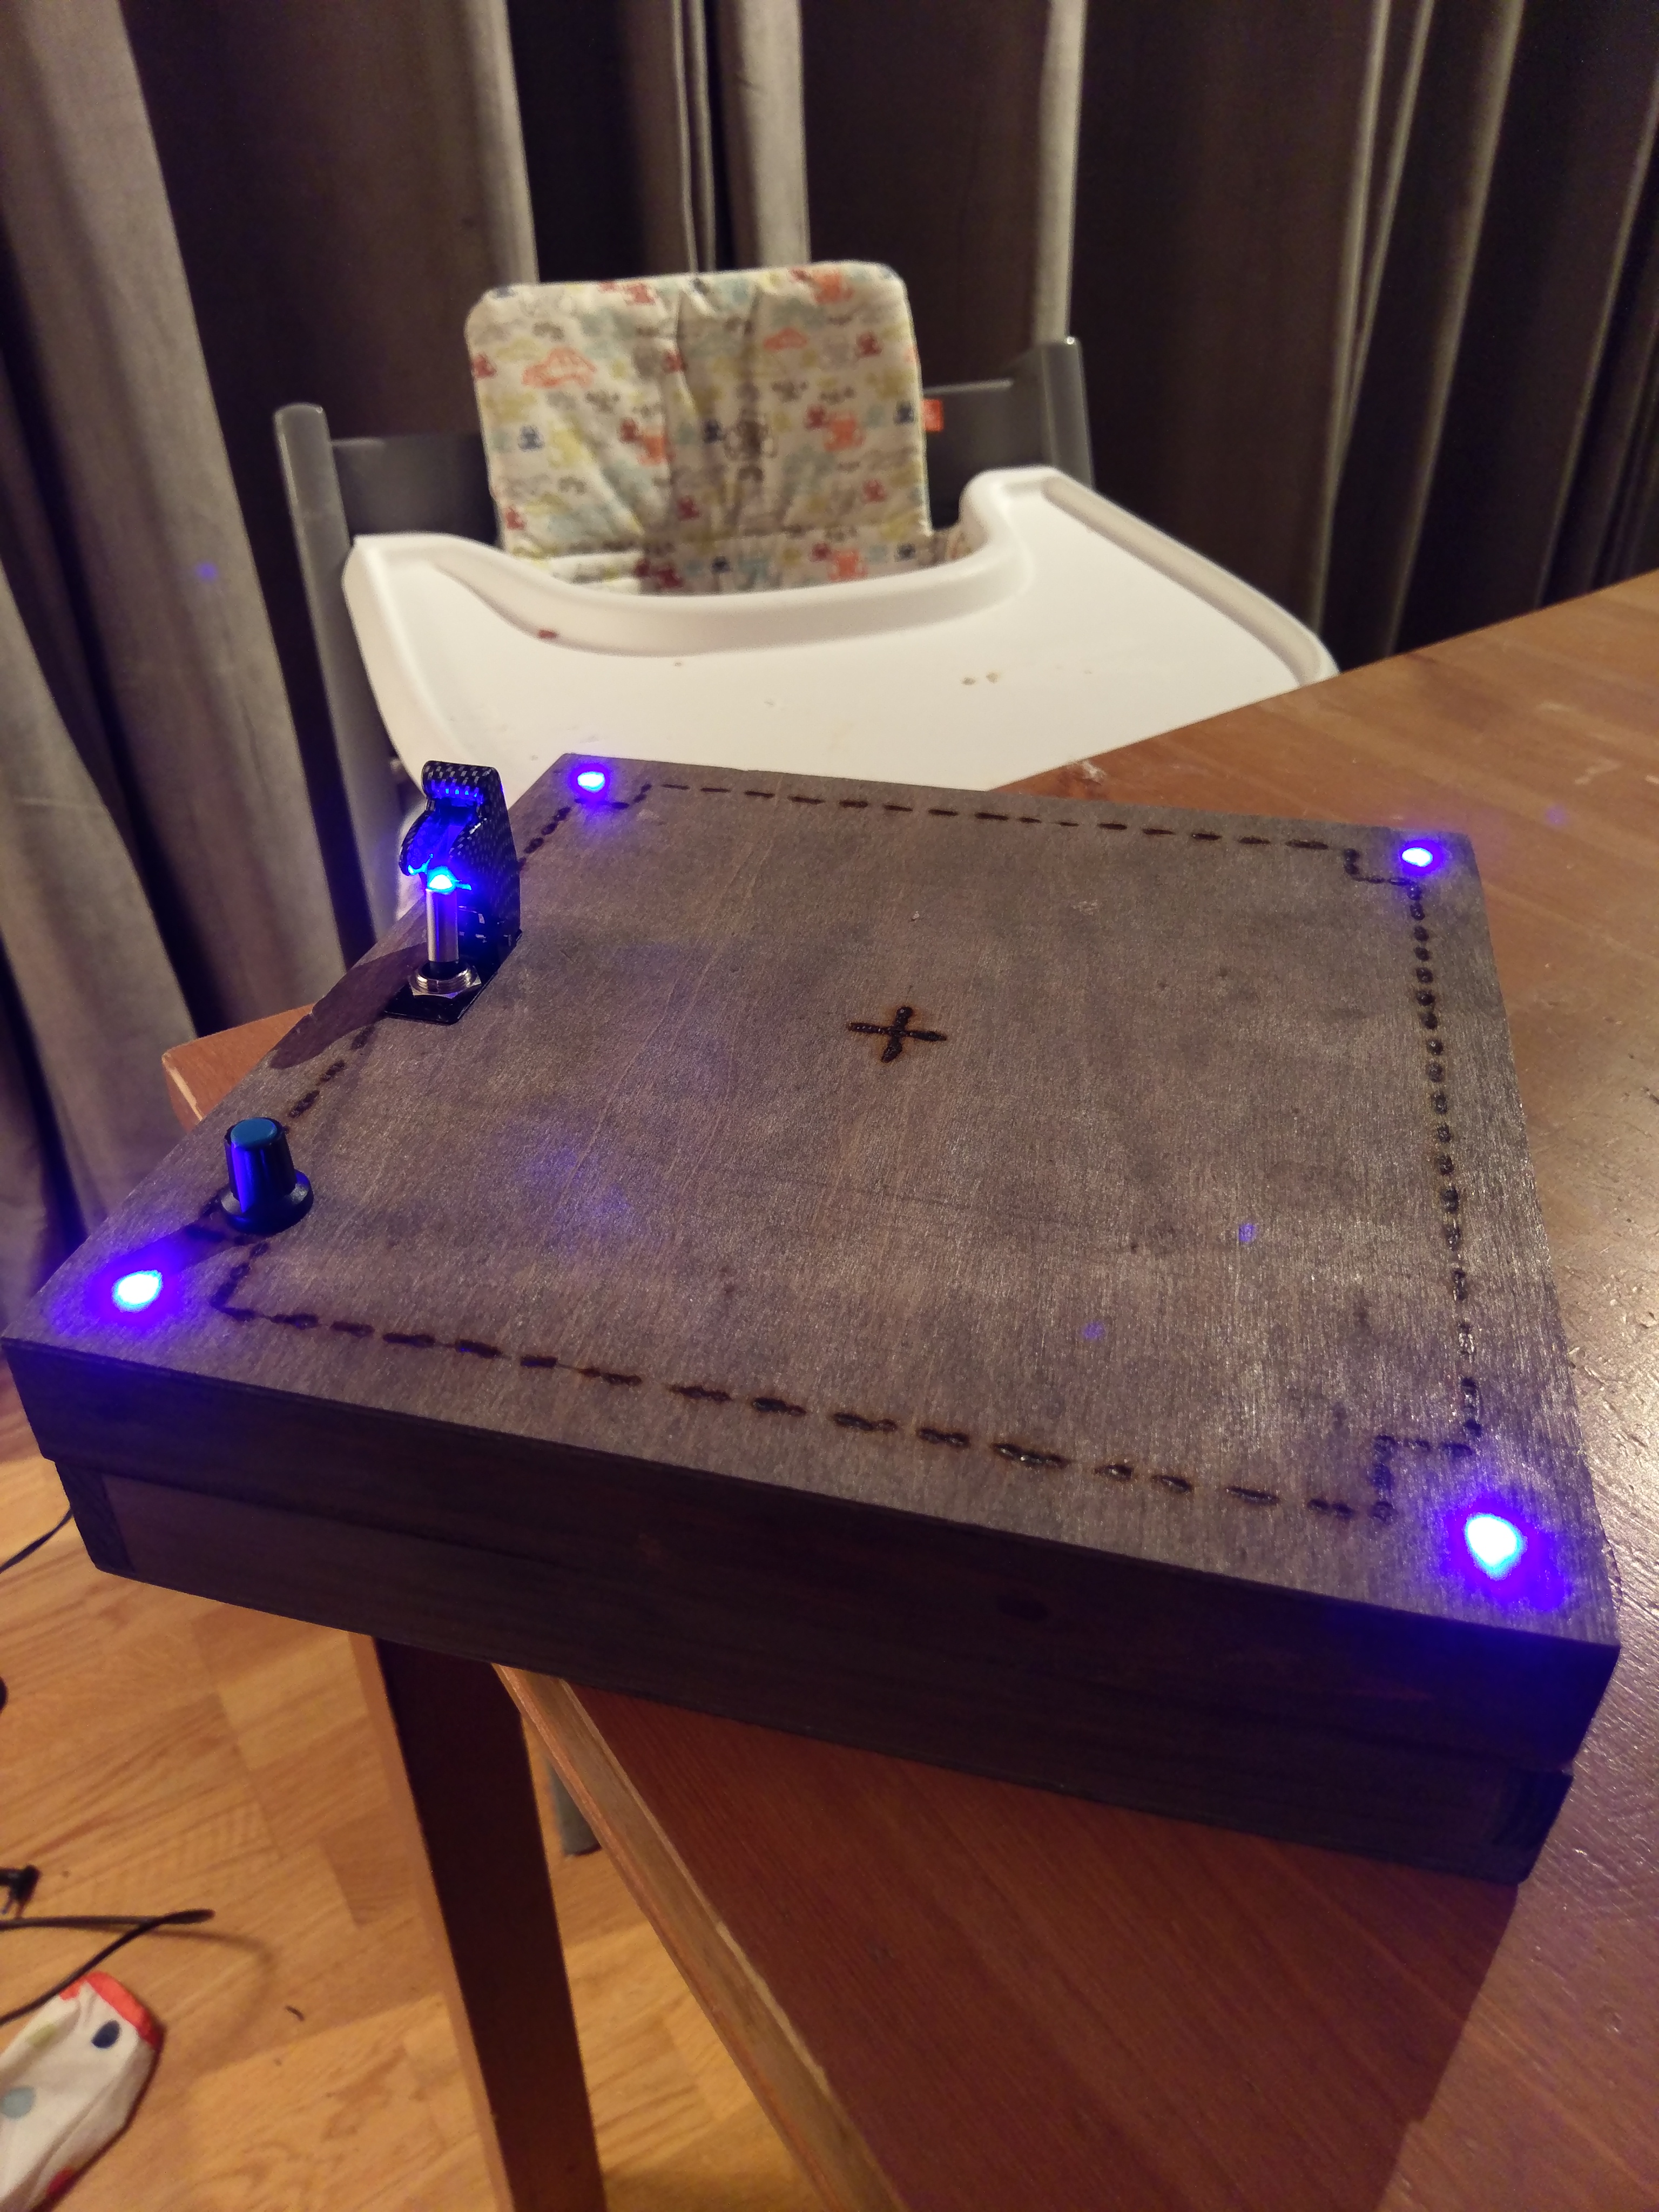
Here is mine. Details of parts used can be found here: https://www.thingiverse.com/thing:3501312
View attachment 618151 View attachment 618152 View attachment 618153 View attachment 618154 View attachment 618155
Here is mine. Details of parts used can be found here: https://www.thingiverse.com/thing:3501312
I am not sure this is a good idea. I'd rather not use it.Quick question: would adding a LED fan to this design have any negative consequences on the starter?
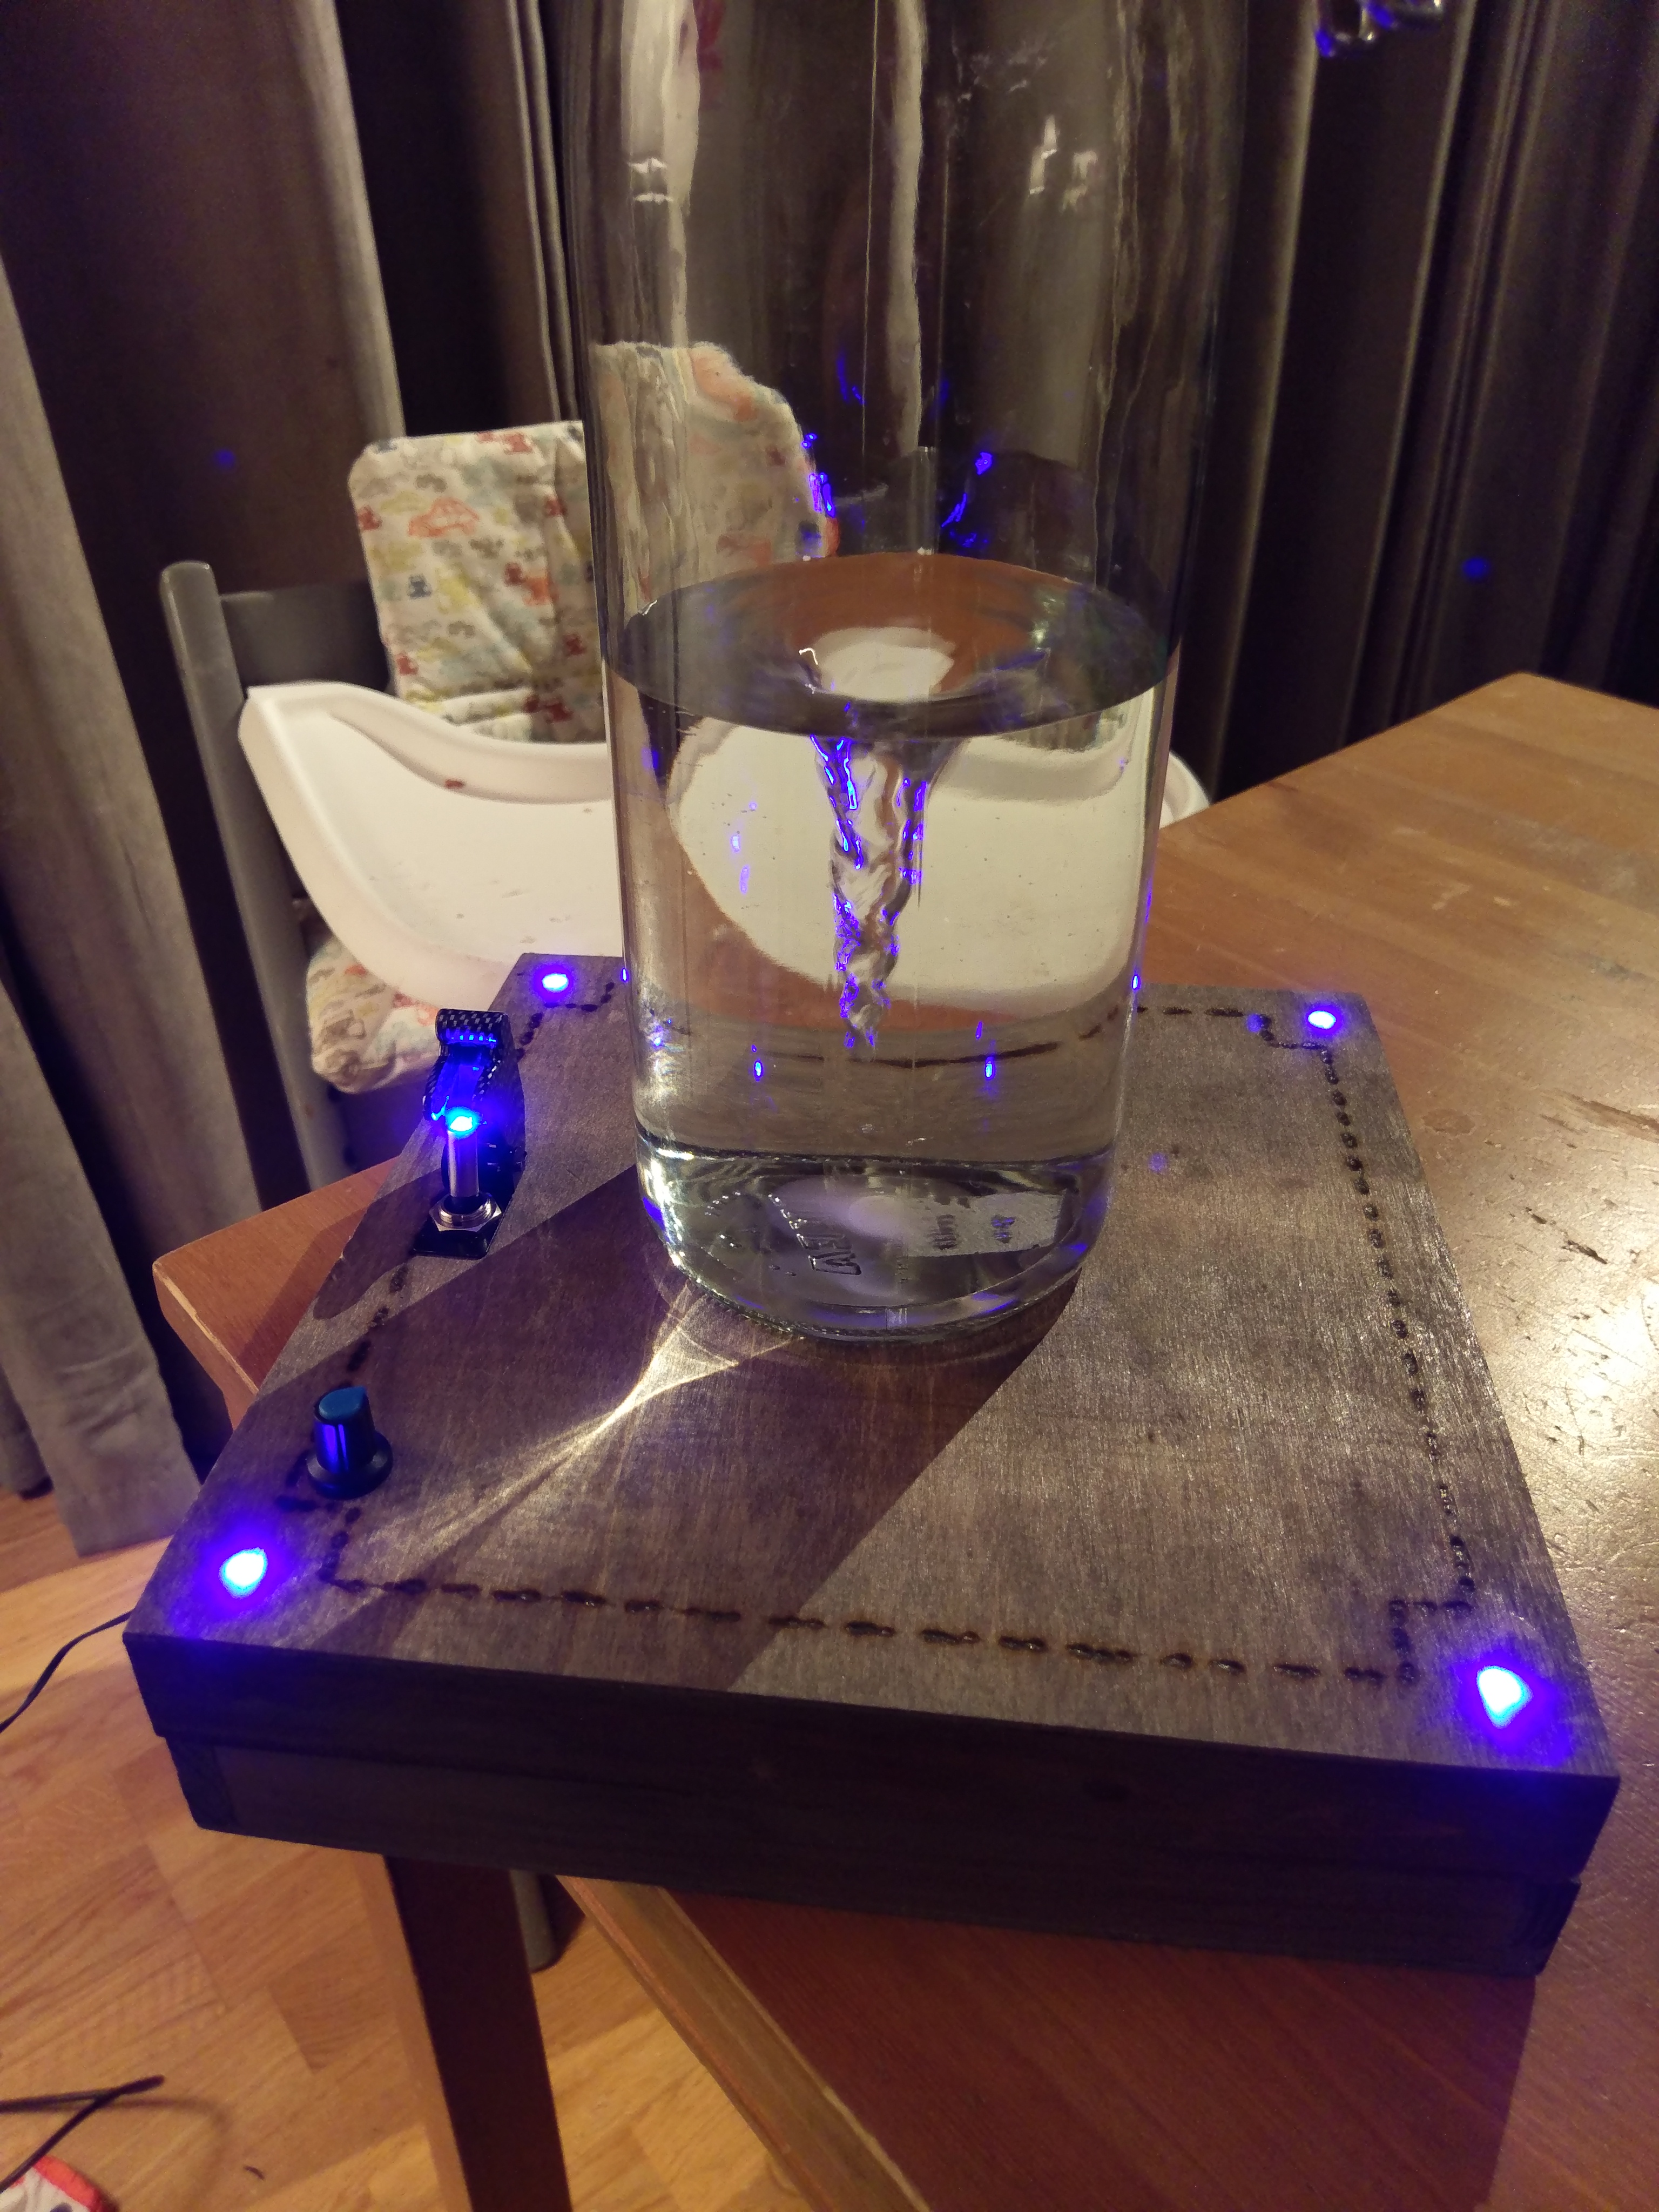
Mine has a bunch of lights! I wanted it to look cool I guessQuick question: would adding a LED fan to this design have any negative consequences on the starter?

Beer is skunked by ultraviolet light, but it takes a combination of the hops, yeast, and barley all together to make that result. I cannot imagine yeast, by itself, is light sensitive in this regard.
just my $0.02
Glad to hear it! If not, mine wouldnt be usable. HahaMy understanding is that LEDs do not produce much ultraviolet light unless designed to do so. They typically drop off in the 450-485nm range.


Simple build using an old business card file box. Any box would do really. For folks that do not get all the soldering and electronics or don't want to mess with it this USB fan is a great option. Comes with a speed control and it is plug and play using any USB phone charger. Everything that I needed came with the fan with the exception of the box, the USB charger and the magnets which I still need to get. I guess unlike everyone else, I got rid of my old computers from the 90s so I don't have an old hard drive laying around. With tax I have $15 invested I this so far.
View attachment 626595
View attachment 626596
View attachment 626597
.jpg")

Simple build using an old business card file box. Any box would do really. For folks that do not get all the soldering and electronics or don't want to mess with it this USB fan is a great option. Comes with a speed control and it is plug and play using any USB phone charger. Everything that I needed came with the fan with the exception of the box, the USB charger and the magnets which I still need to get. I guess unlike everyone else, I got rid of my old computers from the 90s so I don't have an old hard drive laying around. With tax I have $15 invested I this so far.
View attachment 626595
View attachment 626596
View attachment 626597


when I try to control the speed of the fan using this PWM speed controller (Low Voltage DC PWM Motor Speed Controller Module 1.8V 3V 5V 6V 12V 2A | eBay), nothing seems to work.


![Craft A Brew - Safale BE-256 Yeast - Fermentis - Belgian Ale Dry Yeast - For Belgian & Strong Ales - Ingredients for Home Brewing - Beer Making Supplies - [3 Pack]](https://m.media-amazon.com/images/I/51bcKEwQmWL._SL500_.jpg)


.jpeg")
.jpeg")
.jpeg")
.jpeg")
.jpeg")