Russ' Keezer Build

Homebrew Talk - Beer, Wine, Mead, & Cider Brewing Discussion Forum

Help Support Homebrew Talk - Beer, Wine, Mead, & Cider Brewing Discussion Forum:

This site may earn a commission from merchant affiliate links, including eBay, Amazon, and others.

russekc

Member
Joined
Jan 12, 2010
Messages
24
Reaction score
0
Location
Oklahoma City
I dont have as many pics as I would like because I was limited to my iphone for a camera, but I thought I would show what I did for my Keezer. I started off with a Kenmore that I got for my birthday. My original plan was to keep it simple and add just a collar, but after looking at all the beautiful keezers on here I couldnt resist kicking it up a notch.
 
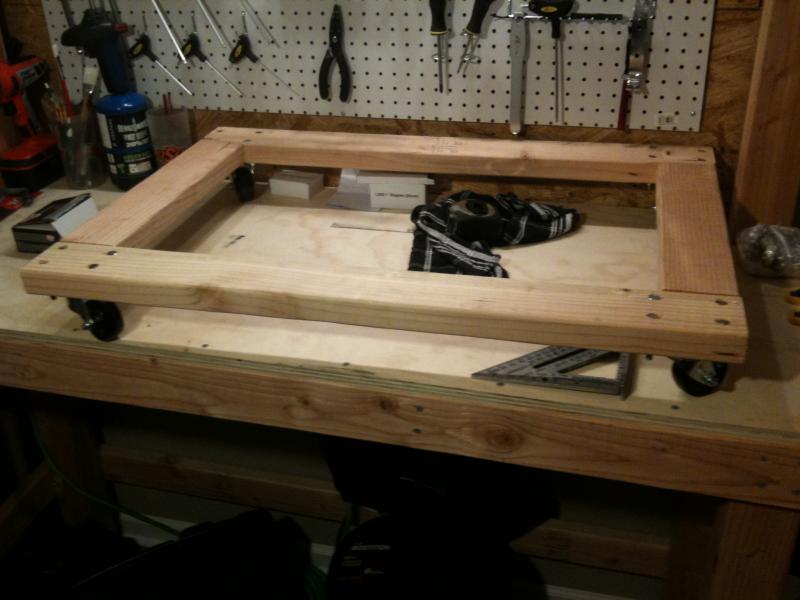
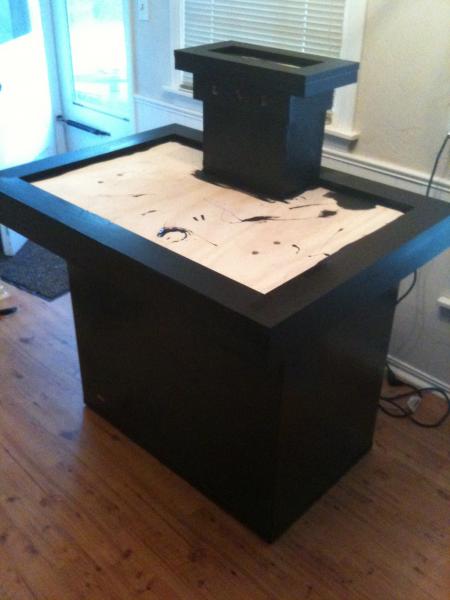
as i said, i started with a kenmore chest freezer. i built a base with casters to make it a little more mobile.

IMG_0193.jpg


IMG_0199.jpg
 
next i added a top. i used 3/4" ply on the top and under the lid, sandwiched together using 2.5" bolts. I used some nice 1x4 to trim it out.

IMG_0200.jpg
 
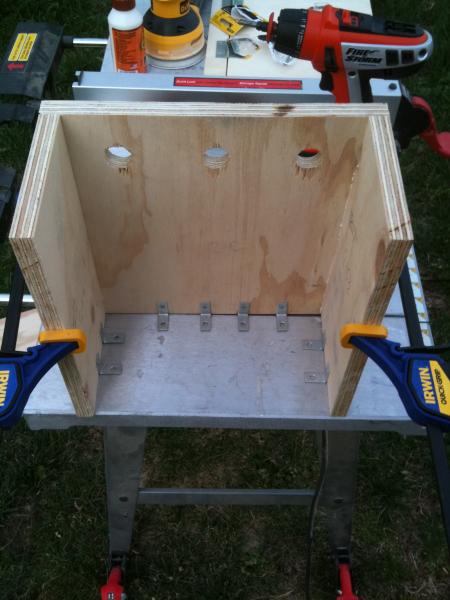
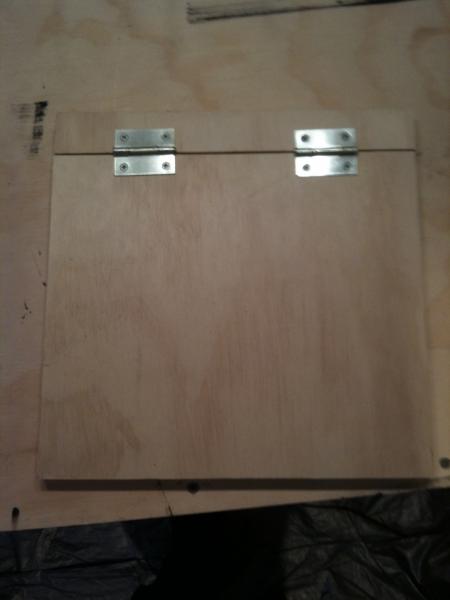
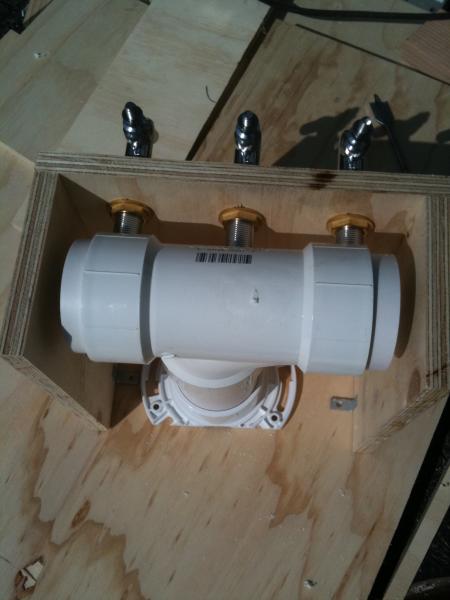
Once i got the top on, i started on the coffin. i didnt have a real formal plan for any of this, so i just mocked some stuff up and went with it. i made a hinged back door and used some 3" PVC for the plumbing. i found some insulation and wrapped it up with zip ties. i knew the dimensions i needed based on the measurements of the trim, tile (12x12) and drip tray (12x5).

IMG_0202.jpg


IMG_0201.jpg
 
once i got the basic dimensions for the coffin cut, i mocked everything up with the tile i picked out and the faucets and tap handles.

IMG_0203.jpg
 
backing up a bit, here are some shots of the PVC with insulation. I also took some of that insulation, rolled it up, and used it to plug the ends.

IMG_0204.jpg


IMG_0205.jpg
 
i decided to get a little more elaborate with the coffin. i originally planned on using the smaller tile for the back splash, but changed my mind and put them on top of the lid. i also decided to put another ring of trim where the tap holes are.

IMG_0206.jpg
 
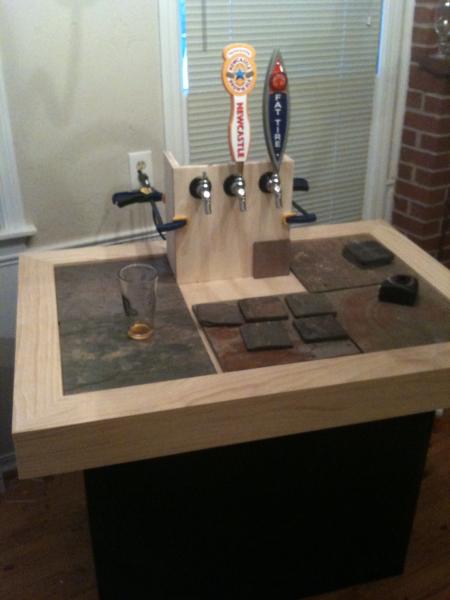
the coffin is complete, and i added a coat of flat black paint. the tile isnt set yet, just laid out to see how it looks. i still need to add the drip tray and i'm waiting for some misc hoses and disconnects to come in and it will be functional. no more picnic tap for me! i'm pretty proud of it so far. i'll post more pics when i get more work done.

IMG_0208.jpg


IMG_0209.jpg
 
Looks great. I am starting to work on something similar. I have a question on your base. How did you attach the shorter 2x4's to the other 2x4's that have the casters on them? I cant see if you used screws and it does not look like you mortised them.
 
Looks great. I am starting to work on something similar. I have a question on your base. How did you attach the shorter 2x4's to the other 2x4's that have the casters on them? I cant see if you used screws and it does not look like you mortised them.
Mizuno, I used pocket joints in the shorter 2x4's. the pocket joint tool that i have iscalled a Kreg tool. they are a very handle jig to have for this and tons of other projects around the house.
 
That's a great looking keezer. The top trim around the coffin will allow for the faucets to close? I'm designing my coffin now, and am noticing that my Perlicks need almost an entirely flat surface to mount on, all the way to the top of the tap handles.
 
That's a great looking keezer. The top trim around the coffin will allow for the faucets to close? I'm designing my coffin now, and am noticing that my Perlicks need almost an entirely flat surface to mount on, all the way to the top of the tap handles.
yes they will close all the way. this is one of the reasons i added the layer of trim around the tap holes. i clamped everything together several times and tested for clearance on the tap handles and they close the way i have it now. it was a win-win because i think that extra trim added a lot to the overall look of the coffin.
 
Thanks. I will have to look into one of those as I always have projects going on around the house.
 
in previous posts i showed the insulated PVC that i made to run the beer lines through and the hinged back door to access it. it looked good on paper and in theory, but was impossible in practice. the hinged door is useless because there isnt enough room inside the coffin to do anything. once that PVC monster is in there, its not going anywhere. it gave me all kinds of trouble when i was trying to get the taps lined up, in the holes, the bolts tightened, and the beer lines attached. after 30 frustrating minutes i decided to ditch the PVC. now the back door serves it purpose and i can easily access the back of the taps if i need to. i folded up some of the insulation and lined the walls of the coffin with it. my coffin is very small, so i figured this would be just as good as using the PVC. i have a muffin fan that i am going to put in to circulate the air, so i think i'll be fine. i'm open to suggestions if anyone see any holes in my theory. i would show a pic, but i forgot to take one while i was in there and i dont want to get back in. now you know.
 
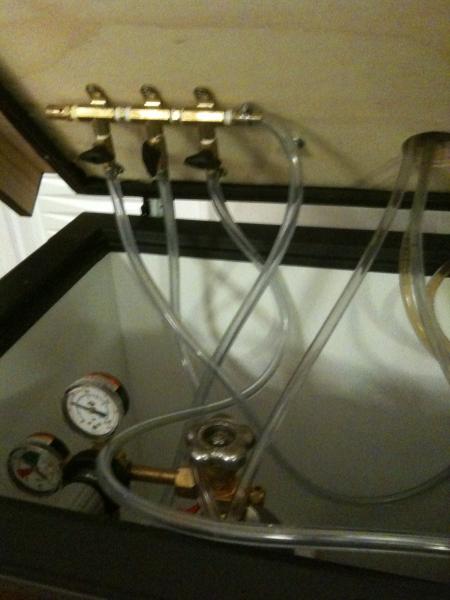
i got my 3 way (giggity) put together and all the fittings attached. someday i will upgrade these. they are very cheap but they are dispensing beer just fine i promise:)

IMG_0215.jpg
 
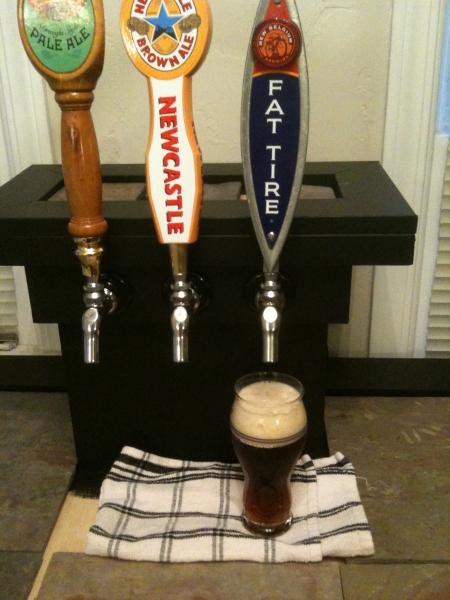
i hooked up my amber ale and officially poured my first pint from my new keezer. tomorrow i am kegging a wheat trappist and an IPA, so in a few days i will have three delicious beers to choose from. i might call in sick to work that day to celebrate and really break this thing in. you're all invited. :mug:

i still need to get my drip tray (LHBS was out and everything online is backordered) and lay that tile, hopefully this week.

IMG_0214.jpg
 
Russ - this is very inspiring. I'm in for one. When is your opening party for the new kegs?
 

Latest posts

Back
Top