• Please visit and share your knowledge at our sister communities:
  • If you have not, please join our official Homebrewing Facebook Group!

    Homebrewing Facebook Group

Rough Greenlee Holes?

Homebrew Talk

Help Support Homebrew Talk:

This site may earn a commission from merchant affiliate links, including eBay, Amazon, and others.

cbzdel

Well-Known Member
Joined
Mar 31, 2013
Messages
269
Reaction score
12
Location
Tacoma
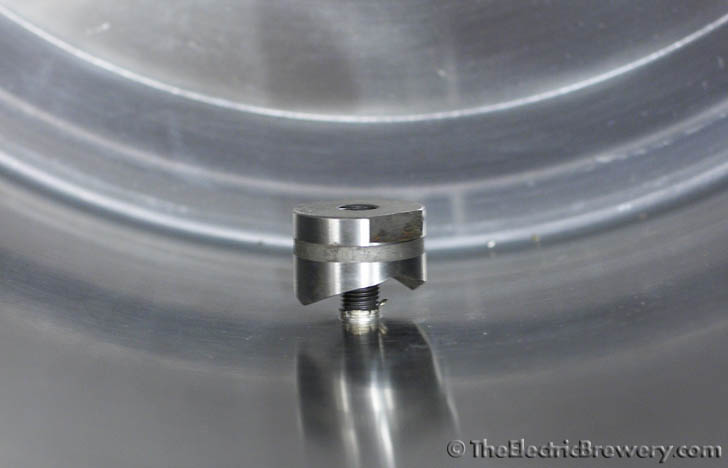
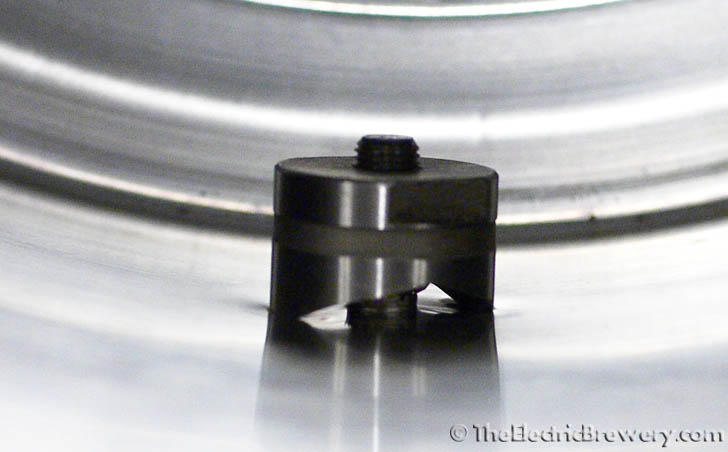
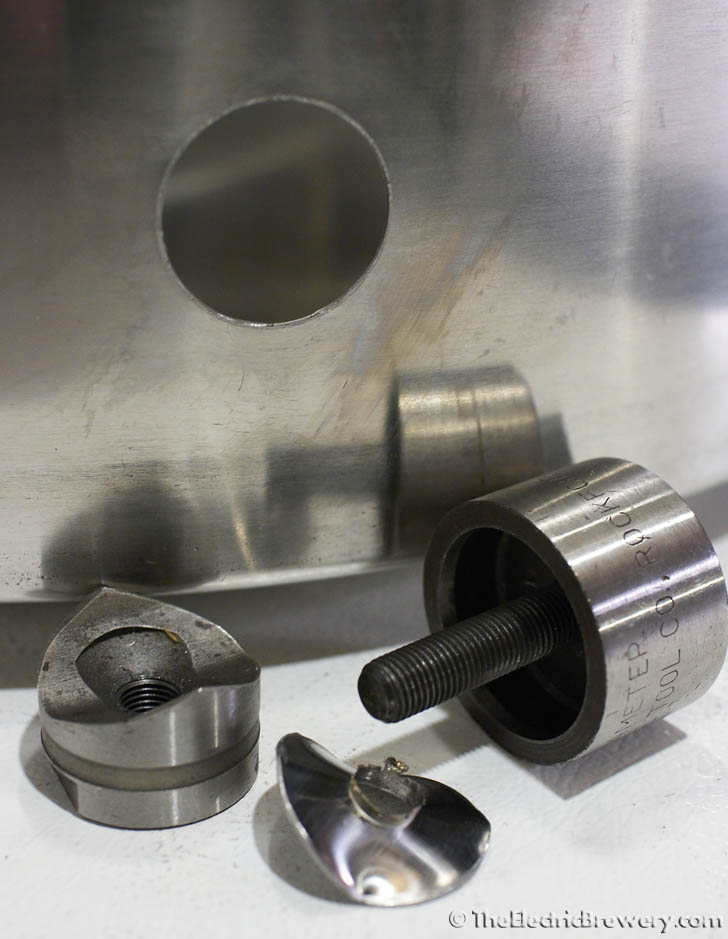
I used Greenlee punches to punch 100% of the holes in my kettle. The side I was pulling the cutter through is perfectly smooth, almost like a factory hole. But the flip side on all of the holes is a bit rough. The holes a perfect in size, shape ect, but just a bit rough on one of the two sides. I was using brand new punches so it was not the issue. Anyone else have this issue? I was debating touching them up with sandpaper, but I was worried I would scratch up the finish on my kettle.

Anyone else run into this??
 
Every hole making device causes a burr in the cut direction. I'll usually be sure I put the cutter on the side of the hole the gasket will sit so that you really don't have to deburr at all. You can use a fine round file to take the edge off.
 
Strange, I used the same Greenlee punches (mine was used) and didn't have any burr in the cut direction. I cut from the inside out.

Inside:

IMG_1360.jpg


Outside:

IMG_1362.jpg


During the cut:

IMG_1363.jpg


IMG_1364.jpg


Outside after the cut:

IMG_1368.jpg


(very clean)

This was a hole for the heating element.

Kal
 
Out of curiosity, did you add any cutting oil to the punch before you ran it through the kettle? I found that my larger punch appreciated a little lubricant. I hit them all with a half-round needle file after I punched them to remove any burs and finished with a little 400 grit, but they came out fairly smooth right from the get go.
 
Out of curiosity, did you add any cutting oil to the punch before you ran it through the kettle?
No, but I do believe they did have some residual oil on them from whoever used them last (I bought all my punches used).

Kal
 
I had to use a Dremel on every hole I have cut with my greenlee punches.

In fact the very last hole pinched on the metal and actually tore the pot a bit trying to get the two parts seperated. Hoping that using a wider white silicone washer/gasket will stop any chance of leak, it covers the spot fine. Hoping to do water test on that pot in a couple weeks.
 
If this is an issue, you can use a deburring tool like this one.

I have never seen a tool like that before. I will have to look into how to even use one haha!

One thing I notice, the way Kal did it shown above. His cutting tool was alomst sideways. I made sure to keep my cutting side vertical, due to the outside of the kettle being round the backside only the center of the backside touches the kettle, so if I kept the cutter vertical, it would slide right into the backside and never put and pressure on an unsupported area of the kettle. If that makes sense at all haha!

The burring that I have is not serious and I am sure if I just installed everything as is I would be fine, but being a perfectionist I would want it to look good even with all the fittings removed.
 
Last edited by a moderator:
A deburring tool is very easy to use, just place the curved part on the rough edge, and lightly move the tool around like you're drawing a circle. There are lots of videos online, but honestly I wouldn't worry about it.
 
Strange, I used the same Greenlee punches (mine was used) and didn't have any burr in the cut direction. I cut from the inside out.

Inside:

IMG_1360.jpg


Outside:

IMG_1362.jpg


During the cut:

IMG_1363.jpg


IMG_1364.jpg


Outside after the cut:

IMG_1368.jpg


(very clean)

This was a hole for the heating element.

Kal

There is a burr there you have just not noticed it. There is always a burr left when you punch a hole in metal because the metal is stretched in the direction of the punch.
 

Latest posts

Back
Top