• Please visit and share your knowledge at our sister communities:
  • If you have not, please join our official Homebrewing Facebook Group!

    Homebrewing Facebook Group

Peering down the kegging hole

Homebrew Talk

Help Support Homebrew Talk:

This site may earn a commission from merchant affiliate links, including eBay, Amazon, and others.
Reminded of this thread last night as I poured a small glass (from one of the beer festivals) of beer to sip on while cooking. Then refilled again a bit later while working on something in the garage. Then filled again while eating dinner. Then once more as I played computer games before bed.

Each pour was fresh and cold. I probably drank about a pint total, if that. Over those several hours I did not wish my beer was cold and fresh, because it never got warm and flat.

If I had bottles, I would have either had to pour a bit at a time, risking stirring up the sediment, or let it get warm.
 
It is surprising to me as well. I've drunk many a very satisfying beer from bottles, but his view is that the best beer is draft beer and you might as well get your draft system in place before brewing. It certainly isn't a book for newbies as I suspect almost all of them would be turned away by the initial commitment to....not actually brewing.

Had I taken ideas like that as gospel when I was first getting interested in brewing, I would have never brewed the first drop. There was no way I could have possibly allowed myself to invested in a kegging system before I knew if I even enjoyed the hobby or not. That's simply not a sensible thing to do, for me, anyways.

Luckily forums like this exist that gave me a much better understanding of what my options were, and all the info I needed to make the packaging process as readily accessible as possible.

Now, however, I've moved on over from just giving brewing a go to a full fledged obsession. :rockin: I am itching like crazy to get me a draft setup going, and I will, as cash flow and interspousal politics allow. Along with better fermentation temp monitoring and control, appropriate equipment for a nice outdoor 3v brewing rig, ss conical fermentor, etc, etc, etc....
 
Well here it is, 2 weeks after deciding to go full throttle!

Thanks for all the convincing opinions on why to do it, no more bottles for me! (except for transport of course) :)

IMG_20170103_170423[1].jpg
 
This thread (and forum) has been an awesome source of information !!

2 things.....

1. I did NOT find an answer to my own personal question to which I am going to start a thread :(

2. What I enjoy about bottling is giving away my brews with my own labels on them. It is an unparalleled gift in the arena of personal touch gifts :)

Which you can still do if you keg...
 
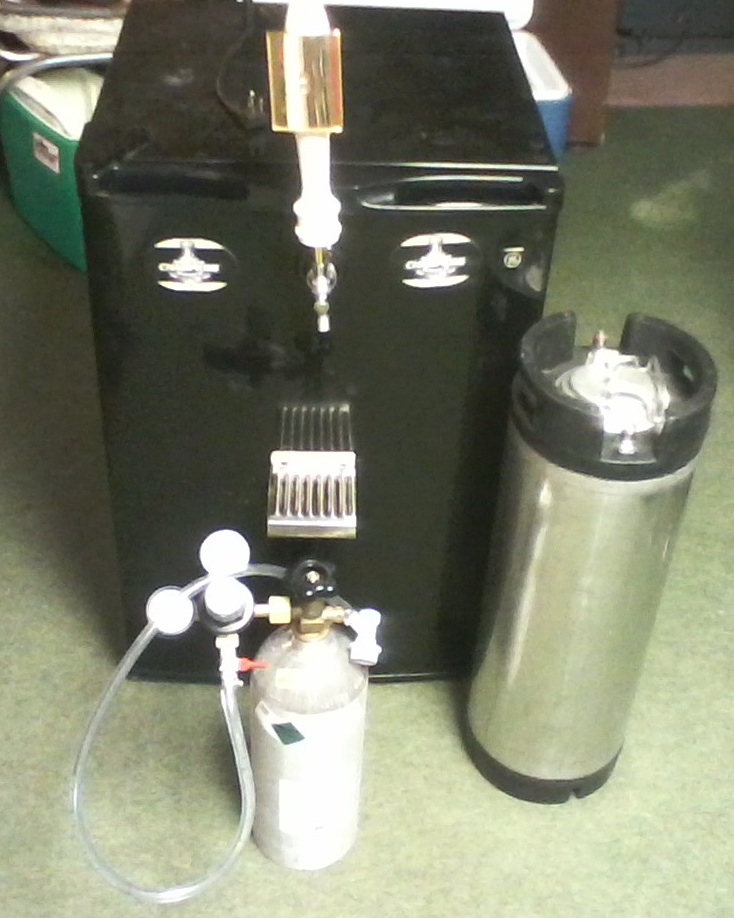
Well, I guess I just fell into the hole, lol. Picked this up today off of CL for $150. Now I got to figure out how I'm going to use it. Currently I use a chest freezer as my fermentation chamber. I think I'm going to make that into something like derekcw83 posted above. Then use the mini fridge as my fermentation chamber. That way I can have more than one tap, plus room to carb new kegs. First thing I need to do is replace the lines and get the CO2 filled.

keg.jpg
 
After some research, I think I know what I want to do. Going to turn my ferm chamber freezer into a keezer. I think I'll go with 3 taps to start, but get a 6 way gas manifold. That way I can add a 4th tap, have one to carbonate, and have an extra spot.

I'm still not sure on the collar height. I've seen anywhere from 4" to 12". I'm thinking 10" or whatever it takes to fit a keg on the compressor hump, so I can use that space. Still have to take some measurements. Probably going with collar on the freezer.

Thinking I'll do the CO2 bottle on the outside.

I see a few people doing stout taps. Need to look into this more. Is this for serving with nitrogen?

I would like to do things right from the get go. That way I only have to buy things once. Trying to think of all the features I want now, but leaving a little room for expansion in the future.

Two other things as considerations:

One is how easy or hard it will be for you to life a full keg over the collar. There are ways around this if it's a problem (hinge the collar at the bottom and the top, for instance), but make sure it's comfortable to do.

Second is that if you have shorter kegs like the original Torpedo kegs, you may be able to fit them on the compressor hump with a narrower collar. I have a couple of those and they sit just fine on the compressor hump, My keezer has a 2x6 as the basic skeleton of the collar. I was able to lift the kegs over that but another 4" or more would make that dicier. Pin lock kegs converted to ball lock might do the trick. Just a thought.

Plus, wiping out the bottom of the keezer (and you will need to wipe it out from time to time) is easier the closer the rim of the collar is to the ground.

When I built my keezer, I was struck by the...I suppose, permanence of all the installations. People are gluing and siliconing the collar to the freezer base, which means it's pretty much there for all time.

I did a different approach, and I'd do it again in a heartbeat: I put foam tape used to cushion truck toppers on pickup sides on the freezer mouth, and set the collar on that. With a nice facade in front to dress it up, it stays there and seals tightly. When I need to, I can remove the collar and lid (after disconnecting the lines) and easily move the base and the collar/lid/taps.

Here's what I'm referring to:

The first shows the 2x6 "skeleton" of the collar, topped off by a 1x8 piece of clear finish pine:

k4.jpg

This pic shows, from below, how the facade extends below the mouth of the frezer. I have this on three sides, so it can't slide side to side, or back. But the thing is heavy enough it's not going ANYWHERE. To see this, look on the very right side of the picture, you'll see a slight gap between the facade and keezer side. The plastic corners cause it to sit ever so slightly away from the side, which is fine.

collarfacade.jpg

Here's a pic that shows the collar pulled forward and you can see the tape it's sitting on. With my freezer, each corner has a little cap thing that stands proud of the front, back, and sides. A little double-sided tape and plastic paint shields from the home supply store and I brought that up to level so the foam tape was level and smooth all the way around. BTW, the two wires are slid in the tiny gaps between the tape. One wire is the Inkbird sensor, the other is a wire to power a small fan I keep inside:

keezertape.jpg

Finally, regardless of how you do this (and I'm sure you'll do a great job), make sure that as you size the keezer you take into account how far inside the lid protrudes. Mine protrudes about an inch, which is too much for me to mount a triple-gauge regulator to the back collar. :( When I closed the lid, it hit the gauges of the regulator. So I went with a distribution manifold connected via a shank to the outside where i now keep the tank and regulator.

keezerlidprotrude.jpg
 
Two other things as considerations:

One is how easy or hard it will be for you to life a full keg over the collar. There are ways around this if it's a problem (hinge the collar at the bottom and the top, for instance), but make sure it's comfortable to do.

Second is that if you have shorter kegs like the original Torpedo kegs, you may be able to fit them on the compressor hump with a narrower collar. I have a couple of those and they sit just fine on the compressor hump, My keezer has a 2x6 as the basic skeleton of the collar. I was able to lift the kegs over that but another 4" or more would make that dicier. Pin lock kegs converted to ball lock might do the trick. Just a thought.

Plus, wiping out the bottom of the keezer (and you will need to wipe it out from time to time) is easier the closer the rim of the collar is to the ground.

When I built my keezer, I was struck by the...I suppose, permanence of all the installations. People are gluing and siliconing the collar to the freezer base, which means it's pretty much there for all time.

I did a different approach, and I'd do it again in a heartbeat: I put foam tape used to cushion truck toppers on pickup sides on the freezer mouth, and set the collar on that. With a nice facade in front to dress it up, it stays there and seals tightly. When I need to, I can remove the collar and lid (after disconnecting the lines) and easily move the base and the collar/lid/taps.

Here's what I'm referring to:

The first shows the 2x6 "skeleton" of the collar, topped off by a 1x8 piece of clear finish pine:


This pic shows, from below, how the facade extends below the mouth of the frezer. I have this on three sides, so it can't slide side to side, or back. But the thing is heavy enough it's not going ANYWHERE. To see this, look on the very right side of the picture, you'll see a slight gap between the facade and keezer side. The plastic corners cause it to sit ever so slightly away from the side, which is fine.


Here's a pic that shows the collar pulled forward and you can see the tape it's sitting on. With my freezer, each corner has a little cap thing that stands proud of the front, back, and sides. A little double-sided tape and plastic paint shields from the home supply store and I brought that up to level so the foam tape was level and smooth all the way around. BTW, the two wires are slid in the tiny gaps between the tape. One wire is the Inkbird sensor, the other is a wire to power a small fan I keep inside:


Finally, regardless of how you do this (and I'm sure you'll do a great job), make sure that as you size the keezer you take into account how far inside the lid protrudes. Mine protrudes about an inch, which is too much for me to mount a triple-gauge regulator to the back collar. :( When I closed the lid, it hit the gauges of the regulator. So I went with a distribution manifold connected via a shank to the outside where i now keep the tank and regulator.

Thanks for all the tips mongoose. I saw your build in another thread, and it's very close to what I have in mind for mine. I'm glad you pointed out about the collar attachment. I was thinking of gluing it because that's what everyone seems to do, but I like your idea much better.

I didn't think about reaching in to wipe it down either. ;)

My plan is to take my time on this build, do it right the first time, and leave myself room for expansion. My goal is to have it completed by early summer.

I realized I had one other thing I forgot to note. When I built mine I originally only have 3 taps, but planned on eventually 5 taps. When I marked out for the 3, I actually marked out for all 5, and used an awl to make a small divot in each place where the faucets should go. That way as I add faucets all I need to do is drill on that little divot and it's perfectly centered and spaced from the other taps.

I have 4 taps on there now, and a fifth on my workbench waiting for a free 20 minutes to install it. That little mark on the collar facade is there waiting for me. If you didn't know it was there, you wouldn't see it.
 
I just did some measuring, and my plans are going to have to change. I was going to use the mini fridge as my new fermentation chamber, and turn my current ferm chamber into the keezer. But it looks like my fermenters are not going to fit into the fridge due to the depth restrictions of the compressor hump, not the height. I'm thinking about ripping the fridge compressor guts out, which they already moved the coils to fit the keg, and building a wood box and using that to cool? Guess I got more research to do.
 
Been thinking about this all day, and I think I'm going to dial back my plans for the time being. I just can't give up my fermentation chamber, that I have dialed in and working perfect. So I might try out using the fridge I bought and only having one keg on tap. I'm going to get a manifold so I can still have a keg on co2 outside the fridge. I can then get brews kegged and on gas, or even carb them and then when ready just switch them out. I am going to switch out the faucet with a Perlick, and get new lines. This way I try out kegging and see if its for me before I dive in headfirst.
 

Latest posts

Back
Top