One Pot BIAB System, Best system ever?

Homebrew Talk - Beer, Wine, Mead, & Cider Brewing Discussion Forum

Help Support Homebrew Talk - Beer, Wine, Mead, & Cider Brewing Discussion Forum:

This site may earn a commission from merchant affiliate links, including eBay, Amazon, and others.

broncosaurs

Well-Known Member
Joined
Nov 15, 2013
Messages
86
Reaction score
27
Location
San Diego, Alpine

Let the beat down begin. But I do think I have one of the easiest to use systems to brew beer at home and thought I would let others in on the information. Let me explain. Years ago I started with a small pot over the stove using extracts. Went to a grain/extracts. Then upped the system to a full three kegel system HLT, mash tun w/false bottom, RIMs, and boil. Started as a gas system then later I went to an all electric. Been on this system for years. I wanted to shrink the size of the system (space in garage not volume), speed up brew time and reduce the lifting and all the cleaning. The idea, I want a one pot system. I looked into the complete automatic one pot electric brew systems and nothing tickled my fancy. Too complicated, to small, very limited to try different methods. I love to build so I “dry hopped” on the DIY train. With the system I have now I can brew a 5.5 gal batch in 3 hours without taking any shortcuts in the boil or mash time. Typical brew day: 5 min mash in, 60 min mash, 15 min to boil, 60 min boil, 30 min cooling, 5 min transfer. The system is real easy to use. I can do 10 gal batches and also very high gravity beers. With a few add ons I can whirlpool and am working on doing stepped mashes. Clean up is a breeze and so is grain disposal. This is how it all worked out.


POT:

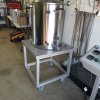
First I needed a pot small enough for a 5 gal batch but big enough for a 10 gal batch. I brew some very high avb beers which take a lot of grain. I settled on a 20 gal. kettle size The size has worked out quite well for what I brew. Maybe a little big for 5 gal light avb and a little small for 10 gal high avb but both work. Because I wanted to mash in the same pot as the boil the pot would either need to have a RIMs system, (HERMs was out because no HLT) or the pot needed to be insulated to hold the temperature. KISS, keep it simple stupid, no RIMs (yet). I found a few pots that had insulation and lids to hold mash temp like a cooler does. I looked into the insulation of the pots and all seem to have a spray in polyurethane. Being that I wanted to boil in the same pot I mash in, I had to make sure the insulation would hold up to the 212* of the boiling mash. None of the pot manufacturers would give me the OK to boil in their pot. In fact most said don’t. With some internet research most spray in polyurethanes are OK up to 260*. He 2xL , I’m willing to give it a $700 try. I ended up buying a 20 gal SS Brewtech Infussion mash tun. (Jump forward, after 30, one hour boils I see no degradation of the insulation.) This pot is beautiful and is holding up very well. The pot mash temperature loss for 9 gal is about 2*, 17 gal about 1*. I don’t use the manometer nor the false bottom because I use a BIAB bag. After the boil I will drain the trub cone out thru the bottom drain before transferring to the fermentation vessel. I do have trouble with the drain clogging up after a boil with a lot of hops. When this happens I have to use the handy dandy auto siphon. If SS brewtech would make a pot without the false bottom, without the manometer and holes, a larger hole in bottom to stop clogged drain, a slot in the lid (more on this later), maybe a guarantee on the insulation, and for less cost because of less features this pot would be the bomb. Just a note in case it is not obvious, DO NOT boil or heat using gas or anytype of heat under the pot. I built a cart with some 80/20 found on ebay. Added a top of some Corian countertop to add some class. Wheels so the full pot can be moved quite easily to and from under the bag lift.
Pot Cart.jpg
 
Last edited by a moderator:

BIAB:

Even though the SS pot came with a false bottom, since I wanted to boil in the same pot I needed a way to get the grain out. I contacted Brewinabag about a bag to fit this brewtech pot. Looks like using this pot with a bag is something a lot of people do already. Brew Bag already

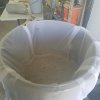
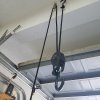
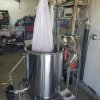
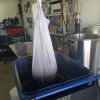
had some in stock to fit this pot. Great bag, very well made and fits quite nice. Lifting a 20+ lb grain bill that must now weigh 40lb, the bag does not show any over straining. Especially with the heaver brews I needed a way to lift the bag out of the pot (Im getting old) and also wanted, again, to make cleanup easy, I rigged up a ratcheting block rope system. Adding the second pulley on the beam gives me a 2:1 lifting advantage and also the pull to lift the bag is in a downward direction. The ratchet is self locking so I don’t have to tie off under load. After lifting the bag I start the boil and let the bag drip for 30 minutes or so during the boil. This ensures I get most of the wort from the grain. When the bag draining is done and during the boil I roll the pot out from under the bag and roll the trash can under the wet grain. Lower the bag some and unhook two of the four bag loops from the ratcheting hoist, I invert the bag inside out. Bam, done, done emptying 40lbs of grain! 10 seconds. A quick spray down on the bag to finish cleanup. A few notes on the BIAB method. My effency went way down. More than “just add some more grain to the grain bill”. Also grain purchased from every supply store, I had a different efficiency ranging from piss poor to just damn bad. I solved this by grinding the grain twice. I let the LBH grind the first time and I regrind the grain a second time before brewing. I have the mill at .032 so not to fine. This method keeps the efficiency OK, 70+% but more important the efficiency is very stable from run to run no matter what LBH I get the grain from. Apart from this the BIAB method is great.

Bag.jpg Rope.jpg boil.jpg Trash.jpg
 
Last edited by a moderator:

HEATER:

I looked into installing an electric heater into the pot thru the double wall but thought against it. Maybe if the factory installed one this would be better, maybe not. I was not willing to do it. I put together a Hotrod heat stick using a 5500w SS ULWD element. I got the tri clover kit from Brew Hardware. The large 5500w ULWD element w/ the hotrod fittings fits into the pot very nicely, it is not to long. I bent the hotrod tube to just start bending on top edge of pot and cut to length. Made my own hook to hook the rod on the side of the pot, the one that comes with the rod is kinda cheesy. I needed a way to monitor temperature for auto pid temperature control so I mounted a small T/C probe into the inside of the tri clover housing in the hotrod and ran the wire up the tube with the power wires. Very clean installation but the T/C was reacting to slow to temperature. For the time being I installed another T/C mounted onto the outside of the hotrod tube. This works great but I have other plans. I am going to build a tri clove housing like the hotrod but with some add ons. First I want a small thermowell to put the temp probe back into the housing. This makes for such a cleaner installation with wires running inside the tube and also protects the probe from damage. Also I am going to install an optical liquid switch. What, you ask? Why would he need this? Well… I accidentally found a great way to clean the heater element without using water. Yes with the liquid switch installed into the hotrod tri clover housing the heater can never be energised unless the element is covered with water. This is a future upgrade, parts are on order. Currently, the “don’t burn the heater up” safety switch is a “remove before flight” tag that is either on the heater tube when powered or on the heater switch when off. So back to the brew day, the hotstick goes into the pot to heat the water to mash in temperature. Put lid on. BTW I cut a slot into the lid so I can have the hotrod in the pot and the insulated lid on without any gaps. This helps heat up time and pre heats the lid so the mash temp does not drop much during the hour mash. I run the system in an automatic temperature PID loop so as not to have to watch the temperature. Distracted for 20 minutes, too many beers,no problem, the pot is still at the correct temperature. Let the water and pot stabilize at mash in temperature calculated for the temperature drop of adding the cold grain. TURN OFF power to the hotrod and remove. Insert the BIAB and mash in. The rod will heat 9 gal of water to mash in temp in 30 minutes, 17 gal about 45 minutes. Mash done, lift grain bag, while draining put hotrod into pot to boil right a way. Boiling in about 15 minutes (9gal). After boil, remove hotrod. Did you turn the hotrod off? Submerge copper chiller, chill, done. My old kegel boil pot would sometimes get the copper chiller stuck under the installed heater element. The element would also get in the way of a good whirlpool. After using this heat stick with the ability to remove the element from the pot I don’t think I would permanently mount the element into the pot.

Heater 1.jpg Heater 2.jpg Heater 3.jpg Heater 4.jpg Heater 5.JPG
 
Last edited by a moderator:
CONTROL:

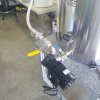
The control is pretty simple. The heater can be controlled in auto PID temperature mode for heat up or in manual wattage power control for boil. I also have a timer with alarm that can be used as a mash, boil, hops etc countdown timer or the timer can be used to turn on the system with the heater in auto PID temperature mode. This gives the ability for the water to start heating automatically. This automatic turn on feature saves so much time on brew day. The heater utilizes an SSR with an external heat sink external and sealed to the case. The SSR is controlled by the PID controller or the Aubern power controller. The power switch in left position is run mode. Right position is timed start. Center is off. The switch in between the two controllers is, left PID control, right power control and center heater off. The buttons by the timer, start, stop/reset. I might make a control system with a touch screen. Why? Because I can.

Cont.jpg


Other Features:

I just started doing long whirlpool hop additions in NEIPAs. I took an old Chugger pump from the 3 kegel system connected it directly to the pot drain with cam locks, ran the outlet back into the recirc port on the pot. I did a 40, 30, 20 minute large whirlpool hop addition without any problems. I saved the old RIMs tube from the old system also just in case I ever want to do a stepped mash. My only question would be the draining of the BIAB to the drain port. I am thinking of lifting the bag just off the bottom and giving it a try.
WP1.jpg WP2.jpg

 
Last edited by a moderator:
My system is like your, but is not sophisticated like this.

I use plastic pot of 35L (9 gallon) with lid in which I installed the heater of electric kettle of 2000W and use BIAB bag maked from curtains. This is enough for standard batch of 23L of beer, BIAB no sparge with full water volume.
I think it can't be simpler and cheaper (cca 50$).
One more heater can be installed for quicker water heating and stronger boiling, tap for easier pouring in the fermenter and pipe thermostat (as with domestic boilers) for automatic heating control.
 
This is a cool idea! This could be the next step for BIAB. The grain father insulated or something. Who knows. Maybe SsBrewTech will make a commercially made item like this with built in heating in the bottom like the grain father. Great job!
 
I have been doing similar but in a much more “ghetto”. much lower budget fashion for several years with nothing more than manual temp control and no pump...not that difficult to hit strike temp imo.

I would choose to forego the pricy insulated mash tun / boil kettle and prefer to just insulate the kettle with a blanket. An insulated vessel like the SS brewtech wouldn’t work for me as I simply kettle ferment making one vessel brewing that much simpler :) and easier...
That’s a one pot system in my world :)

Agreed, a nice 1/4” double ratchet pulley is priceless for easing BIAB lifting!!!
 
Last edited:
I like the heat stick ad insulated mash tun. I would be curious how long that insulation will hold up to boiling temperatures. I think I also read that digital thermometer isn't meant for boiling temps either.

You may consider running that pump when heating your strike water. It will reduce hot spots/stratification and possibly give you a quicker/more efficient heat up time if the heat loss from the hoses isn't too much.

Is the heat stick set up 240V?

Does the PID have an input that is triggered by the timer alarm or is more complicated than that?
I love the idea of setting up the system the night before and walking into the brew room with water already heated to strike temp.
 

Latest posts

Back
Top