justanutherdude
Member
Thought I might post the progress of my conversion of the new "to me" beer fridge. Just in case anyone else is considering doing it.
(Had experience from doing my small chest freezer that holds (2) 3 gallon ball-locks for my bar, but this is a whole other level of destruction!)
Picked up a used 18 cu. ft. fridge from craigslist for $100. Got it home and gutted the interior and cleaned. (and cleaned and cleaned... you get the point)
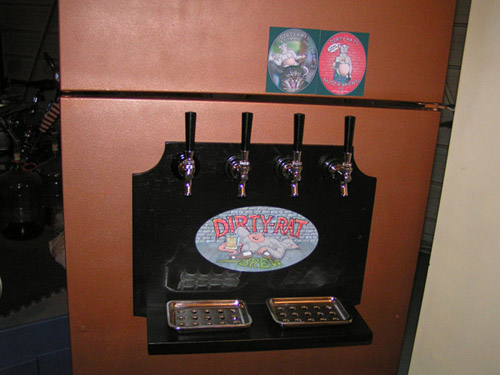
Figured I can easily fit (4) 5 galons cornies with plenty of room for other stuff. So I laid out where I wanted the taps. Made sure that the stardard 4" black tap handles would not interfere with opening the freezer. Also taking into account where I could cut based on the layout of the interior door plastic. (See the picture for what I mean, I wanted to keep as much of the door shelving usable as possible) Cut out the (4) 1" holes into the door with a bi-metal hole cutter on the drill. (For the record, they are spaced at 4" center to center, no reason other than I thought that spacing looked the best) Then used a utility knife with a new blade to cut out the rectangle of plastic from inside the door. Only takes two passes with the blade, so you don't have to use a huge amount of pressure! Be careful!!
After this was done I painted the doors with Kilz primer and Rustoleum hammered copper spray paint. The rest of the fridge will be gloss black.
Cut out the decorative panel behind the taps from wood, attached a shelf for the drip trays and painted it all black. I was counting on this panel to add some stiffess to the taps as well. So far, so good.
Ran the shanks through the door and the panel and attached the faucets.
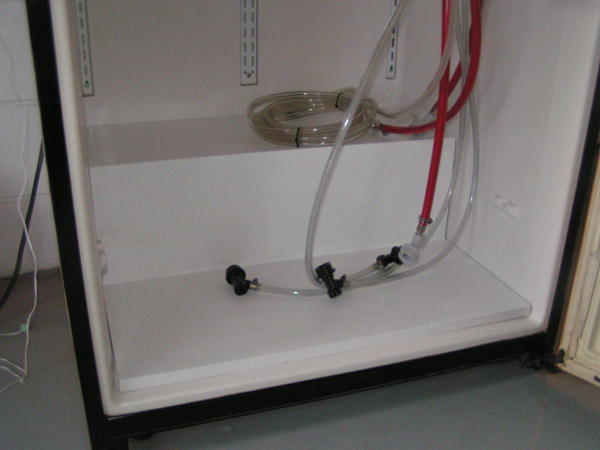
Attached the liquid disconnects to 6' pieces of 3/16" ID thick walled beverage tubing and then to the shanks.
Attached the gas discoonects to 5' pieces of 5/16" ID CO2 line and then to the three way gas mainfold. Also attached the gas-in line at this time. Wanted all the hoses attached first in order to determine the best place to mount the manifold.
Mounted the manifold with 4 bolts through one of the door shelves and a block of wood underneath for strength.
Well, thats where I currently stand. A little long winded but I always think too much info is better than too little. Hope to have more progress in a couple of days.
(Larger pics are in my gallery)


