• Please visit and share your knowledge at our sister communities:
  • If you have not, please join our official Homebrewing Facebook Group!

    Homebrewing Facebook Group

My new mash tun

Homebrew Talk

Help Support Homebrew Talk:

This site may earn a commission from merchant affiliate links, including eBay, Amazon, and others.
Be sure to preheat it first! It wasnt that big of a deal when it was plastic but now that its metal it will drop the temp quite a bit if its not preheated. I have been fliping mine over upside down and putting it ontop of my kettle while I heat my sparge water and letting the steam heat it up for me.

Agreed; it will most certainly need to be preheated. I'll be dropping in a gallon or two of sparge/mash water in prior to mashing.
 
I have been thinking of this for quite sometime too and was just lucky enought to find something that would work. It only took hours and hours of searching pots online to find the right one but im glad I did!
I can relate- I have at least 15 hours logged looking for just the right pot, too…learned a lot about "spinning" metal along the way, and that stainless barrels are far more expensive than a regular ol' stock pot. Oh well, seeing yours gave me the nudge I needed...ordered mine day before yesterday. Now i'll be pricing out march pumps, sparge arms, quick disconnects, etc., etc...
 
I can't believe this, Ben- I have been picturing almost this exact same setup in my mind for the last couple of weeks, but I had no idea you had posted this. Great minds must think alike! I am planning this same build with an electric heating element in the 3 inch open space between the bottom and the basket bottom, adding a March pump and a sparge arm threaded through the lid…add a Ranco and some quick disconnects, and for under $400 i'll have the equivalent of the Braumeister for a ton less dough. Just so weird to see you were doing what I had been scheming these past few weeks. Happy brewing!

From your description, am I correct in concluding that you're planning on boiling in this pot after installing in the cooler? Please post and let us know how it works out?
 
From your description, am I correct in concluding that you're planning on boiling in this pot after installing in the cooler? Please post and let us know how it works out?

I'd be concerned about continued exposure of high heat to the foam; most of the expandable/insulating foams are only rated to 150* or thereabouts.
 
I'd be concerned about continued exposure of high heat to the foam; most of the expandable/insulating foams are only rated to 150* or thereabouts.
I am glad you mentioned the temp issue. I think I'll wrap the pot in that thin foil insulation and cut a circle the size of the bottom and stick it on the bottom of the cooler before I drop the pot in now. It'll add some labor to the project, but this thing will be solid when all's said and done. I am going to try to post pics as I get things underway…
 
From your description, am I correct in concluding that you're planning on boiling in this pot after installing in the cooler? Please post and let us know how it works out?
Yep, I am striving for a single vessel system- HLT, MLT and BK all in one. Small footprint and shorter brew days! To be honest, I wouldn't even be building this thing without my wife's inspiration- she's been on me to get rid of a bunch of brewing equipment that takes up valuable real estate in our garage for years…not to mention her (and my) general distaste for 7-8 hour brew days…when I saw the Braumeister I knew that system would kill 2 birds with one stone. The price tag was not something I could handle, though, so I started dreaming of how I could use what I already have. I sure hope it turns out as cool as I am imagining it to be…
 
I am glad you mentioned the temp issue. I think I'll wrap the pot in that thin foil insulation and cut a circle the size of the bottom and stick it on the bottom of the cooler before I drop the pot in now. It'll add some labor to the project, but this thing will be solid when all's said and done. I am going to try to post pics as I get things underway…

I think that's a good idea, although I'm not sure how much room left there will be for the foam in the cooler. At that point you may want to just wrap your kettle in insulation and get it rhino lined. With 1/2" of wrapping there would be little to no foam left in the cooler. Most of the expandable non latex foams are made from isocyanates (very nasty stuff). While I am sure they release them while curing, I'm not sure what would happen if the foam were exposed to high heat after the fact.
 
well, if all I am left with is the shell of the cooler, I am fine with that. They're not unattractive- certainly more attractive than a foil insulation wrapped pot on its own. Plus, it's got really big, sturdy handles, which is quite important. I found some stuff online that is heat rated to 2000 F and might be even thinner than Reflectix...the walls of the cooler itself are over an inch thick, so I think I should be ok…
 
I just ordered the pot off of Amazon for $86.

Does anyone have any recommendations for a weld-less fitting setup? I cannot figure out what size I need to order (looking at bargainfittings.com) without having the pot here? I will be using this with a domed false bottom.

Thanks
 
I used a domed false bottom and a 1/2" fnpt fitting. I welded mine in because I didnt want any chances of it leaking but a weldless would work just fine.
 
anyone have numbers--- degrees lost over time. Hows this contraption perform?

im intrigued

I brewed again on friday and checked my temp loss but my digital thermometer was broken. I used a analog thermometer and it didnt look like it dropped at all but it is a small dial and the increments are not that accurate so next time I will have a new digital thermometer.
 
I brewed 2 weeks ago; haven't had time to post photos, but it looked like I lost about 1.5* over a 90 minute mash.
 
Brewed 3x in mine so far, every time it's lost about 1.5*-2* in a 75 minute mash. This is with ambient temps around freezing (or 18* last time), so I'm very happy with it. I've noticed no less drop in temperature with this than the regular cooler AS LONG AS IT IS PREHEATED A BIT. The increased thermal mass of the stainless pot/liner will suck more heat out if it's 35* when you throw your strike water in. I just put a gallon of hot tap water in it while heating my strike water which solves the problem.

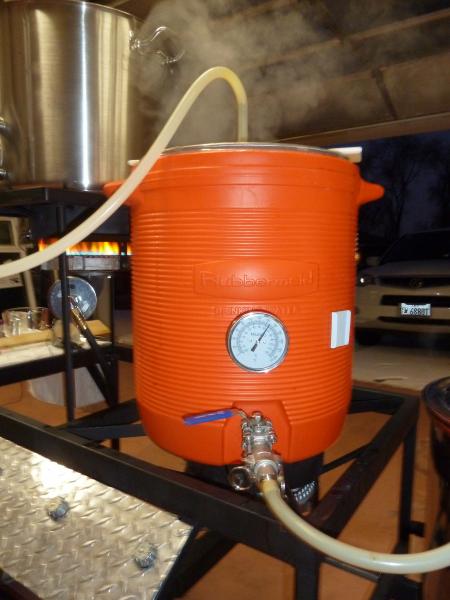
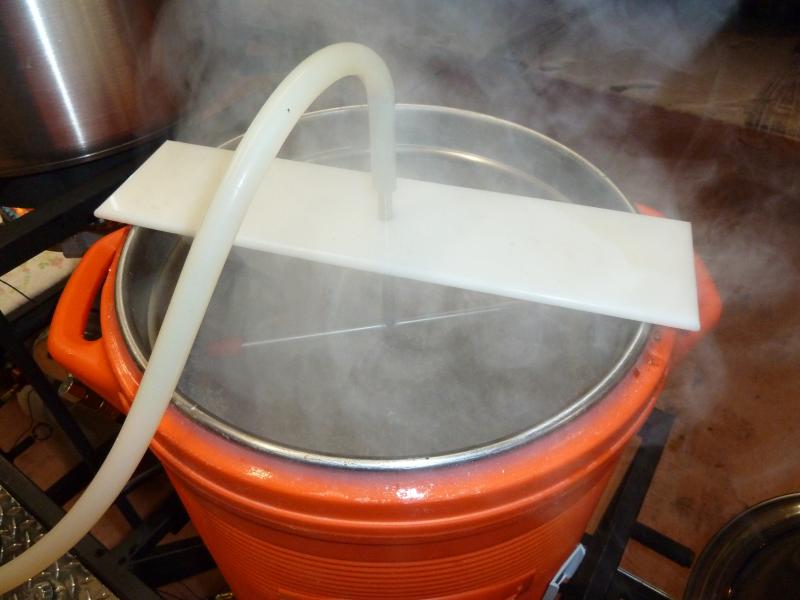
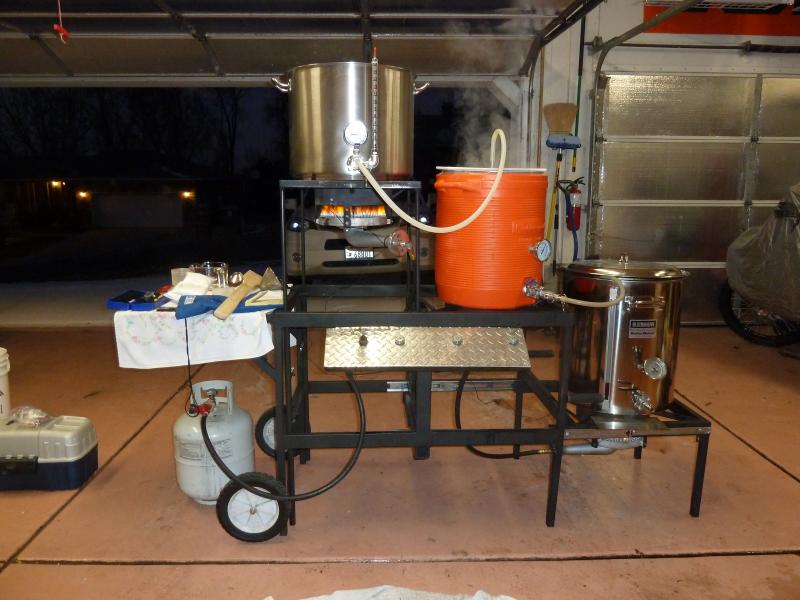
Attached are the photos I promised so long ago. Forgot to take a photo of the lid, which I attached to the stock rubbermaid lid for insulation, but it keeps temps perfectly. Thanks for the great idea Ben!

I'm debating on selling this and upgrading to a larger mash tun as I found an amazing deal on a Blichmann 15 gallon, but it's going to be very hard to find something that insulates as well as this.

P1020512.jpg


P1020513.jpg


P1020510.jpg
 
Hell yea man thats bad ass! I love the valve and thermometer in it. How well is the thermometer working for you? I want to put one on mine but always wondered how well they would work in a mash tun.

Your never gonna find a nice stainless steel mash tun that is insulated like this one. The blichman ones are nice but have no insulation.

Thermo works great as long as you have something to calibrate it against... I bought a thermapen a whole ago so all my thermometers read correctly now. Out of 5 not even one read within 3* of correct at 150*. This explains a lot on my previous beers and how many of my beers were fermenting too far out as I was consistently mashing low.
 
Just put one of these Mash Tuns together, found the pot for $40 on eek-bay and bought the cooler used in the classifieds for $15.00. Such a good idea, I just couldn't get comfortable with my mash sitting in that plastic cooler, love the idea of stainless and the insulation properties of the cooler.
The only piece that I might add is that I think I am going to coat the outside of the pot in urethane grease (release agent) and fill the gaps that I caused (removing the insulation to fit the pot) with GreatStuff. (BTW irrigation/aquarium tubing make really long flexible GreatStuff straws) I was not able to have as much control as I would have liked and I took a little bit more than I would have liked to in certain spots.
Just a thought..I'll try to post back if it fails or seems successful.
 
FWIW, I built another and I'm going to sell it. Thought I could use 2 for the 'big' brew days but I found a good enough deal on a larger 15G kettle that I think I'm going to go that route instead.


I'll post photos in the classifieds in the next week, but if anyone is interested feel free to PM me. Same as the one posted above.
 
Man, can't believe I didn't see this thread 'till now. I've brewed a few batches in my cooler and it's worked great - just never really liked the thought of exposing plastic to such high temps and wondering about leaching bad stuff into my beer? Anyways, awesome info and pics Ben and Kincade. Just ordered my pot and excited to start this project. I'm wondering did you guys glue or fasten the pot into the cooler? How 'bout the top, did you caulk around between the pot and the cooler?
 
Man, can't believe I didn't see this thread 'till now. I've brewed a few batches in my cooler and it's worked great - just never really liked the thought of exposing plastic to such high temps and wondering about leaching bad stuff into my beer? Anyways, awesome info and pics Ben and Kincade. Just ordered my pot and excited to start this project. I'm wondering did you guys glue or fasten the pot into the cooler? How 'bout the top, did you caulk around between the pot and the cooler?

Exactly the reason I wanted to do this conversion as well! It works fantastic. My only bad experience was letting the razor knife slip and ending up with 6 stitches in my thumb. :eek: Well, that and shaving the insulation out. That sucked royally IMHO. I spent at least 3 hours shaving insulation so the fit would be tight; but that stuff is nasty when in dust form. Make sure to wear a dust mask at least.

I didn't glue the pot in as the fittings make sure it can't come out, and the slip fit was quite tight already. I DID use a food safe 100% silicone caulk around the top and both fittings to make sure no water leaked in between the cooler and pot.

I'm sad to sell mine, but excited to step up to larger batches. I'd recommend this to anyone if they have the time.
 
I just bought 2some 10 gallon Rubbermaid coolers now that I saw this I want to buy a couple pots. This a pump, and the external heating element would be an awesome setup.
 
Well, that and shaving the insulation out. That sucked royally IMHO. I spent at least 3 hours shaving insulation so the fit would be tight; but that stuff is nasty when in dust form. Make sure to wear a dust mask at least.

That yellow dust is nasty. I'm about a third of the way down shaving it now. Had to move outside, SWMBO threw a fit about the dust bits in the garage.
 
That yellow dust is nasty. I'm about a third of the way down shaving it now. Had to move outside, SWMBO threw a fit about the dust bits in the garage.

Yeah, that would have been my least favorite part if i hadnt almost cut off my thumb. :p. A shopvac helps some, but the dust gets a static charge and sticks to just about everything.
 
Agreed. The dust is a pita. I got out a dust mask that I purchased for another project. This was a great help. I also used a Dremel Rotary Tool with a cutting disk to shave down the insulation. This, I am sure, contributed to the dust, but it also lessened the time needed to get the pot to fit. Mark
 
Agreed. The dust is a pita. I got out a dust mask that I purchased for another project. This was a great help. I also used a Dremel Rotary Tool with a cutting disk to shave down the insulation. This, I am sure, contributed to the dust, but it also lessened the time needed to get the pot to fit. Mark

I don't think there is any way to avoid the dust. I used a razor, rasp, rotary sander, and dremel. None of them seemed to cause more dust than the other, its just a messy job.
 
OK, just about finished with mine. My Bayou Classic pot came today so I took out my weldless ball valve and thermometer and got to workin'. Took me about two hours to take out the old liner, cut the top off and shave down the foam. I went pretty easy 'cuz I was afraid of taking too much foam off at once. Anyways, for those of you thinking of doing this here's a couple things I did that made things a little easier: I used a folding limb saw for shaving the foam and it worked great. I just laid it flat (very slight tilt actually) against the foam and pulled it out towards me and in a sweeping motion along the foam. Then I used the hacksaw blade to smooth it out at the very end. Also, once I got the pot so it could slip all the way in I pried it out a little and caulked under the rim of the pot then pushed the pot all the way back down. Once I wiped up the excess you can't even see the caulk but it seals the top beautifully. One other thing, don't force the pot in too tight as you're going along because it'll be a BEAR to pull back out - learned that one the hard way:eek: Thanks to the OP for the great idea! Can't wait to brew now.
 
Im glad you guys are liking this build. I personally love it. Be sure to preheat it or you could loose some serious temp. I will never have another plastic mas tun again ever!
 
Got my false bottom a couple days ago and my pot yesterday. I hope to get every thing cut and ready today. Going to take the pot to work and tig weld the fittings. Thinking of having 3 or 4 fittings welded to it. Drain, thermostat, recirculation near the top, and maybe a site glass.
Time to get busy and take some pics along the way.
 
Back
Top