• Please visit and share your knowledge at our sister communities:
  • If you have not, please join our official Homebrewing Facebook Group!

    Homebrewing Facebook Group

Keezer to end all Keezers (in my house) build

Homebrew Talk

Help Support Homebrew Talk:

This site may earn a commission from merchant affiliate links, including eBay, Amazon, and others.

Supergrump

Well-Known Member
Joined
Mar 29, 2011
Messages
97
Reaction score
40
Location
Abbotsford
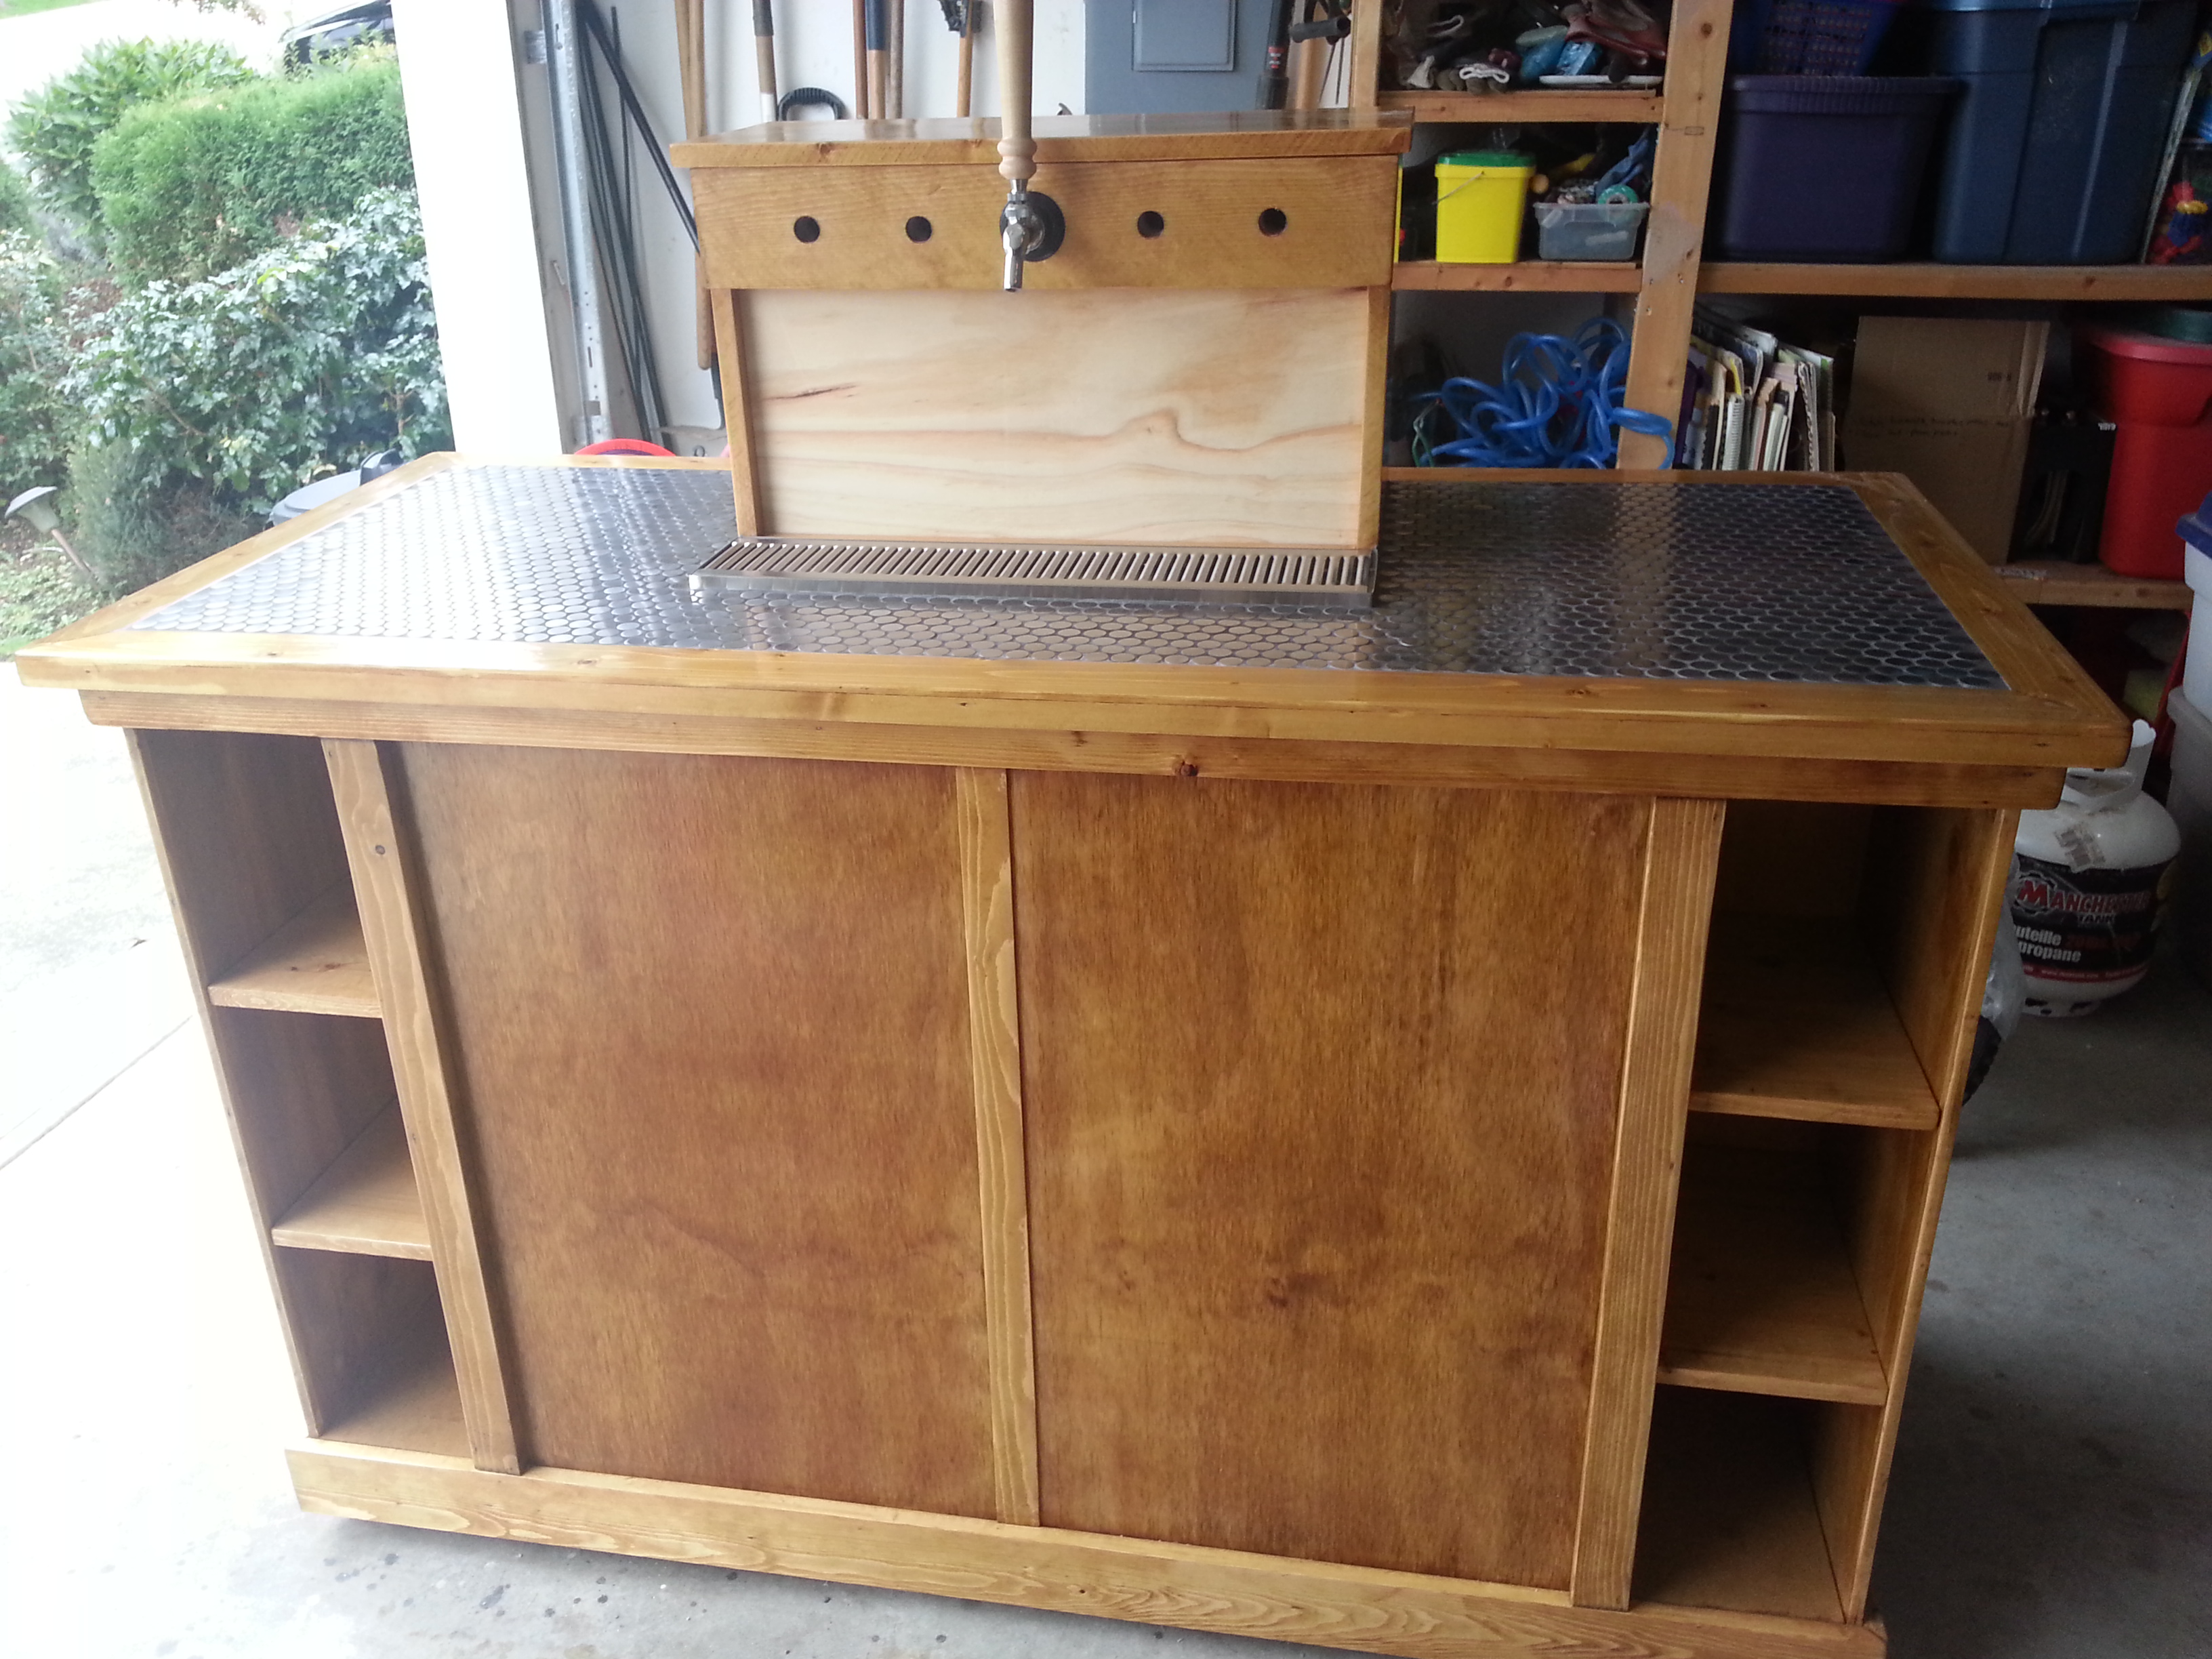
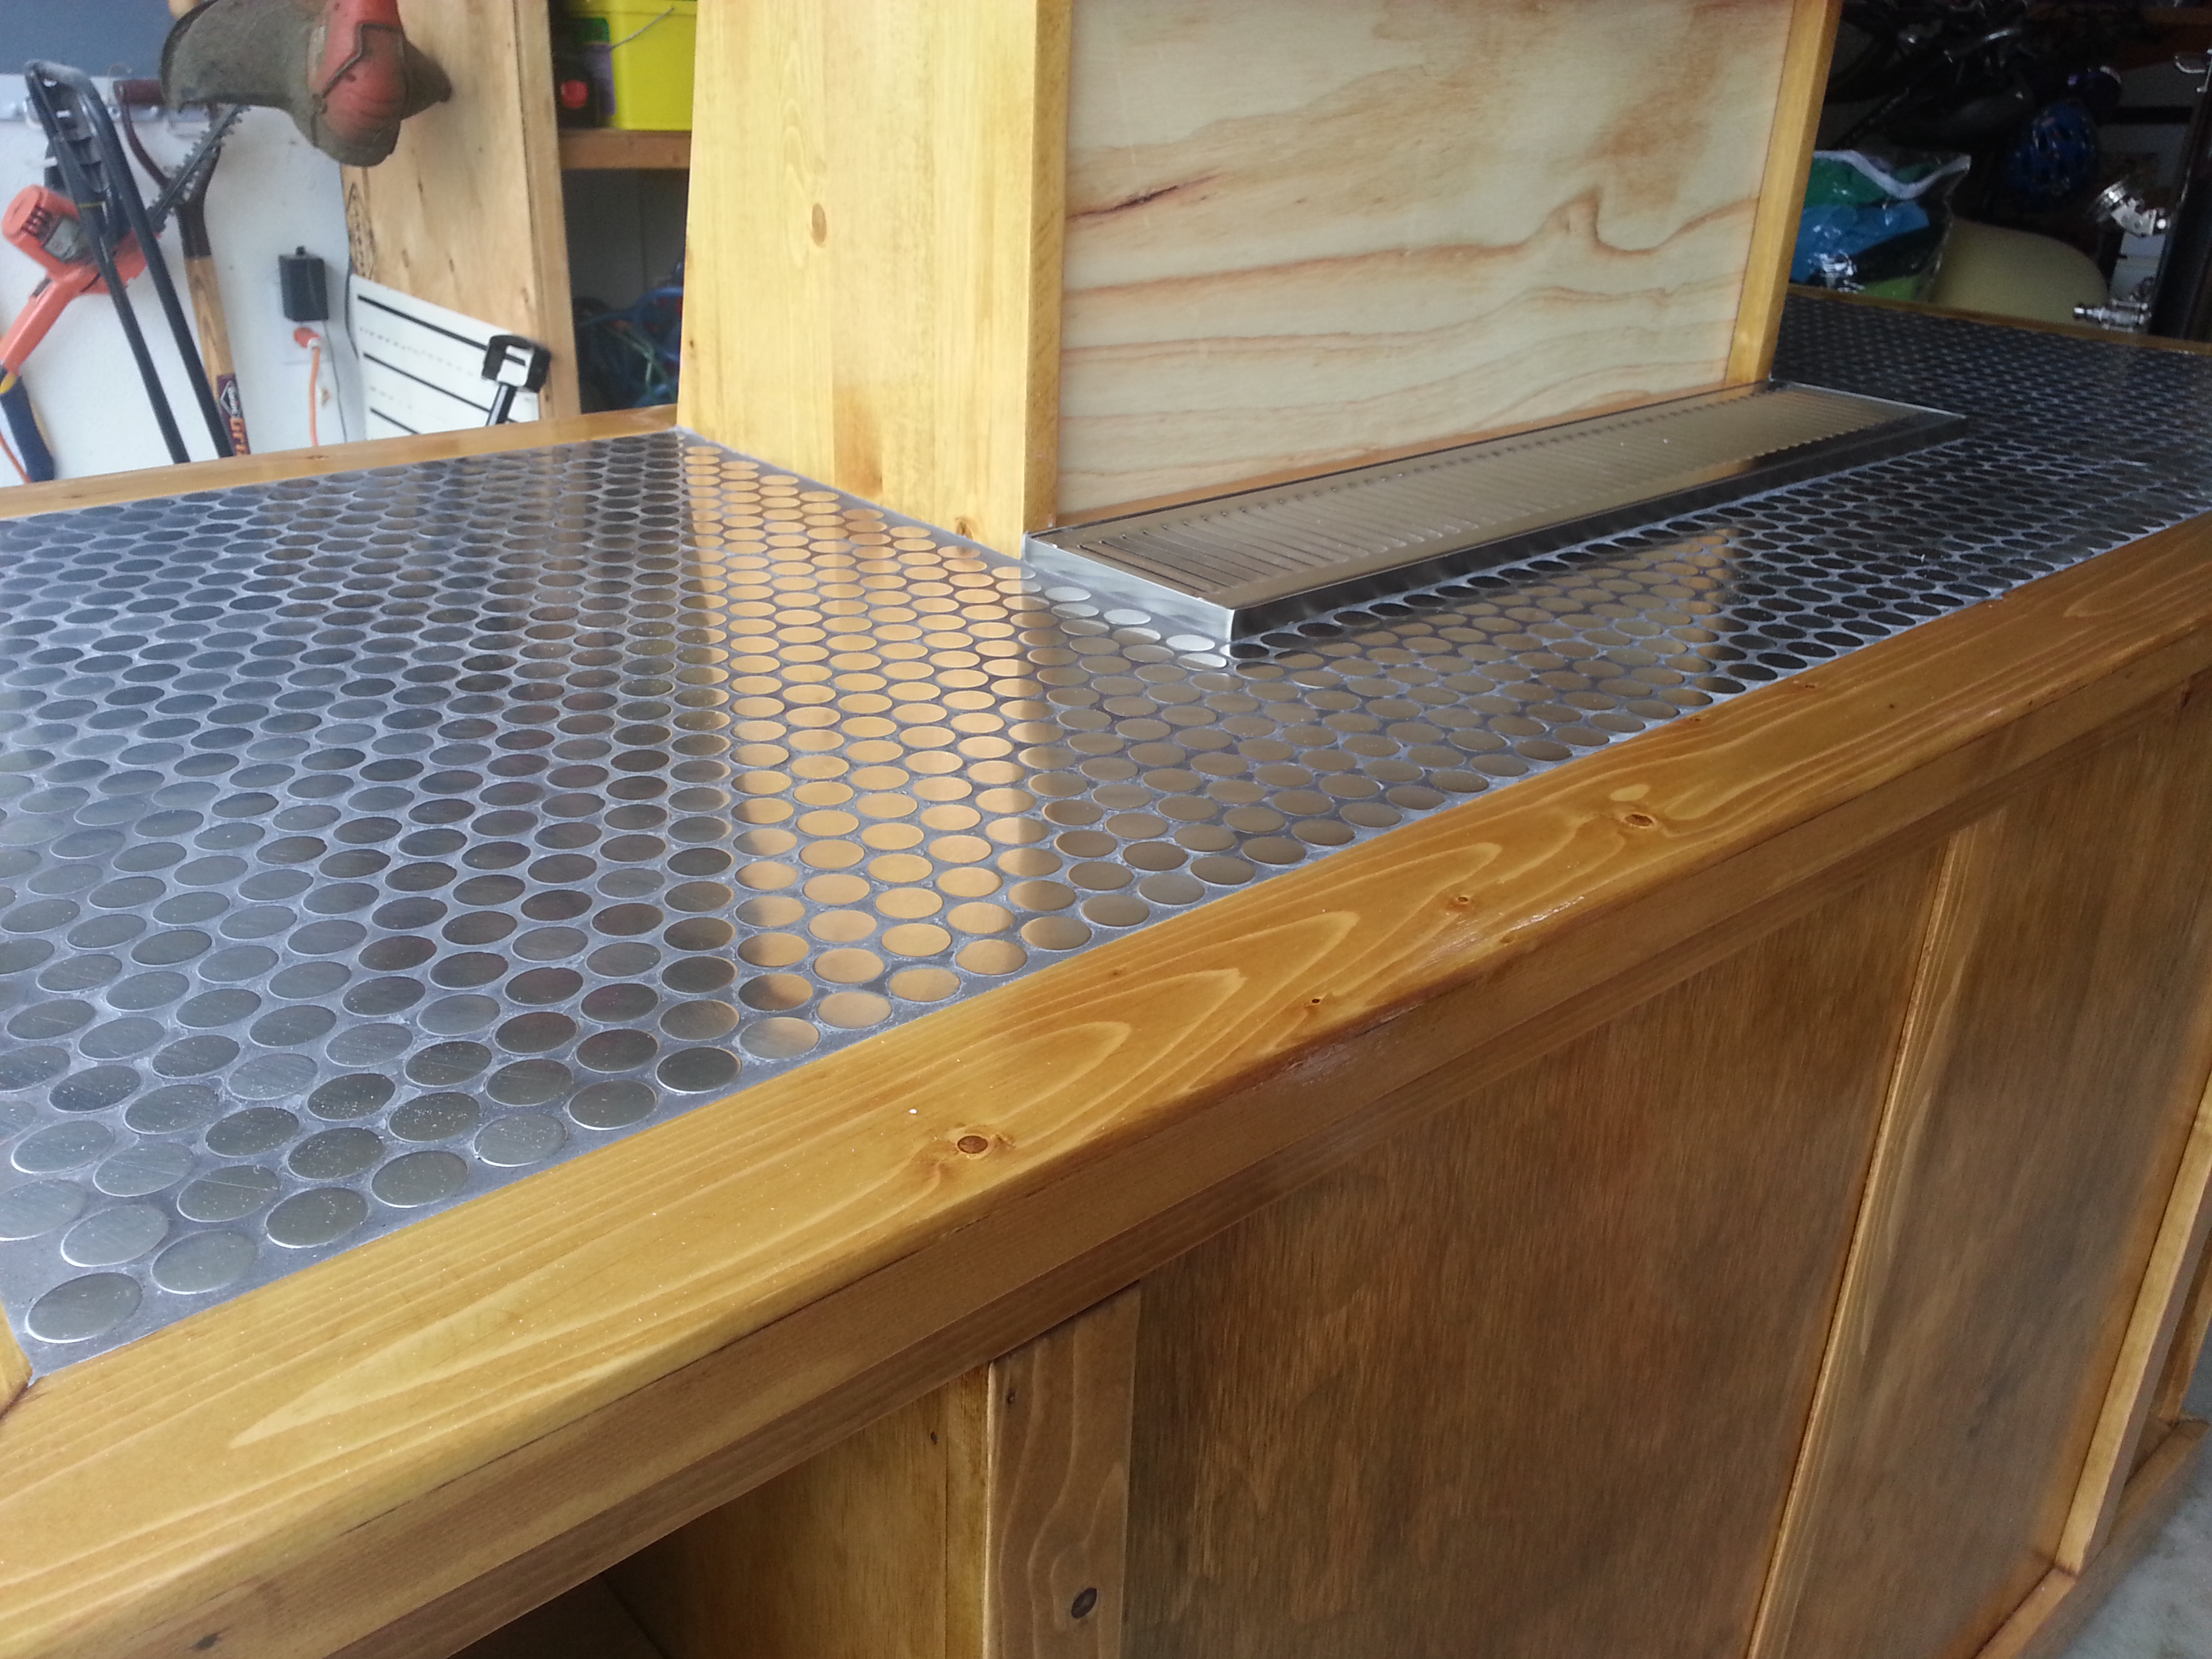
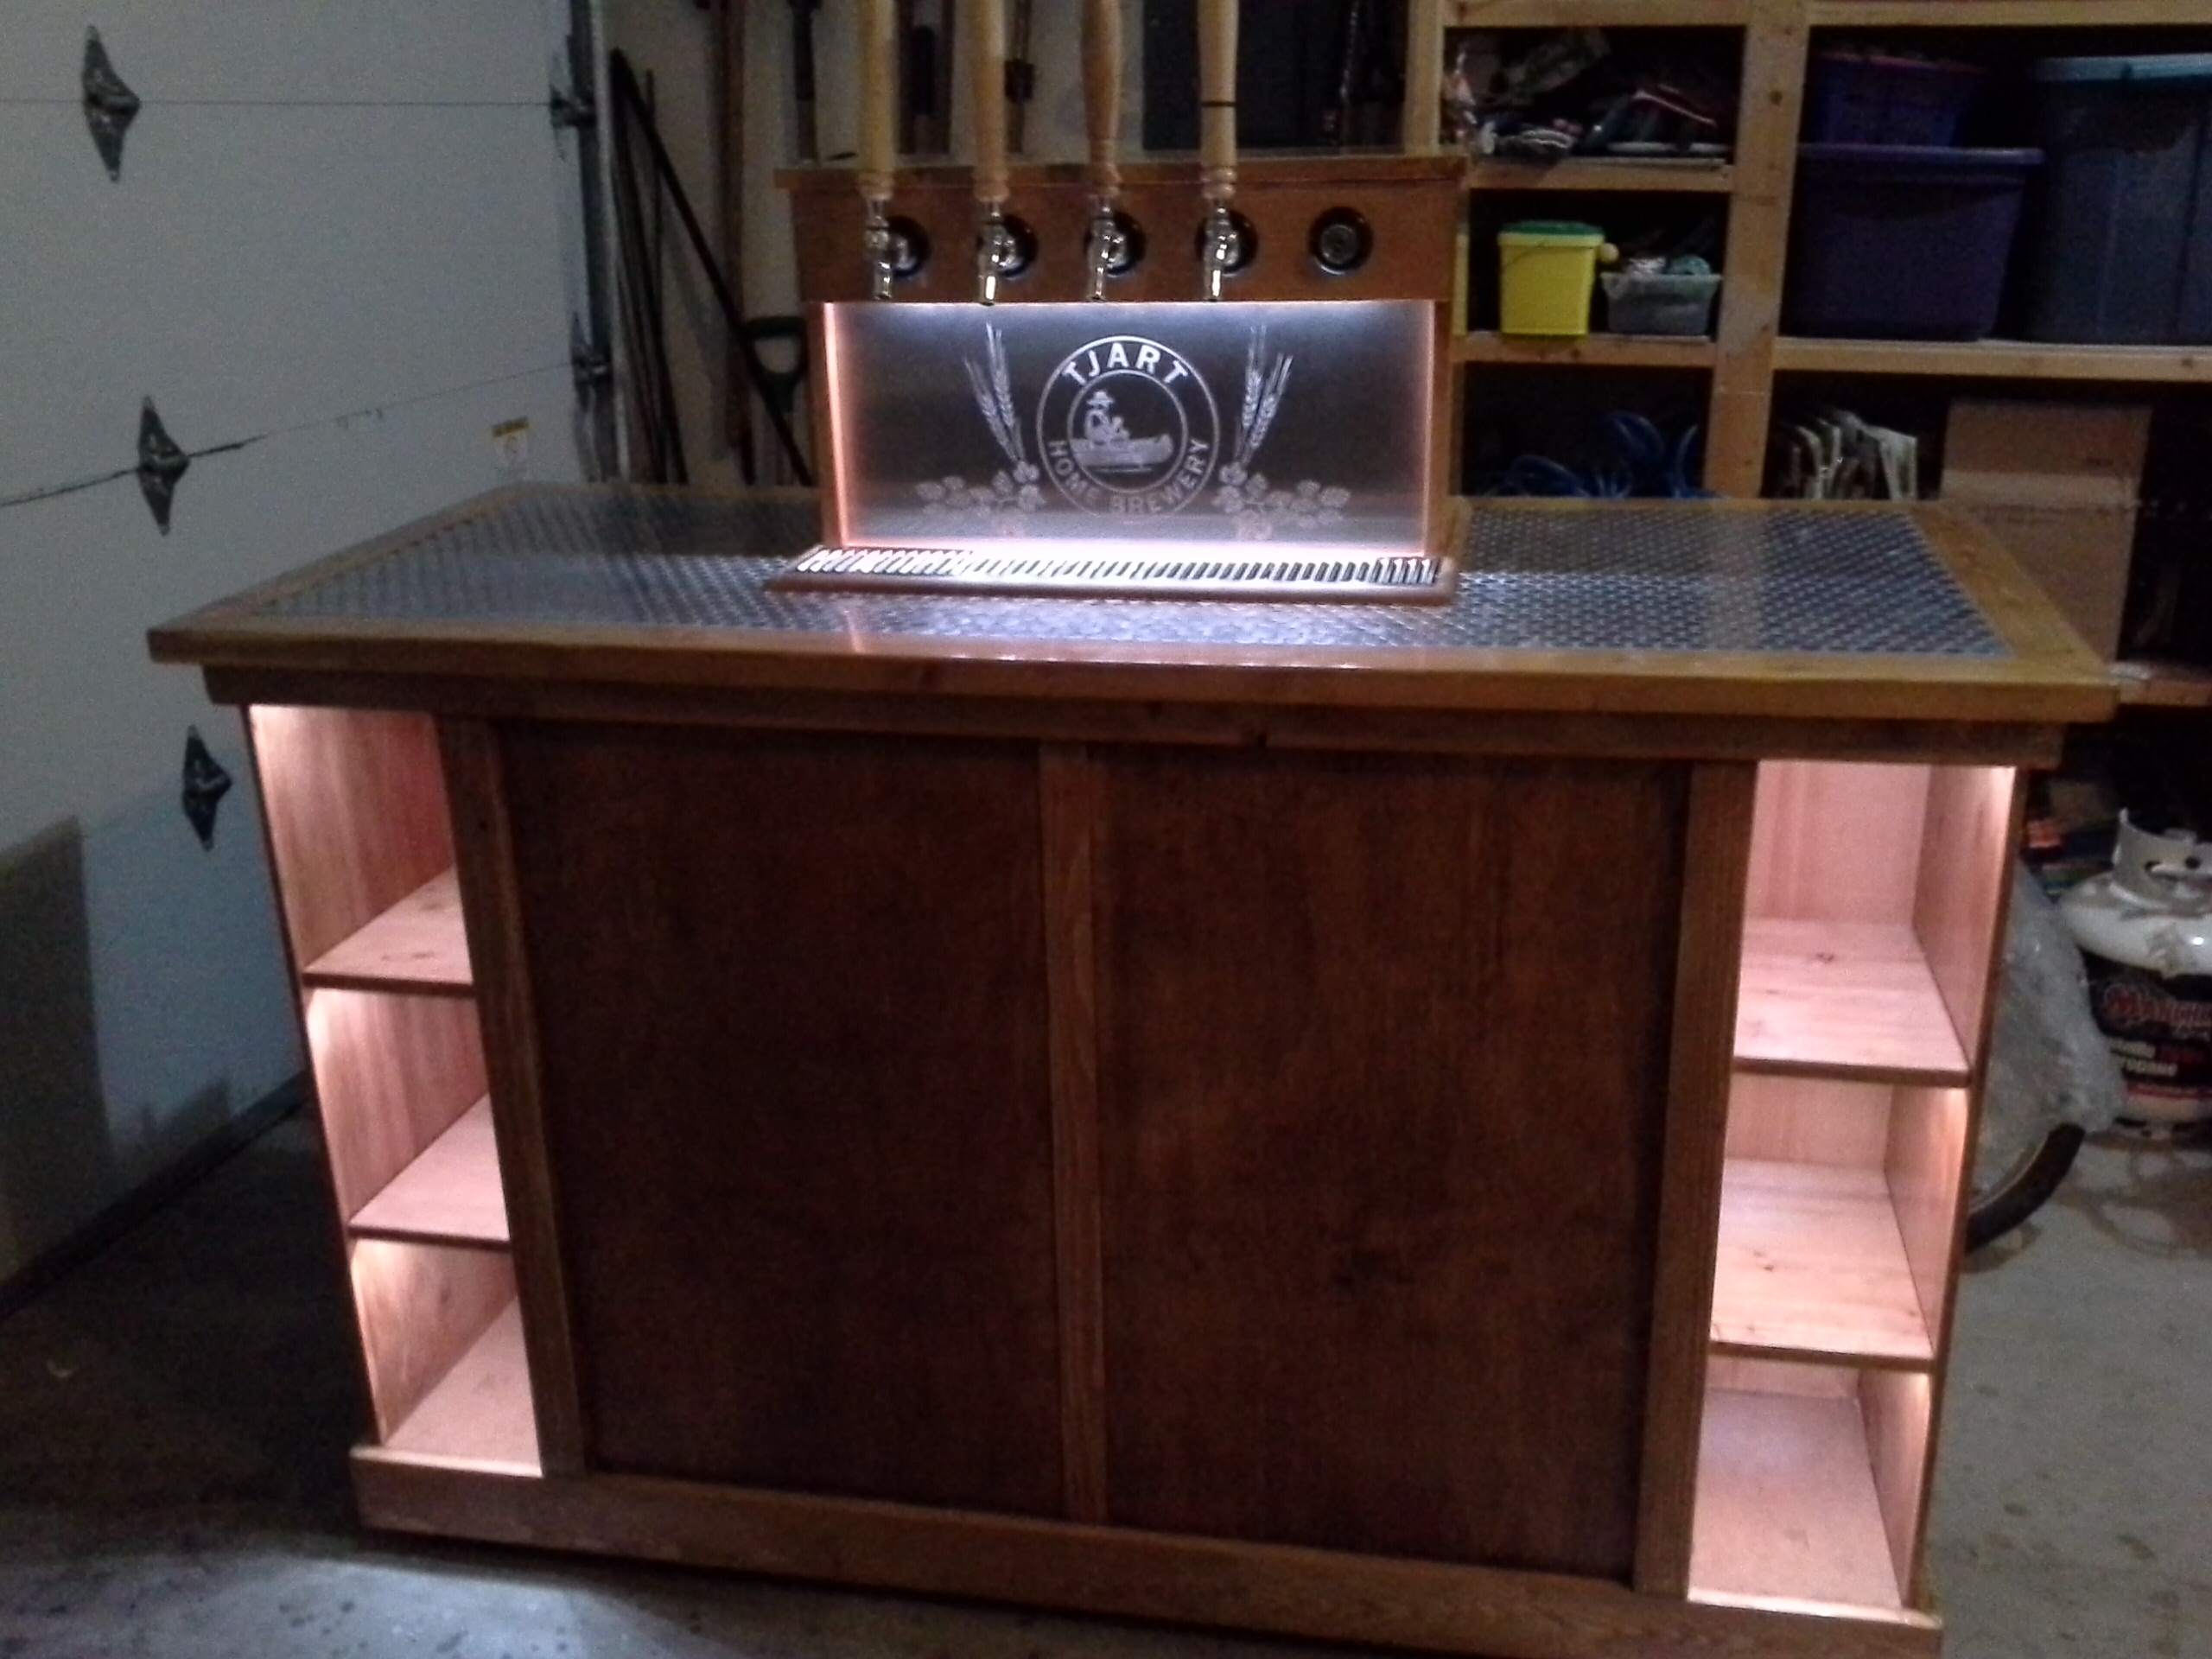
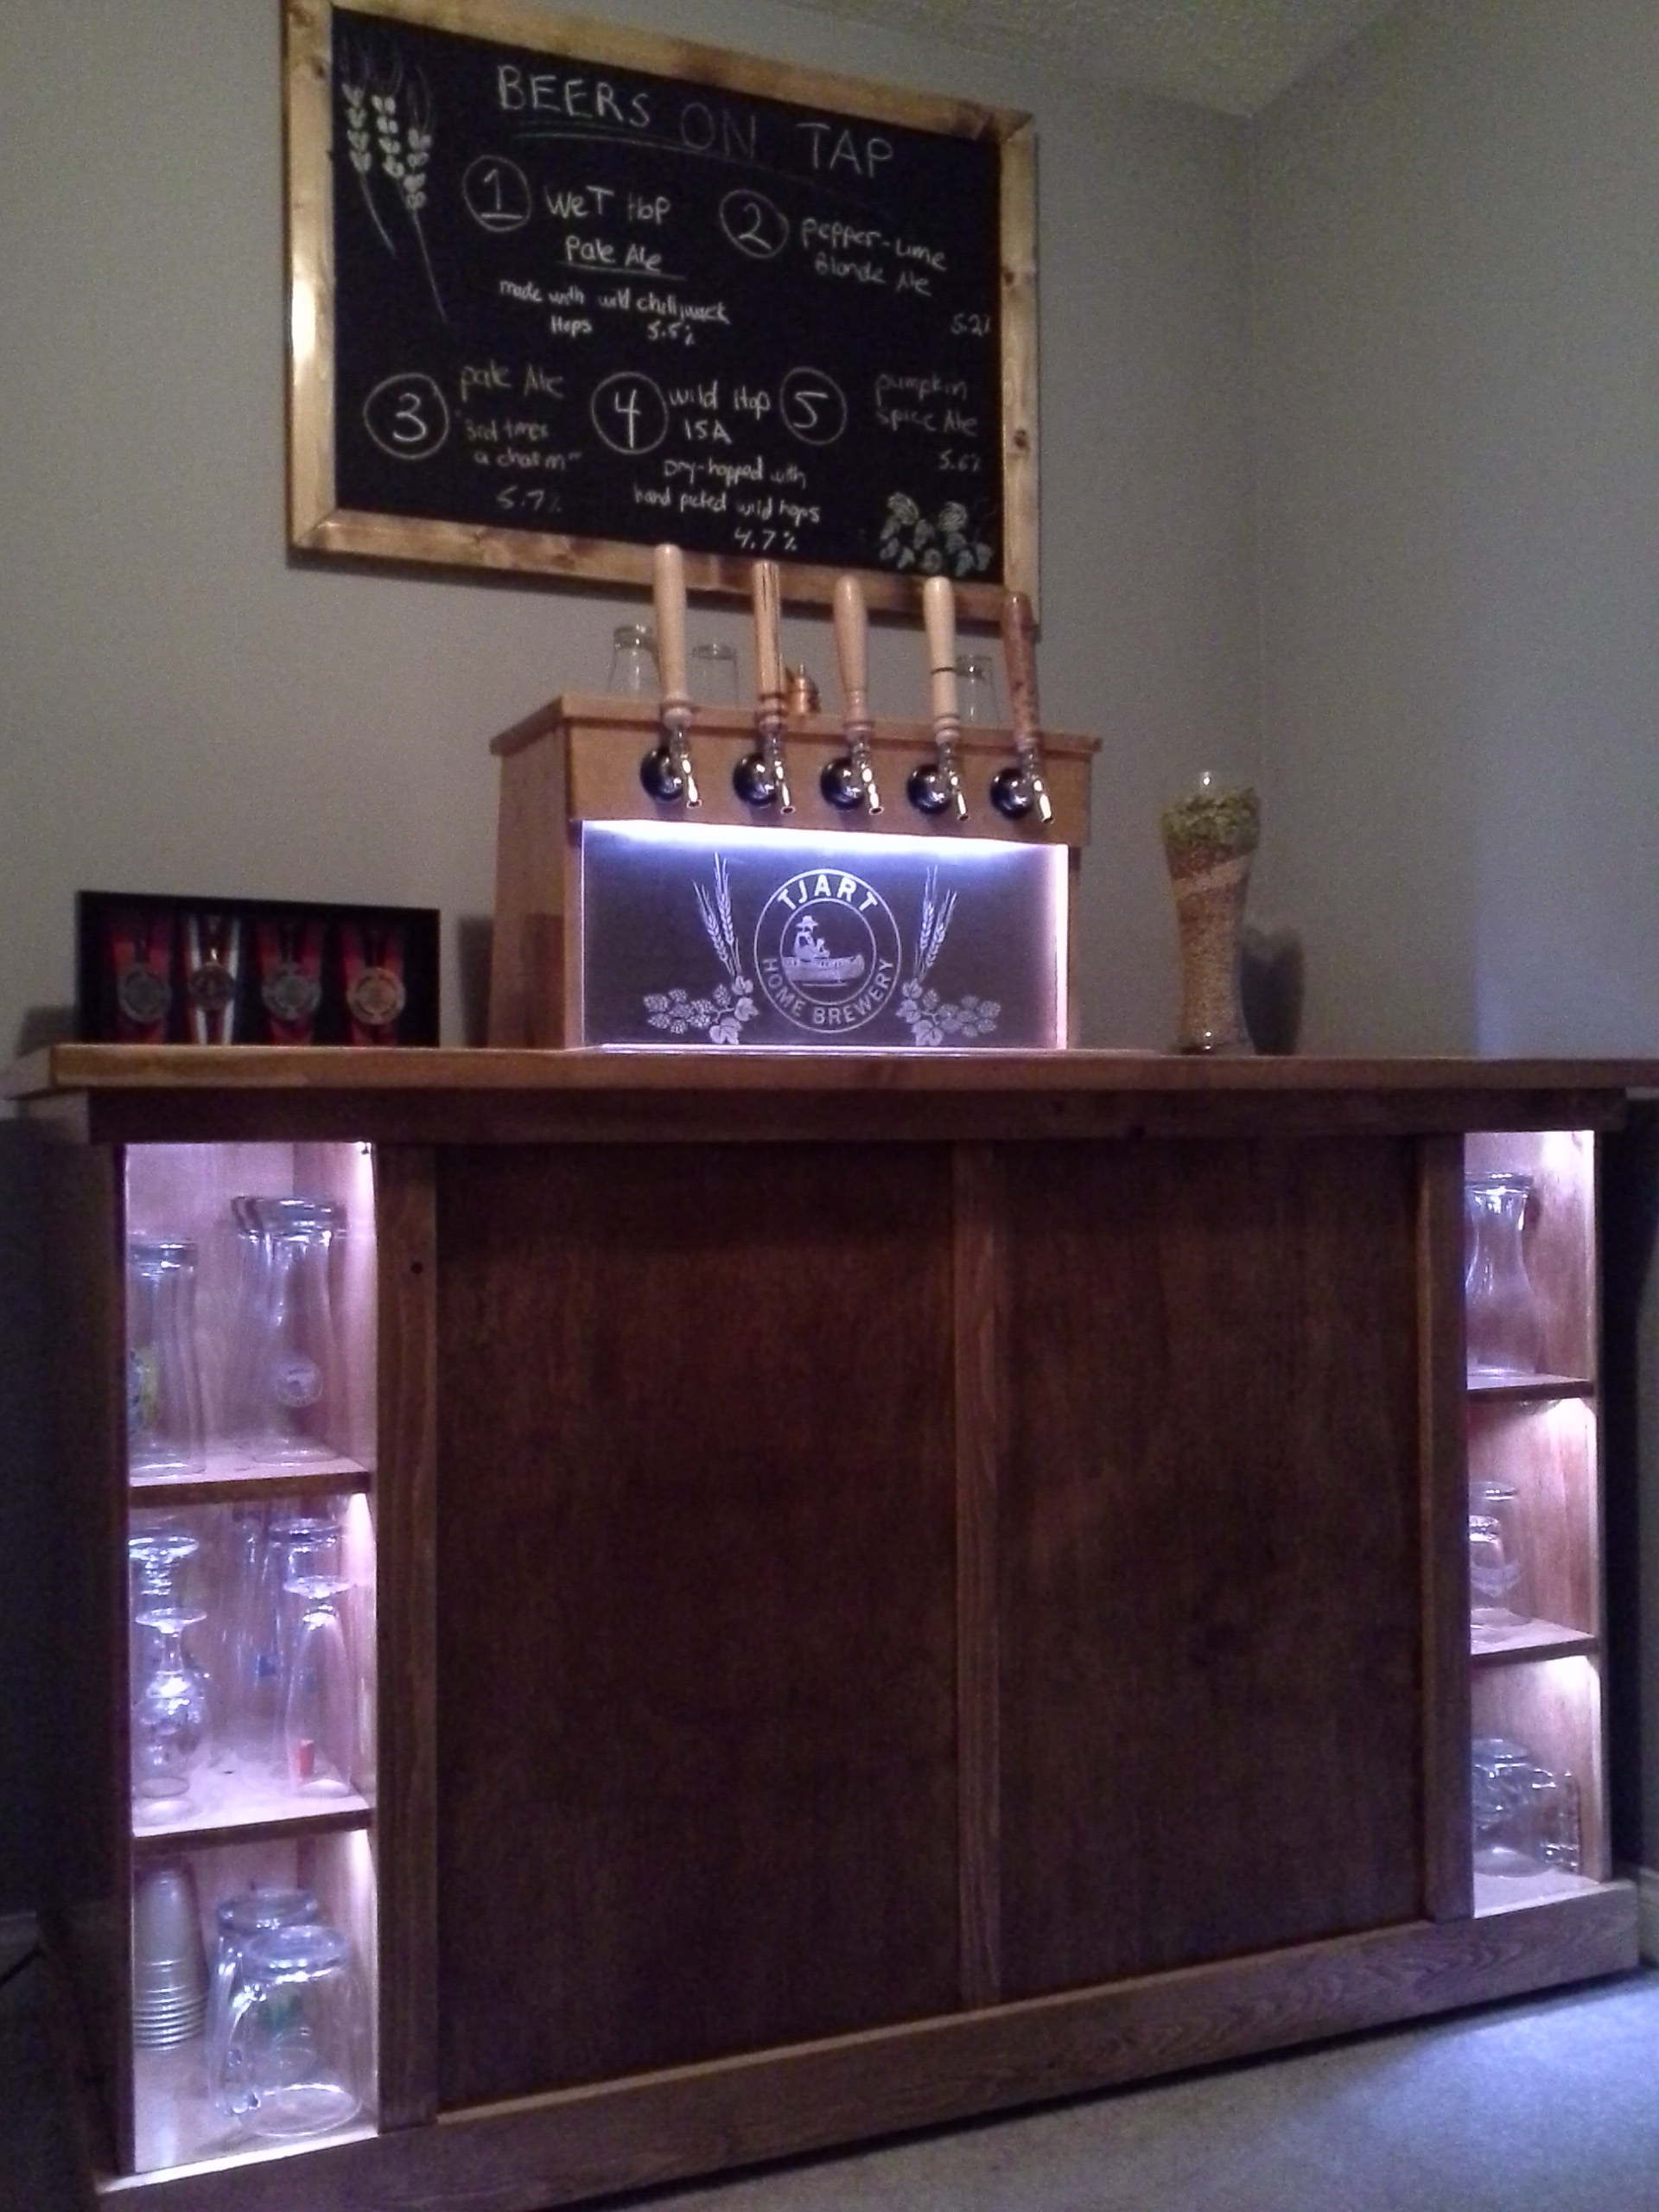
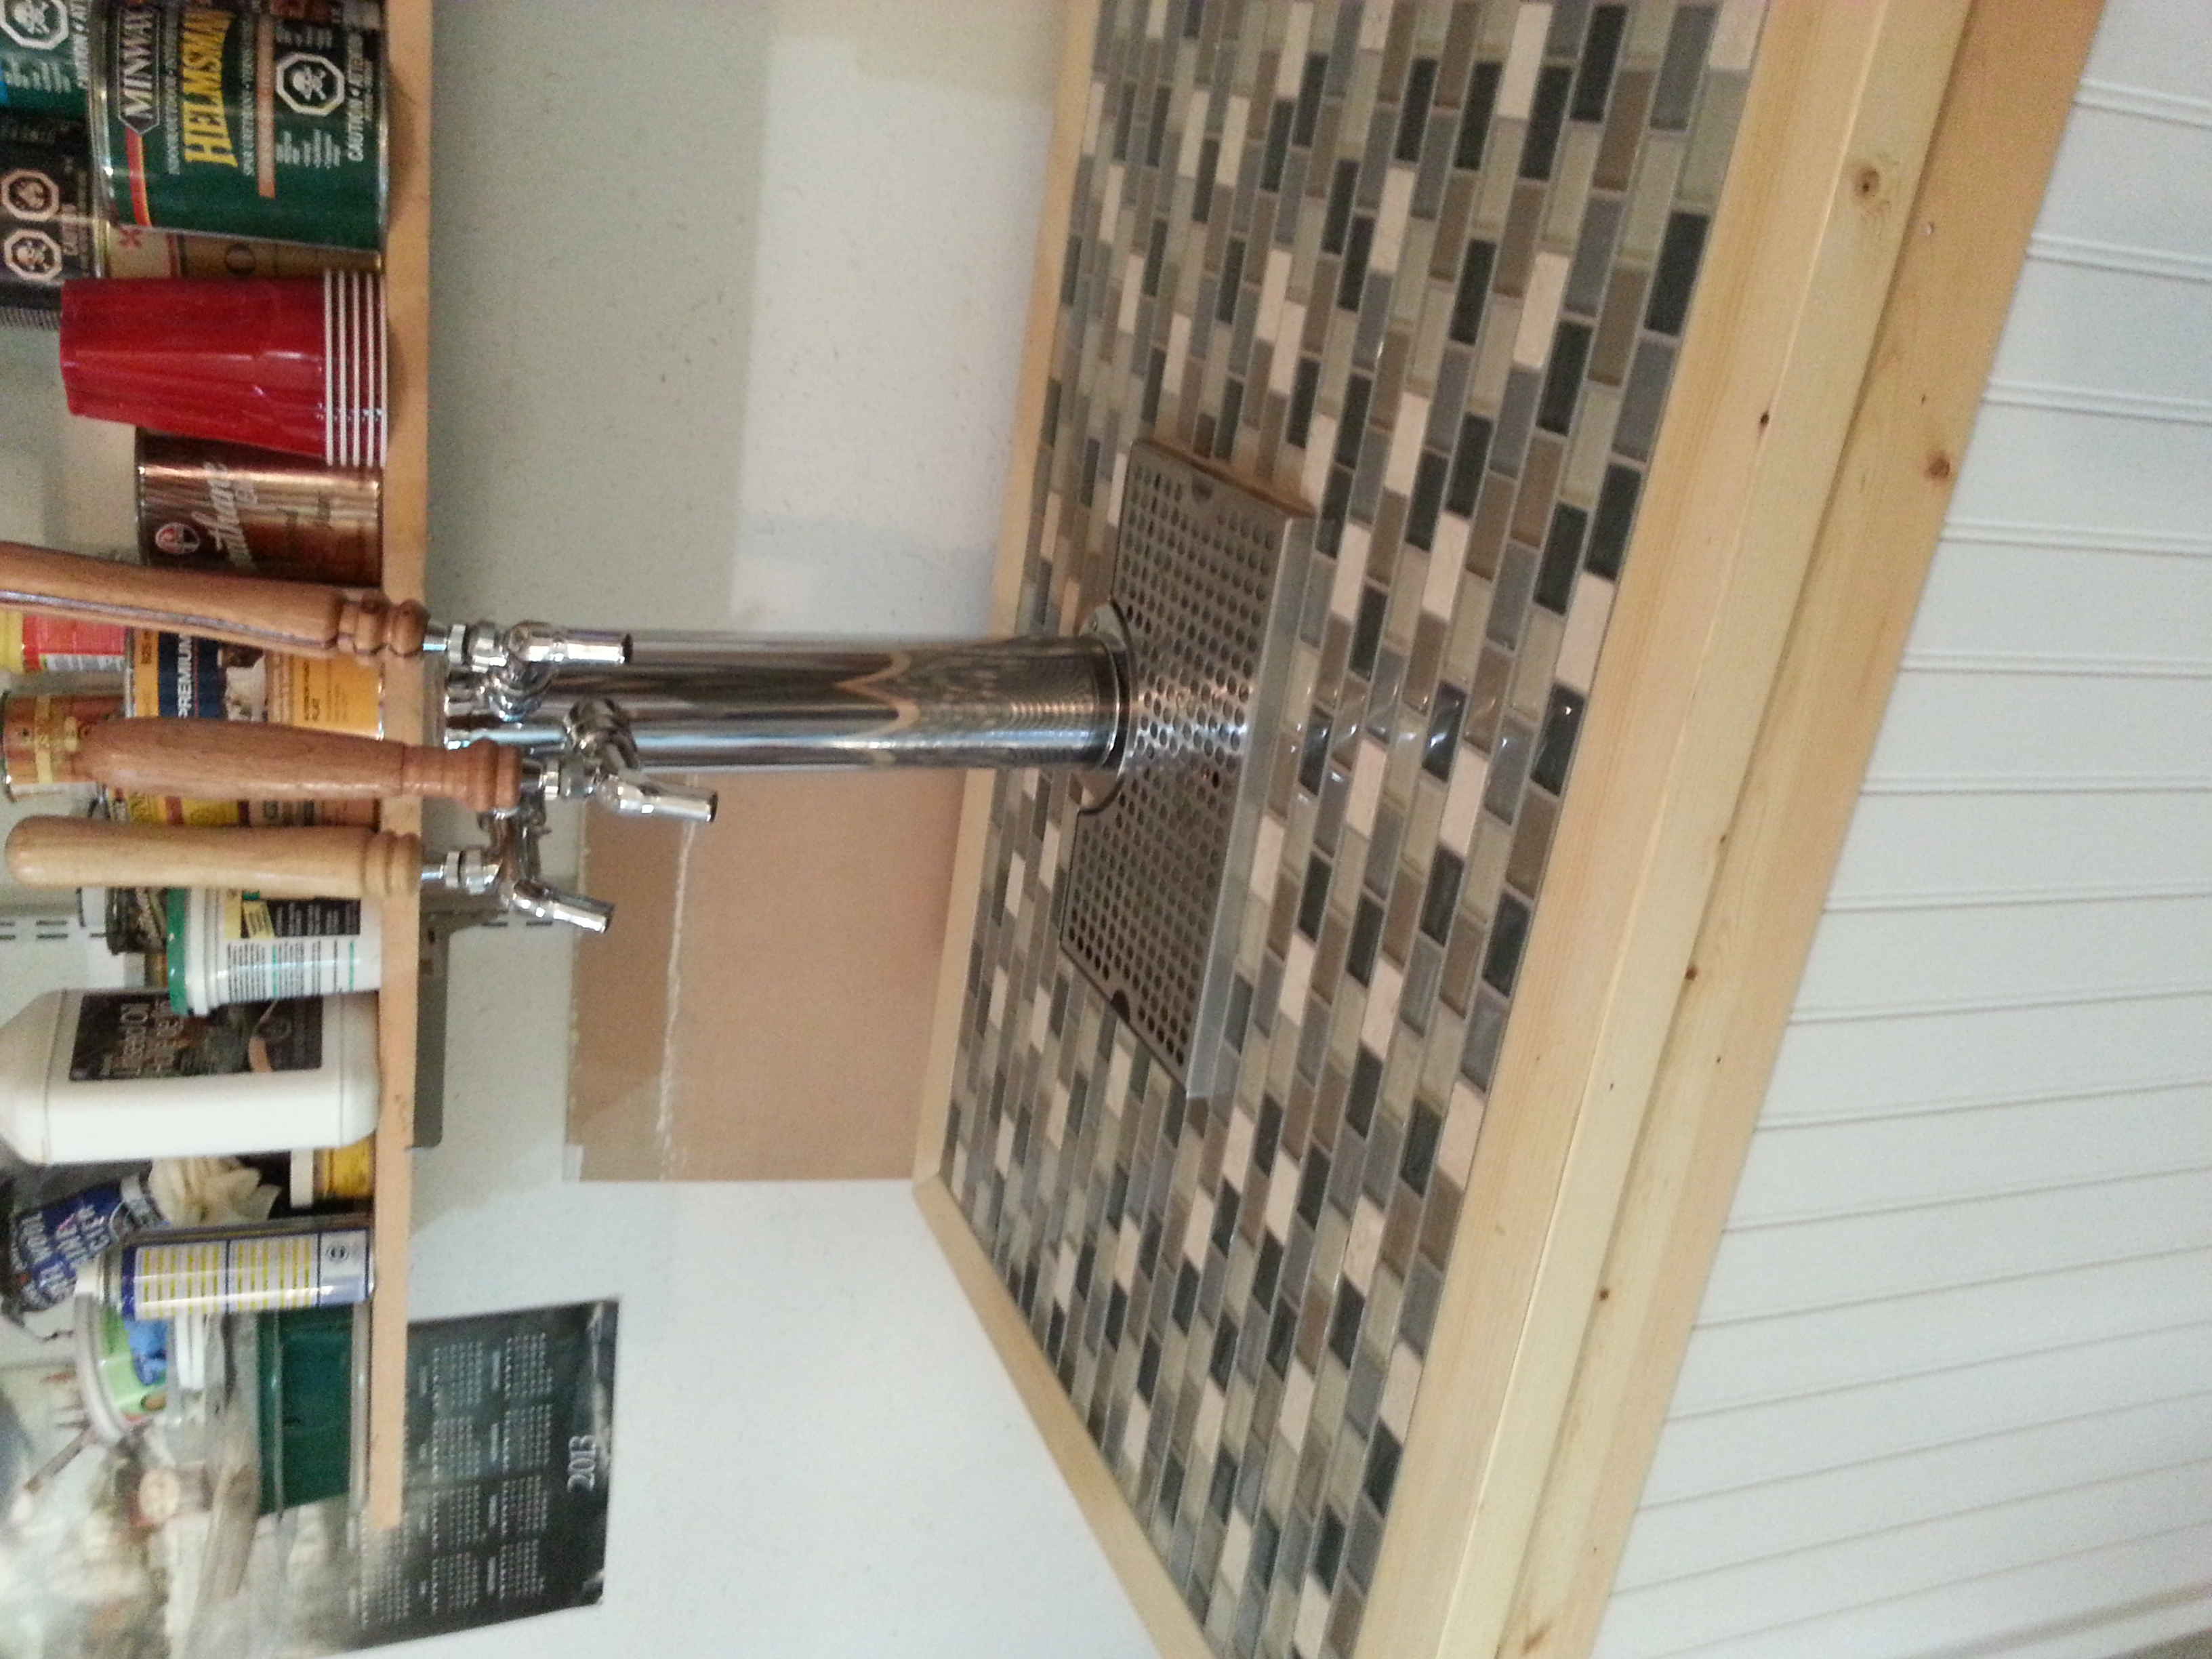
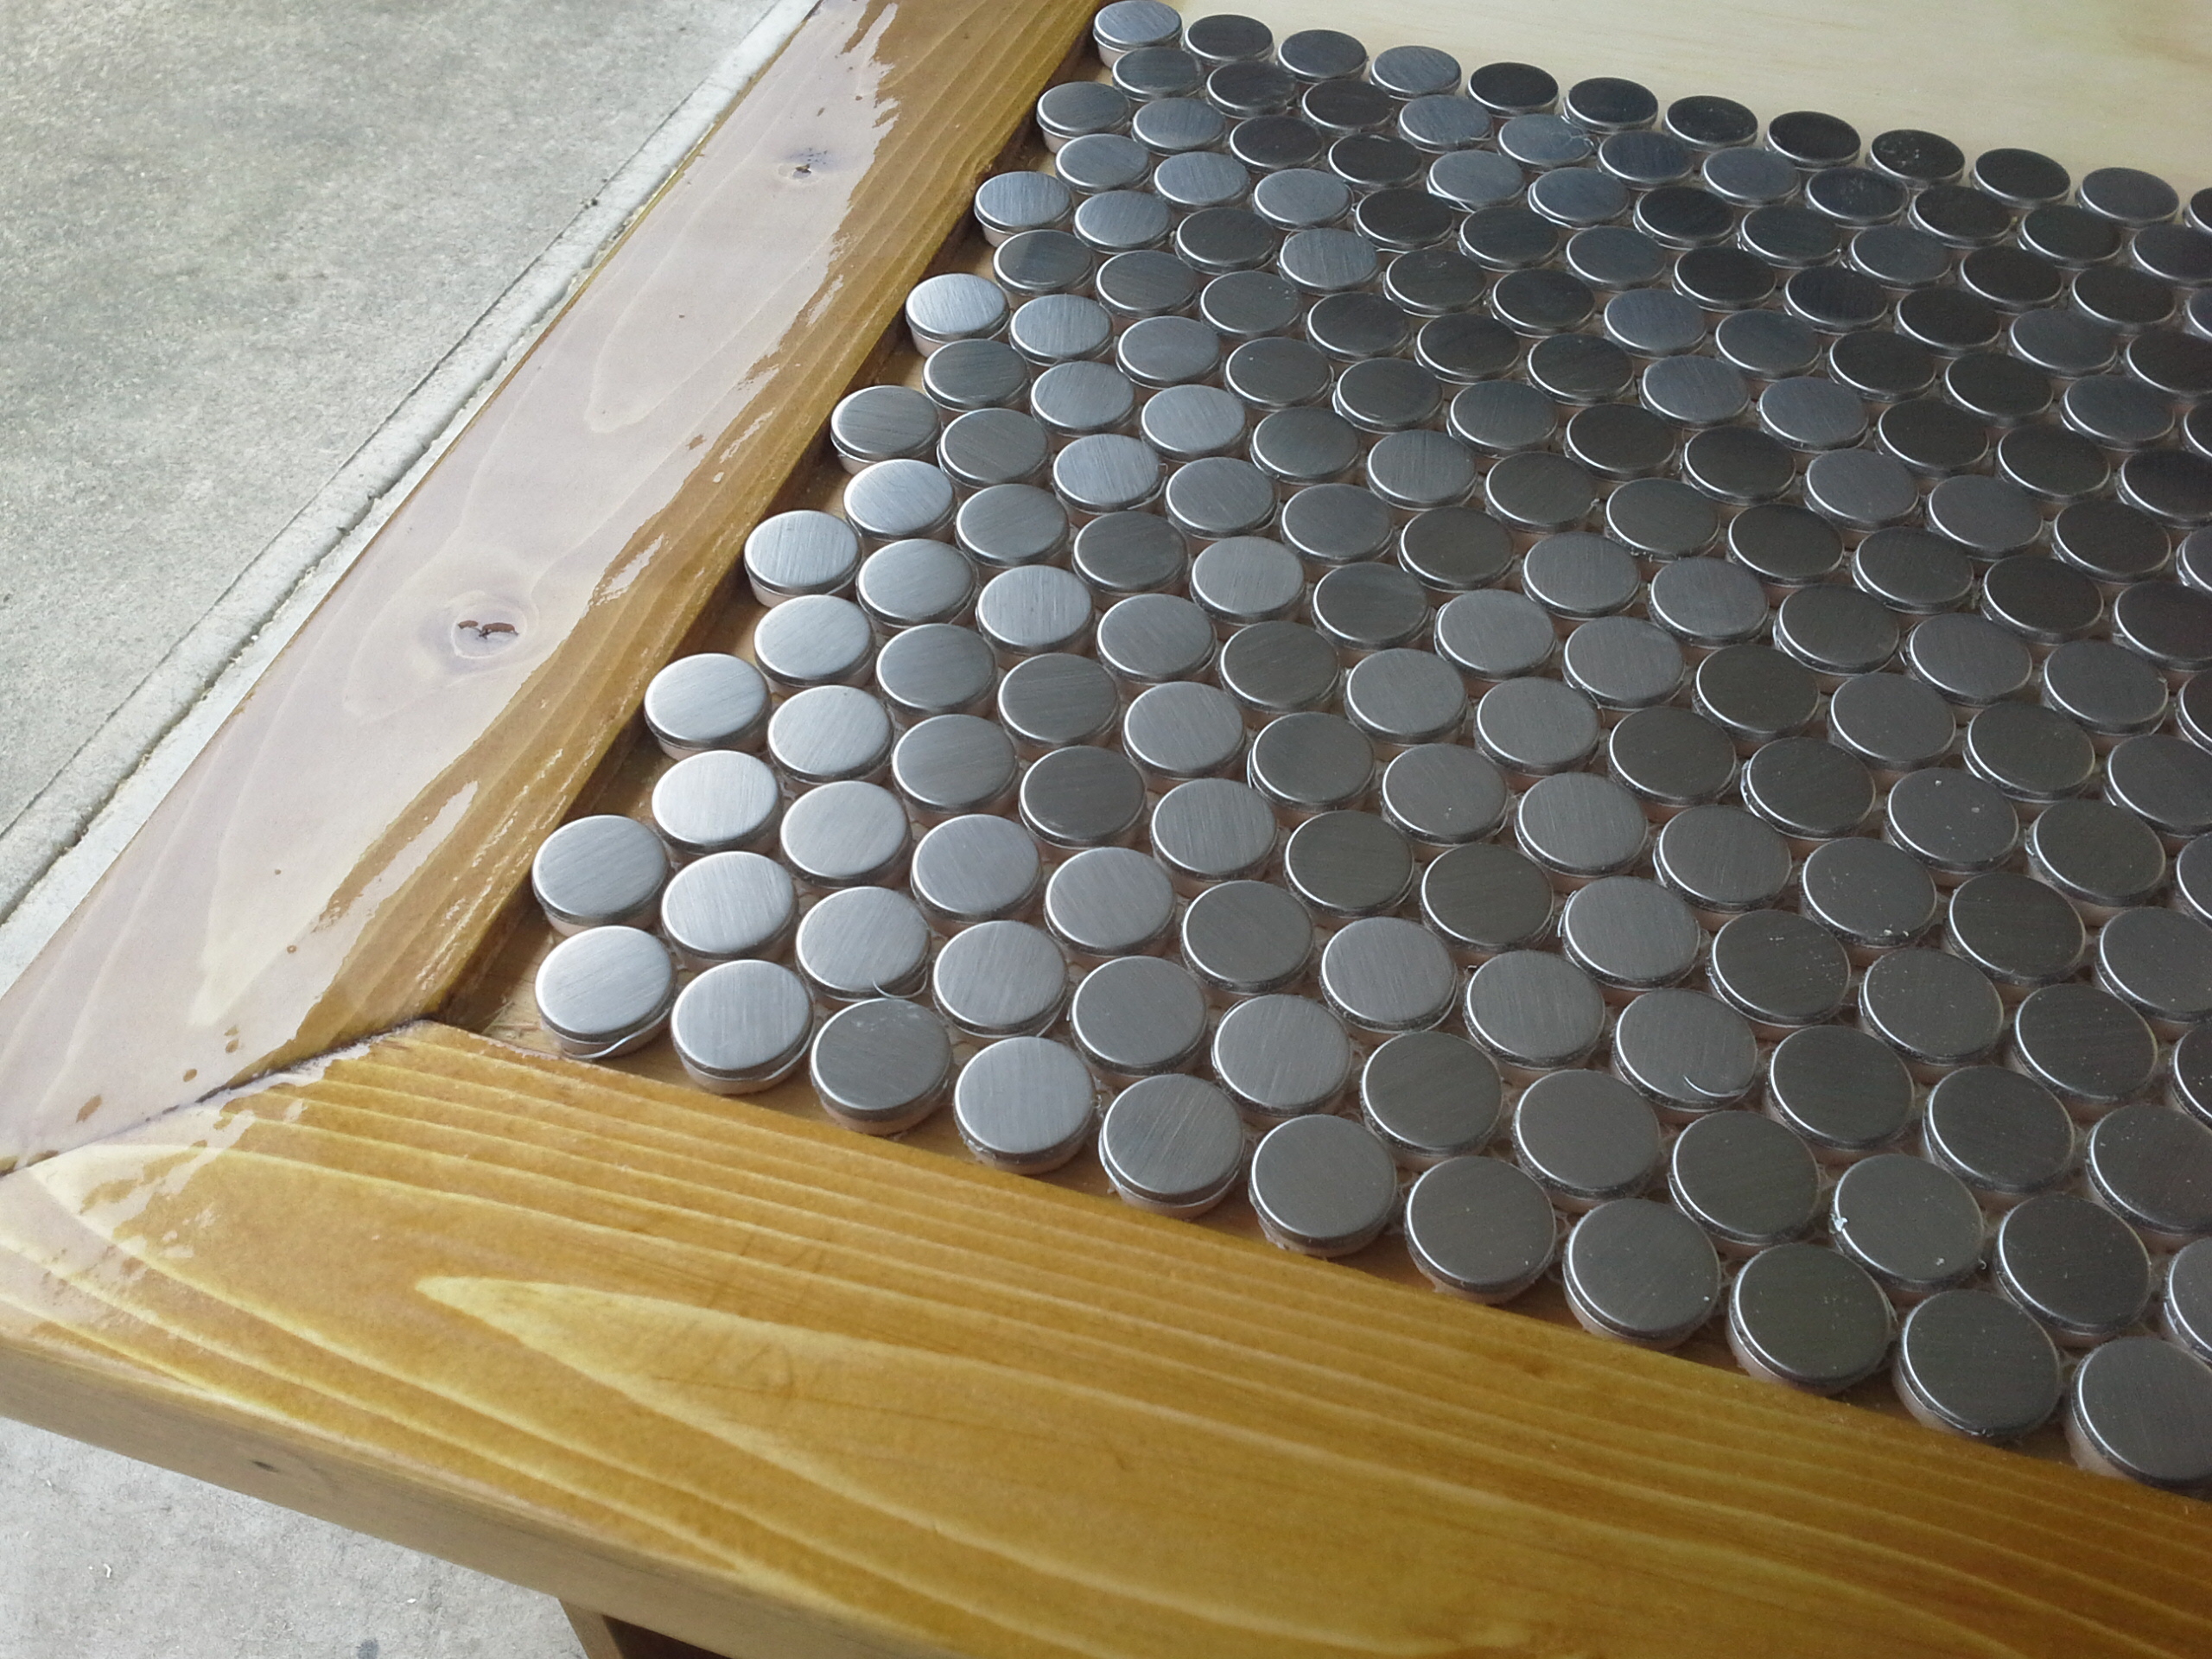
Edit: I thought I would post a picture of the complete unit up front for anyone jumping in on page 1...

20141108_211352-64193.jpg


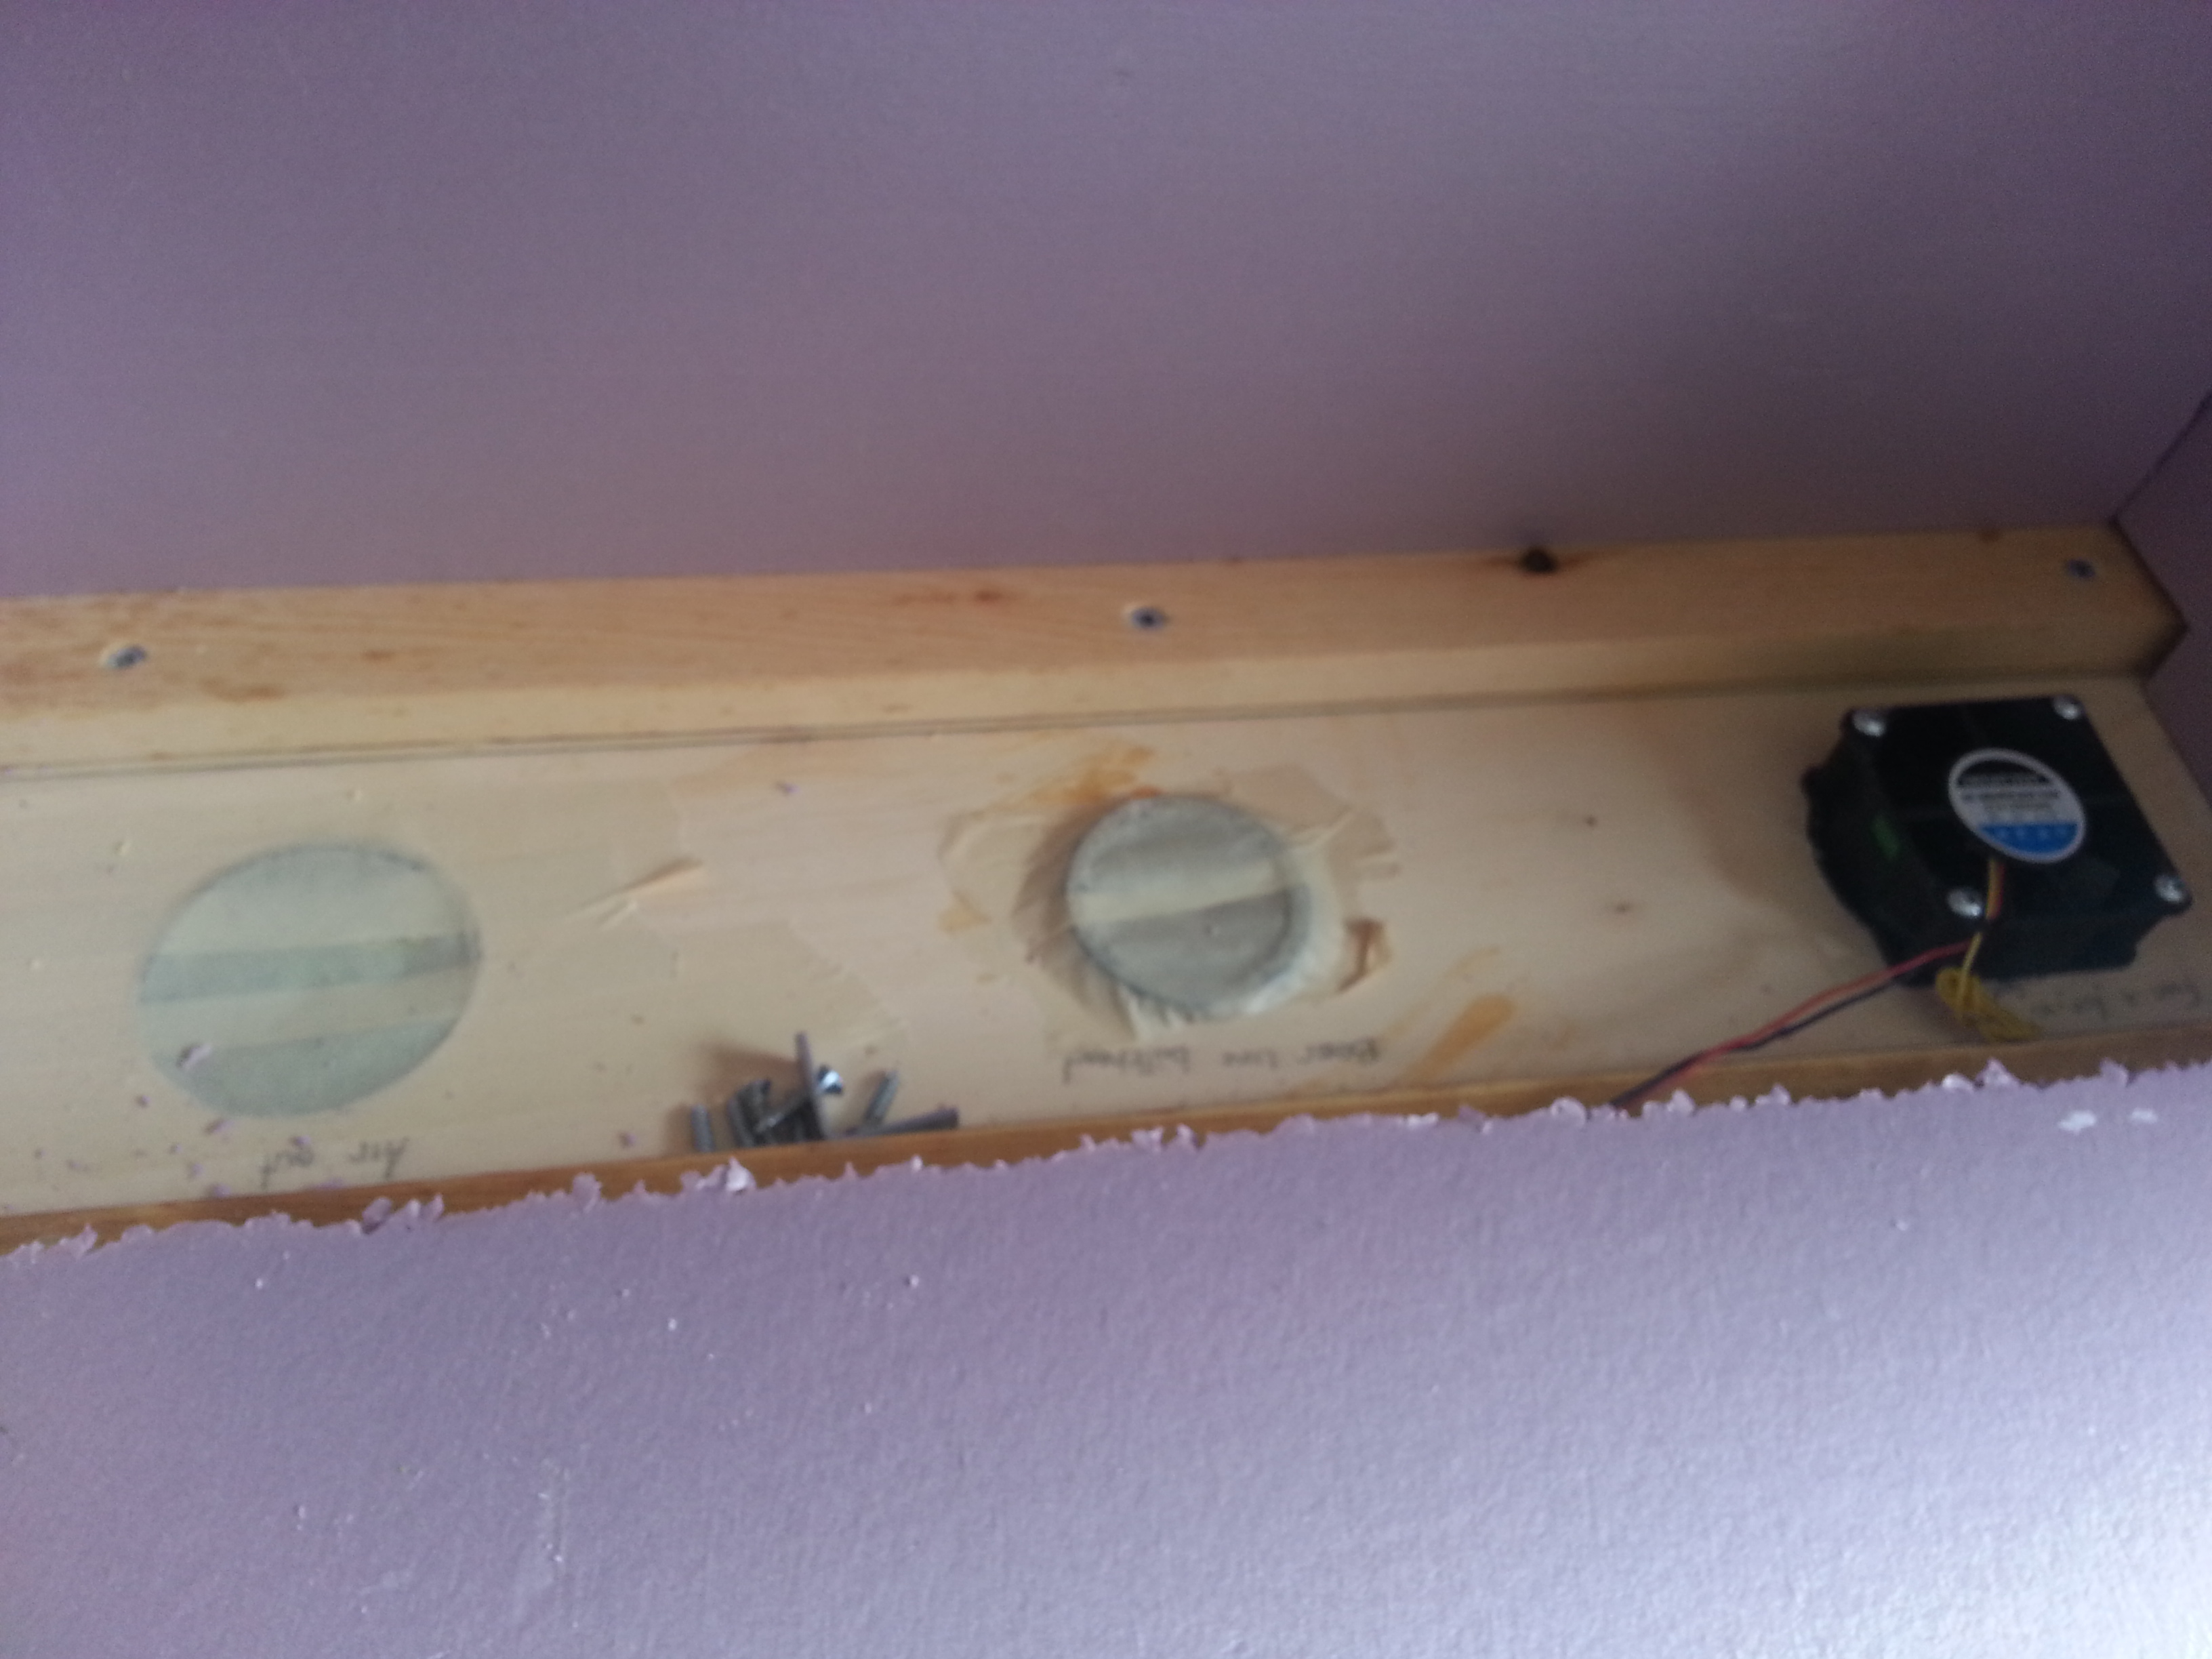
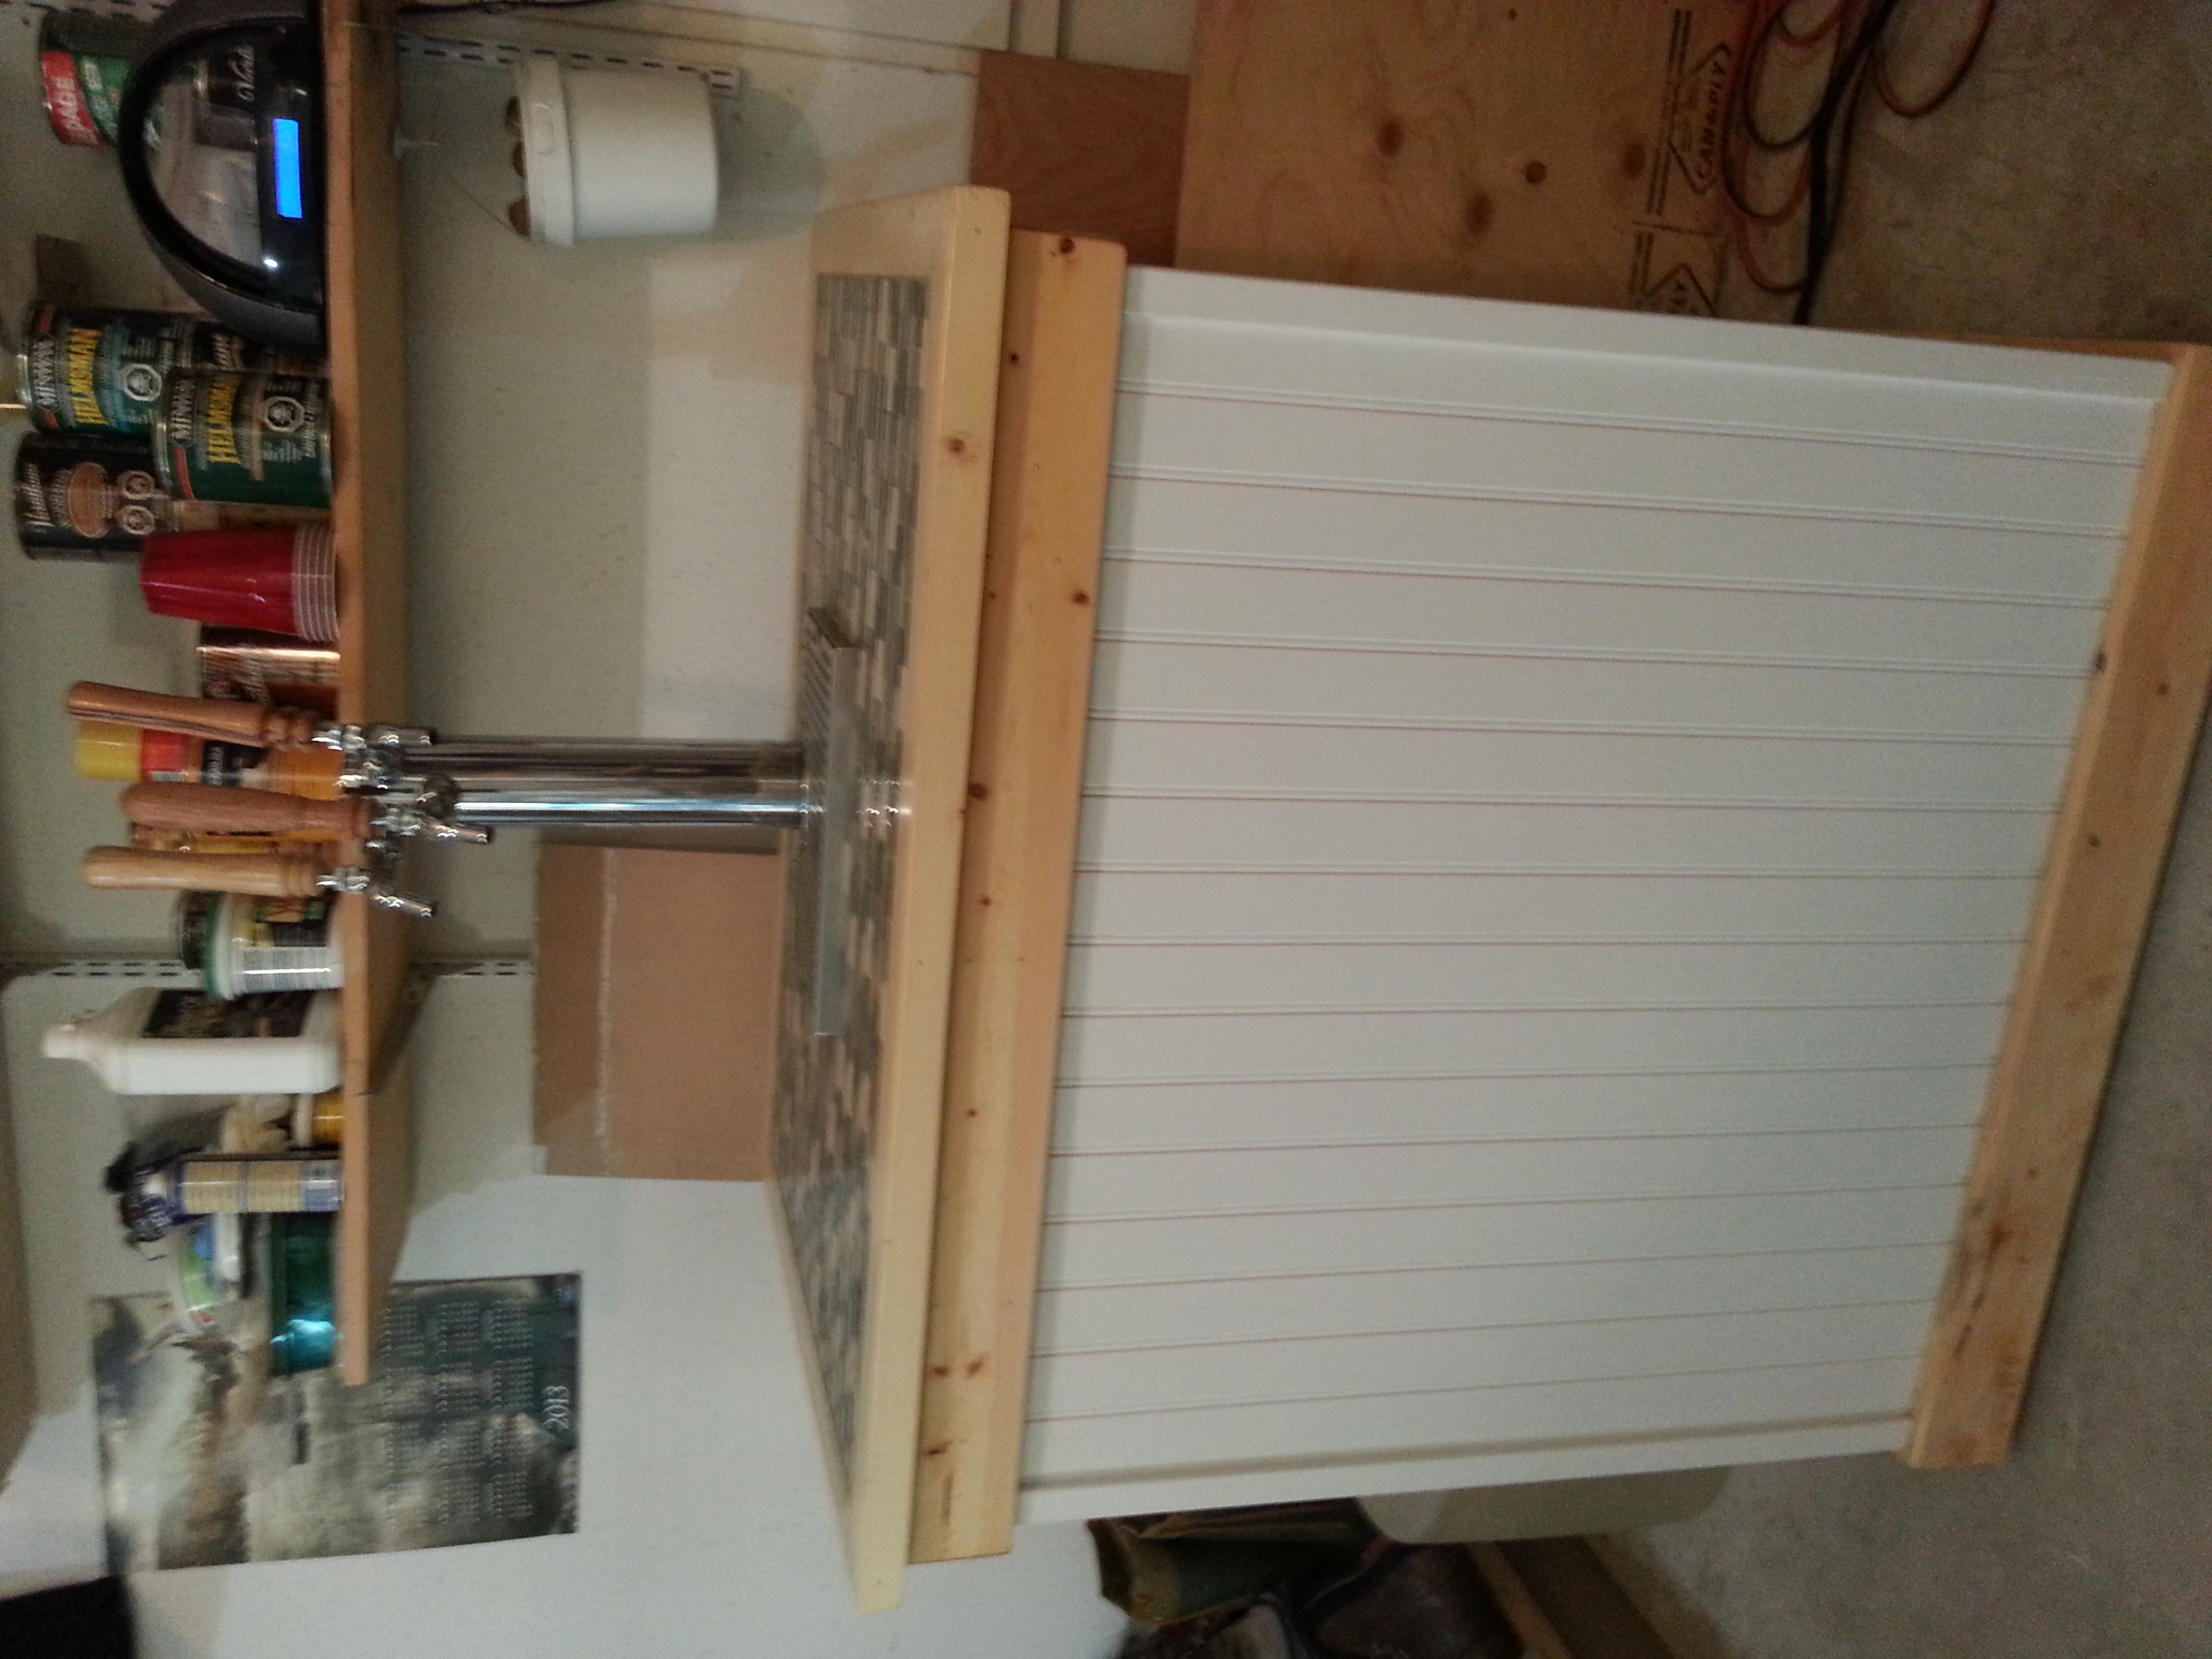
I've successfully killed 2 keezers so far. Both times I mounted the gas manifold to the inside wall and probably punctured a coolant line because both have only lasted 18-24 months. The most recent one develped a huge ice ball right near the drill site which is a tell-tale sign. It took me a while to learn the lesson.

I'm tired of dressing up a new freezer unit every 2 years so I decided to build a new one that's housed within a cabinet so that I can easily swap out a new freezer (of similar dimensions) in case the existing one dies. If it's meant to be permanent, it has to be done RIGHT!

Here's a couple pictures of the old Keezer that just died. Sorry the pictures are sideways, they were taken with my phone:

20130708_195822-63797.jpg

20130708_195907-63798.jpg


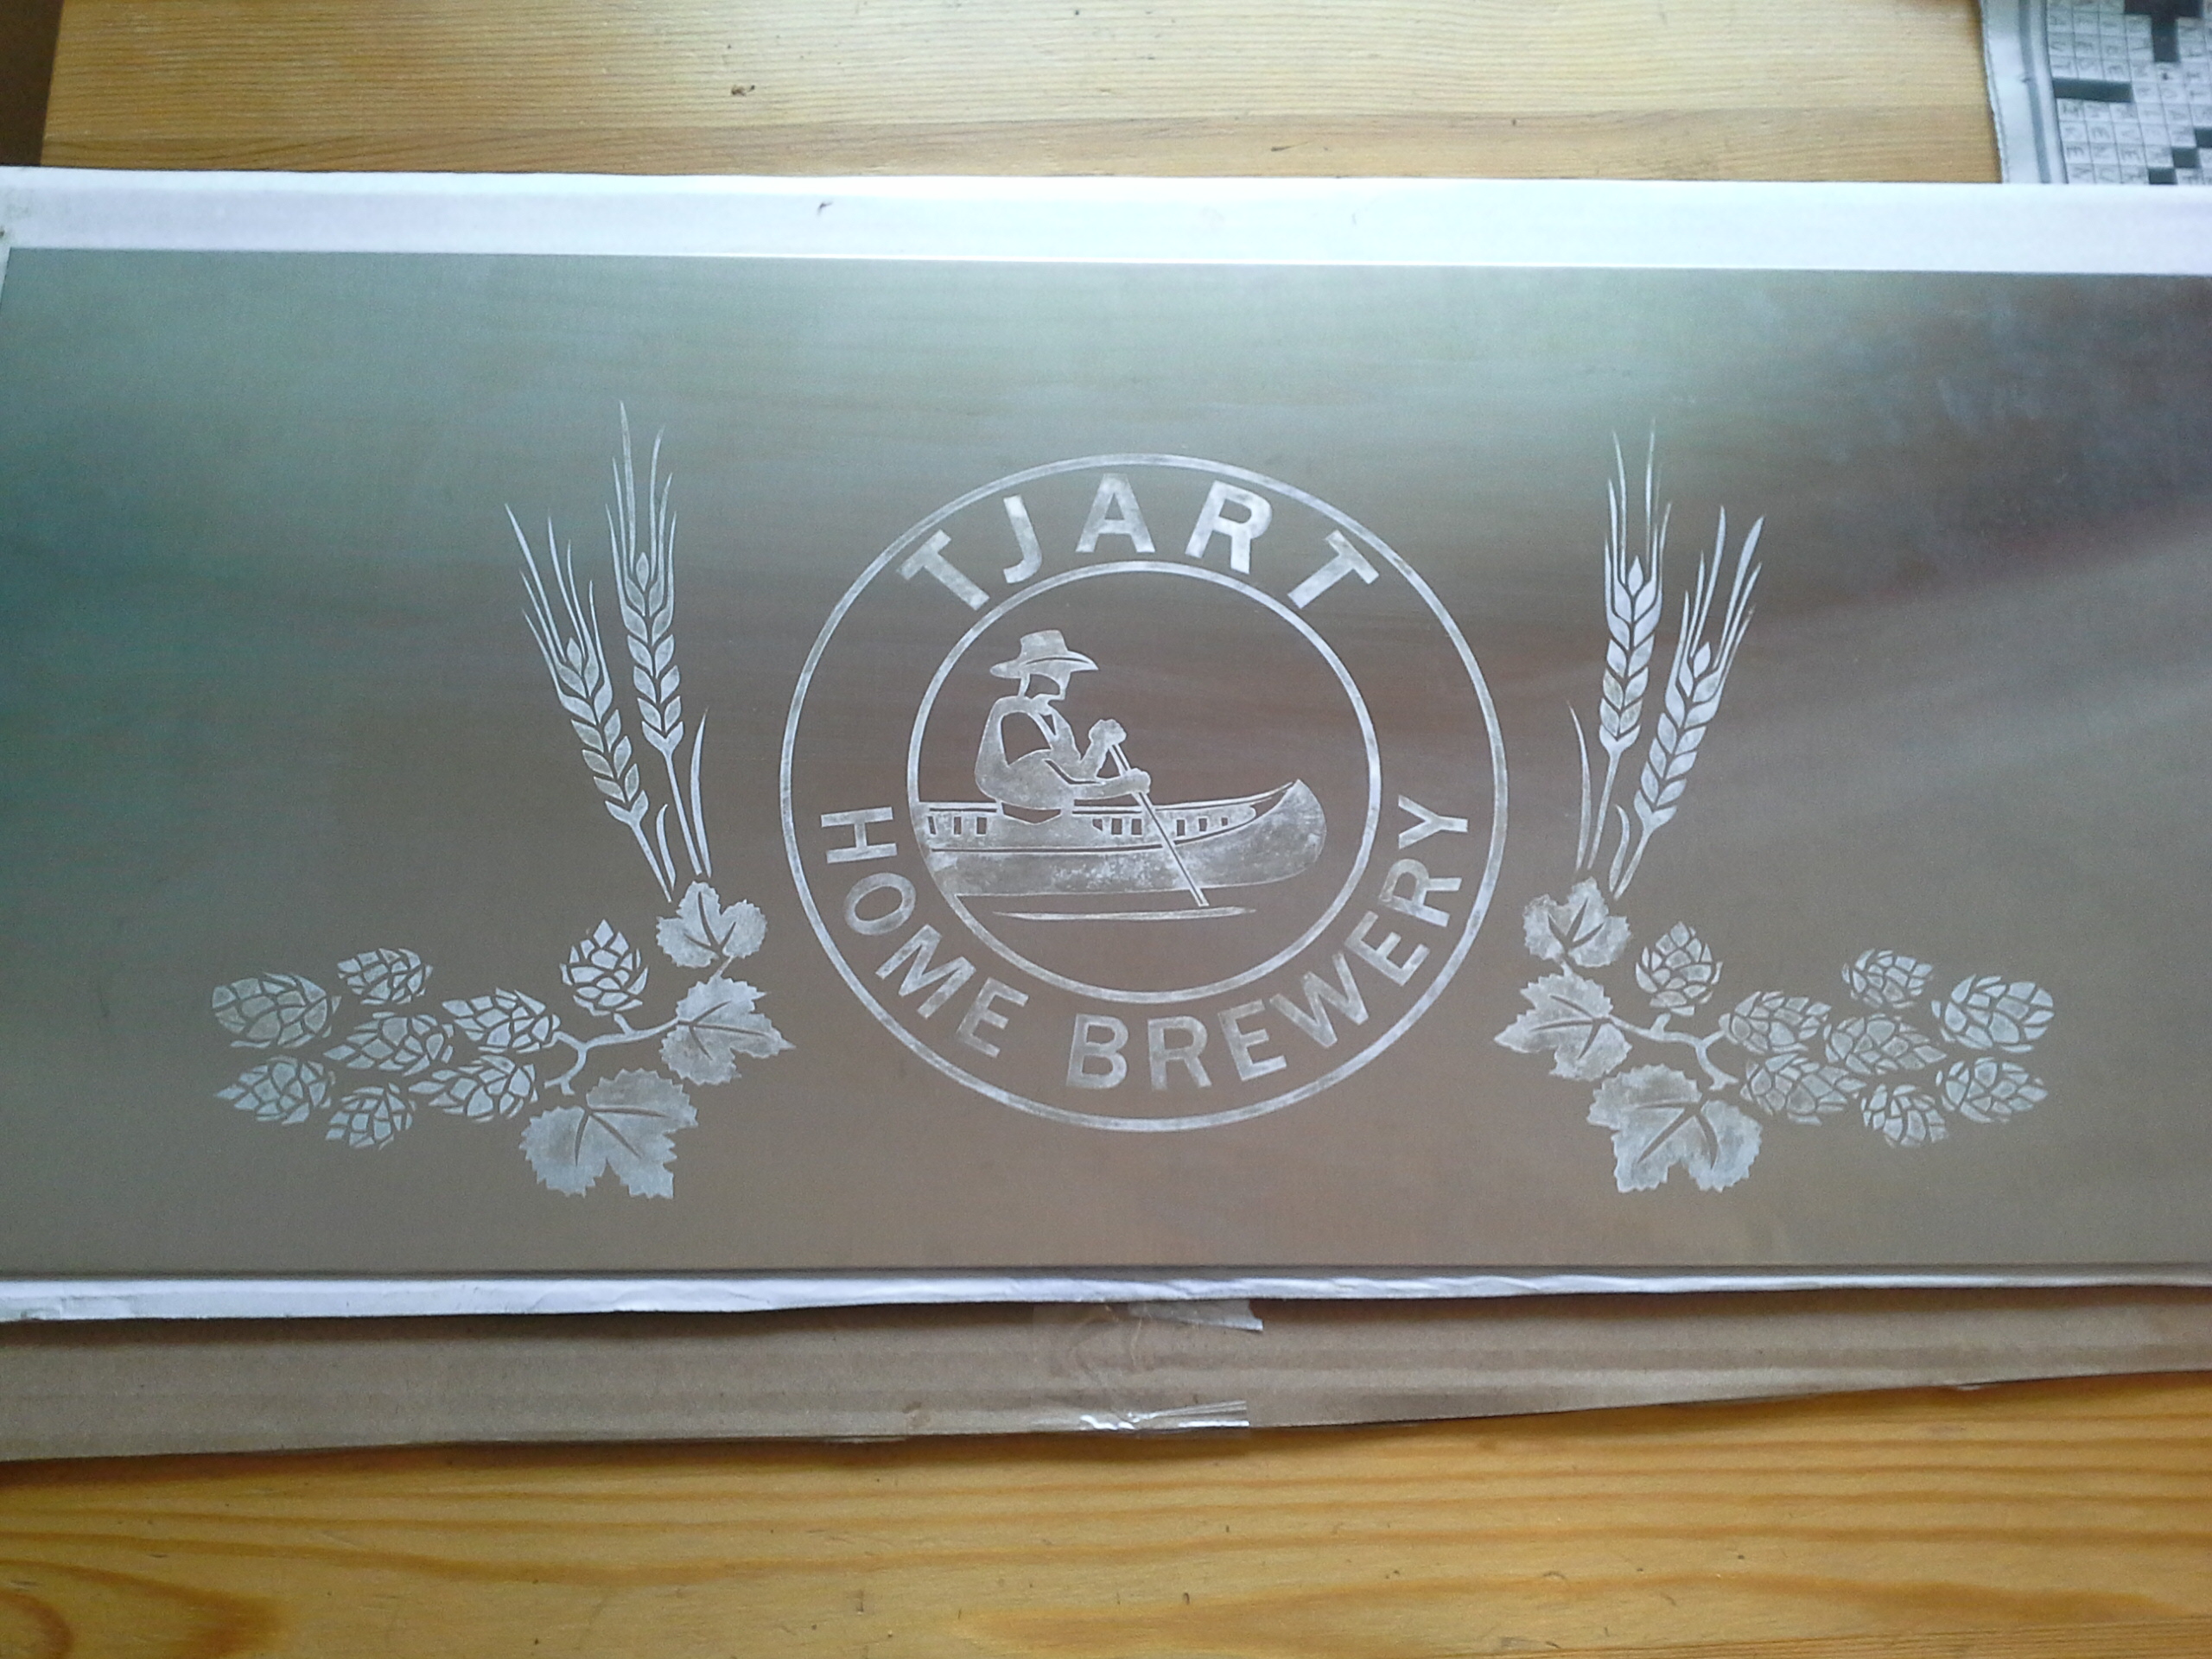
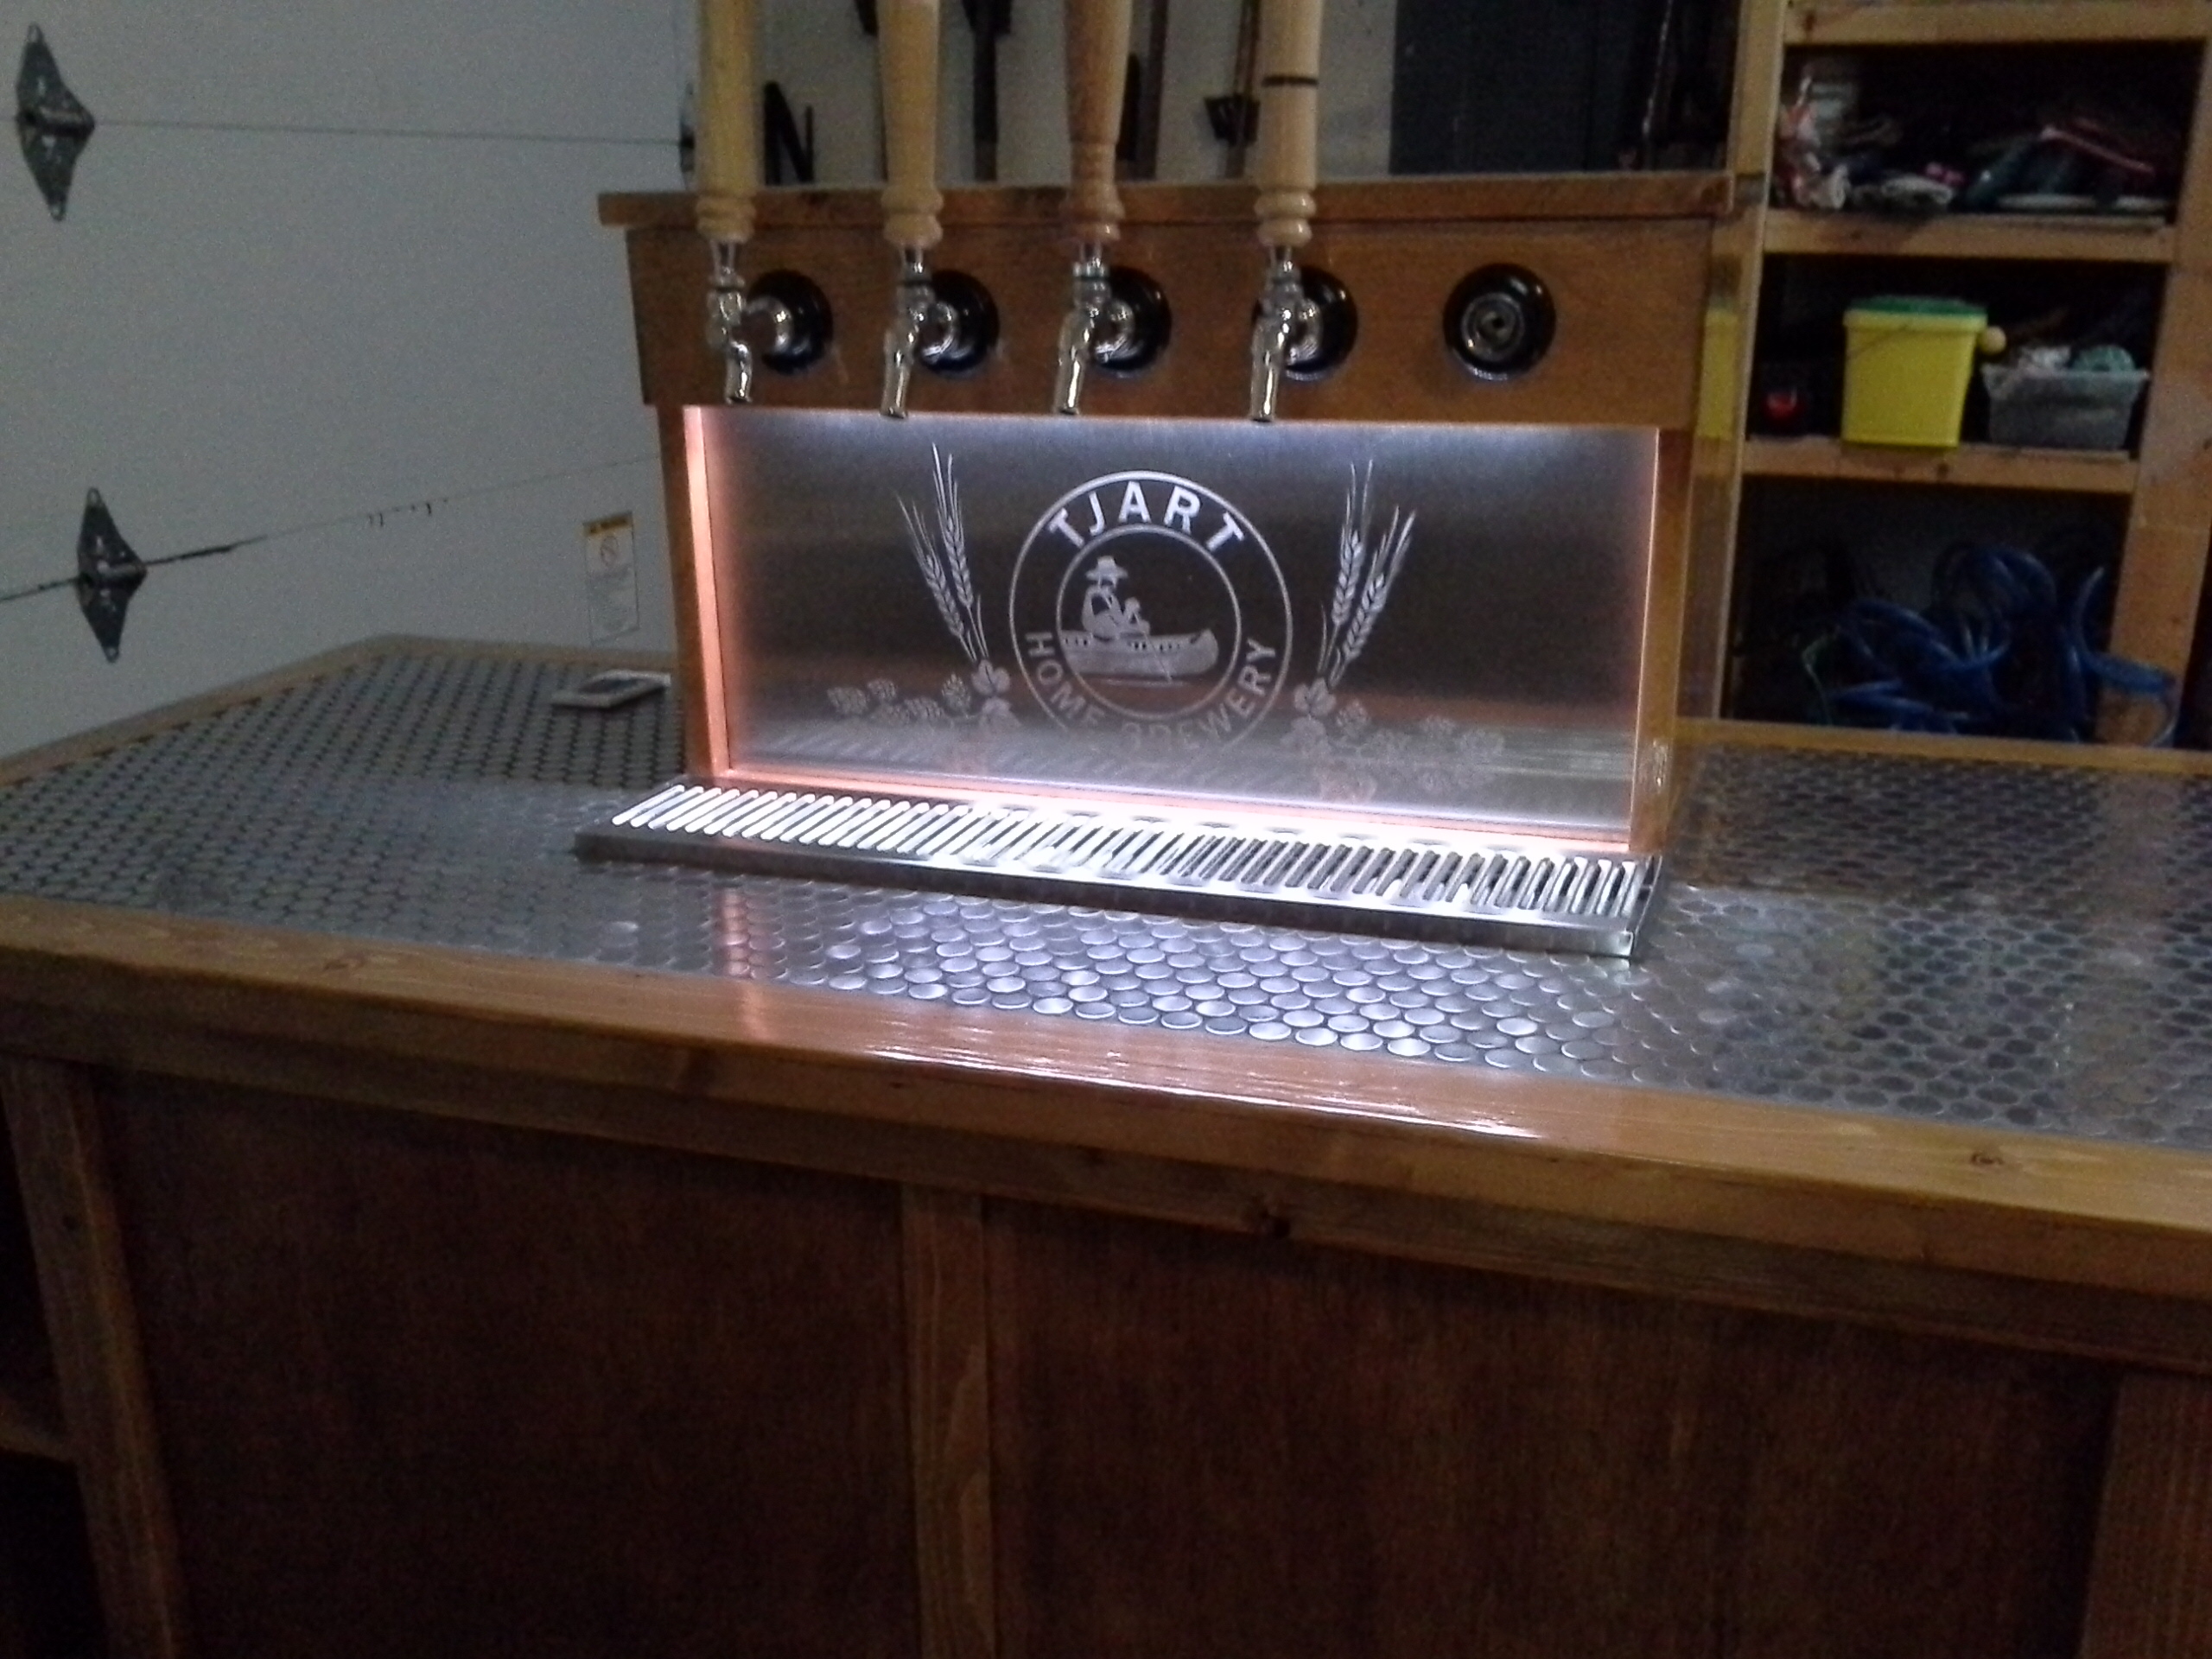
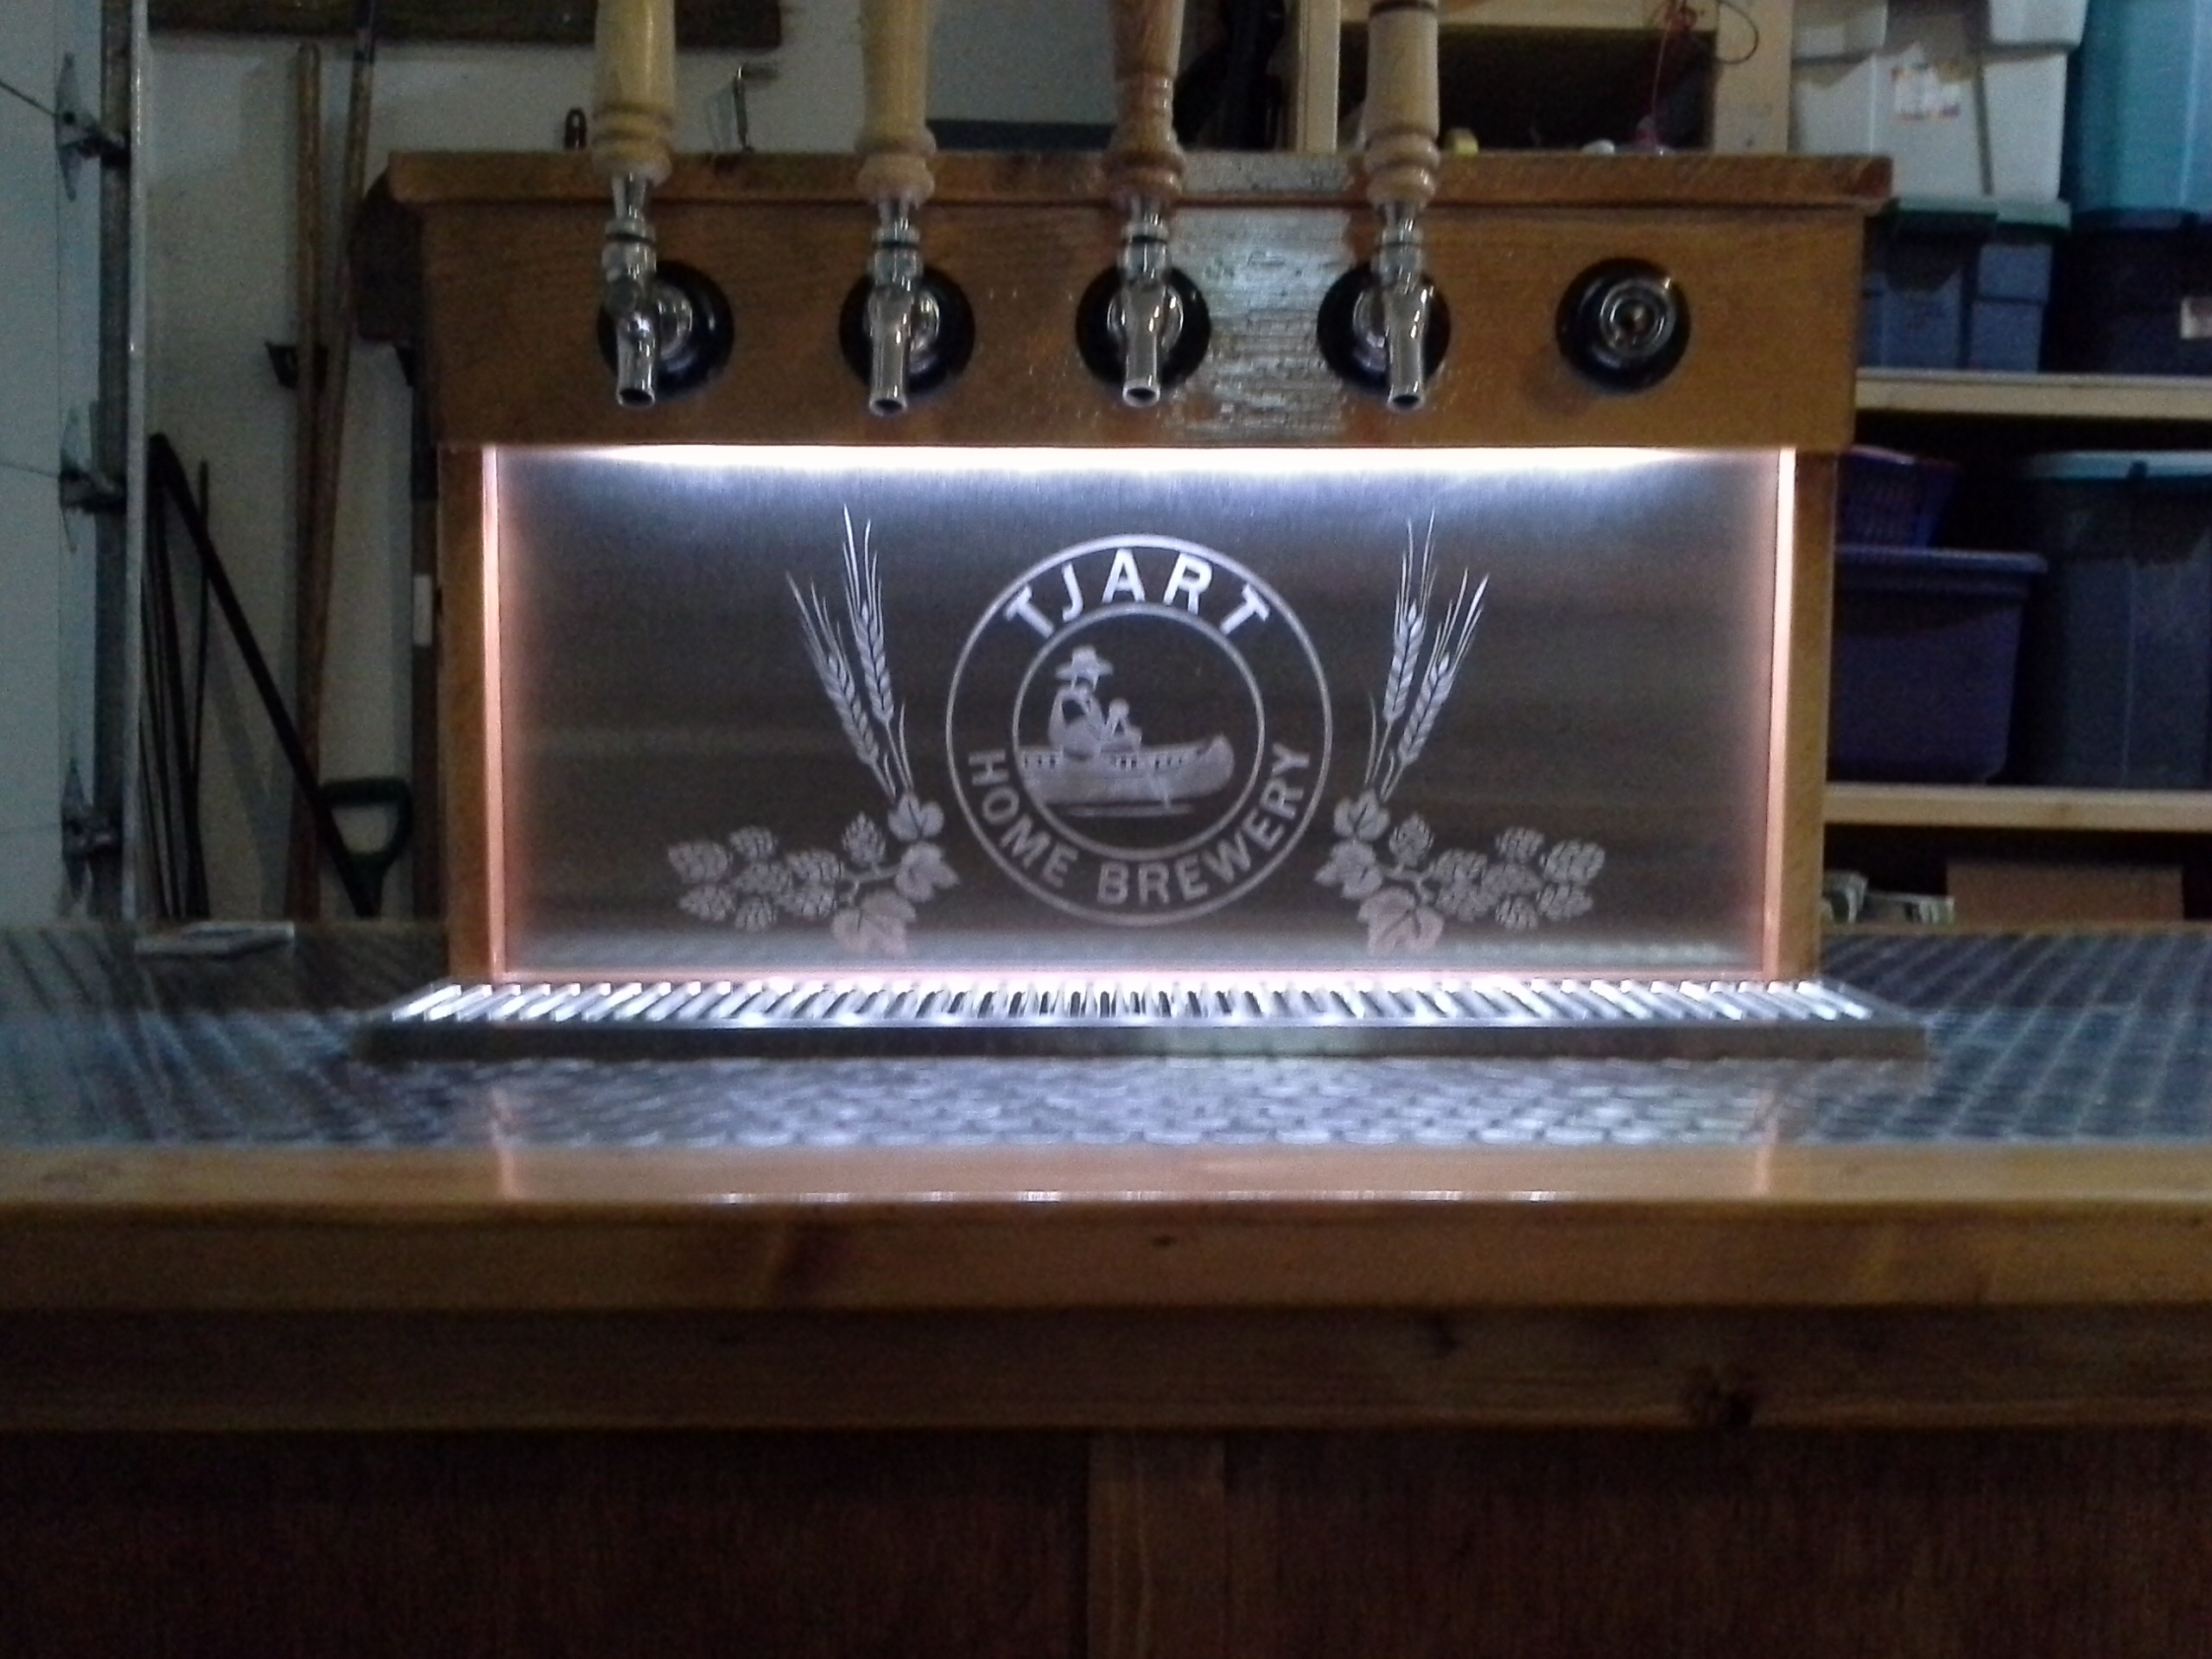
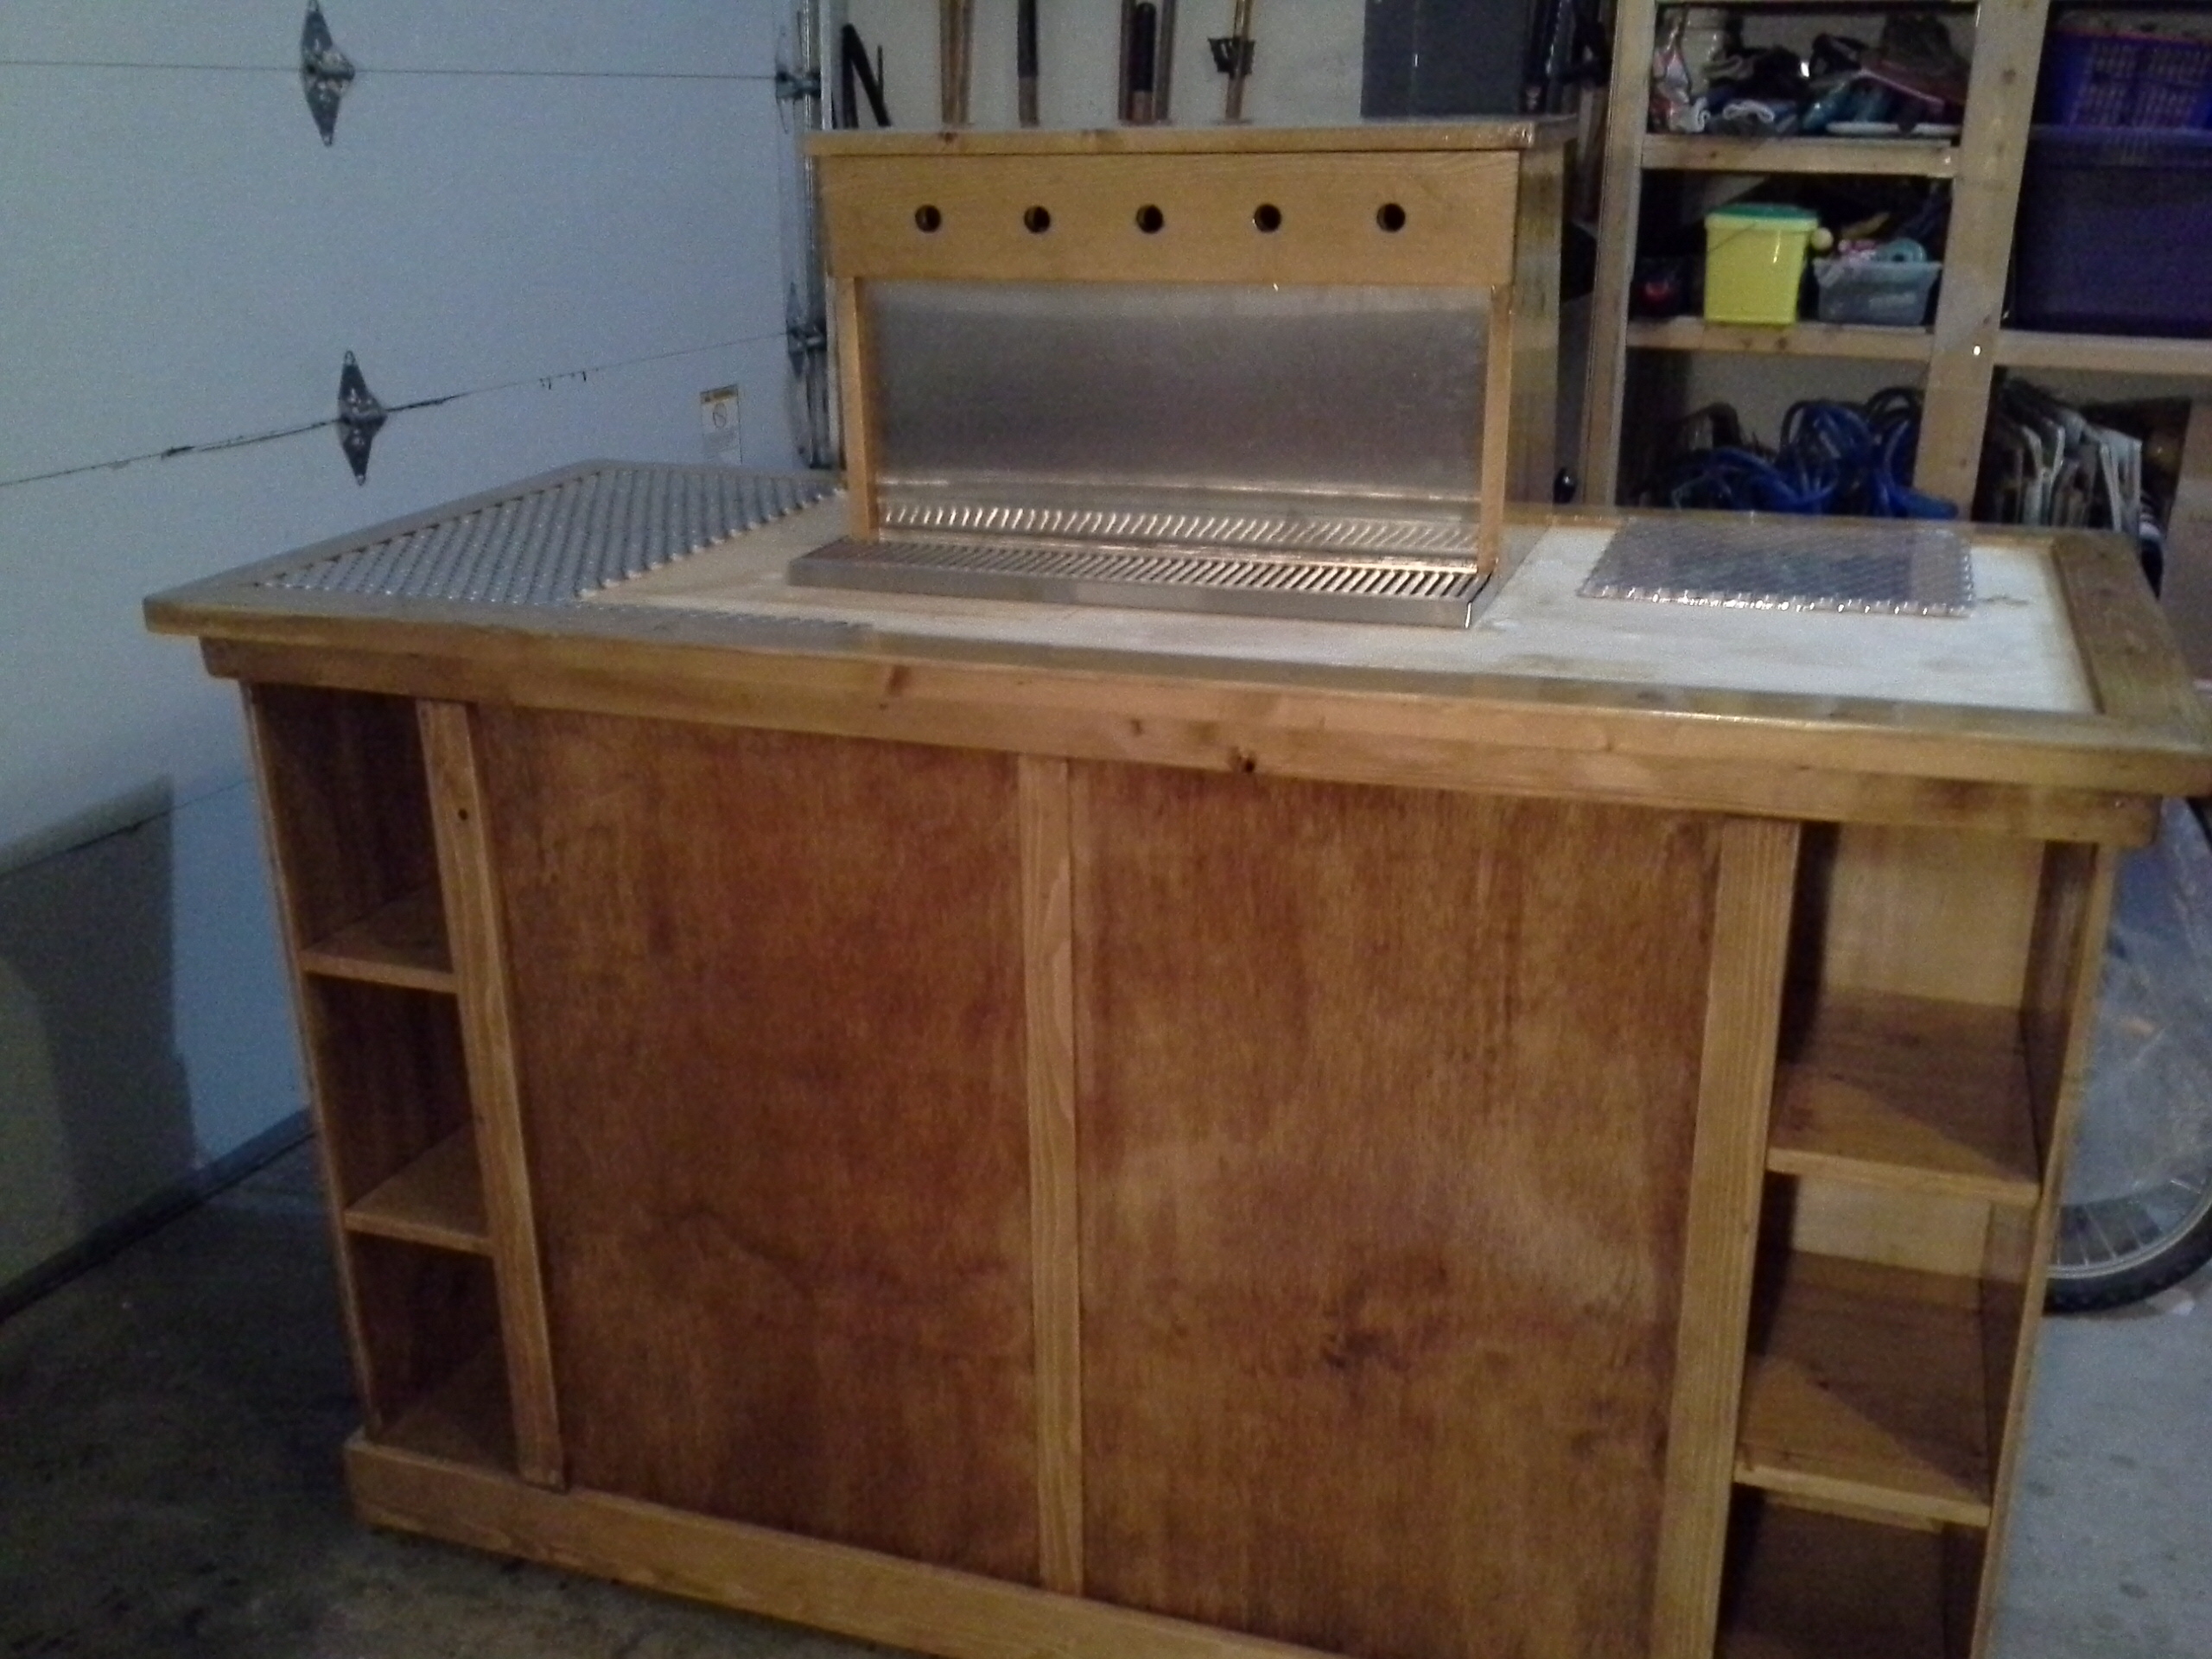
The new one will be a coffin keezer, so I'll do away with the crome tower. It's also gonna have 5 taps, and I'll move it to the basement and out of the garage to make it a more permanent structure in the house.
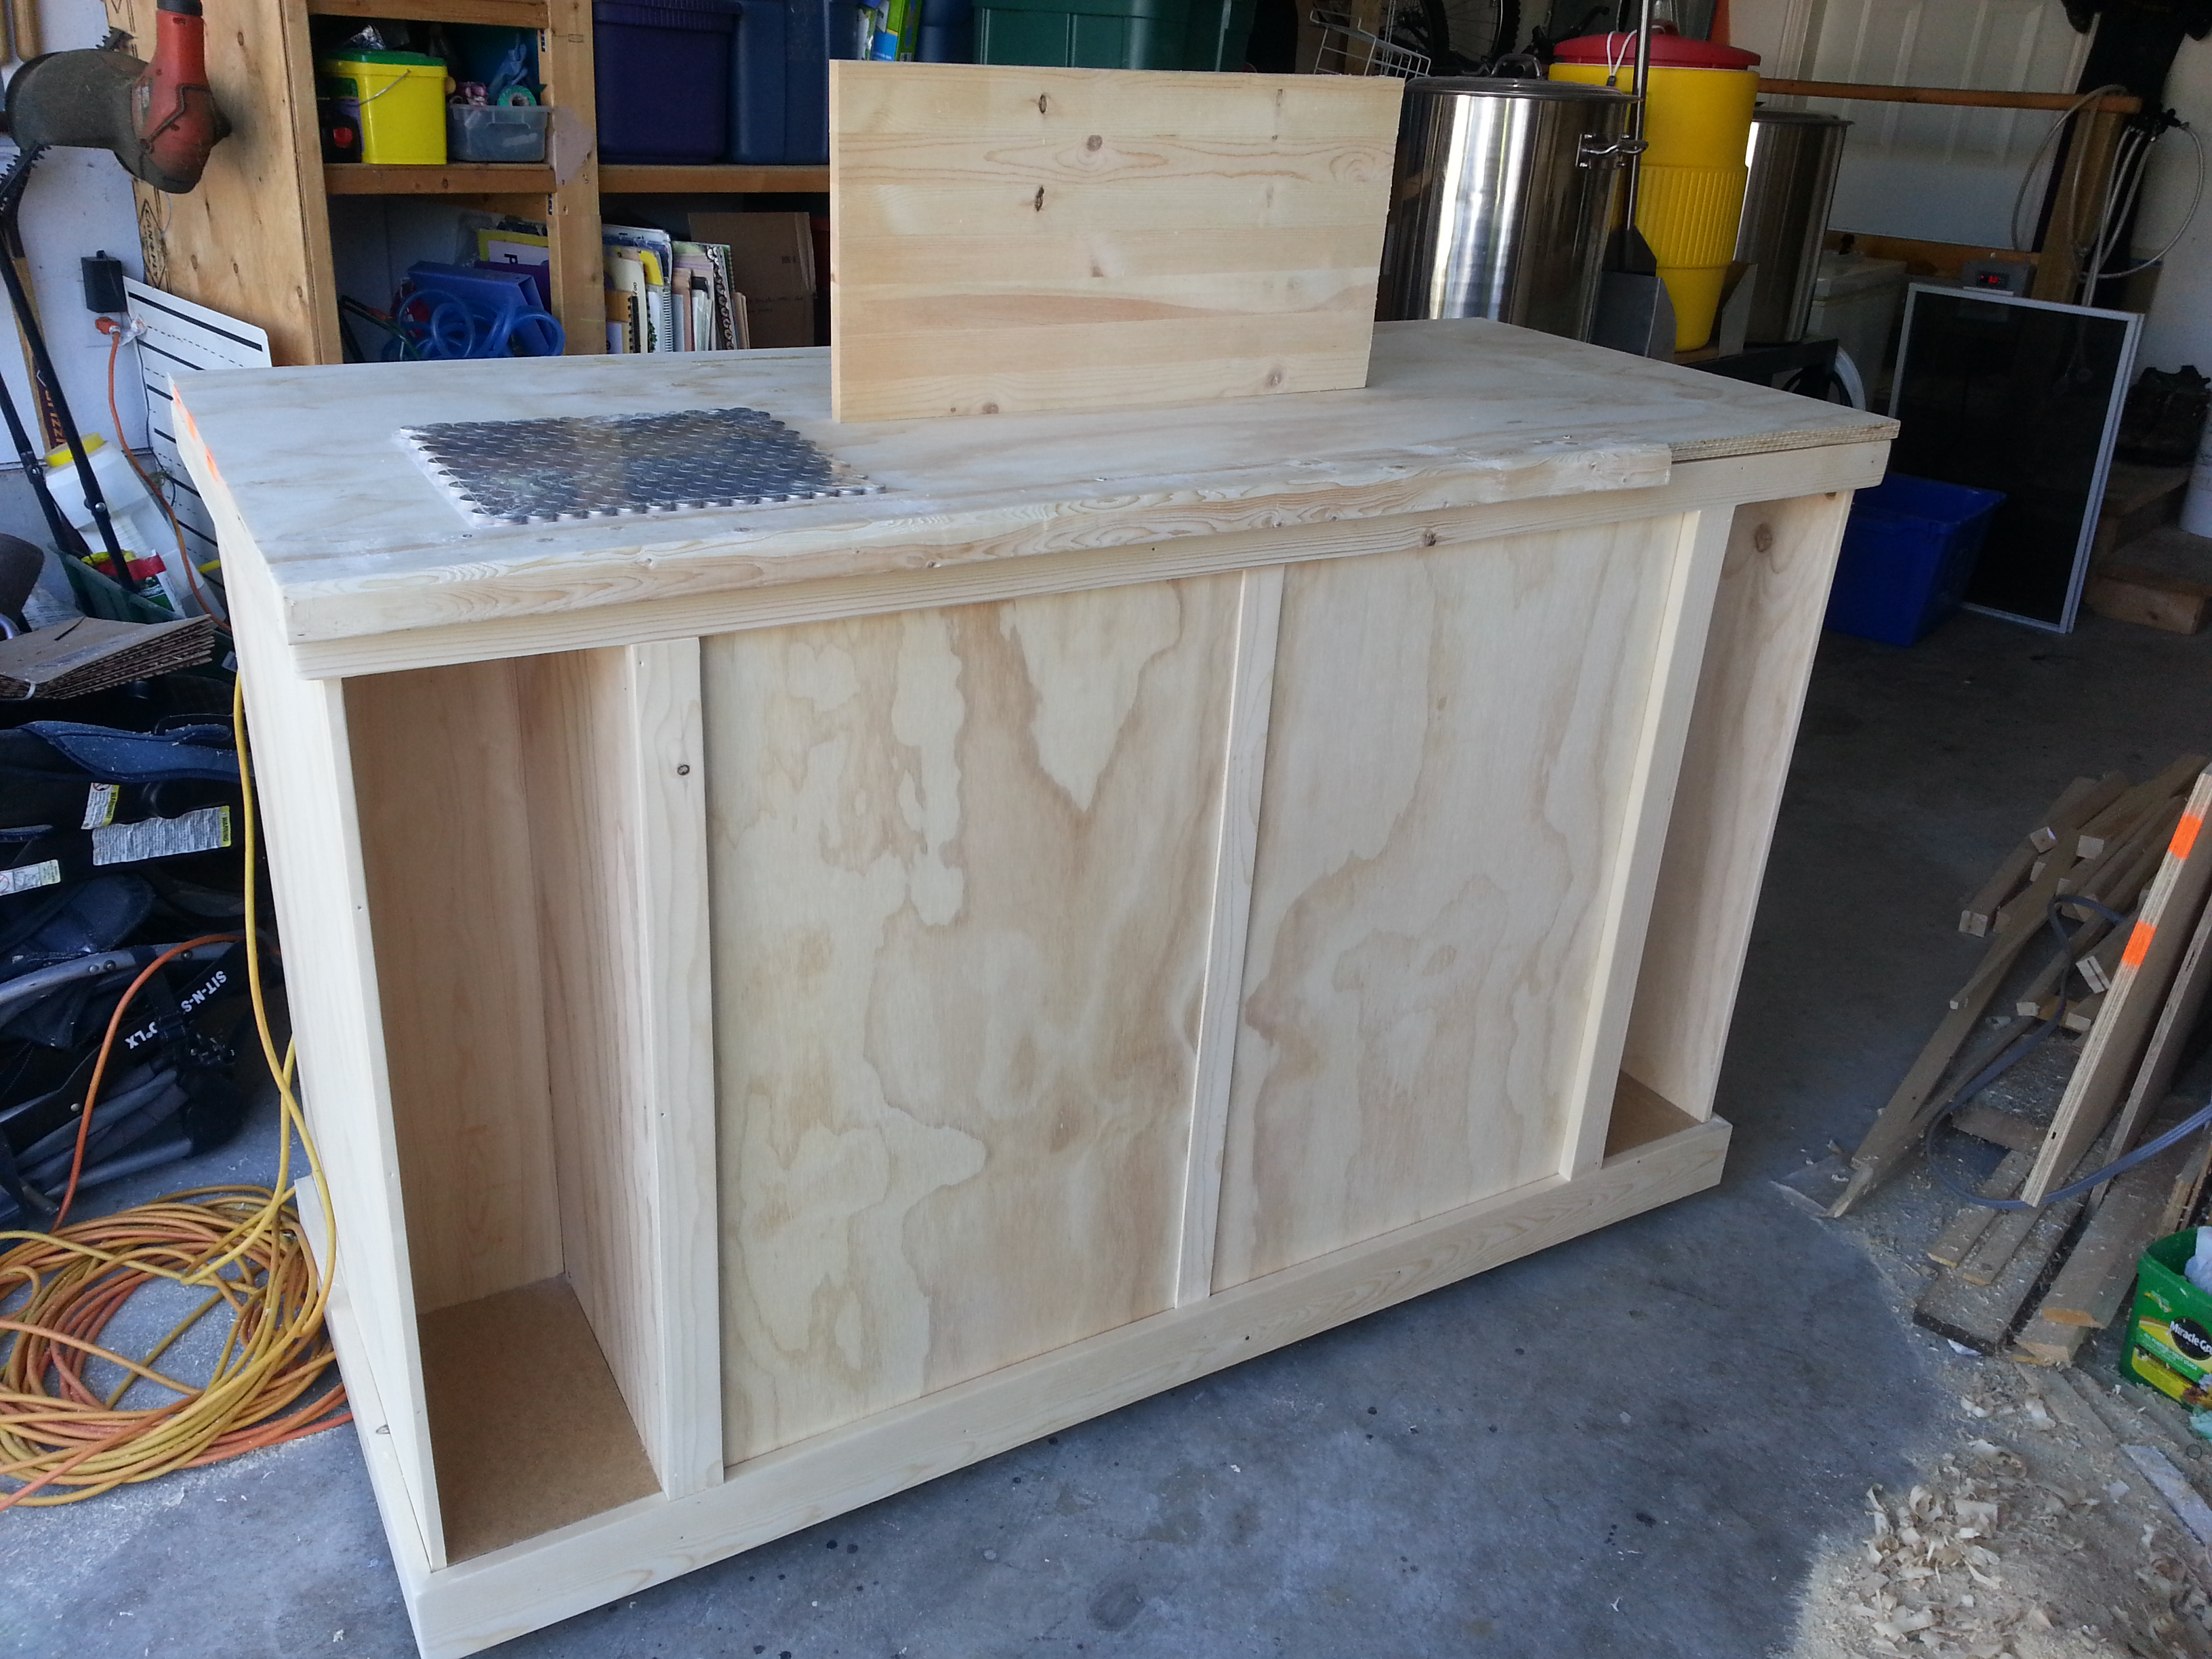
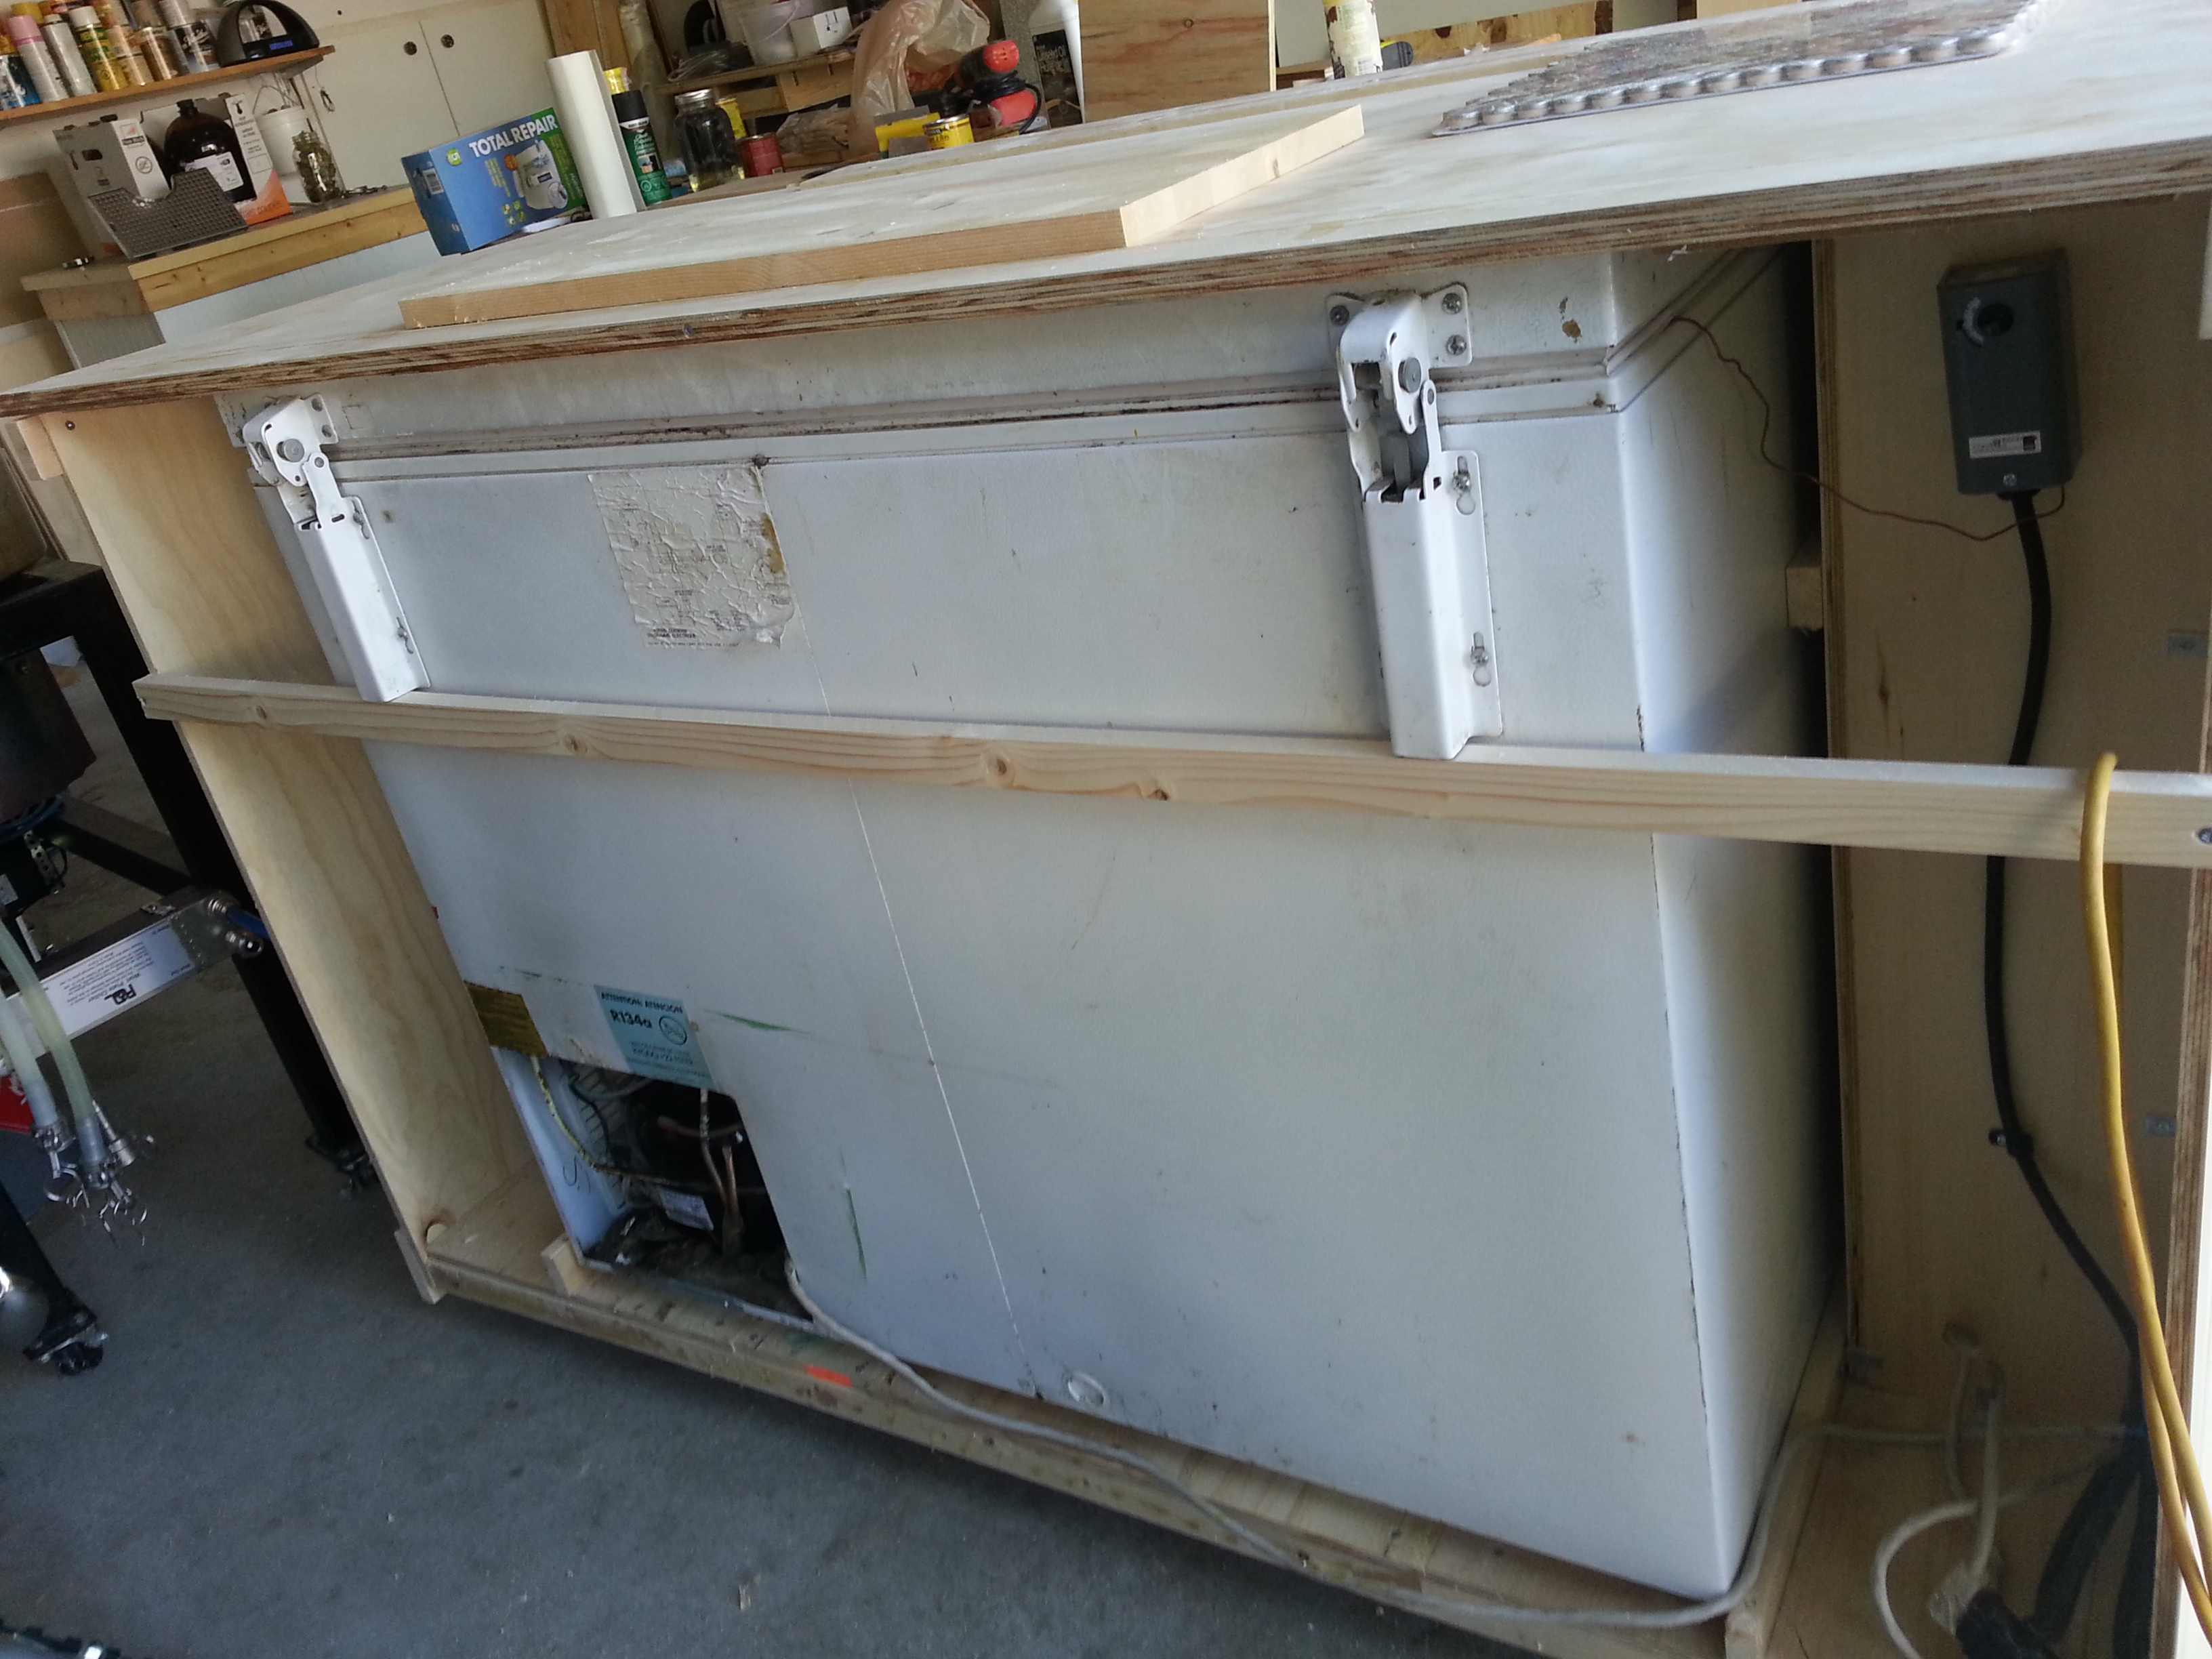
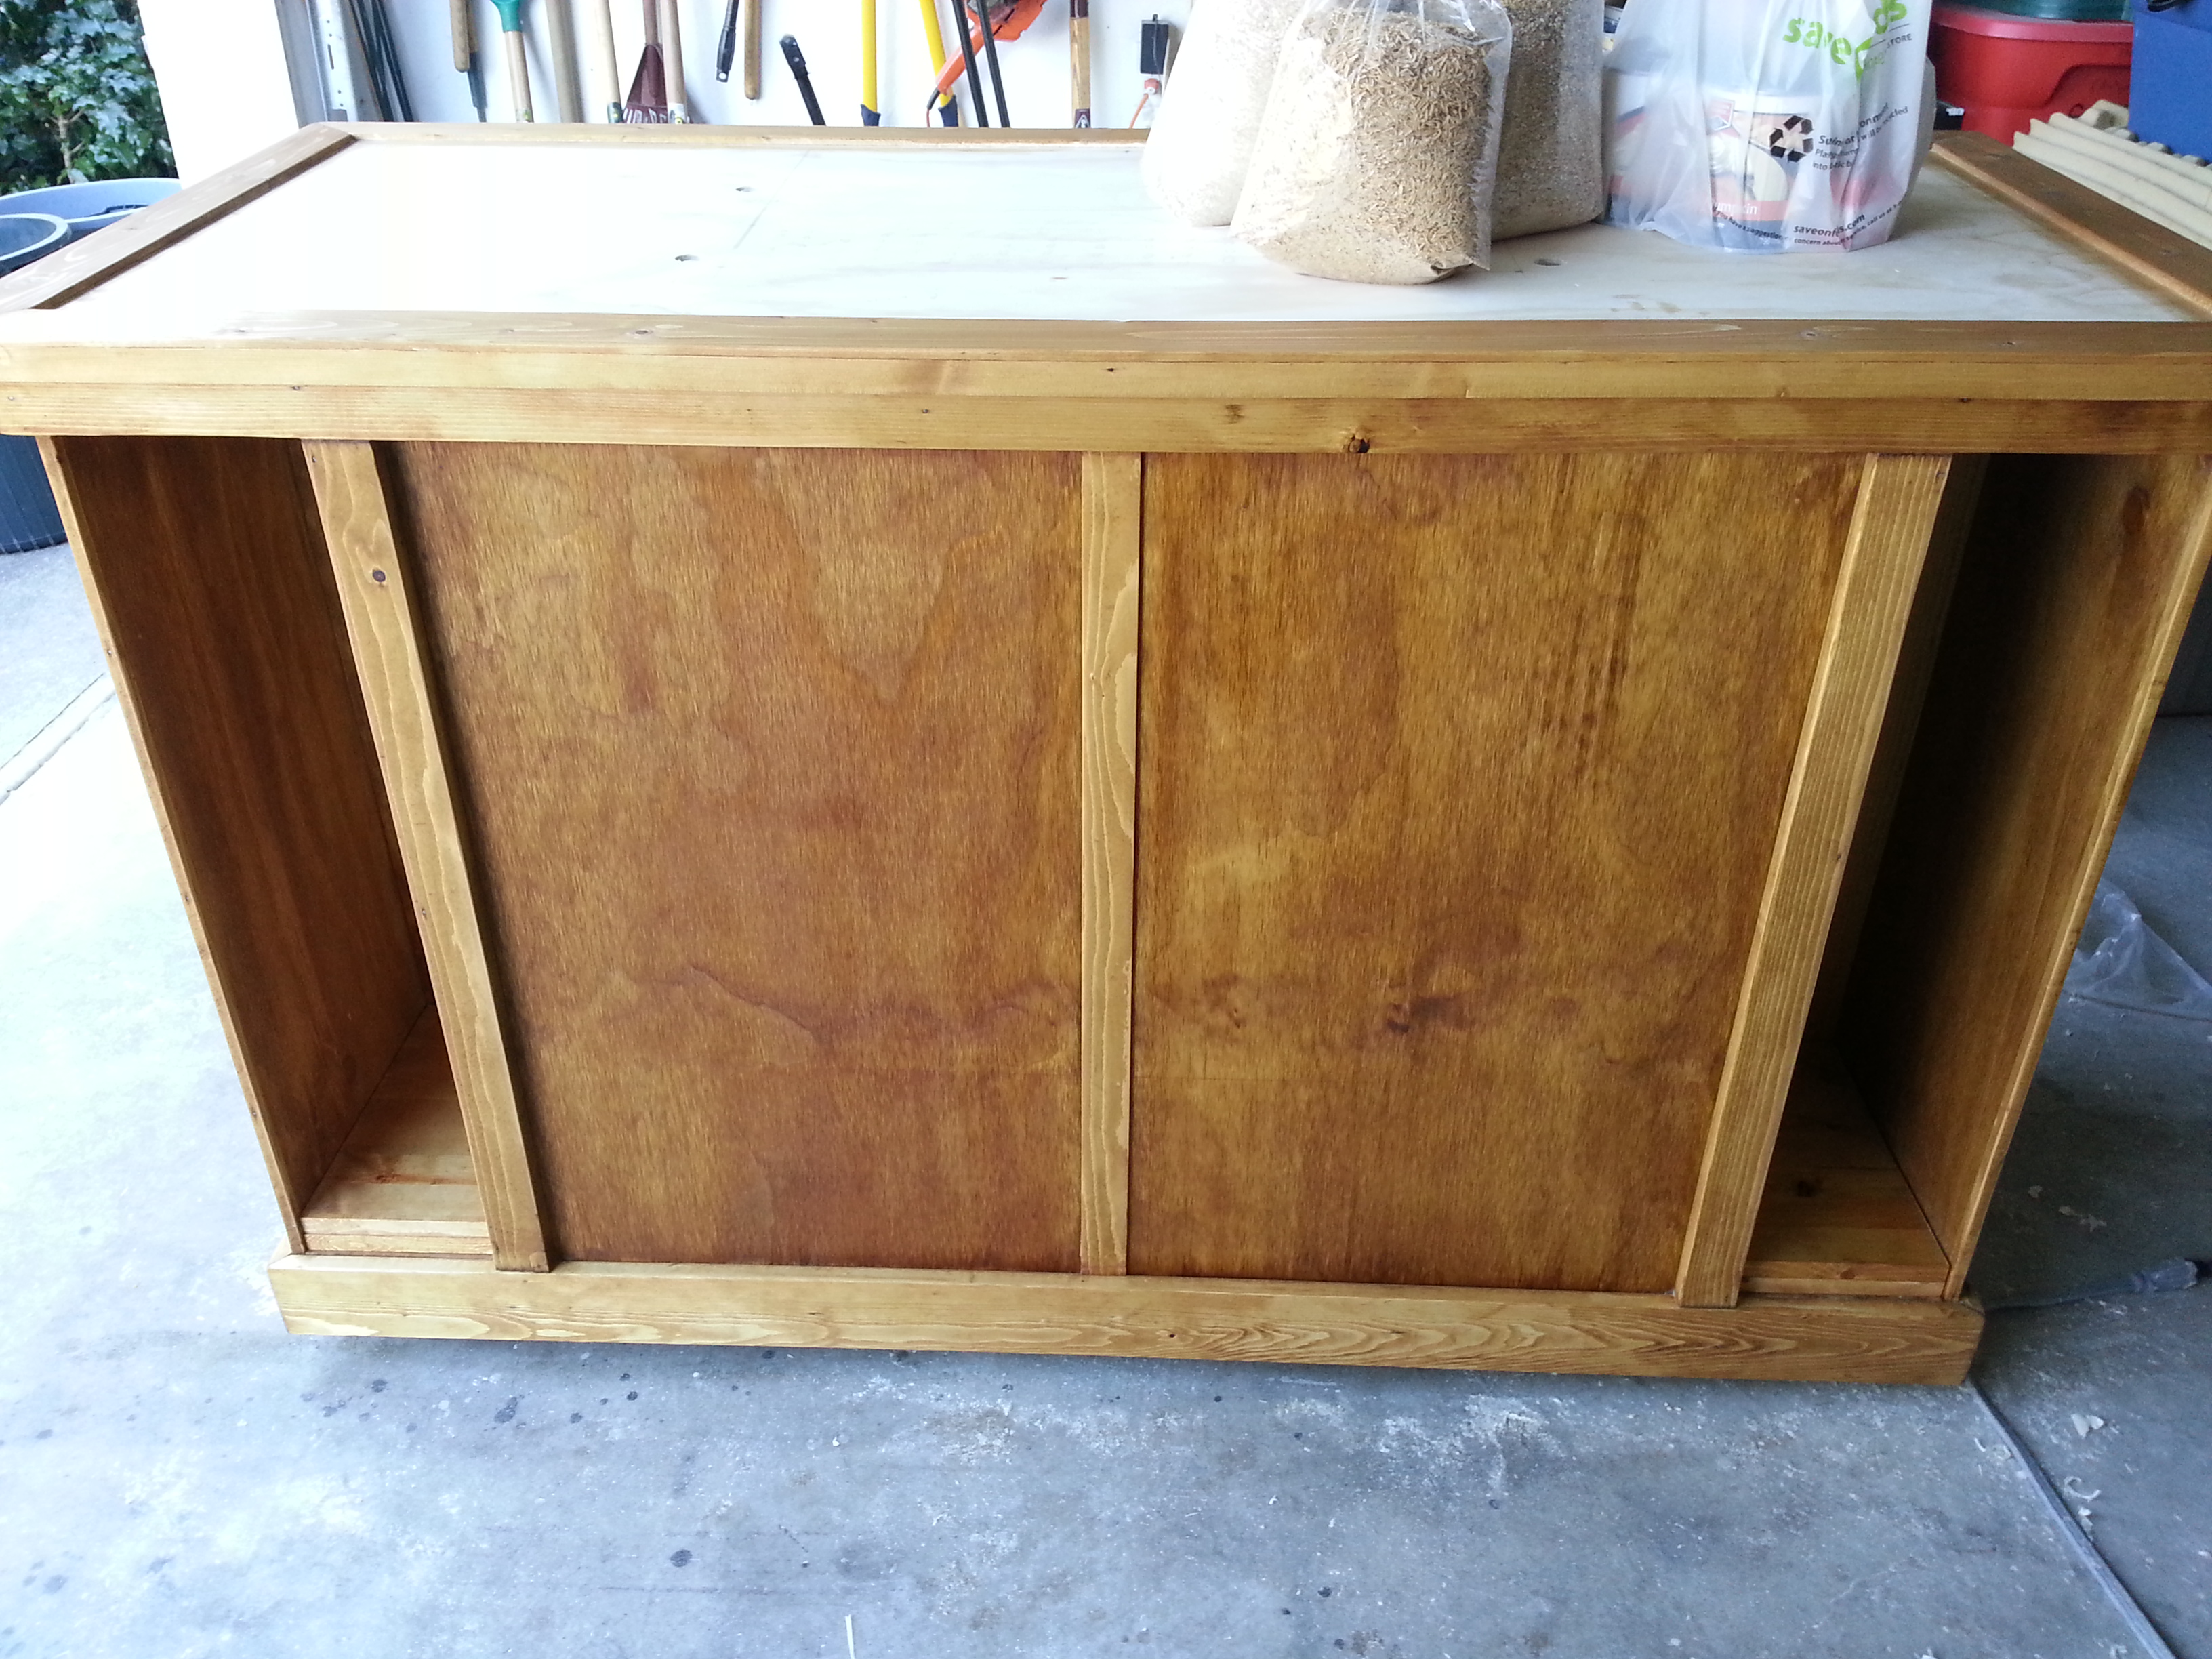
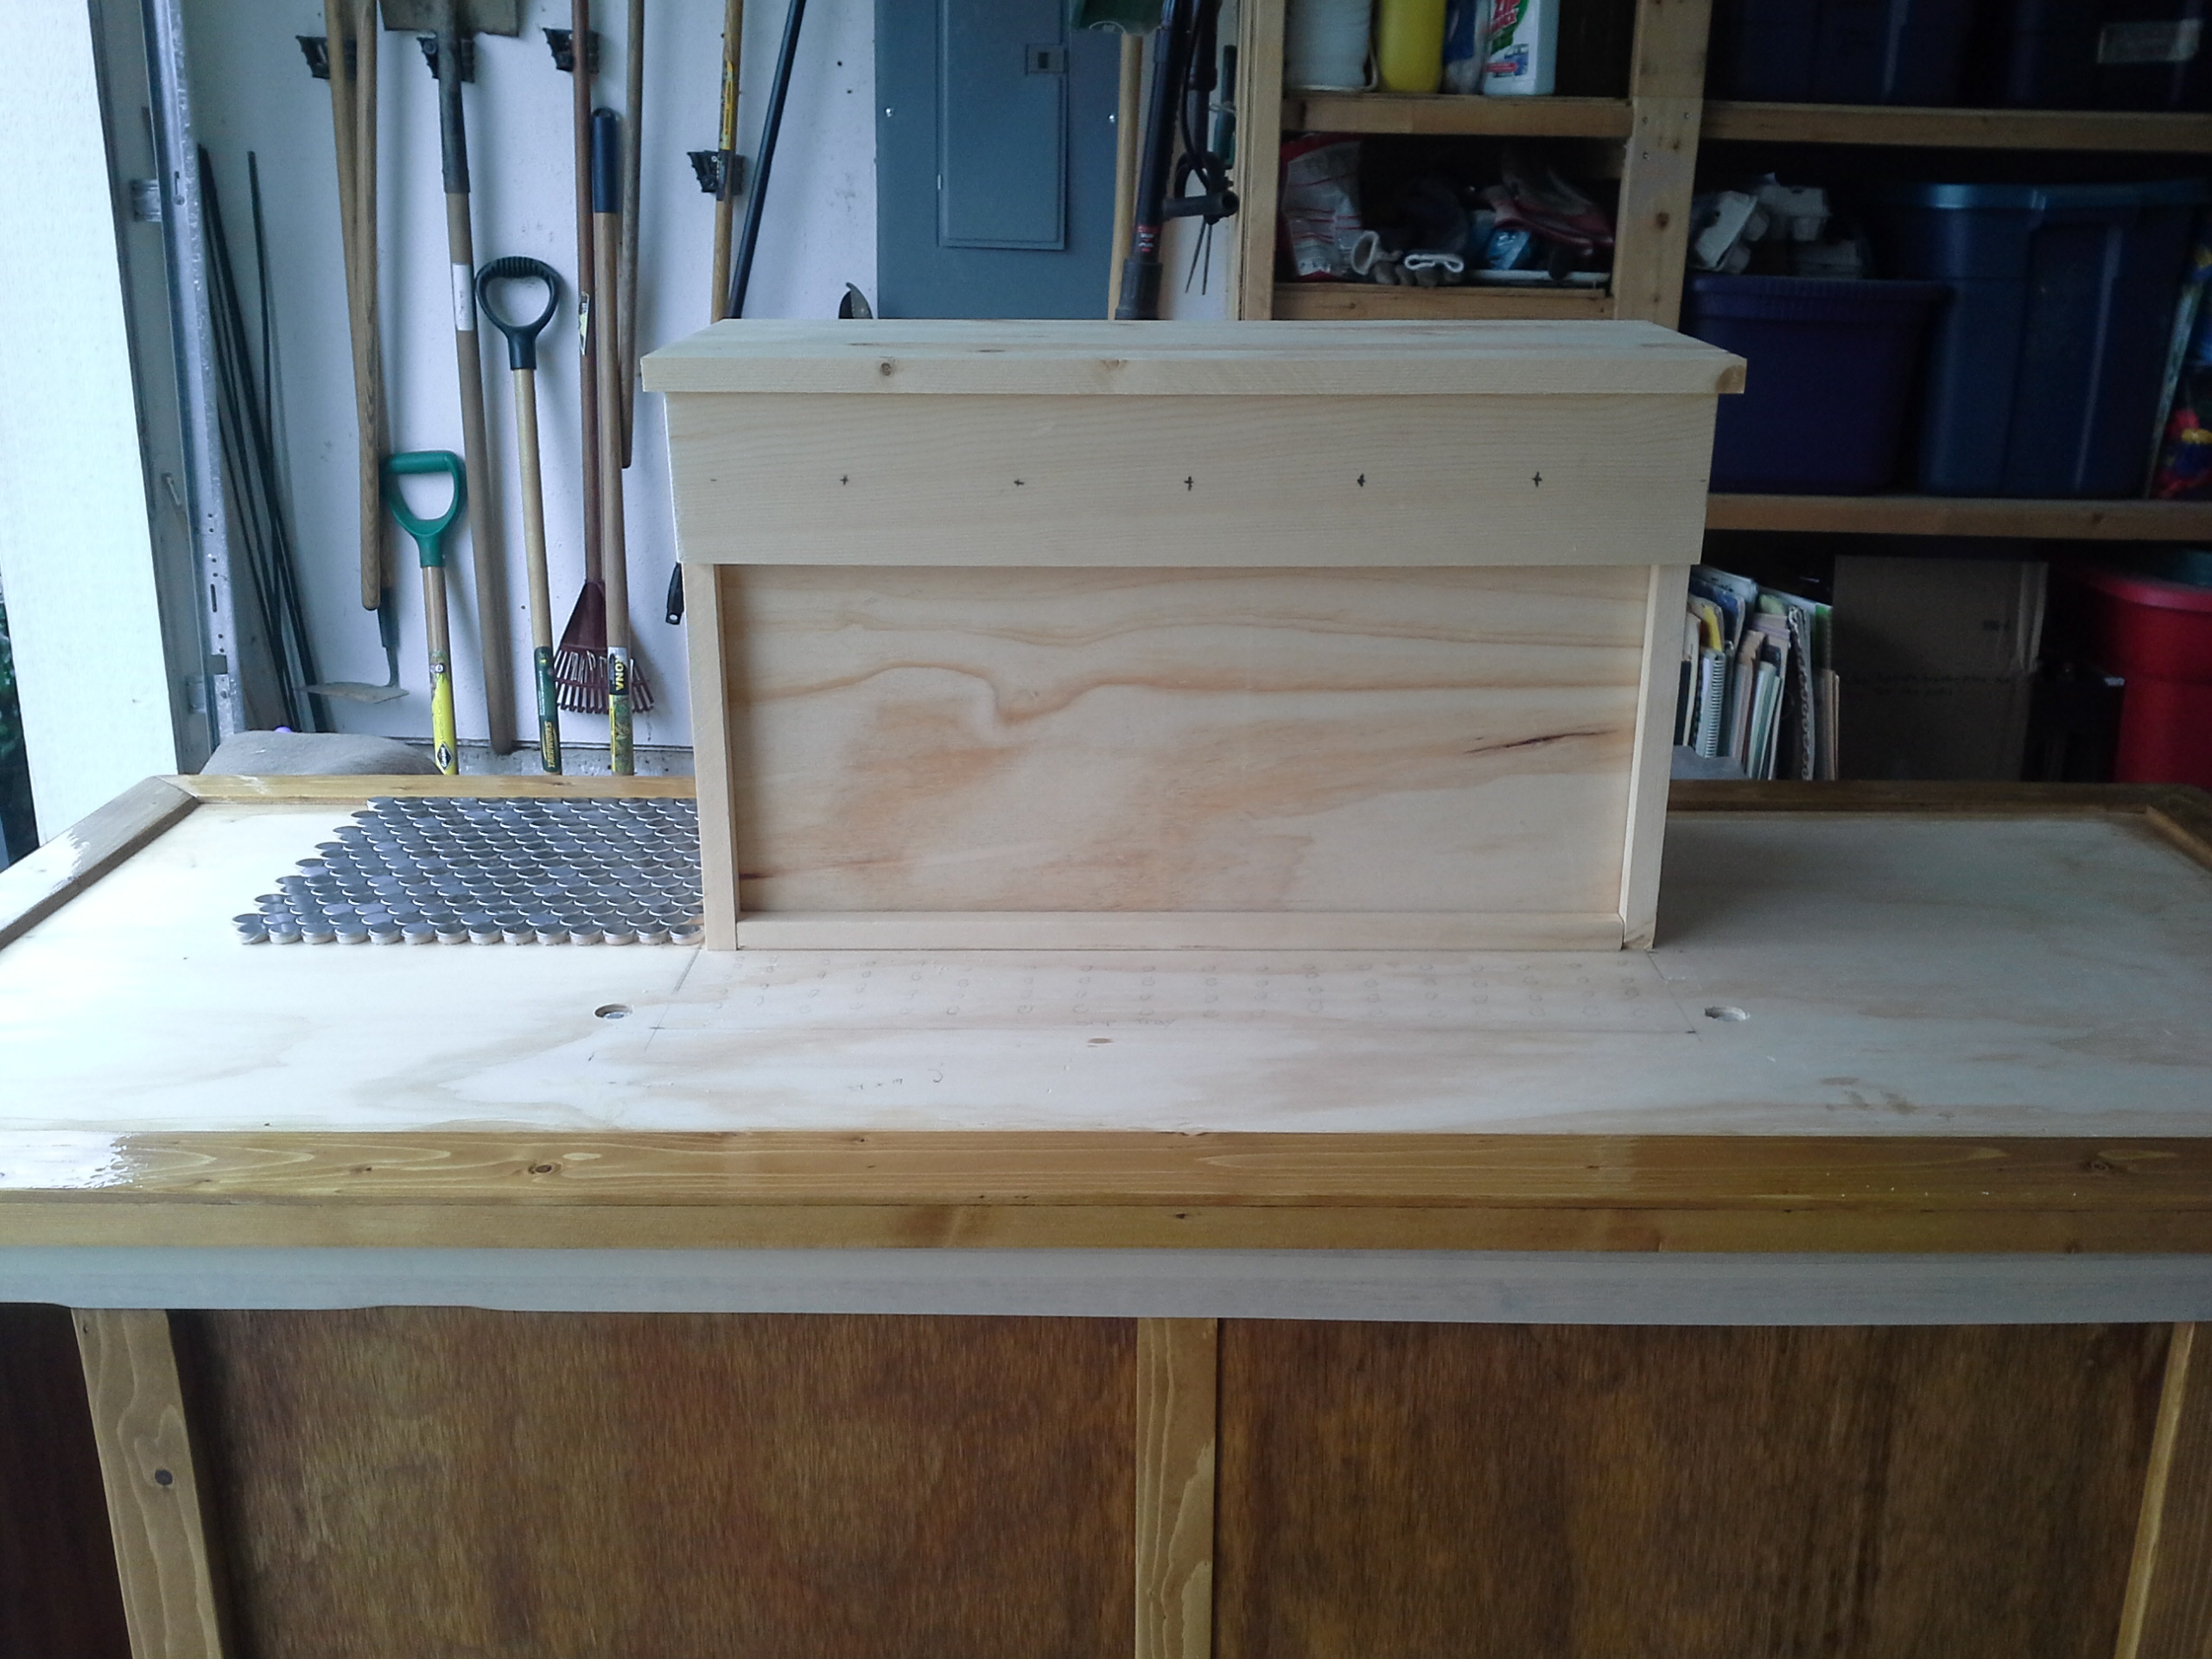
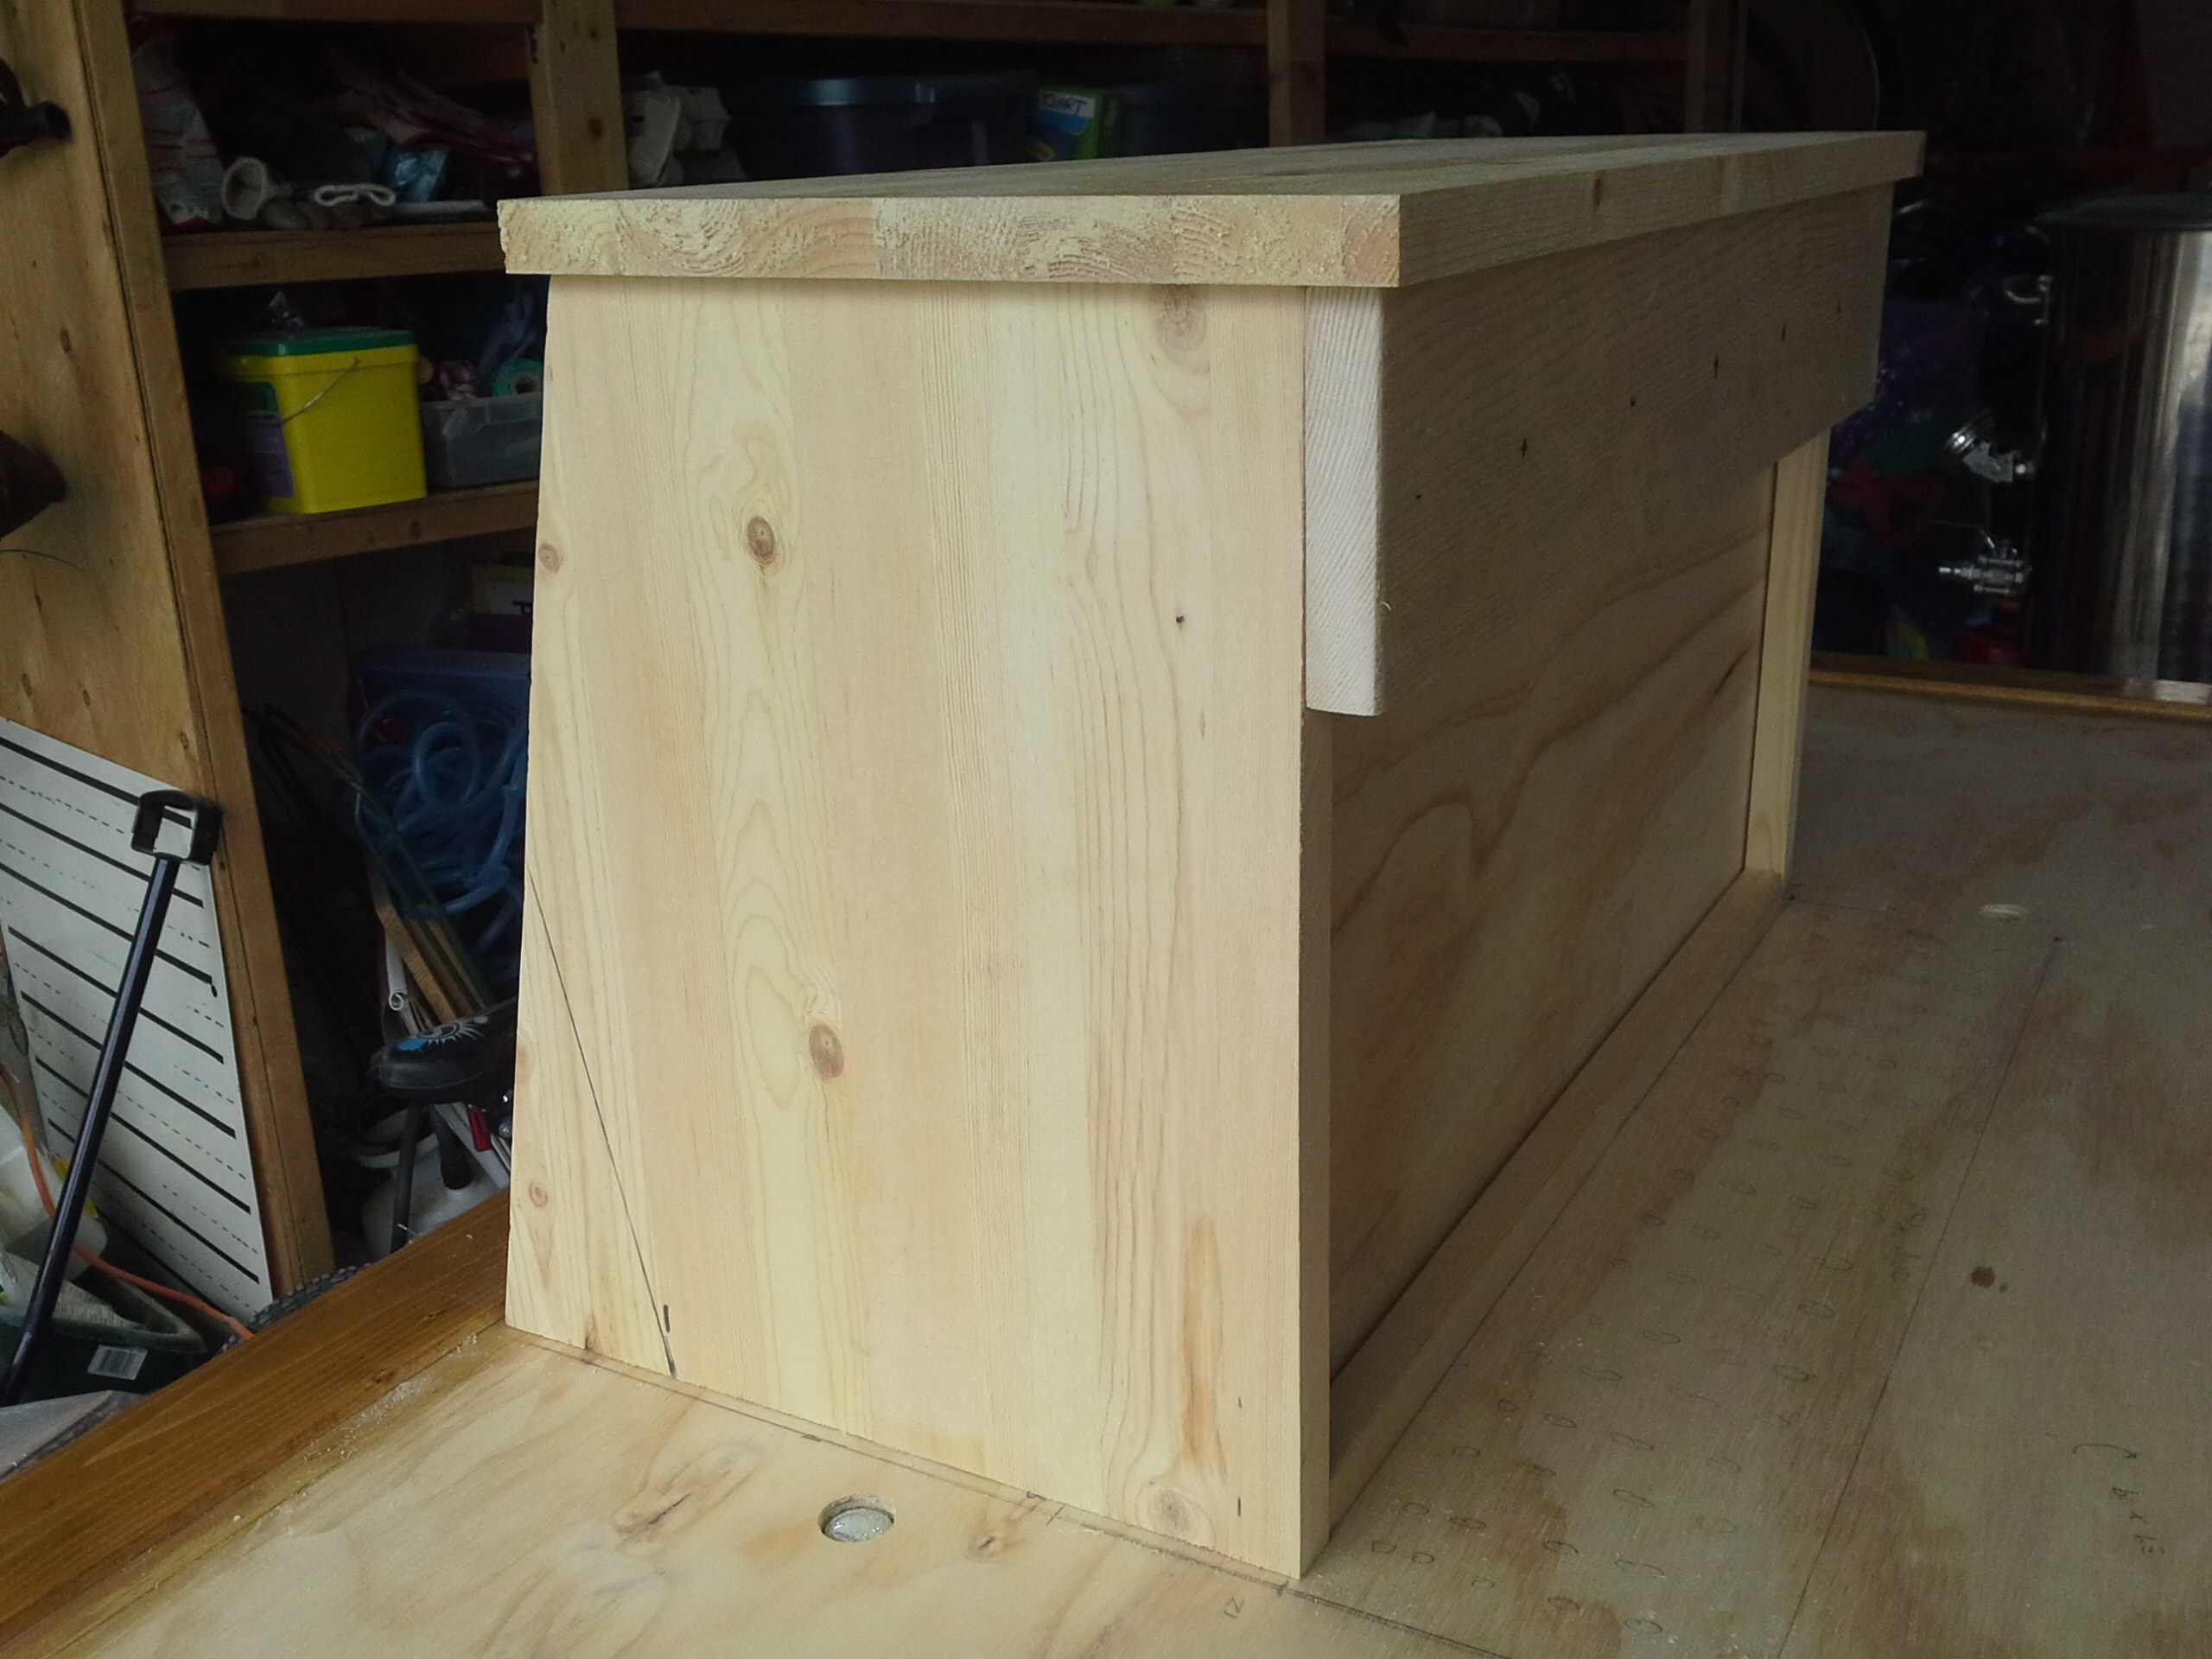
Unfortunately I didn't start documenting the build until recently so the pictures start with the cabinet complete. I'll start posting those pictures in a reply...
 
Last edited:
I purchased a 7 Cu Ft freezer from craigslist. I started by building a cabinet around the front half of the freezer and leaving the back half exposed. The pictures may illustrate better:

Here's the cabinet build and unfinished (un-treated)
20140906_133743-63791.jpg


The plank on top is supposed to offer a visual of where the coffin box will sit. The side compartments will have shelves for glasses. I added the side compartments for glass storage, and to extend the width of the unit so that the dimensions roughly follow the golden ratio (side = 1.6 * height) so the dimensions are 3.2 ft by 5 ft. The golden ratio would require it to be 3 ft high but the castors lift it up a couple inches.

Here's the back
20140906_133812-63792.jpg


I'll be switching the controller to a digital LOVE controller and wiring for fans and lights. The back half of the freezer is exposed so I'm not too concerned about aeration or dispersing heat, but if it becomes a concern I'll use a fan to blow into and out of the gap between the wood and the freezer. Any framing that would impede air flow has holes drilled into it so air can flow freely within the 1 inch gap.

Here's the unit stained:
20140913_091531-63793.jpg


That's the malt for a pumpkin spice ale sitting on top.
I'll varnish the cabinet with flat/matte finish and the top will be very, very high gloss.
 
The countertop will be stainless steel tile:

20140917_131155-63795.jpg


I've also added 1 coat of epoxy to the bullnose around the edge. The epoxy builds up a layer of coating that can't be achieved with varnish and really enhances the gloss. I'll add another coat to even it out and then top it off with high-gloss varnish. The coffin box will also have the same finish (epoxy + varnish for a super high gloss)

Here's the coffin box so far:

20140917_131124-63794.jpg


20140917_131222-63796.jpg


I set the dimensions of the box to follow the golden ratio again for asthetics. The width is 24 inches which is 1.6 * the height of 14.5 inches. The top surface of the side is 9 inches which is 1.6 less than the height.

The backsplash for the coffin box will be stainless sheet metal to match the stainless tile countertop. I'm going to etch my brewery logo onto the backsplash using the salt + vinegar + 9V battery method described in these forums.

More to come as progress continues...
 
Quick update on this...

20141004_182148-63884.jpg


I varnished the cabinet and installed the shelves. The coffin box is stained, varnished, and installed onto the lid. The drip tray arrived a few days ago and it's installed.
The coffin box is more or less done but I can't install the shanks yet because I still need to etch the stainless back splash. The back splash slides into a groove i dadoed into the side walls so I need to have the back splash set in permanently before the shanks get installed above it.
Just starting to lay out the stainless tile on the lid.
 
Not an architect. I have a math degree so I appreciate the golden ratio for its own sake more so than the aesthetics. I'm a business analyst by trade.
 
Rad project. I'm at a similar stage (cabinet done, building coffin box now) as you on a keezer project this week:

New Coffin Keezer Build https://www.homebrewtalk.com/showthread.php?t=494222

Dunno if you're more planned ahead than I am, but I'm just thinking about coffin cooling now. Probably an 80 or 120 mm computer fan, and I'll try it wired to the temp controller, and then splice it into full-time power if that don't cut it. I've got 6 inch shanks, so I'm hoping if I pipe the air up from the bottom of the cooler I'm hoping to keep them pretty frigid.

Post updates!


Sent from my iPhone using Home Brew
 
Keezer is looking very nice. Your talk of losing 2 freezers brings up a suggestion. My fermentation freezer stopped cooling so I spent weeks hunting another one down on craigs list. Then my "new" keggerator stopped cooling. I figured it was time for me to learn how to recharge/fix these things. Some time on youtube, evap pump and some cheep HVAC gauges and I've fixed 3 of my refrigerators over the past year. Really super easy to do.
Looking forward to seeing your finished keezer.
 
A few updates:

Here's the inside of the coffin:
20141012_133626-63969.jpg


The fan will be wired to the temperature controller. The middle hole is a conduit for the beer line and the left hole is to route air out of the box. They are all masked (and insulated from inside) because the keezer is running and I wanted to keep the cold in. Not sure if the fan is powerful enough but I figured all I need is to keep the air moving so we'll see. I'll tape off the insulation seams and use GoodStuff spray foam to try to create a natural air flow into and back out of the box.

I tiled and grouted the lid:
20141012_133351-63967.jpg

20141012_133413-63968.jpg


The lid is quite heavy now. I'll have to work out a prop to hold the lid open without putting too much strain on the freezer's hinges.
 
I got the backsplash done this morning...

My father-in-law is a retired signmaker / graphic artist and he was kind enough to create and apply a stencil for the electrolytic acid etching. My wife designed the logo. Im not too creative with the name of my brewery, but I'm ok with that.

20141013_095409-63990.jpg


Here's the sheet metal etched:
20141013_1232361-63989.jpg


And finally installed with lighting:
20141013_134044-63987.jpg

20141013_134030-63991.jpg


It was difficult to etch it consistently throughout the entire design so it looks less than perfect when viewed from an angle, but it's pretty awesome if you look at it head on.

Almost done! I just need to order 2 more perlick taps, add some quarter-round moulding around the coffin box and drip tray, and wire some lighting to the underside of the shelves. Oh, and I have to get the monster to my basement somehow. I designed it so it could be dismantled so I'll transport it as a freezer, lid, and empty cabinet and re-assemble in the basement.
 
It looks like ass! I'm PM'ing you my address so that you can ship it to me and I'll dispose of it properly, especially that crappy sign - it's the worst part!! :D
 
The backsplash is pretty baller. Curious what temp differentials you end up with between keezer floor and coffin. I'm unsure whether I'll need to run dryer hose down low to pipe colder air up to cool my shanks and faucets or if the relatively undirected fan will manage well enough on its own.
 
I would run the fan 24/7. As long as air is constantly moving it should stay cool
 
I love the stainless tile. I will be stealing that for my up coming build. And I had been playing with ideas like your back splash. I'm thinking about doing something similar with itched glass and some kind of back-lit LED lighting to make it stand out.

Great job!
 
I've finished the wiring of the lighting. I got an RGB LED light strip kit from costco and cut it up into strips. I painstakingly soldered each strip...

20141020_191549-64064.jpg


and installed them into dadoes that I cut into the underside of each shelf. Here's the result:

20141021_215120-64063.jpg


unfortunately I reversed the green and red connections in the middle left shelf (coincidentally it's the one I took the picture of above) so the colors are off for that one shelf only. That's a problem for tomorrow though.

I also added some quarter round moulding around the drip tray and tap box.

I've got 2 perlick taps in the mail and still need to dismantle it and move it out of the garage and into the basement. A chalk board would be nice too.
 
Last edited:
Sweet Keezer!

I was looking at those same LED's from Costco for under cabinet lighting in my kitchen. How easy was it to cut up the sections and rewire? The solder pads look tiny.
 
The costco strips come in 30-ish inch lengths (or 36? Can't remember) and they have male and female connectors on each side so you can easily string them together. The problem is when you want several discontinuous lengths like I did. They can be cut at regular intervals but there aren't soldering sites located at regular intervals like other LED tape that I've seen at hardware stores. You need to cut off the previous installed male or female connectors and solder onto the end of the strips. It was a real waste for me because the shelves used 5 inch lengths and I could only solder onto the ends of each pre- cut strip so the middle section went into the garbage.
I also had to buy separate wire. Not sure if I saved money or not by buying the costco kit. I know the power supply and controller with remote is worth some $$ so the kit probably was cost effective despite the waste.

FYI soldering isn't too hard if you're patient, but I can't think of any other way to wire them if they are not strung together in one continuous length. There is no quick connect clip that im aware of to attach wiring to the male or female plugs. The trick is to solder the ends of the wire first and then it's easy to solder onto the strip by just holding the soldering iron against the wire when it's held in place. Check YouTube.
 
Its done!

I moved it to the basement relatively easily by dismantling it for transport and then reassembling after. The 2 perlick taps I was waiting for arrived and they are installed. Lighting is fixed and working great. I spray-foamed all interior seams of the coffin box and there doesn't seem to be any noticeable air leaks (I was especially interested in checking for leaks in the weather seal that seals the back hatch). I haven't had a chance to check the temperature differential between the coffin box and the freezer, but it's definitely cold to the touch on the inside of the coffin box. Reasonably good air flow in and out from the fan too. I installed the temperature regulator probe on the lid of the freezer, near the air outlet for the coffin box, so hopefully it will kick in when the air near the top of the unit gets too warm.

20141024_170909-64076.jpg

20141024_170951-64077.jpg

20141024_171041-64078.jpg


and... first pour. It's an ipa wet-hopped with hand-picked local feral hops.

20141024_171401-64079.jpg


I definitely need a chalk board to fill the wall-space above the keezer and to keep track of whats on tap.
 
Minbari's comment reminded me to actually comment as well (instead of just drooling in silence).

Great design. I'm going to refer to this thread quite a bit in the next month when I build my own. Great job!
 
Here's my last update. Now ican happily say Iit's 100% done and ready to entertain. First, I added a decorative element in the form of a vase filled with hop and grain. I was lucky enough to find a huge pilsener/wheatbeer style glass at a local discount home outfitter store, and I filled it with different layers of malt for a nice contrast.

20141108_2111531-64194.jpg


I wanted the grain to be the equivalent of a pale ale because in my mind it's pretty generic and non-offensive to the layperson. The different layers of crystal malt don't really contrast well with the pale malt, but I'm happy with it.

I also built a chalkboard to keep track of what's on tap. It's made of 1/4 inch MDF spray-painted with chalkboard paint and framed with pine stained the same color as the kegerator.

20141108_211352-64193.jpg


it's mounted on a french cleat so I can easily get it on and off the wall to change the menu.

Of course, I had to display my small collection of homebrew medals to show off my achievements (on the left side).

Now it's ready, just in time for upcoming holiday entertaining. Thanks for all the kind feedback above.
 
Awesome! An over-used word, but it's the word that fits this project!

I was going to pretty much copy Jester's "Original Keezer" build, but now I'm certain that I'm going to incorporate many of your ideas as well. I've always been a fan of the golden ratio, but somehow it didn't even come to mind as I was thinking about my keezer. Now, thanks to you, it's at the forefront.

Thank you for the inspiration!
 
Damn, this design and finished product is awesome! Do you have any pictures of the frame work you did as it happened? Curious to see how the frame was constructed. What kind of plywood and thickness did you use?
 
Back
Top