• Please visit and share your knowledge at our sister communities:
  • If you have not, please join our official Homebrewing Facebook Group!

    Homebrewing Facebook Group

Keezer "5ive"

Homebrew Talk

Help Support Homebrew Talk:

This site may earn a commission from merchant affiliate links, including eBay, Amazon, and others.
@Newbrewb: thanks for subscribing, i feel like i don't get anything productive done during every day, as all i do is look at keezer build threads, and at night I build mine! haha

@ Jaysus: YES THEY ARE!:mug:

@ Jester369: Thanks! If it wasnt for you, I would be drinking out of a 1 tap kegorator conversion! Pretty soon I'll have 4 on tap! I might be picking your brain after I get this thing up and running about the best way to start homebrewing for a beginner (with a 5 tap setup!) haha

@ Jota21: Thanks for subscribing!

@ Hoppopotomus: see i got the name right this time! thanks for answering my pm's, your really helpin me out, and your build really helped me visualize alot of the things that I am doing with mine!

@ D_Ranged_Eskimo: thanks!

@ John028: Thanks! I toyed around with going the johnson or ranco route, but i really like the digital display being a focal point of my keezer (after my guest's get over the shock of my full blown 5 tap bar in my house!). I'll tell you how much I actually like it after tongiht... .(i have no electrical experience and am gonna WING IT!)
 
No Problem....happy to help! :mug: Love the TSS2 placement.....looks great. What are you doing for the backsplash again? I have ready so many keezer threads lately that I'm getting them mixed up. Are you leaving it wood and staining, or are you tiling? Just curious.
 
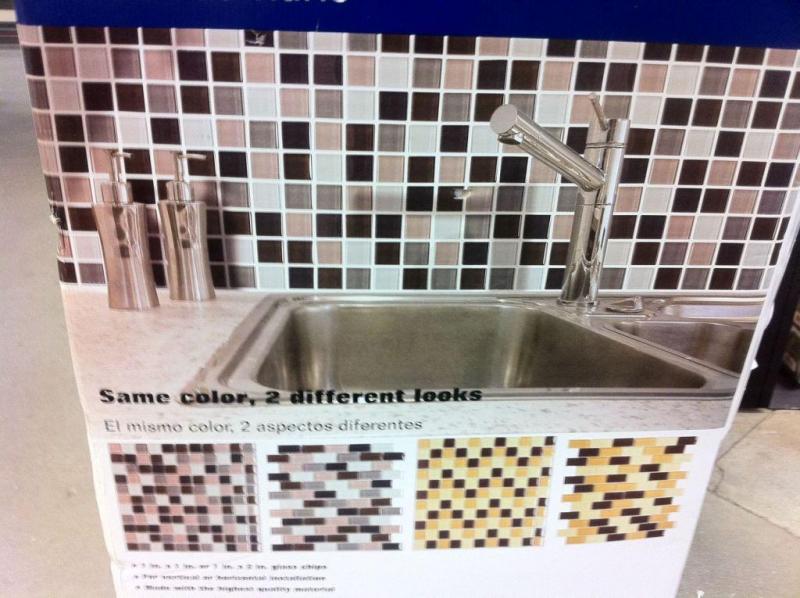
going to be doing a backsplash with 1x1 tiles similar to this design (got the idea from LesserChance).. havent picked it out yet tho... we are also doing a black granite countertop.. and flushmounting the 30" drip tray.. I want to have the thing pouring beers before i mount the granite/drip tray cuz i want to have it actually pouring to determine where to place the driptray so it is perfect for pouring under the faucets

Photo Oct 12, 8 08 11 AM.jpg
 
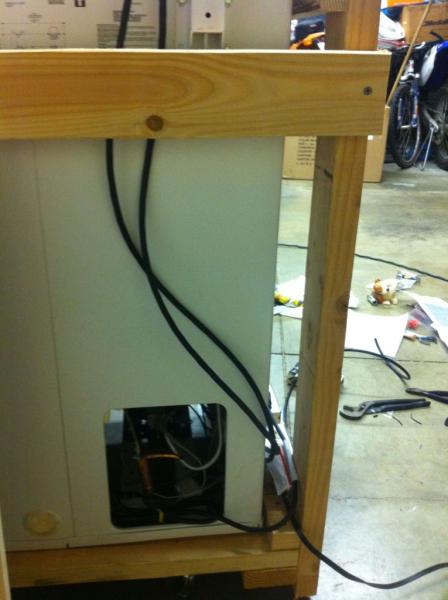
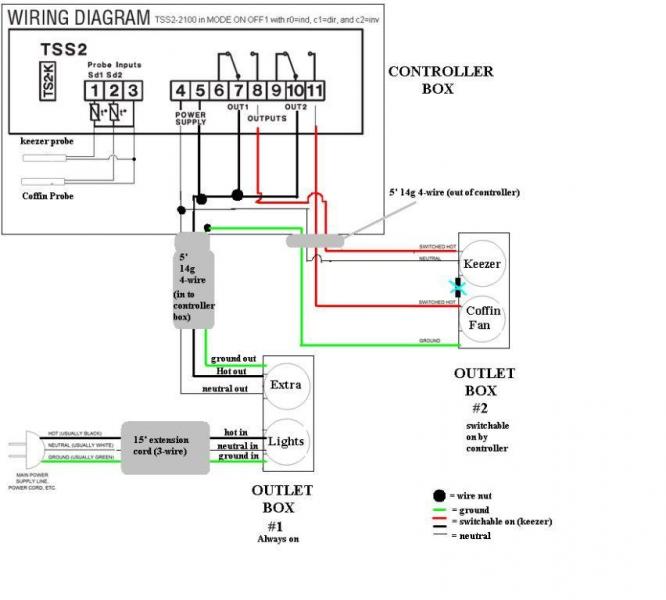
Ok. So we spent 1-2 hours wiring Keezer "5ive" up! We ended up putting a weatherproof box inside the coffin and around the controller so that hopefully no condensation will build up. From there we drilled 3 holes in the side of the box. One for the two probes, one for the incoming wire (from outlet box #1) and one for the outgoing wire (to outlet box #2)

It was very straightforward and easy because of I did tons of research before I went to get the parts at Home Depot. I suggest you do the same. I already had some 14-guage 4 wire laying around, so i decided to use that. (this turns out to be great when you come out of the controller and need to power outlet box #2 because you need 4 wires in order to do that (switchable hot(out1) / switchable hot (out2) / neutral / ground). I didn’t use the 4th wire for the wiring out of outlet box #1 and in to the controller box.


Here is what we did:

Cut the 15' extension cord right before the female plug. The male side will plug into a GFI protected outlet to power your whole keezer.

Wire it to outlet box #1 with a single gang two outlets box (always on) – one outlet will be extra so that we can use to plug a blender or something of that sort into if need be. The Second outlet will be used for the lighting system that will have continuous power and will be switched on and off via a remote control that comes with on/off/dimming/150 different colors/strobe/multi-color fading. (no need to wire in a switch).

Next come out of that box with a 5 ft piece of 4-wire cable (hot/neutral/ground/extra) , go into the coffin, then through a hole that we drilled in the side of the controller box.
Note: I know that the controller doesn’t need ground. We will be bringing the ground into the controller box, so we will be able to make it up with the ground that is needed in outlet box number two (switched on box that’s controlled by the love controller)

I have the wiring info below…

After wiring, we brought a 5ft 4-wire cable (out 1-switched Hot/out2-switched hot/neutral/ground) out of the controller box with another predrilled hole that we use to power outlet box#2.

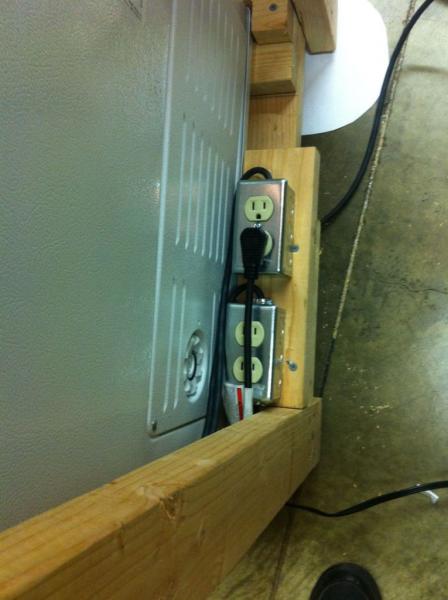
We only need one plug per output (out1 powers keezer and out2 powers a coffin fan), so this fit in another single gang box.
Note: Make sure that if you do this setup, you break the connecter in between the two plugs on the HOT side and then label each, that way one plug is controlled by out1 and one is controlled by out2. The neutral can be wired into either one on the left and the ground goes to the green obviously.

The last thing I did was wire the two probes and put them through my last predrilled hole in the controller box. One will stay drop into the keezer and the other will stay inside the coffin.

Like I said up top, this whole process only really took 1-2 hours. It helps because I had the drawing of exactly what I wanted. Its really easy to get overwhelmed if you start to get confused, so DON’T TRY THIS STEP WHILE DRINKING BEER!

Try not to freak out!

After all the wiring was done, the last step was to plug it in to the wall (make sure that you don’t have your freezer plugged in first… that way if something shorts out it would only potentially damage the controller)… Luckily we heard the beeeep and the controller turned on when we plugged it in.

PS. I will post the parameters soon and how to set up the controller the way I did soon!

Photo Oct 14, 10 39 04 PM.jpg


Photo Oct 14, 10 39 23 PM.jpg


Photo Oct 14, 10 39 30 PM.jpg


wiring small.jpg


Photo Oct 14, 10 47 13 PM.jpg
 
LED Lighting
I really like the recessed lighting that many coffin keezers have and want to use led’s because they won’t put off heat, they will last forever, and they don’t use much electricity. I also want to be able to change colors, must come as a package kit, and have dimming as well.

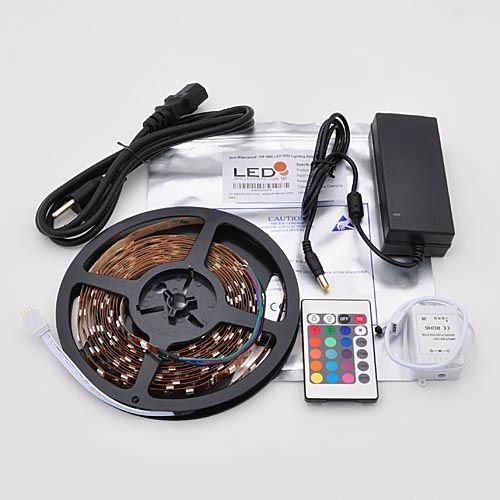
After researching on the net, I found a perfect kit on amazon.com. It’s a “16.4 Ft RGB Color Changing Kit with LED Flexible Strip, Controller + Remote and 12 Volt 4 Amp Power Supply By Ledwholesalers, 2034rgb Kit” sold by LEDwholesalers but fulfilled by amazon. That way I get free 2 day shipping with my amazon prime account!

It cost $55 even and will allow endless features, here are some of the things that it does:
Over 100 different colors including automatic fading and strobe functions
Dimmer on remote
16’ of led rope. With LED’s
30,000 hour lifespan
3m adhesive peel and stick tape
150 Multi color LED’s: one every ¾”
Cutable after every 4” then connect wire via connector clips to go around corners and such
Wireless remote to control every feature (no need for switch just always on consistent power supply)

So I plan on using this to light up my keezer 4 ways (all of which will be controlled simultaneously via the remote:
1. 30” recessed portion of the coffin
2. Recessed under the plywood lid pointing down on the wood that hides the chest freezer frame
3. Under the skirt on the bottom to give it a glow from underneath
4. Recessed behind a nice chalkboard that will be mounted to the wall above & behind the keezer

I am getting the kit on Tuesday, so I’ll be posting pictures soon!
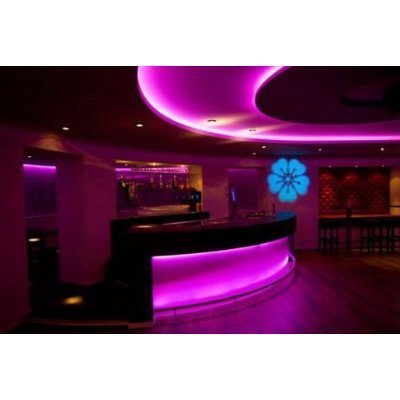
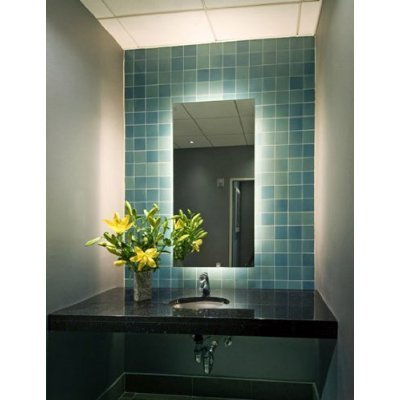
Below I uploaded the generic pictures from amazon for ideas of what it can do.

As always, I love suggestions.. KEEP EM’ COMING!

51mHHJY8moL.jpg


41-mePVQICL.jpg


41R8kElQQ+L.jpg


41wQq9N5tcL.jpg
 
Last edited by a moderator:
Can that led strip be cut and fastened together or does it have to be 16ft of continuous LEDs?

-=Jason=-
 
@ flomaster: Yes, It can be cut every 4". Then after you cut it, all you have to do is use 18g 4-wire cable and solder the connection and run as much length of non lit space you need, and then resolder the wires to the led's again. If you dont want to solder it, they have a connector that you can buy for like $2 each, but i just think that it will be a better, longer lasting connection with soldering it!

I kind of just stumbled onto this, because at first I was just looking around at lowes and home depot and could only find led strips in 12",24",36" and i since my coffin was 30" it forced me to look outside of the box.
 
I think I saw that when I was looking into back lighting my 63" hdtv, but never got around to dropping the coin on it.

carry on...

-=Jason=-
 
Ok, so last night I picked up a 5g keg called Jacked Up Red (8.5% ABV American Strong Ale) from Omaha Jacks (Microbrew in Rancho Cucamonga, CA) and tapped it.
Right away we filled up a pitcher and took it to a friends house and let me just say that it was a HIT! I ended up having to go back to fill up the pitcher 3 more times!!! Barely any foam on the first pour, and since we haven’t yet insulated the coffin, the temp was 73*. Keezer /Keg temp was around 40* and so there was a 33* temp differential.
NO BIG DEAL, this thing poured like a champ. I cant wait to get more on tap. I think I’m already addicted to it!
I will post a pic of the first pour tomorrow!
 
@ jaysus: thanks man, ill keep the pictures comin when i get the lights and start to install them... it will probably be a week or so though
 
Looking forward to seeing the LEDs in action. I thought I had an original idea in using the RGB strips - obviously not, since you're beating me to the execution! Can't wait to see the final results.
 
@ RensBerserker: thanks for the post. I am looking forward to it too. The great thing about this set, is that if I want, I can continue to add 16ft strips at will and potentially have the whole rooms lights controlled by one controller. (seems great for parties, holidays and such) I'll post pics of the whole process, but the finished keezer might take a while.
 
Ok, So I havent fully installed the lights, but below are a few pics of the different colors. We need to test them before we tile, to make sure the tile will still look good on the backsplash. Here ya go....

Photo Oct 16, 7 37 23 PM.jpg


Photo Oct 19, 8 47 32 PM.jpg


Photo Oct 19, 8 47 40 PM.jpg


Photo Oct 19, 8 47 48 PM.jpg
 
Why........Why.........WHY Can't this thread have been created 3 years ago!? I want to see it finished already! Great work futz, keep it up man!!
 
Oh, he has no keezer. He just wants to go through the whole thread and get to the end, where the project is done.

(We are in the process of converting an old fridge into a ferm chamber though. Unfortunately, the need has fallen off with the cooler temps. My ambient temps, with a straight water bath, seem to be good for temp control these days. But, when 100 °F shows up again in July, we'll be ready!)
 
LED Lighting
I really like the recessed lighting that many coffin keezers have and want to use led’s because they won’t put off heat, they will last forever, and they don’t use much electricity. I also want to be able to change colors, must come as a package kit, and have dimming as well.

After researching on the net, I found a perfect kit on amazon.com. It’s a “16.4 Ft RGB Color Changing Kit with LED Flexible Strip, Controller + Remote and 12 Volt 4 Amp Power Supply By Ledwholesalers, 2034rgb Kit” sold by LEDwholesalers but fulfilled by amazon. That way I get free 2 day shipping with my amazon prime account!

It cost $55 even and will allow endless features, here are some of the things that it does:
Over 100 different colors including automatic fading and strobe functions
Dimmer on remote
16’ of led rope. With LED’s
30,000 hour lifespan
3m adhesive peel and stick tape
150 Multi color LED’s: one every ¾”
Cutable after every 4” then connect wire via connector clips to go around corners and such
Wireless remote to control every feature (no need for switch just always on consistent power supply)

So I plan on using this to light up my keezer 4 ways (all of which will be controlled simultaneously via the remote:
1. 30” recessed portion of the coffin
2. Recessed under the plywood lid pointing down on the wood that hides the chest freezer frame
3. Under the skirt on the bottom to give it a glow from underneath
4. Recessed behind a nice chalkboard that will be mounted to the wall above & behind the keezer

I am getting the kit on Tuesday, so I’ll be posting pictures soon!
Below I uploaded the generic pictures from amazon for ideas of what it can do.

As always, I love suggestions.. KEEP EM’ COMING!

Was this what you got? http://www.amazon.com/dp/B004RZUX8S/?tag=skimlinks_replacement-20

EDIT: Weird the link didn't show up in your original post, but only when I quoted it - http://www.amazon.com/dp/B0040FJ27S/?tag=skimlinks_replacement-20
 
Last edited by a moderator:
@Jeebas: Thats really weird... when i posted it, i made sure the link was there.

anyways... yea thats the item, except the controller looks a little different (has more functions). But its made by ledwholesalers, but i think fulfilled by sunvalleytek. Seems they dropped the price a bit too!
 
Check out the wood... Stained and ready for tile... We will be finishing tomorrow, just in time for 18 people over for thanksgiving... I'll post pics of the tile process tomorrow

image-5893546.jpg


image-928544762.jpg


image-1508731798.jpg
 
wow man you didnt mess around. awesome project for you and your old man to work on together and really cool that you will start homebrewing together also!

It looks really great and is putting my mini fridge kegerator to shame ;) Best of luck and cant wait to see it when its done!
 
I want the final cost breakdown, and an estimated date for you guys to go into businessmaking these! Fantastic keezer! Color me green!
 
Looks awesome! I think this is very close to how I would eventually like mine to look. But I think that every time I read another Keezer thread...lol

Since my wife gave me permission to put it in the dining room (as long as it looks nice). I think I need to get on the "who's selling a nice Keezer" list.
 
Back
Top