You are using an out of date browser. It may not display this or other websites correctly.
You should upgrade or use an alternative browser.
You should upgrade or use an alternative browser.
Jersh's Coffin keezer build - second attempt
- Thread starter Jersh
- Start date

Help Support Homebrew Talk:
This site may earn a commission from merchant affiliate
links, including eBay, Amazon, and others.
Looks great, how dark are you going with the stain?
Thanks. I haven't decided yet. I like darker stains but I want to be careful and not go too dark and end up hiding some of the grain character of the red oak. Right now I'm considering the Minwax Red Mahogany, I have some from my previous keezer build that I'm going to test on a scrap piece of red oak and see how it looks. If it's too dark I'll go with either the Sedona Red or Red Oak... That is, unless I decide to try the Minwax Gelstain, if I go that route I'll probably use the Mahogany, it doesn't look to be as dark as the traditional Red Mahogany.
Well, after several weeks of craziness at work and a couple weekends away from home, I finally found some time today to do some more work on my keezer.
Last week I was able to get the interior of the lid insulated. I put about 5 coats of sprayable rubber sealer over the interior of the lid before installing the insulation. I tried to seal the insulation as best as possible with HVAC aluminum tape.
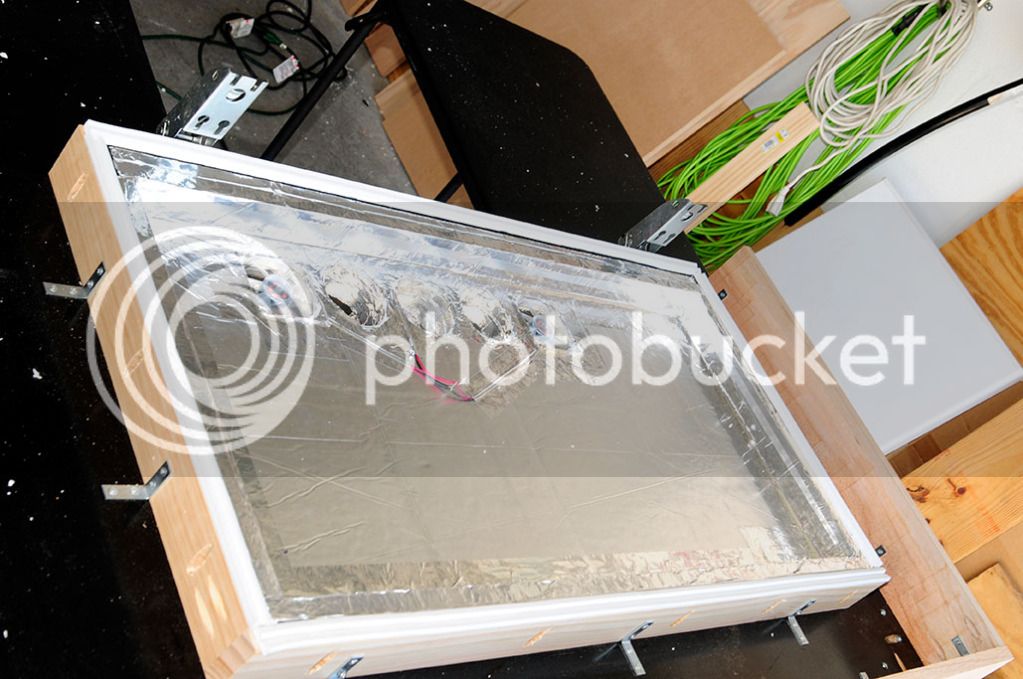
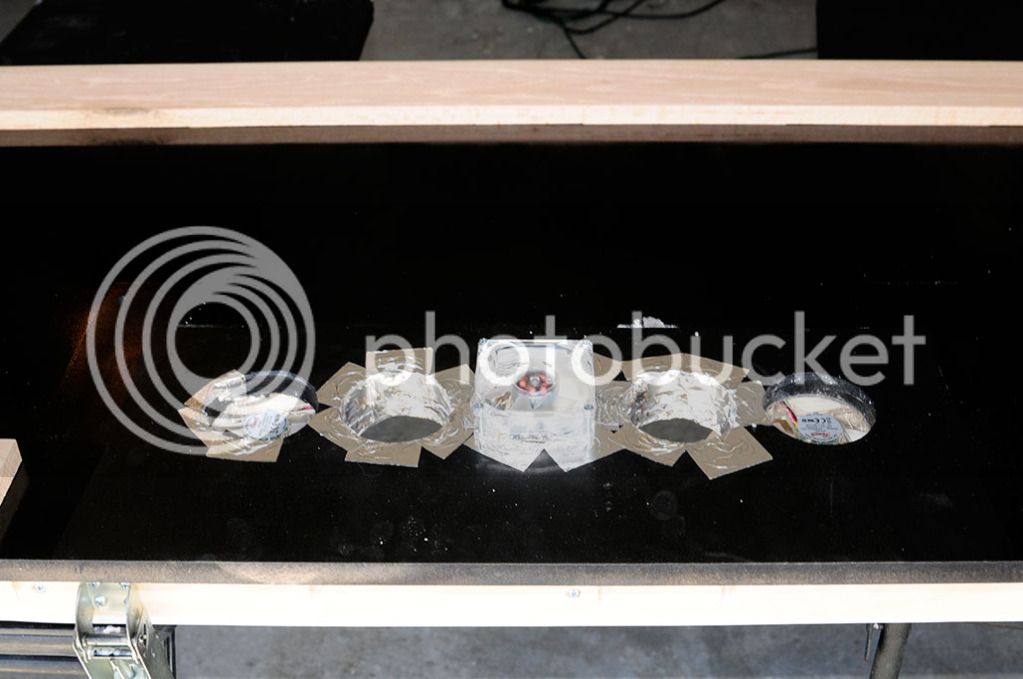
I also installed my fans to help keep the coffin cool... The two fans on the outside are blowing up into the coffin. The middle fan is blow down from the coffin into the main keezer chamber. Hopefully this is enough to not only keep the coffin cool but also to stir up the air inside the keezer to help with temperature statification. The other two holes will be for the beer lines and gas line (gas lines will enter from back of coffin)
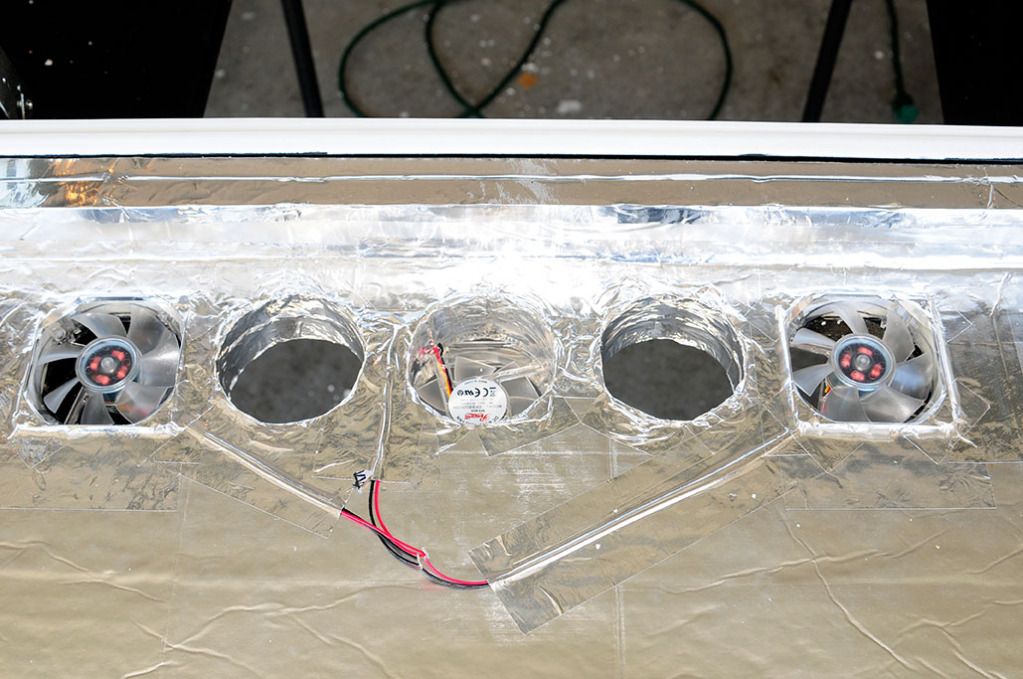
Here's a view of the top, the fan in the middle is blowing down into the main chamber.
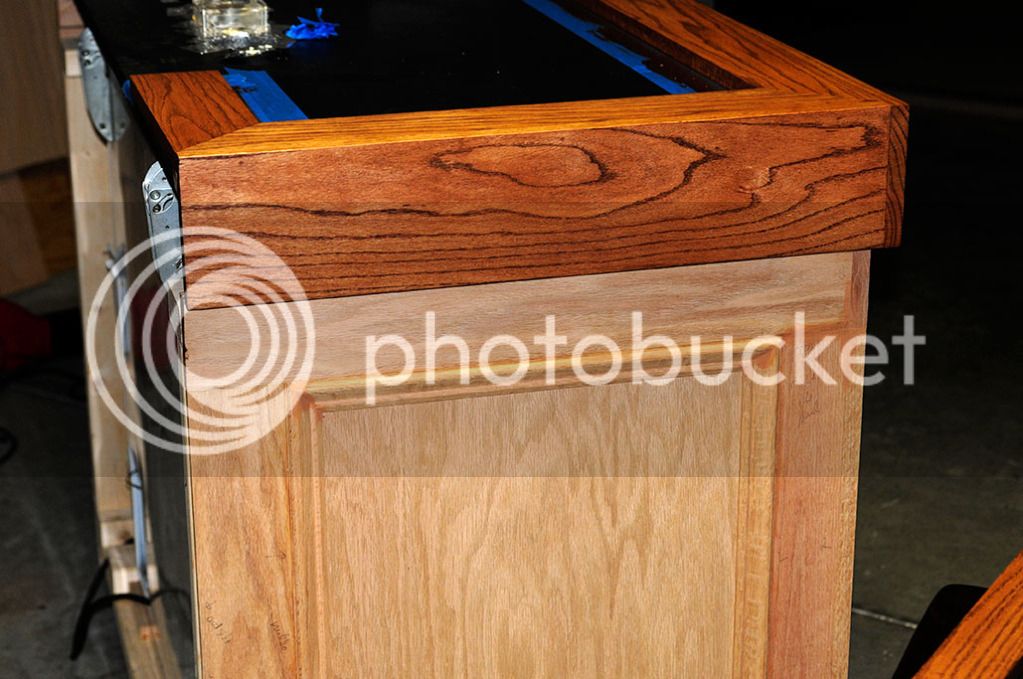
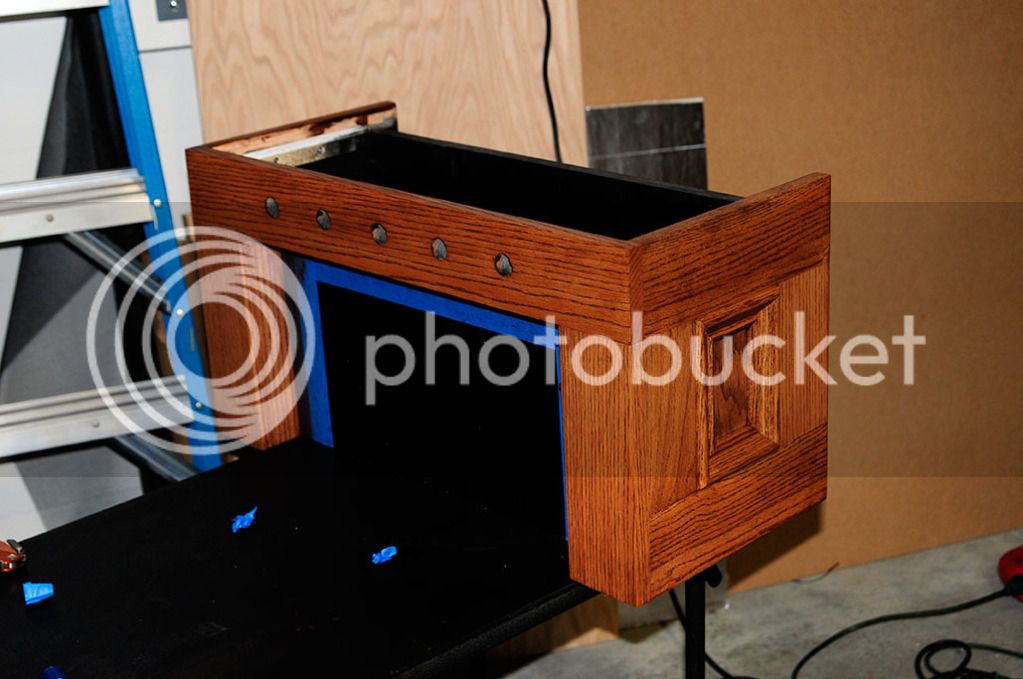
Tonight I started staining some... I got the lid and coffin completed. I ended up going with the Minwax GelStain Hickory color... I was going to use the traditional Minwax Red Mahogony, but after testing it I didn't like how it looked with the red oak, it was wayyyyy to red for my liking. The hickory is perfect. I'm still torn as to whether I want to put another coat. This is just one coat. The photos make it look a little darker than it really is. I'm afraid it will end up darker than I want if I add another coat. So we'll see, I have a hidden area that I can test tomorrow with a second coat.
Last week I was able to get the interior of the lid insulated. I put about 5 coats of sprayable rubber sealer over the interior of the lid before installing the insulation. I tried to seal the insulation as best as possible with HVAC aluminum tape.
I also installed my fans to help keep the coffin cool... The two fans on the outside are blowing up into the coffin. The middle fan is blow down from the coffin into the main keezer chamber. Hopefully this is enough to not only keep the coffin cool but also to stir up the air inside the keezer to help with temperature statification. The other two holes will be for the beer lines and gas line (gas lines will enter from back of coffin)
Here's a view of the top, the fan in the middle is blowing down into the main chamber.
Tonight I started staining some... I got the lid and coffin completed. I ended up going with the Minwax GelStain Hickory color... I was going to use the traditional Minwax Red Mahogony, but after testing it I didn't like how it looked with the red oak, it was wayyyyy to red for my liking. The hickory is perfect. I'm still torn as to whether I want to put another coat. This is just one coat. The photos make it look a little darker than it really is. I'm afraid it will end up darker than I want if I add another coat. So we'll see, I have a hidden area that I can test tomorrow with a second coat.
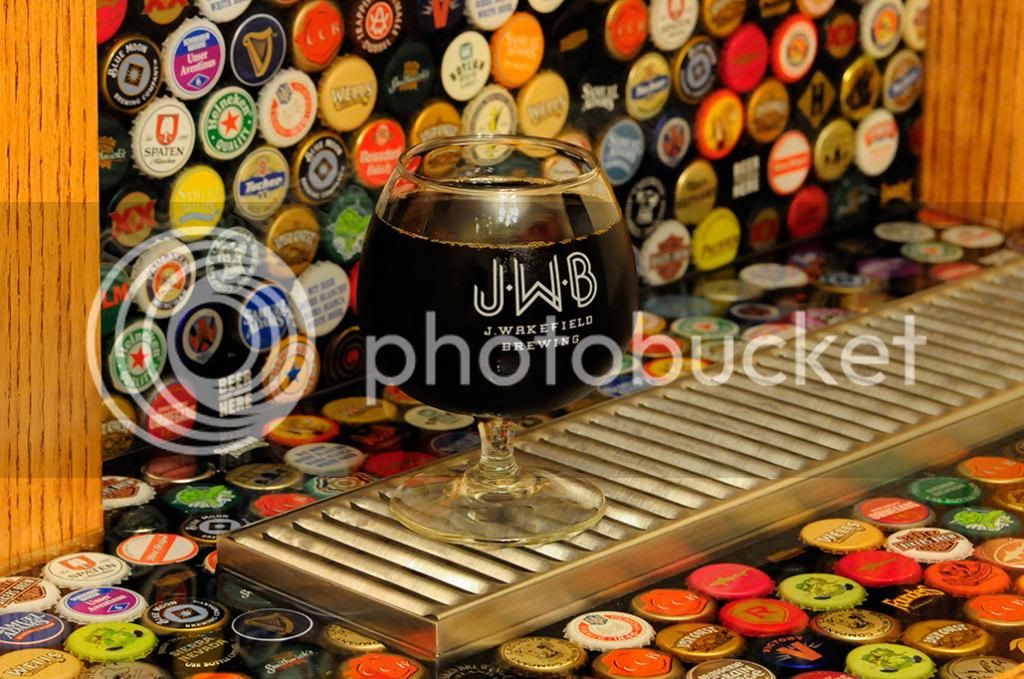
The black backsplash is going to get covered in beer bottle caps and then about 3/8" of clear epoxy... I'm also going to do the same for the entire bar top and also the top of the coffin...
yeah? Lay it out first, especially after you finish staining the pieces that will be stained. This is looking really nice. I like the idea of bottle caps, but not on something like this. I mean, this looks like a real nice piece of furniture. I know it's been done before, but these keezers with the nice tile make it look really classy, not like a piece of frat furniture.
Really like the way this has come out though, you've done an outstanding job. I just used my pocket hole jig for the first time before christmas. Amazing what that tool can do! Congrats again on the build!
Thanks, yeah I do have some reservations about the bottle caps 'cheapening' things a bit, but I also don't think the tile is the answer for me either... This is going into our game room, so I think the bottle caps will keep it more festive.
As for the pocket jib, yeah it is an amazing little $20 tool... If you don't have it, the Kreg clamp is also well worth the extra $20... I started just using a cheapo plastic clamp that I had, and it was a PITA. After it that clamp broke I bought the Kreg clamp and it is soooooo much better, it's easier to attach and it holds the jig much more securely.
I did have one momentary freak out with the jig... I thought I had somehow managed to warp/bend the bit, all of sudden when I was drilling it started making an awful racket, so I thought it was warped and was making noise as it spun in the jig... So I went out, bought a new bit, and still had the noise... So I thought something was wrong with my jig, and then I realized I had inadvertently switched my drill to 'hammer' mode
 whoopsies
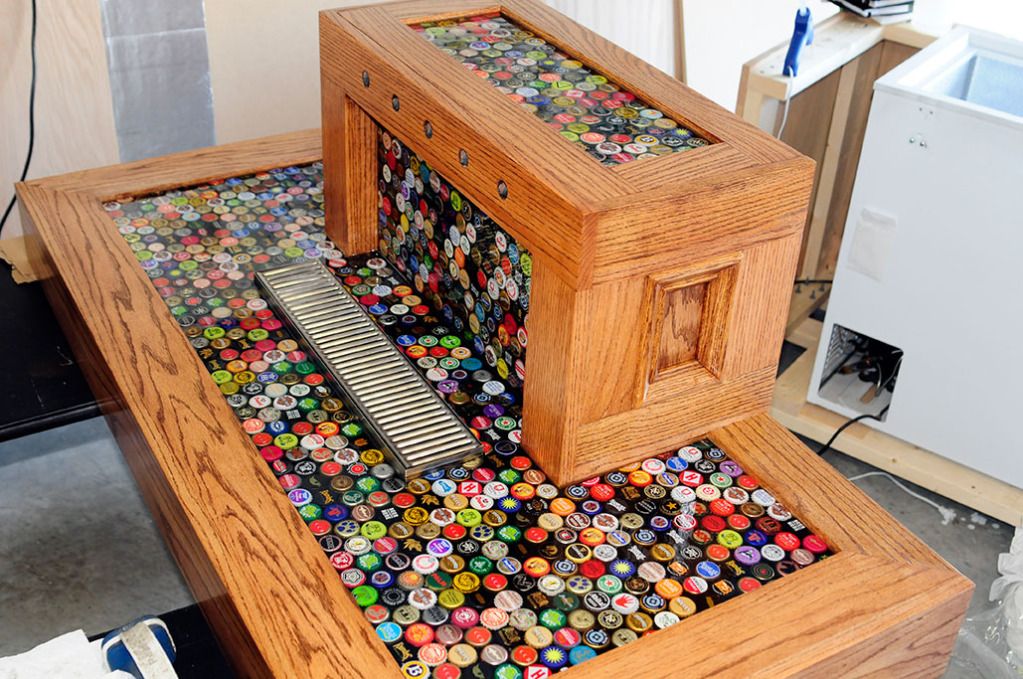
So over the weekend I got around to laying the bottle caps on the coffin box and pouring the epoxy.... I was a little concerned with how I would seal the 'open' end of the coffin box but I came up with a solution that worked perfectly... I took a long piece of 'non-stick' aluminum foil and folded it over on itself about 6 times or so... I then taped it on to a scrap piece of 1x3 and used bar clamps to hold it against the bottle of the coffin that is open... I also ran a piece of aluminum foil tape all along the joint between the coffin and the 1x3 to hopefully hold in any potential leaks. i didn't figure the epoxy would leak too much since it's so thick. I didn't lose a drop, and when I undid the clamps the board and foil came off cleanly without any effort at all... It really worked perfectly. my only regret is not laying the caps flush with the bottom of the coffin, I offset them by the height of a bottle cap, hoping the pattern I'm laying would look pretty seamless going from bar top to coffin backsplash. I'm afraid it's not going to look as seamless as I hoped, in fact there's going to be somewhat of a gap in the caps that I'm not thrill about but I'll deal with it.
Here are some pics: You can't really 'see' the epoxy in the first and third images because it's so brilliantly clear
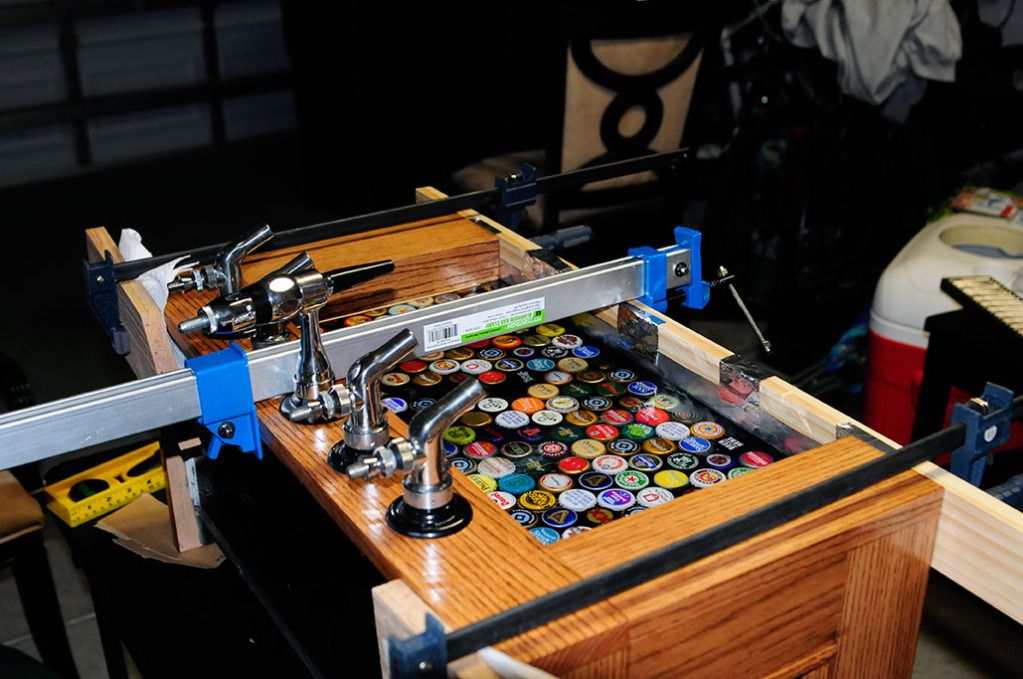
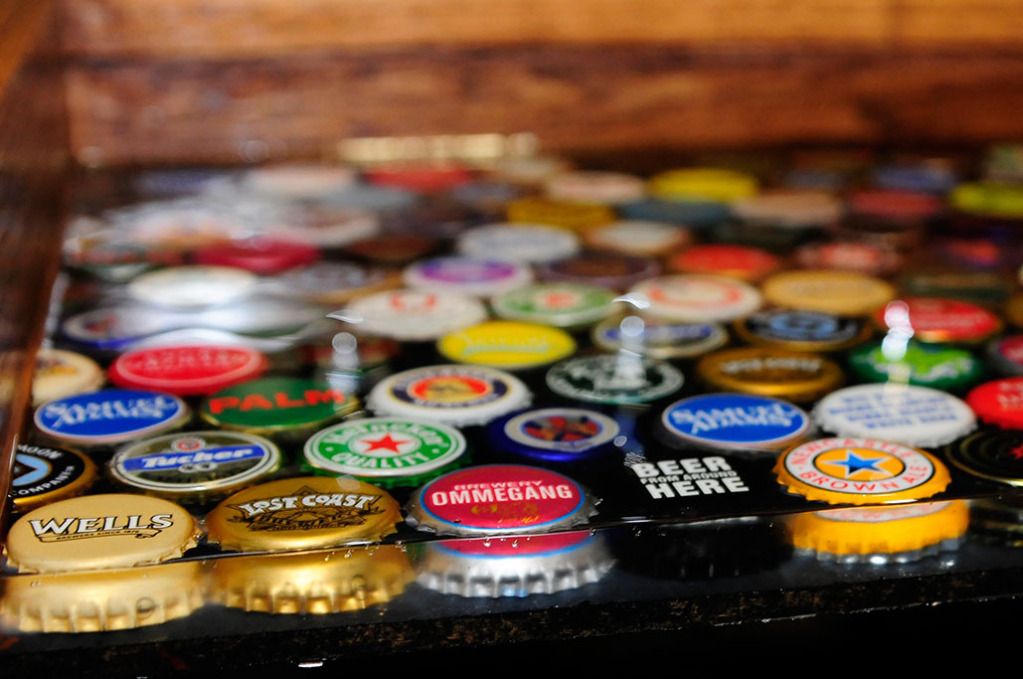
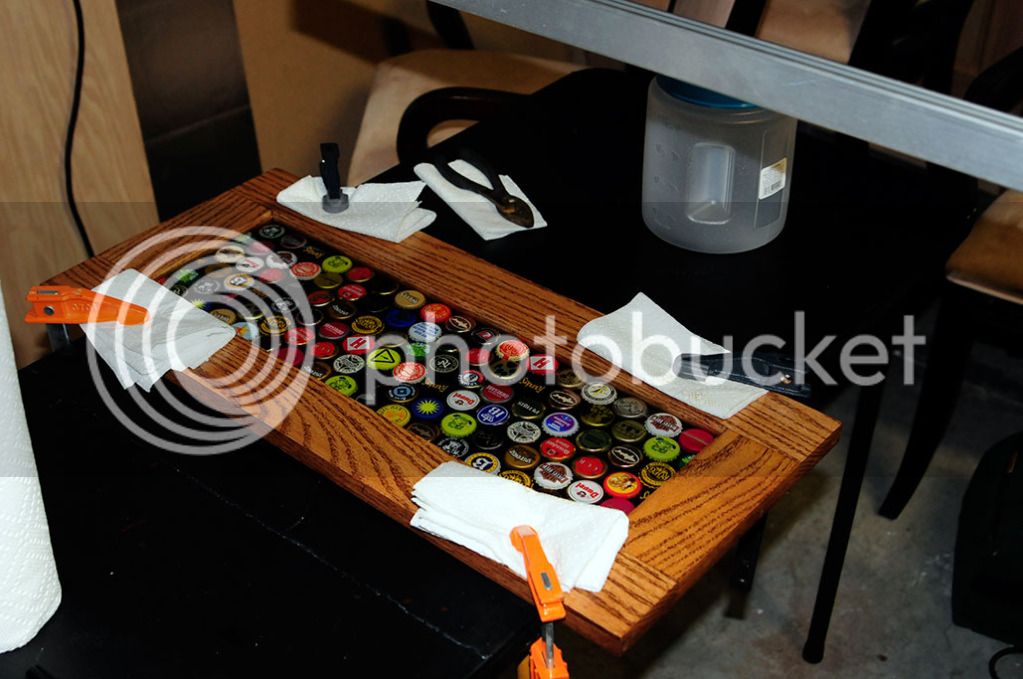
Here are some pics: You can't really 'see' the epoxy in the first and third images because it's so brilliantly clear


$159.50 ($26.58 / Count)
3M High Flow Series System BREW120-MS, 5616001, For Brewed Coffee and Hot Tea, Valve-in-Head Design
Amazon.com


$33.99 ($17.00 / Count)
$41.99 ($21.00 / Count)
2 Pack 1 Gallon Large Fermentation Jars with 3 Airlocks and 2 SCREW Lids(100% Airtight Heavy Duty Lid w Silicone) - Wide Mouth Glass Jars w Scale Mark - Pickle Jars for Sauerkraut, Sourdough Starter
Qianfenie Direct


$44.99
$49.95
Craft A Brew - Mead Making Kit – Reusable Make Your Own Mead Kit – Yields 1 Gallon of Mead
Craft a Brew


$20.94
$29.99
The Brew Your Own Big Book of Clone Recipes: Featuring 300 Homebrew Recipes from Your Favorite Breweries
Amazon.com


$22.00 ($623.23 / Ounce)
AMZLMPKNTW Ball Lock Sample Faucet 30cm Reinforced Silicone Hose Secondary Fermentation Homebrew Kegging joyful
无为中南商贸有限公司


$58.16
HUIZHUGS Brewing Equipment Keg Ball Lock Faucet 30cm Reinforced Silicone Hose Secondary Fermentation Homebrew Kegging Brewing Equipment
xiangshuizhenzhanglingfengshop


![Craft A Brew - Safale BE-256 Yeast - Fermentis - Belgian Ale Dry Yeast - For Belgian & Strong Ales - Ingredients for Home Brewing - Beer Making Supplies - [3 Pack]](https://m.media-amazon.com/images/I/51bcKEwQmWL._SL500_.jpg)


$53.24
1pc Hose Barb/MFL 1.5" Tri Clamp to Ball Lock Post Liquid Gas Homebrew Kegging Fermentation Parts Brewer Hardware SUS304(Liquid Hose Barb)
yunchengshiyanhuqucuichendianzishangwuyouxiangongsi


$10.99 ($31.16 / Ounce)
Hornindal Kveik Yeast for Homebrewing - Mead, Cider, Wine, Beer - 10g Packet - Saccharomyces Cerevisiae - Sold by Shadowhive.com
Shadowhive


$719.00
$799.00
EdgeStar KC2000TWIN Full Size Dual Tap Kegerator & Draft Beer Dispenser - Black
Amazon.com


$28.98
Five Star - 6022b_ - Star San - 32 Ounce - High Foaming Sanitizer
Great Fermentations of Indiana

$76.92 ($2,179.04 / Ounce)
Brewing accessories 1.5" Tri Clamp to Ball Lock Post Liquid Gas Homebrew Kegging Fermentation Parts Brewer Hardware SUS304 Brewing accessories(Gas Hose Barb)
chuhanhandianzishangwu


$53.24
1pc Hose Barb/MFL 1.5" Tri Clamp to Ball Lock Post Liquid Gas Homebrew Kegging Fermentation Parts Brewer Hardware SUS304(Liquid Hose Barb)
Guangshui Weilu You Trading Co., Ltd

$7.79 ($7.79 / Count)
Craft A Brew - LalBrew Voss™ - Kveik Ale Yeast - For Craft Lagers - Ingredients for Home Brewing - Beer Making Supplies - (1 Pack)
Craft a Brew


$479.00
$559.00
EdgeStar KC1000SS Craft Brew Kegerator for 1/6 Barrel and Cornelius Kegs
Amazon.com

$176.97
1pc Commercial Keg Manifold 2" Tri Clamp,Ball Lock Tapping Head,Pressure Gauge/Adjustable PRV for Kegging,Fermentation Control
hanhanbaihuoxiaoshoudian

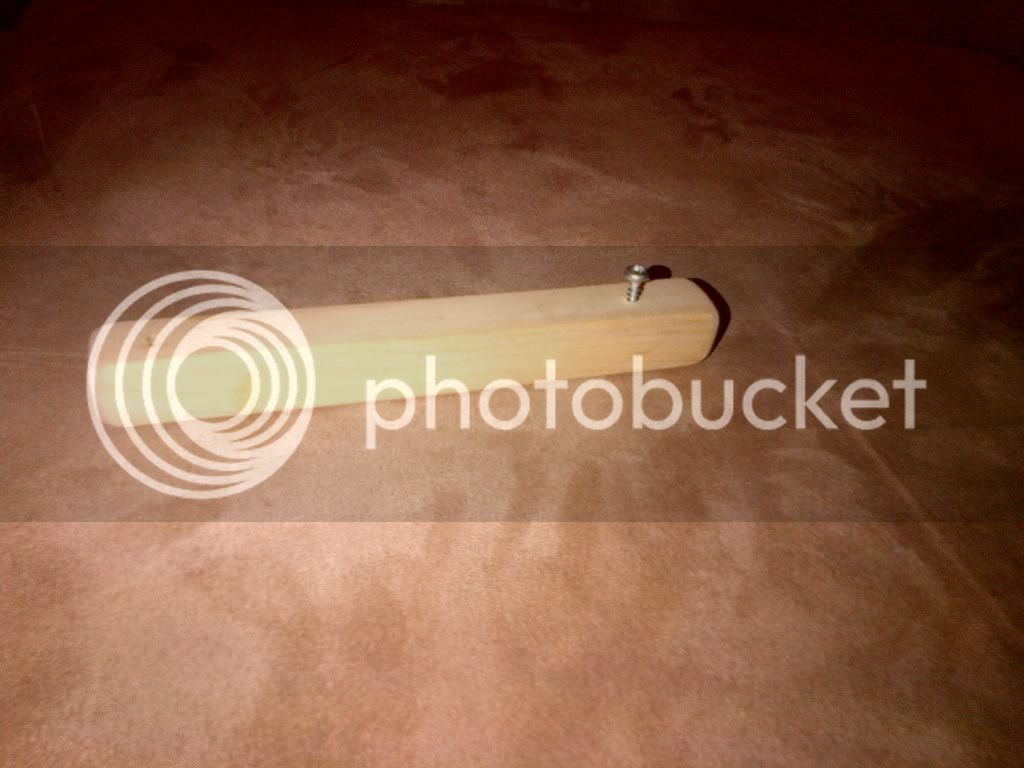
I collected some, some friends collected some, and a lot came from my local beer bar. I built some cheap and easy openers that do not damage the caps...Gave them to my buddies and one of the bartenders at the beer bar. He used it when he wasn't super busy and just threw them in a bag for me. The openers are basically just a screw/nail put into a square wooden dowel. Put a bottle cap upside down on the towel and insert the screw to where the head is at the level of the rim of the cap.... Then, when you open the beer, you put the screw under the rim of the cap and push down on the other end of the wooden down to pry it up... The dowel maintains pressure on the surface of the cap so it doesn't get bent.
This is a top notch build. The epoxy cap top looks great!
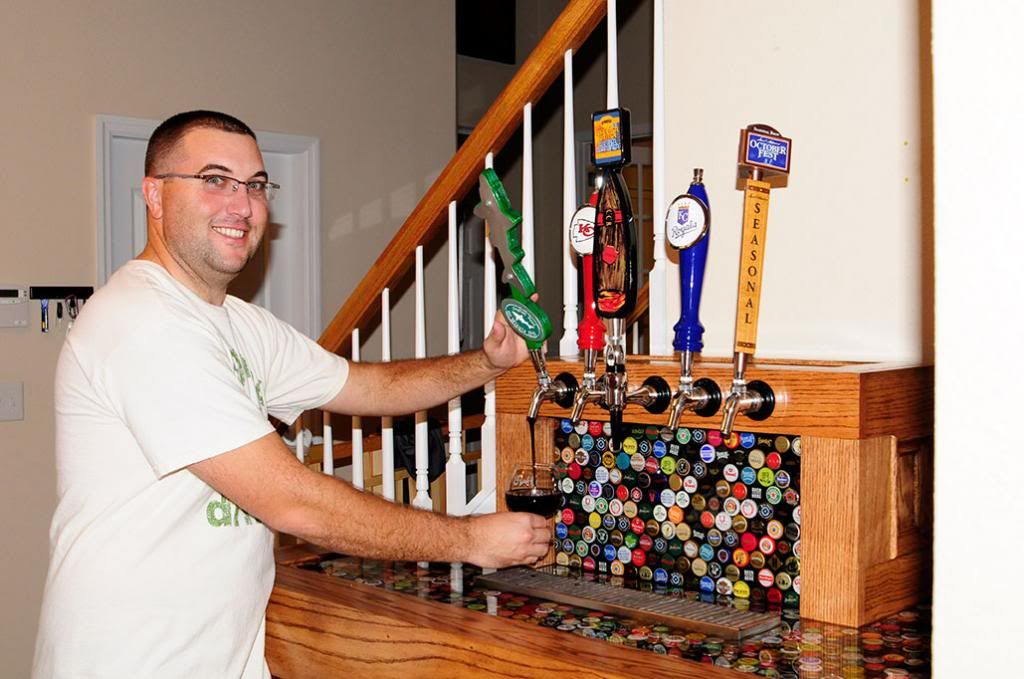
And here is the final product! I finished everything up tonight, all that is left is to attach the gas quick disconnects and I will do that tomorrow before I pour the first pint!
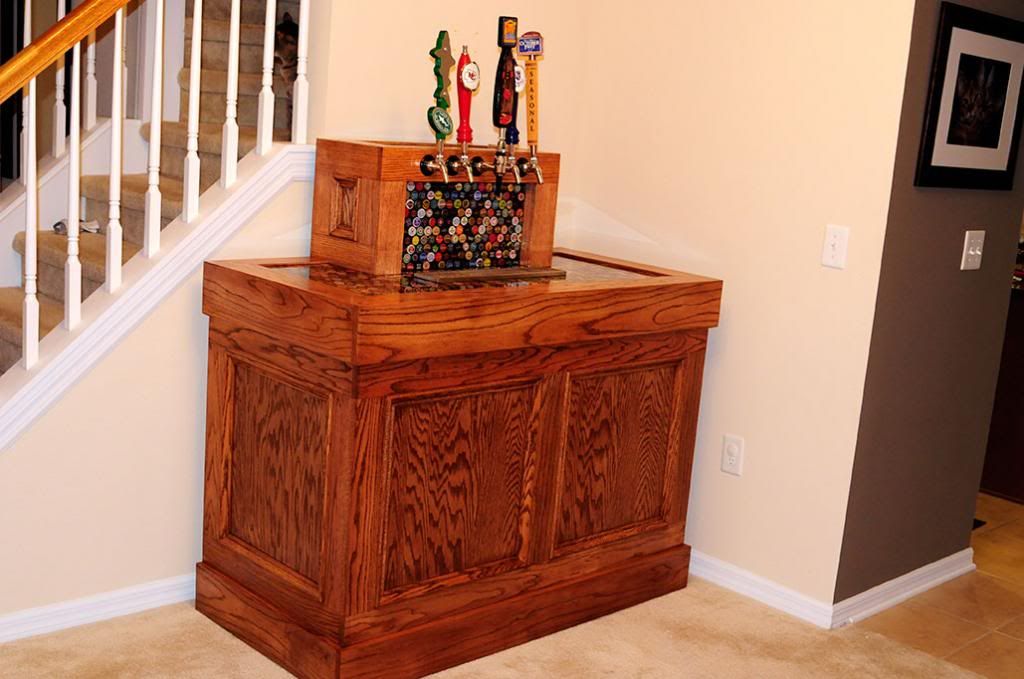
I have some more photos of the build to post, I'll do that later this week.
I have some more photos of the build to post, I'll do that later this week.
coy94
Active Member
- Joined
- May 11, 2012
- Messages
- 28
- Reaction score
- 1
Your keezer looks great. I too am in the process of making my keezer and want to do a bottle cap top. I have a few questions in regards to that and your coffin if you don’t mind answering.
1. What epoxy did you use and how much did it take?
2. Did you use anything to protect the wood while pouring?
3. Why did you paint the MDF underneath and what did you use? Do you feel it is necessary?
4. Do you have any other tips on the bottle caps/epoxy combo?
5. What height is the centerline of your taps related to the MDF top and what is the dimension in between the centers of each tap?
6. What is your overall height/depth/width of your coffin?
Thanks for taking the time to answer whatever you can.
Coy94
SoonerDoc
Well-Known Member
That is really very nice. You did a great job.
Here are the obligatory First Pour photos... I'm pouring a big imperial stout that I brewed about a year ago, it was intended to go into my 5 gallon whiskey barrel but I wasn't pleased with the beer at the time so I just kegged it and put it in the closet... Time worked wonders, this beer is ridiculously delicious after aging!
Coy94, I'll answer your questions tomorrow
Coy94, I'll answer your questions tomorrow
Your keezer looks great. I too am in the process of making my keezer and want to do a bottle cap top. I have a few questions in regards to that and your coffin if you don’t mind answering.
Coy94
Thanks, I'm happy to answer your questions...
1. What epoxy did you use and how much did it take?
- I used Glaze Coat from Lowe's... I started off with a gallon and that should have been enough for everything, however I ended up having to get an additional quart to use for a 2nd pour on the bar top. See explanation here: https://www.homebrewtalk.com/f51/need-help-fixing-blemish-epoxy-keezer-top-398119/
Cost was $62 for the gallon and $22 for the quart
2. Did you use anything to protect the wood while pouring?
-Nope. I probably should have but I was careful. I did have a few drips that got on the finished wood but I was able to wipe them off immediately and the finish on the wood is fine.
3. Why did you paint the MDF underneath and what did you use? Do you feel it is necessary?
-I'm guessing you mean the MDF underneath the bottle caps? If so, the reason is simply because I wanted the visible gaps between the bottle caps to be black. I used standard spray paint for this.
4. Do you have any other tips on the bottle caps/epoxy combo?
- I used a hot glue gun to glue all of the caps down before pouring the epoxy. I just put one good dollop of glue inside each cap and put it into position, allowing the glue to then run down and set. So each cap only had a small area glued down. This was the quickest and easiest way that I found to get them down and prevent them from ‘floating’ up after pouring the epoxy, however obviously each cap was pretty much an air bubble waiting to happen. I was successful in keeping the bubbles at bay in both the coffin top and the coffin backsplash, however I ended up with a bunch of bubbles in the main bar pour. I had NO problem with bubbles when I poured the 2nd layer on the top, but that was because all of the caps were already covered. I think the only way to prevent the bubbles would be to some how seal the caps completely. Two ways I thought about doing this, first would be to completely fill the inside of the cap with hot-glue. 2nd would be to pour a small amount of epoxy for a thin layer over a smallish area, and then put the caps into this…. I think the 2nd way would be best, but would also be pretty challenging as well. It would be more manageable if you had someone to help you. Beyond that, just make sure you work in a warm room. The first two pours I made it was probably around 55-60 degrees in my garage. The epoxy was pretty thick. The main bar pour it was around 75 in my garage and the epoxy was a lot thinner and easier to work with.
5. What height is the centerline of your taps related to the MDF top and what is the dimension in between the centers of each tap?
- centerline of taps is 12.25” over MDF. Taps are 3.5” between centers
6. What is your overall height/depth/width of your coffin?
-13 7/8” H x 12” D x 26.5” W
GutterRunner
Member
VERY nice!

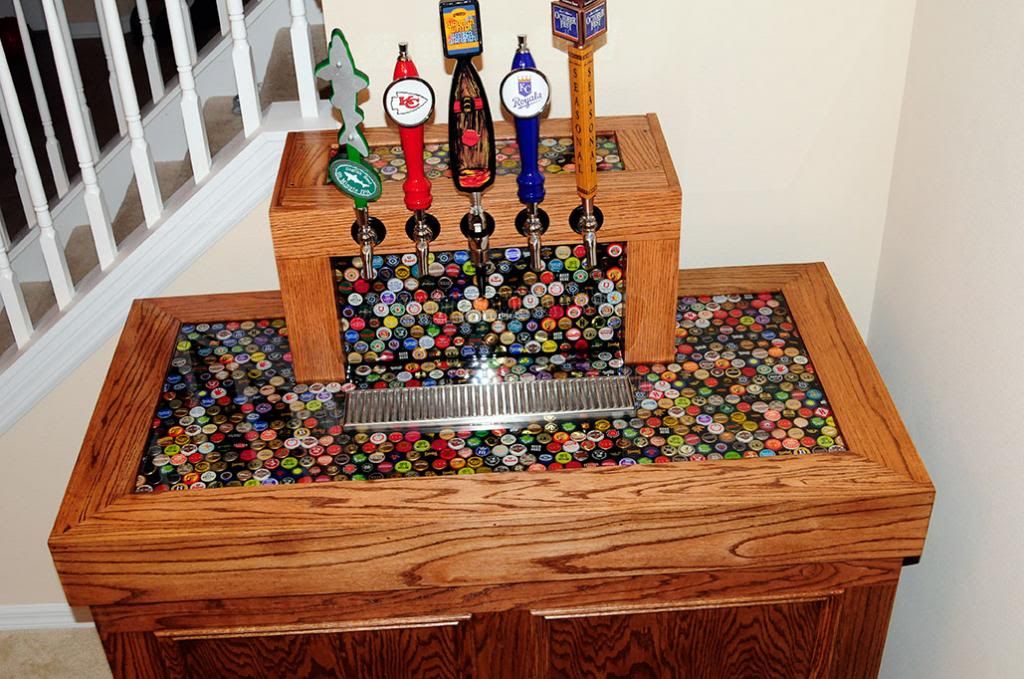
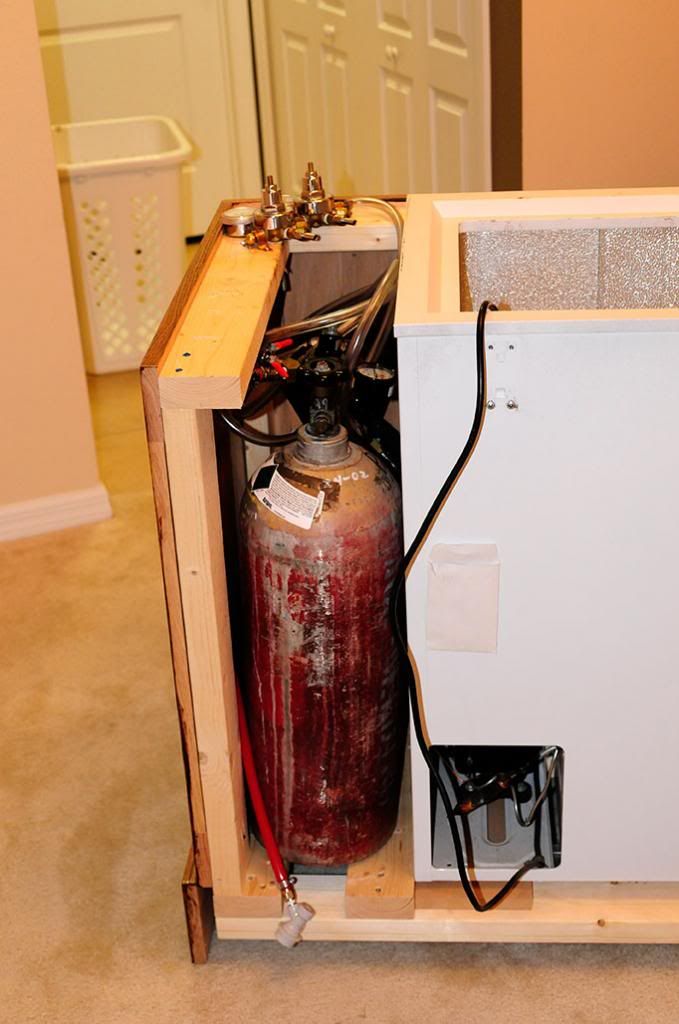
Here are the final photos of my build.... I had so incredibly much fun building this thing. I'm drinking a beer from it as I type this....
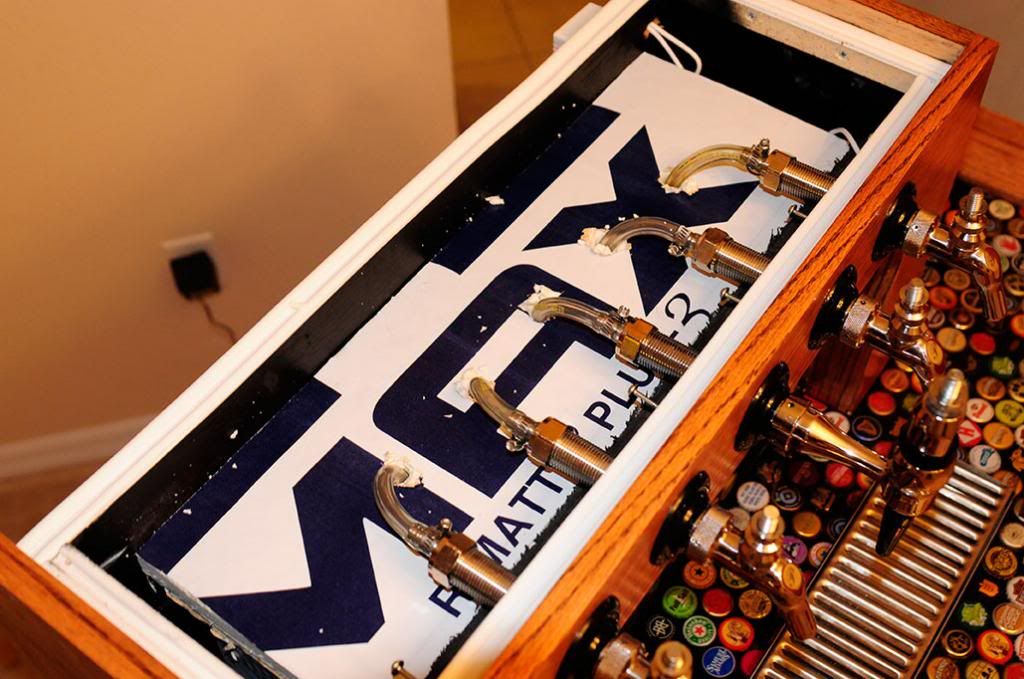
Here is a view of the storage space for the tanks... Also you can see here how I mounted my secondary regulators. I wanted them to be easily accessible but out of the way, so this was the best spot for them.

Here is a view from the back. I ended up taking my jig saw to the 2x4 along the top after I took this photo , I cut it back some to make it easier to get the tanks in and out.
Here's a view of the back of my coffin.
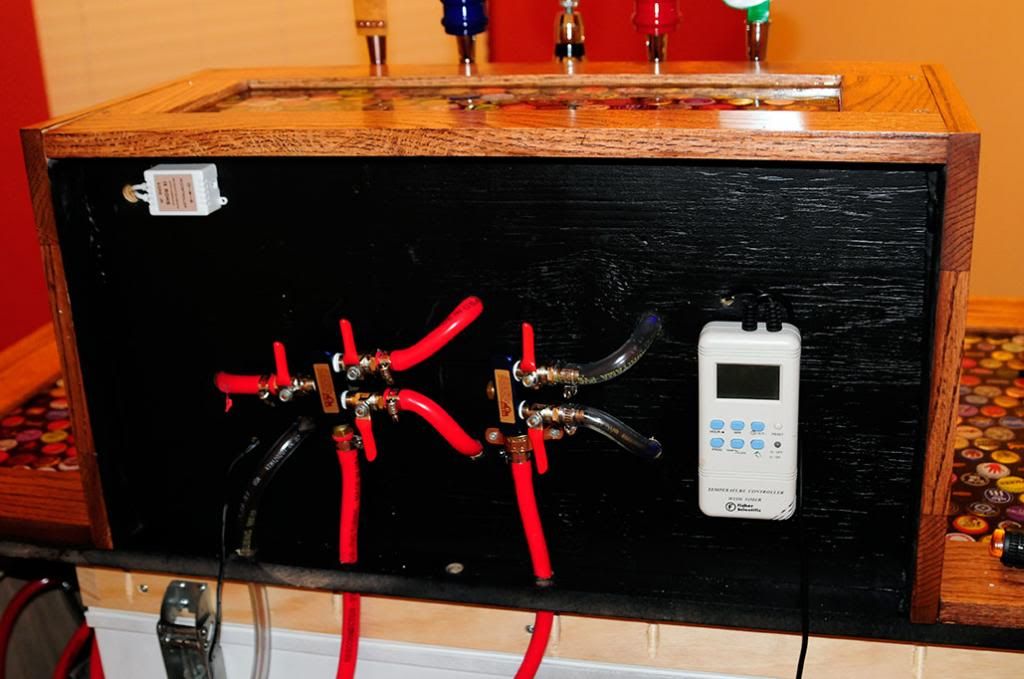
Here's a view of the inside of the coffin after all the tubing was installed. I used aluminum foil tape to try to seal the openings around all the lines. I'm sure it's not perfect but it's gotta be better than nothing.
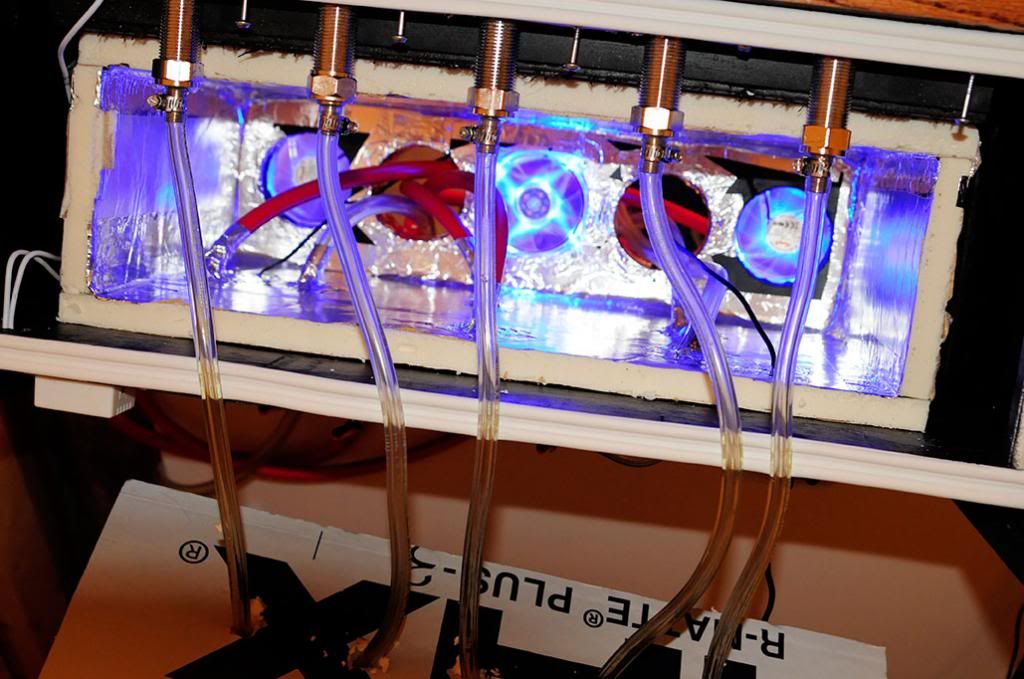
And here is the final image... This is looking into the coffin from the top with the 'lid' to the inner insulated chamber installed. I used the aluminum foil tape to seal the lower pieces of insulation, however for this top piece I want to have access to the coffin without destroying the insulation so I got a couple thick but easily compressible sponges to place on of the insulation. When I put the lid to the coffin on and screwed it in it compressed the sponges and should hold the lid on pretty tight (hopefully at least).
And that is all she wrote folks!
Here is a view of the storage space for the tanks... Also you can see here how I mounted my secondary regulators. I wanted them to be easily accessible but out of the way, so this was the best spot for them.
Here is a view from the back. I ended up taking my jig saw to the 2x4 along the top after I took this photo , I cut it back some to make it easier to get the tanks in and out.
Here's a view of the back of my coffin.
Here's a view of the inside of the coffin after all the tubing was installed. I used aluminum foil tape to try to seal the openings around all the lines. I'm sure it's not perfect but it's gotta be better than nothing.
And here is the final image... This is looking into the coffin from the top with the 'lid' to the inner insulated chamber installed. I used the aluminum foil tape to seal the lower pieces of insulation, however for this top piece I want to have access to the coffin without destroying the insulation so I got a couple thick but easily compressible sponges to place on of the insulation. When I put the lid to the coffin on and screwed it in it compressed the sponges and should hold the lid on pretty tight (hopefully at least).
And that is all she wrote folks!
HDIr0n
Well-Known Member
Awesome build, if I ever build a keezer it will be like this.
awarner322
Well-Known Member
Looks great- saving for later
I know this thread is over a decade old at this point, but I wanted to comment on how slick this build is. I have had this thread bookmarked for YEARS thinking that I would make one of my own eventually. Well eventually is today and I'm going to pattern mine off your example.
Similar threads
- Replies
- 0
- Views
- 321
- Replies
- 15
- Views
- 1K

Latest posts
-

-
-
-

-
-
 The Dysfunctional-Palooza Obnoxious Masshole BS Thread
- Latest: Hoppy2bmerry
-
