HOWTO - Make a BrewPi Fermentation Controller For Cheap

Homebrew Talk - Beer, Wine, Mead, & Cider Brewing Discussion Forum

Help Support Homebrew Talk - Beer, Wine, Mead, & Cider Brewing Discussion Forum:

This site may earn a commission from merchant affiliate links, including eBay, Amazon, and others.
Status
Not open for further replies.
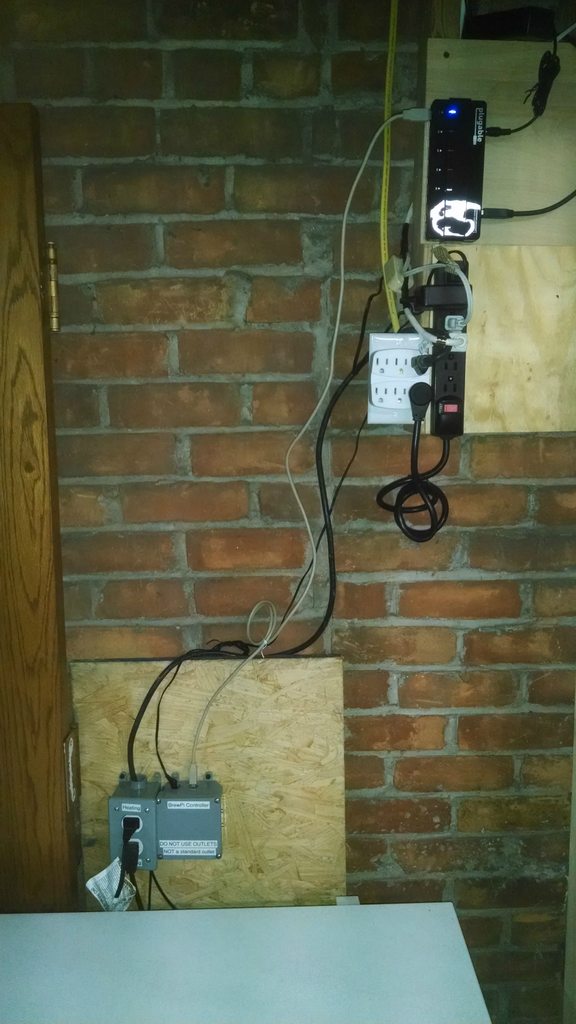
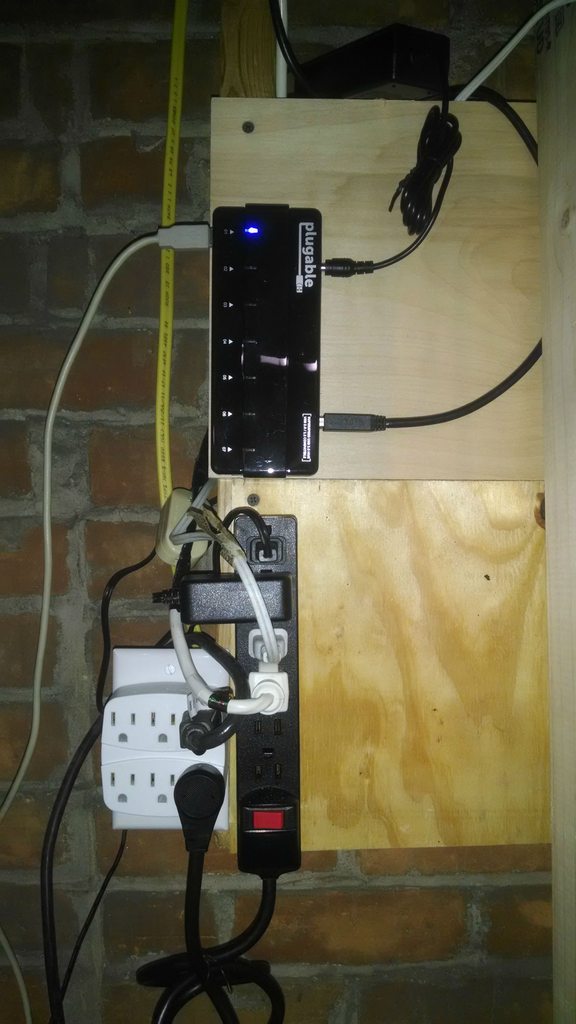
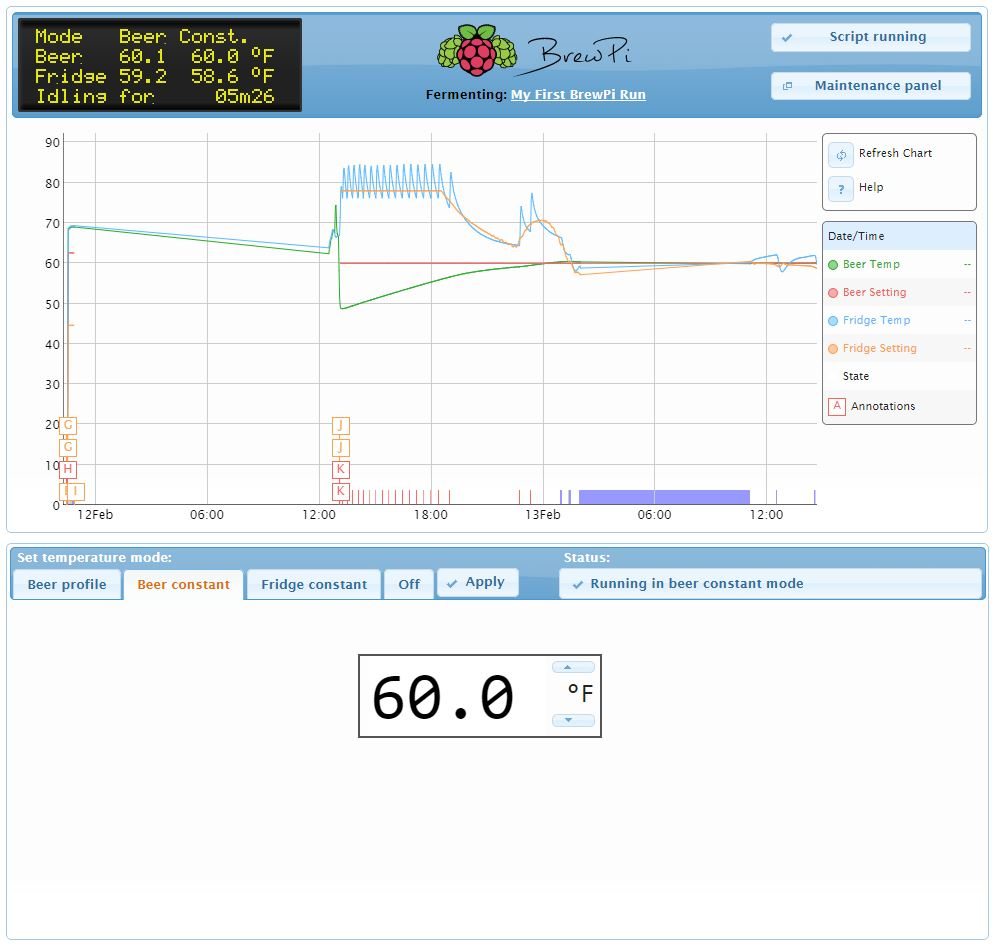
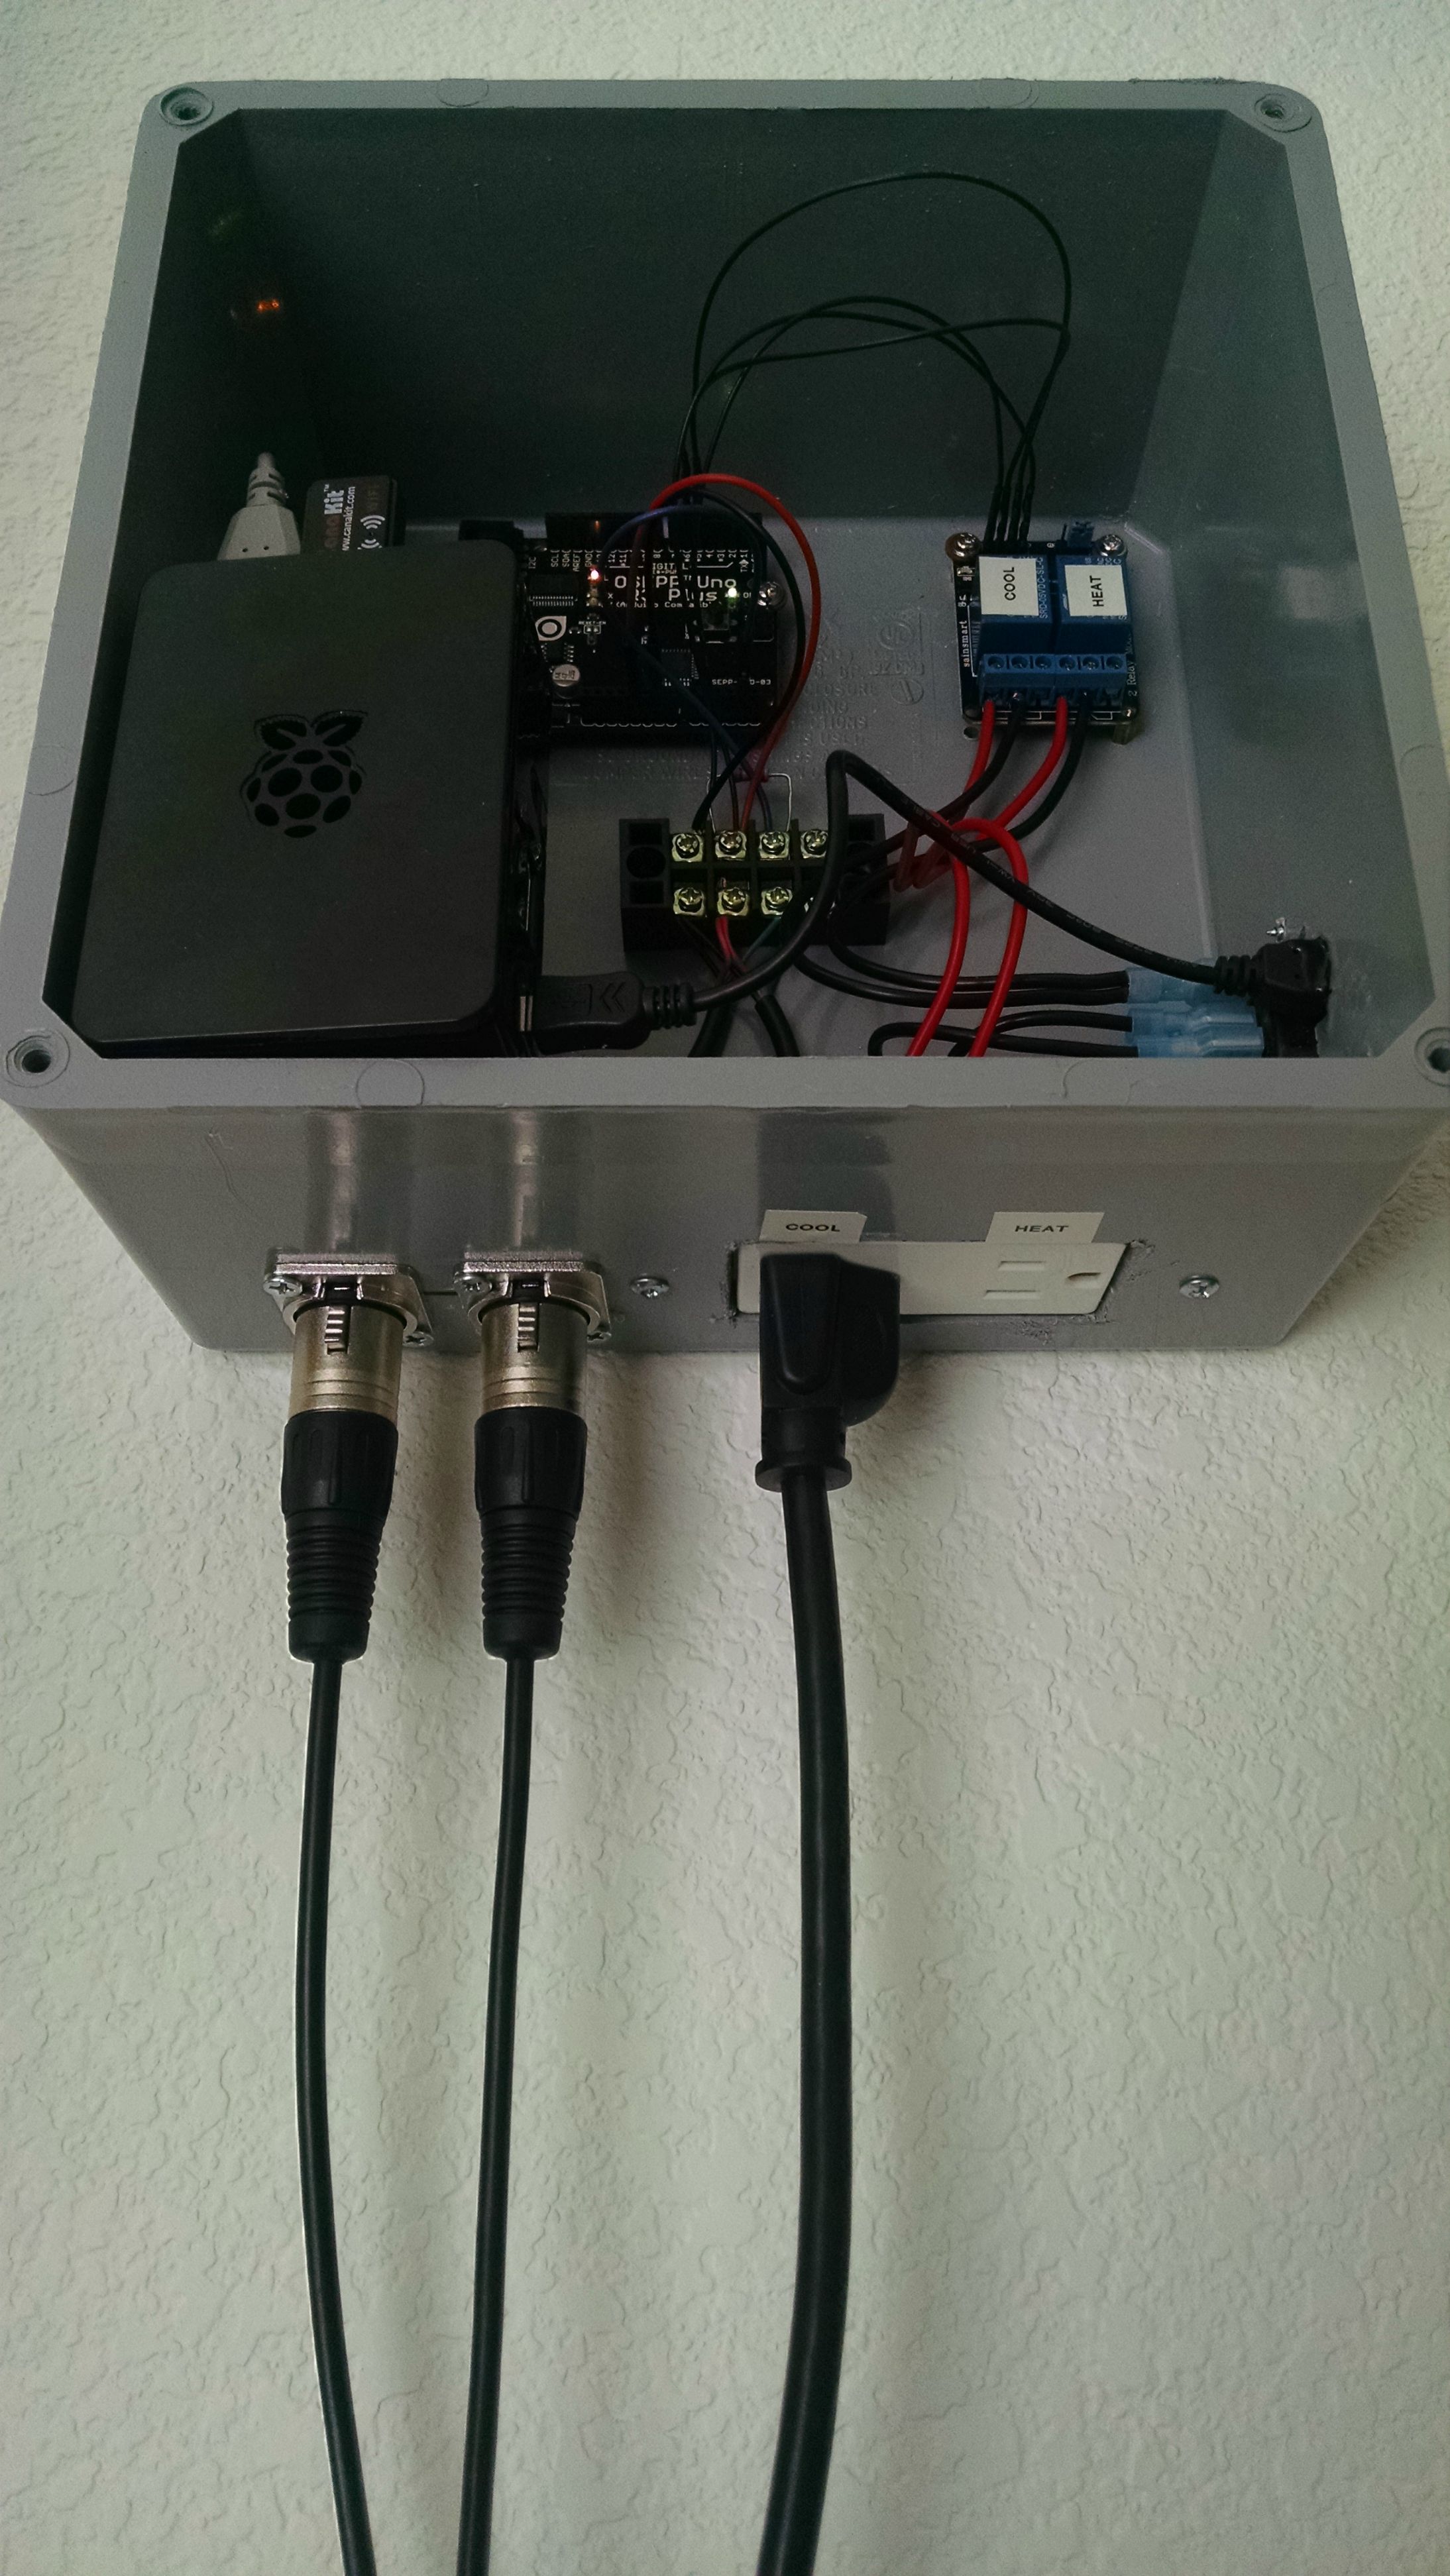
Anyone running into issues with the control/PID algorithm creating self-induced oscillation after fermentation is complete and there isn't an exothermal reaction?

Fn6OsGE.jpg


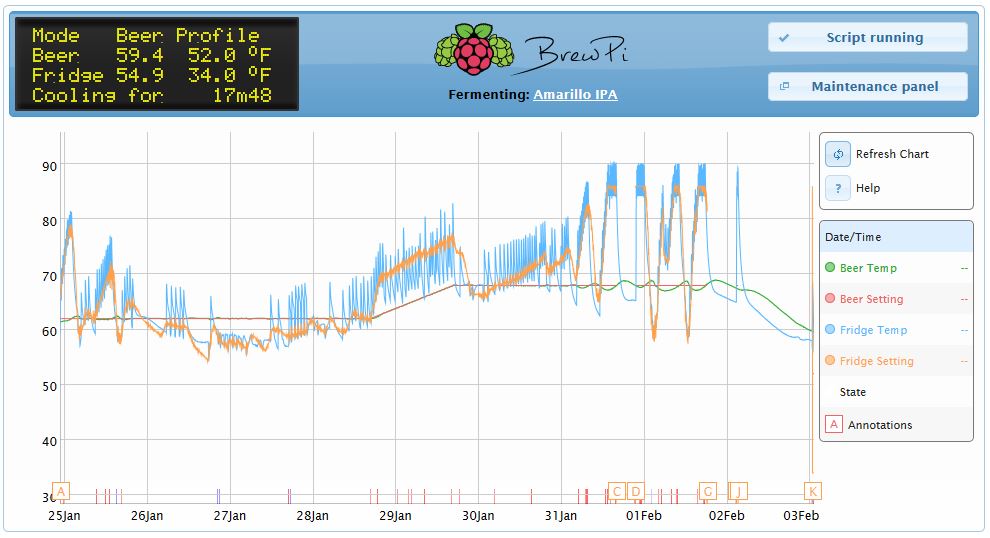
I had this happen on a previous brew at the same exact time frame. Thinking this was a fluke, I didn't ask the question then. You can see each time I either pause or turn off temperature control when progressively gets worse. Let it stabilize back to the right beer temp and it again starts the feedback oscillation. Anything I can adjust in the PID values to help compensate this? It handles fermentation temp management perfectly, but seemingly looses it's mind when it has to heat more than cool.

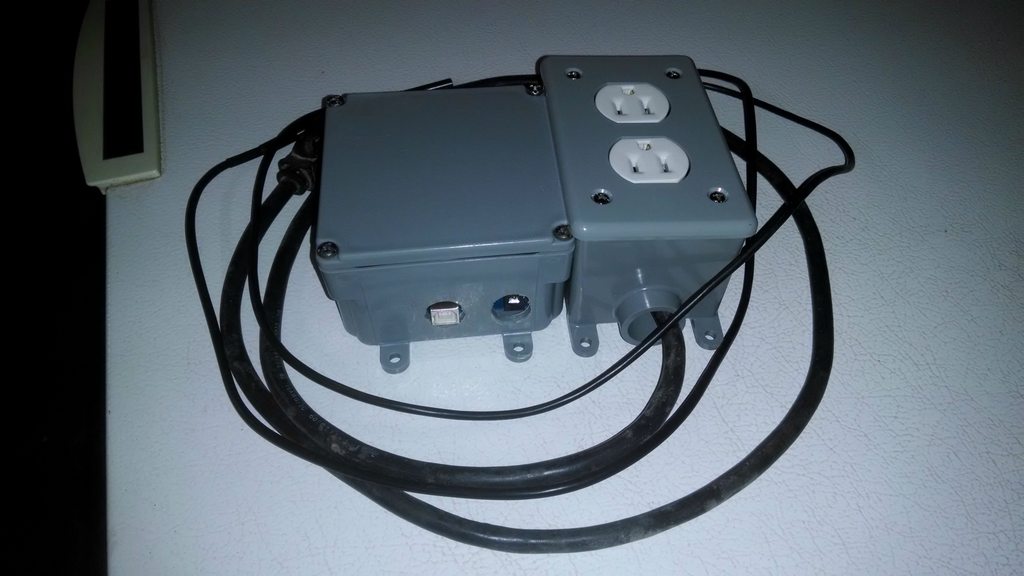
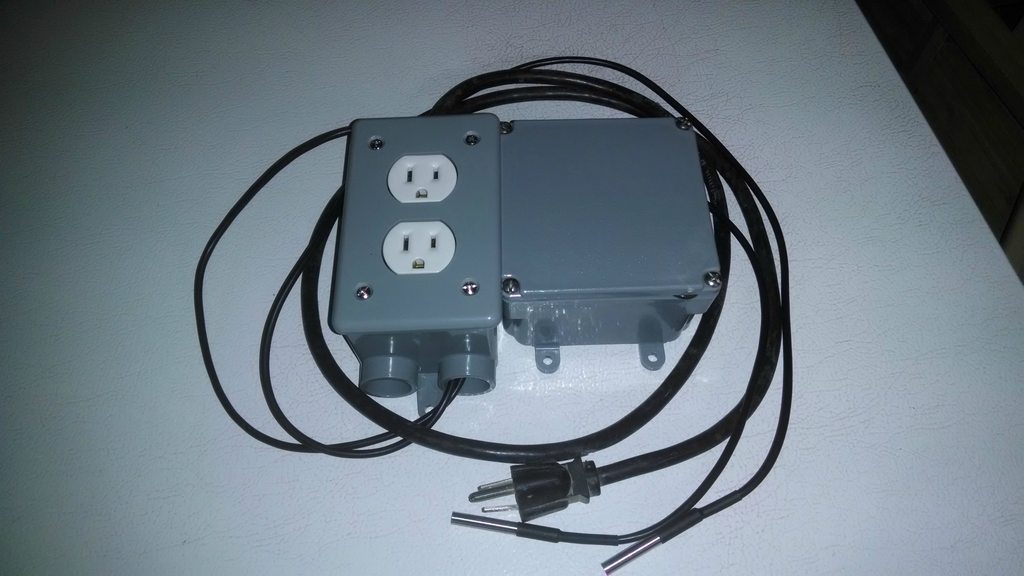
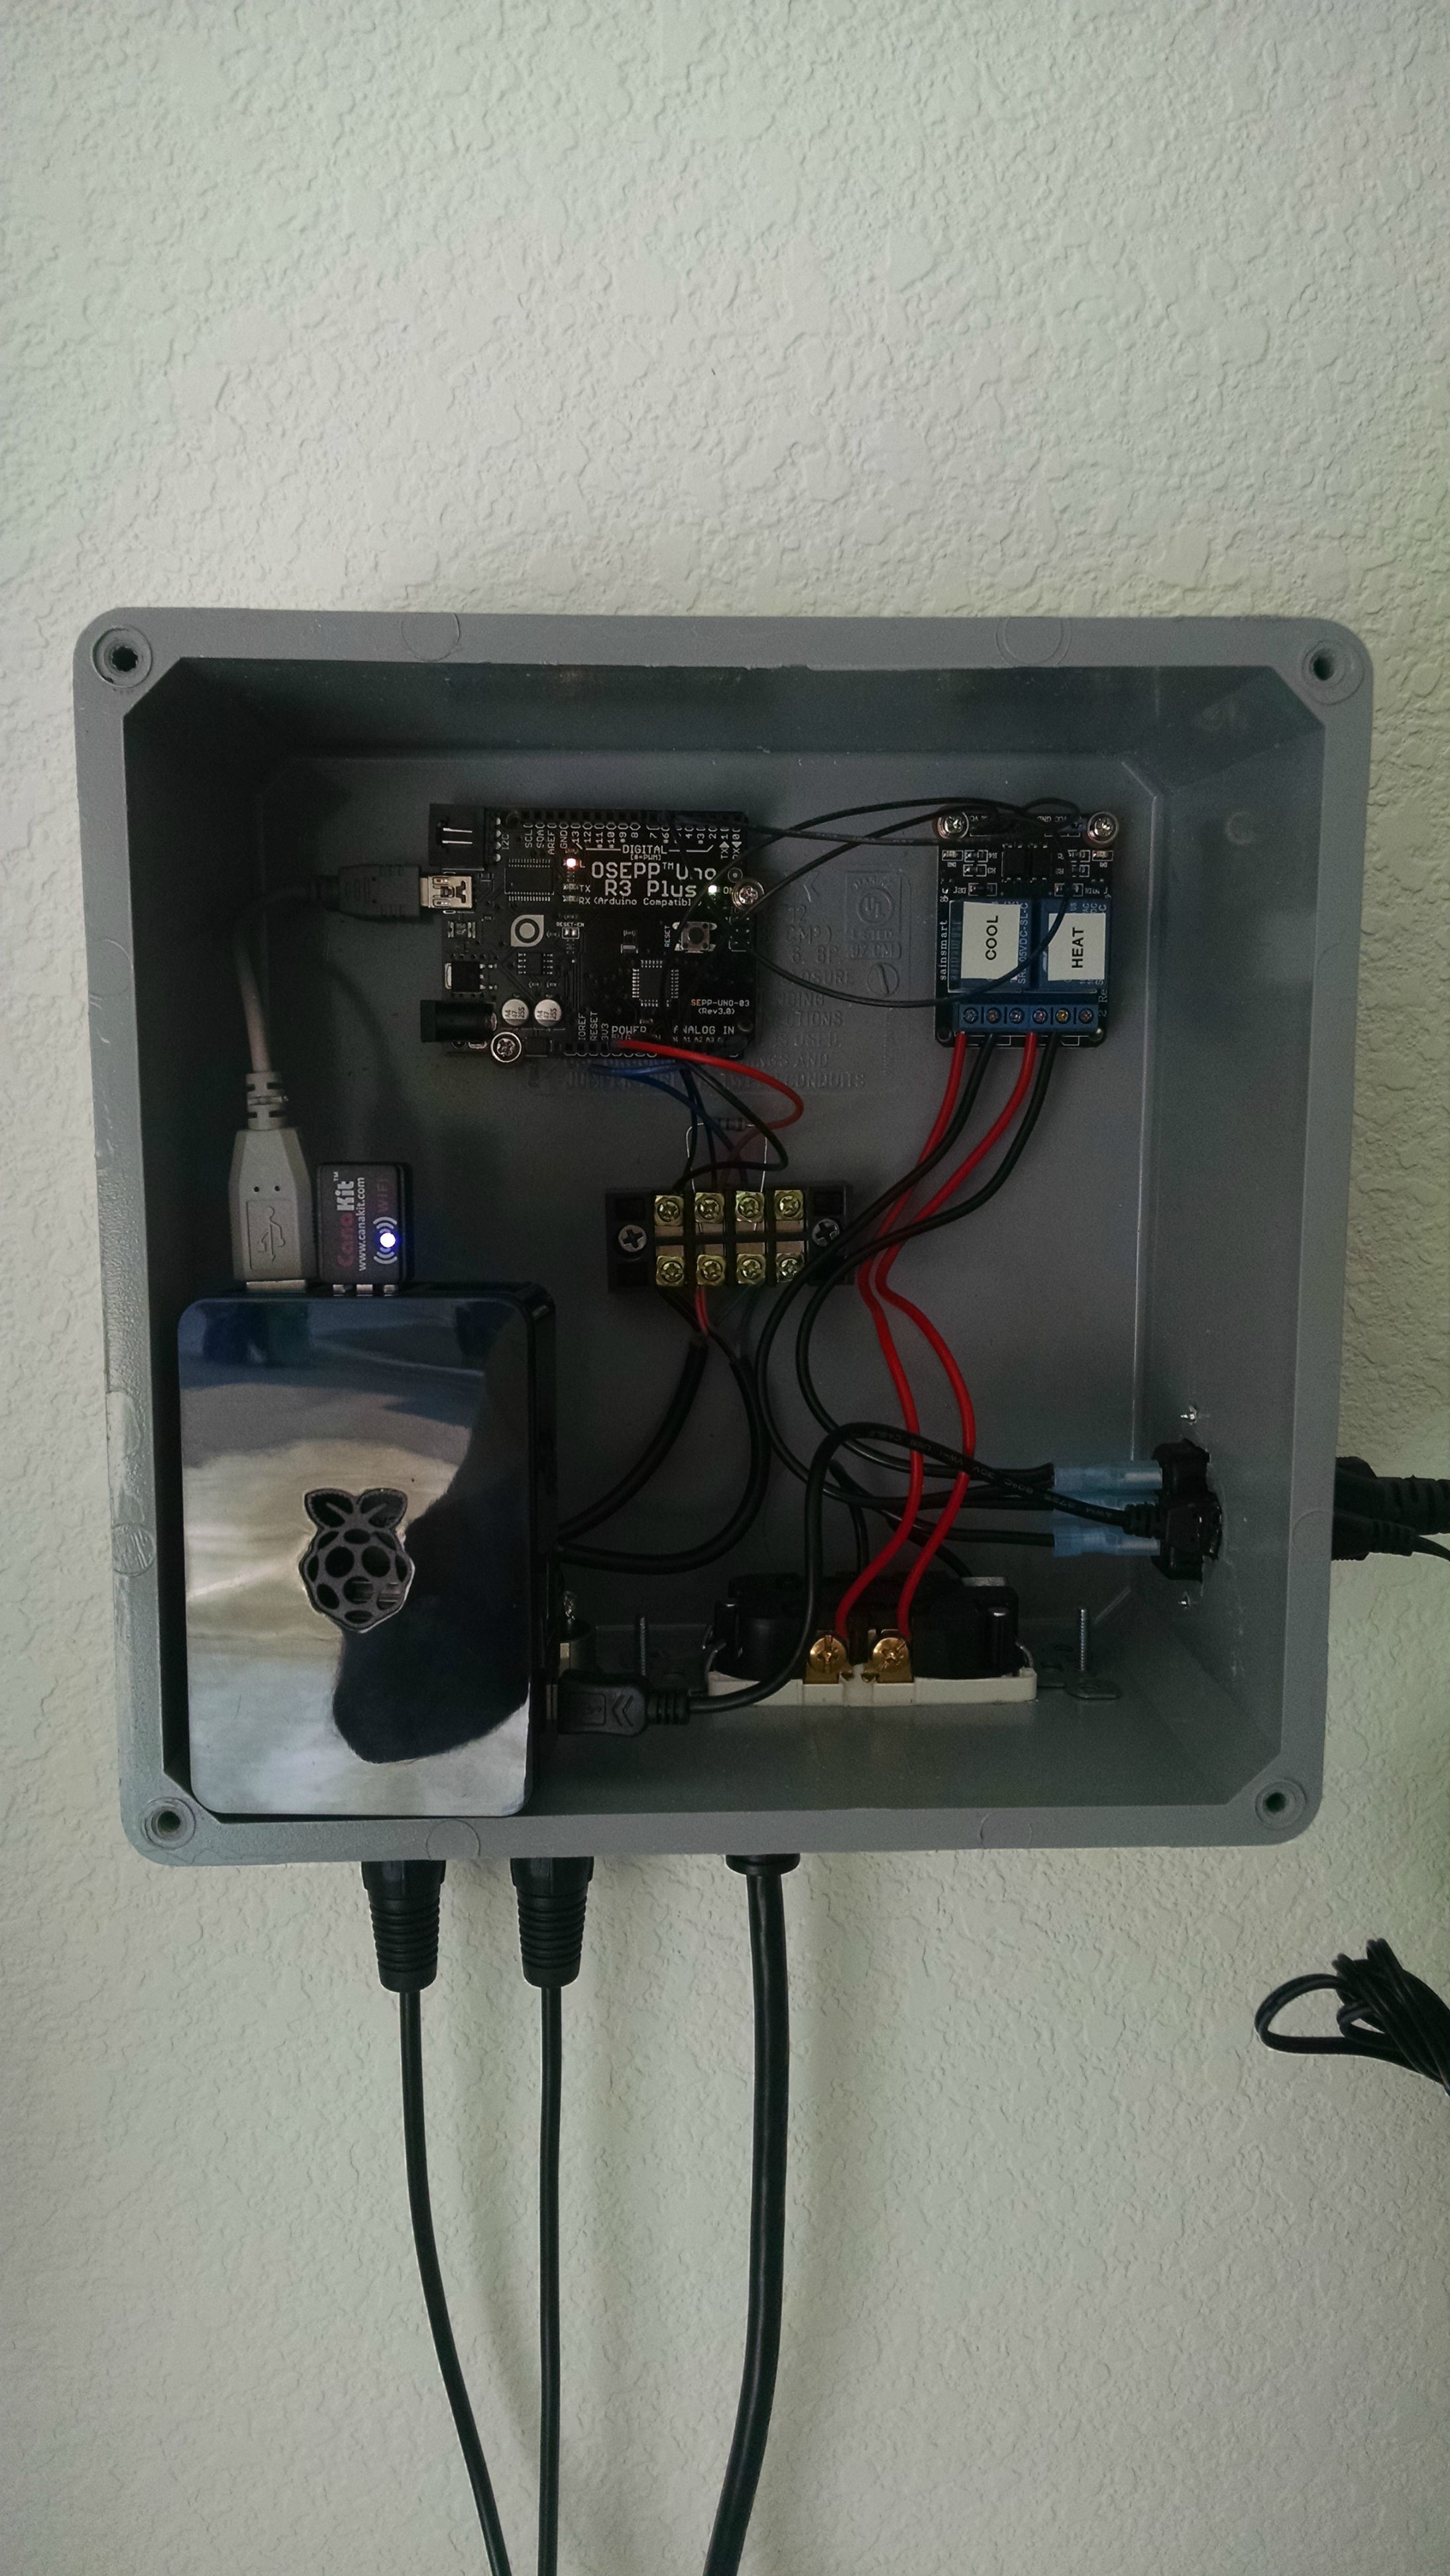
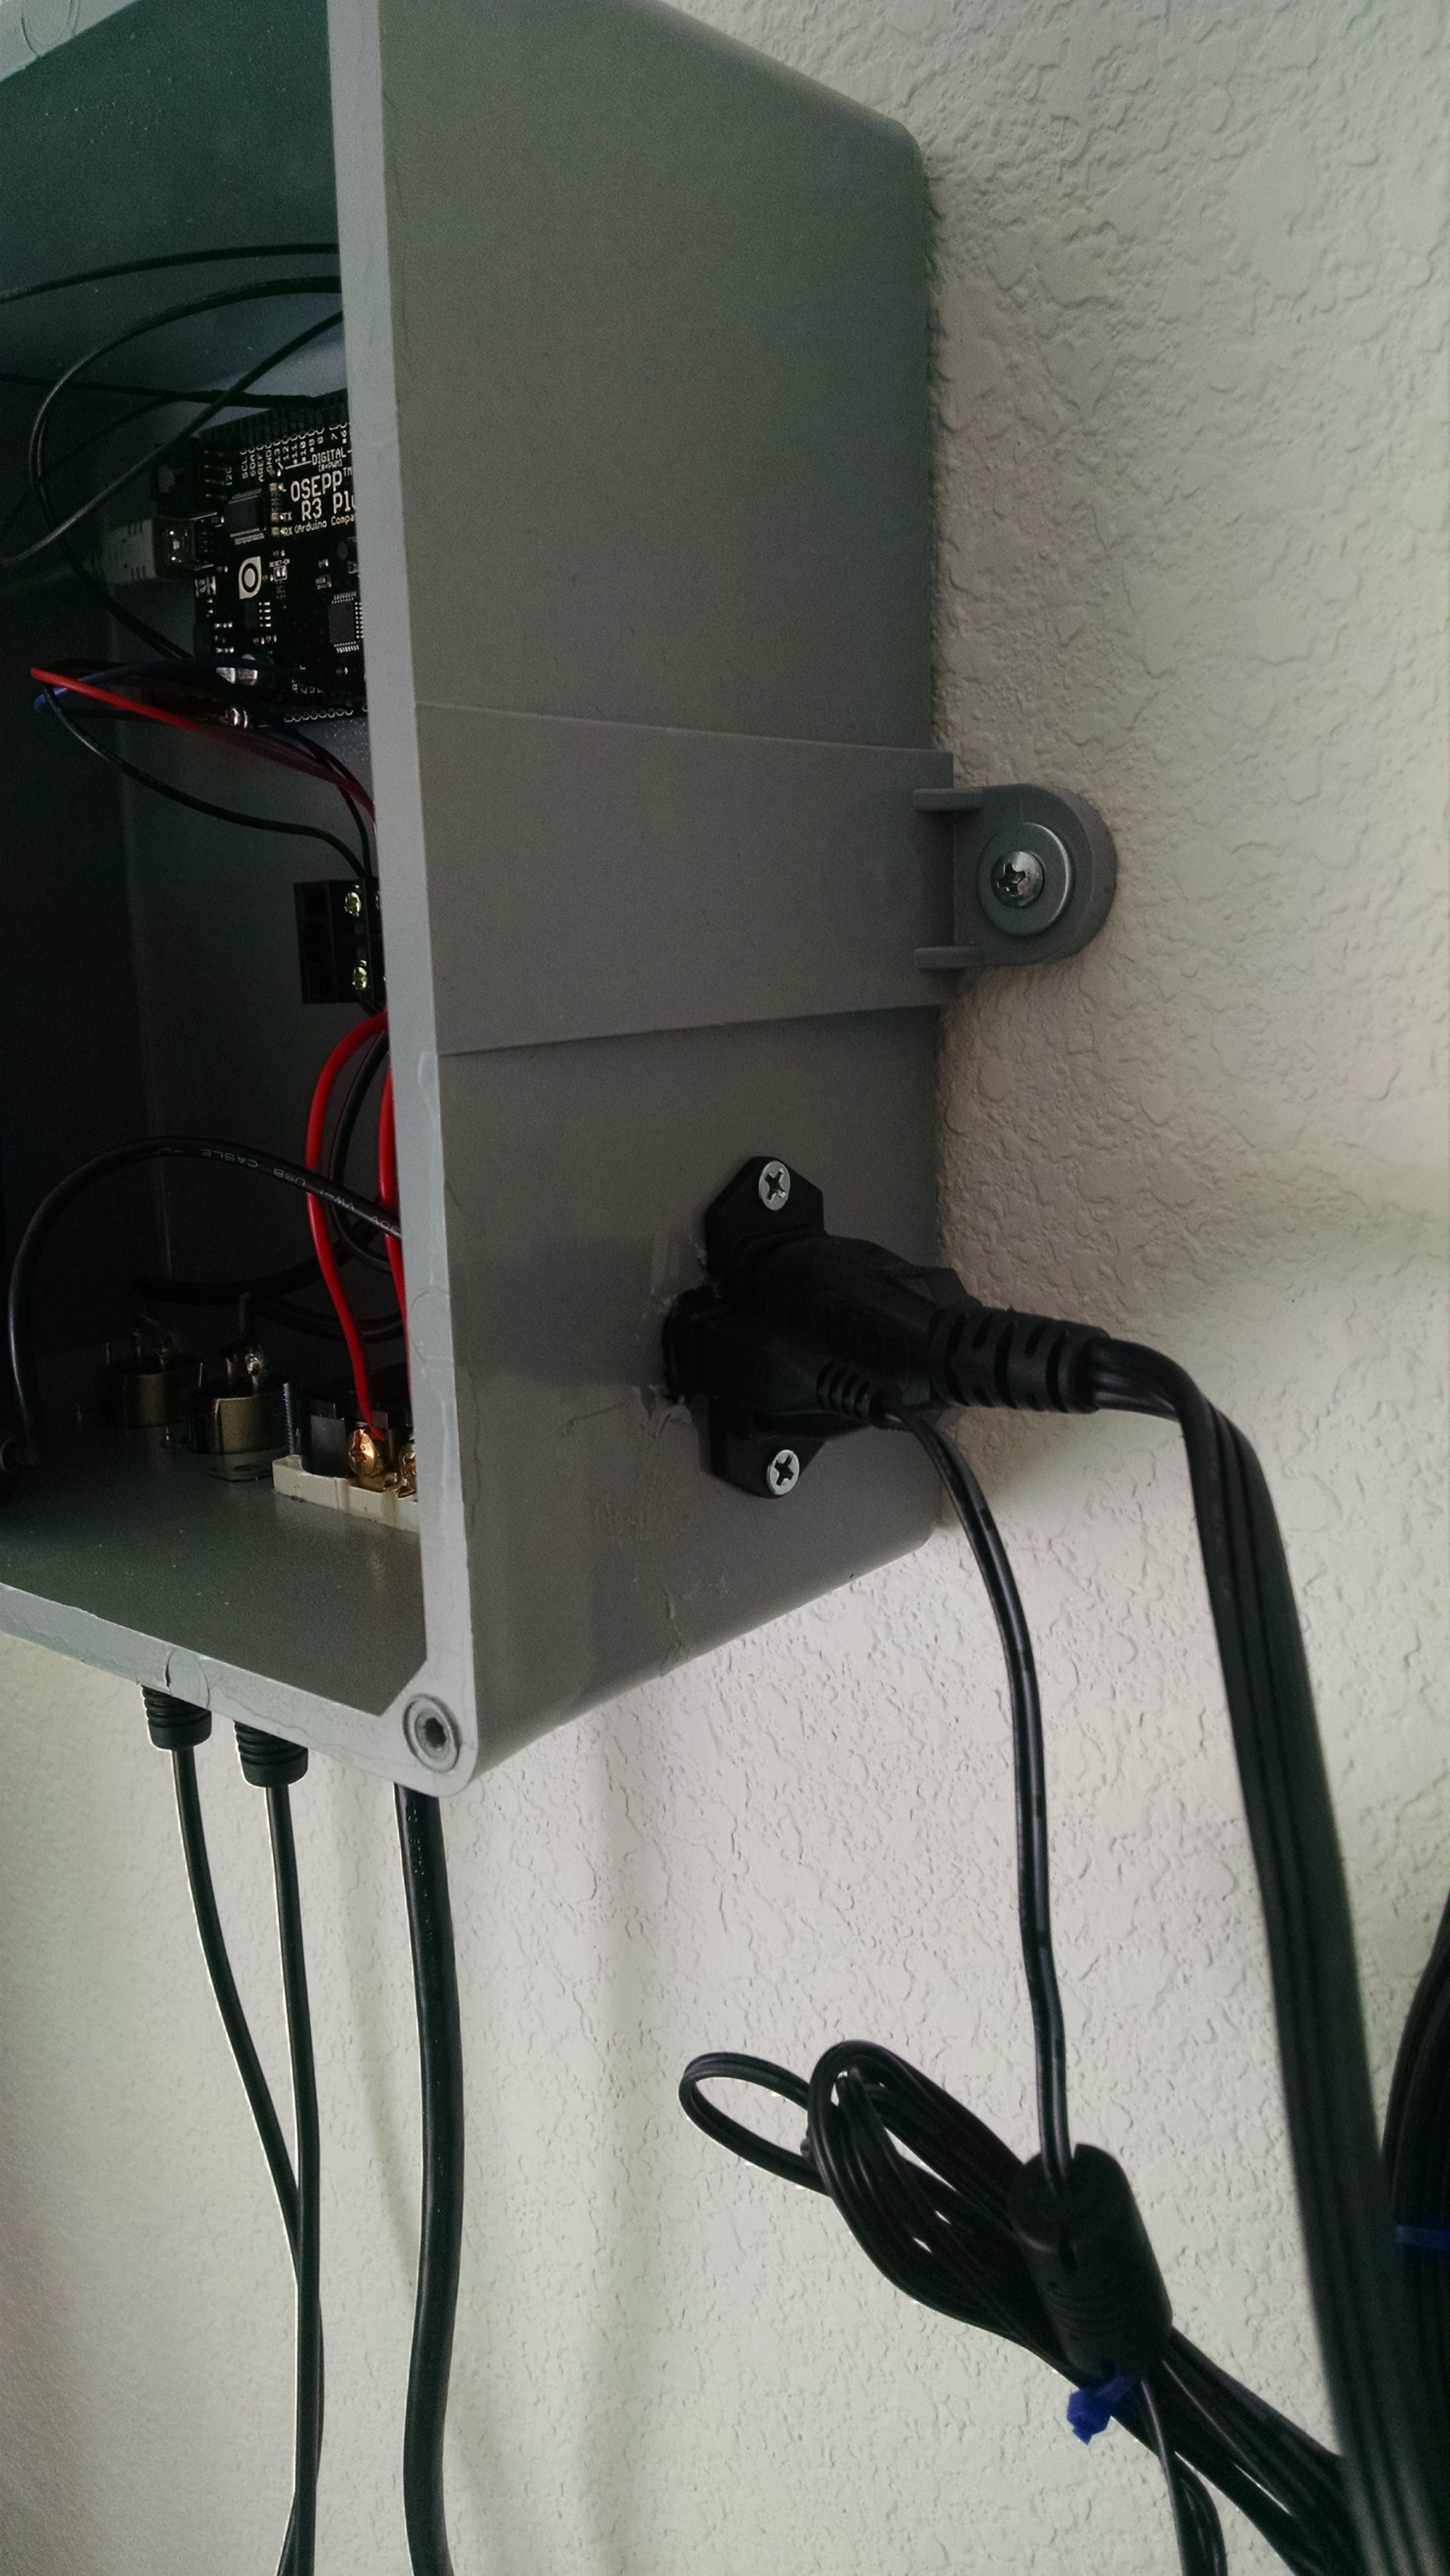
Could it be the setup I'm using? Using a mini-fridge with a small personal space heater (<100W).
 
People, first of all, I didnt do anything yet, but my doubt is even I do ajust on RPi time, both (main graphic and beer profile graphic) take time information, theorically, from the same source (RPi). So, why is happening these divergency from time of the 2 graphics?
 
I figured out why one probe wasn't working with the stereo jack.
View attachment ImageUploadedByHome Brew1423075416.200412.jpg
It worked fine when the jack cover was off, but when I slid the clear plastic sleeve over the connections it forced the red wire to brush against the green lead. I put a sliver of electrical tape between the two before recovering the jack and it worked. Finally. I assume a similar issue is at play with the other probe.

Also, my Uno was not fried so that's one less thing to worry about.
 
@sixthgear I have a similar problem now to. It was rock solid up to annotation C then starts to struggle to maintain temp. The swings aren't huge so I haven't really cared. Are the annotations associated with a log file or something that might tell me what happened?

View attachment 1423085330054.jpg
 
@sixthgear I have a similar problem now to. It was rock solid up to annotation C then starts to struggle to maintain temp. The swings aren't huge so I haven't really cared. Are the annotations associated with a log file or something that might tell me what happened?
 
I'd guess annotation c is where you either started or stopped one control method in favor of another.
 
View attachment ImageUploadedByHome Brew1423105785.163359.jpg
Finally, I got all the components installed, mounted and working. Thanks for all the advice and help.

I'm using a dual Anker USB wall wart to power both the Pi and the Arduino. I went with the dual so it would leave an open socket to power the encased gang outlet for the heating and cooling devices. This the first electronic device I've built and I really enjoyed this DIY project.
 
I'll say almost all large temperature swings or difficulties brewpi has maintaining temps are related to where your probe is placed.

If your using a thermowell try plugging the end with some paper towels or foam or s omething after your probe is in to prevent cold air from going down the tube to throw the sensor off.

All these builds look great! Baby Girl was born last week so hopefully(maybe?) ill have more time to check on here more :)
 
So I super rookie question and I tried reading as much of this as I could but I thought a question would be easiest. I installed raspbian then did the automated install but went to the http://brewpi and it should the rpi directory. Any help? Also when I did this I didn't have the arduino hooked up. is it
1. install raspbian
2. Hook up arduino and cables
3. Install automated brewpi package
4. Go to http://brewpi?
I'm a super noob and am just trying to make this happen. Any help is super appreciated. Even if you had to teach me as if I was a 3rd grader setting it all up would be awesome
 
People, first of all, I didnt do anything yet, but my doubt is even I do ajust on RPi time, both (main graphic and beer profile graphic) take time information, theorically, from the same source (RPi). So, why is happening these divergency from time of the 2 graphics?

Any help? @day_trippr, @mr_so, anyone? Please!
 
Any help? @day_trippr, @mr_so, anyone? Please!

The times that are set in your beer profile are scheduled times. Your rpi is running several hours behind (at least, likely weeks months or years). Try just logging into your rpi and using this command to manually set the clock:

Code:
sudo date -s "5 FEB 2015 18:00:00"

Substitute the relevant parts of the string above for your date and time. Setting timezone may or may not come into play, hopefully not.

Without a connection to the internet, or a RTC, every time your rpi powers off you will have to reset your clock if you wish to keep things synced.

(edit) When you log into your rpi, you can just use the command 'date' to see what the date and time are on it, and see how far off it really is.

I'll jump out on the limb here and guess that when you set up the beer profile schedule that the javascript pulled the date/time from your browser and not your rpi. The browser, on your computer that is connected to the internet, probably has the right date/time, correct?
 
I got to the brewpi page. But I had to use 127.0.1.1 is there anyway to change it? or will that happen when I set it up to be accessed anywhere
 
I got to the brewpi page. But I had to use 127.0.1.1 is there anyway to change it? or will that happen when I set it up to be accessed anywhere

If you access your brewpi remotely from your LAN you will either connect to it with http://raspberry/, http://brewpi/ or what ever the host name is on your pi, OR you will have to connect to it using the IP address that is assigned to your pi. It depends on your router's settings (which is beyond the scope of this thread). Newer routers tend to automagically work.

If you need to access it using the pi's ip address you can find the ip address by running the command 'ifconfig'.
 
linux noob trying to get this set up on pc.
have debian installed and running. if i try to use the installer in a root terminal when i try to clone the repository i get the error: git command not found. what am i doing wrong here?

appreciate the help in advance
 
figured out i needed to install git core and got that done. repository clones and install runs. get an error: unable to locate package rpi-update

exit out and go to my ip and screen reads :it works, this is the default webpage....

what next?
 
There's 2 ways to install to pc. 1st lets clear this up. The install script is only for rpi. But can be modified to work on Linux. You have to physically modify the install script so it doesn't try to run rpi-update because it stall at this point because the package rpi-update is only available for raspberry pi. The other way is to run through the brewpi docs and find the subsection on manual installs.
 
i've tried (and failed) twice to install manually and get different results each time. the closest i've come is getting brewpi installed but could never get the scrips running. this is why i wanted to try to use the install script. how difficult is it to edit the script to work on pc? as easy as opening it in a text editor and removing any mention of rpi-udate?
 
ran through the manual install again. got no errors. when i get to the portion to program the arduino, i enter the ip for the computer in the url field and get the screen that reads "it works".

i logged off from root user and logged on as brewpi user and tried the ip again. now i get the brewpi interface however it says the script is not running. nothing happens if i hit the button.

if i try to start the script manually i get the error: conflict: same config file as another brewpi instance already running

what now?
 
Hello everyone! I took an unintentional vacation from brewing for about 6 months. Life got busy, blah, blah, blah. I had only brewed one batch of beer with the BrewPi setup before the break and it went flawlessly.

First brew back, it kept the beer at the perfect temp for the first two weeks. I had it programmed to start at 63 for the first 5 days, then ramp up a degree per day until it hit 68. It was supposed to maintain 68 for the last week, but instead it dropped back down to 63 and did whatever the hell it wanted. I've kind of learned to trust this setup so after the first 2 weeks of monitoring it I didn't keep an eye on it.

Anyway, the beer is fine I'm sure. I'm kegging it tomorrow. But what went wrong? How can I troubleshoot this?

Thanks again to everyone who helped me get this going in the beginning! It was a bit of a struggle. Once I had everything working I used Clonezilla to clone 3 more laptops that I had laying around just for backups. But this issue doesn't make sense to me.

Thanks in advance for any help you can give me!
 
ran through the manual install again. got no errors. when i get to the portion to program the arduino, i enter the ip for the computer in the url field and get the screen that reads "it works".

i logged off from root user and logged on as brewpi user and tried the ip again. now i get the brewpi interface however it says the script is not running. nothing happens if i hit the button.

if i try to start the script manually i get the error: conflict: same config file as another brewpi instance already running

what now?


For me, when I did my manual install and I clicked the "start script" button it took a little bit before it actually started. It wasn't an instantaneous thing. How long did you wait?
 
My start script button doesn't even work. I have to run a command (that I've since forgotten) before it starts working again. I just never stop it from running.
 
My start script button doesn't even work. I have to run a command (that I've since forgotten) before it starts working again. I just never stop it from running.


You're having permission issues. You most likely have a manual install and you used the wrong user names when setting up and manually installing.
 
if i close out the brewpi browser window and then run the command to start the script it starts.
now i have moved on to programing the arduino, but am at yet another standstill.
i get oserror: [error13] permission denied: '/var/www/data/my first brewpi run/'
 
OK, I have a couple of issues. I can change the "Log Data point every" to 5 minutes. When I go back and check it later it's back to the default of 30 seconds. I just set it again and went to the View Logs and it shows as being set to 300 seconds but it also shows an error on the Profile Name:

Feb 06 2015 20:40:13 Notification: Interval changed to 300 seconds
Feb 06 2015 20:40:15 Error: Received invalid message on socket: profileName=belguim ale
Feb 06 2015 20:40:16 Changing date format config setting: mm/dd/yy

So what causes the Log Data Point to change back to default and what is causing the other error? It's been running fine other then this.
 
Running the command line to start the script does so as the logged in user account not as user brewpi as the software is setup to. If you can only start the script by using the command line, then you don't have the proper permissions set up.
 
Running the command line to start the script does so as the logged in user account not as user brewpi as the software is setup to. If you can only start the script by using the command line, then you don't have the proper permissions set up.


ran the permissions fix script and that seemed to take care of the issue. Was able to program the arduino, script running, and all looks good. ready to start testing now.

Thanks for the help guys!
 
Thank you to the BrewPi team and FuzzeWuzze for this thread. I now have a BrewPi assembled, up, and running.

Some pictures:

An Arduino, two boxes from Lowes, a little work on the drill press, and some wiring:
psqczEgh.jpg

HgYCHo5h.jpg

KZKmltch.jpg

S2QUvLeh.jpg


Fully assembled and ready to install:
Top:
fT8pxgqh.jpg


Bottom:
oHb1S5oh.jpg


Installed:
Overview:
zZ2geZDh.jpg


Electrical and USB hub:
z9YguXGh.jpg


Controller:
TfmepzIh.jpg

AkXXlCfh.jpg


Up and running with a test bucket of water:
eG1v01Nh.jpg


The remaining problem is that my lead wires for the probes are too short. I am going to use some six wire cable or cat-5 with rj-45 connectors and cable couplers to fix this problem. If I add the DIY multiple probe digital thermometer J_Hanna posted a while back, I will be able to control the temperature based on one fermentor while monitoring the other 3-6 containers in the fermentation chamber.
 
Very nice! I used the same box, but the bigger version. I was able to get everything into it. I have built 2 for myself and 2 for my buddies. People love these things!

Here are a few pics of mine.

OHjSZVs.jpg


mgxCoEt.jpg


0Y9ZrpY.jpg


This was during testing of the newest one I made for lagers today, hence the no cover, and no heater. I made a plexi cover so it remains see-thru.
 
I have read through this as I have cobbled together a brewpi as well and it is working great except for one issue, when the relay (Sainsmart 2ch) triggers it garbles the LCD and I basically have to power cycle the arduino to clear it up.. Any suggestions? I hooked it up following the wiring diagram in this thread on page 118. Everything continues to work just fine except for some odd characters that show up on the screen..
 
Two things I'd be looking for:

- if you're powering the Uno via USB, there can be significant voltage drop on the 5V at the Uno, depending on the cable used (some aren't too bad but I've tested a couple of 18" cables that sucked pretty hard). Using a dedicated 9V wall wart to power the Uno will eliminate that problem.

- otherwise, power and ground distribution is important. The shift register - whether on a protoshield or a breadboard - should get power and ground directly from the Uno, and the LCD should get its power and ground connection directly from the Uno as well - and not from the shift register assembly. A "star" topology where everything connects at the Uno is better than daisy-chaining from the Uno through a breadboard or protoshield to the LCD...

Cheers!
 
Went to start building mine today and totally overlooked the fact that I need a keyboard and a mouse. Had my laptop from work with my mouse, but I need my own. Didn't realize how cheap they've become for a wireless set $21 shipped from Amazon with reviews confirming that its plug and play with the Raspberry Pi.

Can't wait to get this setup.
 
Highly inspiring thread. I've ordered all the necessary parts and while I wait for them to arrive, I've compared the original BrewPi and the one here. I hope I can ask about some of the differences I noticed (I read through a good chunk of this 292 page long thread; apologies if I ask something that has been answered before.):

&#9674;) Since there is quite a difference in which and how the pins are used, do I need different software for the Arduino?

a) The sensors are connected to Pin 10 and 11 on the original setup, but in the one here, they are both connected to a single analogue input. Is there any disadvantage in using just one input channel (especially considering that there are so many unused ones)?

b) The original setup uses pins 3 through 9 to drive the LCD, while this setup employs a shift register, and thus uses only pins 10, 11 and 13. Why not use the original wiring without the pin shift register?

c) The original setup uses pins 12 and 13 for the relay, while here we use 5 and 6. Do I have to change the Arduino BrewPi software, or does it have the flexibility to change pin configuration afterwards?

d) The design here omits the rotary encoder. Those can be had for a buck or two on eBay. Can I just hook one up on pins 0, 1 and 2 and have it work?

e) The original design has an input for the fridge door, which has been omitted in this design. What does the fridge door switch do in BrewPi? Can I just add that "sensor" as per the original shield?

f) I want to install the RPI, Arduino, Relay and power converter all in one box. Should I add a little fan for ventilation, or is that overkill?

g) gfisher99 - lovely setup. May I ask what the inner size of that box is, that seems like the perfect balance between keeping things compact yet manageable.

Thanks for your help and have a great Valentines beer/day!
 
Do any of you guys know where I can get 22AWG M-F jumper wires so I don't have to do any soldering?
 
Status
Not open for further replies.
Back
Top