
Hello,
I went to ACE and looked the 4 1/2 x 4 1/2 inches waterproof boxes for the heating elements and I thought they were HUGE.
While there I looked at the "half" version of that.
Looks like this
To me should have plenty of room to install the element. Just curious if anyone tried it ?
Thanks!
Q
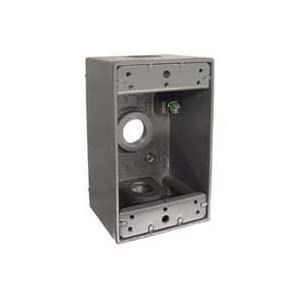
I went to ACE and looked the 4 1/2 x 4 1/2 inches waterproof boxes for the heating elements and I thought they were HUGE.
While there I looked at the "half" version of that.
Looks like this
To me should have plenty of room to install the element. Just curious if anyone tried it ?
Thanks!
Q


![Craft A Brew - Safale S-04 Dry Yeast - Fermentis - English Ale Dry Yeast - For English and American Ales and Hard Apple Ciders - Ingredients for Home Brewing - Beer Making Supplies - [1 Pack]](https://m.media-amazon.com/images/I/41fVGNh6JfL._SL500_.jpg)


