First All Grain Brew!!

Homebrew Talk - Beer, Wine, Mead, & Cider Brewing Discussion Forum

Help Support Homebrew Talk - Beer, Wine, Mead, & Cider Brewing Discussion Forum:

This site may earn a commission from merchant affiliate links, including eBay, Amazon, and others.

VladTheImpaler

Well-Known Member
Joined
Mar 7, 2016
Messages
69
Reaction score
3
Location
Buford
Hello everyone!

Yesterday me and a buddy decided to start try our hand at all grain brewing. I've extract brewed a few times already and this was his first brew day. We brewed a 5 gallon batch of a Tropicalia clone. All in all, I think it was a success so I'll include some pictures and a rundown of the process for you guys so you can see and maybe give a few pointers if you see something.

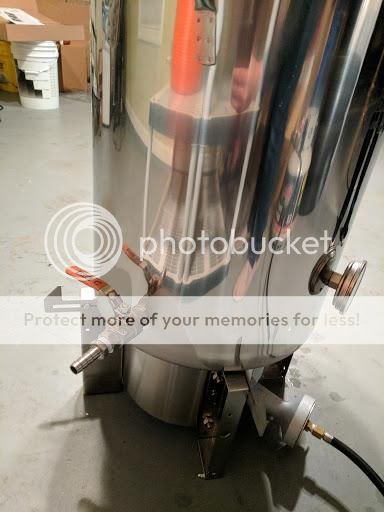
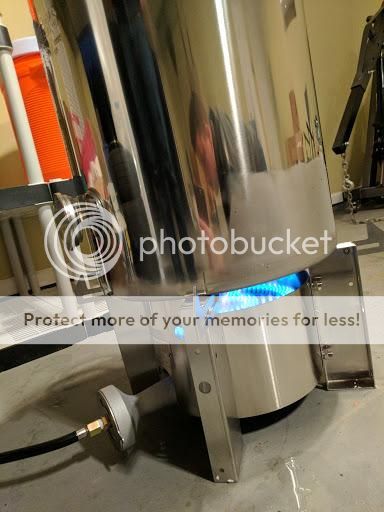
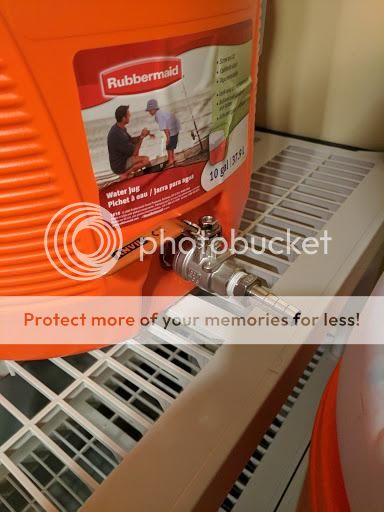
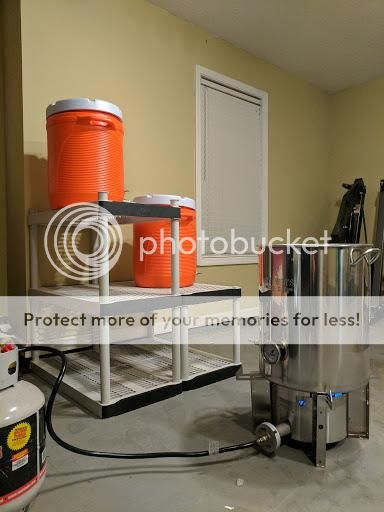
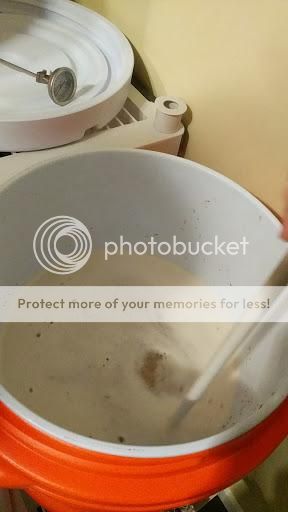
We went out and got a 14 gal boil kettle that we drilled a thermometer and a ball valve outlet into. As well as 2 10 gal insulated Home Depot coolers that got the same spigot treatment. Along with a Blichmann Hellfire burner, wort chiller, and a couple other odds and ends.

IMG_1067_zpsd1puaebz.jpg

IMG_1065_zpsdef9qxbk.jpg

IMG_1068_zpspq5r06tq.jpg

IMG_1063_zpsyllwhjle.jpg


Then we heated out strike water to 170 and started the mash! The mash temp held steady at 151-152 for the whole hour. I was trying to have it be right at 150, but we weren't too far off.

IMG_1072_zps6a05bvws.jpg


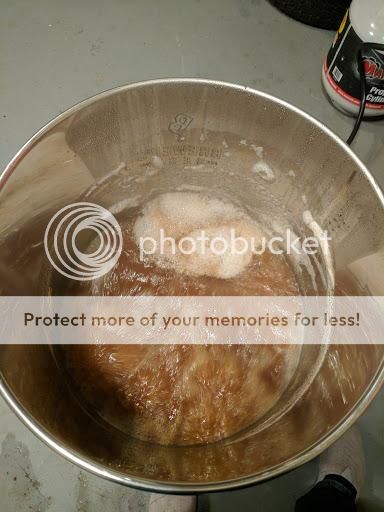
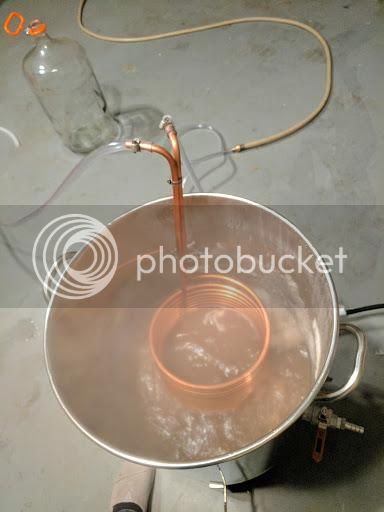
Then we fly sparged and collected 7 gallons of wort to boil and got the boil started, then cooled with the wort chiller!

IMG_1074_zpshqc2lwda.jpg

IMG_1075_zpsjk4f6cwz.jpg


Got it all in the fermenter and pitched at 70 degrees! This morning I checked the temp and it was at 69 degrees with airlock activity already!

IMG_1080_zpsentl7gr2.jpg


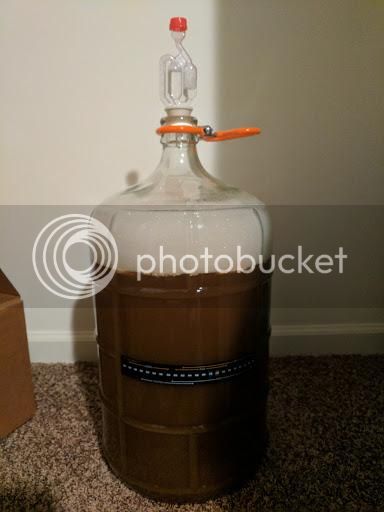
All the foam is from the star san. But all in all I would say it was a success!

I do have one question though, per the instructions for the recipe it said our OG should have been 1.066 and we clocked in at 1.054. I'm assuming we had a drop in efficiency somewhere. Maybe if we sparged slower, or collected 6.5 gallons of wart to boil as opposed to 7 it would raise our OG?

Feel free to throw in any input whatsoever! We'll be brewing again next Tuesday so it would be nice to have some tips beforehand!
 
Did the grain come pre-crushed? My guess for the drop in efficiency would be the quality of the crush. That is usually the main culprit (my efficiency went up about 7-8% when I bought my own grain crusher). I wouldnt reduce the pre-boil volume as it looks like you pretty much ended up with 5 gals and some change. You could always try batch sparging and see if there is a difference. Just out of curiosity, what was the recipe?
 
Did the grain come pre-crushed? My guess for the drop in efficiency would be the quality of the crush. That is usually the main culprit (my efficiency went up about 7-8% when I bought my own grain crusher). I wouldnt reduce the pre-boil volume as it looks like you pretty much ended up with 5 gals and some change. You could always try batch sparging and see if there is a difference. Just out of curiosity, what was the recipe?


Yes, my local brew supply store crushed the grain there and then bagged it up. I left a little bit in the kettle after boiling, but it wasn't very much at all.

As far as the recipe, I will post it when I get home. All I remember off hand is 10.5 lbs of 2 row, then some caramel, and the rest I can't remember. Hops were .5 oz galaxy at 45 min, .5 oz centennial at 20 min, and 1 oz Citra at 5 min. Then the same amounts again for dry hopping.
 
Looks great. I'd consider looking into swamp cooling if you don't have a temperature controlled fermentation chamber. 69 is a, tad hot for IPAs and can cause some off flavors.
 
Looks great. I'd consider looking into swamp cooling if you don't have a temperature controlled fermentation chamber. 69 is a, tad hot for IPAs and can cause some off flavors.

Thanks Maple, I'm planning on converting a fridge into a ferm chamber here soon. What temp would you recommend fermenting at for this IPA? The recipe said between 68-70 so I figured I was alright.
 
Yes, my local brew supply store crushed the grain there and then bagged it up. I left a little bit in the kettle after boiling, but it wasn't very much at all.

As far as the recipe, I will post it when I get home. All I remember off hand is 10.5 lbs of 2 row, then some caramel, and the rest I can't remember. Hops were .5 oz galaxy at 45 min, .5 oz centennial at 20 min, and 1 oz Citra at 5 min. Then the same amounts again for dry hopping.

Next time you have them crush it, ask them if they will double crush. Most places are pretty chill and will do it for you. That could certainly boost your efficiency

Thanks Maple, I'm planning on converting a fridge into a ferm chamber here soon. What temp would you recommend fermenting at for this IPA? The recipe said between 68-70 so I figured I was alright.

I ferment my IPA's around 66-67 during high krausen.
 
Thanks Maple, I'm planning on converting a fridge into a ferm chamber here soon. What temp would you recommend fermenting at for this IPA? The recipe said between 68-70 so I figured I was alright.

62 to 64 for me. I don't think you'll have many issues if your wort is only truly 69. It sure does stink having to pay for and put together contraptions for a 5 to 6 degree difference!
 
Next time you have them crush it, ask them if they will double crush. Most places are pretty chill and will do it for you. That could certainly boost your efficiency


I ferment my IPA's around 66-67 during high krausen.

Do you change your temps after high krausen? or do you just keep it at 66-67 through the whole fermentation process?

62 to 64 for me. I don't think you'll have many issues if your wort is only truly 69. It sure does stink having to pay for and put together contraptions for a 5 to 6 degree difference!

Getting the fridge together shouldn't be hard at all. Just a temperature controller to plug it and a place to tap for the temp probe. After that all should be good to go right?

What's the worst that could happen at 69 degrees? Some fruity esters?

Also, how long do you ferment at 62-64? I feel like that would slow things down a little bit. Or do you just watch the airlock activity and take gravity readings to see if fermentation has stopped?
 
Do you change your temps after high krausen? or do you just keep it at 66-67 through the whole fermentation process?


Getting the fridge together shouldn't be hard at all. Just a temperature controller to plug it and a place to tap for the temp probe. After that all should be good to go right?

What's the worst that could happen at 69 degrees? Some fruity esters?

Also, how long do you ferment at 62-64? I feel like that would slow things down a little bit. Or do you just watch the airlock activity and take gravity readings to see if fermentation has stopped?

After high krausen I let it slowly come up in temp in whats called a diacetyl rest. Yeast produce it when they ferment your beer and warming it up allows them to go back and clean it all up.

Fermenting warm during high krausen can cause a build up of diacetyl and will cause your beer to taste like fake butter. But I dont think 69 is too warm to cause too much damage. More than likely, youll be fine. Too warm is more like 75+.
Dont go off of airlock activity for fermentation progress. Use a hydrometer to check to see if its stopped

So after racking to a secondary and dry hopping take hydrometer readings after about a week and see when the gravity stops decreasing? As opposed to just letting it sit in secondary for 2 weeks?
 
Getting the fridge together shouldn't be hard at all. Just a temperature controller to plug it and a place to tap for the temp probe. After that all should be good to go right?

What's the worst that could happen at 69 degrees? Some fruity esters?

Also, how long do you ferment at 62-64? I feel like that would slow things down a little bit. Or do you just watch the airlock activity and take gravity readings to see if fermentation has stopped?

Yep, a temp controller plugged into the fridge itself and I tape the probe to the side of the fermenter right in the middle.

Maybe some mild esters at 69, what I always worry about is that during peak fermentation, it c an be 3-5 degrees hotter inside than the ambient temperature, that's why I set my controller to 62 to account for this.

I ferment at 62 for about 4-6 days depending on my brewing schedule and chamber needs. Then usually bring it out after that and let it set in my basement at 67 or so to finish off. The first few days are the most important with regards to temperature control.

I just got home and checked the little stick on thermometer strip and it was actually at 66 so that kinda made me breathe a little sigh of relief!

I am definitely going to get a fridge to use a ferm chamber here soon.

Next Tuesday we're brewing the same exact recipe and try to improve our efficiency and hit the target OG.
 
So after racking to a secondary and dry hopping take hydrometer readings after about a week and see when the gravity stops decreasing? As opposed to just letting it sit in secondary for 2 weeks?

Dont secondary. widely regarded here and amongst brewers to be generally useless. with adding to secondary you do two things, introduce a lot of o2 to your beer and expose the beer to potential infections. secondary is great/necessary (sort of) if doing any aging/racking over fruit, but for a normal ale, it can do more harm than good. just let your beer sit undisturbed. and when you get a fermentation chamber, you can cold crash and clear your beer up that way


I just got home and checked the little stick on thermometer strip and it was actually at 66 so that kinda made me breathe a little sigh of relief!

I am definitely going to get a fridge to use a ferm chamber here soon.

Next Tuesday we're brewing the same exact recipe and try to improve our efficiency and hit the target OG.

When you do it, try double crushing the grains and try batch sparging and see if it helps :)
 
Dont secondary. widely regarded here and amongst brewers to be generally useless. with adding to secondary you do two things, introduce a lot of o2 to your beer and expose the beer to potential infections. secondary is great/necessary (sort of) if doing any aging/racking over fruit, but for a normal ale, it can do more harm than good. just let your beer sit undisturbed. and when you get a fermentation chamber, you can cold crash and clear your beer up that way


When you do it, try double crushing the grains and try batch sparging and see if it helps :)

Noted. So when I dry hop just open up the primary, drop the hops in, and seal her back up?

I'll definitely try double crushing the grain and batch sparing next time!
 
Agree no secondary, completely unnecessary.

To dry hop, get a 1 gallon paint strainer bag from Lowes /Home Depot and a few stainless steel nuts. Sanitize these and drop your hops inside. Use flavorless dental floss to tie the bag together at the top and hang/tie the loose string outside your fermenter. This will keep the hop trub out of your beer and allow the oily goodness in. Then when you're ready to package, just yank the string and bag out. Easy peasy.

Perfect! I really appreciate all the advice guys, I can't wait to brew again on Tuesday! I feel like a little kid waiting for Christmas morning!:mug::mug::mug::mug::mug::mug::mug:
 
Agree no secondary, completely unnecessary.

To dry hop, get a 1 gallon paint strainer bag from Lowes /Home Depot and a few stainless steel nuts. Sanitize these and drop your hops inside. Use flavorless dental floss to tie the bag together at the top and hang/tie the loose string outside your fermenter. This will keep the hop trub out of your beer and allow the oily goodness in. Then when you're ready to package, just yank the string and bag out. Easy peasy.

Never tried the paint strainer bag method, but I'm still gonna play devil's advocate here. That way you have multiple options op :D. I just toss the pellets in loose. The hops eventually settle out and my beers end up pretty clear (but I am kegging as well)
 
Never tried the paint strainer bag method, but I'm still gonna play devil's advocate here. That way you have multiple options op :D. I just toss the pellets in loose. The hops eventually settle out and my beers end up pretty clear (but I am kegging as well)

Gotcha, I was thinking about fitting the strainer bag through the tiny opening of the carboy haha.

I might just dump them in! We'll see.

I plan on kegging, but as far as cold crashing goes. What's the best way to do so? I've read about throwing it in the freezer for an hour before bottling/kegging.

I have big mouth bubblers which have a huge wide opening conducive to the dry hop method I described. With the old school thin neck carboys, the hops would probably be a pain to pull out with the bag because they end up taking on beer and expanding to quite a decent size. So throwing them in by themselves is probably your best bet. It just takes a few days longer from my experience to get everything to settle out.
 
I have big mouth bubblers which have a huge wide opening conducive to the dry hop method I described. With the old school thin neck carboys, the hops would probably be a pain to pull out with the bag because they end up taking on beer and expanding to quite a decent size. So throwing them in by themselves is probably your best bet. It just takes a few days longer from my experience to get everything to settle out.

I was thinking and wondering about if after 7 days in the primary I just kegged it and dry hopped in there... but for how long? And how long should I cold crash it and at what temp before carbing? :confused:
 
I was thinking and wondering about if after 7 days in the primary I just kegged it and dry hopped in there... but for how long? And how long should I cold crash it and at what temp before carbing? :confused:

Nothing wrong at all with dry hopping in the keg. Then you can use the method I described. That way no hop debris will clog your tube or poppets either.

Ferment approx 2 weeks until terminal gravity.

Cold crash 2-3 days @ near freezing (if you have the space, it's not necessary at all if you're kegging and not in a hurry for crystal clear beer) I rarely do. If I'm in a hurry I'll add some gelatin after the 2 days @ 30 PSI.

Then keg, sink your dry hop bag in, tie the dental floss to the lid that snaps down, carbonate @ 30 psi for 2 days, bleed it and reduce pressure to serving (mine is 12 psi). Your beer will be almost perfectly carbed this way in just a couple days. Also no need to pull the dry hops out until the keg kicks. The "grassy" flavors people talk about is a myth in my opinion.

Source: brewed/kegged 52 five gallon batches in 2016 :)

Once a week is quite respectable my friend! I'm gonna try my best to brew once a week this year - that's the goal anyway!

But let me make sure I got this, sorry for all the questions but I guess I just like to double check everything lmao.

- about 2 weeks in primary; or until terminal gravity is reached and my readings stabilize
- cold crash for 2-3 days if able to do so (if not just add gelatin to beer after initial 2 days @ 30 psi.)
- rack to keg, dry hop with essentially a giant tea bag of hops.
- Let it sit at 30 psi for 2 days, then drop down to about 12 psi and let it sit a couple more and it should be ready to serve!

If I decide to just add gelatin to the keg, how much should I add for a 5 gal batch?

You got it. The only thing I think is a bit off is I don't add the gelatin until after doing the 30PSI for 2 days. I think it works better when the beer is cold. Just remember that you're popping the lid off to add the gelatin, so you're losing that strong seal that the 30PSI gave you initially. You're not losing carbonation doing this at all, especially since you're only going to have the lid cracked for a few seconds. Just remember once you add gelatin to reseal the lid @ 30PSI and burp it a couple times, same thing you do when kegging initially. Then drop back down to serving pressure and you're good to go.

I use this method for clearing with gelatin, it really does make a difference. I can assure you all beer will clear eventually with time, but this does accelerate the pace big time.

http://www.bertusbrewery.com/2012/06/how-to-clear-your-beer-with-gelatin.html

Good luck and let me know how it goes!
 
I do have one question though, per the instructions for the recipe it said our OG should have been 1.066 and we clocked in at 1.054. I'm assuming we had a drop in efficiency somewhere. Maybe if we sparged slower, or collected 6.5 gallons of wart to boil as opposed to 7 it would raise our OG?

Congrats on your first AG brew! As someone mentioned, your crush will have a lot to do with efficiency.

Also a common issue with new systems is not estimating your volumes correctly. If you haven't done so already I'd suggest "calibrating" a dipstick etc with markings so you can measure the volumes in your kettle.

I would also highly recommend getting a copy of BrewSmith if you don't already have one. You can track all this stuff and adjust your system specs from batch to batch until you get it dialed in. Then it makes it easy adjusting someone else's recipe to your own system. Just set it up for your known efficiencies and volumes and determine the grain bill by % instead of weight. E.g. if a recipe calls for X lbs of malt but your system gets lower eff then you can scale the malt up to arrive at the correct OG.
 
You got it. The only thing I think is a bit off is I don't add the gelatin until after doing the 30PSI for 2 days. I think it works better when the beer is cold. Just remember that you're popping the lid off to add the gelatin, so you're losing that strong seal that the 30PSI gave you initially. You're not losing carbonation doing this at all, especially since you're only going to have the lid cracked for a few seconds. Just remember once you add gelatin to reseal the lid @ 30PSI and burp it a couple times, same thing you do when kegging initially. Then drop back down to serving pressure and you're good to go.

I use this method for clearing with gelatin, it really does make a difference. I can assure you all beer will clear eventually with time, but this does accelerate the pace big time.

http://www.bertusbrewery.com/2012/06/how-to-clear-your-beer-with-gelatin.html

Good luck and let me know how it goes!

What exactly is the process of burping a keg? I'm trying to do some reading on it now.

Congrats on your first AG brew! As someone mentioned, your crush will have a lot to do with efficiency.

Also a common issue with new systems is not estimating your volumes correctly. If you haven't done so already I'd suggest "calibrating" a dipstick etc with markings so you can measure the volumes in your kettle.

I would also highly recommend getting a copy of BrewSmith if you don't already have one. You can track all this stuff and adjust your system specs from batch to batch until you get it dialed in. Then it makes it easy adjusting someone else's recipe to your own system. Just set it up for your known efficiencies and volumes and determine the grain bill by % instead of weight. E.g. if a recipe calls for X lbs of malt but your system gets lower eff then you can scale the malt up to arrive at the correct OG.

Thank you! I can't wait to taste it!

I do need to make one of those cheat sticks for measuring volume. And I actually started playing around with BeerSmith 2.3 last night so I'm trying to get the hang of it. I set my Equipment profile and loaded up the recipe that I brewed into BeerSmith and most of the numbers were spot on except for the boil volume and initial strike water volume... but I do need to calculate for the "dead space" in the MLT, and boil kettle. But how exactly do I do it for the fermenter?

Would it be wise from now on to just load up any recipe I try to brew into BeerSmith from now on and just go based off of those numbers because they're specific to my setup?
 
What exactly is the process of burping a keg? I'm trying to do some reading on it now.

Whenever you keg a beer, hit it with 30PSI to create a tight seal on the o-ring and lid. This will help prevent potential leaks. Then pull the ring or press down on the gas side poppet (depending on whether you have a ball or pin lock keg, whatever you do to relieve pressure) do this about 10 times at least while the gas is on, this will help push out any residual oxygen from your keg so your beer doesn't have an ill effects from it.

So I was just saying that when you add gelatin remember to do this again since you're taking the lid off and having to reseal.
 
I do need to make one of those cheat sticks for measuring volume. And I actually started playing around with BeerSmith 2.3 last night so I'm trying to get the hang of it. I set my Equipment profile and loaded up the recipe that I brewed into BeerSmith and most of the numbers were spot on except for the boil volume and initial strike water volume... but I do need to calculate for the "dead space" in the MLT, and boil kettle. But how exactly do I do it for the fermenter?

No reason to calculate fermenter deadspace (headspace?) other than to know if you want to put a blowoff tube on or not, but you can eyeball that. Is there even a field for fermenter deadspace in BS? I don't recall ever seeing that. In any case, not needed.

But yes, knowing your system volume specs and then being able to accurately measure your volumes while brewing is key to hitting your numbers.

What I did when I changed my system around last time was to set up a profile "System 1" etc. Then each subsequent brew I would tweak the settings and save it as "System 2", "System 3" etc. Eventually you get it dialed in and consistent and can stop messing with it.

Would it be wise from now on to just load up any recipe I try to brew into BeerSmith from now on and just go based off of those numbers because they're specific to my setup?

Absolutely. That's what many people do. If you see a recipe grain bill written out in weights, convert it to % of each malt. Then input your grains into BS to match the % of each, rather than an absolute weight. Then just scale it to hit your target OG, maintaining those %'s, given your system efficiency. Maybe seems a bit complicated but really simple once you get hang of entering recipes into BS.
 
No reason to calculate fermenter deadspace (headspace?) other than to know if you want to put a blowoff tube on or not, but you can eyeball that. Is there even a field for fermenter deadspace in BS? I don't recall ever seeing that. In any case, not needed.

But yes, knowing your system volume specs and then being able to accurately measure your volumes while brewing is key to hitting your numbers.

What I did when I changed my system around last time was to set up a profile "System 1" etc. Then each subsequent brew I would tweak the settings and save it as "System 2", "System 3" etc. Eventually you get it dialed in and consistent and can stop messing with it.


Absolutely. That's what many people do. If you see a recipe grain bill written out in weights, convert it to % of each malt. Then input your grains into BS to match the % of each, rather than an absolute weight. Then just scale it to hit your target OG, maintaining those %'s, given your system efficiency. Maybe seems a bit complicated but really simple once you get hang of entering recipes into BS.

I was reading through all the values last night trying to understand what they all are and what they all mean... any pointers on what the values that matter the most are? And the ones that you shouldn't pay too much attention to?
 
I was reading through all the values last night trying to understand what they all are and what they all mean... any pointers on what the values that matter the most are? And the ones that you shouldn't pay too much attention to?

Boil off rate is huge, I have mine set to 1.75 gallons but I have a large pot and an aggressive boil. Also fermenter deadspace as well as loss to boil kettle trub are important too. Just do a cheap batch, record all of these things on a piece of paper, then enter the actuals into Beersmith. Then next recipe you'll know your efficiency %, boil off rate, fermenter losses etc, and you'll hit your OG near perfect every time as long as everything you do is fairly consistent.
 
Boil off rate is huge, I have mine set to 1.75 gallons but I have a large pot and an aggressive boil. Also fermenter deadspace as well as loss to boil kettle trub are important too. Just do a cheap batch, record all of these things on a piece of paper, then enter the actuals into Beersmith. Then next recipe you'll know your efficiency %, boil off rate, fermenter losses etc, and you'll hit your OG near perfect every time as long as everything you do is fairly consistent.

Boil off rate is measure by the hour right? That way if you have a 2 hour boil or something it'll still be accurate?

Boil off rate seems pretty easy to figure out, but how exactly do I calculate loss to trub in the boil kettle and fermenter dead space?

Or is it super simple and I'm just overthinking it?
 
Boil off rate is huge, I have mine set to 1.75 gallons but I have a large pot and an aggressive boil. Also fermenter deadspace as well as loss to boil kettle trub are important too. Just do a cheap batch, record all of these things on a piece of paper, then enter the actuals into Beersmith. Then next recipe you'll know your efficiency %, boil off rate, fermenter losses etc, and you'll hit your OG near perfect every time as long as everything you do is fairly consistent.

Yes - off the top of my head probably the most important measurements are pre-boil volume, pre-boil SG, post-boil volume, post-boil SG. Also knowing mash tun dead space and volume left in the kettle (hops/trub) will help.

I'm setting up my new eBIAB system in BrewSmith sometime this weekend so I'll let you know if there are any other parameters that are helpful.
 
Also should mention that SG measurements are influenced by wort stratifying (denser, higher SG wort can sit at the bottom of your kettle while less dense, lower SG wort is on the top). Make sure you mix to homogenize as much as possible before pulling a sample.
 
Yes - off the top of my head probably the most important measurements are pre-boil volume, pre-boil SG, post-boil volume, post-boil SG. Also knowing mash tun dead space and volume left in the kettle (hops/trub) will help.

I'm setting up my new eBIAB system in BrewSmith sometime this weekend so I'll let you know if there are any other parameters that are helpful.

That would be awesome if you could share if you see something else super important, I really appreciate yours and everyone else's help and pointers for the newbie.

Any idea on what the easiest way to calculate fermenter dead space would be?

Also should mention that SG measurements are influenced by wort stratifying (denser, higher SG wort can sit at the bottom of your kettle while less dense, lower SG wort is on the top). Make sure you mix to homogenize as much as possible before pulling a sample.

Gotcha, mental note made! Does temperature have any ill effects on your SG reading using a hydrometer?
 
Any idea on what the easiest way to calculate fermenter dead space would be??

Again... there isn't really such a thing as fermenter dead space. Do you mean mash tun dead space? This is the volume let behind in your mash tun after lautering due to your false bottom pickup being higher than the bottom of the tun. It's easy to calculate, just fill the tun above the false bottom with water, drain it via the outlet. Water left over in the tun is your dead space volume. Pour it out into a bucket and measure how much there is.

Gotcha, mental note made! Does temperature have any ill effects on your SG reading using a hydrometer?

Yes it has a huge effect. Density decreases with increased temperature. Most hydrometers are calibrated to 20 C. You can measure wort hot, measure temperature and then adjust your SG reading based on that (another feature of BS or many online calcs). I find it best though to cool it to close to 20 C and then take the reading.
 
Boil off rate is measure by the hour right? That way if you have a 2 hour boil or something it'll still be accurate?

Boil off rate seems pretty easy to figure out, but how exactly do I calculate loss to trub in the boil kettle and fermenter dead space?

Or is it super simple and I'm just overthinking it?

Yes it's per hour. If you hold your mouse over the field in BeerSmith it will tell you what it is specifically.

Well you can either eyeball it or measure them yourself if you want it to be spot on. Once you're done draining into your boil kettle and start boiling, go back to your mash tun, tip the hell out of it and measure how much wort you get. Same with post boil, measure how much is left over once you've filled your carboy.
 
Does temperature have any ill effects on your SG reading using a hydrometer?

yes, most are calibrated to 60F. I recommend getting a refractometer for preboil OG and checking gravity during the boil, as you only need a few drops of wort to get a reading. Check your gravity at preboil once it starts boiling as well as about halfway through. If you're not where you need to be gravity wise, you can make boil intensity adjustments and/or get some DME to compensate for an expected missed lower gravity if you so choose. With a hydrometer this is difficult to do because you have to wait for the wort to cool down before taking the reading, which takes awhile and in these situations you're more looking for on the fly data.

If you get your Beersmith set up properly and do everything the same each time as far as your steps and volumes, you'll notice you'll become incredibly consistent with your numbers and won't have to worry about these things as often, but it takes awhile when you're new.
 

Latest posts

Back
Top