FastFerment conical fermenter??????

Homebrew Talk - Beer, Wine, Mead, & Cider Brewing Discussion Forum

Help Support Homebrew Talk - Beer, Wine, Mead, & Cider Brewing Discussion Forum:

This site may earn a commission from merchant affiliate links, including eBay, Amazon, and others.
Aha! Mystery solved! I knew it had to be simple....
I received the box today and the first thing I did was to look at the thermowell. Duh!...the tube is sealed at the end. For some unknown reason, I thought it was a hollow tube open at the end that the thermometer protruded through into the beer!
Never underestimate the power of assumptions! :)
The only thing missing was a lid gasket. It wasn't in the box, and wasn't in the lid. FastTrack customer service was very cool - they'll be sending me a gasket posthaste.
So for now, I'm having fun x-acto-ing away the mold flash, and sanding the top of the fermenter to make sure I get a good seal when the gasket arrives.
 
Sorry, I meant to do that!

Everything is 1/2 inch M-NPT or F-NPT with the exception of the ball valve which is 1/4 inch.

I will dig through my emails to US plastics and get all the part numbers and link, but right now my wort is waiting :)

US Plastics

Part #62287 Ball valve
Part #62240 1/2' to 1/4' Reducer Bushing
Part #27231 PVC ’T'
Part #27045 1.25“ Threaded PVC pipe nipple

Use teflon tape when connecting, I connected everything together THEN screwed it into the thermowell port on the FF

It is a bit bulky and all this could be avoided if FF would just offer an option for a second threaded port, but until then.
 
I'm not sure if I'm stating the obvious, but the thermowell is a enclosed brass tube, its not like an open straw. That's not to say it wont leak if you don't apply Teflon tape to the threads before you screw it into the FF. Just don't over tighten it or you can damage the plastic threads.
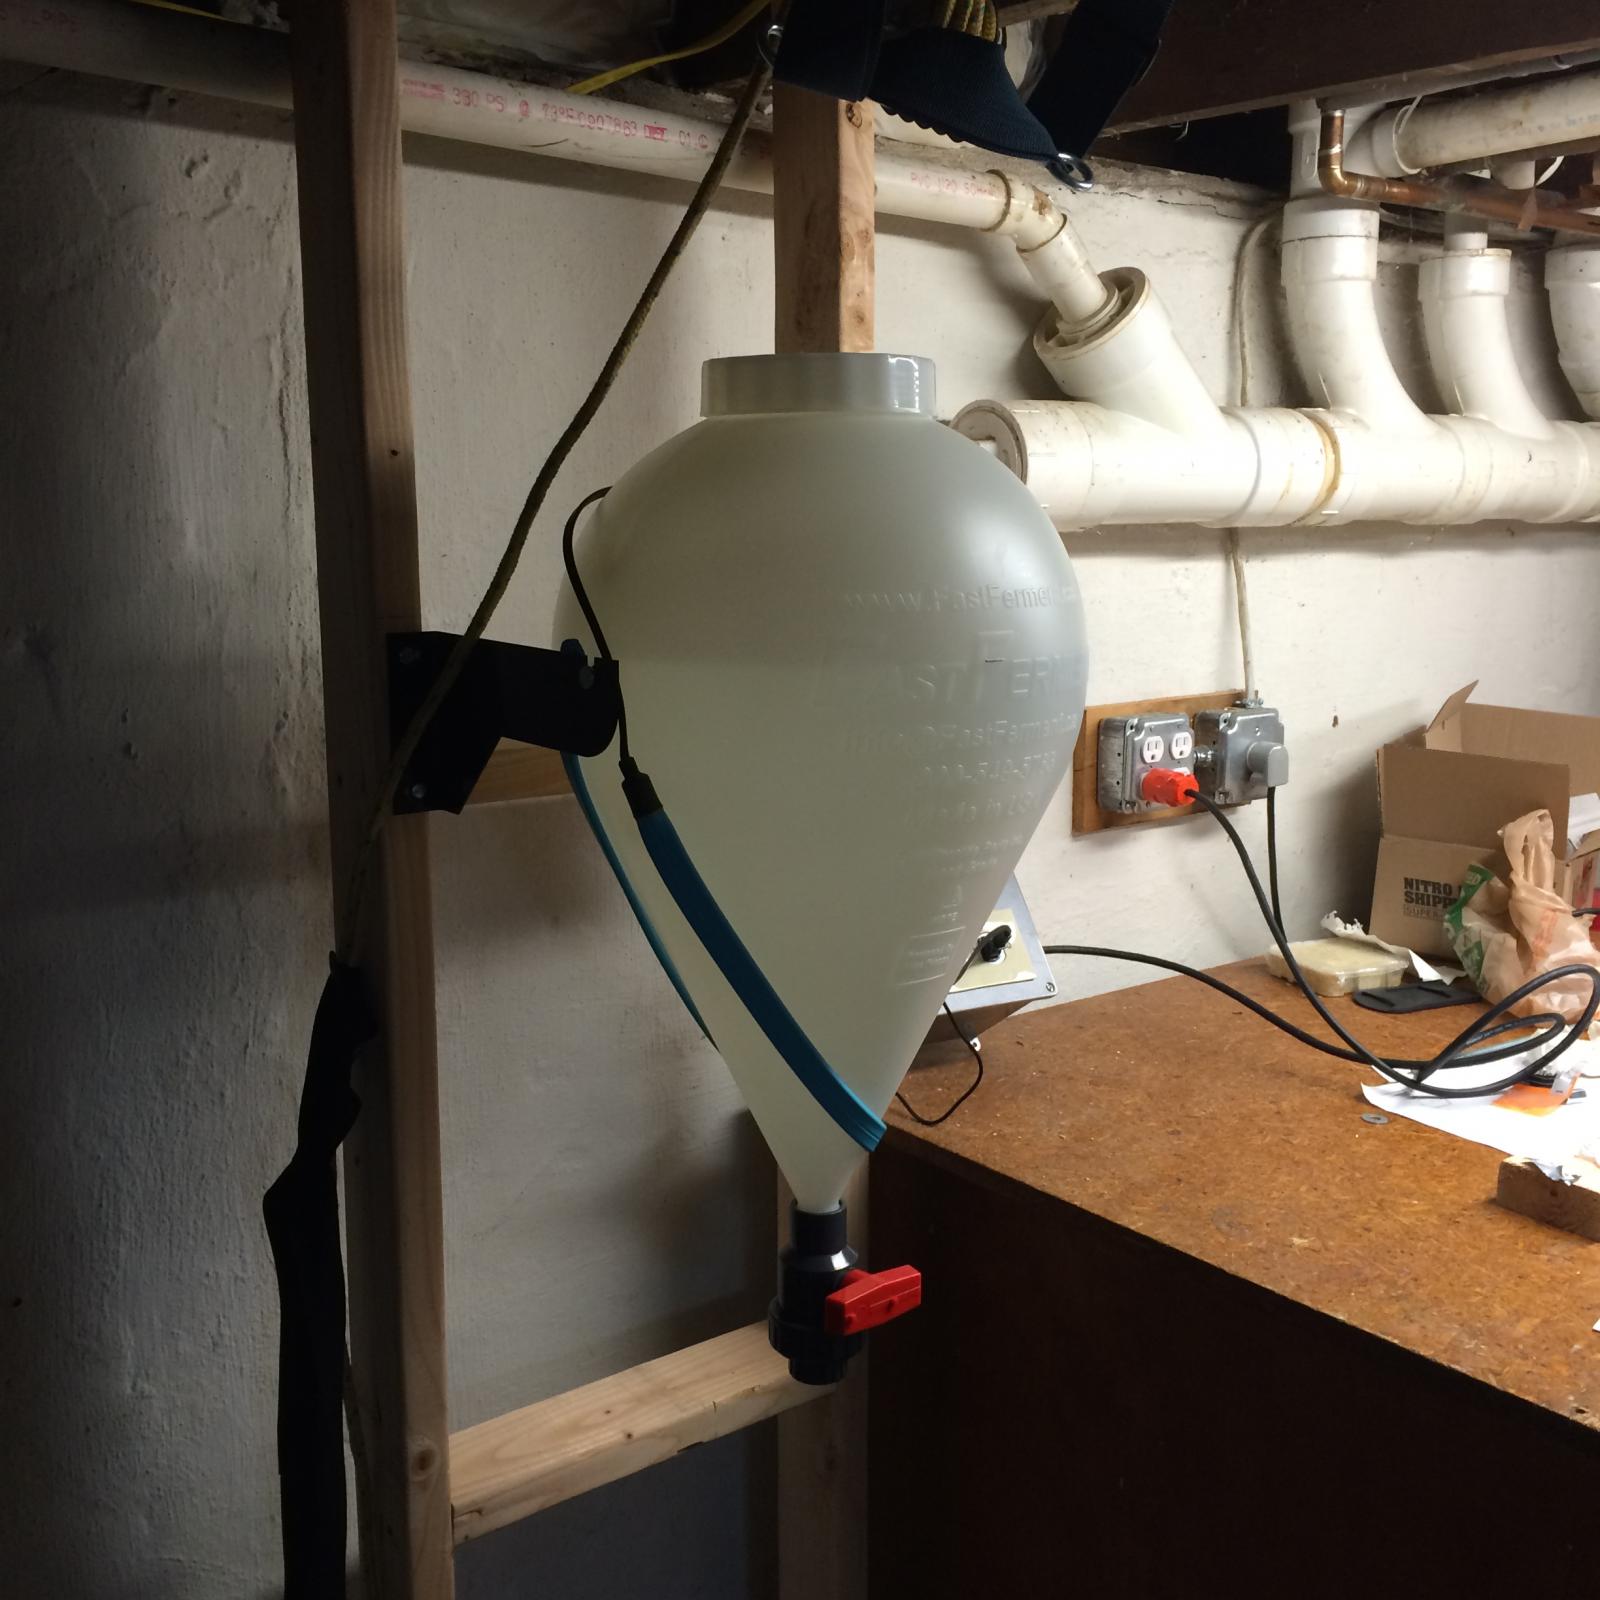
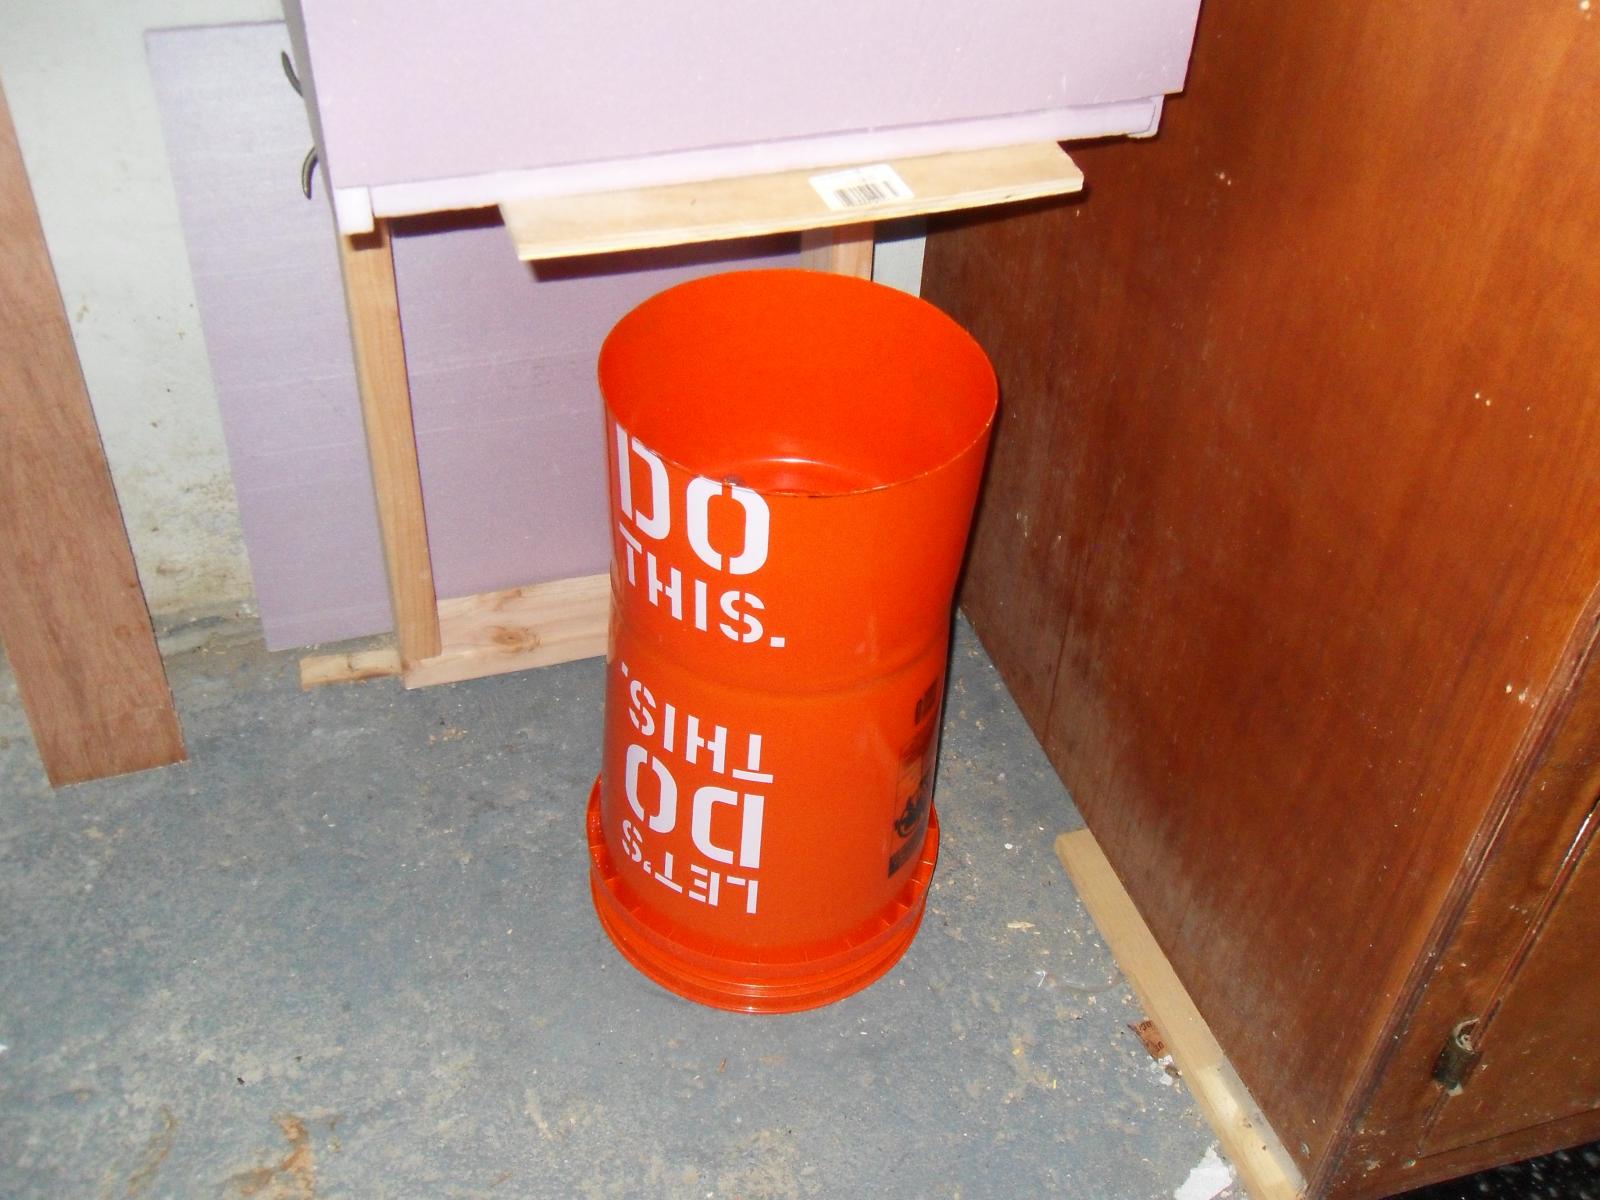
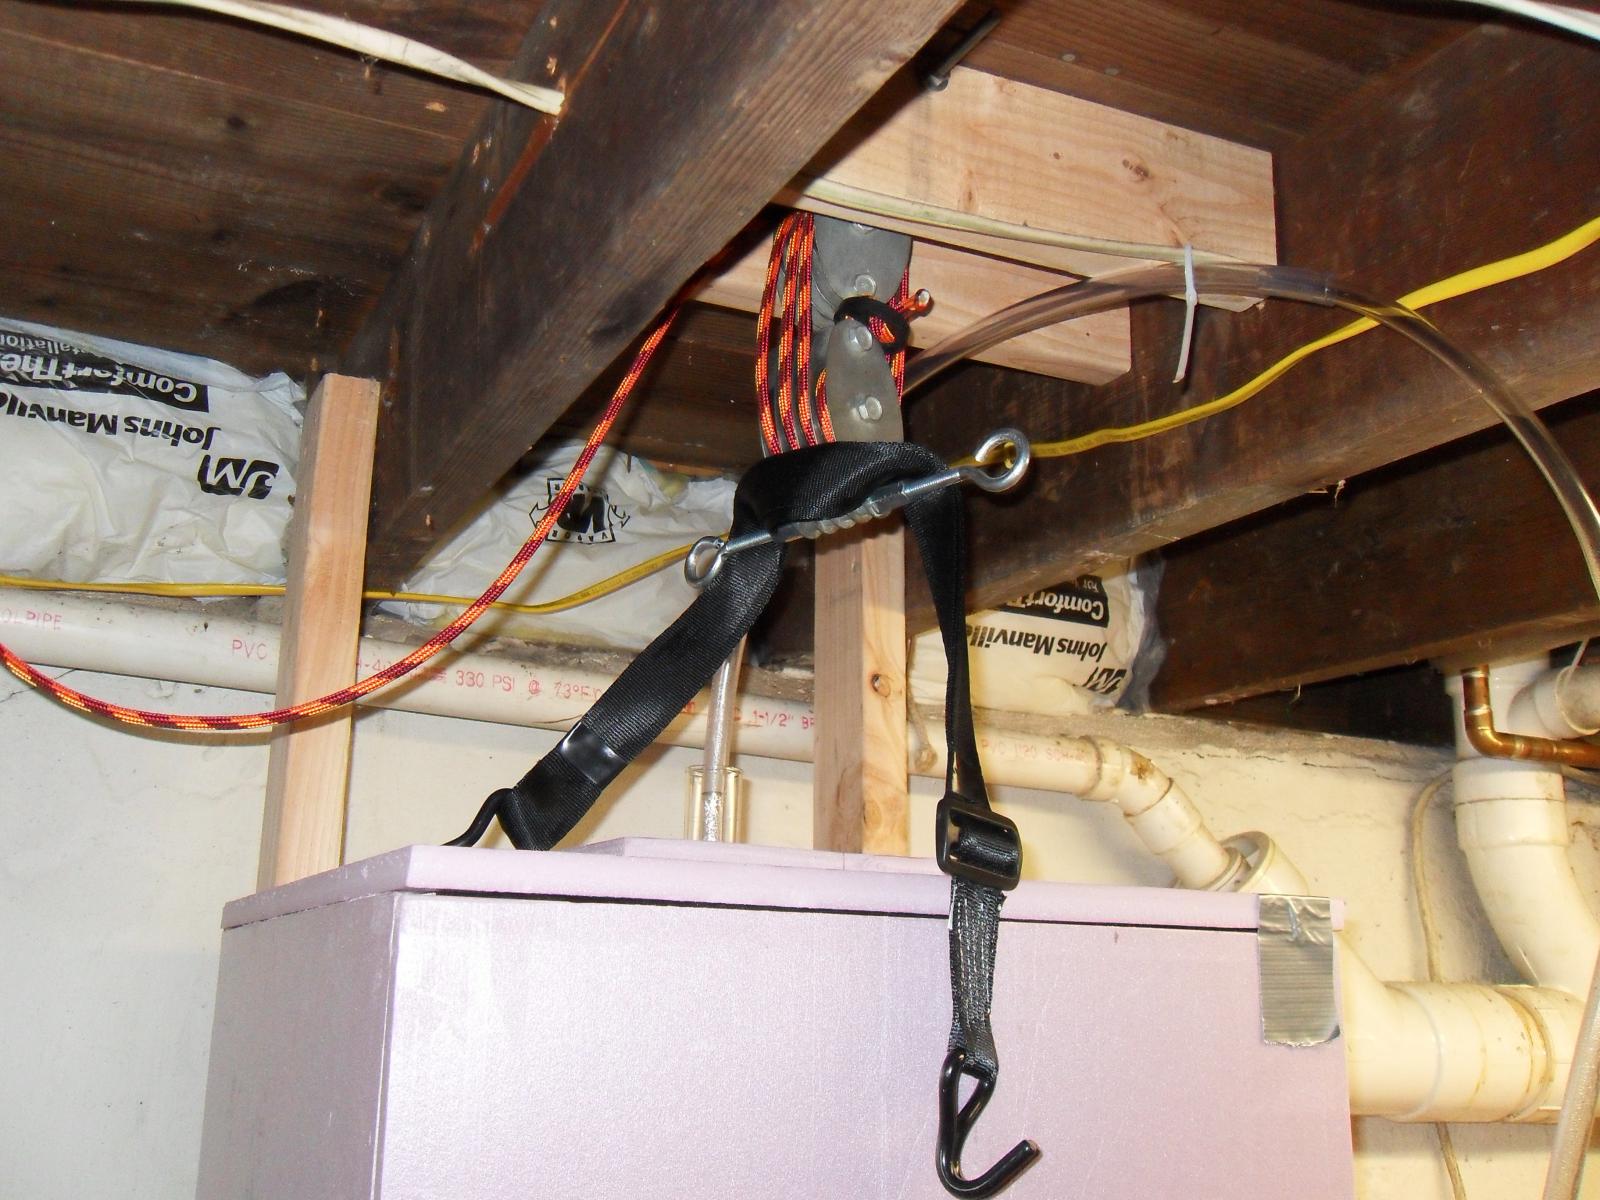
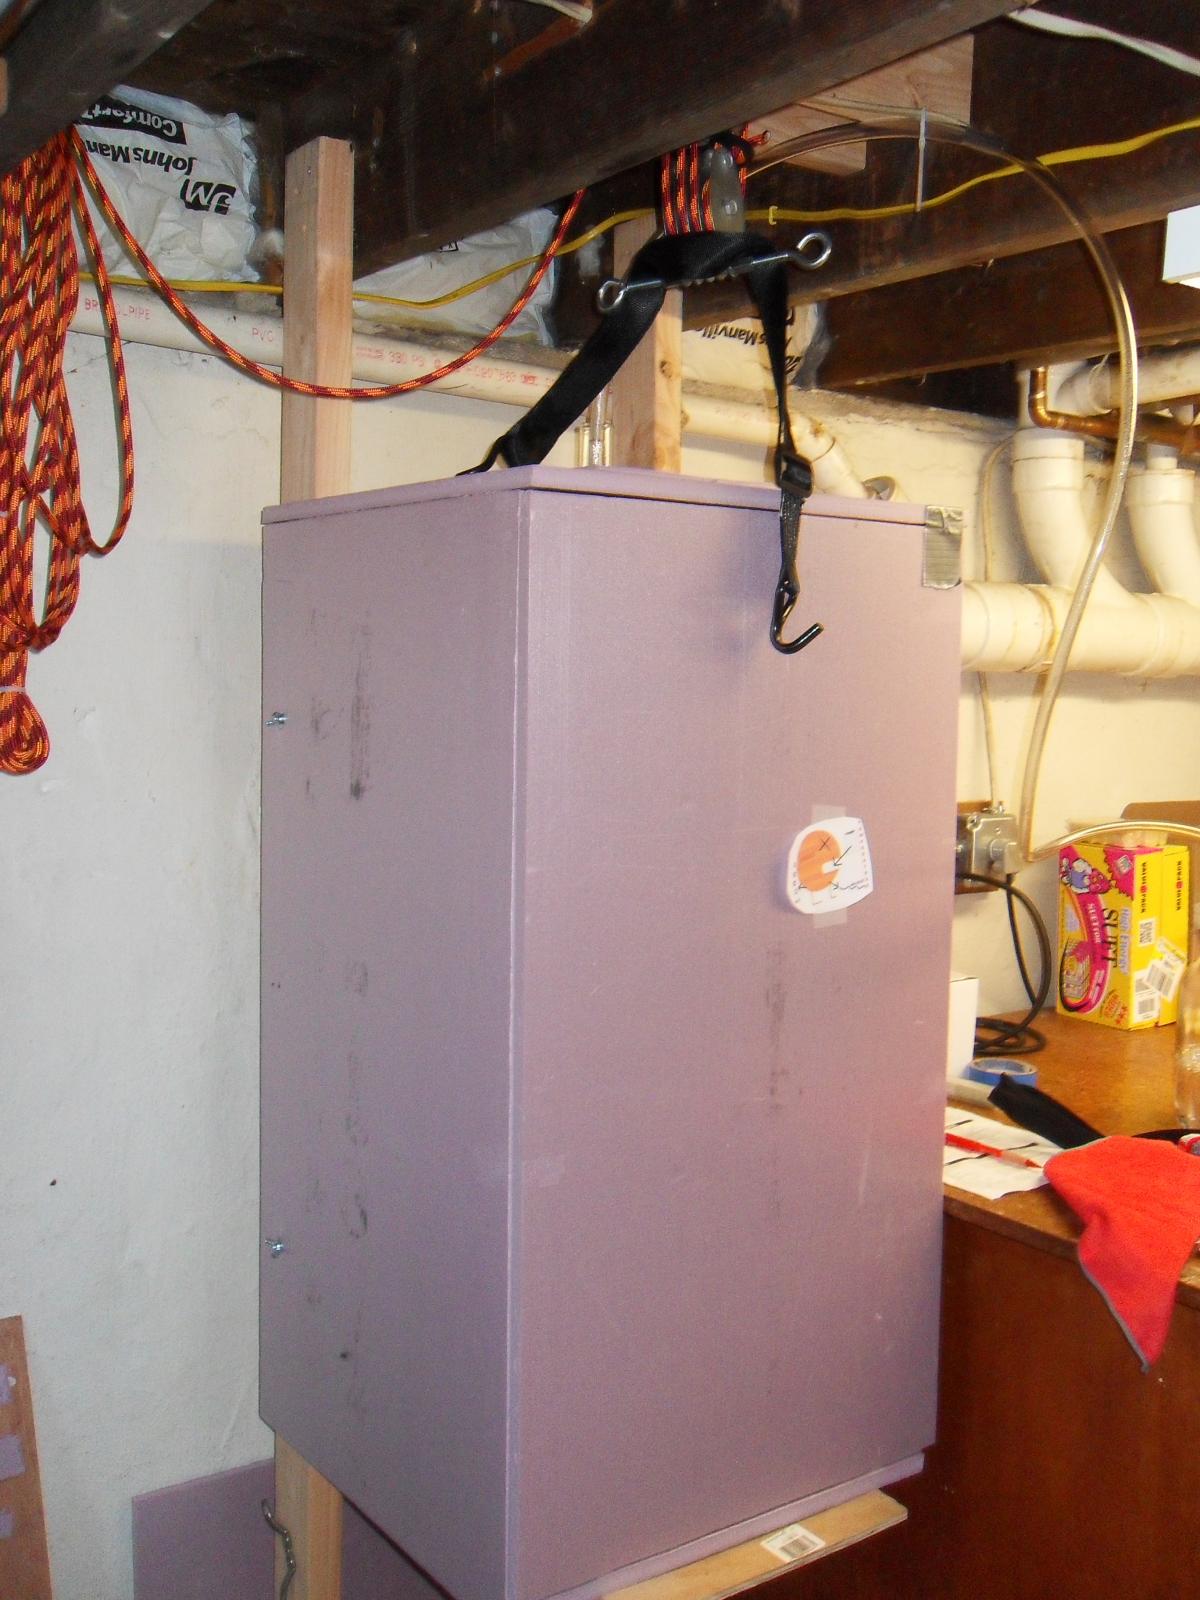
To raise and lower my FF, I used a old hoist I got from Home Depot. When its down it sits on two buckets I put together.

IMG_0777.jpg


SDC13897.jpg


SDC13898.jpg


SDC13899.jpg
 
apezz - It is obvious to me now that the FF arrived, but until then I was really scratching my head. Never having dealt with a thermowell before, I just didn't know it was sealed at the end....but now I'm shaking my head and grinning at the "Duh" of it all! :)
I like your insulating cabinet.....do you have a way to adjust the ambient temp inside it?
 
Yes, I have a brew belt around the conical pluged into a temperature controller.
 
US Plastics


Part #62287 Ball valve

Part #62240 1/2' to 1/4' Reducer Bushing

Part #27231 PVC ’T'

Part #27045 1.25“ Threaded PVC pipe nipple


Use teflon tape when connecting, I connected everything together THEN screwed it into the thermowell port on the FF


It is a bit bulky and all this could be avoided if FF would just offer an option for a second threaded port, but until then.


Great thanks!
 
Regarding the cleaning. Do you leave the thermowell in place? Or, do you disassemble the thermowell after each batch for cleaning?
 
Regarding the cleaning. Do you leave the thermowell in place? Or, do you disassemble the thermowell after each batch for cleaning?


I think cleaning after each batch is a must. There is a space between cavity that I noticed always hold buildup of wort/trub. I didn't after my first batch when I did pull it out when I started my third batch there was noticeable mold on the Teflon tape. Luckily my beer came out fine.
 
I think cleaning after each batch is a must. There is a space between cavity that I noticed always hold buildup of wort/trub. I didn't after my first batch when I did pull it out when I started my third batch there was noticeable mold on the Teflon tape. Luckily my beer came out fine.

There is a cavity on the inside around the thermowell where the plastic was molded for the threaded opening. And it is hard to clean inside that cavity. But I would try to limit the repeated removal and reattachment of the thermowell as much as possible. Once those plastic threads get bugger up, it's done.

Maybe remove it every 3rd or 4th batch? And use a tooth brush to clean inside the cavity in between removals?? Just don't use anything metallic or too abrasive.

:mug:
Understood, I took great care when installing the thermal well for the first time. I had my first batch fermenting now and will inspect that area closely while cleaning. Thanks for your insight
 
My LHBS actually has the conical ' set up on the wall. I know alot of buddies who swear by these things for both the clarity and lack of difficulty dealing with the trub.
 
Regarding the cleaning. Do you leave the thermowell in place? Or, do you disassemble the thermowell after each batch for cleaning?

I have been unscrewing the whole thermowell assembly and cleaning it, even soaking in strong PWC won't get the crud out, especially now that I have all the other corners and valves running through it. I do worry about stripping it though, and have been very careful.
 
gotbags - Not yet, but I plan to bottle from it. I've seen the youtube video about the small amount of sediment, but I think if I let it settle a bit before I actually bottle, and then dump that small amount of sediment out first, it would be ok. Only one way to find out!:mug:

apezz - Very cool on the heating. Do you have to do any cooling as well?
I'm hoping I won't have to do any cooling. The unit is in my basement, this is my first year of brewing and I haven't done anything in the summer yet. I don't believe it will get above 70 degrees in the hottest months.
Let us know how you do Bottling from the FastFerment. Will you be adding your priming sugar to the FastFerment?
 
Yeah I was thinking about going to a restaurant supply store and getting a big rubber spatula to stir the sugar with so I don't scratch it
 
There is a cavity on the inside around the thermowell where the plastic was molded for the threaded opening. And it is hard to clean inside that cavity. But I would try to limit the repeated removal and reattachment of the thermowell as much as possible. Once those plastic threads get bugger up, it's done.

Maybe remove it every 3rd or 4th batch? And use a tooth brush to clean inside the cavity in between removals?? Just don't use anything metallic or too abrasive.

:mug:

Not so sure that is a real issue. Or at least not a terminal issue. If those threads break, you could drill the hole out a little and use a but and an o-ring to secure the thermowell.
 
Not so sure that is a real issue. Or at least not a terminal issue. If those threads break, you could drill the hole out a little and use a but and an o-ring to secure the thermowell.

Then disregard and rip away.
 
Well, got my first batch in the FF. No leaks, and with the Harbor Freight hydraulic lift table, it was a snap to transfer my carboy's primary batch of Irish Red into the secondary, and even easier to load up the FF with Cream Ale.

I am now officially a 2-batch simultaneous brewer! :ban:

apezz- gotcha...I have mine in the kitchen, but I keep the house at a steady 65...hoping this will do the job.

gotbags - I'll let you know in a few weeks how it comes out.

Homercidal - WAY cool idea! I've used peltiers in several cooling applications at work. They get less efficient as the ambient temp goes up though, but you might be able to get up to a 15-25 degree drop . After that, you need colder air on the peltier heatsink fins to remove the heat. Fortunately, in this application, we wouldn't need much, usually. I don't think we could use it for lagering, but who knows? :mug:

Congrats! Looks like you're stocking up that homebrew supply line.

I may attempt my first back to back brew day tomorrow myself. Just completed a 3 tap keezer build and need to fill it up!
 
Cool beans! I've drooled over 'em.....But that'll have to wait for the big plunge into kegging.
But I'm with ya...nothing sadder than empty taps!
:mug:
 
Ok... I'm sold on the thermowell. In the past, I always kept the house at a decent ambient temp (65), and used the stick-on thermometers on my carboys. Now that my first batch is bubbling nicely in the FF, the house is still at 65 degrees, but the thermometer in the FF shows a wort temp of 74! A lot different than using the stick-ons, that's for sure. I've brewed this particular recipe before, and in the carboys, the stick-ons showed around 68-69 during the really active part of fermentation. I know there will be some variation from batch to batch, but this seems a fairly significant change.
A dunk of a sanitized brewing thermometer into the happily bubbling cream ale shows 73, so the FF thermometer isn't out of whack. Seems a little high, but I reckon if past brews have been good, then I should be ok. I just didn't have the temp data staring me in the face before! :D
 
Ok...mid-cycle update.
My cream ale was ready for secondary, so I put a plate under the ball, and closed the valve. Took the ball off, and boy, was it packed with trub! There was definitely yeast on the top, so it could have been harvested if I wanted to. But the trub inside was quite compacted, and I'm thinking there was more yeast up through the valve and in the bottom part of the fermenter, as it was milky all the way to the top of the ball when I took it off.
This being said, I'm thinking that there will definitely be more sediment when I'm ready to bottle, so if folks are thinking to bottle from the FastFerment, I'm thinking that you'll need to purge a little out of the bottom first into a bucket, as has been advised by others.
I didn't measure the ball volume ahead of time, so I had 5 1/2 gallons fermenting, and emptying the ball brought that down to about 5 1/4. I figure another empty of the ball, and the purge before bottling will put me right at 5 gallons.
The air bubbles when I put the ball back on and opened the valve were considerable. It bubbled up through the airlock enough to foam up the sanitizer in it. But no worries, I think...the CO2 in the fermenter should provide a protective layer from the oxygen sitting on top of it, and that will get pushed out by residual fermentation over a little time.
I'll have an update in about 2 weeks when I bottle!:mug:
 
I’m currently fermenting my first five gallon batch. It’s a West Coast IPA, lots of yummy hops. Last night it was time to drop the collection ball. I couldn’t get the union fitting apart with my hands only. I ended up using a large pair of channel locks on the screw while holding the valve with my other hand. That did the trick, but I wasn’t expecting that. Also like many others have written about the o-ring from the top of the union valve came off. No big deal.
The collection ball was filled with sediment just like I hoped. The sediment in the collection ball was really thick with almost a peanut butter consistency.
So using warm water I got the collection ball and o-ring cleaned and then sanitized them. I have co2 so I purged the collection ball with it and reattached it to the FF. Now to turn open the valve and watch the large bubbles flow to the top. Here we go… Nothing.
I can see a line of what must be more of this thick sediment sitting in the bottom of the conical, like 4-5 inches of it. This was a serious clog. To me there’s no way any air bubble from the collection ball will penetrate that load. I tapped the bottom of the conical to see if I could get the sediment to flow into the collection ball but it didn’t budge. I ended up sanitizing a long plastic stick and from the top of the conical pushed through the sediment. Eventually the collection ball did fill.
I’ve since read on this forum that if I just leave it alone in a few days gravity will eventually pull the sediment down into the collection ball. I just wasn't sure what to do. So I gave it a poke.
Bottling in one week and i'm sure I'll use a bottling bucket at least the first time.

:smack:
 
Yup, I hear ya. I was lucky the first time, and did the cream ale. I think if I had done an IPA, I'd have been in the same boat with a lot more sediment.
I'm also bottling next week. I'm gonna try from the FF. I ordered a 1/2" spring loaded bottler wand that's coming in the end of this week, so I oughta be ready to go. I'll let you know how it goes.
 
I'm not crazy about having to pay $10 for the gaskets either but I'm hoping they solve the problem.

A few pics of my setup:

The tilt stand I made, allows me to tip the fermenter enough to direct fill it from the counterflow chiller mounted under my bench
TiltStand.jpg

The ferm chamber I made, still need to add more insulation to the back wall
Chamber.jpg

And my electric brewery
ElectricBrew1.jpg
 
Has anybody purchased and used the new gaskets yet ? If so, did they work OK ? Personally, I have been using teflon tape on the threads where the lid attaches for the past few batches but would like to get away from doing that and just being able to use gaskets.
 
Nice Setup, preamble!

pauld315 - Not yet, I just received the new gasket myself, but I'm in the middle of a batch. I'll let you know how it works. It's a lot thicker, and looks to be made of silicon rubber.
 
Has anybody purchased and used the new gaskets yet ? If so, did they work OK ? Personally, I have been using teflon tape on the threads where the lid attaches for the past few batches but would like to get away from doing that and just being able to use gaskets.
I received my new gaskets but but since I have something already fermenting I've yet to try them. Luckily i was able to get the original gasket to seal, but I really had to crank down on the lid to make that happen. The new ones are much softer and thicker and since I was able to get a seal with the original gasket I'm assume the new ones will work. Lets brew some more and find out...
 
I have had excellent seals using two of the old foam gaskets going on first ( touching the lid) and then one of the new silicone gaskets going in second, touching the foam gaskets and sealing on the lip of the opening. The new gaskets work great
 
I just got mine. Having just moved recently, none of my brewing stuff is unpacked yet, so I haven't had a chance to try mine out. I only got the original collection ball, but I'm starting to wonder if I should have gotten a second one... How many of you bought the second one and was it worth the extra $$?
 
I just got mine. Having just moved recently, none of my brewing stuff is unpacked yet, so I haven't had a chance to try mine out. I only got the original collection ball, but I'm starting to wonder if I should have gotten a second one... How many of you bought the second one and was it worth the extra $$?

They shipped an extra collection ball with each of mine because of the delay in the order. So far I have had no need for them.
 
I just got mine. Having just moved recently, none of my brewing stuff is unpacked yet, so I haven't had a chance to try mine out. I only got the original collection ball, but I'm starting to wonder if I should have gotten a second one... How many of you bought the second one and was it worth the extra $$?

I have 2 units and I haven't had them both full so I have an extra handy. Having said that I couldn't readily locate the ball on my empty when I dumped so I just gave it a quick wash and dunk in star san and used the same one. If you are harvesting the yeast it could be handy though. I haven't put much thought into harvesting yet but I'm thinking I'd get the most usable yeast on the second ball dump anyway.
 
I have 2 units and I haven't had them both full so I have an extra handy. Having said that I couldn't readily locate the ball on my empty when I dumped so I just gave it a quick wash and dunk in star san and used the same one. If you are harvesting the yeast it could be handy though. I haven't put much thought into harvesting yet but I'm thinking I'd get the most usable yeast on the second ball dump anyway.

Harvesting is exactly why I am thinking I should have gotten the extra one. Until I use it the first time though, I really won't know. I plan on dumping the trub before I pitch my yeast so that I get a full clean yeast drop. Then if I want to dry hop, I can pull all the yeast off before I add them. :rockin:
 
I picked up an extra ball just on the "crap breaks" rule. I haven't used it yet - first batch in the FF. When I emptied the trub at the end of active fermentation, there was a good layer of yeast bubbling in the top of the ball. I expect that if you emptied the trub out in the first couple of days, you'd get a nice batch of yeast in there.
 
Ok...I just bottled my first batch from the FF. And started a new batch with the new seal. Here's my observations.
Emptying the ball the second time before bottling yielded a good layer of yeast in the bottom, covered with a good layer of beer. No trub to speak of, after I had emptied it the first time at the end of active fermentation.

I didn't attempt to stir in the priming sugar. I wussed out and used fizz drops. After it was all said and done I was glad I did. I bottled directly from the FF, and although the cream ale was good and clear, there was a bit of sediment clinging to the sides of the conical. If I had stirred in the priming sugar, it would have suspended all of that remaining sediment, and really clouded up the beer. It would have settled in the bottles, of course, but I wonder if it would have affected the taste any. In any case, next time I'll use the bottling bucket to save the expense of the fizz drops.

Cleaning was a breeze! Hot dog! I just used my sink sprayer with hot water to wash it out, followed by star san, inside and through the valve. The ball, I soaked in star san after rinsing it well. Easy cleaning!

The new batch of TC and Bearcat wheat went into the FF, and I put on the new seal. I set the old seal aside, and used no teflon tape on the threads. Today, it's bubbling happily, so the seal looks to be working very well. I didn't crank down on the lid really, either. The new seal is quite thick and pliable...good choice. I'd recommend getting it to save the hassles of trying to seal with the original. Not a lot of expense, and worth it, IMHO.

As an aside...the fizz drops...Holy Moley! Just out of curiosity, I cracked open one of the bottles after aging only 3 days. Full carbonation! The beer was a little raw still. It needed to age in the bottle a bit. But the carbonation was there, and the fizz drop was completely dissolved. I'd try them again. The expense is prohibitive, but the results, at least in my case, were good.

Hope this gives some data to those wondering. Your results may be different of course, but some data is better than no data! :D

Cheers!:mug:
Waw
 
Back
Top