• Please visit and share your knowledge at our sister communities:
  • If you have not, please join our official Homebrewing Facebook Group!

    Homebrewing Facebook Group

Easy Stovetop All-Grain Brewing (with pics)

Homebrew Talk

Help Support Homebrew Talk:

This site may earn a commission from merchant affiliate links, including eBay, Amazon, and others.
I was targeting an OG of 1.064 and ended up with 1.065. If I am using (and reading) Pro Mash properly I ended up achieving 85% efficiency. So unless I am dead-wrong (which is quite probable) it seems one does not necessarily need to sacrifice efficiency using your all-grain stove-top process. Good news!

Cheers! :mug:

DSC_0034.JPG

I get on average about 75%, and have reached up to 80% before (85 seems really high). SParging adds another 10% probably, and my addition of 5.2 stabilizer keeps my efficiency in the mid 70's.
 
I get on average about 75%, and have reached up to 80% before (85 seems really high). SParging adds another 10% probably, and my addition of 5.2 stabilizer keeps my efficiency in the mid 70's.

Maybe I just don't know how to read this. I think I have the recipe plugged in properly. But again, this is my first time using Pro Mash and I am not exactly certain.
Efficiency_Calculation.png
 
Excellent that your stovetop can handle that big of a boil... it's a good stove!

The best mine can do and remain "vigorous" is about 3 gal. :(
 
I used Pro Mash for the first time so I could calculate water volumes and track my efficiency at the end of the brew session. I was targeting an OG of 1.064 and ended up with 1.065. If I am using (and reading) Pro Mash properly I ended up achieving 85% efficiency. So unless I am dead-wrong (which is quite probable) it seems one does not necessarily need to sacrifice efficiency using your all-grain stove-top process. Good news!

Cheers! :mug:

DSC_0034.JPG

So I was messing around with BeerSmith today and plugged in my recipe. I am a bit more familiar with BeerSmith and actually prefer it over Pro Mash which I was using for the first time. BeerSmith estimated the SG of my recipe to be 1.066 at 70% efficiency. It seems more likely that my efficiency was probably about 70%. I could see probably getting up to 75% if I tweaked a few things. However, I doubt seriously that the 85% I thought I had achieved is very probable using this method on my stove-top.
 
Not always true... You can overpitch if you use way too much yeast, or far more than recommended via Mr. Malty (like 1.5x+ their recommendations)... But, most of us find that what we're pitching in doesn't come close to that. Most of the time we're trying to get at least up to the recommended cell count...

I wouldn't pitch a full pack of yeast into a 1 gallon batch with an OG of <1.020. Well, except for when making a starter, but you're not going to drink THAT... Right? :eek:


So if I were to pitch a whole packet of liquid into a 2.5-3 gallon wort, would I have any overpitching issues?
 
There's no reason not to move to all-grain using the method described in this thread...

All-grain is more work. There is more that can go wrong, it takes longer, and you can get a less-consistent result until you fine-tune your process. You also have more trub loss.

That being said, the cost is lower, and you have more control over the end product. So, all-grain has advantages.

You're right, though -- if you've been thinking of doing all-grain, there's no reason not to try it. :mug:
 
What do you do different when you use you're burner to get a higher effeciency?

I don't know if that's really a fact. I think the sparge gives you better efficiency, but I don't think anyone has claimed higher efficiency from using the burner. What you want to do is keep it on low, and stir A LOT. This will help you maintain temp, but I wouldn't guarantee a higher efficiency. A more robust profile maybe, but a higher efficiency, I haven't seen 'proof' of it.

Also, to maintain temp, some people throw the mash tun in a heated oven.
 
I just used this method for the second time. I'm only doing 2.5-3 gallon batches. This way I get to brew more often, and thus try making more styles of beer (and if I end up with something that I don't like then it doesn't take as long to drink it). Now that I'm more comfortable with the basic stove-top process, and have recently acquired a refractometer with which to measure the specific gravity before/during/after the boil, I can comment on the efficiency of this setup.

Today I hit 78.6%! I figured it would be more like 60-70%, tops.

I did add a bit of an extra step though, which may or may not yield significant improvements in efficiency. After the 10-minute teabag-like "steep" of the grain bag in the sparge water, I then put my grain bag in a wire mesh collander spanning the top of my boil pot, and slowly poured the same sparge water back through the grain bed. I figured this would help me extract some more sugars, and would somewhat simulate what people do with those more expensive, complex setups using coolers and manifolds, etc. I just used a quart-sized pyrex measuring cup for this, and poured it slowly quart by quart. The other reason I did this is that I was worried about really stirring up the grains in the "steeping" step, since supposedly this yields extraction of tannins, which can cause bitterness/off-flavors in the beer.

I did a "mash out" step prior to the sparge as well, so this may have slightly boosted efficiency. It's such an easy extra thing to do on the stove top.

Even with these extra efforts, the entire brewing process still just took about 5 hrs, including initial cleaning/sanitizing, and cleanup afterwards. I'm loving the stovetop all grain life! :rockin:
 
What do you do different when you use you're burner to get a higher effeciency?

If your bag cannot fit your pot inside you will suffer from lower efficiency. A smaller bag will restrict the amount of water that contacts your grain.

I am loosely quoting a wise biab sage on the aussie forums.

Your sack may be plenty big. and you may have another problem thats hurting your efficiency.
 
What do you do different when you use you're burner to get a higher effeciency?

One possible scenario: If your stovetop burner cannot handle boiling ~7 gallons of wort, then you cannot use as much water and you will suffer loss in efficiency. More water during your mash and/or sparge can result in higher efficiency, depending on process.

I would like to note again, though, that over-sparging can result in tannin extraction so find what works best for your system.

For me, I only have a 5.5 gallon kettle, when you consider that water expands in volume when heated, there really is only about 5-5.25 gallons boiling. I sparge with an extra gallon or so. I say extra because it is more than my kettle can hold, but is not any more water than I'd sparge with if I had a bigger kettle. Once I start my boil, I put the extra wort into a smaller kettle and bring it to a slow boil. It still boils for the same time, but I add it into the bigger kettle throughout the first 30-60 minutes. This lets me get closer to 5 gallons at the end.

And I stir when I sparge and don't notice any more tannins. I only sparge for 10 minutes though, and don't run the water through again.
 
Tannin extraction is often due to a combination of high sparge temperatures (above 168°F for the actual mash temp) and too much water. Some people actually record their run-off gravity and shut it off if it gets too low. That won't work with this method, however.

I generally go to about 6 gallons when using this method, adjust my hops up a bit to account for that (beersmith works ok for calculating IBUs if you account for the boil amount) and top off with water at the end to my usual 5.5 gallons.
 
I have had a question after my first time doing this method. I had a lot of trouble lifting the grain bag out to drain it. The angle was really strange, and that bag is pretty heavey.

Any advice on how to make it easier? Could I use 2 bags? I ended up just lifting it out and draining in another container mostly.

BTW I got close to 80% efficiency I think on my first try. I don't have a reliable way to measure the volume on my pot, but my best guess put me at about 78%.

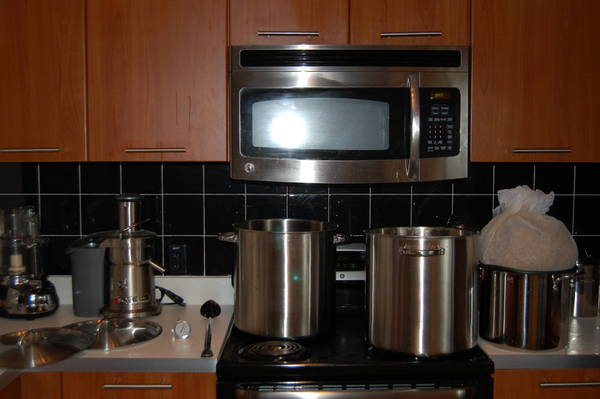
You may want to pull your pot off the stove and place it on the floor or on a stool before you lift the grain bag out. I use a third pot to actually drain my grains after the "sparge" (or this variation of one). You can see how I use a third pot with a colander in the photo below.

Volume can easily be calculated using a tape measure if you have no other means. The formula for calculating the volume of a cylinder is:

pi * radius2 * height = volume (using inches, this formula will give you a value in cubic inches) Here is a good calculator.

Once you have a value in cubic inches, you can convert cubic inches to gallons using the following conversion: 231 cubic inches = 1 US gal.

DSC_00371.JPG
 
I've been using this method for sometime now, and I wanted chime in and say that I've recently built a heat stick, and this reduced my brew session by about an hour. It's something to try out if you're comfortable with the idea of a heat stick.
 
I've been using this method for sometime now, and I wanted chime in and say that I've recently built a heat stick, and this reduced my brew session by about an hour. It's something to try out if you're comfortable with the idea of a heat stick.

I feel compelled to chime in and give some sort of safety warning. A heat stick requires you to put electrical equipment in water, this can be very dangerous if you are not comfortable building electronics and keeping it waterproof.
 
I feel compelled to chime in and give some sort of safety warning. A heat stick requires you to put electrical equipment in water, this can be very dangerous if you are not comfortable building electronics and keeping it waterproof.

Yep yep, diy at your own risk. Just sayin that most people in this thread are gonna be doing their heating on a stove and this little addition could save quite a bit of time. My first brew day with a heatstick took 3 hours.
 
Yep yep, diy at your own risk. Just sayin that most people in this thread are gonna be doing their heating on a stove and this little addition could save quite a bit of time. My first brew day with a heatstick took 3 hours.
The addition of a heatstick to my stove top brewing was the best thing I did to speed up my brew day.
 
I have had a question after my first time doing this method. I had a lot of trouble lifting the grain bag out to drain it. The angle was really strange, and that bag is pretty heavey.

Any advice on how to make it easier? Could I use 2 bags? I ended up just lifting it out and draining in another container mostly.

BTW I got close to 80% efficiency I think on my first try. I don't have a reliable way to measure the volume on my pot, but my best guess put me at about 78%.

Draining into another container and adding back is fine. I also used to let the last bit drain in a bowl while I added the extract and then added that little bit to the mix to get the most out of the grain.

I have a big colander that works wonders...then I can just set it on top of a pot or bucket and let 'er drain.
 
i have been looking all over for a colander big enough, but haven't found one yet.

I like the idea of putting the pot on the ground to get some more leverage on holding the bag. only thing i would be worried about would be spilling when i'm moving it to the floor. And burning my floor, but I think a few folded towels under neath would do the trick.


I probably will just drain for a few seconds to get the bulk at first, then put the bag in a spare pot.
 
Drain the bulk of it and then even a small plastic strainer (just to keep it off the bottom) inside an additional pot or bucket will allow it to drain.

Yeah i need to find away to keep it off the bottom. I was using a little pail that I generally have star-san in, but it was sitting in the liquid run off, so I doubt I got as much out of it as I could.

To be honest though I am not going to put too much more effort into upgrading the process. Your method is simple and effective, and I thought that living in my small studio apartment that AG was more or less out of the question. I love looking through peoples photos of their 3-tier set ups, and being jealous, but knowing that I am doing basically the same process in my small kitchen
 
A bit of loss in efficiency is no biggie, just add a bit more base grain. You're saving money overall even without a great efficiency.
 

Latest posts

Back
Top