drinkerofpints
Member
Im doing a sessionable red ale at around 4.9 abv and also a not so sessionable RIS at around 11.2 abv. I cant wait! 

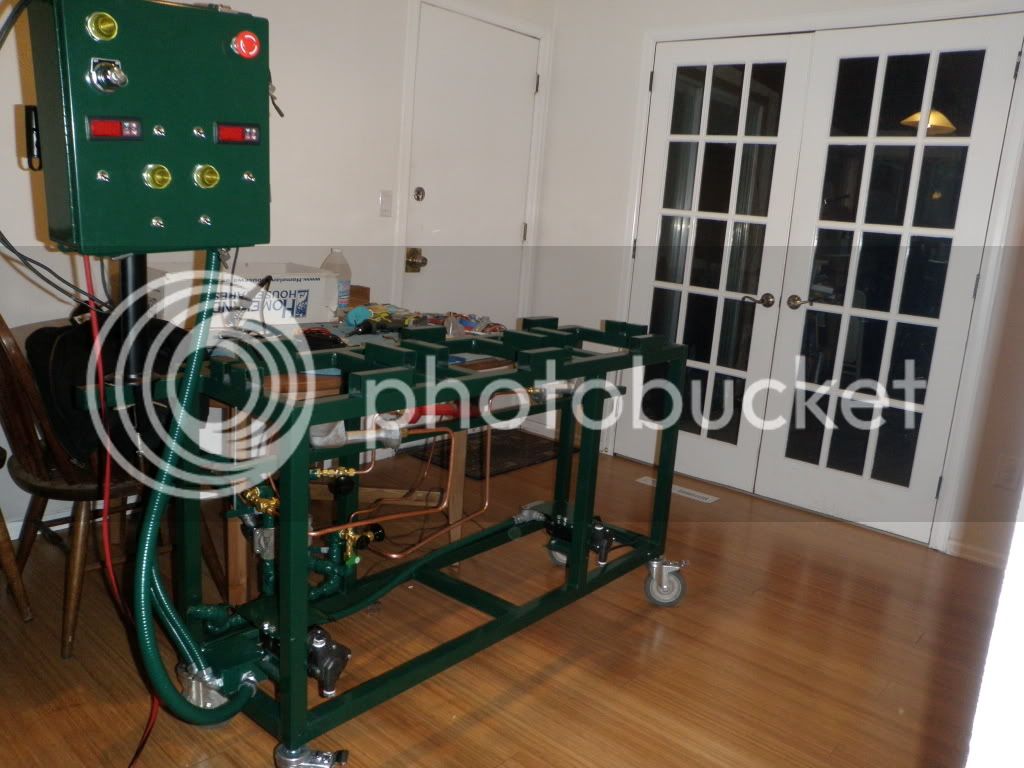
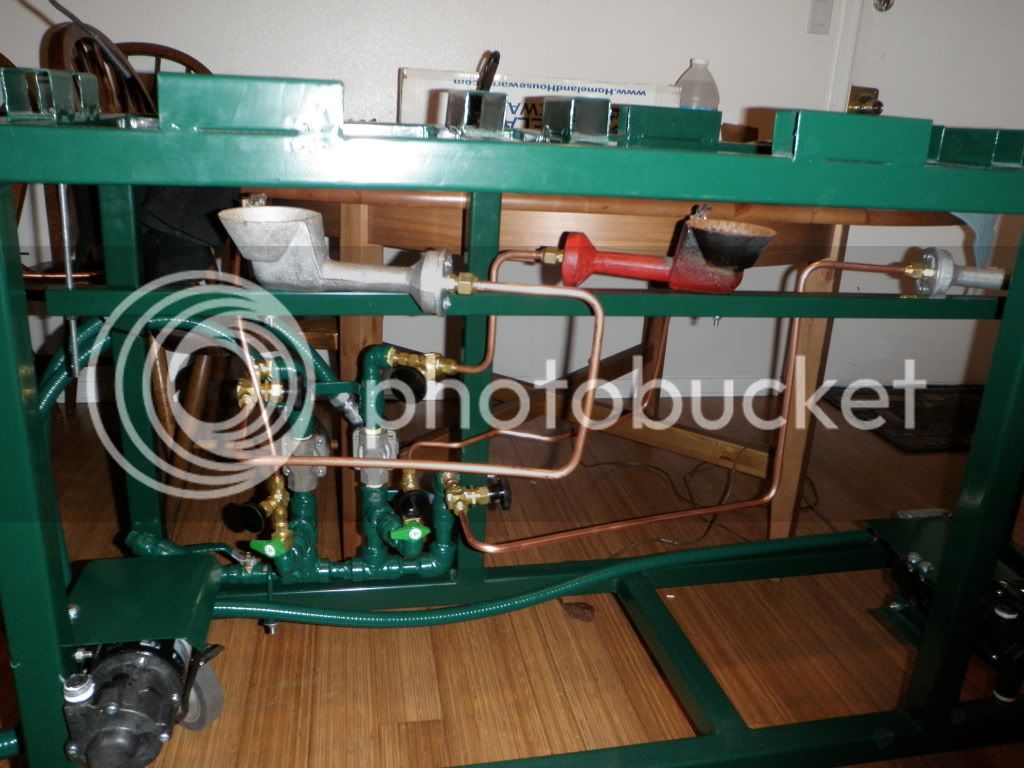
I have NOT finished her yet - she still needs A LOT of paint. The infrastructure will be red. The propane burner support and conduit will be yellow. The control panel and pump shields will be green. The "heat sink" blocks will just be some black BBQ paint.
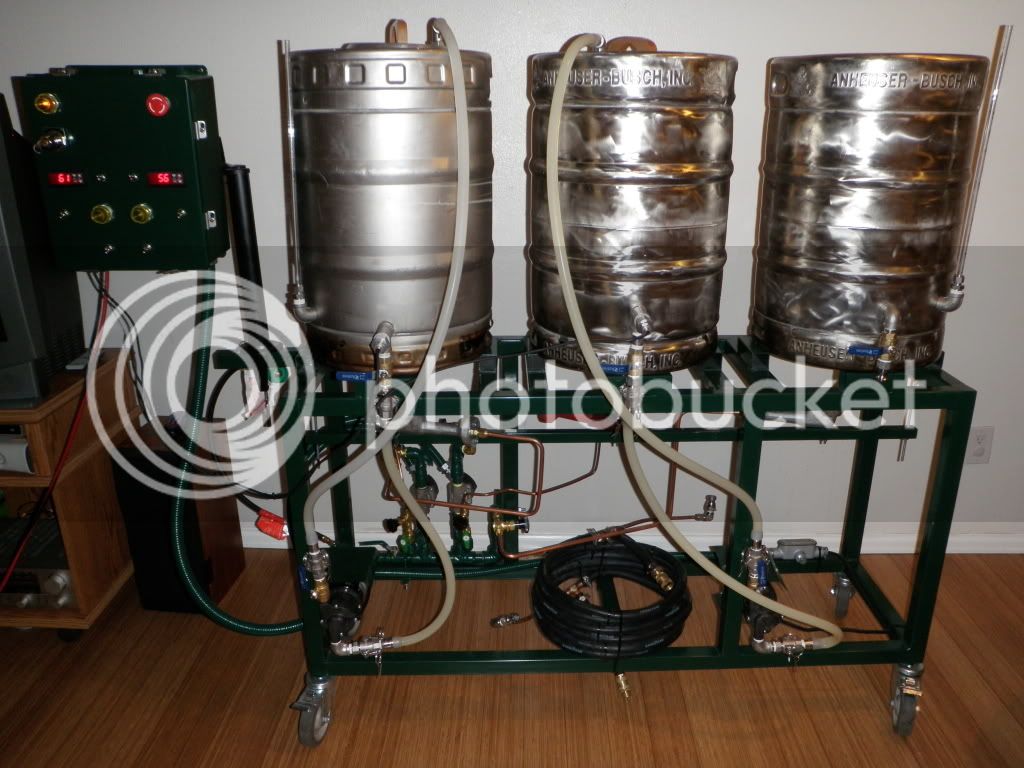
Awesome rig! One question, the two kegs on the right... what did you use to clean them up like that? Bobby M's approach? Something else?
Thanks!
Im doing a sessionable red ale at around 4.9 abv and also a not so sessionable RIS at around 11.2 abv. I cant wait!


 Looks great!!
I wish I knew how to weld. That looks great. I pretty much want exactly that just electric instead of gas and plate chiller instead of counter-flow chiller.
If you ever want to travel to RI and build one of them for me, I'll pay in beer and food (oh and obviously pay for material) hahahaha
EarthBound said:Thanks. It was a really cool project. I bought a HH140 without knowing how to MIG weld. It was fun and easy to learn it.
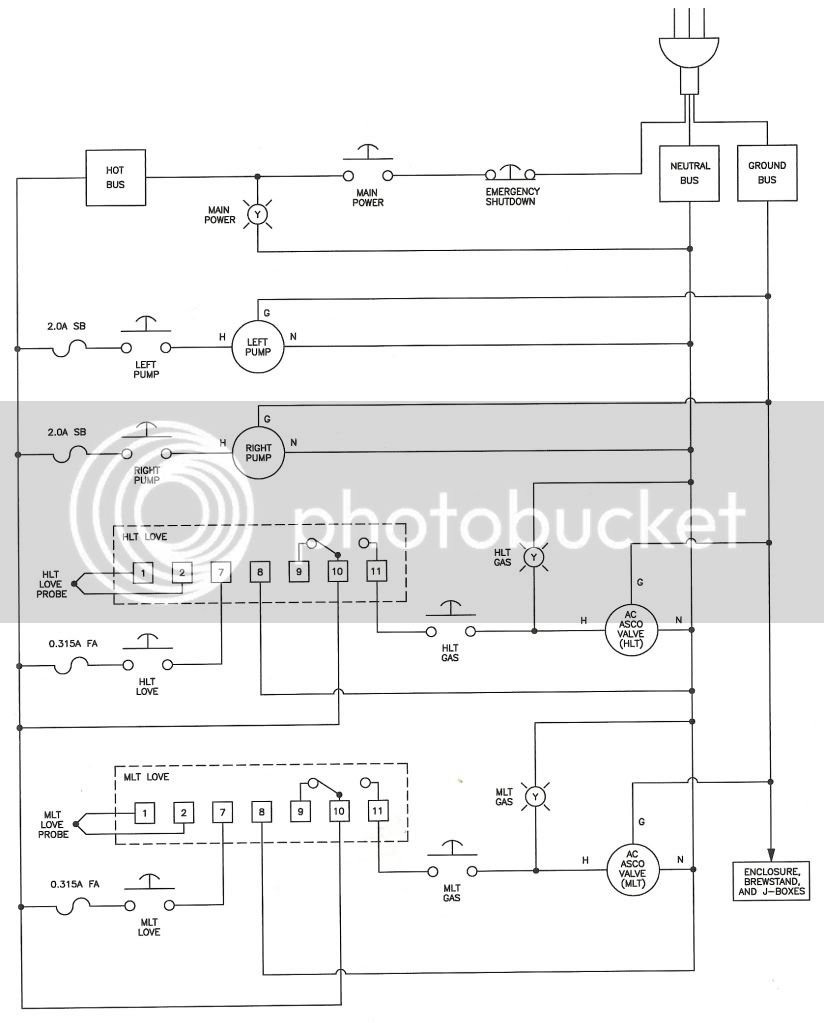
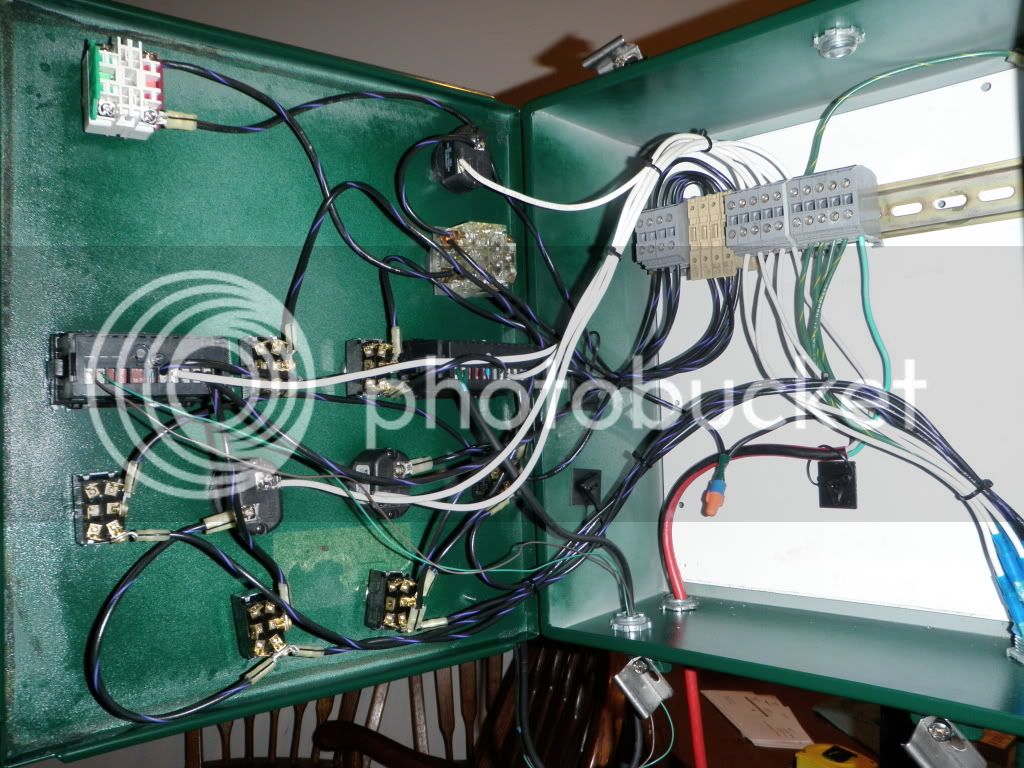
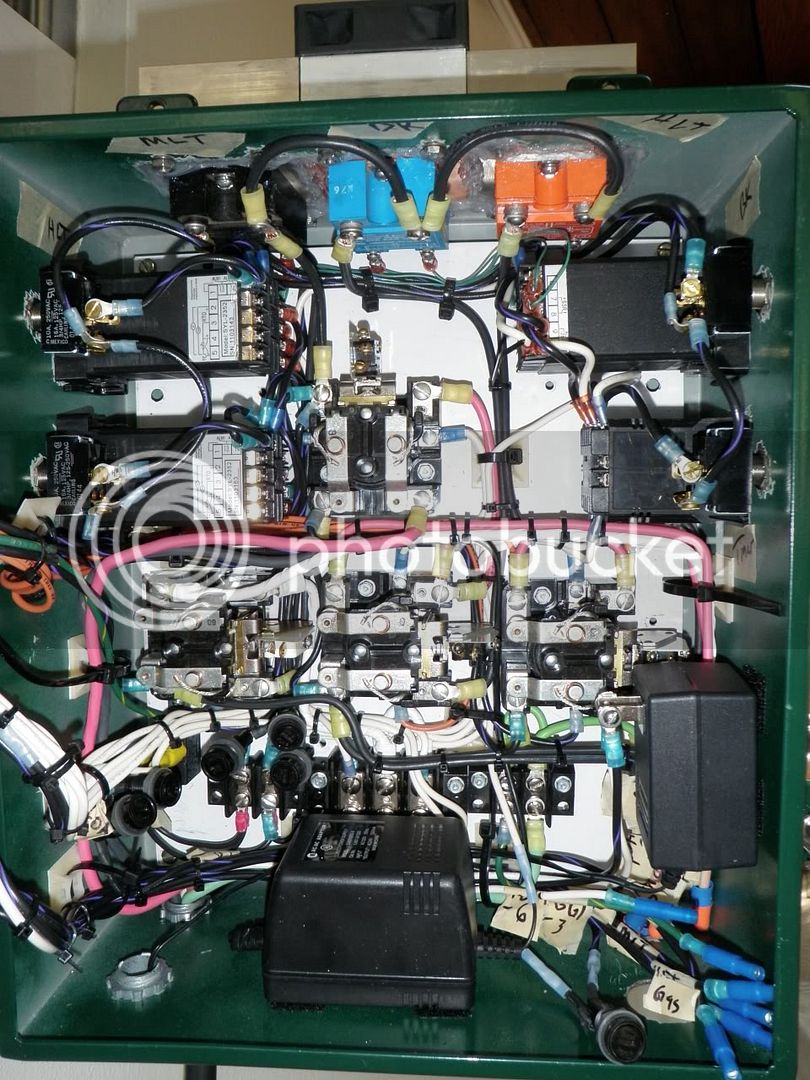
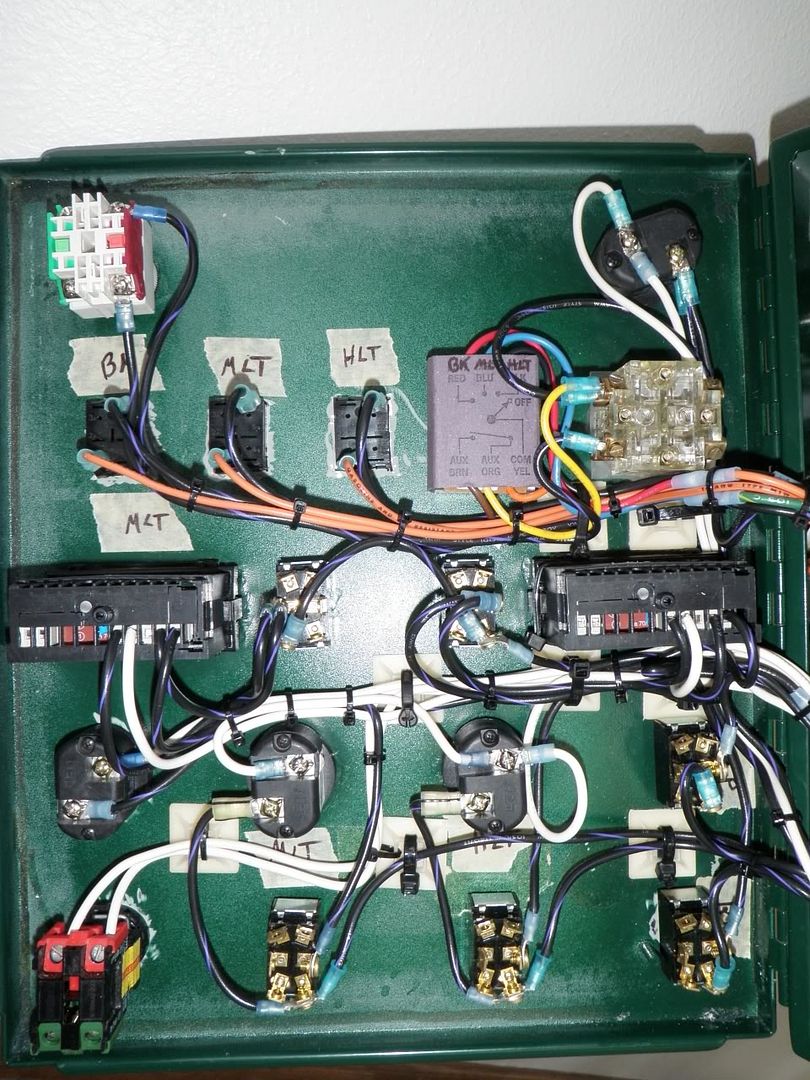
I'll making a couple batches this weekend via HERMS (for my first time). After that, I'll be doing those upgrades I mentioned. I already have all the parts. I posted the schematic for it all in a thread I made in the electric brewing forum.


It's like science fiction.


![Craft A Brew - Safale BE-256 Yeast - Fermentis - Belgian Ale Dry Yeast - For Belgian & Strong Ales - Ingredients for Home Brewing - Beer Making Supplies - [3 Pack]](https://m.media-amazon.com/images/I/51bcKEwQmWL._SL500_.jpg)


