
Brewntang
Active Member
Hey y'all!
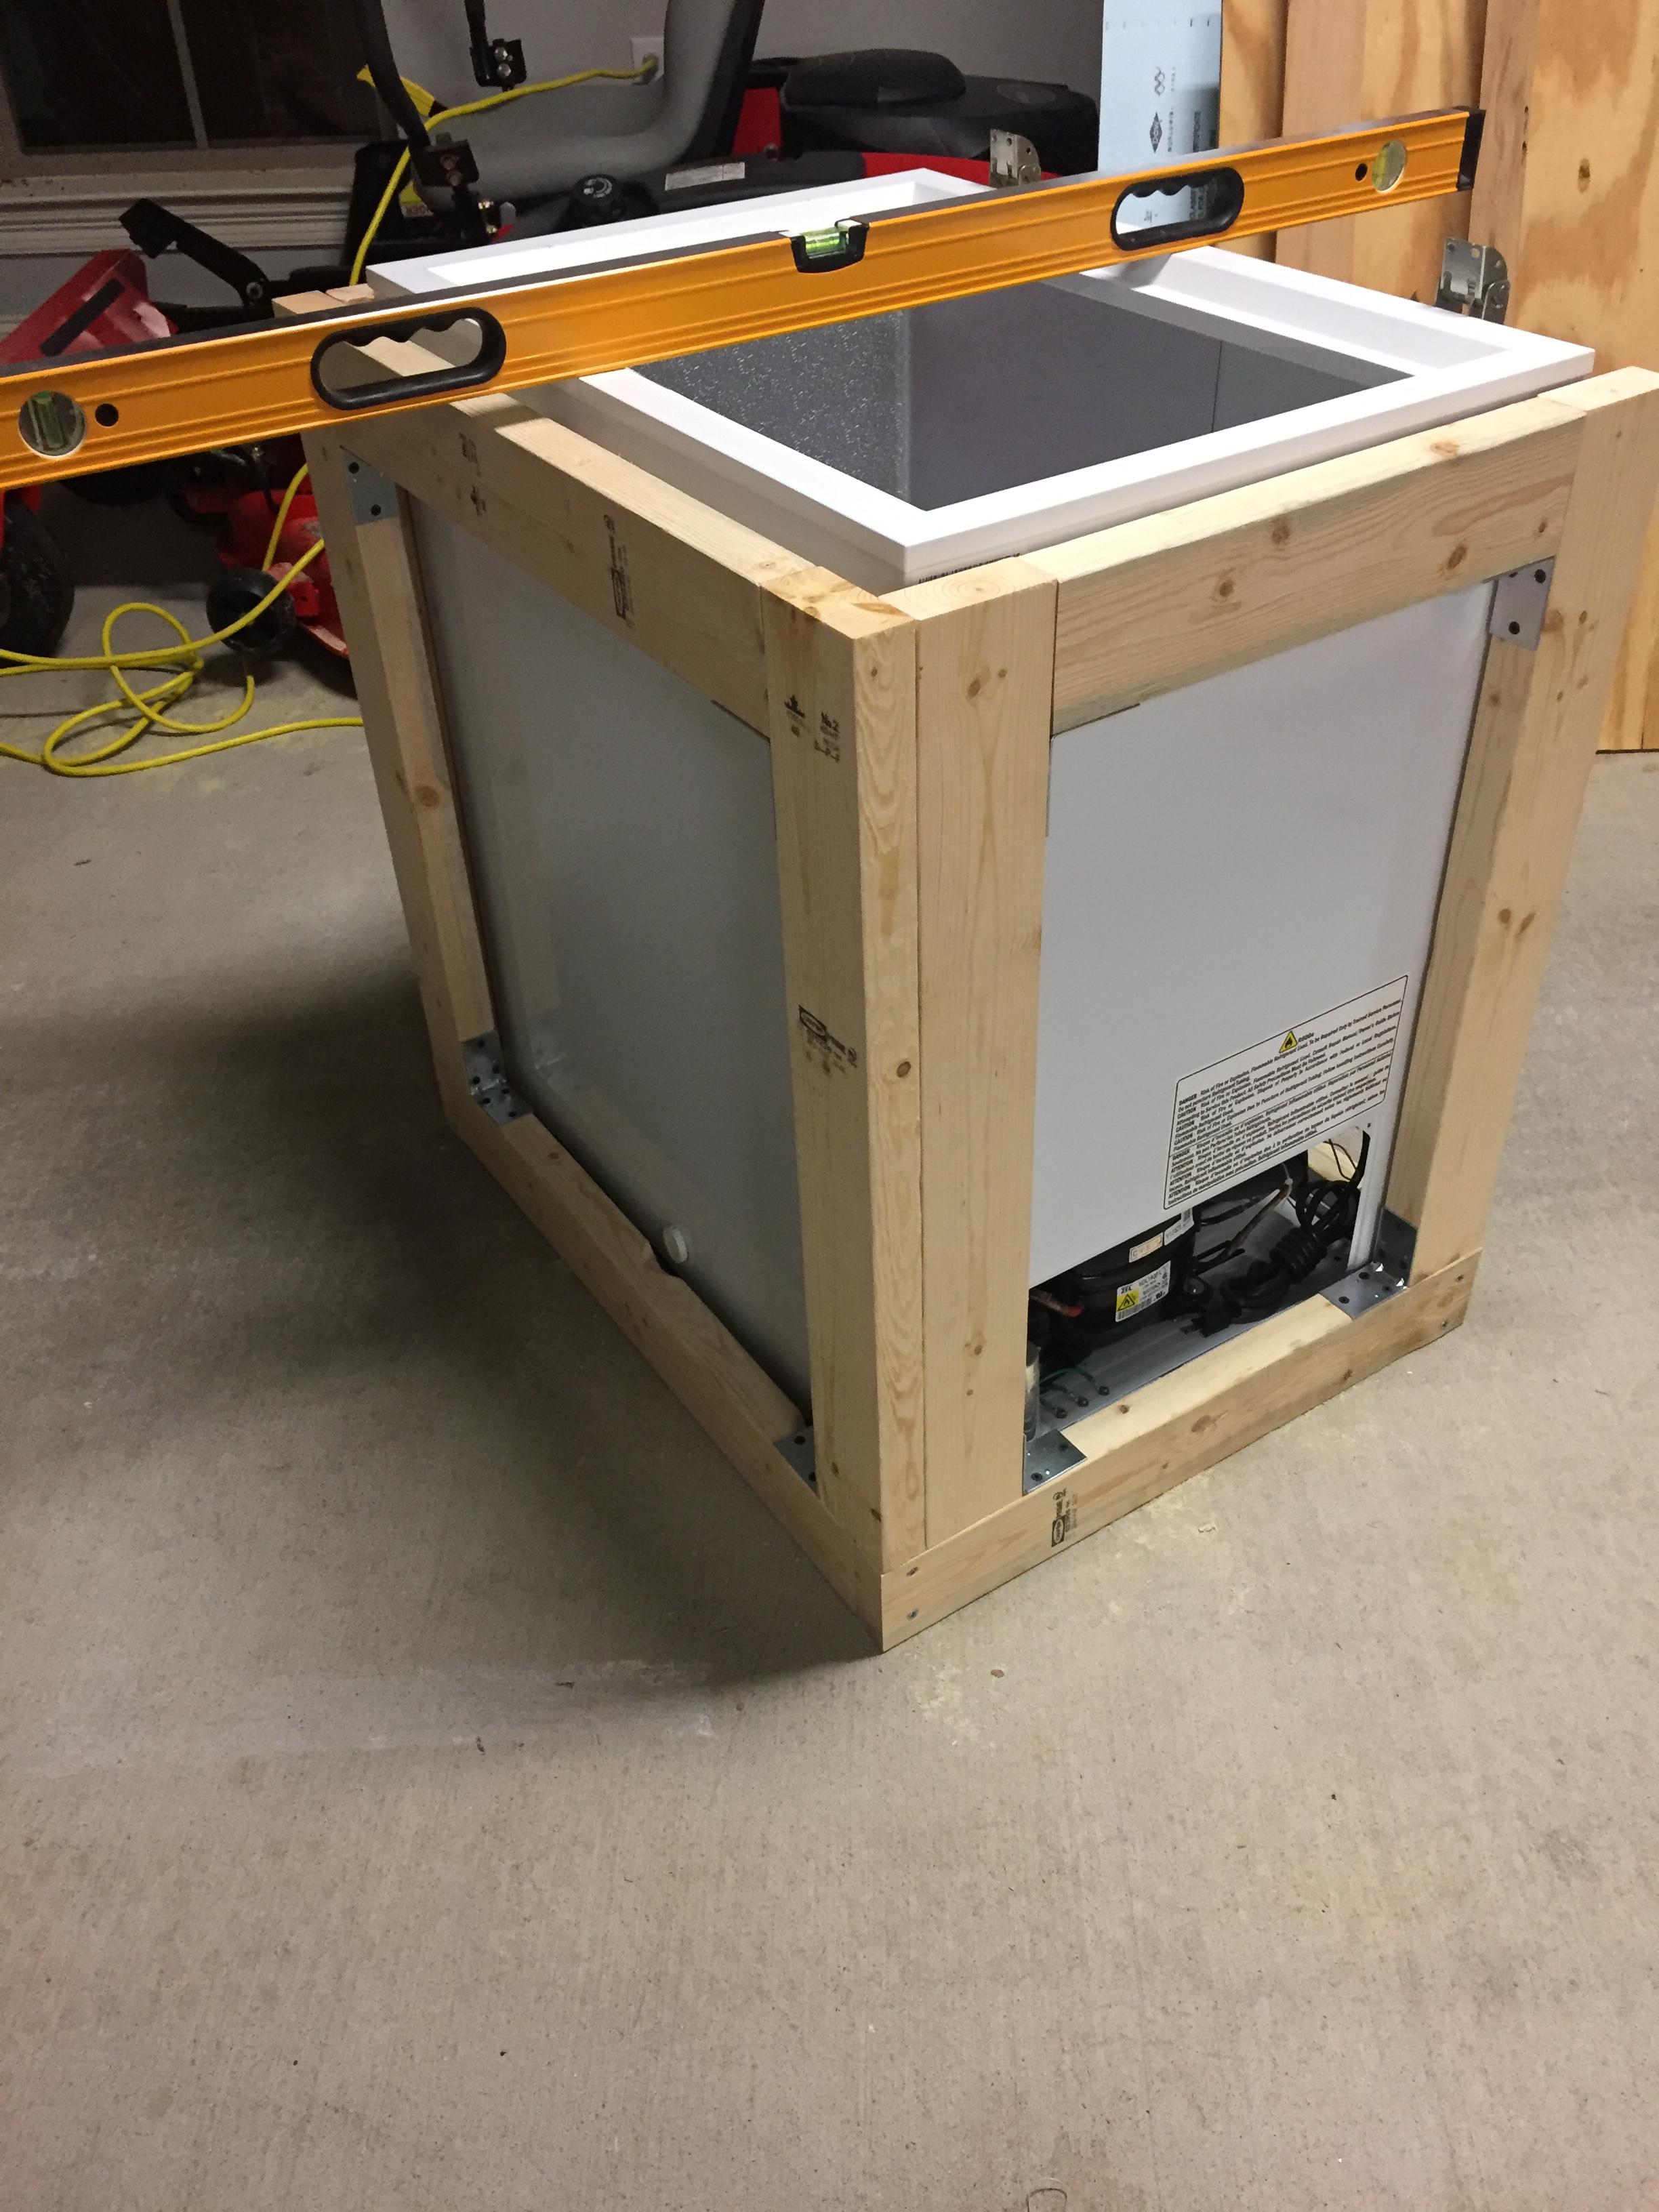
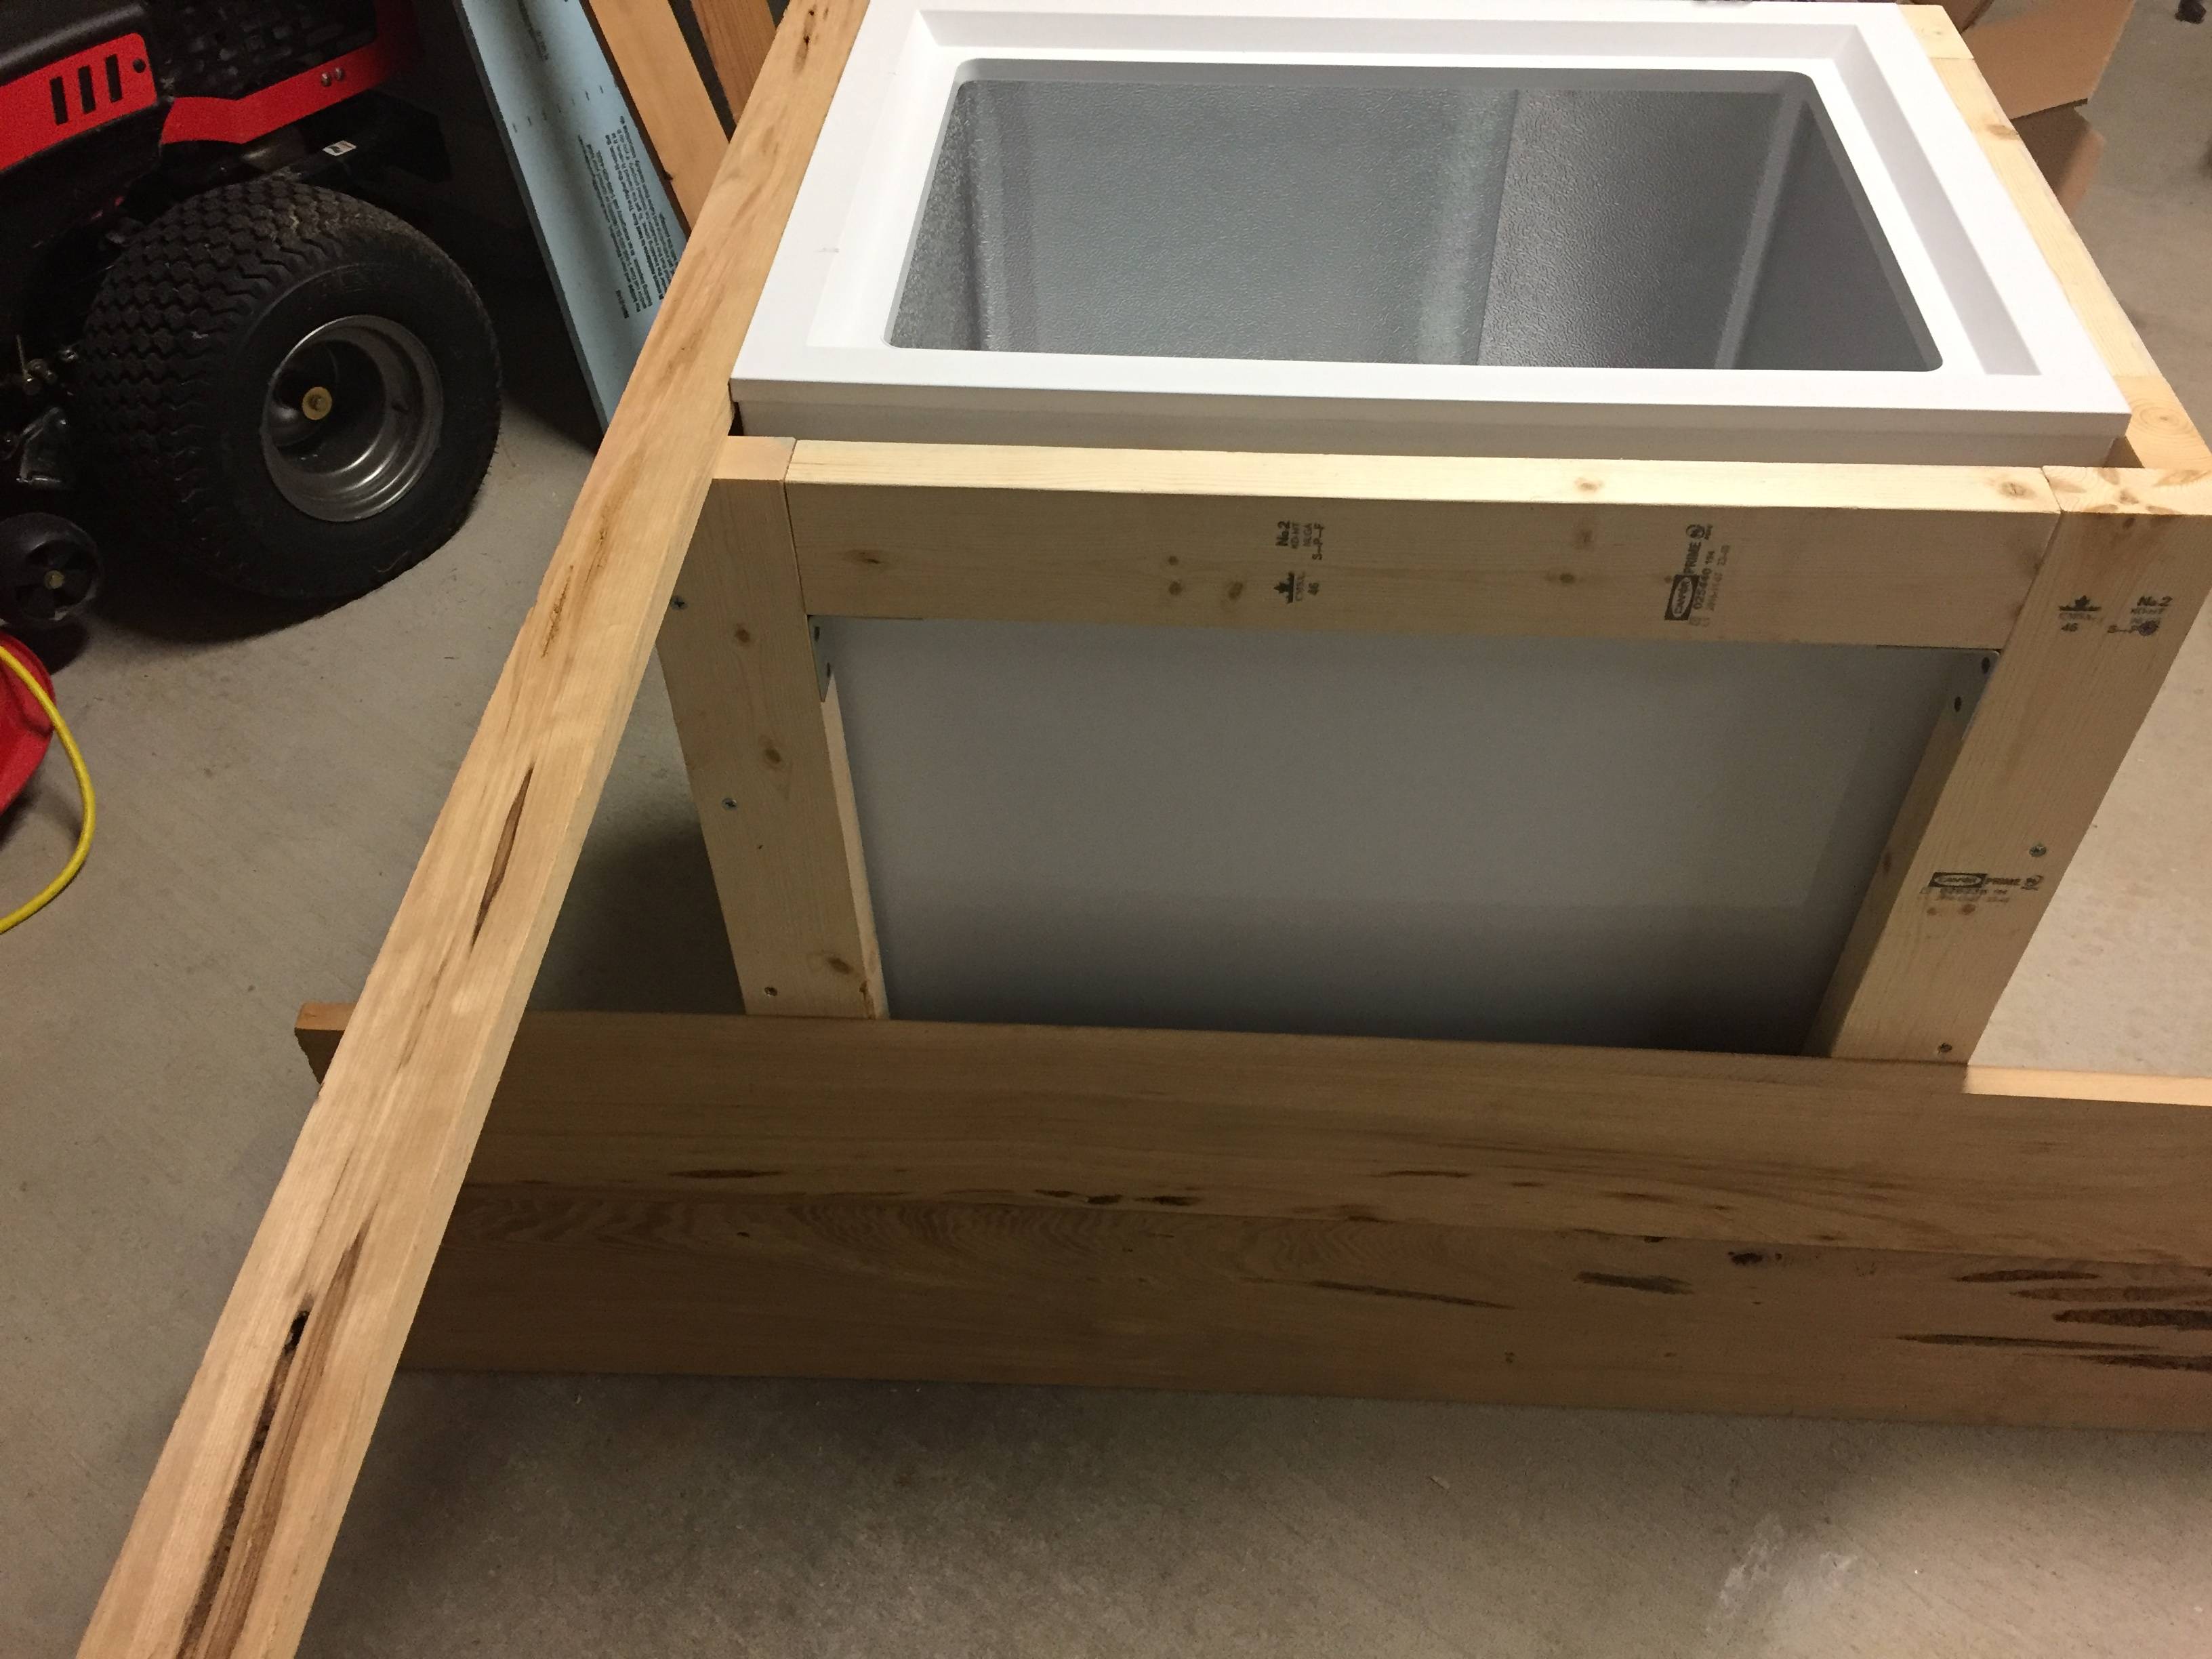
After getting a deal on a 5.0 cuft Haier chest freezer from Amazon, researching my needs, and sourcing materials, I have finally started my build. My original plan was just to do a basic 6" collar build but UPS literally dropped the package at my house and as a result I have a dented up freezer I did not want to showcase in the house. My fix is to build a base and 3 sided frame, wrap it horizontally with cypress boards mitered at the corners, and build a lid so that if/when the freezer dies, I can toss the old freezer and install a new one of similar measurement. This Keezer will have 2 taps and can fit (2) 5 gallon ball lock corny kegs without the need for a collar.
I have built the frame using 2 x 4's so there is a 1.5" gap between the boards and freezer. The freezer itself sits on some 90degree 2x4 triangles at the corners and I will install "rollerblade" style casters at the end of the project. The rear and bottom openings should provide some air movement as others have stressed about freezer acting as a heat sink. I will start on the cypress boards this week.
The comes the lid...My Plan for the lid is to miter 2x4's in the border of the freezer, and add another 2x4 border on the front and sides to flush it with the frame, add a sheet of 1/2" or 3/4" plywood to the top followed by cypress boards, then border the entire lid with cypress to flush it up with the body of the keezer. I will use aluminum foil to tape the corners, insulate (or double insulate) the interior of the lid and drill my taps through the front (ordered 6" shanks). I realize the lid will be heavy and I will definitely have to figure out something to prop or hold it open. I may try to offset it by an 1/8" or less on the inside so that the only pieces making contact are the inside border. Any advice/input/constructive criticism you can provide me for the lid will be very helpful as I am nervous about how it will seal with the additional thickness.
Here are some pics so far:


![Craft A Brew - Safale S-04 Dry Yeast - Fermentis - English Ale Dry Yeast - For English and American Ales and Hard Apple Ciders - Ingredients for Home Brewing - Beer Making Supplies - [1 Pack]](https://m.media-amazon.com/images/I/41fVGNh6JfL._SL500_.jpg)


