
EarlyAmateurZymurgist
Well-Known Member
- Joined
- Aug 4, 2013
- Messages
- 518
- Reaction score
- 139
I have been working on a custom kettle for brewing 3.5-gallon batches since rejoining the amateur brewing ranks a few months ago. I used to brew 5.5-gallon batches almost exclusively; however, that's just too much beer for my current needs. Three gallons (kegged) seems to be sweet spot between having too much beer to drink and not having enough beer to share with friends.
A problem encountered when purchasing gear to brew 3.5-gallon batches is that the commercially available brewing kettles are the wrong geometry. After careful consideration, I specified what I wanted in a base stockpot.
With my base specs in hand, I went about searching for a stockpot that fit my needs. I wound up selecting a Vollrath Optio 3506 27-Quart stockpot. I was not crazy about the idea of purchasing a Chinese-made stockpot, but Chinese manufacturers appear to have corned the market on commercial-grade induction ready stockpots (the induction ready Polar Ware stock pots are also made in China).
Another problem that I encountered while building a kettle that is tailored to brewing 3.5-gallon batches is that none of the off-the-shelf false bottoms fit my needs (I use whole cone hops exclusively). I ended up using a kettle screen (a.k.a. bazooka tube) for a couple of batches before breaking down and ordering a custom Jaybird false bottom and stand. NorCal met my specs perfectly. I specified a false bottom that was a 1/16th of an inch smaller than the actual inside diameter of the 3506 because no kettle is perfectly round. The false bottom in the Polar Ware brew pot that I owned back in the late nineties was so close to the inside diameter of the kettle that it was difficult to install and remove without marring the inside of the kettle.
The perforated false bottom stand that I received from NorCal did a great job of filtering out any hop petals that managed to find their way through the 0.03125" gap around the false bottom. It's a very good design; however, I decided that I wanted to replicate the configuration of the first commercially made brewing kettle that I owned and foolishly sold, which was a 38-quart St. Patrick's of Texas kettle. St. Patrick's (St. Pats) of Texas used to be a top-tier home brewing supplier. Lynn O'Conner and company sold kettles that were converted Vollrath 38 and 60-quart stockpots in the first half of the nineties. The attribute that I liked the most about the St. Pats 38-quart kettle was the false bottom. Unlike modern false bottoms that sit atop feet or a stand, St. Pats' false bottom design took advantage of the radius at the bottom of the stockpot. This configuration resulted in a much smaller amount of dead space between the false bottom and the bottom of the kettle (Blichmann Engineering copied and improved upon this design by adding a stepped bottom to their kettles). Dead space reduces the effective coil count on an immersion chilling.
With the above said, here's kettle:
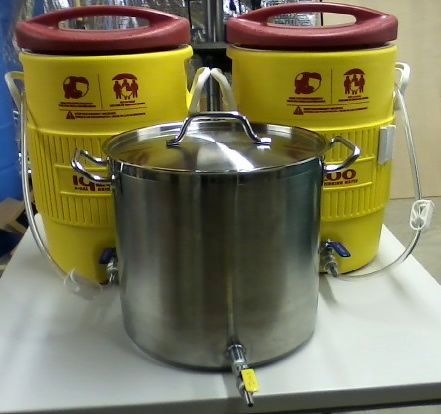
Complete 3.5-Gallon Setup
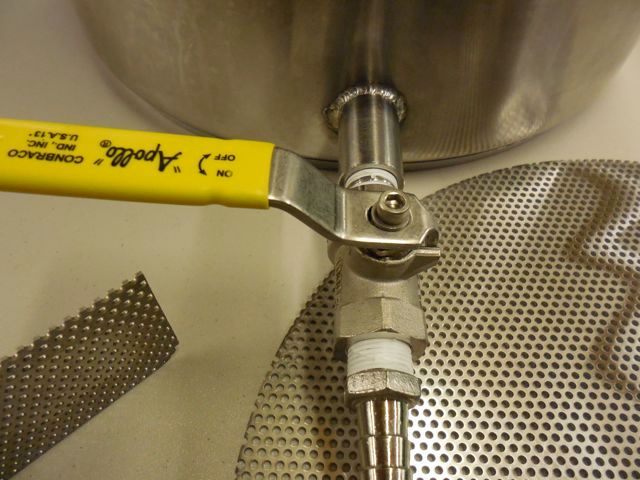
Exterior Sanitary Weld/Ball Valve Close-up
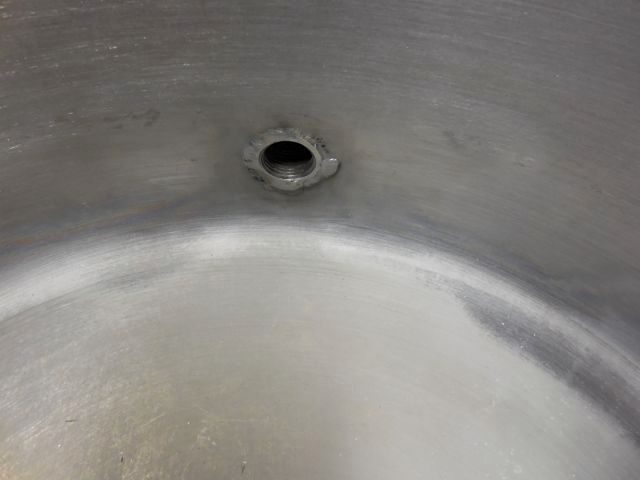
Interior Weld (the weld was difficult to perform due to its location and the diameter of the stockpot)
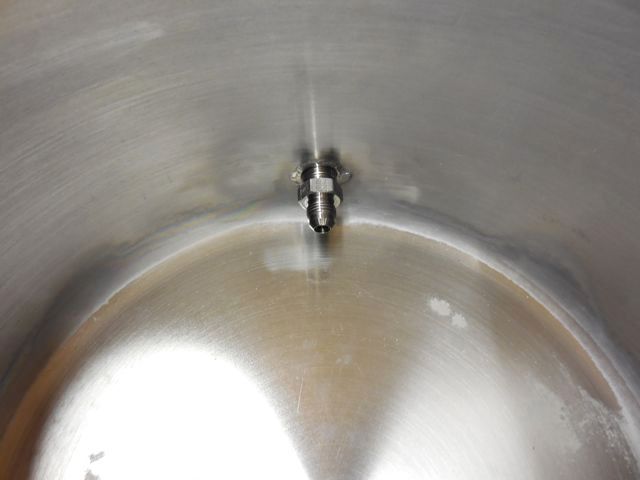
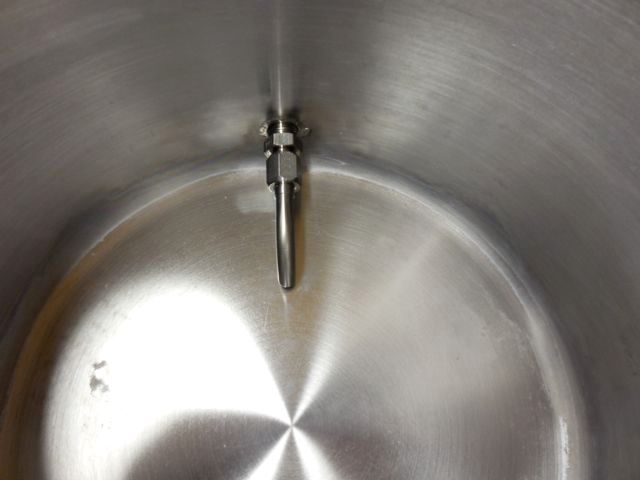
Internal 3/8" NPT x 3/8" 37° AN Fitting
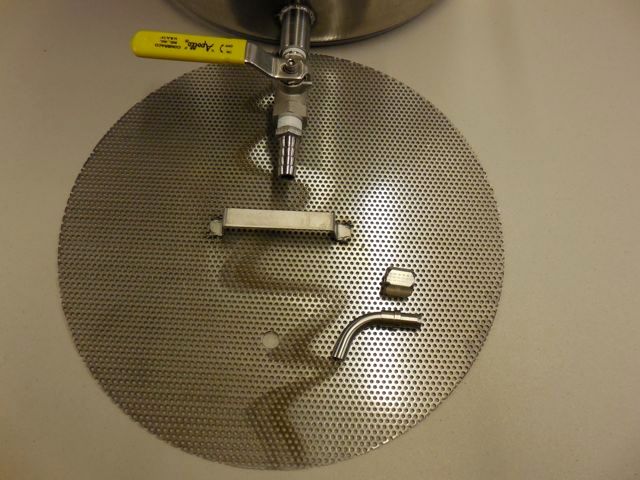
Jaybird False Bottom, 37° flared 3/8" 316 SS pickup tube, 3/8" SS 37° AN sleeve, and 3/8" SS 37° AN nut (I drilled the 7/16" hole in the Jaybird false bottom)
Pickup Tube Installed
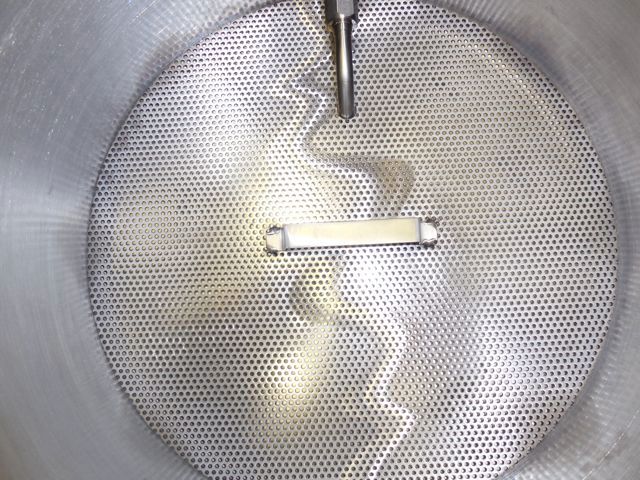
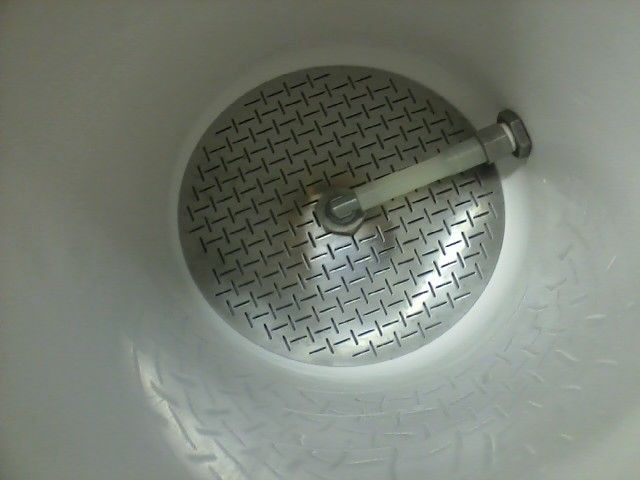
Complete False Bottom Assembly (approximately 1/2" of dead space)
Additional Photos
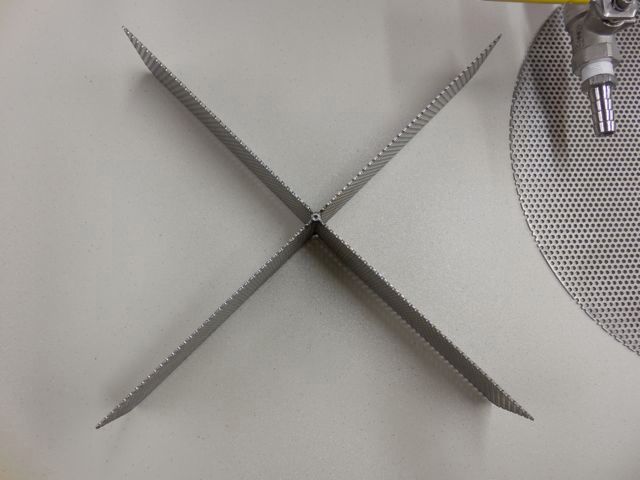
Jaybird Stand (previous configuration)
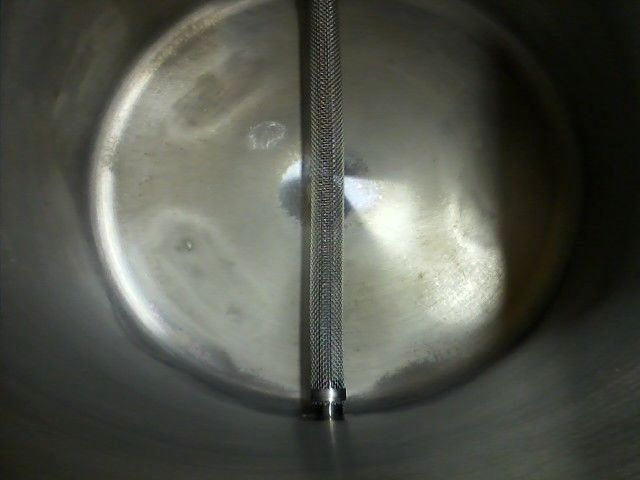
Brewer's Edge Kettle Screen (previous configuration)
Mash Tun "Gut Shot"
A problem encountered when purchasing gear to brew 3.5-gallon batches is that the commercially available brewing kettles are the wrong geometry. After careful consideration, I specified what I wanted in a base stockpot.
- Correct size for brewing 3.5-gallon batches
- 1:1 height to diameter ratio
- Induction ready
- Thick enough to weld
With my base specs in hand, I went about searching for a stockpot that fit my needs. I wound up selecting a Vollrath Optio 3506 27-Quart stockpot. I was not crazy about the idea of purchasing a Chinese-made stockpot, but Chinese manufacturers appear to have corned the market on commercial-grade induction ready stockpots (the induction ready Polar Ware stock pots are also made in China).
Another problem that I encountered while building a kettle that is tailored to brewing 3.5-gallon batches is that none of the off-the-shelf false bottoms fit my needs (I use whole cone hops exclusively). I ended up using a kettle screen (a.k.a. bazooka tube) for a couple of batches before breaking down and ordering a custom Jaybird false bottom and stand. NorCal met my specs perfectly. I specified a false bottom that was a 1/16th of an inch smaller than the actual inside diameter of the 3506 because no kettle is perfectly round. The false bottom in the Polar Ware brew pot that I owned back in the late nineties was so close to the inside diameter of the kettle that it was difficult to install and remove without marring the inside of the kettle.
The perforated false bottom stand that I received from NorCal did a great job of filtering out any hop petals that managed to find their way through the 0.03125" gap around the false bottom. It's a very good design; however, I decided that I wanted to replicate the configuration of the first commercially made brewing kettle that I owned and foolishly sold, which was a 38-quart St. Patrick's of Texas kettle. St. Patrick's (St. Pats) of Texas used to be a top-tier home brewing supplier. Lynn O'Conner and company sold kettles that were converted Vollrath 38 and 60-quart stockpots in the first half of the nineties. The attribute that I liked the most about the St. Pats 38-quart kettle was the false bottom. Unlike modern false bottoms that sit atop feet or a stand, St. Pats' false bottom design took advantage of the radius at the bottom of the stockpot. This configuration resulted in a much smaller amount of dead space between the false bottom and the bottom of the kettle (Blichmann Engineering copied and improved upon this design by adding a stepped bottom to their kettles). Dead space reduces the effective coil count on an immersion chilling.
With the above said, here's kettle:
Complete 3.5-Gallon Setup

Exterior Sanitary Weld/Ball Valve Close-up

Interior Weld (the weld was difficult to perform due to its location and the diameter of the stockpot)

Internal 3/8" NPT x 3/8" 37° AN Fitting

Jaybird False Bottom, 37° flared 3/8" 316 SS pickup tube, 3/8" SS 37° AN sleeve, and 3/8" SS 37° AN nut (I drilled the 7/16" hole in the Jaybird false bottom)

Pickup Tube Installed

Complete False Bottom Assembly (approximately 1/2" of dead space)

Additional Photos
Jaybird Stand (previous configuration)

Brewer's Edge Kettle Screen (previous configuration)

Mash Tun "Gut Shot"

