• Please visit and share your knowledge at our sister communities:
  • If you have not, please join our official Homebrewing Facebook Group!

    Homebrewing Facebook Group

Brooklyn Brew Shop Everyday IPA Kit Tips

Homebrew Talk

Help Support Homebrew Talk:

This site may earn a commission from merchant affiliate links, including eBay, Amazon, and others.
ANNDD IT'S GOOOD!! After three weeks in the primary and 2 weeks bottle carbing, I cracked open my Everyday IPA. Oh man is this good beer! It had a good feel to it and my sister says its awesome. Some things I think I'll work on in future batches whether 1 gallon or bigger:
1. There's just a slight bit of what might be astringency. It might be because of the hops but when I mashed, the temp did jump around 180. I've heard about mashing in an oven so I might try that next.

2. If I had known about BIAB, I would've done that with this and made things simple on me. I mean why not?

3. Get a fermometer for my jug and take OG and FG. It was brewed during a cold January but that's not always the case in San Antonio so I'm gonna look into swamp coolers.

4. I only let the bottle chill for 3 hours in the fridge and as soon as it hit the glass it started foaming. Carbonation was perfect nonetheless but I am chilling the remaining bottles now so that the CO2 stays in the beer better. They'll be perfect this weekend.
 
I just brewed my first batch (ed ipa) a three weeks ago to the day, I was forced to transport the carboy from my girl's place to mine a week ago. Everything seemed to be going fine; steady bubbling first few days, not much activity after the air lock, looking like a good drinkable beer right at week 2. I tried to keep agitation to a minimum but that's a little difficult in a 1 ton pickup but I believe where I messed up is where I moved it to. With my mind in a dozen other places I put the carboy in a closet that was a little on the warm side 75°f (+/-2°) with bit of sunlight getting under the door and I didn't realize that it wasn't a very ideal spot until I was ready to bottle it on day 17, it had become SUPER cloudy, I mean to the point that it appeared to look like I had peanut butter in a bottle at a quick glance. There was a small layer of foam and the air lock was bubbling about once every 10-15 seconds, that's when I found a more ideal spot for it and it has settled back down almost to where it was a week ago. I'm a total newb and I'm afraid I may have ruined my batch? Any advice (other than to pay a little more attention next time :p ) or recommendations would be greatly appreciated!
 
I just brewed my first batch (ed ipa) a three weeks ago to the day, I was forced to transport the carboy from my girl's place to mine a week ago. Everything seemed to be going fine; steady bubbling first few days, not much activity after the air lock, looking like a good drinkable beer right at week 2. I tried to keep agitation to a minimum but that's a little difficult in a 1 ton pickup but I believe where I messed up is where I moved it to. With my mind in a dozen other places I put the carboy in a closet that was a little on the warm side 75°f (+/-2°) with bit of sunlight getting under the door and I didn't realize that it wasn't a very ideal spot until I was ready to bottle it on day 17, it had become SUPER cloudy, I mean to the point that it appeared to look like I had peanut butter in a bottle at a quick glance. There was a small layer of foam and the air lock was bubbling about once every 10-15 seconds, that's when I found a more ideal spot for it and it has settled back down almost to where it was a week ago. I'm a total newb and I'm afraid I may have ruined my batch? Any advice (other than to pay a little more attention next time :p ) or recommendations would be greatly appreciated!

If it's clearing back up it should not be a problem, you probably just "roused" the yeast and kicked up a bunch of trub. As far as temp, I ferment around 72-76 deg F all the time and everything works out fine. Also if there is too much light around what I do is get a double paper bag and put it upside down over the fermenter. All in all, give it a few more days till it's not by blubbling and it should be fine :) happy brewing!
 
To those who are having an issue with the cost of the kits/mixes plus shipping, I hope this helps:

I've found taht if you spend 45$ or more, the shipping is free. This works out pretty well, because it's like getting a mix for free (the cost of two mixes at 15$ each, plus shipping, is a little over 44$). Or, if you're buying a kit with the equipment and a mix (which is 40$), you simply need to spend another 5$ on things you probably need anyway, such as bottle caps or extra sanitiser, in order to get the free shipping.

Another option, of course, is to get BBS's two books, which have the recipes for their mixes and many more, totalling almost a hundred. All of them look interesting, and most of them I would like to try. With the recipes, you can go to your LHBS and simply buy the ingredients, thereby saving even more money. The books are rather expensive at BBS's website, but can be found for just a few dollars at Amazon.

Hope this helps -

Ron

PS - I am in the middle of my first brew right now, which is BBS's Chocolate Maple Porter. Here is the link to my "progressive thread" on the project, if anyone wants to take a look or offer comments, suggestions or advice:

https://www.homebrewtalk.com/f39/brooklyn-brew-shops-chocolate-maple-porter-tips-advice-492568/

So far, things seem to be going quite well, and I'm looking forward to trying my first home-brewed beer! For what it's worth, BBS's customer service has been great for me so far; I've gotten quick, friendly responses to all of the issues and/or questions that I've had. I'm a fan!
 
I bought one of these kits last year as a complete newbie to home-brewing, and I think the kit and this hobby are fantastic!

I'm using it in a little apartment-sized kitchen, the kit and project really don't take up too much room and it really is easy and fun to do this.

I'm not a big beer drinker, but even my very first batch of beer (a "Chestnut Brown Ale" I modified) tasted better than any commercially brewed beer I've ever had - this might be the first time I've actually enjoyed drinking beer.


I think I'm echoing what others have said, but it probably bears saying again:

1. 2+ pots, collander, strainer, funnel: In addition to the kit, you'll probably want at least two pots (I got a couple of inexpensive stainless-steel 16-quart pots at my local "Wally World" department store and these seem to do the job nicely), as well as a collander (strainer, I used a cheap 5-quart stainless steel collander from "Wally World" which fits perfectly on top of the pots), a fine strainer that will sit on top of the pot alright for finer straining (I just used an inexpensive wire mesh strainer), and a funnel. You may already have most of these items sitting around your kitchen, and if you don't, it's nice to have them handy for more than just brewing.

2. For the ingredients, you don't need to follow the recipes exactly. I let the beer ferment a little longer than the directions called for, as it doesn't seem to hurt anything, and the results were great. For my first batch, the "Chestnut Brown Ale" kit I bought called for the addition of chestnuts, but I left those out, and instead added some additional whole grains (barley, oats, buckwheat) that I would otherwise have cooked as hot cereal or soup, and I also tossed in some anise seed because the bitter licorice-like flavor seemed like it would go well as a bittering agent to complement the hops, and I also added a little honey early while cooking the grain ("mash") on the assumption that a little extra sugar early on wouldn't hurt. In spite of the liberties I took, the result was delicious, and the recipes from Brooklyn Brewing seem fairly forgiving of experiments like this, so feel free to experiment.

3. Nevertheless, read, understand, and follow the directions carefully and you should be fine. (You don't have to follow the instructions exactly, just be careful about how and when you do something different, and understand how and why you are doing something different.)


I suspect the purists will wince, but I didn't have any glass bottles to bottle my beer in, so I used rinsed and sanitized leftover plastic screw-top soda bottles instead. These seemed to work just fine. (I've since gotten some nice 1-liter "growlers" with flip-tops to bottle stuff with, and these work GREAT.)


With the positive experience of this kit, I'm now a fan of home-brewing. It seems to be perfect for beginners with very little space to work in.

I've since experimented with home-brew hard cider, root beer, and ginger-ale. These are also easier than I expected to home-brew, and taste great as well. If you enjoy making your own beer, give these a try as well! (The hard cider is especially easy: it's like making beer, except you don't need to heat anything up. Root beer and ginger-ale are similar to making beer, but vaguely resemble making tea or coffee a little more.)

Outstanding post, ywhateley! I've discovered a lot of the same things that you mention here, and have "bolded" two points in your post above that really struck a chord with me.

If I may suggest, you might consider getting (or using, if you already have one) a smaller pot (perhaps a 6-quart) for the actual boil. The reason for this is that the extremely wide (by comparison) 16-quart pot creates a much bigger surface area, which might lead to more evaporation from the boil than you desire.

Have you brewed any other BBS mixes since your first?
 
Two great posts, I received the Everyday IPA as a Christmas gift, I had pots but picked up a large mesh strainer, large funnel with screen at my LHBS. It will be two weeks since I bottled it this Sunday. I have brewed one other gallon kit from my LHBS and it will be in the fermentor a week this Sunday, good luck and cheers.
 
Sorry, the kit I bought was their starter 1g kit. I'll check out the instructions and see if I have any questions to fill in the gaps. I'll also check out that book. Is that one the best?
57.gif
30.gif


htfdb - if you're referring to BBS's book - I would strongly recommend both of them. They are a bit expensive on their website, but can be found for a very good price at Amazon.

If you were only to get one, I would suggest their first book, called BEER MAKING BOOK. Once you have that and read through it, you will probably be inspired to also get their second book, MAKE SOME BEER.
 
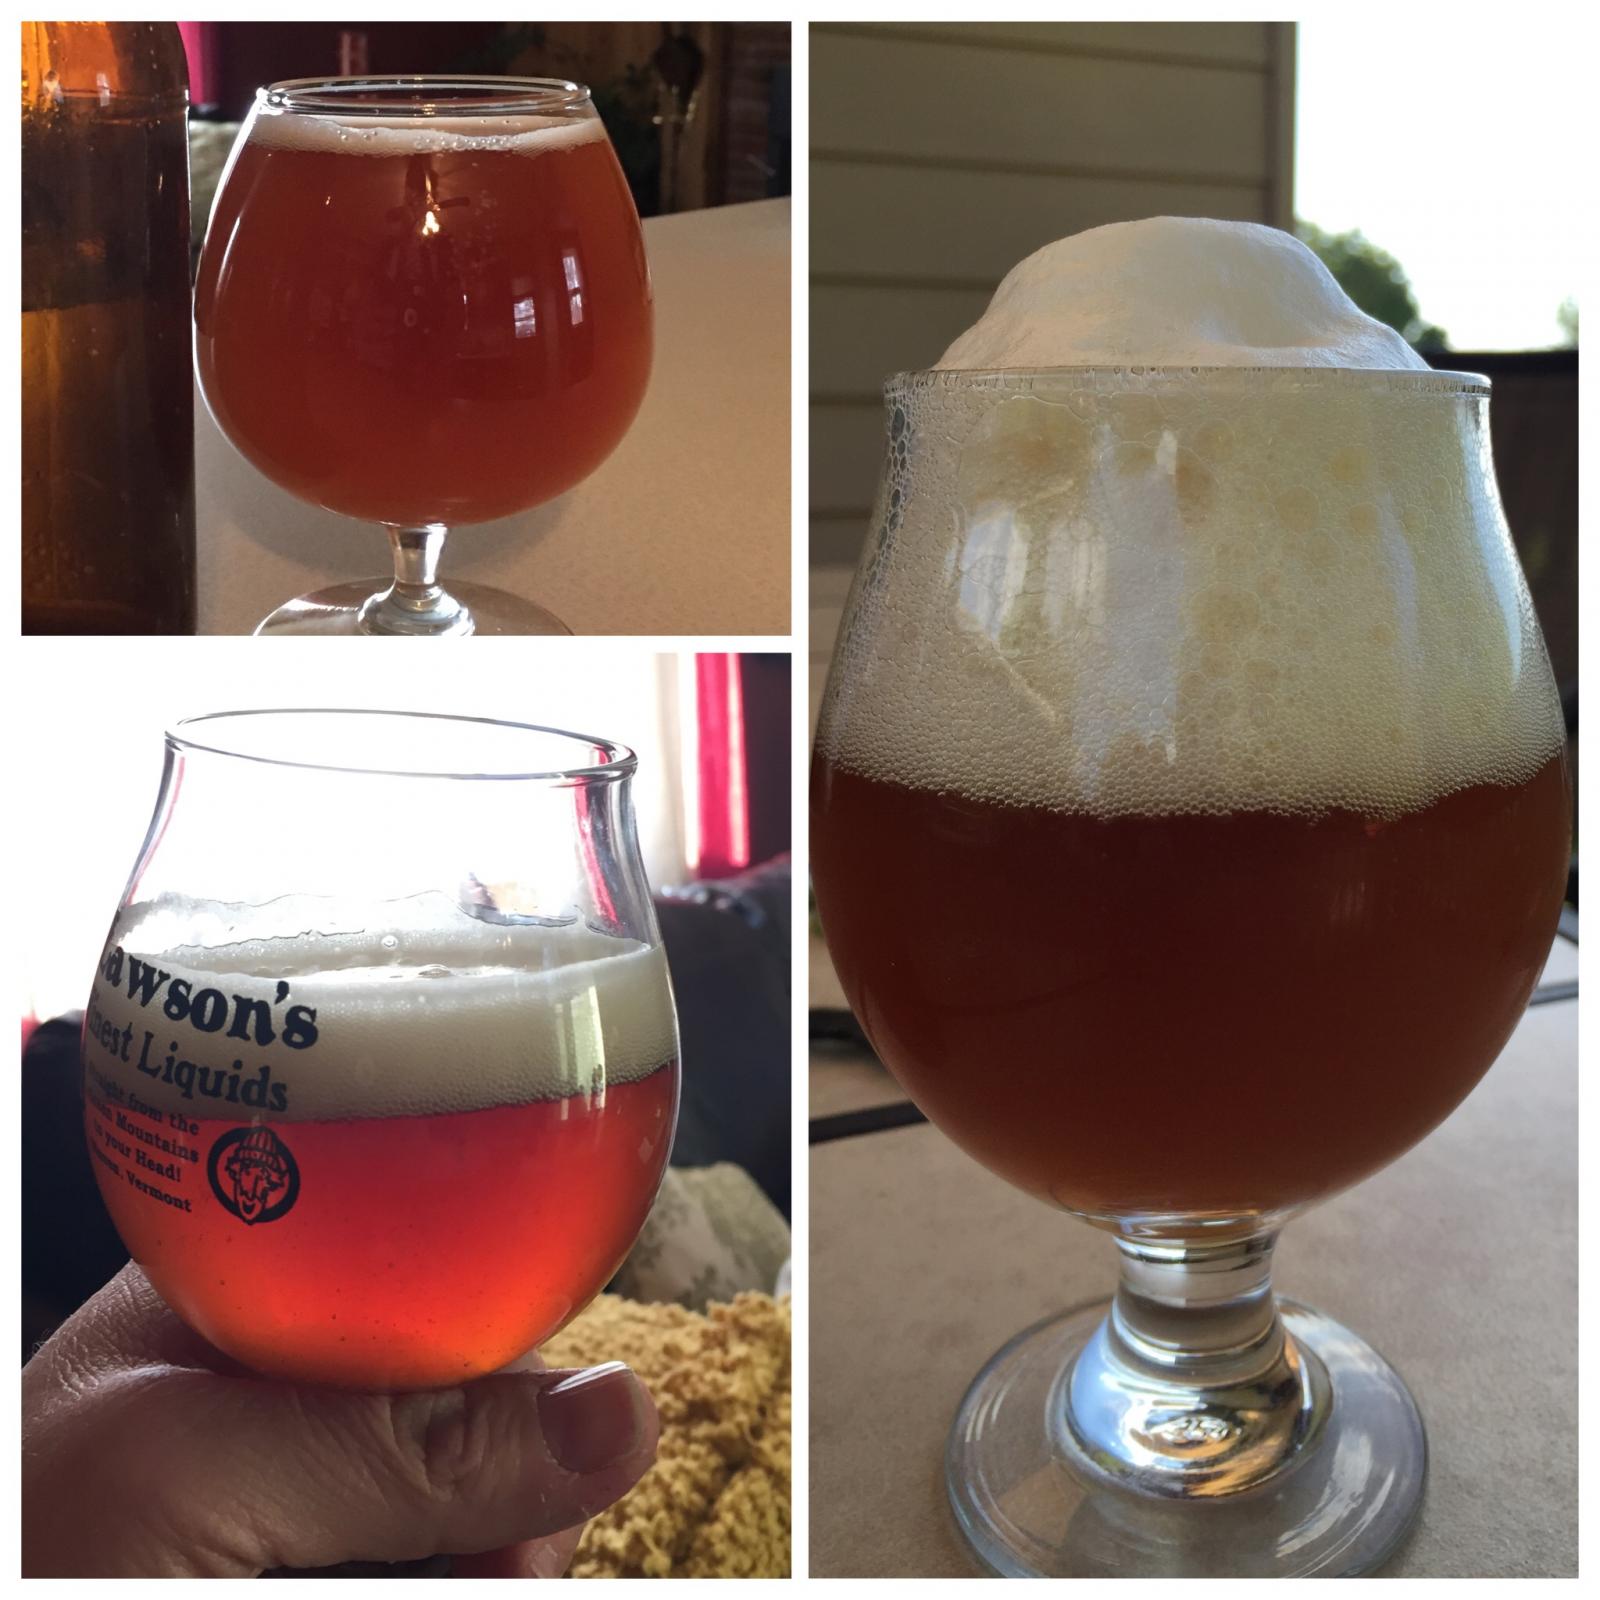
So anyone else have an issue with a vinegar like taste/smell? Also my beer seems to be getting more carbonated with each one I open. In the pic it is the same batch just opened at different times. It fermented for 3 weeks and then bottle conditioned for 3 weeks. The upper left pic was #1 opened after 3 weeks in the bottle and as you can see very little head but it had carbonation. The lower left was #2 opened a week or two later and the head much bigger, the pic on the right is #3 opened this passed Sunday and I could tell as soon as I cracked it that the carbonation was way up and look at the head. The general consensus is that it is infected anyone else have similar issues?

image.jpg
 
It's not infected, I can tell you that. After 2 weeks (or three, if you prefer), it should be stored at a cooler temperature.

My beer was over-carbonated until I dropped it to 2 tablespoons of (honey, maple syrup etc.), rather than three.
 
It's not infected, I can tell you that. After 2 weeks (or three, if you prefer), it should be stored at a cooler temperature.

My beer was over-carbonated until I dropped it to 2 tablespoons of (honey, maple syrup etc.), rather than three.

Actually this batch was primed with a 1/4Cup DME boiled in 1/2Cup water and man I hope you are right, the other thing that has me concerned is the vinegar taste/smell.
 
I can't explain the vinegar thing, but I'm nearly certain that it's not infected.

I haven't tried the DME but if you use it again cut back a but and see if it helps. 1/4 cup seems like almost twice too much, to me. If there's too much sugar, perhaps it's somehow souring, if your conditioning temperatures were off? That's just a guess....
 
I'm a first time brewer, long time lurker. Just want to share my experience with this kit.

I mashed at 176-180 for one hour. Thought I screwed up the whole batch. I had used a Creuset pot which just kept rising in temp long after I thought that it had stabilized. Everything else on brew day went according to the instructions, though. I boiled in a very large stock pot.

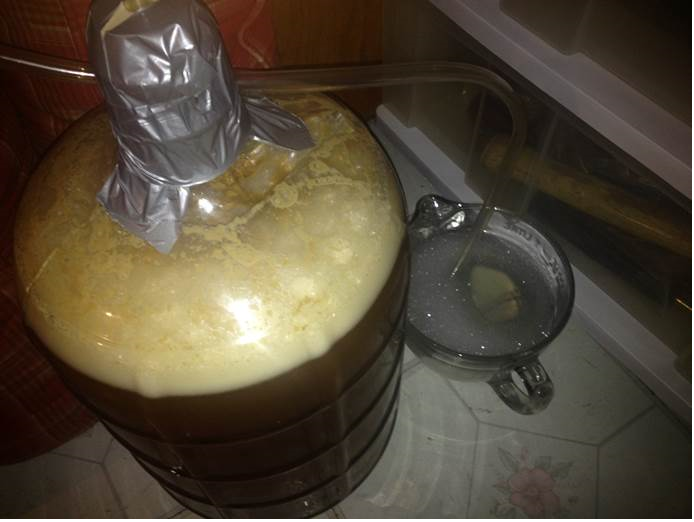
Set up a blow off tube for 3 days. It bubbled pretty actively for the first day in the fermenting jug then quieted down. Added the airlock and let it sit for 3 weeks in total. Didn't notice any action in the airlock during that time when I checked it out.

Bottled into 7.5 x 500 mL Hacker-Pschorr Hefe Weisse bottles. That's a great beer, incidentally. I used a mini autosiphon for the transfer that I bought for about $10 after reading these forums. I also used honey, as directed, though I cut it down slightly to about 2 tbsp. This went pretty well.

The bottles sat for 2 weeks until I cracked my first one. It was delicious. Despite the high temp mash, the beer was not too sweet at all and would be something that I would happily drink again. Nice, caramel smell, a good head and refreshing over all. It may not be the intended flavour profile but it worked out well, regardless. Not sure about the alcohol content as I didn't get a chance to drink more than 2 at a time. Overall, I'm pretty pleased with the whole experience and want to brew some more.

The only thing I felt I needed to buy after was a better strainer. I had used an old colander that didn't have enough holes to drain properly. The autosiphon was easy to use but I'm not sure how difficult it would have been to use the directed method provided your fermenting jug is higher than the bottles.
 
Last edited:
I brewed this kit on Saturday. It was my first all-grain attempt (after a dozen or so extract brews). It wasn't any more difficult than extract brewing (just a little more time consuming, but nothing to complain about). I did have a little bit of a problem keeping it within the mash temp window. A couple of times I crept below 144 (by a couple of degrees) and upon trying to warm it back up I crept above 152 (by a couple of degrees). I'm sure that is a dance I'll eventually learn, but it seems like I wasn't out of that 144-152 window for more than 7-8 minutes for the entire 60-minute mash.

As many others have mentioned... I had extremely fast and violent visible activity those first 24 hours (started about 6 hours in and was blowing through the blowoff tube in about 10 hours... then slowed to a crawl in just over 24 hours). After about 30 hours, I stirred up the yeast cake on the bottom (gently... didn't want to oxygenate), but that hasn't brought any more visible activity yet. I'll let it go for three weeks before bottling and then use the two tablespoons of honey for conditioning (in three 1-L and a single 12oz bottle... that seems to be what I've been getting for most of my 1-gallon brews).

It smelled awesome and tasted great before going in the fermenter. I'm not quite sure yet if I'll perform a dry-hop before bottling or not. I've got some time to make that decision.
 
I wanted to post my experience with this kit as I just tried the first bottle today.
Brewed on May 21st
Put Airlock on May 24th
Was still bubbling a bit on June 7th(see attached .mov)
Left it in fermentor until June 10th (20 days total fermenting)
Bottled on June 10th - 7 and 1/2 bottles out of batch
Used honey
Put a bottle in fridge this morning, June 24th
Tried it this afternoon, tasted great!
Will put some more in the fridge and drink this weekend

Great kit/recipe
I bought 16 oz brown flip top bottles at my LHBS
Bought Starsan online to soak bottles(I used the kit sanitizer on brew day)
Used the included racking cane to siphon into bottles, I thought it worked just fine
I bought a strainer on Amazon before brew day ( http://amzn.com/B0029SVQ9K )
I used two 8 qt kettles and a couple sauce pans to handle all the water
Cooled the wort in my sink with a couple bags of ice and water

While I waited for the batch to be ready, I bought a brew kettle, and put a ball valve on it. I have 4.5 gallons fermenting right now! I attached a pic of the new kettle in action.

View attachment 2015-06-07 12.05.10.mov

2015-06-22 11.18.05.jpg
 
I wanted to post my experience with this kit as I just tried the first bottle today.
Brewed on May 21st
Put Airlock on May 24th
Was still bubbling a bit on June 7th(see attached .mov)
Left it in fermentor until June 10th (20 days total fermenting)
Bottled on June 10th - 7 and 1/2 bottles out of batch
Used honey
Put a bottle in fridge this morning, June 24th
Tried it this afternoon, tasted great!
Will put some more in the fridge and drink this weekend

Great kit/recipe
I bought 16 oz brown flip top bottles at my LHBS
Bought Starsan online to soak bottles(I used the kit sanitizer on brew day)
Used the included racking cane to siphon into bottles, I thought it worked just fine
I bought a strainer on Amazon before brew day ( http://amzn.com/B0029SVQ9K )
I used two 8 qt kettles and a couple sauce pans to handle all the water
Cooled the wort in my sink with a couple bags of ice and water

While I waited for the batch to be ready, I bought a brew kettle, and put a ball valve on it. I have 4.5 gallons fermenting right now! I attached a pic of the new kettle in action.

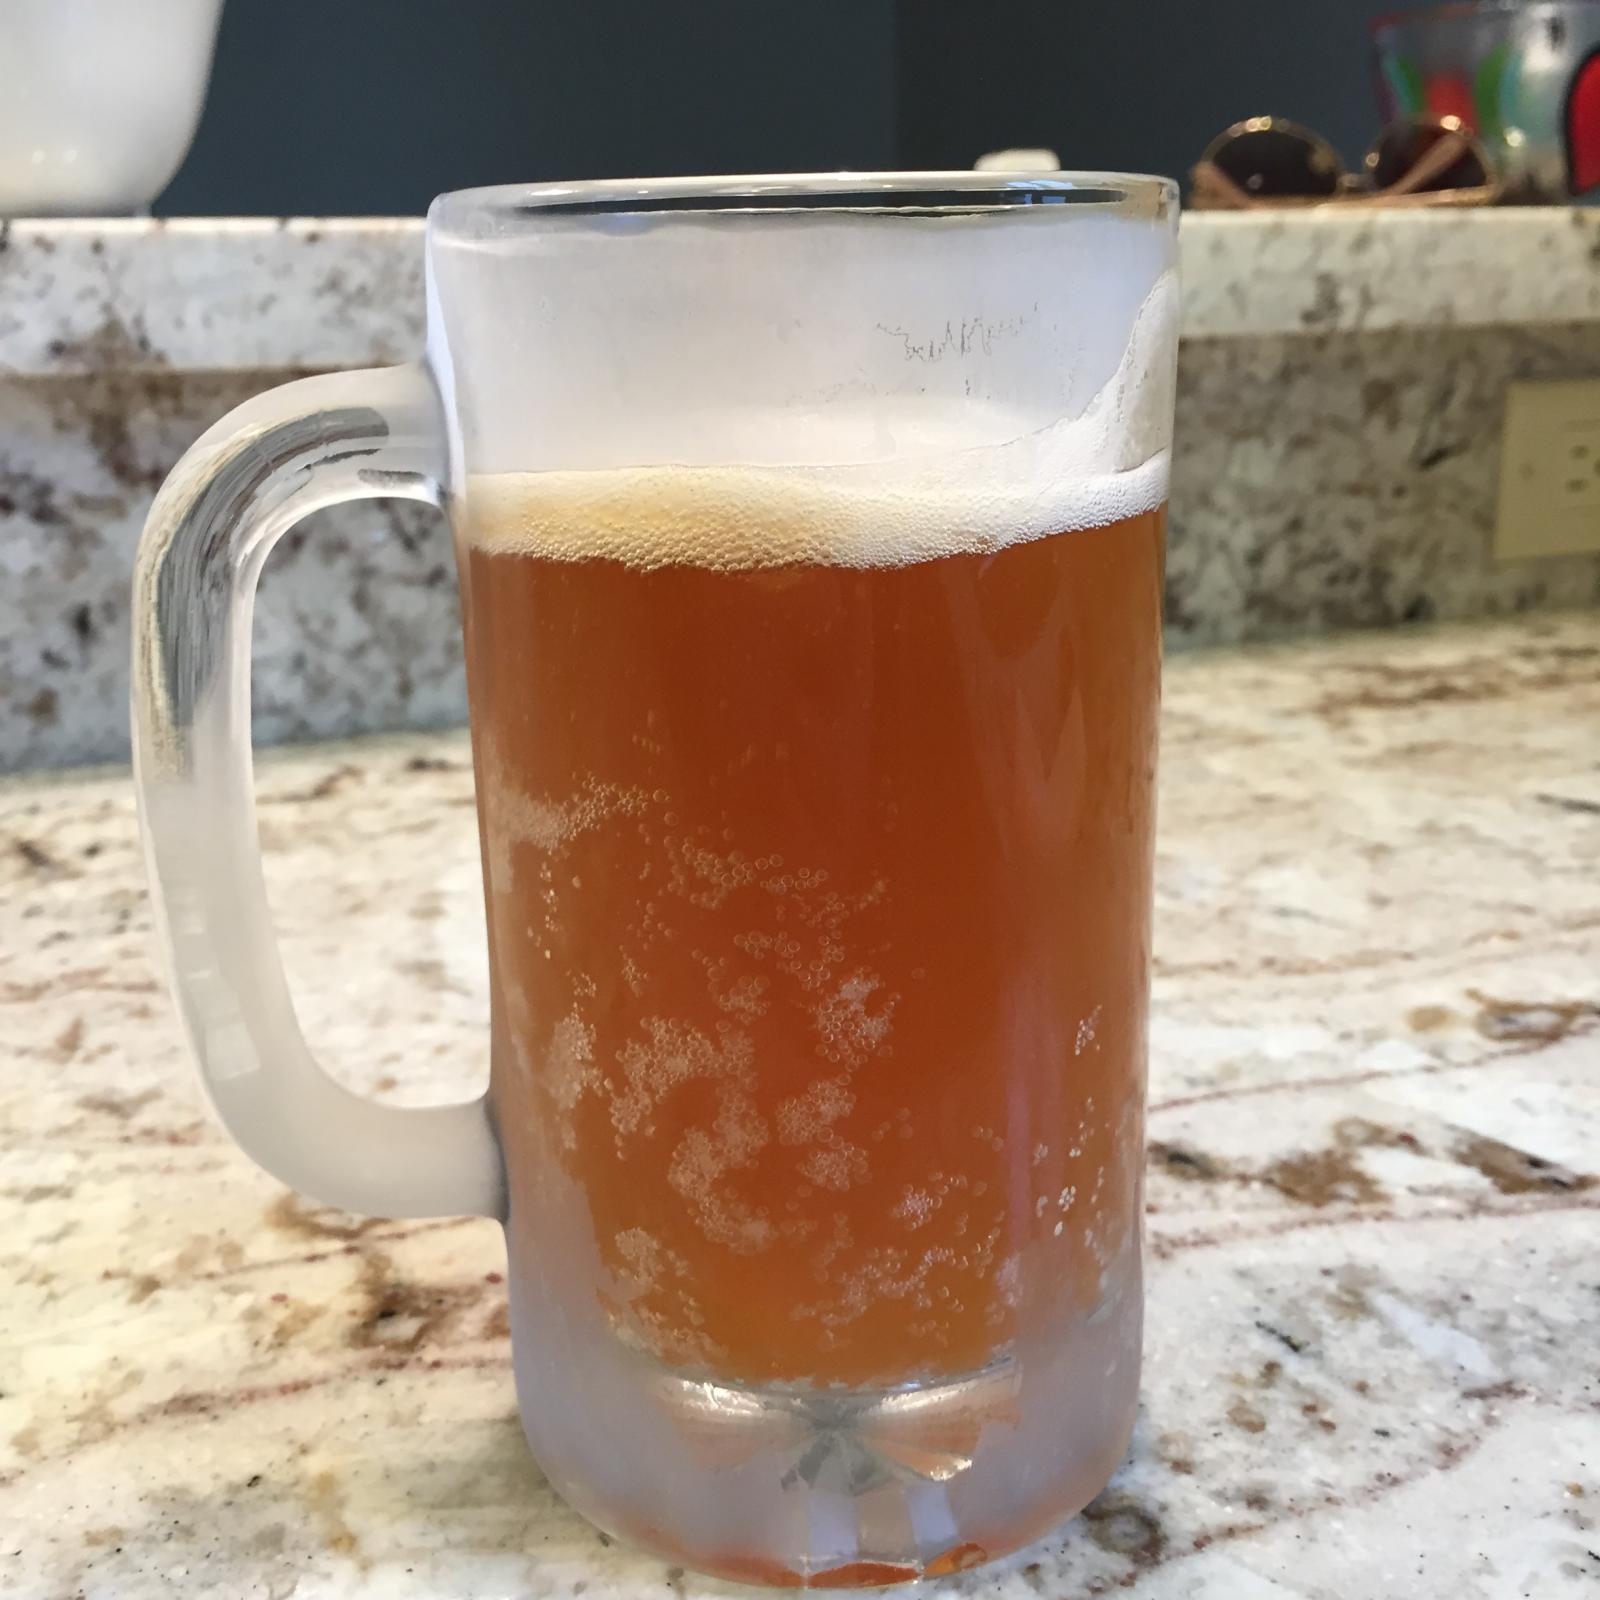
Just cracked open another bottle. Happy 4th! I think it is over carbonated a bit, but tastes pretty good. 3.5 weeks since I bottled. Pics attached. Took one with the frost on the mug, one without.

2015-07-04 18.04.54.jpg


2015-07-04 18.04.12.jpg
 
I have brewed this Brooklyn Brew Shop 1G Everyday IP kit and was very satisfied with it. I since tried a couple of their other kits and was pleased as well.

I bought a 3G carboy, large pots and bought the raw ingredients from the same Everyday IPA recipe in their book, enough for a 3G batch, and followed the same exact instructions for doing it on the stovetop. (Cook the grains in the pot like oatmeal, stir and check temp every 10 minutes, sparge using a strainer over a pot (multiple steps) etc.), ice bath in the sink after the boil (took quite a bit longer though, about 40 min). Anyway, day-2 in the fermenter and all looks good so far.

My question is this, has anybody else tried this, and does anybody foresee any problems with doing things in this way at such scale (3G) or have any advice?

And, my first purchase after purchasing the Brooklyn Brew Shop starter kit was an auto-siphon and a spring tip bottle filler, MUST HAVES!

Thanks!!

brew.png
 
I did the same thing. I bought two 3 gallon carboys....ended up just doing 5 gal a bit later. 1 gal is easy and quick....3 felt the same as 5.
 
Have to say after 3 wks - definitely NOT an IPA ... nice mellow APA, yes. Now to make some exprimental beer with HBC-483 hops and this gallon jug ;)

Woot woot!
 
I just brewed this kit this morning but something went wrong. After mashout, I took a gravity reading and it was around 1.05 (seems normal to me). The instructions say to add 3/4 cup maple syrup after the boil, which I did. However, after cooling the wort down, I took another gravity reading, and now I am at an SG of 1.10 (about 12% alcohol potential).

Doing a logic test, adding 3/4 cup maple syrup to 1 gallon of wort already at 1.05, does sound like it would raise the SG significantly. However, the instructions say this is supposed to only be a 6.5% beer. What went wrong?

Here is a link to the instructions if anyone would like to check me.
http://brooklynbrewshop.com/directions/Brooklyn_Brew_Shop_Chocolate_Maple_Porter_Instructions.pdf
 
Hi, @brottman -

The Chocolate Maple Porter was the first BBS mix that I ever brewed. It turned out very well, but I am looking forward to trying it again, to see how my skills/techniques have improved.

Regarding your specific question, I really don't have an answer. My only guess (and I could be wrong) is that there is some sort of error either reading or interpreting the hydrometer reading. The BBS mixes are designed to incorporate a minimum of science or twiddling with the knobs, and in my opinion are intended to get one acquainted with some of the fundamental steps as one learns to brew. Having said that, an email to BBS might be able to answer your question, and they should be happy to provide you with OGs and FGs etc. so that you can compare numbers.

Let us know how your beer turns out - I am a big fan of the BBS mixes and recipes, and this one was a clear favourite. If you are able to, I strongly suggest picking up BBS's two recipe books. they are a little expensive on the website, but do go on sale occasionally - or, they can be had for pennies at Amazon.

Good luck!

Ron
 
Back
Top