andrewmaixner
Well-Known Member
Wow! that's a most impressive rig

If it helps -- I use this and love it!
https://utahbiodieselsupply.com/brewingfilters.php#kegglefilteroutsidehook
I'll second brewApprentice. I've used a number of methods and landed on this little gem. So far, I am very happy with the results. Hop utilization is good, whirpool unaffected, and particles in the plate chiller are negligible. They can customize to fit larger BK too.


![Craft A Brew - Safale S-04 Dry Yeast - Fermentis - English Ale Dry Yeast - For English and American Ales and Hard Apple Ciders - Ingredients for Home Brewing - Beer Making Supplies - [1 Pack]](https://m.media-amazon.com/images/I/41fVGNh6JfL._SL500_.jpg)
How well do the m12 sensor wires hold up to heat? Mine are going to be similar placement to yours and I worry that they may get scorched.
What are you using for ignition?
I love the tippy dump idea. How do you think you're going to implement it here?
As for the tippy dump, I have some ideas I'm working on.
Awesome Rig. I greatly appreciate you sharing this setup. I am planning on doing something similar and this absolutely helps. I had a quick question, do you have any trouble priming the pumps since everything is hard plumbed? There doesn't seem to be any purge valves to get the air out of the lines to prime the pump.
Hi Jon,
I had another question if you don't mind. From what I can see, your system is a closed system. How are you transferring to a fermenter after chilling and how are you draining any left over junk wort and such? There must be a place that allows you to drain and transfer wort.
Thanks
Nice. I assume you don't whirlpool then?
Yes, I whirlpool. Why would you assume not?
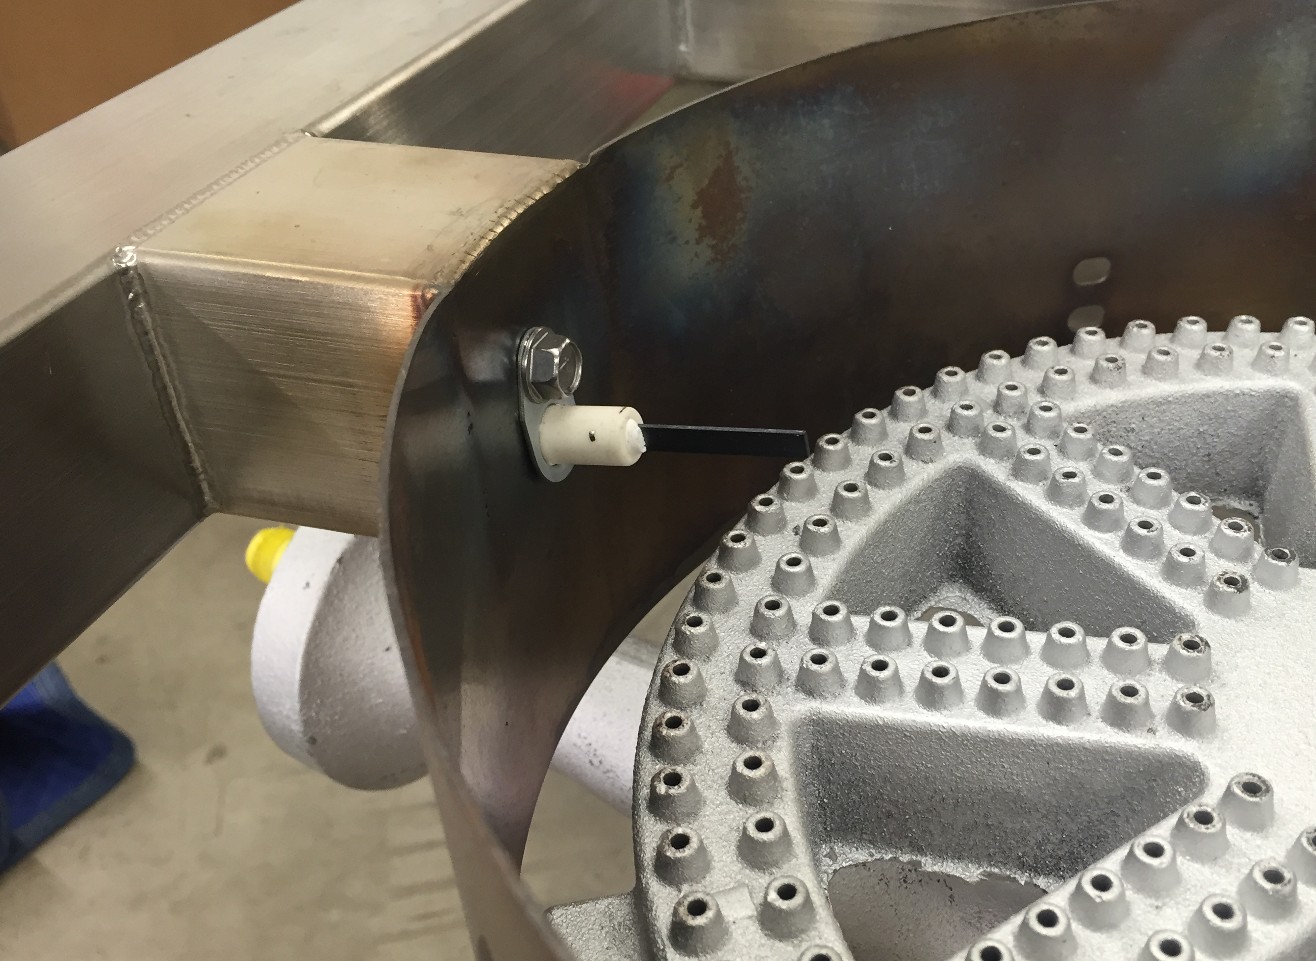
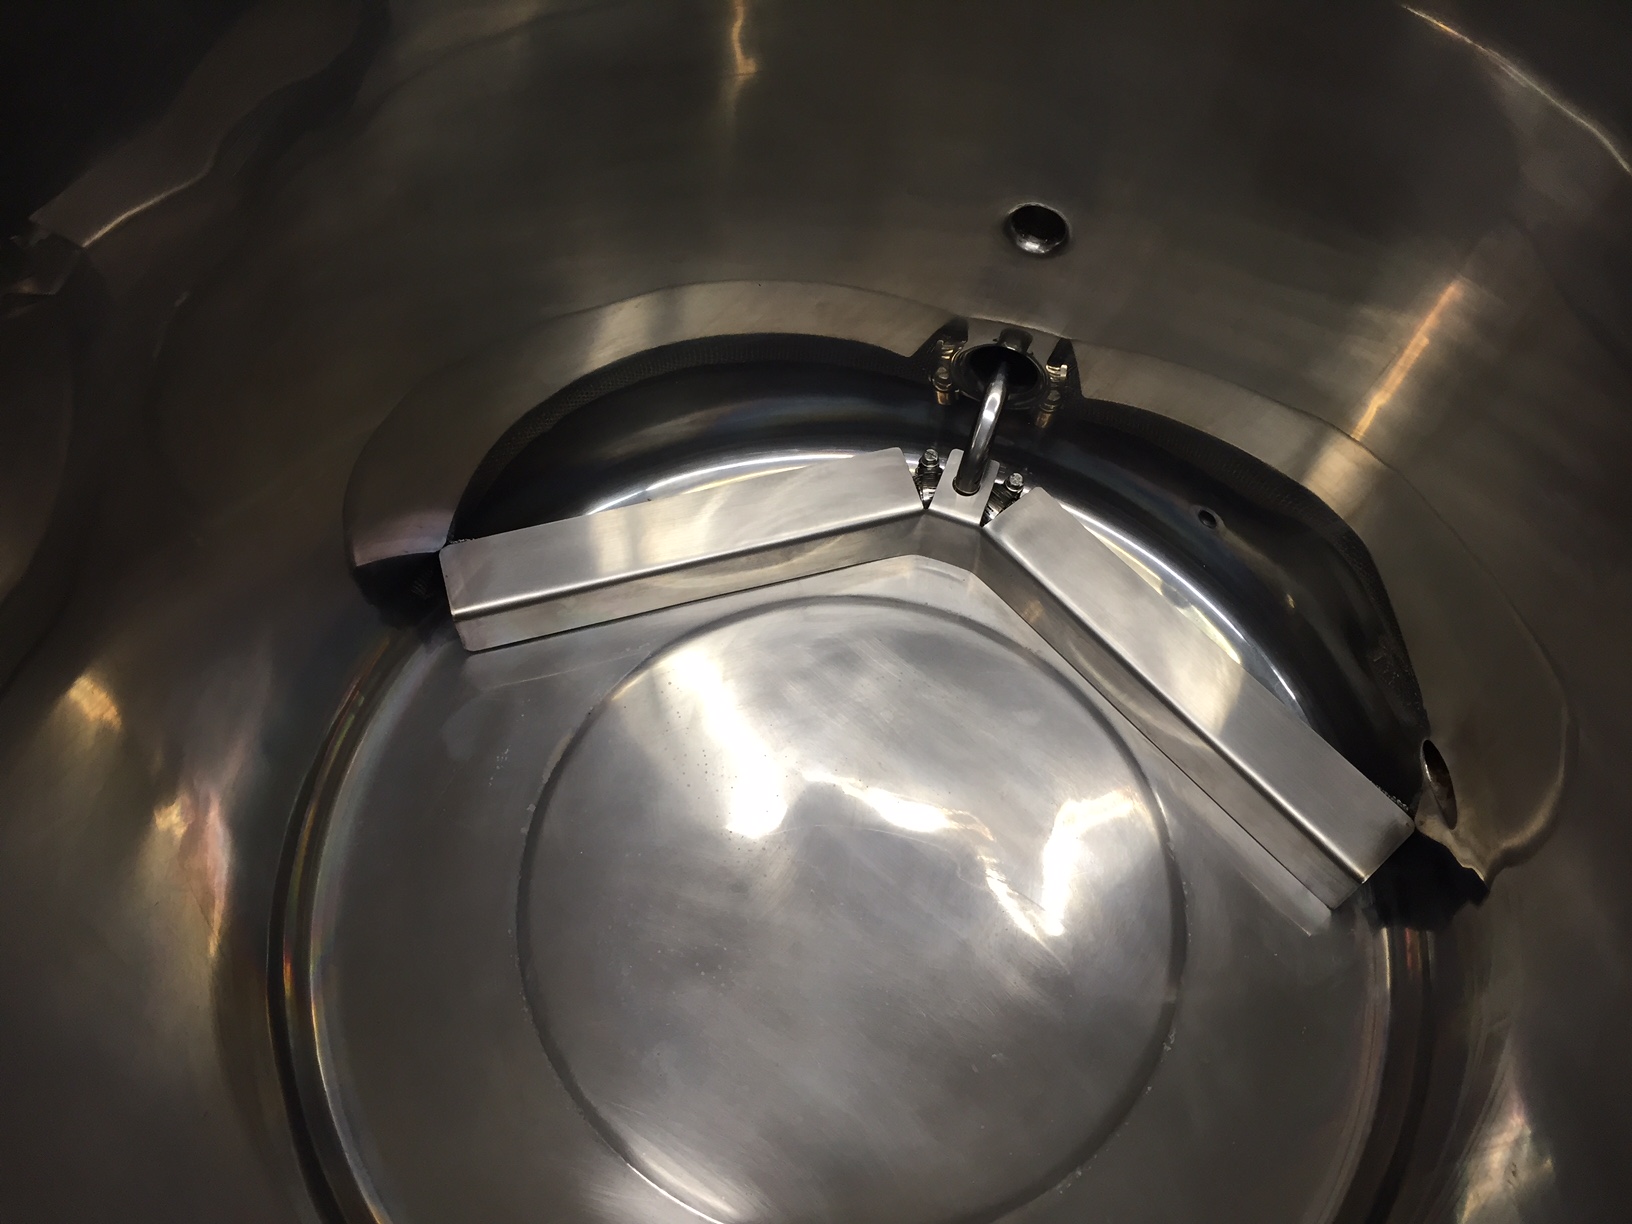
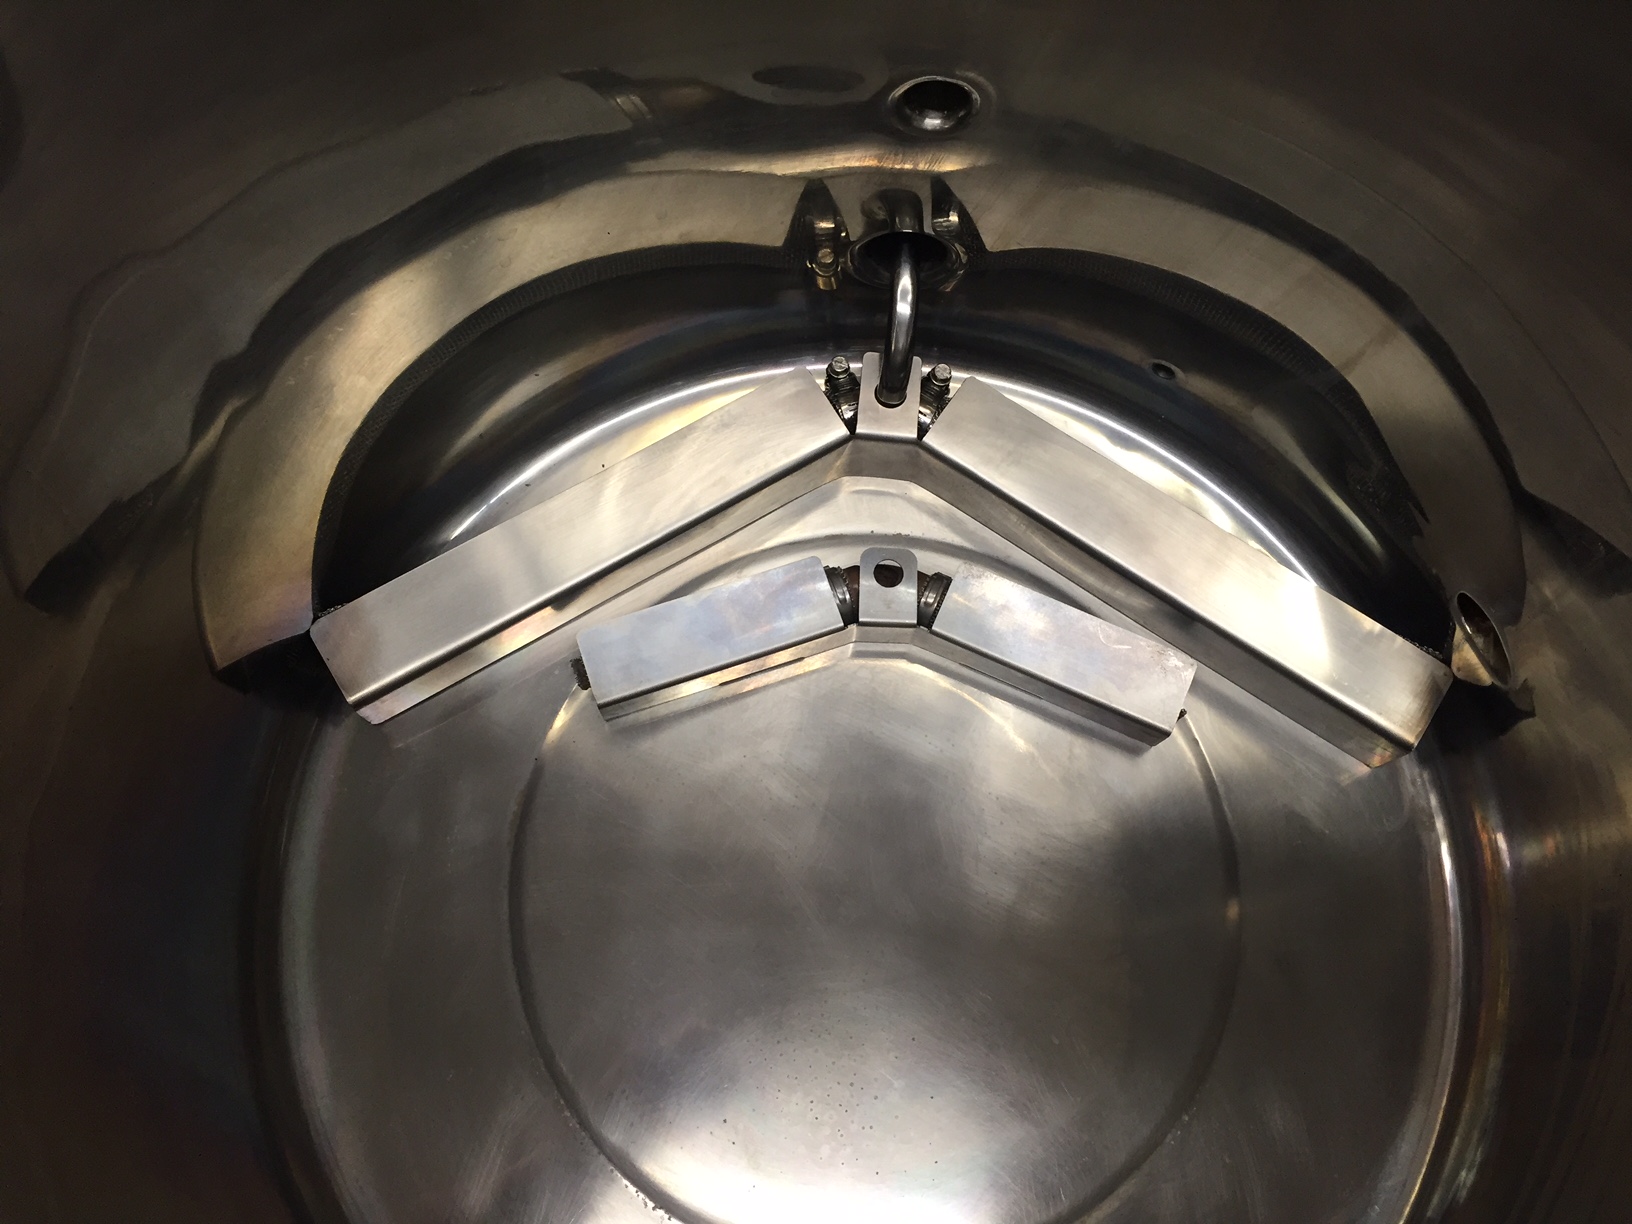
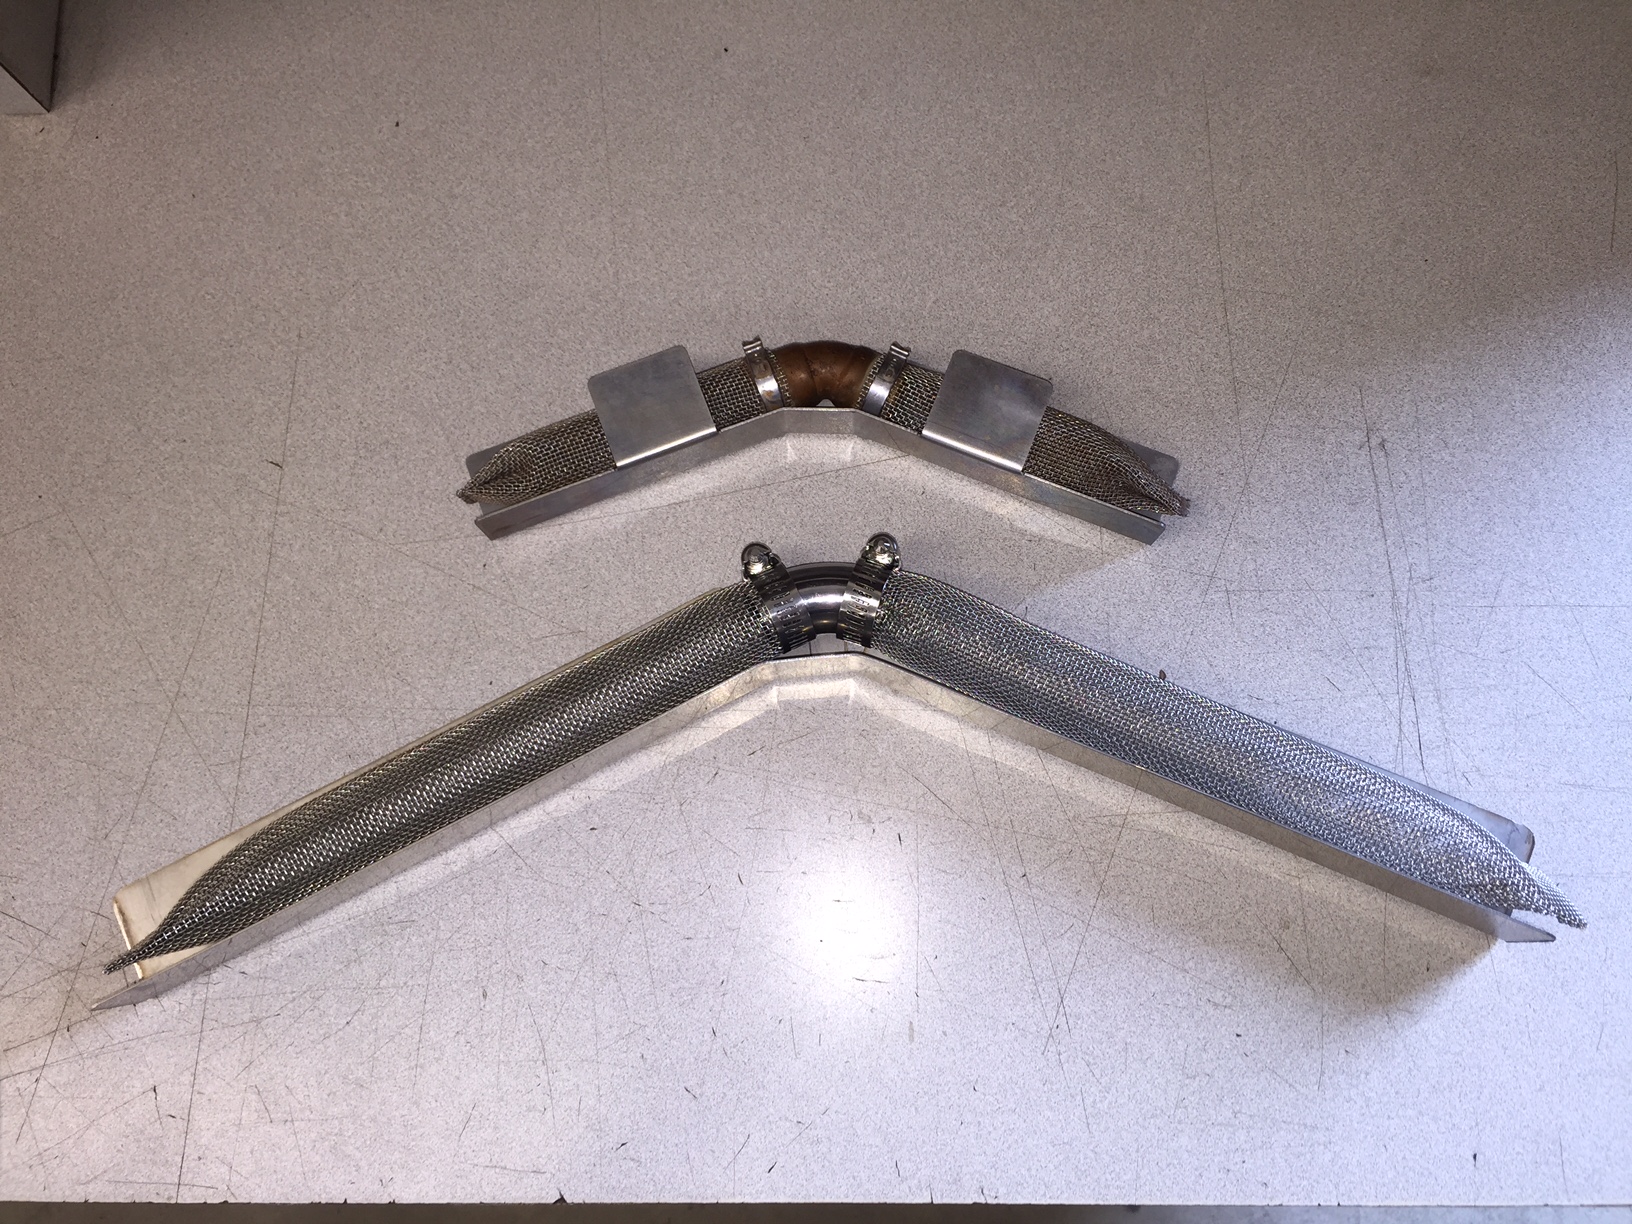
Isn't the screen and wall overkill for whirlpool? Can't you just wait for the trub to settle then run a pickup tube against the side wall?
With 10 minutes left in the boil, I start a recirc. At 6 minutes left, I bring the plate chiller into the loop to sterilize it and the hose that is used to transfer to the fermenter. I don't want to recirc through the plate chiller without filtering the trub out.
With 10 minutes left in the boil, I start a recirc. At 6 minutes left, I bring the plate chiller into the loop to sterilize it and the hose that is used to transfer to the fermenter. I don't want to recirc through the plate chiller without filtering the trub out.
I keep the boil going while I recirc. With the old kettle screen, every once in a while I would lose prime on my pump with a vigorous boil going. However, I can tell just from the two batches yesterday that the new kettle screen is helping greatly as my flow was way better than it was with the smaller screen.In your cycle above, do you stop the boil? I suppose I could let the temp come down and hold near boiling, do a fast whirlpool, then a slow whirlpool like you do (through chiller). I suppose 208 would still sterilize the chillers. But how would you do a reduced temp hopstand? Turn the chiller flush on at the end or the chiller sanitization?
I've found these forums to be a terrific wealth of knowldege, very glad that you pros are here.
With this setup, I have perfectly clear wort. I am very happy with the performance of my chillers, but would someday like to upgrade to plate chillers, if for no reason other than more of a "professional" setup. My concerns are the propensity for clogging doing this. So I could turn the boil off (or go PID 208 degrees) and whirlpool first, then bring the chillers inline (and the remaining sub-boiling temp should be OK to sanitize as you mentioned), but then how would I do a hopstand? I have a silly goal of not using filtering (I like the challenge I guess?), so any ideas how this could be accomplished? Probably more of an academic discussion, but what the heck.
An incredible setup. Pro. Very complicated. I'd absolutely love to stand on your shoulder and replicate something close to this system.
Any chance for a partslist?


