• Please visit and share your knowledge at our sister communities:
  • If you have not, please join our official Homebrewing Facebook Group!

    Homebrewing Facebook Group

Beer Cool Down

Homebrew Talk

Help Support Homebrew Talk:

This site may earn a commission from merchant affiliate links, including eBay, Amazon, and others.

frank80401

New Member
Joined
Jan 6, 2013
Messages
4
Reaction score
2
Just curious of how many homebrewers skip the normal cool down with a wort chiller of any type, put the wort in the fermenter and place it somewhere to cool down over night to pitching temp.
I talked to homebrewer that has done this for years. Of course he lives in an environment where this is easy to do most of the year.
 
There are some risks--mainly, the chance of an infection setting in. But if your sanitation is very good and you seal up the container, it can be done safely. There's also the issue of late addition boil hops that will continue to isomerize while the wort stays hot. Look into the "no chill" method.
 
Early homebrew wisdom encouraged rapid cooling to reduce the time that wort presented a nice warm sugary growth medium for bacteria. Lacking a chiller or fermentation fridge, some would float a container of hot wort in a bathtub or swimming pool. Some still do.

Slow chilling is not ideal, but usually works fine.
 
I used a wort chiller for years, but I don't use a wort chiller now because I have absolutely no possible way of connecting it to my faucet. The house I live in now has one of those super thin flat faucets with no threads or fittings. It's just perfectly flat.

That's not to say I haven't been cooling the wort down rapidly. I've reverted to the very first method I used when I first started brewing before I bought my first wort chiller. An ice bath, though a rather excessive one where I use 20 pounds of ice, plus several pounds of ice packs, and 2-4 2-liter bottles of ice (for a total of up to 8 liters of ice in PET bottles), altogether more than 30 pounds of ice combined for a single batch. This allows me to get my wort down to the mid 60s, even though my tap water might be in the mid 80s, in less than an hour. Really wish I could use a wort chiller, though. Then I'd only use the ice once the chiller got my wort down into the 80s to bring it down into the 60s.

For leaving it overnight, I've never tried that and it feels dangerous, but the "no chill" guys have a lot of success with it.

Here's a video I saw a little while back:
 
Just curious of how many homebrewers skip the normal cool down with a wort chiller of any type, put the wort in the fermenter and place it somewhere to cool down over night to pitching temp.

Me! But my fermenter is a food-grade HDPE plastic bucket, so I can't pour anything hotter than about 135F into it.

So, my process is:
use a mash sized bag to contain the hops, while still letting them swim very loosely
at flameout, pull the hops bag, squeeze the hell out of it, remove hops bag.
Place lid on boil kettle, and set it in a sink full of cold tap water to cool.
Go do something else for an hour or two.
Once wort temperature is cool enough for a plastic bucket, transfer to bucket, and wait until next day.
Next day, pitch yeast.
 
I used a wort chiller for years, but I don't use a wort chiller now because I have absolutely no possible way of connecting it to my faucet. The house I live in now has one of those super thin flat faucets with no threads or fittings. It's just perfectly flat.
1756183362550.jpeg
1756183398100.jpeg
 
I used a wort chiller for years, but I don't use a wort chiller now because I have absolutely no possible way of connecting it to my faucet. The house I live in now has one of those super thin flat faucets with no threads or fittings. It's just perfectly flat.

That's not to say I haven't been cooling the wort down rapidly. I've reverted to the very first method I used when I first started brewing before I bought my first wort chiller. An ice bath, though a rather excessive one where I use 20 pounds of ice, plus several pounds of ice packs, and 2-4 2-liter bottles of ice (for a total of up to 8 liters of ice in PET bottles), altogether more than 30 pounds of ice combined for a single batch. This allows me to get my wort down to the mid 60s, even though my tap water might be in the mid 80s, in less than an hour. Really wish I could use a wort chiller, though. Then I'd only use the ice once the chiller got my wort down into the 80s to bring it down into the 60s.

For leaving it overnight, I've never tried that and it feels dangerous, but the "no chill" guys have a lot of success with it.

Here's a video I saw a little while back:

Hmmm... if you're already using ice, you might not be opposed to this. I use a 90 qt (85 L) cooler and fill about halfway with water and ice (6 or 7 bags). I connect my immersion chiller to a fish tank pump. The out line goes into a bucket until temp hits about 115-120 F (46-49 C), then I move it into the cooler to recirculate. I easily get to mid-60s F (~18 C) fast. I've gone as far down as 50 F (10 C) for lagers with 1 or 2 more bags of ice. I hope this helps!

Cooler: https://a.co/d/5ORv1Jh

Pump: https://a.co/d/4OaiH7j
 
I used a wort chiller for years, but I don't use a wort chiller now because I have absolutely no possible way of connecting it to my faucet. The house I live in now has one of those super thin flat faucets with no threads or fittings. It's just perfectly flat.

That's not to say I haven't been cooling the wort down rapidly. I've reverted to the very first method I used when I first started brewing before I bought my first wort chiller. An ice bath, though a rather excessive one where I use 20 pounds of ice, plus several pounds of ice packs, and 2-4 2-liter bottles of ice (for a total of up to 8 liters of ice in PET bottles), altogether more than 30 pounds of ice combined for a single batch. This allows me to get my wort down to the mid 60s, even though my tap water might be in the mid 80s, in less than an hour. Really wish I could use a wort chiller, though. Then I'd only use the ice once the chiller got my wort down into the 80s to bring it down into the 60s.

For leaving it overnight, I've never tried that and it feels dangerous, but the "no chill" guys have a lot of success with it.

Here's a video I saw a little while back:

This is certainly not ideal, but I fill my sink with tap water and with the faucet still running, use a pond pump to push the water through my wort chiller. Once it gets to about 100F, I’ll turn the faucet off and let the sink drain down a bit and then start adding ice to the sink and recirculating the water instead of letting it run down the drain. I usually only use about 10lbs of ice and get the wort into the mid to high 60’s.
Pond pumps on Amazon for about $25
🍻
That's interesting. I've never heard of pond pumps before and I'm not sure I understand what they are, but from the photos I'm seeing online, this does seem feasible. It's something I've never considered before. I'm not sure what the Japanese for "pond pump" is, so I just searched the Japanese Amazon for it, and I'm finding various water pumps with names that translate to "submersible pump," "underwater pump," "wave pump," "water pump," "aquarium pump," "circulator pump," "fountain pump," and so on. I'm not sure which one of those are pond pumps, but the "submersible pumps" / "underwater pumps" look like the photos of the "pond pumps" on Google.
 
Hmmm... if you're already using ice, you might not be opposed to this. I use a 90 qt (85 L) cooler and fill about halfway with water and ice (6 or 7 bags). I connect my immersion chiller to a fish tank pump. The out line goes into a bucket until temp hits about 115-120 F (46-49 C), then I move it into the cooler to recirculate. I easily get to mid-60s F (~18 C) fast. I've gone as far down as 50 F (10 C) for lagers with 1 or 2 more bags of ice. I hope this helps!

Cooler: https://a.co/d/5ORv1Jh

Pump: https://a.co/d/4OaiH7j
Looks like I overlooked this response and only noticed Tony B's and BrewZer's. While I don't think BrewZer's idea is possible (given the shape of my faucet), your idea and Tony's idea of using this kind of pump, whether a fish tank pump or a pond pump, seems like a real solution that I hadn't considered. The cooler part wouldn't work, though, because my kettle is way too big to fit in the cooler that I have, but attaching either a pond pump or a fish tank/aquarium pump to a chiller sounds like an interesting idea.
 
Looks like I overlooked this response and only noticed Tony B's and BrewZer's. While I don't think BrewZer's idea is possible (given the shape of my faucet), your idea and Tony's idea of using this kind of pump, whether a fish tank pump or a pond pump, seems like a real solution that I hadn't considered. The cooler part wouldn't work, though, because my kettle is way too big to fit in the cooler that I have, but attaching either a pond pump or a fish tank/aquarium pump to a chiller sounds like an interesting idea.
Yup, pump is the key. Whether in the cooler or in the sink. They both serve the purpose of holding the cold water to be pumped through your chiller. 👍🏻
 
Looks like I overlooked this response and only noticed Tony B's and BrewZer's. While I don't think BrewZer's idea is possible (given the shape of my faucet), your idea and Tony's idea of using this kind of pump, whether a fish tank pump or a pond pump, seems like a real solution that I hadn't considered. The cooler part wouldn't work, though, because my kettle is way too big to fit in the cooler that I have, but attaching either a pond pump or a fish tank/aquarium pump to a chiller sounds like an interesting idea.
As I read Jose's post, the cooler is used to hold the cold water and ice to be pumped through the chiller, not the kettle itself. Basically using it as a large bucket. The cold water is pumped from the cooler by the pump through the chiller and then back into the cooler where the ice chills it down again.
 
As I read Jose's post, the cooler is used to hold the cold water and ice to be pumped through the chiller, not the kettle itself. Basically using it as a large bucket. The cold water is pumped from the cooler by the pump through the chiller and then back into the cooler where the ice chills it down again.
Ahhhh, right. In that case, that could actually work pretty well... And come to think of it, I've heard about that method before. I'd just forgotten all about it. Thanks! I had just misread that part of Jose's post.
 
P Pl
As I read Jose's post, the cooler is used to hold the cold water and ice to be pumped through the chiller, not the kettle itself. Basically using it as a large bucket. The cold water is pumped from the cooler by the pump through the chiller and then back into the cooler where the ice chills it down again.
This is how I did it the first 2 years when I started brewing, pumps are my best friend, I usevseveral different ones each brew day now.
 
I have absolutely no possible way of connecting it to my faucet.

You should have fittings under the sink for feeds off the mains water supply, with their own shutoff valves - they are put there for connections to kitchen appliances, i.e. washing machine/dishwasher. if you have one that's not used, you're golden, if you have one but it's used, then it'll be a bit more awkward to split it, but I don't imagine it would be too hard.

edit: just realised I'm on the US site, not the UK one. Guess it might be completely different over there.
Hi Zad. I'm in Japan, but I did take a look under the sink just to see if there was anything like that down there, but it was jut the pipe from the sink going down into the floor.

I kind of feel like I've hijacked the OP's thread, though I do really appreciate all the helpful replies. The water pump idea is one I hadn't even considered, and I think all the times I'd heard about it before were when I lived somewhere where I could just easily attach the wort chiller to the faucet using a readily available adapter. I'm pretty much 99% sure I'm going to use this aquarium pump method that Jose mentioned, though maybe a bit closer to Tony B's method (mainly depending on how well i can use my cooler for it, I guess).
 
Last edited:
I use a cooler and a submersible pump ( that serves double duty for a keg washer) I make blocks of ice ahead of time and hook it up to a wort chiller
 
I used a wort chiller for years, but I don't use a wort chiller now because I have absolutely no possible way of connecting it to my faucet. The house I live in now has one of those super thin flat faucets with no threads or fittings. It's just perfectly flat.

That's not to say I haven't been cooling the wort down rapidly. I've reverted to the very first method I used when I first started brewing before I bought my first wort chiller. An ice bath, though a rather excessive one where I use 20 pounds of ice, plus several pounds of ice packs, and 2-4 2-liter bottles of ice (for a total of up to 8 liters of ice in PET bottles), altogether more than 30 pounds of ice combined for a single batch. This allows me to get my wort down to the mid 60s, even though my tap water might be in the mid 80s, in less than an hour. Really wish I could use a wort chiller, though. Then I'd only use the ice once the chiller got my wort down into the 80s to bring it down into the 60s.

For leaving it overnight, I've never tried that and it feels dangerous, but the "no chill" guys have a lot of success with it.

Here's a video I saw a little while back:

Thanks for sharing the video. It was very helpful.
 
Count me in as one of the guys who uses a chiller with a tub of ice. I hook the chiller to the pump, run the water thru the chiller and back into the tub where I put bags of ice to keep the water cool. Out here in California, water is a big deal so I try and conserve when I can. Usually I can get the wort down to pitching temps within an hour or two, but I never watch the clock when I brew. I know it is going to be a full day's work no matter what I do to prepare.
 
I used a wort chiller for years, but I don't use a wort chiller now because I have absolutely no possible way of connecting it to my faucet. The house I live in now has one of those super thin flat faucets with no threads or fittings. It's just perfectly flat.
Perhaps, you could just use a small submersible fountain pump to push your tap water through your chiller. If you have a double sink, you could still put ice, or frozen jugs to further lower the tap water temperature. Then drain out to the other side. If a single sink, you could drain out to five gallon buckets. I catch my chiller water and use it for cleanup.

Edit: Sorry, should have read through first. I see others have already made similar suggestions.
 
I've done no-chill for four years with good results. Currently I'm in third place in my club's yearly competition. Third place and I only entered one beer in the first round instead of the two allowed and I didn't have a cider to enter in the first round.
 
That's interesting. I've never heard of pond pumps before and I'm not sure I understand what they are, but from the photos I'm seeing online, this does seem feasible. It's something I've never considered before. I'm not sure what the Japanese for "pond pump" is, so I just searched the Japanese Amazon for it, and I'm finding various water pumps with names that translate to "submersible pump," "underwater pump," "wave pump," "water pump," "aquarium pump," "circulator pump," "fountain pump," and so on. I'm not sure which one of those are pond pumps, but the "submersible pumps" / "underwater pumps" look like the photos of the "pond pumps" on Google.
I think this is the one I’m using. Been a while since I bought it…
https://a.co/d/2P0lRQT
 
So your faucet is rectangular? If so, NVM.
Yep. Like a thin flat rectangular sheet of metal with holes for the water to come out of at the end but with no threads or fittings to attach anything there. Works great as a normal faucet. Not so great if you want to attach anything to it.
 
That's interesting. I've never heard of pond pumps before and I'm not sure I understand what they are, but from the photos I'm seeing online, this does seem feasible. It's something I've never considered before. I'm not sure what the Japanese for "pond pump" is, so I just searched the Japanese Amazon for it, and I'm finding various water pumps with names that translate to "submersible pump," "underwater pump," "wave pump," "water pump," "aquarium pump," "circulator pump," "fountain pump," and so on. I'm not sure which one of those are pond pumps, but the "submersible pumps" / "underwater pumps" look like the photos of the "pond pumps" on Google.
There are plenty of pond pumps listed on english language Amazon. Just don't get a 2000gph one. You want it slower to give the water time to transfer the heat into the water.
 
Yep. Like a thin flat rectangular sheet of metal with holes for the water to come out of at the end but with no threads or fittings to attach anything there. Works great as a normal faucet. Not so great if you want to attach anything to it.
Is there a section that pulls out to help wash dishes and stuff? If so the bit where the hose attaches to the faucet outlet is threaded.
 
Is there a section that pulls out to help wash dishes and stuff? If so the bit where the hose attaches to the faucet outlet is threaded.
A "section that pulls out to help with dishes"? I'm trying to imagine what that might look like, but whatever it is, I'm pretty sure I don't have it.
 
There are plenty of pond pumps listed on english language Amazon. Just don't get a 2000gph one. You want it slower to give the water time to transfer the heat into the water.
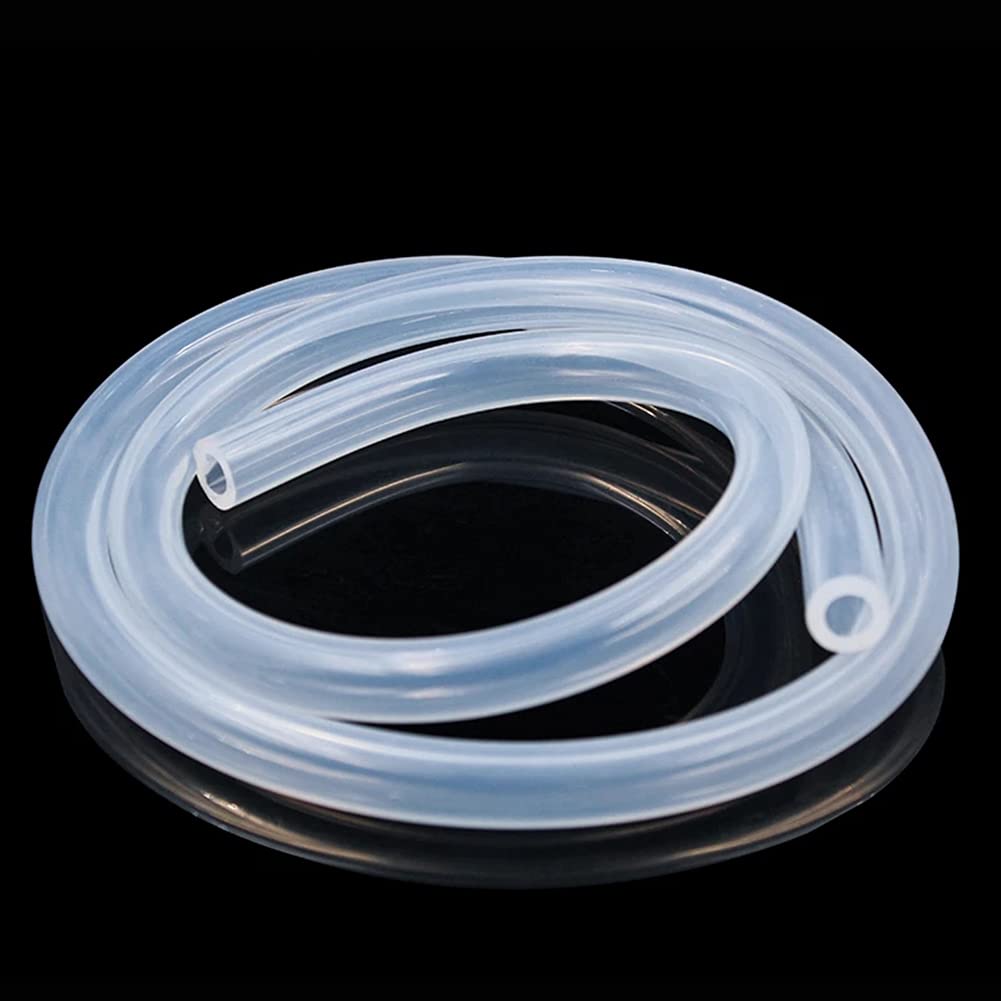
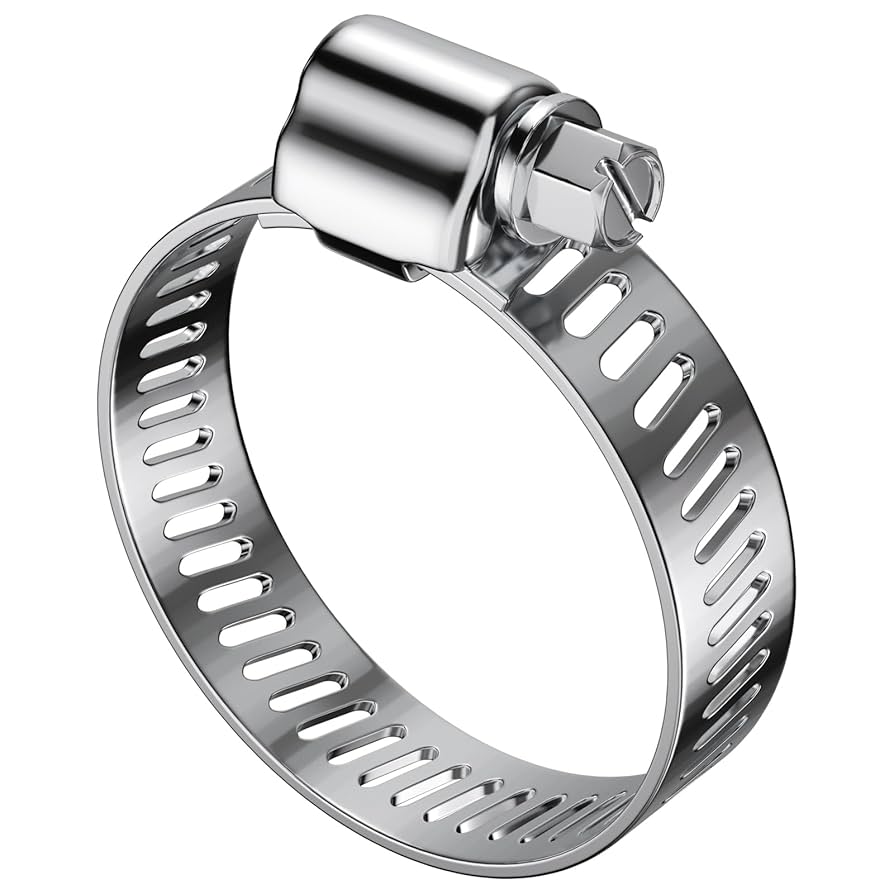
I ended up buying one with essentially the same specs as Jose's (which is also very similar to Tony B's). It arrived pretty quickly and I found that the typical silicon tubing used in homebrewing for transfers, racking, and so on, fit perfectly over the smallest outlet adapter. I imagine I'll probably need to use a clamp on the end attached to the chiller, though.
 
We’ve probably all heard that “no-chill works fine.” But what does everyone think about not getting cold break to settle out & leave behind?
 
Really wish I could use a wort chiller, though. Then I'd only use the ice once the chiller got my wort down into the 80s to bring it down into the 60s.
Buy yourself an aquarium pump or something similar.

You could have it in a bucket, into which you're running your flat faucet, and still use an immersion chiller. The best part of this is that you can use the warm tap water to take down the temperature to something reasonable, and then start adding ice to the bucket so that your chiller can bring the wort down below the temperature of your tap water.

I can't hook my IC to the faucet for a similar reason, so this is what I do when I'm using my IC.
Yeah, thanks to everyone's helpful replies (especially Tony B and Jose Diaz), I've bought an aquarium pump and plan to try this using my cooler. I do still plan to use ice, but instead of the 30+ pounds of ice total that I use now, it'll probably be less than 10 pounds. I do think that even if I didn't use the cooler, I could probably lower the temperature pretty quickly in the sink simply using my current method but by circulating that water through the wort chiller, but just delaying the adding of the ice until under a certain temperature (and also probably draining the warm/hot water, while adding fresh tap water).

The method I've been using has been able to get the temperature of the wort down to pitching temps within about an hour, but it has taken an excessive amount of ice and a lot more effort than when I used to use a wort chiller just regularly hooked up to the faucet, so there are quite a few benefits I can imagine this method having.

It also should allow me to try some different methods of hop whirlpooling and hop stands.
 
Just curious of how many homebrewers skip the normal cool down with a wort chiller of any type, put the wort in the fermenter and place it somewhere to cool down over night to pitching temp.
I talked to homebrewer that has done this for years. Of course he lives in an environment where this is easy to do most of the year.
I do not do this. The few situations where I've had to, I haven't been happy with the final result. The most recent was coming back to brewing after a multi-year hiatus, and realizing that my counterflow chiller... Wasn't... Flowing, that is. So my beer got put into the fermenter and had to go from hot to pitching temp in the fermentation fridge.

That said, I don't always chill ALL the way down to pitching temps. I can do so, if I use my pumps, CFC, and ice... Even down to lager pitch temps. But more likely is that I'll chill down pretty close to the temp of the ground water recirculating the wort through the CFC, and then push it through the CFC into the fermenter. Then I put it in the fermentation fridge to get it down to pitch temp.

This can often be a 6-7 hour process for ales, but for example the lager I brewed yesterday started at 98 degrees in the fermentation fridge and it took about 24 hours (10 gal volume) to get it down to 55 degrees where I could pitch the W-34/70 slurry I had from the pilsner I had just kegged.
 
Back
Top