• Please visit and share your knowledge at our sister communities:
  • If you have not, please join our official Homebrewing Facebook Group!

    Homebrewing Facebook Group

Basement Brewery Build (illustrated and alliterated)

Homebrew Talk

Help Support Homebrew Talk:

This site may earn a commission from merchant affiliate links, including eBay, Amazon, and others.
Hey look I made a thing that will tell you the temperature and also you can plug a lamp into it if you plug in the thing first (by all that I mean the 120V side is wired).

ANNNNNND tracking says my kettle is arriving today!!! :ban::rockin::fro::ban::fro::D:goat::goat::goat:
xizakBT.jpg
 
Lots going on this weekend and last night!
- Kettle came in Friday, so was finally able to build my stand. It is 2x kettle width, and the kettle sits on a floating platform. Left side for mash (winch mounted above), right for boil (hood above). Other nice thing is that this design makes a trough on the stand top that I caulked in (and will paint). I'll put a drain through this and all brewery spills go through that into a bucket below.
hryNgAz.jpg
52mzC0q.jpg

Note: that electrical outlet above the stand is getting a GFCI and an outdoor waterproof cover!!
zWPYNL7.jpg

- Spa panel wired and mounted
egEtKrg.jpg


- Controller is 90%+ complete. Only need to solder XLR connector and pot, make final connections, and put the lid on (all assuming that the wiring works)
PmNpxWx.jpg


Things are finally starting to come together!!!
With any luck I can finish my controller tonight and do a water test!
0Y6xWva.jpg
 
Also realized while wiring the box that the yellow lights would only work subject to the controls for the SSR/SSVR (the SSR/PID one would flash with the fire signal), so I switched those to before. I shouldn't be any impact otherwise.
J81GnrM.jpg
 
Also realized while wiring the box that the yellow lights would only work subject to the controls for the SSR/SSVR (the SSR/PID one would flash with the fire signal), so I switched those to before. I shouldn't be any impact otherwise.

Many panels will use a light to indicate power is on to any element with the switch indicating which control is active. Then they use an indicator light to show them when the element is actually firing.

I'm sure that it doesn't matter at all which route you are going with. I don't have any lights at all, but at times I've thought that a nice glowing light to indicate "Element Firing" would be fun. I feel like I saw a build where the person wired the Firing light directly into their element enclosure. That way the pot itself is lighting up when power is running.

No matter what, I'm sure you'll enjoy the build.
 
Well, yesterday was a very good day.
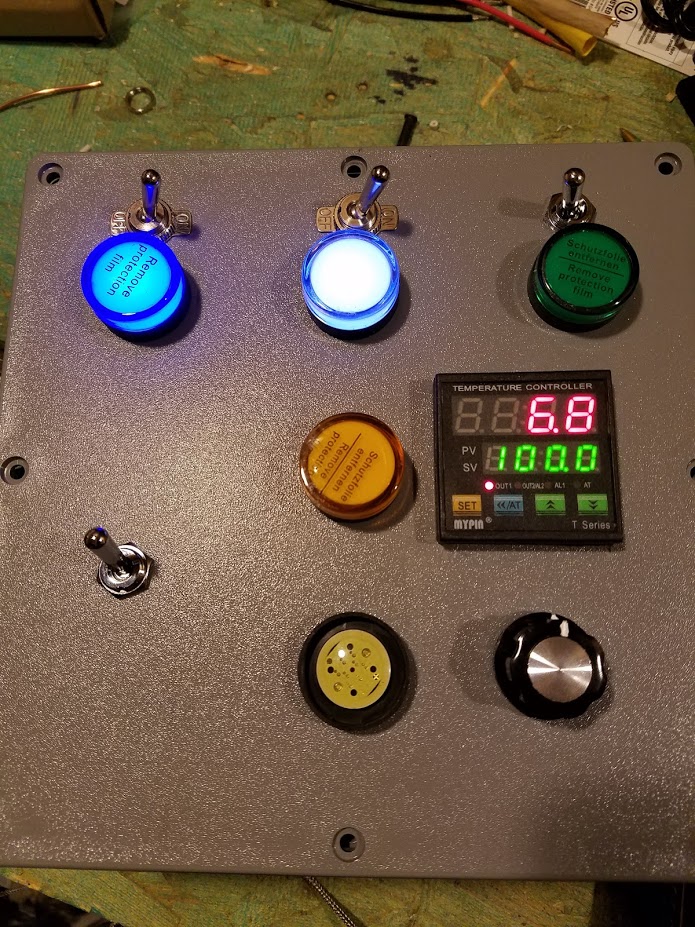
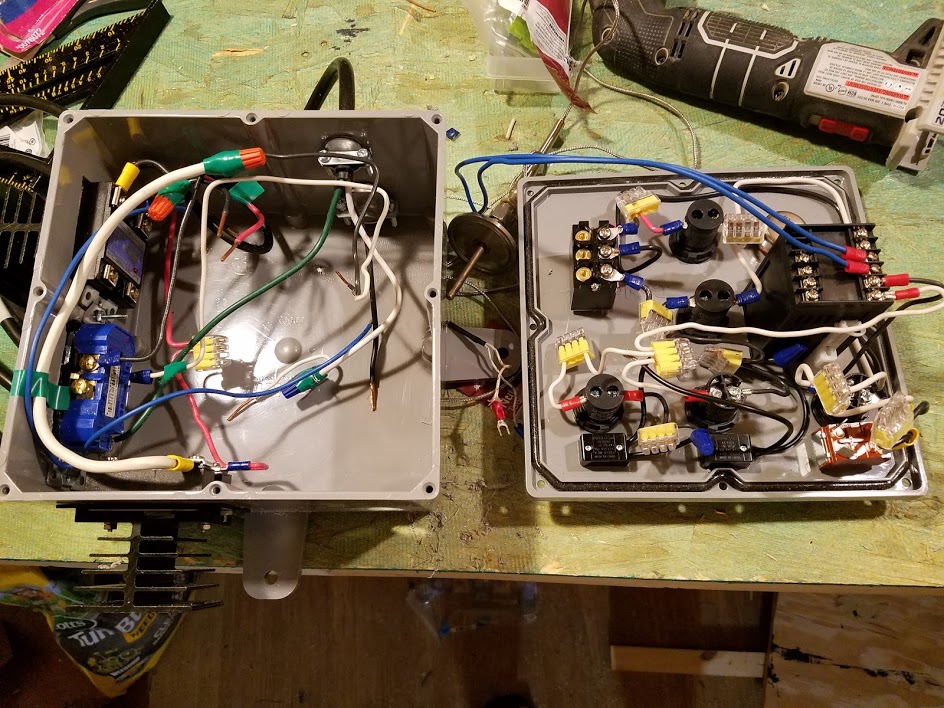
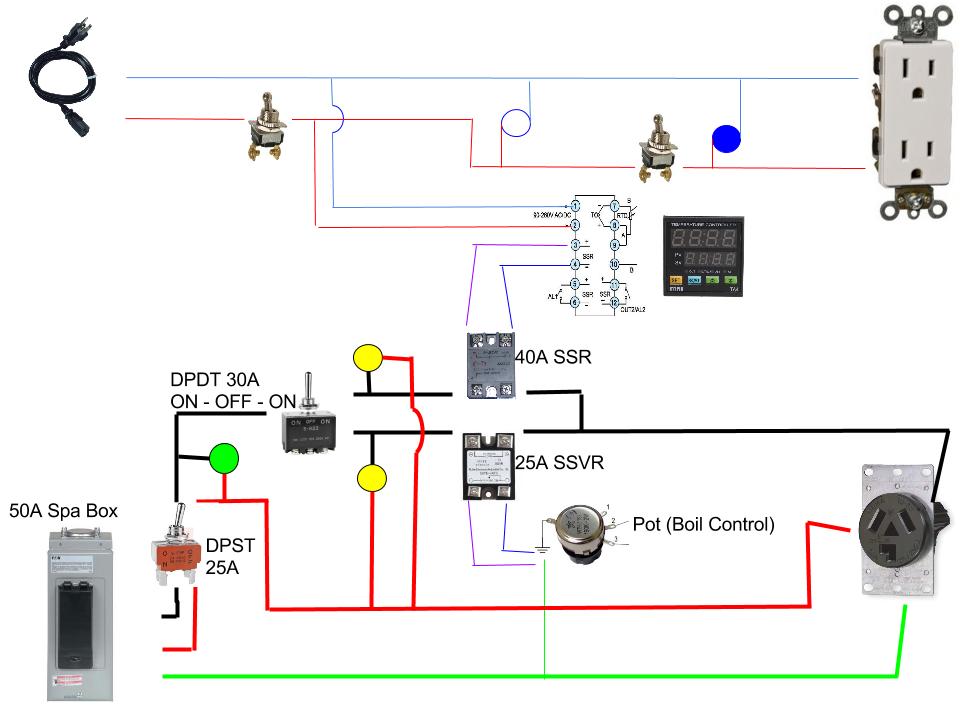
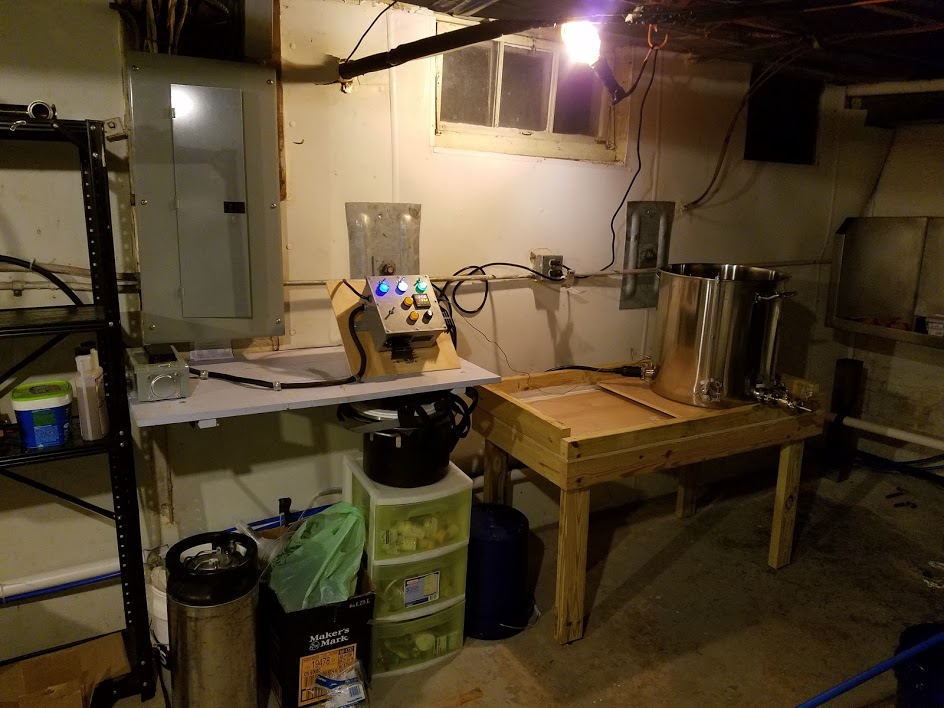
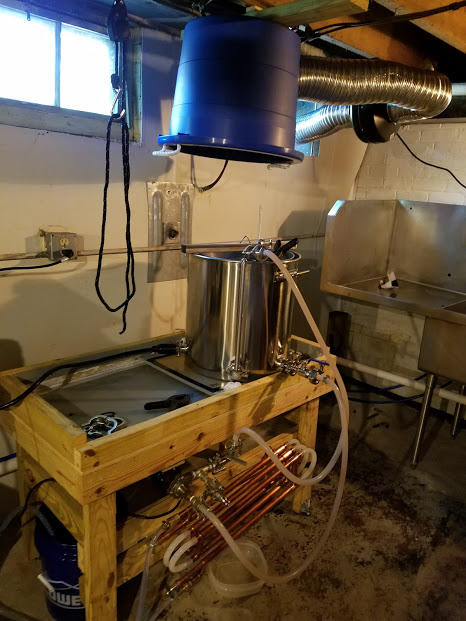
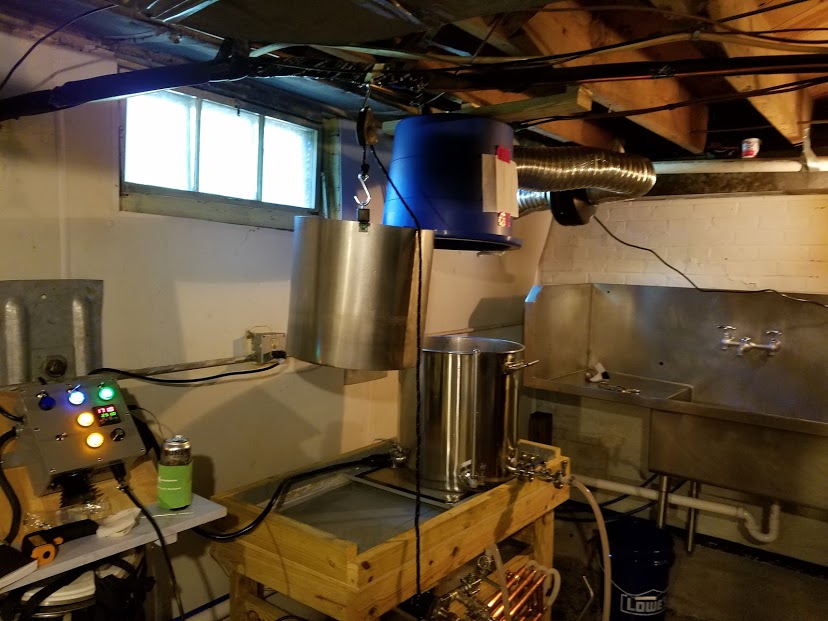
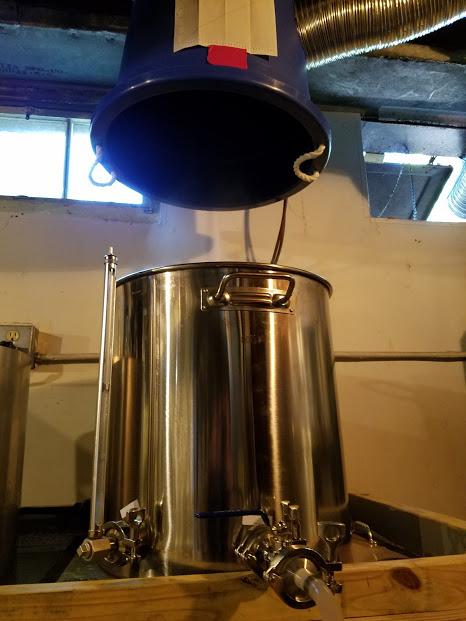
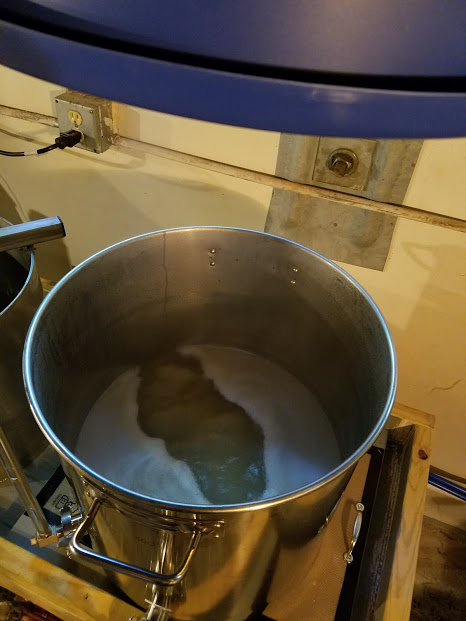
After work I was able to get all of the big bits installed and the electronics tested. Getting the controller plugged in and running has relieved a huge amount of anxiety. It was the only part of this whole thing that I wasn't 100% confident in my ability to do myself. As should be clear by now, I am by no means an expert with electricity, and have never worked with 240V before. Definitely an anxious moment checking the final connections, putting on the lid, and hitting the switch for the first time. That said, it looks like my research and ambition paid off, and it all appears to work (water test pending). There is one issue with the lights that may not be a bad thing after all.

Remaining Tasks:
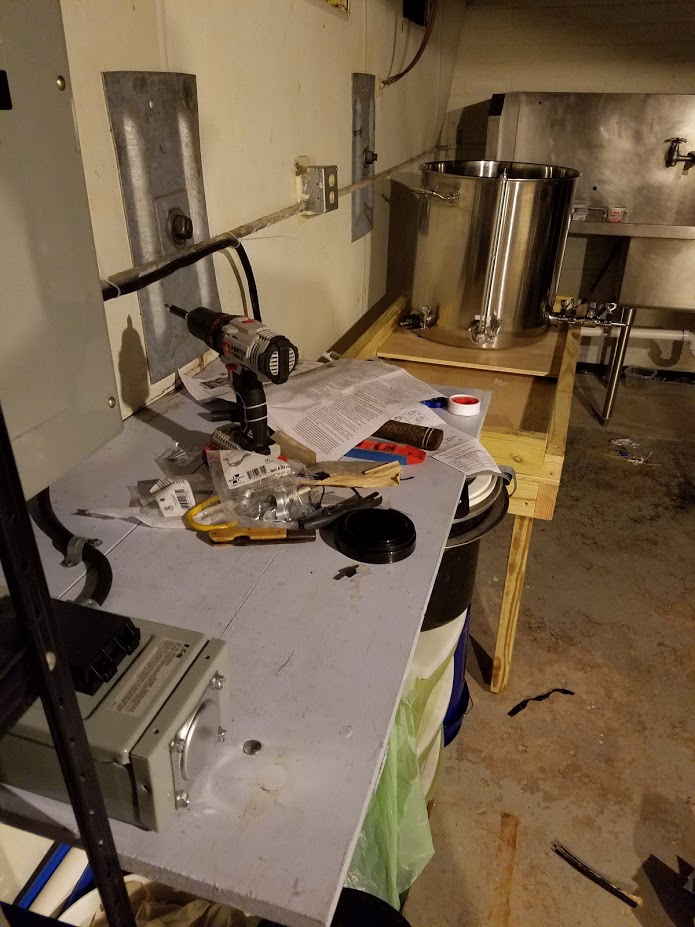
- Jaded CFC comes in tomorrow. I'll mount that to the stand and run permanent water to it
- Paint stand and drill drain
- Reinforce stand legs with frame
- Finalize pump orientation and placement, mount
- Plumb beer route for pump/CFC
- Mount vent hood and fan
- Clean piles of wire pigtails, sawdust, switches and spades, tools, brewing equipment that are basically covering my house.
- BREW.
I think all of this (except brewing) can be knocked out in basically a single day.
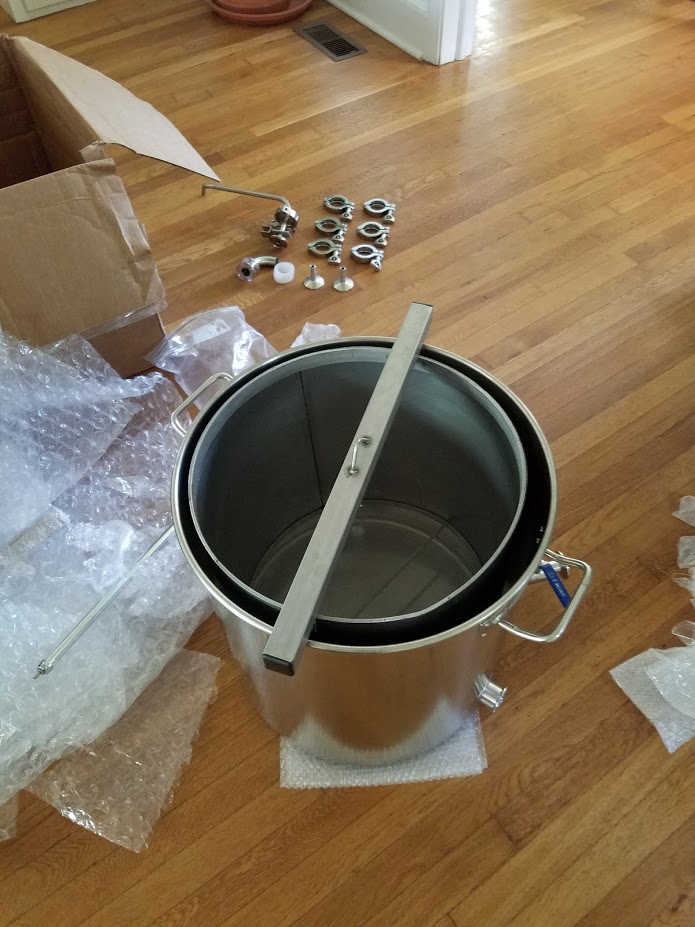
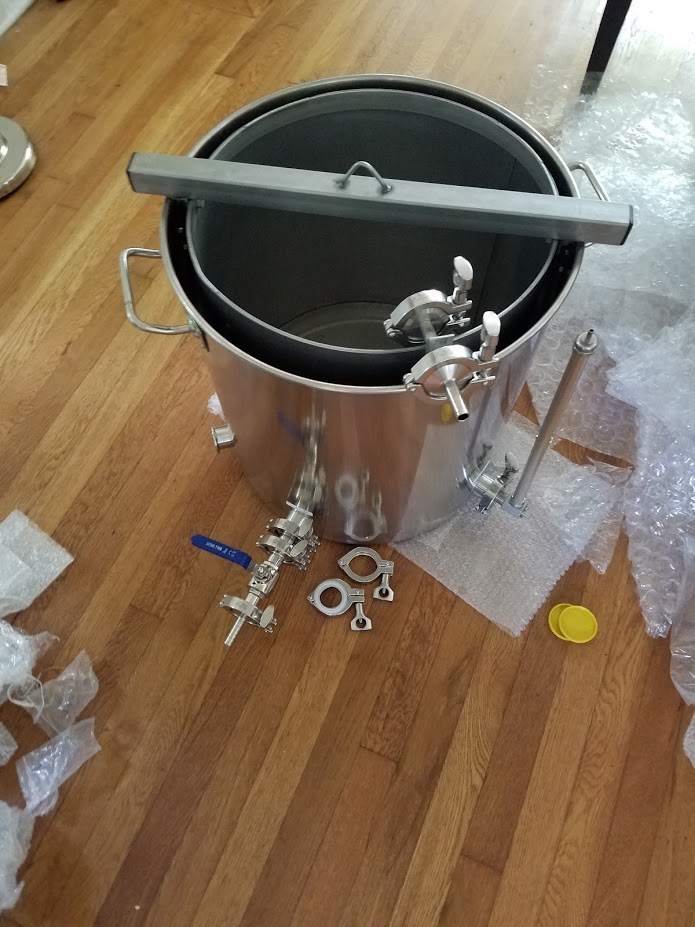
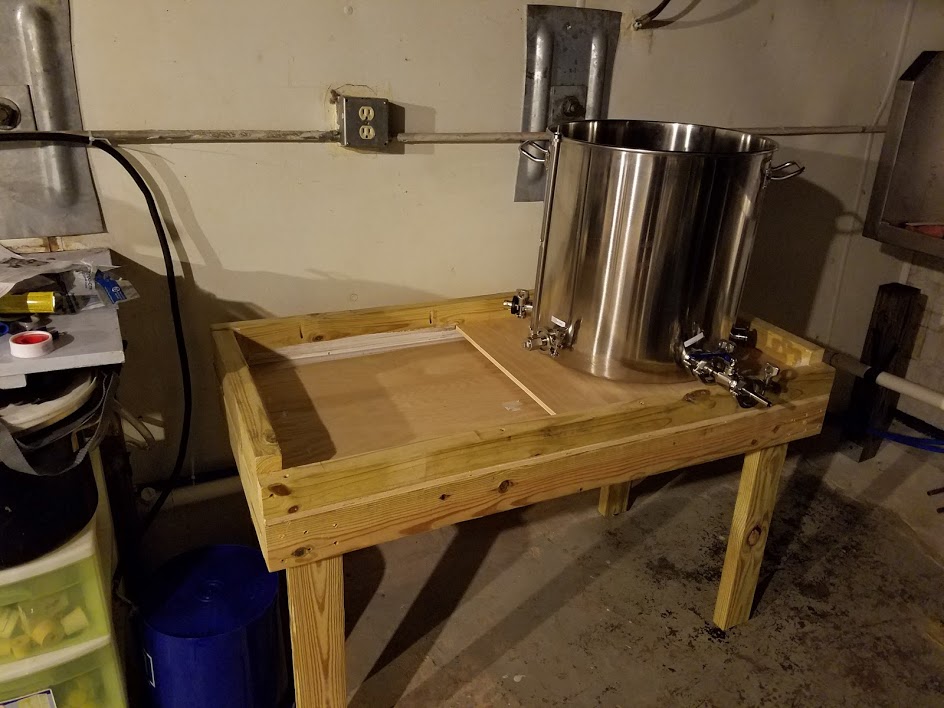
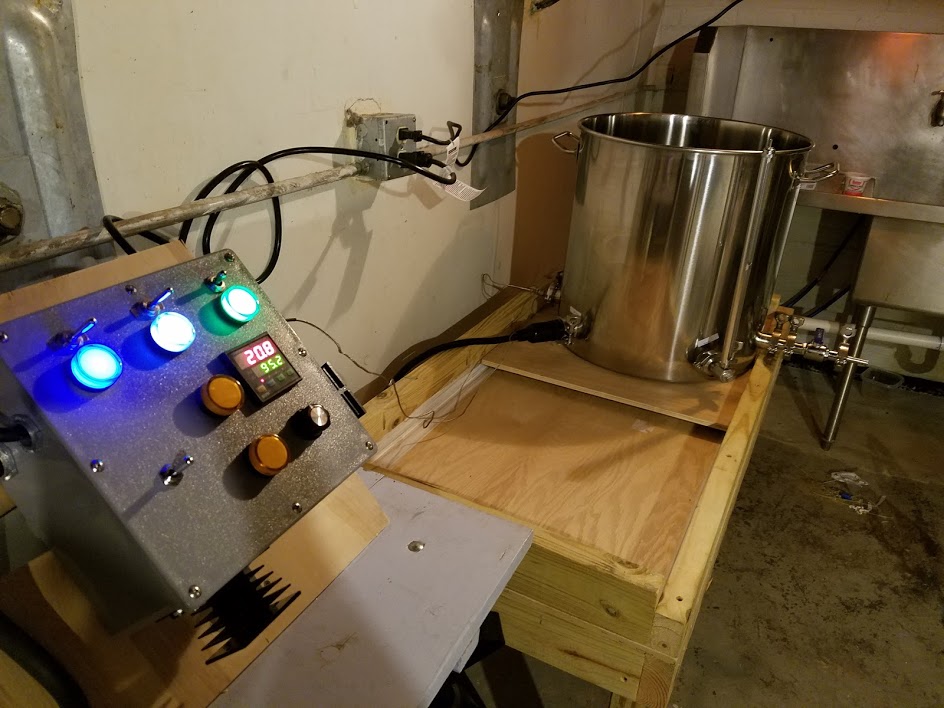
Here are a couple shots of the nearly finished product, though it's tough to get glamour shots in my seriously unglamourous basement at midnight.

NhmbwRr.jpg


JTOXMSO.jpg
 
After a final push, the brewery is done and first batch brewed this weekend!
Mash
sEDW4ya.jpg

LEtGI6u.jpg

Drain
kIMphyy.jpg

Boil
HP6uCzn.jpg

mDdl9Zg.jpg


Overall, everything went smoothly. I do have a couple of items I wanted to get some feedback on.
First, a bit into the boil, I started to get a pretty decent drip going out of the bottom of my inline fan. It's not on a long run, and it seems to be exhausting great, so I'm not sure what the problem is. Here is the fan model. Do I A) RDWHAHB and put a bucket under it? B) caulk the bottom seam and hope it blows out (may cause moisture/mold buildup)? C) Change my vent setup?
Only other area of concern was with my heat sinks. I am used to running 120V, where the heat sink barely got warm. The temp when I was at full power approaching boil was 150+, very hot to the touch. Am I concerned, or is this normal?
 

Latest posts

Back
Top