• Please visit and share your knowledge at our sister communities:
  • If you have not, please join our official Homebrewing Facebook Group!

    Homebrewing Facebook Group

Are you gonna bark all day little doggie... or are you going to build a Keezer?

Homebrew Talk

Help Support Homebrew Talk:

This site may earn a commission from merchant affiliate links, including eBay, Amazon, and others.

Guntr

Well-Known Member
Joined
Jan 2, 2010
Messages
114
Reaction score
1
Location
North Stormont, Ontario
Hey all,

Been slowly day by day completing my Keezer with much help from people here. It is amazing what you can learn by reading through the FAQs and old threads. Since I'm about 95% completed, exterior just about 100% completed, I thought I would finally post some pics.

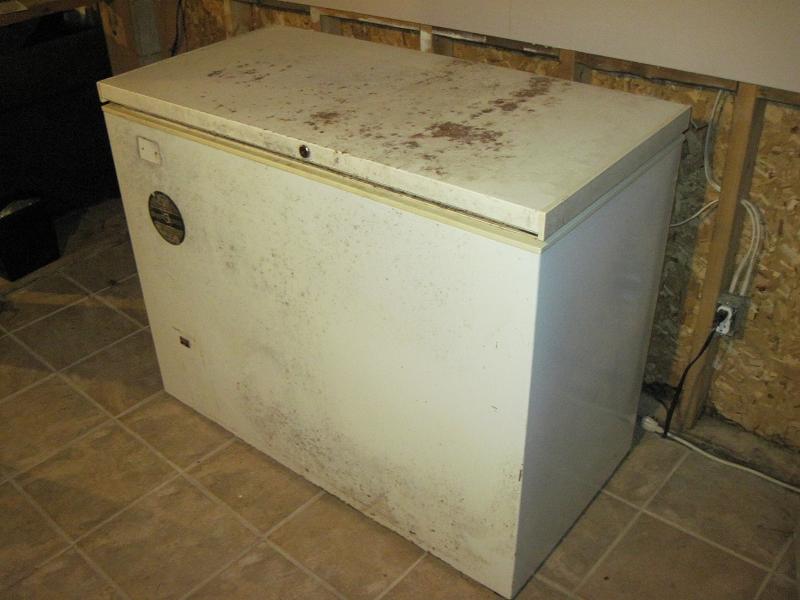
To give you an idea, this is what I started with:

001%20-%20Old%20Freezer%20Before%20-%20medium.JPG


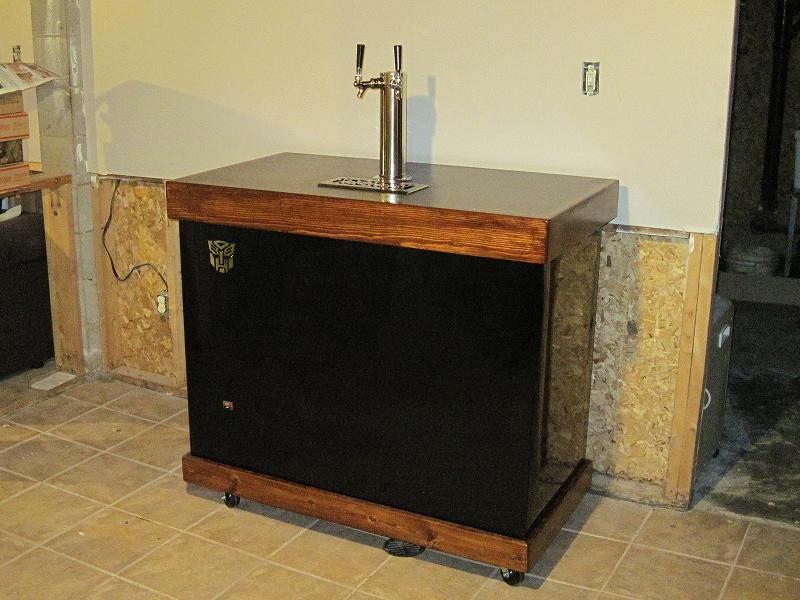
This is the final result:

029%20-%20Kegerator%20%28Autobot%20Emblem%20added%29%20-%20medium.JPG


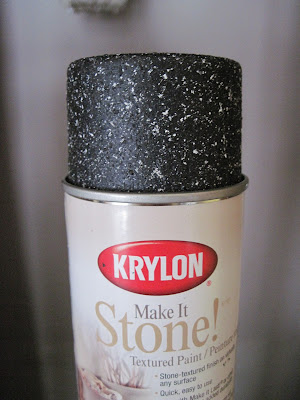
I must show off the counter-top that I made pretty much from scratch:

029d%20-%20Kegerator%20%28Autobot%20Emblem%20added%29%20-%20medium.JPG


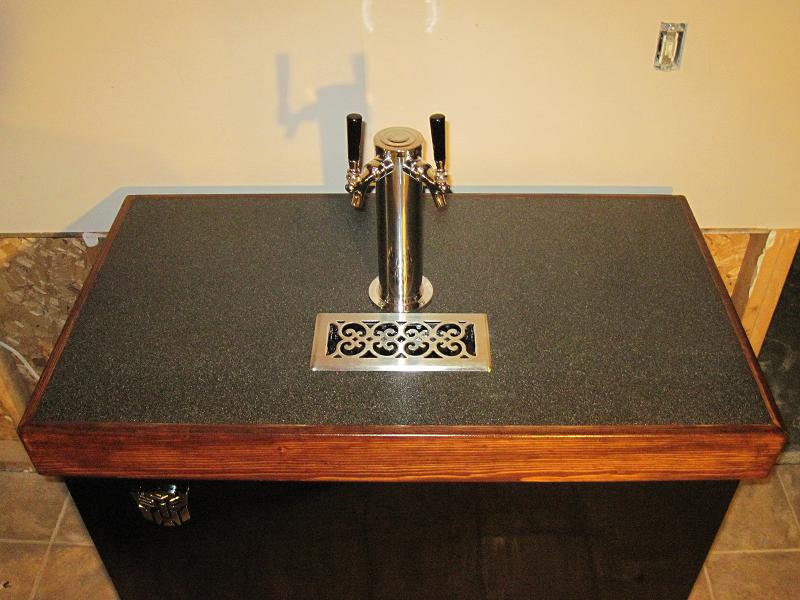
Inside I have room for at least five cornies + 20lb CO2 Cylinder, possibly one more corney.

030a%20-%20Kegerator%20%28inside%29%20-%20medium.JPG


I've posted a tonne more step-by-step photos and comments on my Picasa Album.

Let me know what y'all think.
 
Nice work! do yourself a favor and stick the 20# co2 tank on the outside of the keezer. it'll free up more room.
 
Wow, those are Keezer equivalents of Charles Atlas before and after pics.
 
Thanks for all the compliments everyone. I owe it all to the help and advice from this forum.

Nice work! do yourself a favor and stick the 20# co2 tank on the outside of the keezer. it'll free up more room.

That is an option down the road, but since I only have two kegs at the moment I think I'm ok for now. Unless you're offering to give me four cornies??? :mug:
 
Great Keezer and equally great Reservoir Dogs reference!

Thanks! Glad someone got it. I actually saw it originally in the theater.

When does it transform in to a robot and piss beer in to my cup?

That's been pushed out to Phase 2 of the project due to budgeting constraints during first quarter of 2010.
 
That is cool you saw it in theater! It is one of my fav movies. Have the big "Let's go to work" poster hanging on the wall actually.
 
looks stellar, nice work! is that a transformers bottle opener?

Just an Autobot emblem I bought on eBay to cover the holes left behind from the original name plate, but making one out of steel set up to pry bottle caps off between the "nose" and "mouth" would be cool.
 
Wow! Very Nice. I like the side-by-side comparison of before and after...

Thanks. It was a lot of work. Looking back though, cleaning up and painting the freezer was the cheap and easy part.

I am another step closer today. I picked up the CO2 cylinder today, kegged my first batch of beer and have it force carbing as I type.
 
Let me know what y'all think.

Thats a beautiful project! I wish i could have started home-brewing back in the States--would have saved a lot of money!

What material is the top-surface? Looks like granite but I'm fairly certain you didn't use actual granite. ;)

Suggestion: If you raise up the whole project (up on cinderblocks like a car?) and reinstall the casters about 2" closer to the center, they won't even show from the front.
 
Beautiful!

What did you use for the black paint, and how did you apply it? I used the black spray appliance epoxy stuff...it worked okay, but it sure wasn't shiny like yours!
 
Thats a beautiful project! I wish i could have started home-brewing back in the States--would have saved a lot of money!

What material is the top-surface? Looks like granite but I'm fairly certain you didn't use actual granite. ;)

Suggestion: If you raise up the whole project (up on cinderblocks like a car?) and reinstall the casters about 2" closer to the center, they won't even show from the front.

Thanks! Granite would have been nice, but beyond my budget and pretty heavy for the freezer lid. I used a spray called "Make It Stone!" from Krylon, the lots of clear-coat with light sanding in between.

IMG_6732.jpg


If you check out my Picassa Web Album it shows step by step of the process.
 
Beautiful!

What did you use for the black paint, and how did you apply it? I used the black spray appliance epoxy stuff...it worked okay, but it sure wasn't shiny like yours!

I actually just used a quart of glossy Tremclad Black Rust Paint and a brush. Only a few spots required a second coat. Turned out nicer than I thought it would.


Nice build, but why no forward sealing faucets??

When I ordered my kit I didn't realize that Keg Connection would customize their kits and their default options did not include forward sealing faucets without CO2 cylinder and being in Canada I wasn't sure if the CO2 would be legal to fill here. Plus the 5lb would cost just as much as a 20lb to fill locally.

We'll see how these do. Being my first build I'm happy for now.
 
I put together the "fan box" this morning. We'll see if this Dollar Store box works, I still might have to make one out of wood. The "flex" conduit is not as flexible as I had hoped. I may end up buying an elbow or two to make routing it inside the freezer easier. I'm also going to buy some velcro to hold down the box.

031%20-%20Fan%20Box%20-%20medium.JPG

How is your fan box working... I think we will have to rig something up to cool the tower.
 
I haven't seen very many freezers with a tower on top, why is that?

Do you have any pictures of the thermostat that you installed?
 

Latest posts

Back
Top