corcis
Member
First, my inspirations:
mwill07's thread
IOnceWasLegend's thread
Xakk's thread
I'm pretty good at making beer, food, and messes. Figured I should try my hand at making a fermentation chamber. My plans are pretty butt-ugly/not-to-scale, so they may not appear on here. Mostly, a lot of stupidity, wood screws, and 2x4s, so far. I picked up a circular saw, along with a bunch of lumber, came home and whacked it up into these piles:
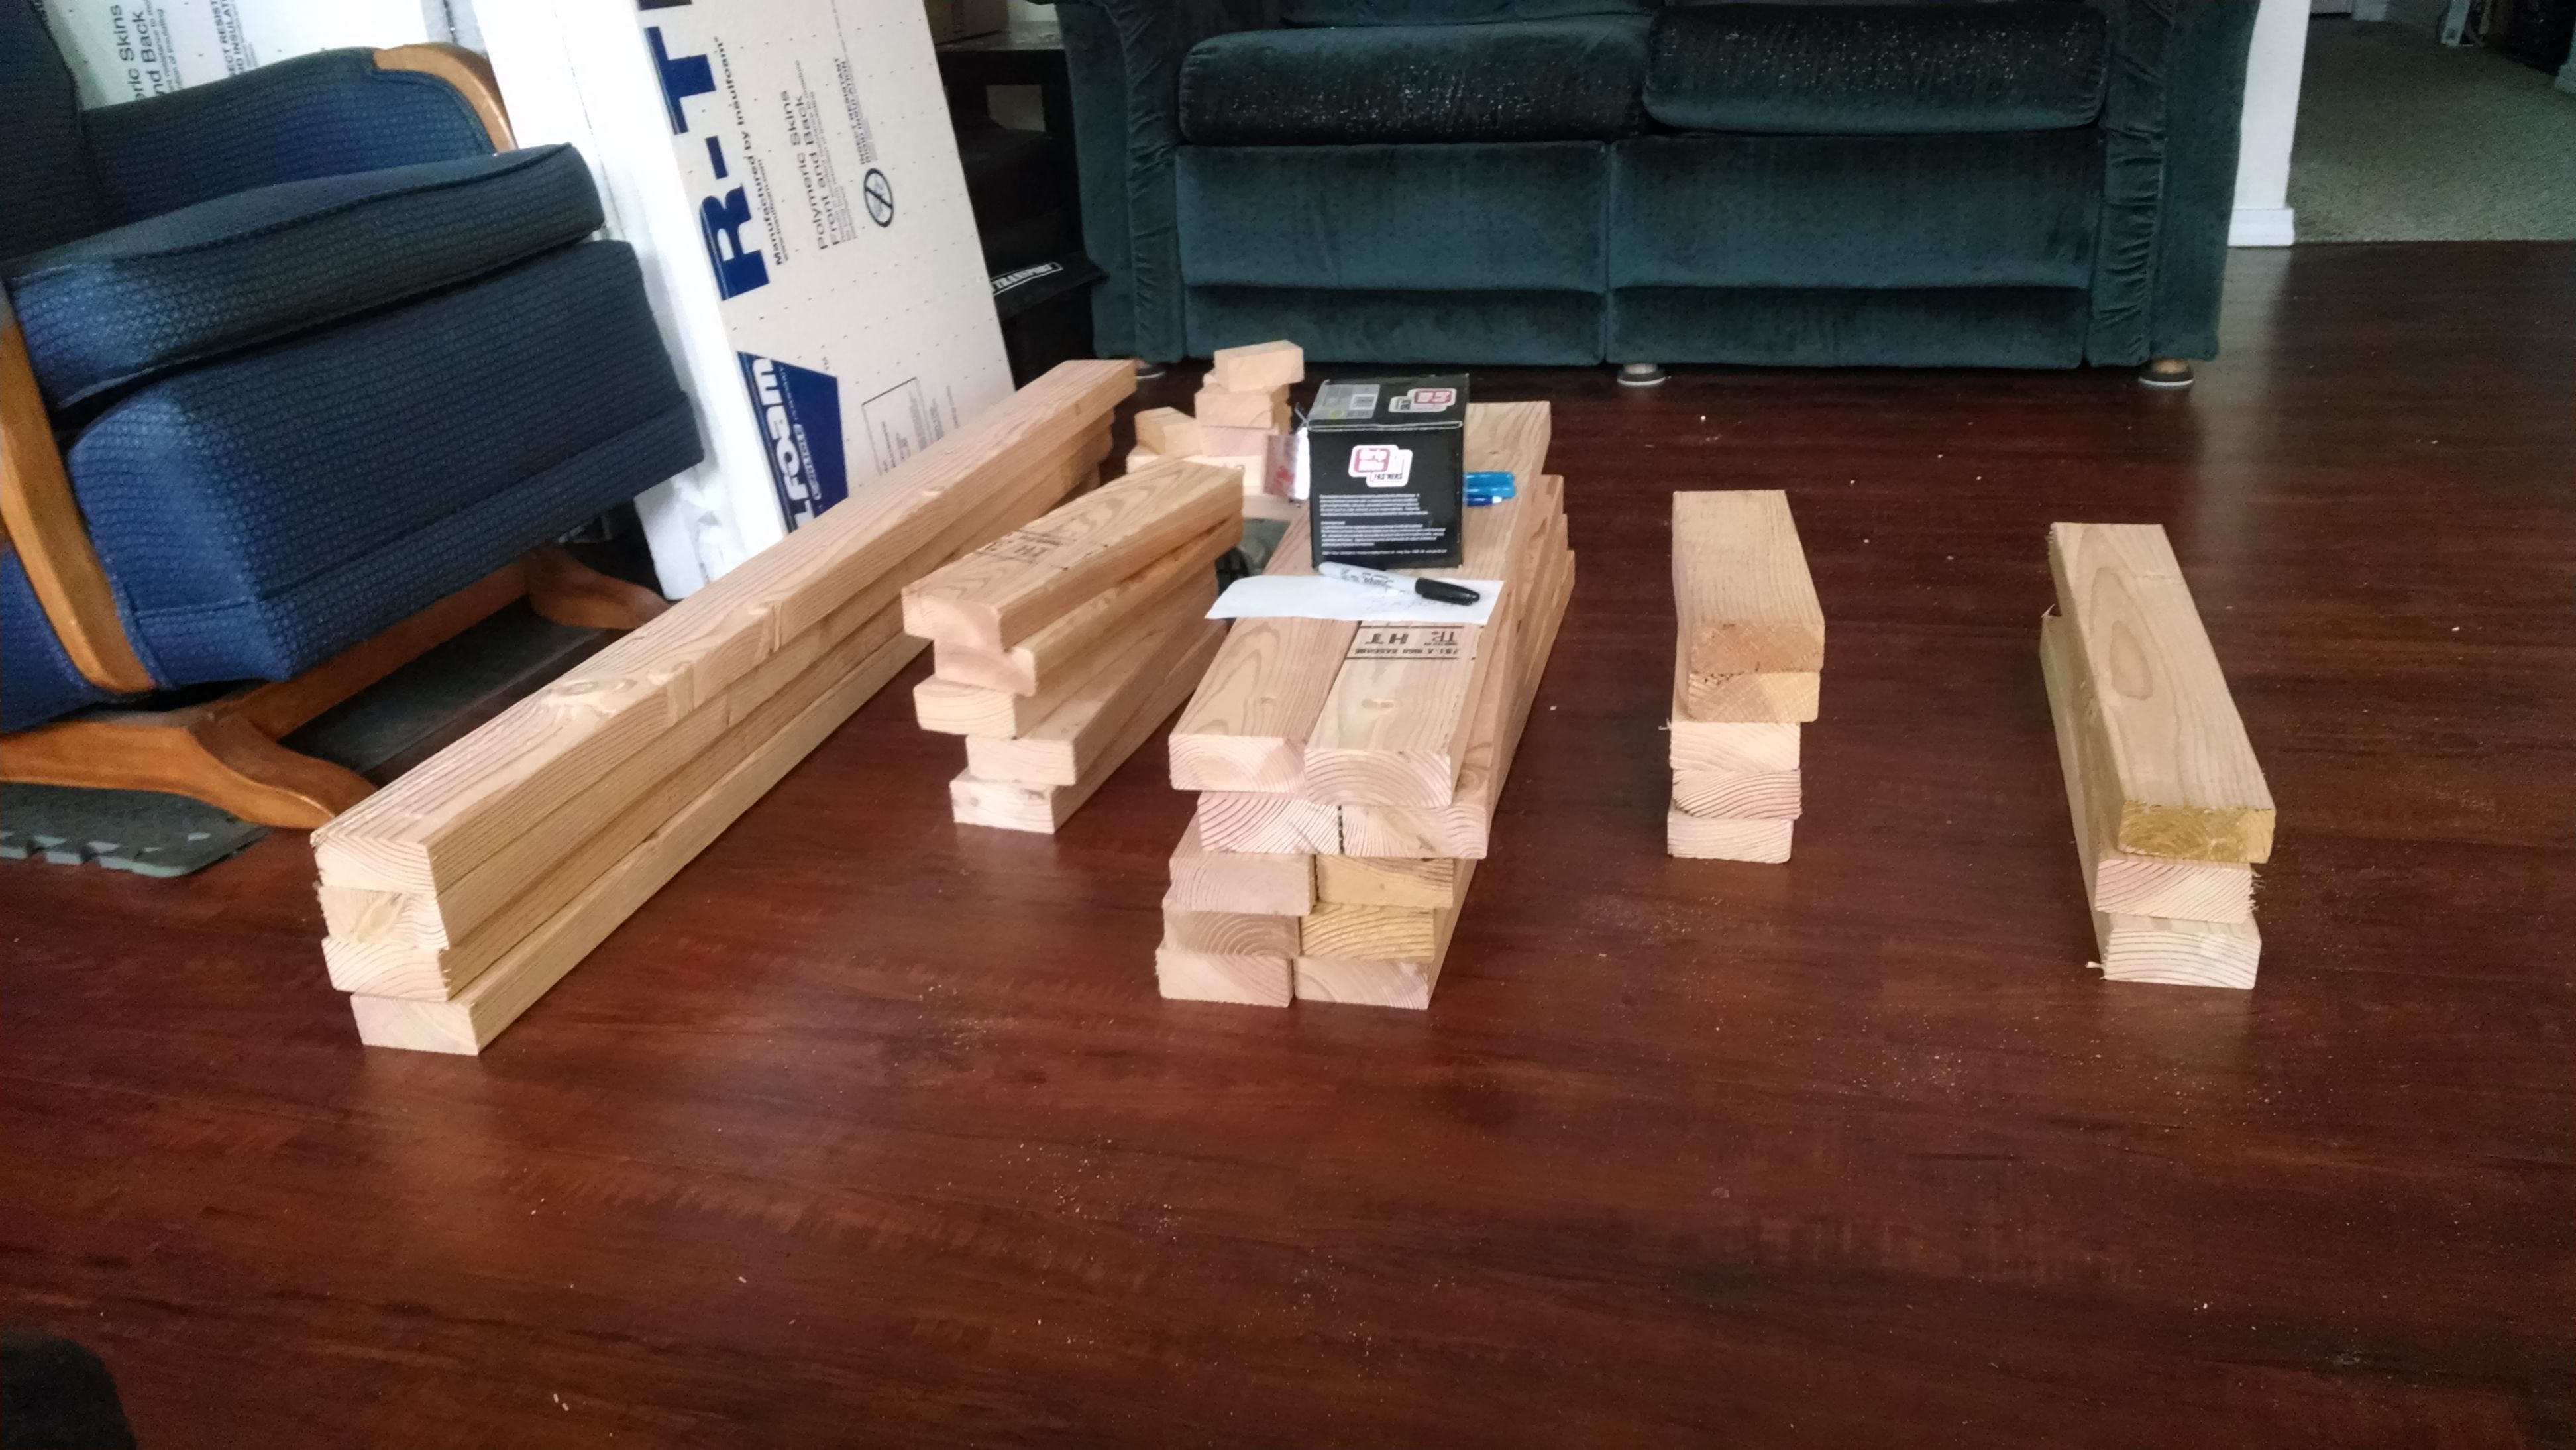
Sizes, left-to-right: 50", 15", 32", 12", 22", all +/-1/8". I'm still new to the whole cutting-lumber deal. If I didn't have my roommate's table and clamps from a speakerbuilding project (still in progress, still not sure wtf I'm doing), I'd be in the woods as to how to cut the lumber safely/without destroying my damage deposit.
And my commentary, so far:

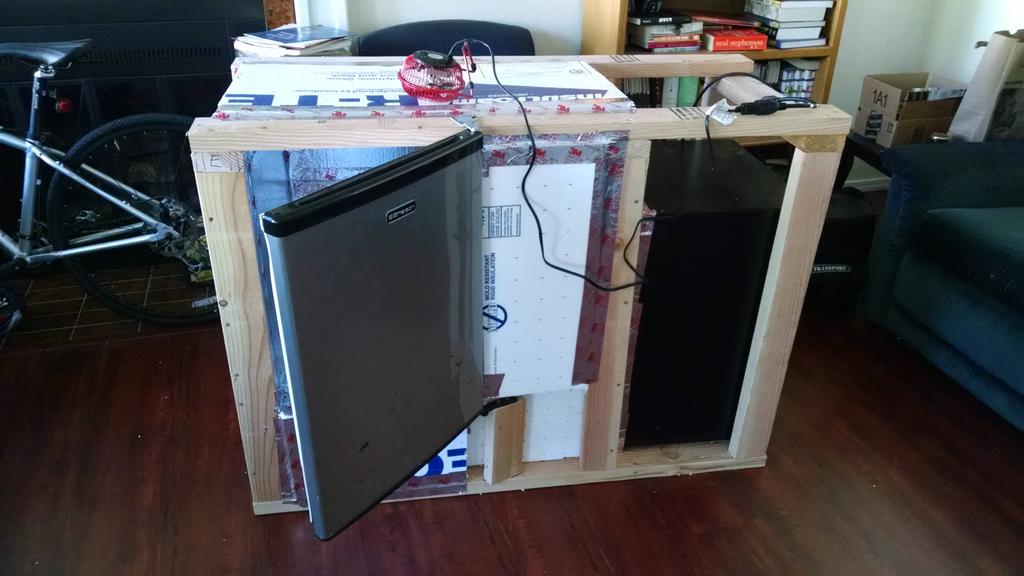
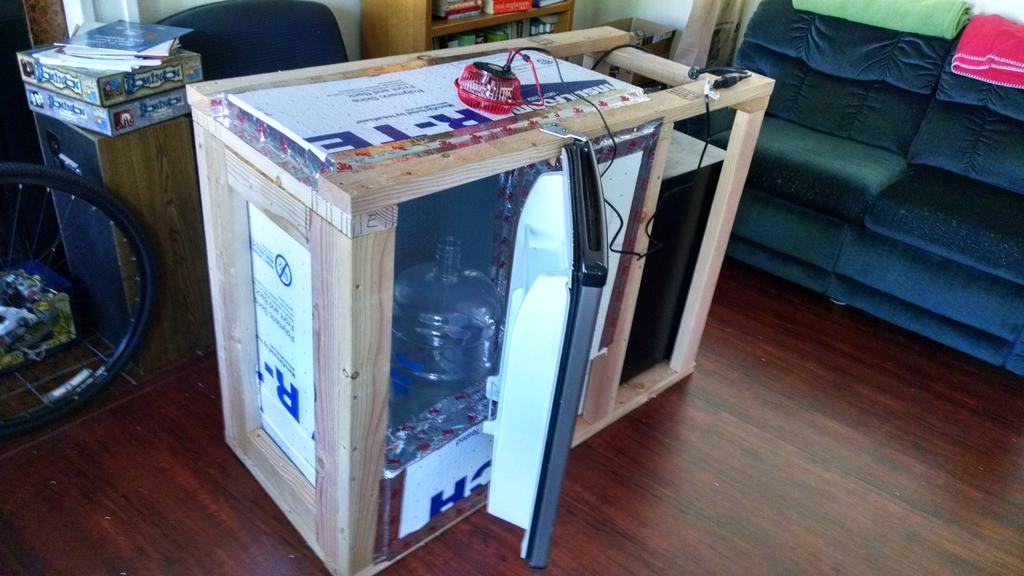
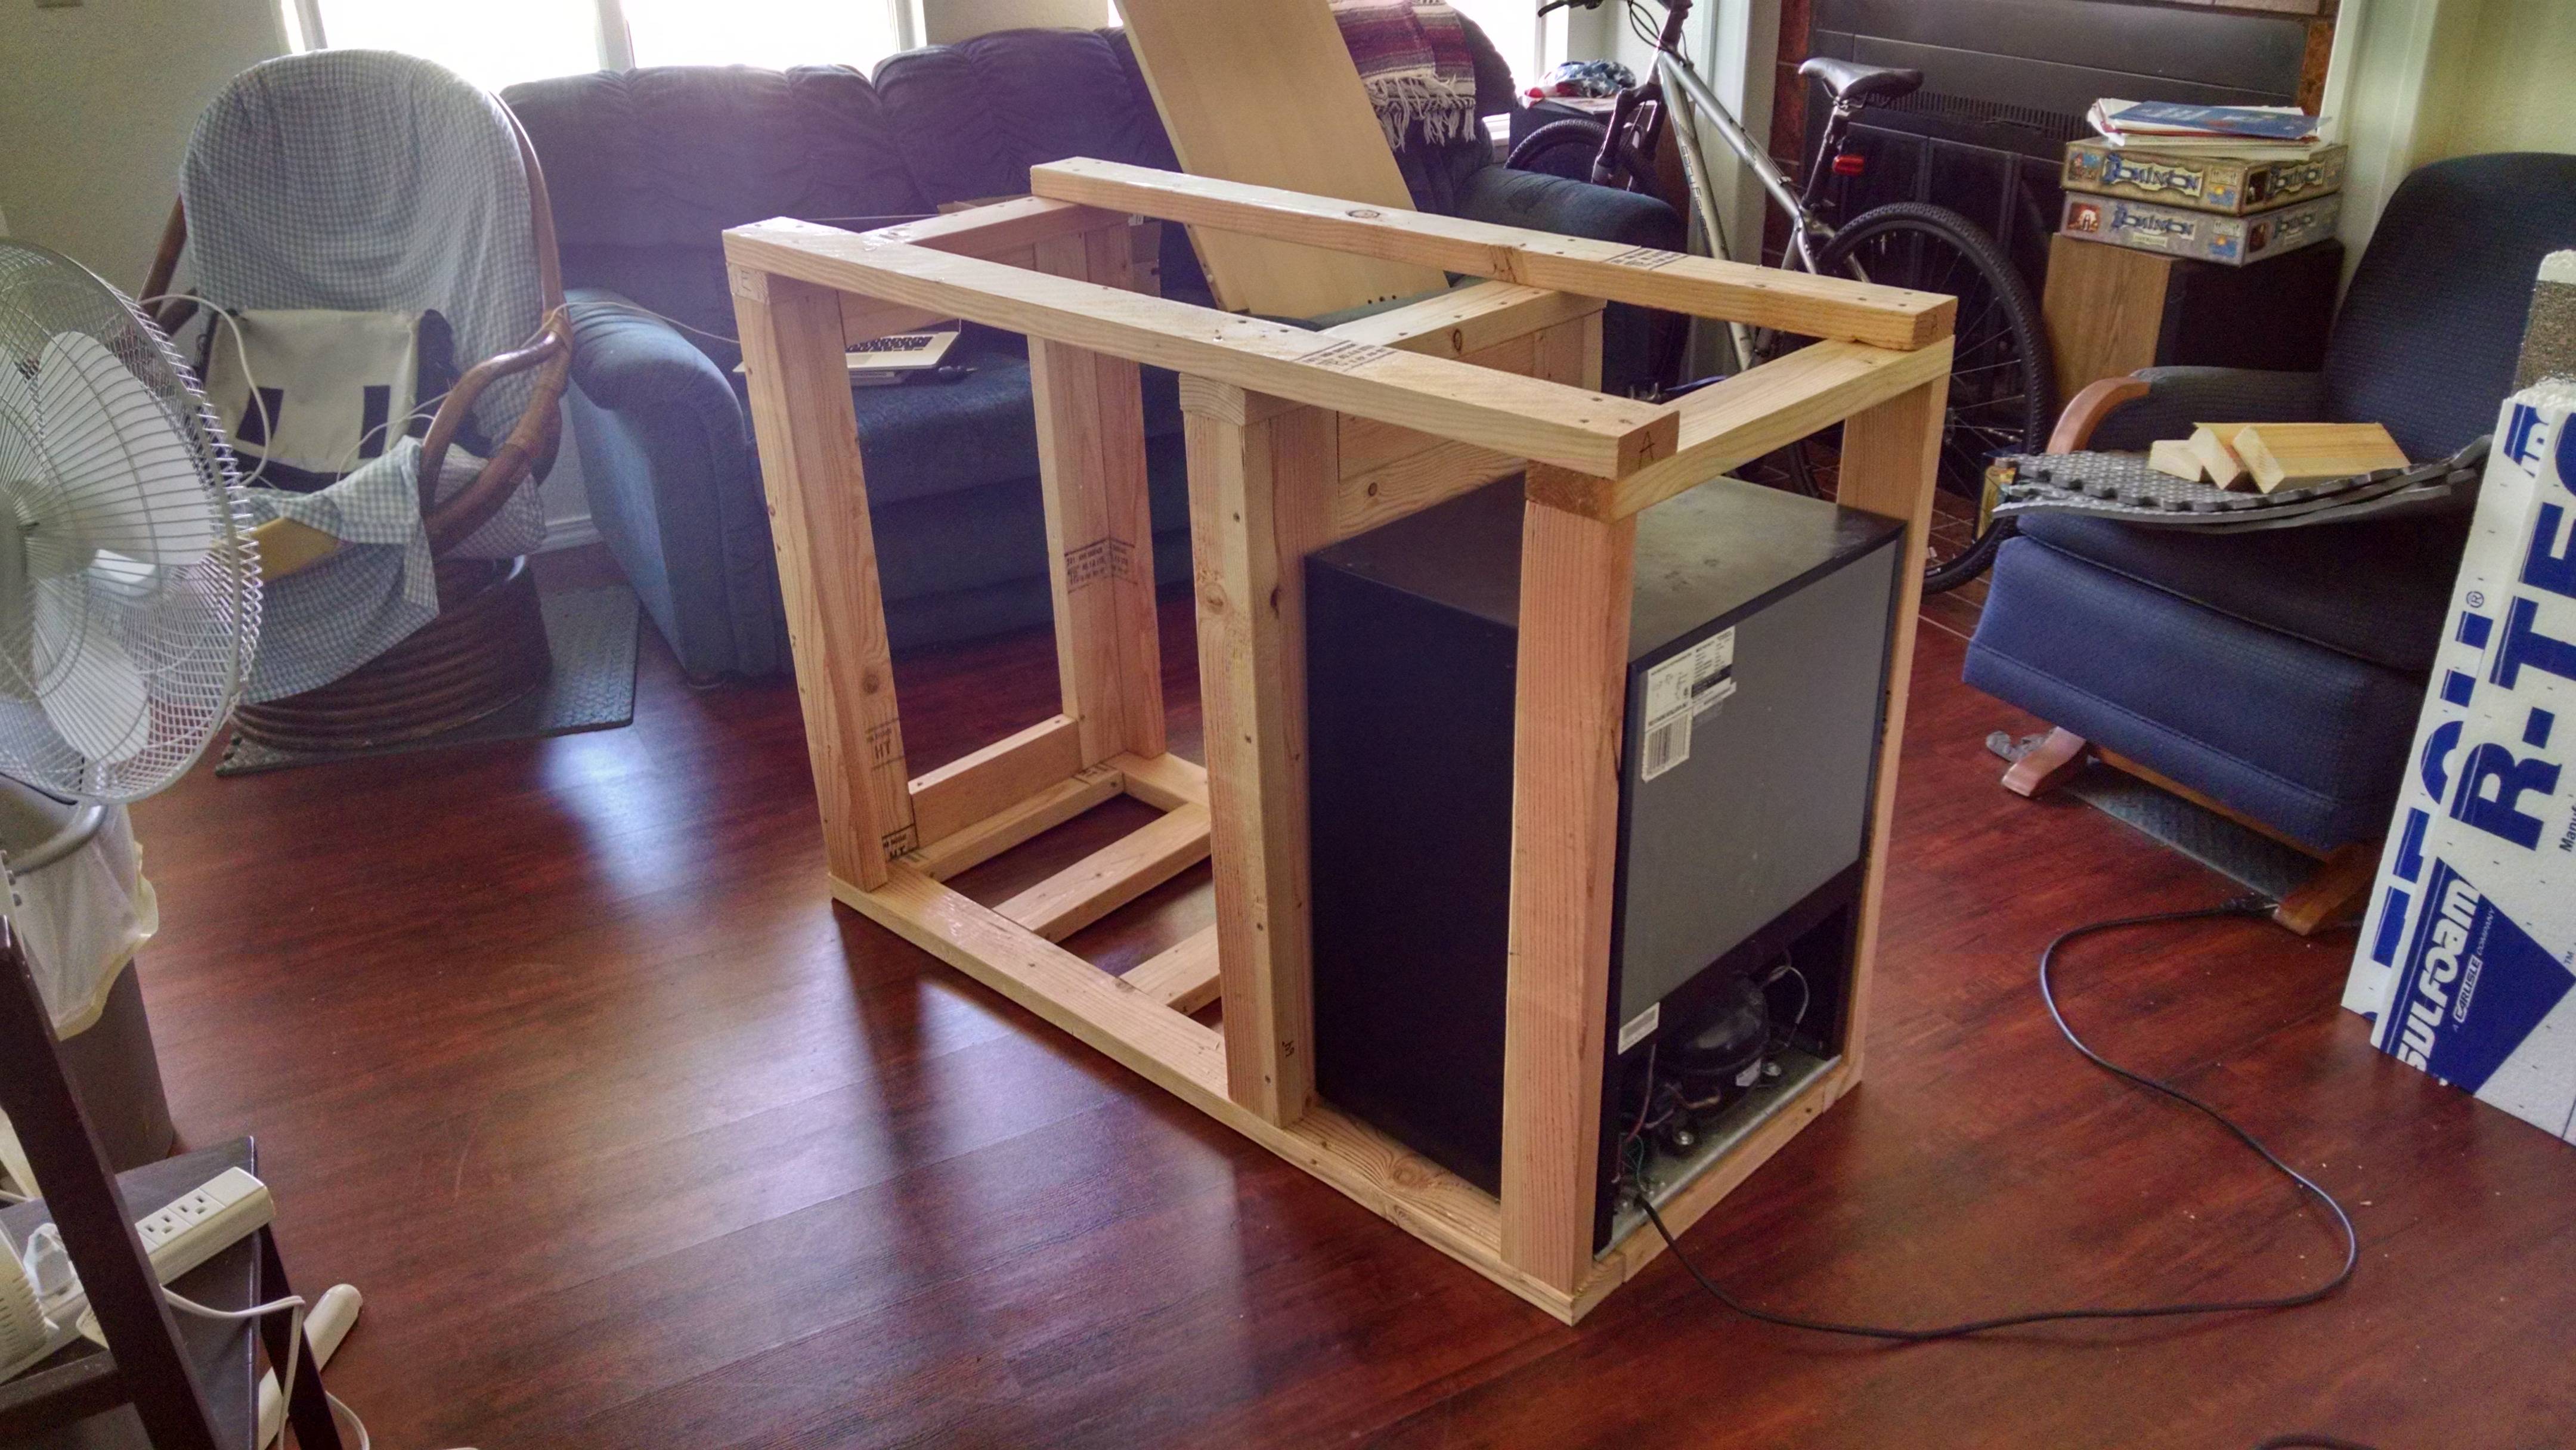
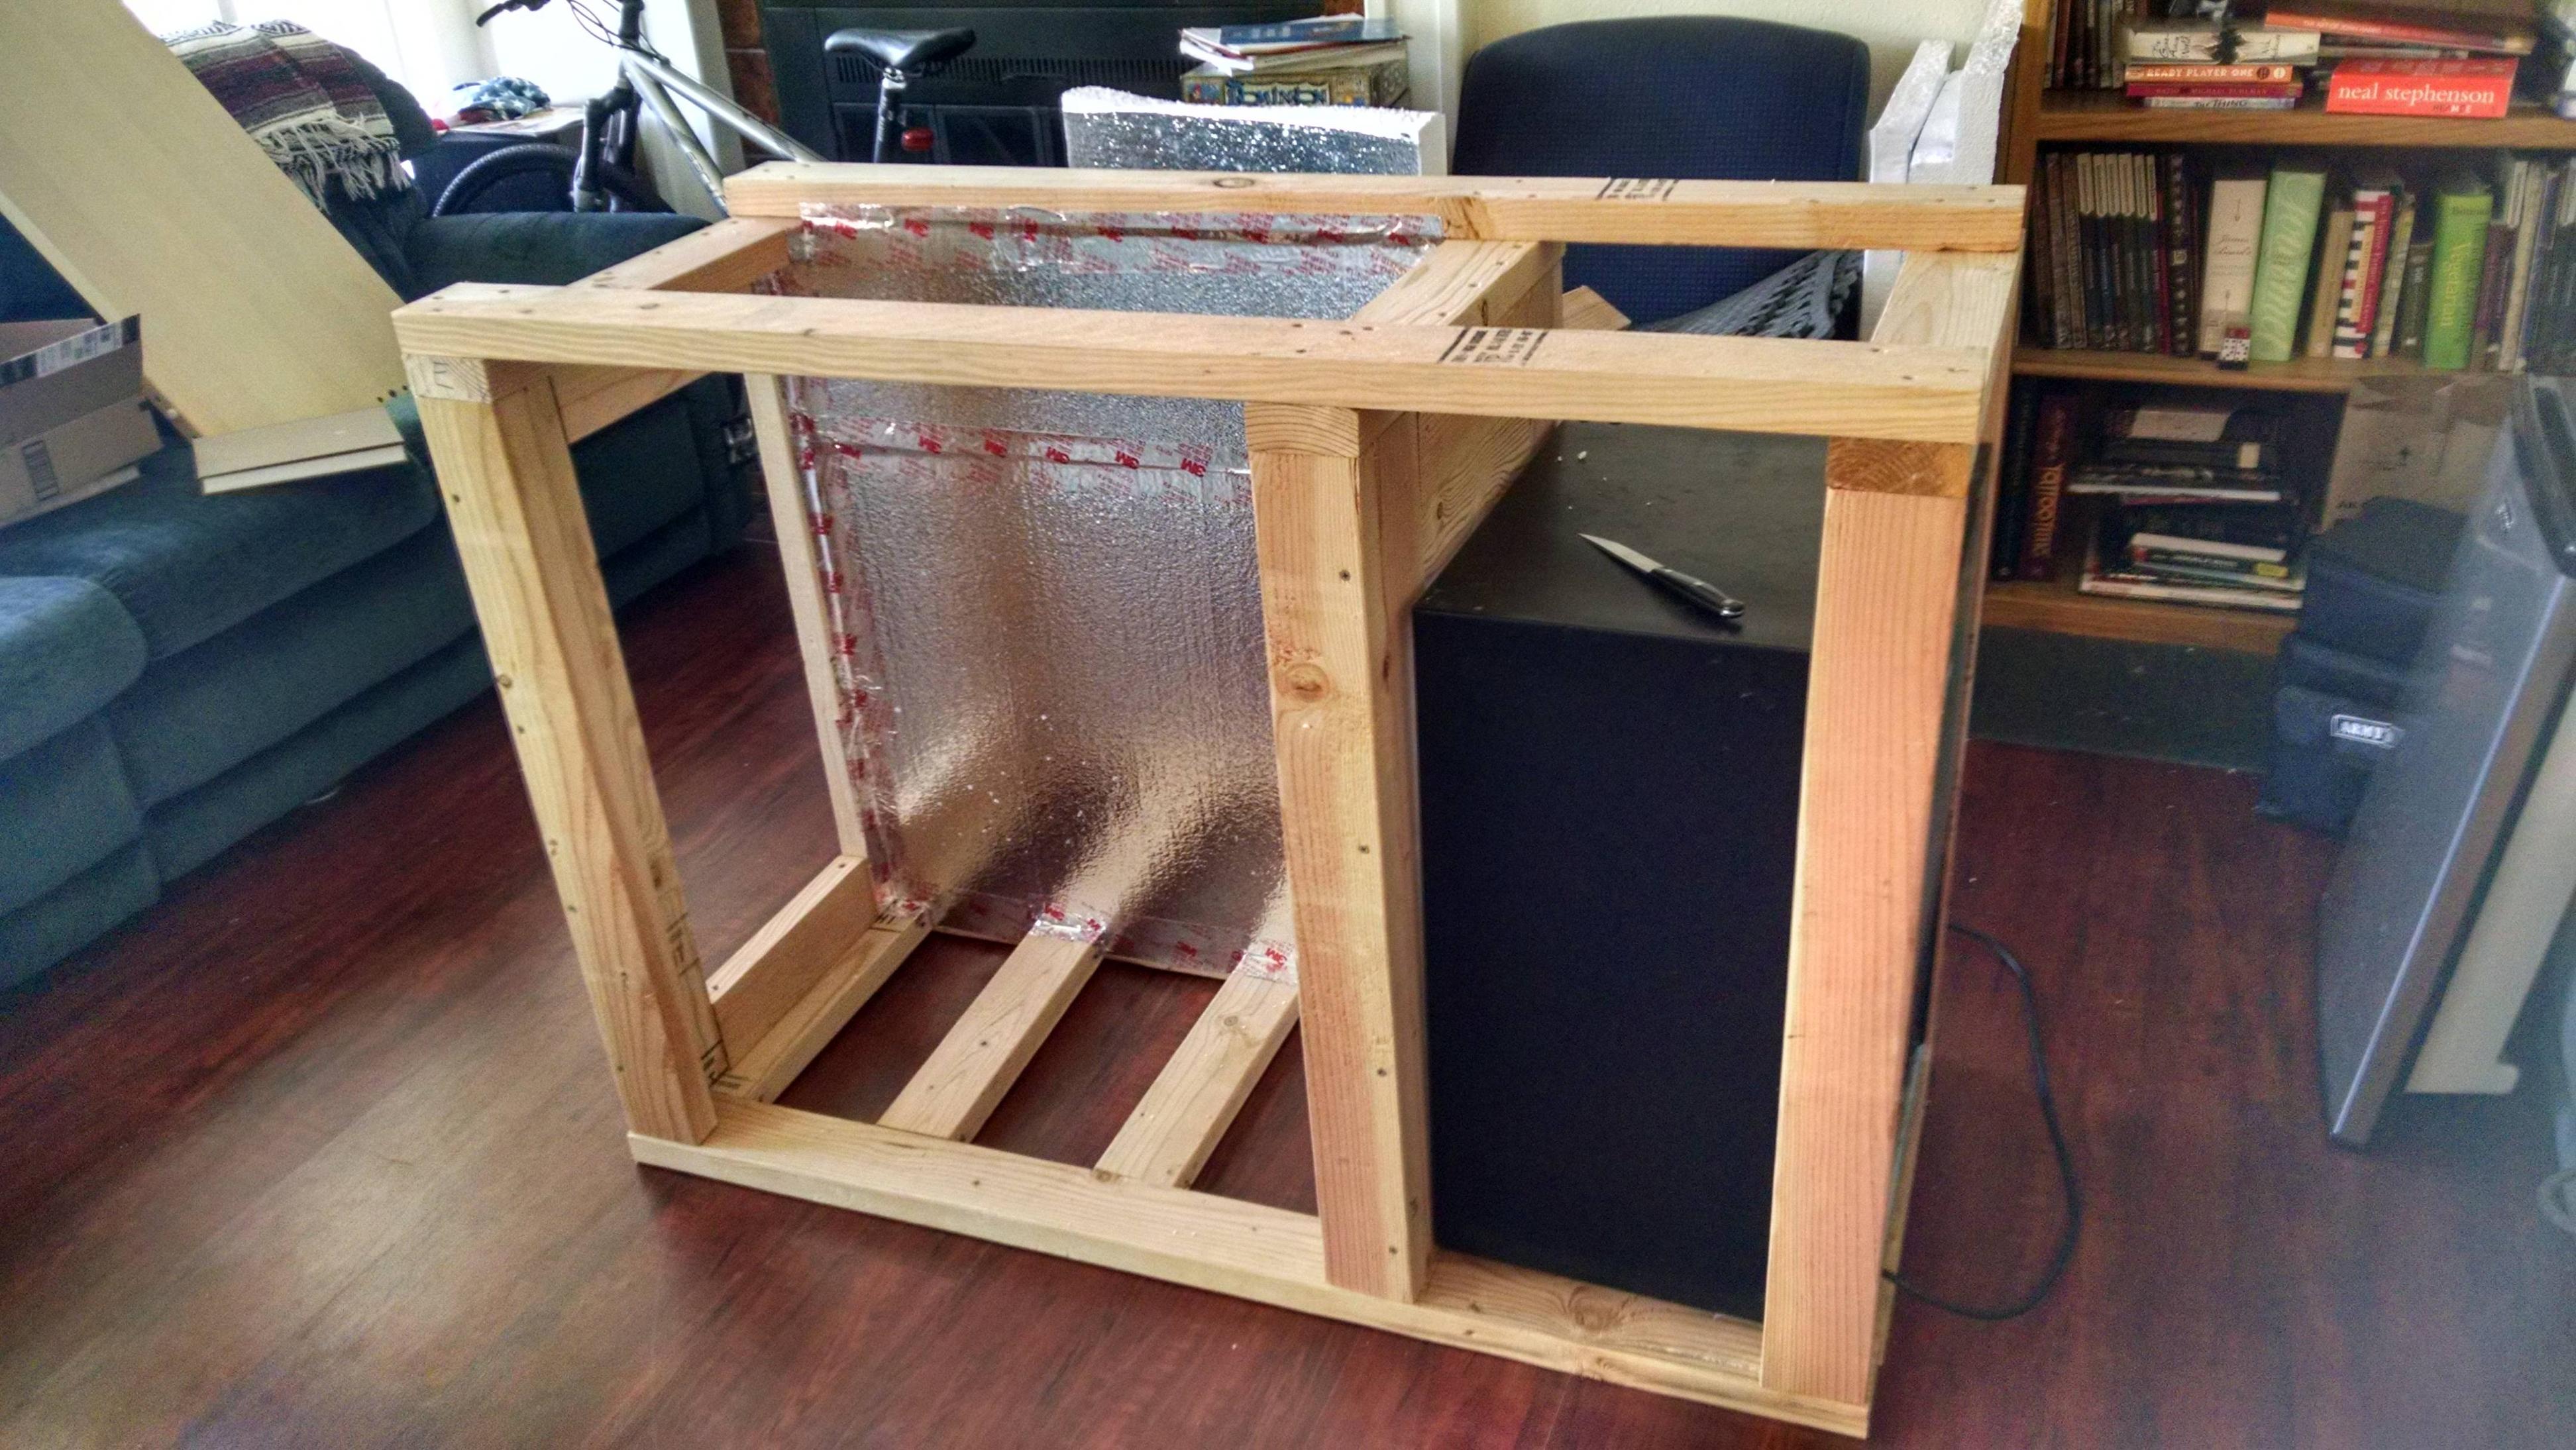
So, the gist of it is that the 50" pieces will be set parallel on the bottom, with the 15" pieces laying between them (not on top of them), perpendicular. The 32" pieces will become uprights, two on the left (or, what I'm calling the left in my head), four in the middle, four on the right. The top will have the 22" pieces laying across the uprights and the other 50" pieces running lengthwise. I'll pick up plywood to skin it in a week. The middle uprights will have a 'frame' built into them ('frame', because it's all really just one big frame); on the left of it will be the minifridge, on the right the fermentation chamber.
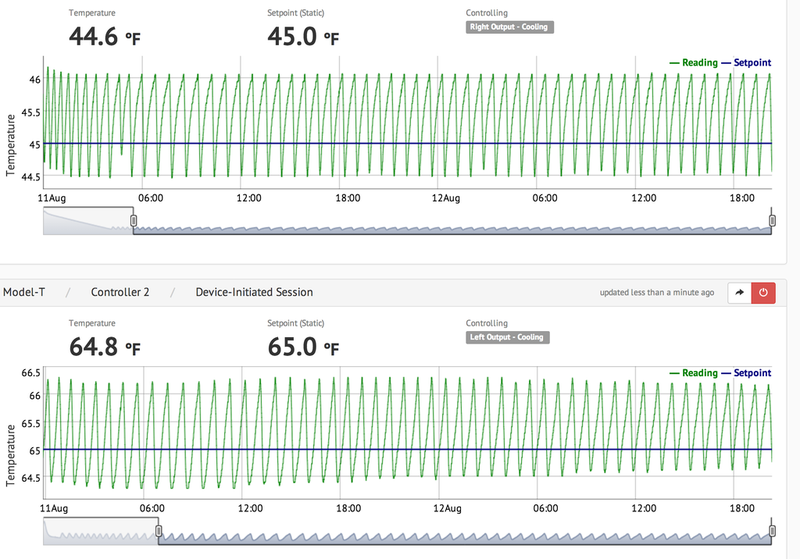
Temperature monitoring and fridge control will be managed by a Brewbit Model T, since I'm smitten with the idea of seeing my temperature profiles and playing with them. I may try to contribute to that project as well, since my day job is programming.
More as I progress!
mwill07's thread
IOnceWasLegend's thread
Xakk's thread
I'm pretty good at making beer, food, and messes. Figured I should try my hand at making a fermentation chamber. My plans are pretty butt-ugly/not-to-scale, so they may not appear on here. Mostly, a lot of stupidity, wood screws, and 2x4s, so far. I picked up a circular saw, along with a bunch of lumber, came home and whacked it up into these piles:
Sizes, left-to-right: 50", 15", 32", 12", 22", all +/-1/8". I'm still new to the whole cutting-lumber deal. If I didn't have my roommate's table and clamps from a speakerbuilding project (still in progress, still not sure wtf I'm doing), I'd be in the woods as to how to cut the lumber safely/without destroying my damage deposit.
And my commentary, so far:
So, the gist of it is that the 50" pieces will be set parallel on the bottom, with the 15" pieces laying between them (not on top of them), perpendicular. The 32" pieces will become uprights, two on the left (or, what I'm calling the left in my head), four in the middle, four on the right. The top will have the 22" pieces laying across the uprights and the other 50" pieces running lengthwise. I'll pick up plywood to skin it in a week. The middle uprights will have a 'frame' built into them ('frame', because it's all really just one big frame); on the left of it will be the minifridge, on the right the fermentation chamber.
Temperature monitoring and fridge control will be managed by a Brewbit Model T, since I'm smitten with the idea of seeing my temperature profiles and playing with them. I may try to contribute to that project as well, since my day job is programming.
More as I progress!


![Craft A Brew - Safale BE-256 Yeast - Fermentis - Belgian Ale Dry Yeast - For Belgian & Strong Ales - Ingredients for Home Brewing - Beer Making Supplies - [3 Pack]](https://m.media-amazon.com/images/I/51bcKEwQmWL._SL500_.jpg)