• Please visit and share your knowledge at our sister communities:
  • If you have not, please join our official Homebrewing Facebook Group!

    Homebrewing Facebook Group

3 Keezer collar build questions

Homebrew Talk

Help Support Homebrew Talk:

This site may earn a commission from merchant affiliate links, including eBay, Amazon, and others.

Burgs

Well-Known Member
Joined
Feb 5, 2010
Messages
937
Reaction score
11
Location
Decatur, IL
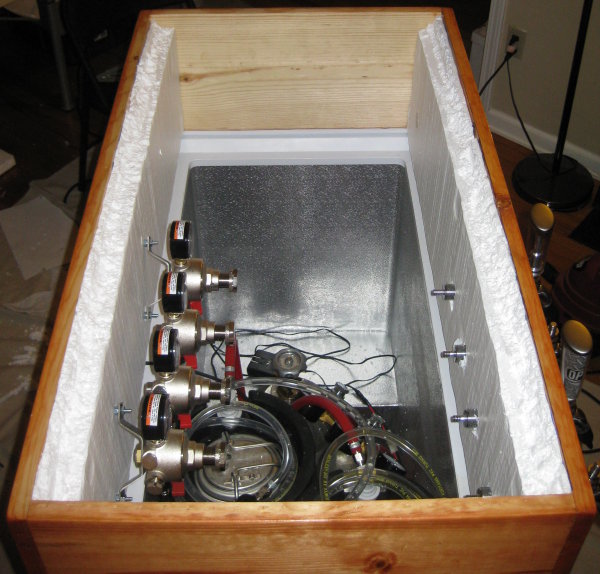
1. What is the preferred adhesive for attaching a wooden collar to a freezer lid? Ideally I'd like something that is clear. Liquid nails looks awful when it dries and I don't want that.

2. Is it beneficial to have a lot of the shank exposed to the cold air inside the keezer? The shanks I bought are 4 5/8" long. My collar is 1x6 (so, 3/4" thick). I was considering cutting a small square of wood as an accent piece for the front of the collar. The faucets would go through that accent piece. If the shank goes through 1.5" of wood rather than 3/4" of wood - am I warming the beer up as it passes through the shank?

3. Is it beneficial to coil the beer lines inside your keezer? I'm considering cutting myself longer beer lines (10') while I'm re-doing this and I'd like to have them neat and out of the way. WILL THIS MAKE MY BEER DIZZY? (kidding, just wondering if this is what most people do)

Thanks in advance!
 
1) I used silicon since I don't handle the lid at all. Makes it easier should I decide to redo the collar or remove it all together.

2) Not sure if it makes a difference. By the time my insulation was in place there wasn't much shank sticking out and it doesn't seem to be a problem.

AllButThePlumbing.JPG


3) Hose length is part of balancing the system. I went with 10' and, yes, it is just coiled on top of the kegs.

FinalPlumbing.JPG
 
Is there a specific brand I should look out for? I'm putting together a shopping list for the stuff I need to complete my build & I'd like to grab it all this weekend.
 
TomSD - hey, your build thread helped me out quite a bit today. Your lid is exactly like mine, but my freezer is a smaller model.

We were trying to cut that weatherstripping out and cracked the plastic lip. Then I saw your thread and was like ooooohhhhh, that's where he cut it.

I got home and cut that whole plastic lip off, exposing the foam about 1/6" all the way around, like you've got in your photo. I ruined the gasket, but i'll just go get some weatherstripping for it instead, not a huge deal. I think that's the smart way to do it, because I didn't want to adhesive my collar to that flap of plastic. Once you cut it off, there's a nicer surface to glue to, it seems! So, thanks for that!
 
Glad to help... that is why I went so overboard with descriptions and pictures. I know the threads before mine helped me do mine so I figured I would add to the cause.:mug:
 
One more question:

My collar is assembled and I've put the last coat of poly on. It's ready to be glued to the lid, and then I've got to attach my weatherstripping to the bottom edge of the collar.

What did everyone use as far as weatherstripping for this?

Hard rubber vs. rubber foam?
D-shape vs. ribbed?
Something else entirely?

Please give me suggestions, as I'm ready to go out and grab these last few things to wrap this project up.

I used the thickest high density foam I could get at Home Depot. Probably 3/4" wide or so, and I don't recall how thick it is. Its cross-section is square shaped. Once I put the collar on, the weatherstripping fills in the uneven-ness quite well.
 
Back
Top