DIY Copper Ribcage Immersion Wort Chiller - 1/2" x 50'

Homebrew Talk - Beer, Wine, Mead, & Cider Brewing Discussion Forum

Help Support Homebrew Talk - Beer, Wine, Mead, & Cider Brewing Discussion Forum:

This site may earn a commission from merchant affiliate links, including eBay, Amazon, and others.

vinylrooster

Well-Known Member
Joined
May 24, 2013
Messages
339
Reaction score
49
Location
Columbus, OH and Buffalo, NY
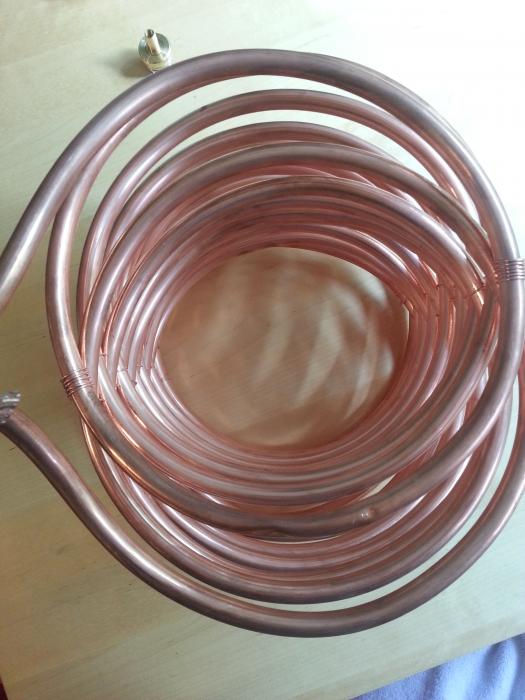
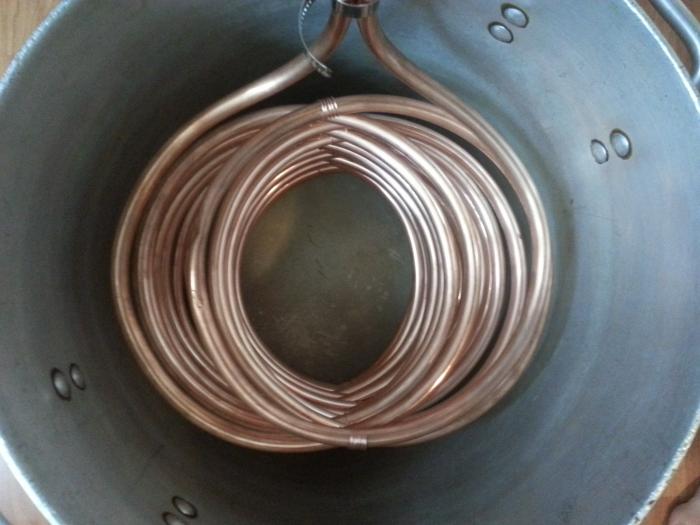
Just finished making my ribcage-style Copper Immersion Wort Chiller and I wanted to share some pictures.

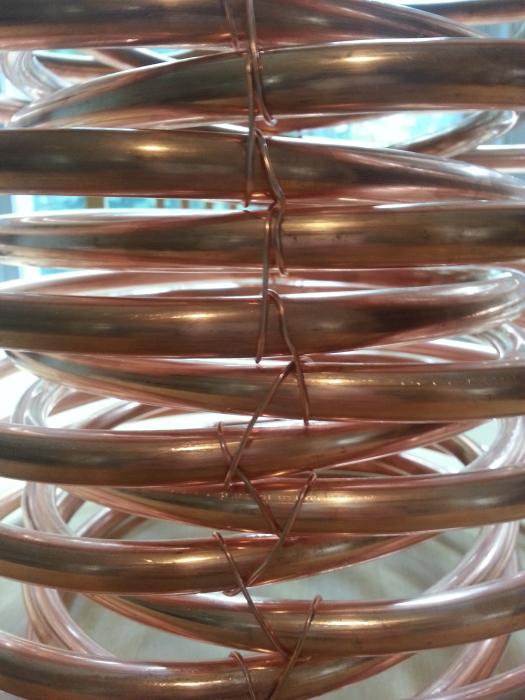
I ultimately chose to go with 50 feet of 1/2" copper and interwove it so that it will maximize the amount of copper surface area. I also liked the idea of adding some copper wire for stability, so I got some 16 gauge wire and simply wove it from coil to coil, to keep them in place.

I tried to take a few pictures to show you it from every angle, including inside my pot, and a close up of how I added the copper wire for stability.

I'll try to remember to post cooling times to see how efficient it will be, but I'm assuming it will cool my ~5.5 gallon boils in under 15 minutes according to similar builds on here.


Cheers!

-Rooster

2013-09-29 17.35.24.jpg


2013-09-29 17.34.58.jpg


2013-09-29 17.30.17.jpg


2013-09-29 17.35.11.jpg
 
What was your total build cost?

Let me first say that this was my second generation build, so I already had the tube benders ($10).

Otherwise, the copper tubing was $60 at Lowe's. The copper wire was $8 at ace, but I already had that too.

I also already had vinyl tubing for my faucet hookups, but that was ~$10.

So, the full answer is around about $80, but it only cost me $60 because I already had some of the stuff.
 
Awesome! Thanks for the quick reply. I'm planning to build one in the near future, this was super helpful.
 
Of course. Let me know if you have any other questions during your build.

Two pieces of advice:
(1) go slowly when coiling the chiller into form. If you kink the copper, you are screwed so take your time. I coiled mine around a smaller stock pot I had
(2) buy the tube bender. I used it to make my 90* bends. Without the bender you will kink the copper when you try to make the 90* bend.
 
Has anyone used a similar shaped ribcage chiller in combination with a hop spider? I'm wondering if the chiller will interfere with hop movement and thus lower utilization? Obviously I add the chiller with about 15 minutes left in boil, so it should only effect my aroma hops

I can try to post pics to show what I'm talking about, but I am imagining using the hop spider "inside" of the ribcage. Or maybe I should just push the chiller to the side of the pot and see if I can get the spider more free?

Thoughts and input are greatly appreciated
 
Vinylrooster:

Have you used this yet? What was your cooling time? There has recently been a great sale on copper 1/2 ID tubing at Home Depot so I'm sure people will want to know. I hoping to build this in the coming week or two.
 
Vinylrooster:

Have you used this yet? What was your cooling time? There has recently been a great sale on copper 1/2 ID tubing at Home Depot so I'm sure people will want to know. I hoping to build this in the coming week or two.

I haven't had a chance to brew since building this, but I did do a test run of 7 gallons of boiling water. After letting the water boil for roughly 20 minutes, I pulled it off the burner and started running cold water through the chiller. Amazing, I got it cooled down to 65F in 15 minutes! Just to give you some stats, I live in Columbus, OH and it's anywhere from 20-50F ambient temperature so my water runs in the low 50's out of the tap, which I think helps greatly with my chilling times.

Good luck everyone who uses this! As a sidenote, I checked 3 home depot's this past friday and none of them had the sale I've seen others taking advantage of.....oh well.
 
How exactly did you get the rib cage effect? You mention wrapping around a can but I am trying to understand how you then got them interlaced like that. That really is a nice job you did.
 
I started at the middle of the entire coil and unwrapped and straightened out about 10 feet a time. I then took the area that I just straightened out and began to wrap it around a pot. I did this until I had about 5 left feet left before reaching the end (because you want to leave enough to make the final piece that that reaches out the kettle).

Next I stoped and went back to the middle of the coil and did it exactly the same manner as the first half but working in the opposite direction. At this point you essentially have two normally shaped immersion chillers that are connected the middle. Next, you just push and pull the coils so that every other loop comes from one of the sides. The last step (optional) is to weave the copper wire through the coils to give it a little more stability.

Sorry I didn't take pictures throughout, but I might be able to take some more pictures of the final product if it helps
 
That looks great. I just found a coil of tubing at my Home Depot that I will convert into wort chiller.
I just have to watch and learn how to make the bends so it doesn't kink up.
Is one of those benders necessary?
 
That looks great. I just found a coil of tubing at my Home Depot that I will convert into wort chiller.
I just have to watch and learn how to make the bends so it doesn't kink up.
Is one of those benders necessary?

Not necessary, but trust me you will be mad when you kink your $50 copper coil because you didn't buy the $8 bender
 
Back
Top