• Please visit and share your knowledge at our sister communities:
  • If you have not, please join our official Homebrewing Facebook Group!

    Homebrewing Facebook Group

Side By Side Build Keezer/Fermentation

Homebrew Talk

Help Support Homebrew Talk:

This site may earn a commission from merchant affiliate links, including eBay, Amazon, and others.

drkwoods

Well-Known Member
Joined
Sep 21, 2010
Messages
362
Reaction score
13
Location
Chino Hills
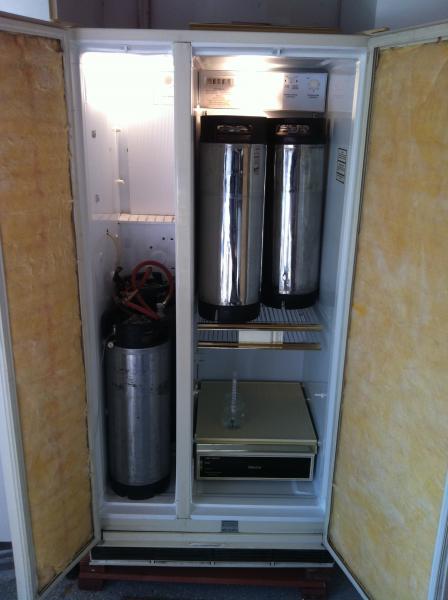
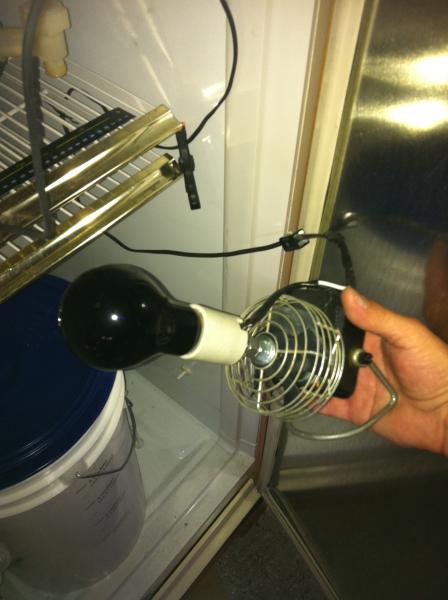
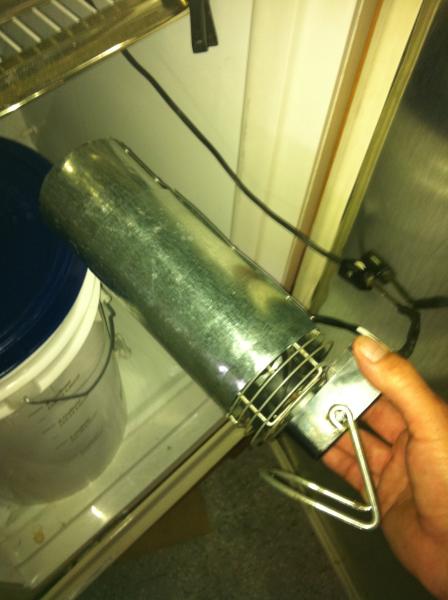
I decided to pick up an mid age Side by Side Fridge to build out and have serving Taps/Temps for my Corney Kegs and Fermentation chamber in the larger side. I Also wanted to be able to get down to serving temps as well on the Fridge side and have Co2 available on both side as well.. Here's what I did: I wanted to go with the idea that I control the compressor for the freezer and that on the Fridge side I use a Fan to pull cold air from the freezer and a small Heater both to control fermentation temps year round. My idea was based on this drawing. I had a couple fans available and I very hot light bulb so I made a heater out of that and a sheet metal shroud to house the PC Fan for cold air

Scan_Pic0007.jpg
 
So I got my fridge on CL for $100 and gutted it. I removed all the door plastic food item storage etc. left on the shelf in the fridge and nothing in the freezer. I picked up a Love TSS2-2100 to control the transfer fan and heat fans since its a two stage controller. I had an STC-1000 already so that would simply control the compressor. i checked the positioning of the kegs and began with finding the hot and neutral wires and cutting for the PIDs

Iphone Camera 706.jpg


Iphone Camera 4803.jpg
 
I could not for the life of me find a schematic for this fridge but this one seemed to agree with what I was looking at. The defrost timer had red and orange running to the cold control so I went with that and it worked. Hot n Neutral was easy to find. Orange being the controlled hot (by the defrost timer) and Black being "Always" hot. The STC-1000 (from Ebay) schematic plan shown, to control just the compressor. (defrost timer removed in second pic) (110v pwr supply not 220 as shown)

Untitled-1ee copy.jpg


Iphone Camera 236.jpg
 
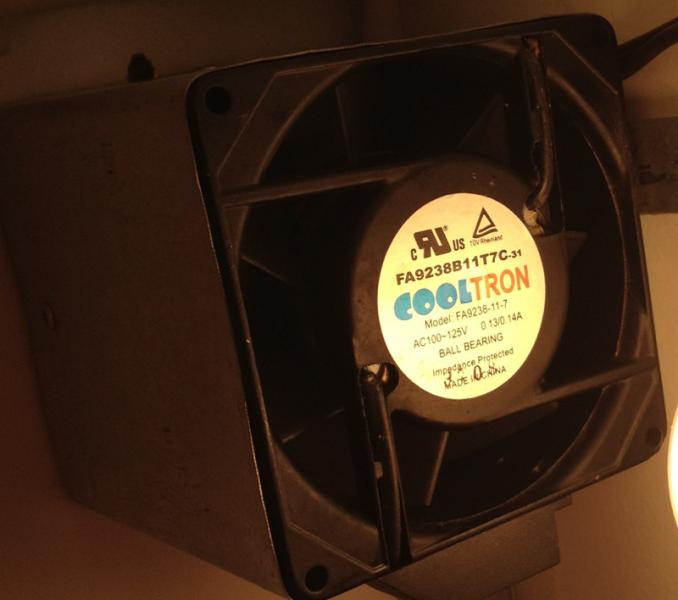
Here's pics of my heat idea using a black light bulb (which I found gets 100 degrees hotter than a 200 watt incandescent bulb) a 120v Fan and Sheet metal shroud. Also the Transfer fan box made from Sheet metal and an Ebay Computer fan

Iphone Camera 239.jpg


Iphone Camera 242.jpg


Iphone Camera 237.jpg
 
This is how Im wiring the Love Control to my Heater and Transfer fan to control the temp in the Fermentation side of the fridge year round. Im pulling the hot from the defrost timer because I do not want the transfer fan trying to pull cold air from the freezer while the defrost heater is on. I know it probably doesnt matter too much but I do know that the Bi-metal (shut off thermostat) on the Defrost heater is set to allow the heater to rise all the way to 54`f , so this fan will not have power while the Defrost cycle is on.

Untitled-2ee.jpg
 
Next step was to drill for the shanks and support it with some wood. I then covered each inside door with Sheet metal to hide the insulation and give me max room inside each chamber

Iphone Camera 4828.jpg


Iphone Camera 4874.jpg
 
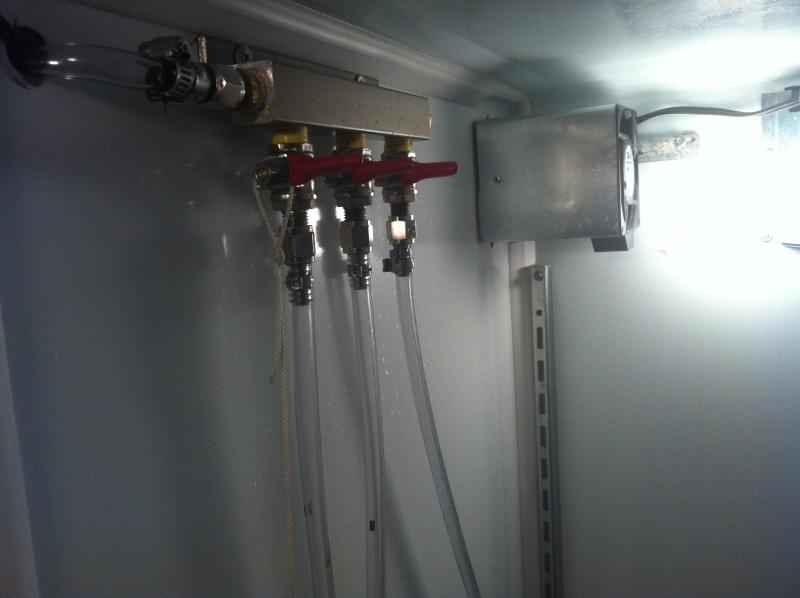
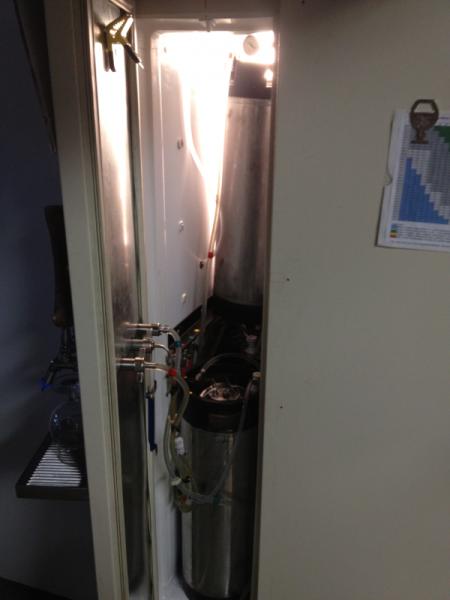
Next I added my Co2 distributors and some angle iron to support my cornies in the freezer side

Iphone Camera 1166.jpg


Iphone Camera 083.jpg
 
Nice build. I like the way you addressed the corny shelving, ive been meaning to do the same but hacent had the time. My only question is if the defrost has been keeping up with the build of ice on the coils? When I built my side by side I tried a couple of different ways to control the auto defrost but kept having icing up issues. I finally went with the "kiss" principle (keep it simple) and its worked awesome.
 
I like what you did for the shelving on the freezer side. Did you use any adhesive on the angle iron before you fastened it to the walls with screws?
 
This is great. I have what looks like the same side by side. At least the exact same controls anyway. I left the defrost control intact however and used the stc to replace the thermostat. I love the angle iron shelf and am gonna have to use the same. We have tons of angle iron lying around work. Great build.
 
Nice build. I like the way you addressed the corny shelving, ive been meaning to do the same but hacent had the time. My only question is if the defrost has been keeping up with the build of ice on the coils? When I built my side by side I tried a couple of different ways to control the auto defrost but kept having icing up issues. I finally went with the "kiss" principle (keep it simple) and its worked awesome.
yes, since I only pulled the thermostat out and wired the STC in its place, the defrost timer (works as normal) turns on the defrostheaters based on time. (i think its every 8 hrs?) so there is no frosting up at all. When I originally ran the entire fridge based on it being "plugged" into the controller via the power cord, then I ran into the coils icing up pretty good avery 8-14 days.
 
I like what you did for the shelving on the freezer side. Did you use any adhesive on the angle iron before you fastened it to the walls with screws?

No adhesive on there. but thats not a bad idea. I like being able to remove the angle iron to clean so thats why i didnt do that.
 
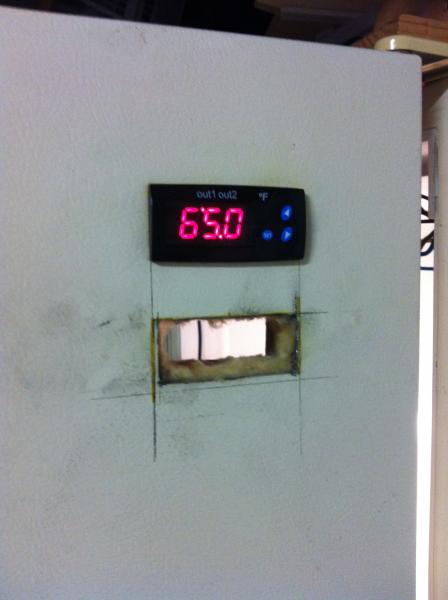
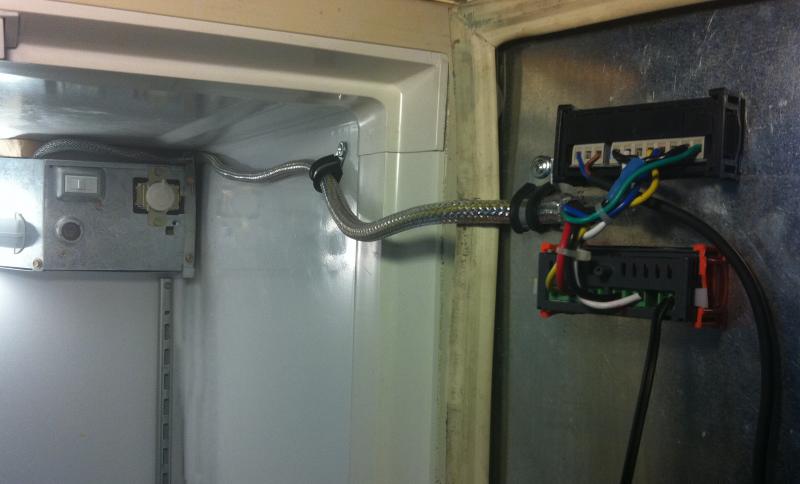
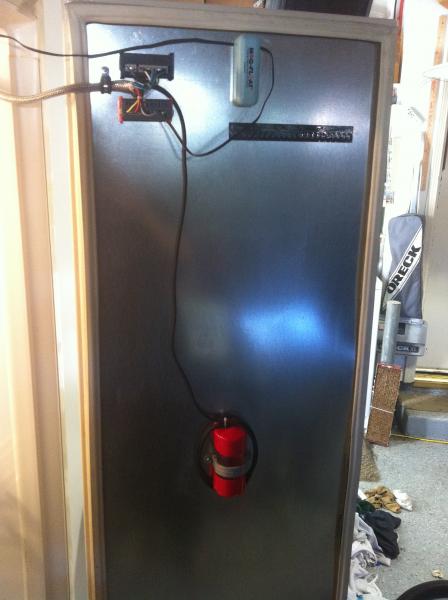
Finally wired up both controllers and cleaned up their install. I also decided to drop both thermos probes into about 6 oz of water in a tube mounted to each door. The one in the freezer is vodka water combo to avoid freezing.. I wanted to prevent over reacting to temperature swings when opening the doors and get a slower response. so far so good. The probe bath is a home depot nutz n bolts organizer tube I found in the hardware section that has a small coin purse like slit into the top and I just mounted it to the door on both sides.

Iphone Camera 1168e.jpg


Iphone Camera 1173.jpg
 
yes, since I only pulled the thermostat out and wired the STC in its place, the defrost timer (works as normal) turns on the defrostheaters based on time. (i think its every 8 hrs?) so there is no frosting up at all. When I originally ran the entire fridge based on it being "plugged" into the controller via the power cord, then I ran into the coils icing up pretty good avery 8-14 days.


Has anyone tried this build on a refrigerator with a motherboard, instead of analog controls? I have a GE GSH22 side-by-side and it looks like all the controls are routed through a digital circuit cards on the back of the unit. Since the circuit card is reading the thermistor values and responding based on programmed logic, I don't think I can simply replace the thermistors with a Love controller, as most have done. I am leaning towards plugging the entire refrigerator into a STC controller and hoping the defrost cycle still works as designed (which I believe is based on measuring evaporator coil temperature rather than time).
 
Has anyone tried this build on a refrigerator with a motherboard, instead of analog controls? I have a GE GSH22 side-by-side and it looks like all the controls are routed through a digital circuit cards on the back of the unit. Since the circuit card is reading the thermistor values and responding based on programmed logic, I don't think I can simply replace the thermistors with a Love controller, as most have done. I am leaning towards plugging the entire refrigerator into a STC controller and hoping the defrost cycle still works as designed (which I believe is based on measuring evaporator coil temperature rather than time).
I think you are right about that. The time based ones like mine freeze up over time, whereas simply turning on/off via overall power on yours should work because of how it detects the need to defrost vs just scheduled derosting
 
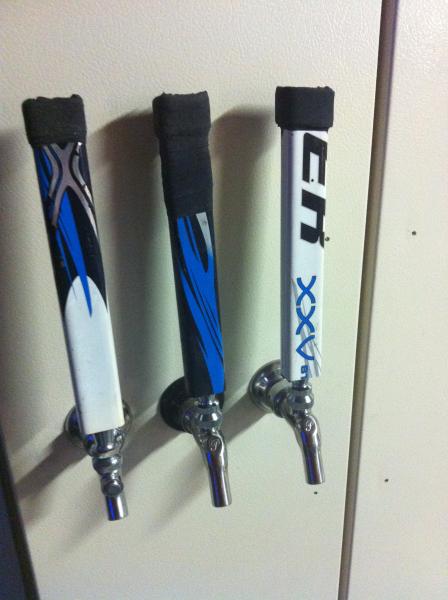
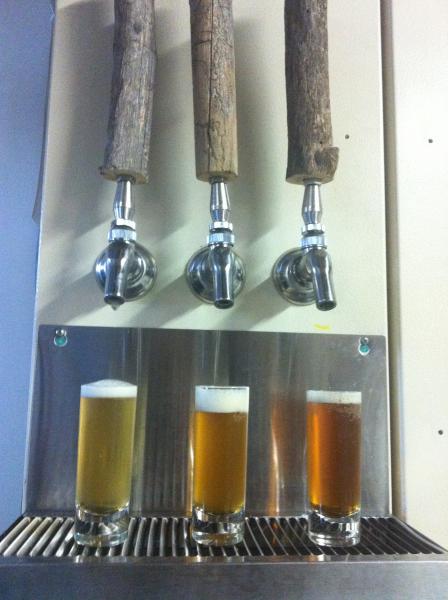
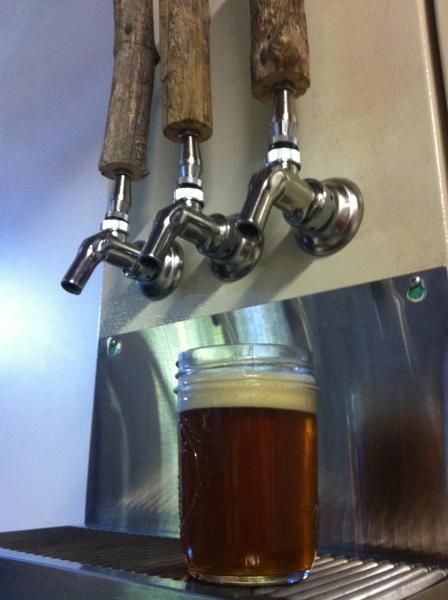
Original Idea was for Hockey stick taps and I also wanted rustic looking real wood handles too..The sticks all have experience..LOL.. The
Wood was actually collected from fallen trees in the Sequoia National Park. The faucets I settled in on are the Perlick PERL 575SS. I like them so far but when you push back for a little extra foam you have to be careful that they close back up all the way.. I lost 1/2 gallon of beer on the floor yesterday
 
I'm impressed that you were able to fit 3 kegs on the freezer side. I'm taking measurements and it looks like I can fit 2 with plenty of extra space but not a third. I haven't cut any of the parts out of the door (yet). Do you have a compressor hump? How many cubic feet is your fridge?
 
Im not sure the Cubic feet of this fridge since I have no manual or schematic or anything?
but I will tell you, in the freezer side I have 54"x10"x18" which in theory can hold 4 corneys. (the ones I use are 5 gal (25x8.25) ). there is a "ramp" bump in the back but that would only effect the bottom rear keg and I just made a seat for it thats level. Of course I removed everything off the doors and gained several inches of space that way
 
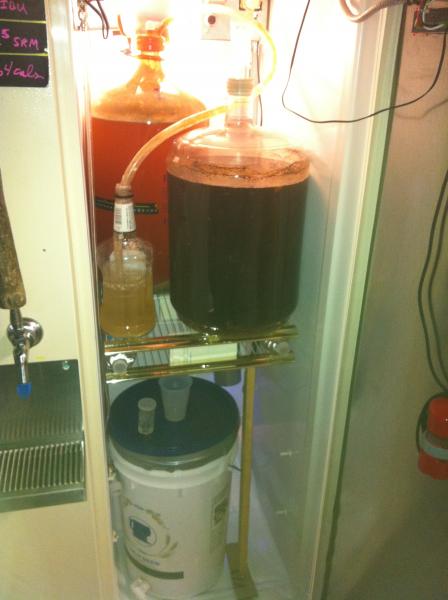
heres a pic with the fermentation side loaded up and bubbling away.. Its at a solid 68` F

Iphone Camera 1177.jpg
 
Man that's awesome, wish I ha room for something like that at my place. I'm about to trim my ferm chamber into something kegerator compatible and just deal with alternating.
 
Thank you so much for posting this information. I have the same fridge and also could not find wiring diagrams etc. I was in the preliminary stage of investigating how to proceed with this fridge. I've been trying to monitor the cooling and defrost cycles of the fridge to try and understand how every thing works.

My question involves the defrost cycle, which appears to happen every 8 hours no matter what. You mentioned that you left the defrost cycle intact. Have you monitored the temperature of the 2 chambers during this cycle? So far I only have information on the freezer side. Unmodified I have identified 3 settings in this unit:

1) The actual thermostat setting in the fridge side (dial 1 to 5)
2) A manually adjustable feedback hole between the fridge and freezer at the bottom of the fridge side
3) A manual (don't know the right word) flap adjustment on the freezer side which essentially directs more or less air from the freezer fan to the fridge during the cooling cycle (it looks like this is the area you placed your fan)

From the settings I have currently it looks like the freezer side during the cooling cycle hovers around -7 to -8F. The disturbing part to me came during the defrost cycle. Granted I am measuring air temperature, but the cycle caused the freezer chamber to swing from -8F to 33F over a 30 minute period. It seems to me that this is a timed defrost since the defrost thermostat doesn't open til 70F.

I guess my question would be have you monitored fermentation temps during the defrost cycle on the fridge side?

I only have one thermometer at the moment so it is rather a long process to document the temperature changes and have only monitored the freezer side so far. I have one of these on order http://pcsensor.com/index.php?_a=viewProd&productId=52 so I can do some more detailed analysis of both sides.

Anyway thank you again for the information and any feedback you can provide. Also have you tried lagering in this setup?
 
Yes I watch the Fermentation on the fridge side and it does come up but only a degree or maybe two.. nothing I would get too worried about.. I have my thermo probes in about 3 ounces of Vodka so that the temp swing is buffered somewhat more like a 5 gal batch of beer would be too. I have thermometers on the fermenters and those stay dead on 68 (common temp I choose)
The defroster turns off based on Heat and/OR Time. the DEFROST BIMETAL shuts off based on heat. It is a part located on the evaporator or the back of
the liner and is used during the defrost cycle. This
bimetal senses the temperature from the evaporator.
When the temperature reaches 50°-70° degrees
(F) the defrost bimetal opens, turning the defrost
heater Off. But remember its sitting right near the defrost coils, So it shuts it off befor the actual beer in the kegs rises above 40 and Ive never seen my vodka encased freezer temp prob go over 45. I have not tried lagering but I should let you know, I had to go with a bigger fan to pull cold air from the freezer.. I just went with a higher CFM fan and was able to get 6 kegs on the fridge side down to 40`F. Also the Black light idea was insufficient when we had a cold week (40 @ night here, LOL) and my ferment dropped to 60 one time. So I went with a small ceramic heater..
 
Thank you for the reply to the necro (almost a year later). Yeah, that was a little short sighted on my side. Since my post I've been using water on the fridge side and vodka on the freezer side to monitor temps. I ordered my switch today. Thank you again for the valuable information, very much appreciated!


have you tried putting 4 kegs in on your freezer side? Will they fit well enough to run 4 taps?

 
(4kegs in freezer?) Yes I've tried an it will work...but the shanks on my taps get in the way when the door closes. If I swap those out to shorter shanks it will work. (pic of the new heater too).

image-51370851.jpg


image-218451319.jpg
 
I am just digging into a Side by Side Fridge. I bought a Whirlpool ED25DQ on Craigslist and the wiring looks very similar to yours.

I have a few questions.

1. Did your Fridge have damper where it appears that your transfer fan is located. My unit does that controls the freezer temp via a dial and mechanical linkage to the damper/
2. It appears that my unit pulls air from the evaporator fan (above the coils inside the freezer) through the damper reference above. Did your unit have a similar setup?
3. Did you make the sheetmetal housing for the transfer fan? How did you cut a hole? How did you mount?
A couple of questions:
 
Back
Top