You are using an out of date browser. It may not display this or other websites correctly.
You should upgrade or use an alternative browser.
You should upgrade or use an alternative browser.
Potentiometer SSRV wiring help
- Thread starter stevebell
- Start date

Help Support Homebrew Talk - Beer, Wine, Mead, & Cider Brewing Discussion Forum:
This site may earn a commission from merchant affiliate
links, including eBay, Amazon, and others.
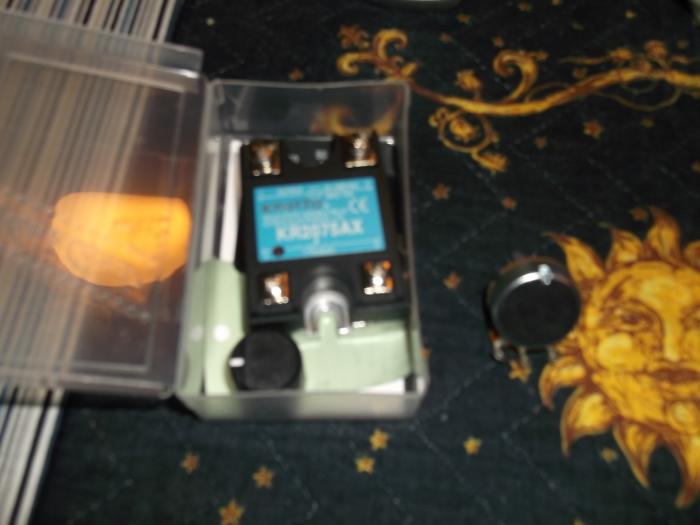
Series the first SSR with the secondary SSRV. This one I have is like a triac-diac combination. Jumper the out from the original to the in on the second one.. then go on to the heater coil with the wire originally on the first SSR. You are basically putting the SSRV inline.
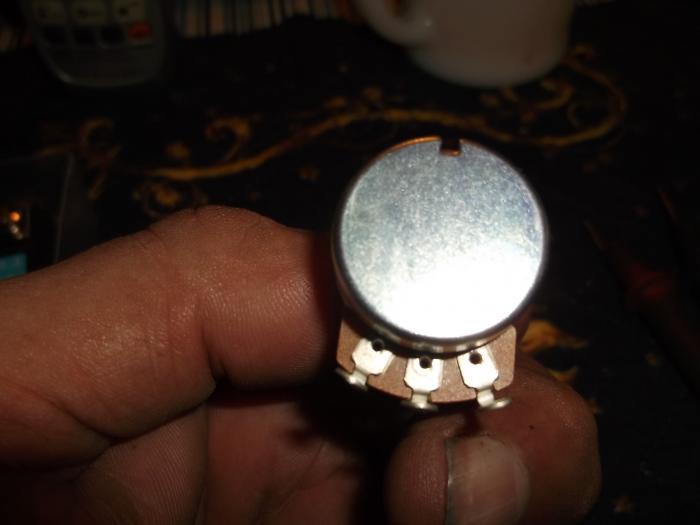
You connect the two posts on the pot to create a variable resistor, inside it has a coil of wire and a brush that travels around inside it picking up off the round wound coil. IE the further you turn it, the lower resistance on the brush.. The less resistance on the pot the more current flows out of the cube.
I bought one too, not put it in my pot, it seems to actually "heat too fast and I was going to slow it down" by reducing the current flow through the heater coil.
Don't know how to scan to draw you a picture. I am on a Ubuntu Linux OS here.
It is much better to use a PSR-25 phase angle controller. Super easy to wire. 2 pole for the pot, and 2 for the element
http://www.newark.com/united-automation/psr-25/power-control-module/dp/97K7822
http://www.newark.com/united-automation/psr-25/power-control-module/dp/97K7822
IF you knew how hard I worked with Ubuntu Linux "GIMP" then exited to "LibreOffice" in a scan to a page.. then.. (it looks like it clipped half the image) I'll keep working on it..
Sheesh.. I miss DOS 3.0.... Not to mention my wife dropped a toothpick into the printer paper rack there and I had to turn it upside down and shake it a bit..
THE pot, is used as a variable resistor, not a voltage divider (where positive and negative as connected to the coil and the wiper sweeps it), In this case it is just a variable resistor that sweeps altering the resistance going through the "control" points on the SSRV. You only need two of the three connections, one is CCW, other CW low resistance.. the wiper can sometimes be on the "end" of the three connections there. It takes a meter to figure out what it is doing..
A antique triac with Antique DIAC does the same thing.. a light dimmer works like this. It is not in this "neat new package thou" with heat sink on the back of it. (use heat sink grease to conduct heat if you have it)
(send homebrew to Hillbilly engineering, Tunnel hill Gawgia) Till then I am going to have one of mine.

cliffhanger1821
Well-Known Member
https://www.homebrewtalk.com/f170/my-planned-ebiab-keggle-cheap-simple-controller-404174/
That's what I did, and it includes wiring diagram (super easy)
That's what I did, and it includes wiring diagram (super easy)
IF it is the "exact" same as this "chinese pot", then the two prongs on the left from the back side will give you "lower resistance" as you turn it clockwise 0-100 dial.
In other words, decrease the pot resistance, increase the power out of the cube. THE two terminals on the SSRV will be hot to ground most probably, thou I really don't know how they are made inside, not seen a block diagram. I suppose they are a normal ac triac.. meaning it takes "line voltage to trigger it". I had the wind blow panel door on my elbow on the left arm years ago, a variable pot hanging on the door was hot with 277 volts.. pretty exciting for a moment, I saw stars.. like a bugs bunny cartoon.
The middle terminal is "wiper - pickup brush" that sweeps the resistance coil or carbon inside.
Be careful, as you are green apprentice electrician you will make mistakes, do a obsessive compulsive check on everything before turning on power. I've not been shocked in quite a few years because of my obsessive compulsive nature.


That wiring setup runs on a "plastic barrel heater" system, I am modifying barrels for different shapes. I was burning, scorching the barrels before I changed to this proportional control.
Using this system I can build a conical fermenter for "cheap" from a barrel.. but by the time you pay my time, you can buy one of the cheaper ones already done.
Working on my 3d printer now. Using scrap hdpe.
Using this system I can build a conical fermenter for "cheap" from a barrel.. but by the time you pay my time, you can buy one of the cheaper ones already done.
Working on my 3d printer now. Using scrap hdpe.
Similar threads
- Replies
- 14
- Views
- 1K

