• Please visit and share your knowledge at our sister communities:
  • If you have not, please join our official Homebrewing Facebook Group!

    Homebrewing Facebook Group

My new brew system, a brutus 10 with some nice modifications

Homebrew Talk

Help Support Homebrew Talk:

This site may earn a commission from merchant affiliate links, including eBay, Amazon, and others.
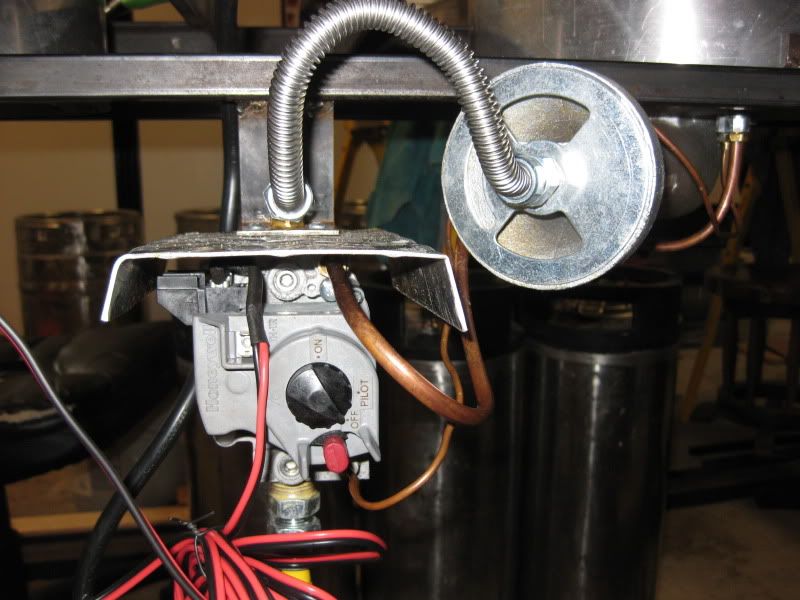
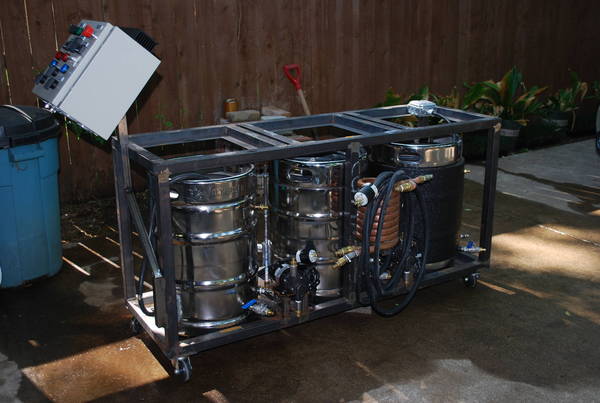
Beerthirty I'm putting together an automated HLT with a pilot using the:

Each Y8610U kit includes:

— S8610U Intermittent Pilot Module.
— VR8304M Dual Valve Combination Gas Control.
— 392431 Igniter-Sensor* (Not used for this Application you will need to purchase a Q345A1313. See Below).
— 394800-30 Ignition Cable.
— 393691 Natural to LP Gas Conversion Kit.
— Wiring Harness.
— 393690-14 Straight Flange Kit (3/4 in.) .
— Reducer adapters for gas control.
— Adhesive mounting option for S8610.
— Installation hardware.

Can I run 10 PSI through this? Will I need an ASCO value with it? I didn't think the Y8610U could handle high pressure. What type of regulator are you using in your setup? I would really use some help pulling these pieces together. Thanks!!!!!!
 
The paint has held up great. No complaints at all.

--
Josh

How did you go about "curing" the paint, if you don't mind my asking... starting construction on my single tier this weekend and was very curious about the 2000F spray paints. Did you just fire the burners? How long? Did you have the kegs on top while you did this?

Thanks for the intel!

:mug:
 
How did you go about "curing" the paint, if you don't mind my asking... starting construction on my single tier this weekend and was very curious about the 2000F spray paints. Did you just fire the burners? How long? Did you have the kegs on top while you did this?
Thanks for the intel!
:mug:

I fired the burners with the kegs on top (fill with water), and I used an infrared thermometer to keep an eye on the hottest parts of the frame. From there, just follow the heating instructions on the can of paint. I don't recall the procedure exactly, but it was a series of heat up and cool down steps.

Any parts of the frame that don't get much heat, don't need curing anyway. It worked great.

--
Josh
 
J, 1st and foremost - that's 1 bad machine. I would like to use your concept for my build and was wondering if you had the dimensions and or measurements for your brewstand. Great job and thanks in advance.

Bryan
 
jlandin

Thanks for the great thread. I'm jumping in late but hopefully you can help

I don't see a low pressure regulator in your setup. Is it at the propane tank connection?

Thanks
 
Thanks Brian! Looking forward to seeing your build thread.

To mount the pilot burners, I first straightened the L-brackets attached to them. I then fed the pilot and thermocouple protrusions up through one of the triangle-sized holes in the banjo. I marked the two bracket holes on the burner underside with a sharpie and drilled them out for two screws (note to self, replace with stainless steel). I did put rectorseal on the screws before installing them just to prevent gas leakage there. Here's a picture:

IMG00380.jpg


I was initially going to do the same thing, black pipe to support my valves. I wanted everything from the valve up to the burner to be rigid, and everything from the valve down to the manifold to be soft. That way the valves move with the burner height adjustment and the pilot/thermocouple lines are not being bent repeatedly. However, I quickly realized that there is no "official" way to go from black pipe NPT to the 3/8" flared orifice fitting with rigid fittings (some on this forum have done workarounds, like brazing the two together, etc but I didn't feel great about doing that). Anyway, the options for me were copper tubing union, or a flexible hose, neither of which would give me the rigid support I wanted. Thus were born, the brackets.

In case you need any, this is a good place for those flex hoses in all sorts of sizes:
http://www.plumbingsupply.com/gasconnectors.html

The brackets mount to the bolt pattern that is already on the valve. Coming out the top of the valve is a brass 1/2" NPT to 3/8" flare elbow. Attaching that to the burner orifice is a 12" x 3/8" flare to 3/8" flare flex hose from PlumbingSupply.

IMG_0015.jpg


Below the valve is the standard yellow flex hose from Lowe's that comes with a 1/2" NPT to 1/2" flare adapter.

IMG_0016.jpg


--
Josh

Hey Josh, I looked at the plumbing supply that you have linked. I am looking for the same flex hose you used with 3/8 " female flare fittings on both ends. It looks like they only carry flex hose with female NPT fittings instead of the flare fittings. Is there something I'm not seeing on the site, as I can't find the ones that you have pictured. I know I can have them custom made but that will cost about $130.00 for three hoses. Any help will be most appreciated.


John
 
jlandin
Thanks for the great thread. I'm jumping in late but hopefully you can help
I don't see a low pressure regulator in your setup. Is it at the propane tank connection?
Thanks

Yes, the regulator connects to the tank and has a hose which connects to the stand (on the gas manifold).

--
Josh
 
Hey Josh, I looked at the plumbing supply that you have linked. I am looking for the same flex hose you used with 3/8 " female flare fittings on both ends. It looks like they only carry flex hose with female NPT fittings instead of the flare fittings. Is there something I'm not seeing on the site, as I can't find the ones that you have pictured. I know I can have them custom made but that will cost about $130.00 for three hoses. Any help will be most appreciated.
John

I bought mine from here and they are flare fittings.

--
Josh
 
Hi Josh

The adjustable burner height appears to be a great feature, and I am now considering the same design. Can I ask how often you adjust the burner height, or have you settled on a preferred height

Thanks
 
I'm in the middle of a build and am shamelessly ripping off the adjustable burner rack idea. There's been a few moments where I've wondered if it was worth it honestly. End of the day it's a cool feature that may come in handy.
 
Hey OB, thanks for the feedback that's exactly what i'm looking for. On the cool-factor side the adjustable burner rack gets a "10". Just wanting to know how practical it is.

What I'm concerned about really is the low flame height during my burner test run. I've always used high pressure turkey-fryer setups before and not convinced I'm going to get the BTU's with this low pressure set up. Hence the adjustment if I need to get closer to the kettles.
 
lots of great info and links will use this info as I convert my full electric to dual heat/transportable brew stand still working out some design issues
 
I would be interested to know anyone's experience using BG14 burners (banjo 14") with low pressure propane. I am considering a 20 gallon system but having some concern about heating liquids quick enough. BK, MT, HLT kettle diameter is about 20" (26 gallons)

Thanks
 

_______________
*************
PLEASE READ!!
_______________
*************


Hopefully that got your attention. ;-)

I get a TON of messages from HBT users about my Brutus 10. I try to reply to all of them, but I have a couple of suggestions to people reading my build thread...

1) Please don't PM me if you think the question is something that can help others. Ask it in the thread instead! I get A LOT of duplicate questions and it would serve the community much more if we get the question/answer into the thread.

2) Please read the entire thread before asking me questions. It's only 20 pages (at this time) and MANY of the questions I get, have already been answered.

If everyone followed these two suggestions, eventually the build thread will be complete and will contain everything you ever wanted to know about building a clone of my system.

This was a really fun build, and I learned a lot in the process. I'm eager to help out wherever I can, so please do ASK AWAY! If you PM me with a question about this build, don't be surprised if I reply with "Ask this in the thread".

--
Josh
 
First off I love it and it is exactly what I want to do...Though I would like to add a remote device so one could track the temperatures and information much like the brew magic. Any Ideas???

After reading the entire thread and looking at your schematic a couple different times I noticed that the third burner is all by its self. Is is controlled by any switch or do you just manually fire it? In all truth a switch could be put in place that allows one of your PId temp controls to receive info from a third probe on the third burner to allow for temp readings and adjustment of temp at boil could it not? :drunk:

Thanks
Caleb
 
Hey does anyone have a fully completed .skp model with all the brackets in place to share?
 
Any reason why most Brutus have the HLT on the right, and the BK on the left? I mean we read left to right... right? Is it just because the original was setup that way?

Thanks.
 
BigJefe said:
Any reason why most Brutus have the HLT on the right, and the BK on the left? I mean we read left to right... right? Is it just because the original was setup that way?

Thanks.

Takes advantage of the Coriolis effect to increase efficiency.
 
Thanks to Josh for starting this tread and letting me shamelessly pilfer some of his great ideas. Instead of gas I went the all electric route. But the concept is the same

The sea trial of my new system went great. I just have a few tweeks to make to it and I'll be ready to start my first brew with it in a couple of week. I didn't do a photo essay but here are a couple of pics.

1_Sea_Trial.jpg


Here it is heating up the HLT. I'm using a counter flow chiller as a pseudo HERMS heat exchanger.

4_Storage_Mode.jpg


Of coarse, here it is in storage mode.
 
Thanks to Josh for starting this tread and letting me shamelessly pilfer some of his great ideas. Instead of gas I went the all electric route. But the concept is the same

The sea trial of my new system went great. I just have a few tweeks to make to it and I'll be ready to start my first brew with it in a couple of week. I didn't do a photo essay but here are a couple of pics.

Of coarse, here it is in storage mode.

Wow Blane, that looks very nice! Good work. I like to come back to this thread and drool over the nice pics. I'm slowly gathering the Keg(s) <--- have one and working on the next two--- people are mental where I'm from and want at least $10 more for an empty keg then it cost for one that is full of beer (deposit is $50 and ppl are aking $60-$90 for an empty keg). Once I get the kegs ready then I'll go ape-**** on buying the rest of the equipment. I'll be going the gas route because the price of electricty is nucking futs here, unless I brew at midnight!
 
Killercal said:
Wow Blane, that looks very nice! Good work. I like to come back to this thread and drool over the nice pics. I'm slowly gathering the Keg(s) <--- have one and working on the next two--- people are mental where I'm from and want at least $10 more for an empty keg then it cost for one that is full of beer (deposit is $50 and ppl are aking $60-$90 for an empty keg). Once I get the kegs ready then I'll go ape-**** on buying the rest of the equipment. I'll be going the gas route because the price of electricty is nucking futs here, unless I brew at midnight!

People are asking more for an empty keg because buying beer and keeping the keg is considered theft (even if you paid for a deposit.)

The deposit is meant to be a detterent, and cover the cost of the scrap metal - breweries lose quite a bit of money every time they need to replace a keg they didn't get back. They would charge full price for the keg as a deposit if they could, but it would make it MUCH harder to sell kegged beer if people had to put that much money down.

Of course, the law is very difficult to enforce, and I'm not going to tell you that you can't - I don't exactly always follow the law myself. So ultimately it depends on whether or not you're okay with ripping off the brewery (or breweries) that owns the kegs.
 

Latest posts

Back
Top