My New Hybrid e-HERMS BIAB setup

Homebrew Talk - Beer, Wine, Mead, & Cider Brewing Discussion Forum

Help Support Homebrew Talk - Beer, Wine, Mead, & Cider Brewing Discussion Forum:

This site may earn a commission from merchant affiliate links, including eBay, Amazon, and others.

jdhranek

Member
Joined
Mar 7, 2014
Messages
11
Reaction score
1
Location
Boston
I have been perusing the HomeBrewTalk forum for a few months now collecting equipment ideas, recipe advice, etc. Since I just finished my shiny new brewing setup, I figured it was long since time to become a member and support the forum that has been a goldmine of advice and project ideas.

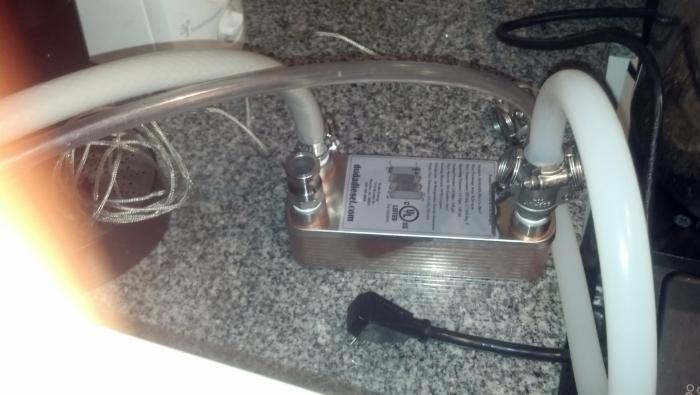
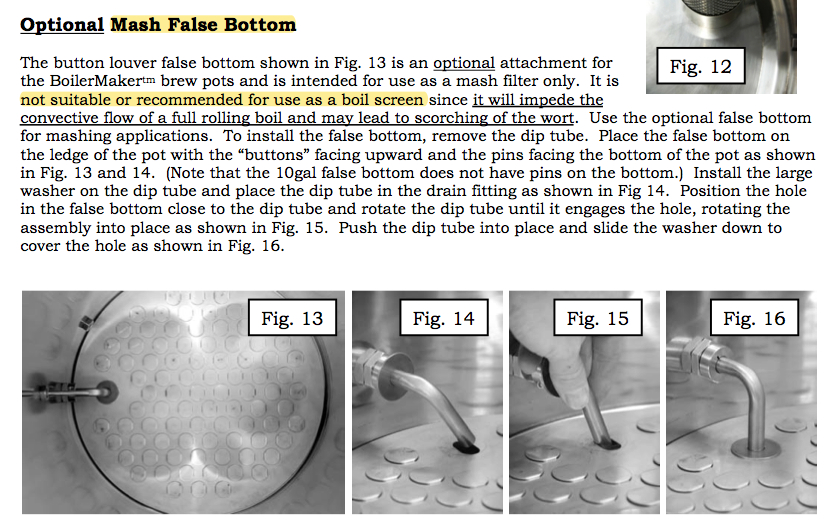
So a quick run down of my new system...It is a Brew in the Bag setup that uses my old brew pot as a Hot Liquor Tank/HERMS pot. My brew kettle is a Blichmann 10 gal Boilermaker with a false bottom. Pushing everything around is a Chugger pump with a stainless steel pump head. Everything runs through silicone tubing with camlock quick disconnects all around. I re-purposed my old 3/8" copper immersion chiller as my HERMS coil, so I purchased a DUDA Diesel 20 plate-plate chiller to cool things off.

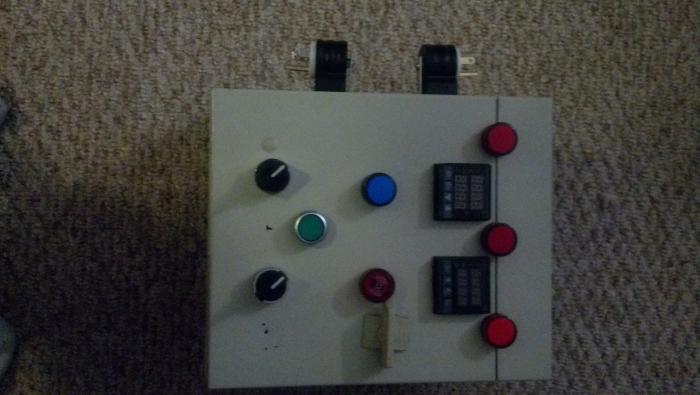
I built my own control panel with ideas heavily borrowed from theelectricbrewery.com and the forum. It has an Auber syl-2352 PID controlling an Auber 25 amp Solid State Relay. I also added an Auber Multi-Event Timer that was specifically designed for beer brewing.

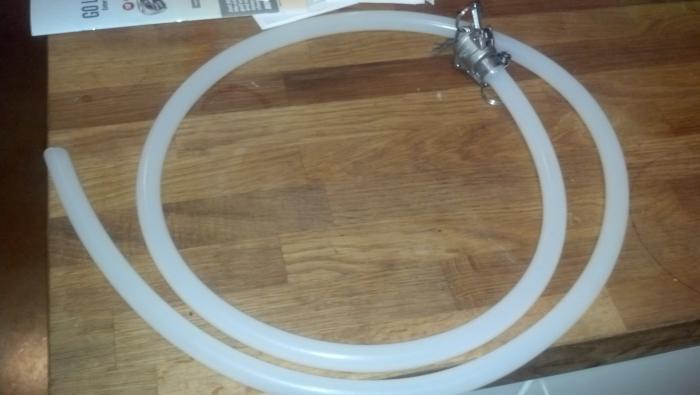
I purchased a Bayou Classic B300 crab cooker/steamer basket to hold all my grains and make sparging easier. I also put together an extra long hose with a quick disconnect for filling pots and racking to my Carboy.

Complete Setup.jpg


Control Panel in operation.jpg


Grain basket.jpg


Extra long hose to fill carboy.jpg
 
The control panel is probably a little bigger than it needs to be, but this is my first attempt at wiring anything more complicated than a light switch. So I figured more space would give me a better chance of success.

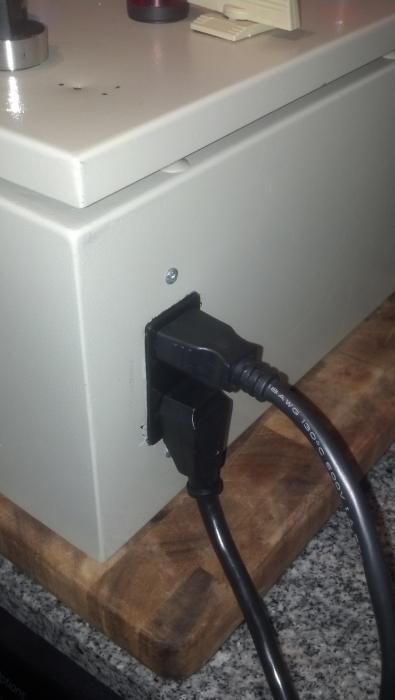
For power in, I found two angled plugs at Home Depot and mounted them to the side of the box. I then cut to fit and wrapped all the holes from the mount with a rubber replacement garage door gasket and siliconed the edges for extra water-proofing. The top power plug is for the boiler booster and is rated for 20 amps (the boil booster is a 1650 watt water heater element setup that is 100% necessary because my stove can't boil sh*t). The bottom power plug is for everything else (PID, Timer, Pump, lights, etc) and is rated for 15 amps. The angled plugs came with a female connection, so I wired that to a power cord replacement plug.

Power out goes to a split-wired standard outlet. The top plug and bottom plugs are on different circuits. The top plug is for the pump and the bottom is for the boil booster.

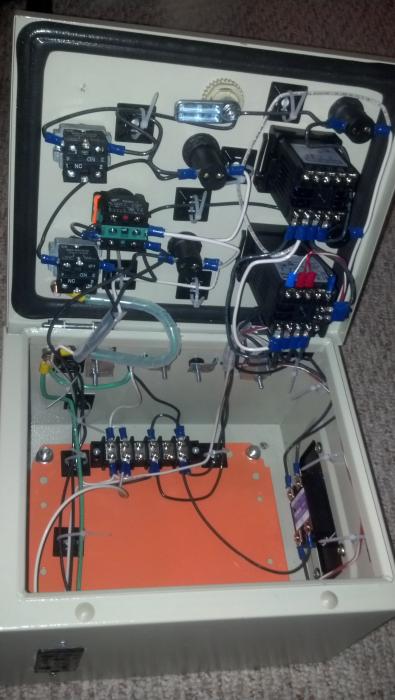
Inside I wired everything to a terminal strip where half is for the neutral and the other half runs the hot wires for ease of splitting the power to where it needs to be. The box has grounding studs on the door and the bottom enclosure and everything is powered by GFI outlets in my kitchen so I won't murder myself trying to brew.

Control panel components.jpg


Control panel initial layout design.jpg


Control panel power-in side.jpg


Control panel power-out side.jpg


Control panel interals.jpg
 
The Boilermaker does double duty as my boil kettle/mash tun. I ran a 1/2" street elbow through a bulkhead near the top for my whirlpool arm (which is just 5 feet of silicone tubing that will sit on top of the grain bed while mashing, on the bottom of the kettle for whirlpooling while boiling and move to the top when cooling).

My grain basket will hold the grains and the straining bag during mashing so that I can remove the bag easier when I'm finished with the grains. I also found these perfect little hammer hangers that will suspend the basket when I'm rinsing the sparge water through the grains. The hangers also hold my boil booster in the pot when boiling.

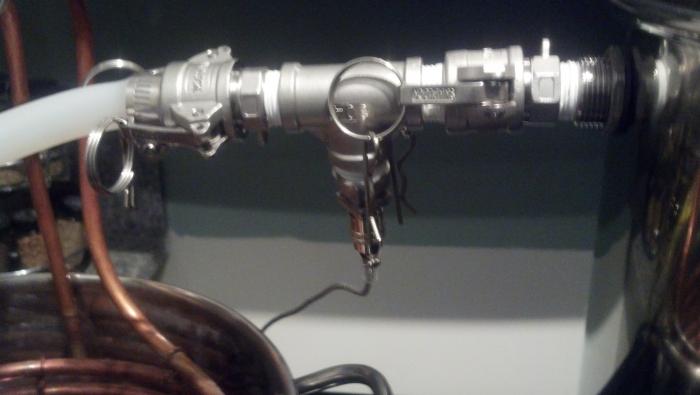
I also built a T fitting with quick disconnects on both sides to hold my RTD thermocouple. I wanted to be able to move it up to the connection for the Whirlpool Arm when I'm mashing and down to the Boilermaker's ball valve when I'm cooling (because I recirculate the entire volume of wort through my plate chiller until it's all cooled to pitching temp).

Mash setup.jpg


Brew Kettle with whirlpool arm.jpg


Sparge setup.jpg


Thermocouple.jpg
 
Nice work! The two male plugs mounted to the enclosure are incoming power using two separate 120V circuits?
 
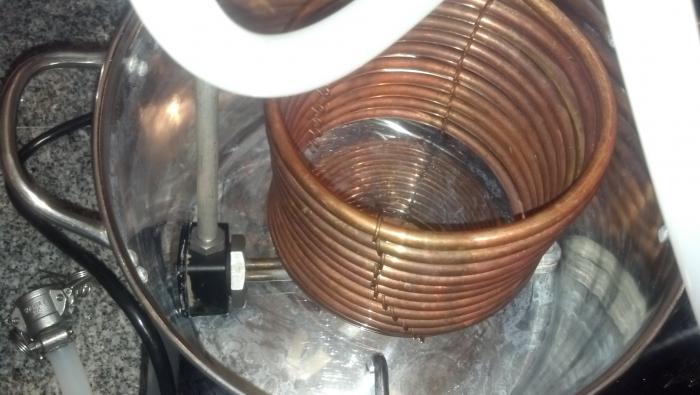
For the HLT/HERMS coil, I re-purposed my old 20 quart stock pot. I added a ball valve and a dip tube (which I made out of a 3/8" to 1/2" NPT blichmann elbow).

During mashing, my boil booster sits under my re-purposed immersion chiller (HERMS coil) and is controlled by the PID/SSR combo to control the mash temp. The water here will serve dual purposes: 1) heat the recirculating mash and 2) sparge me up to boil volume so I don't have to have a thin mash like most BIAB.

During sparging, I will remove the immersion chiller, dunk the grains in the straining bag into this pot, stir like my life depends on it for 10 mins or so, replace the grains in the hanging grain basket and then pump the pot dry through the grains into the boil kettle. I think I'm going to purchase a sprinklerhead or make a sparge arm that I attach to the Boilermaker's lid that I can set on top of the grain basket for rinsing the grains.

HLT_HERMS.jpg


Sparge setup.jpg
 
Hey atoughram...yes the two male plugs will be controlled by the two 20 amp GFI circuits I have in my kitchen. Upon testing, I found that 1 of the circuits will run the entire setup, but I want to be able to pull the power for the boil booster when I need to transfer it so I can't dry fire the element, but can still control the pump.
 
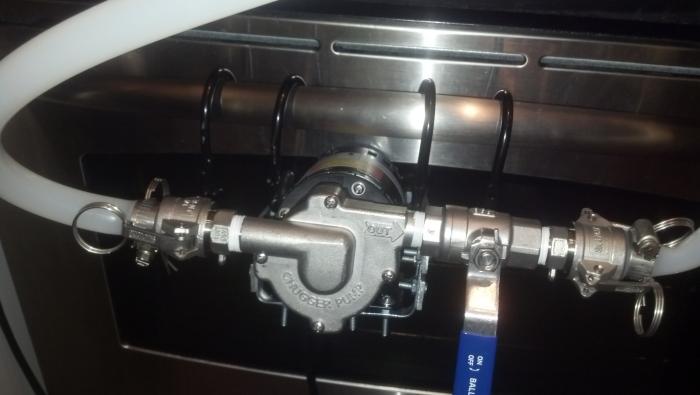
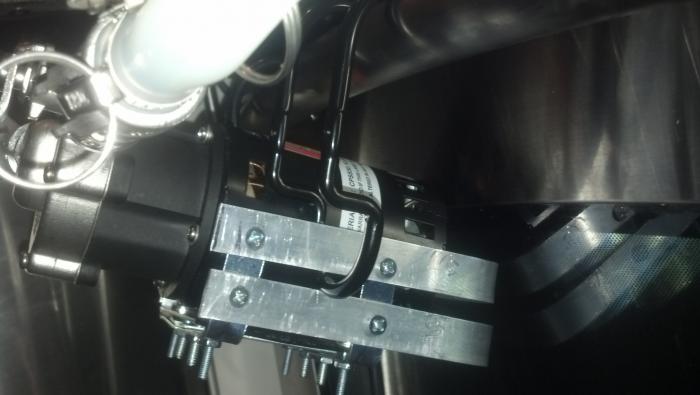
Since I learned from the Forum that Chuggers are not self-priming and need to be lower than the kettles to pump, I decided to build a pump hanger that uses the towel holder on my oven. Chuggers have a base welded on the bottom, so I used that, 4 L brackets from Home Depot and an aluminum bar that I cut and bent into shape by hand for the pump hanger assembly.

That hammer hanger kit I bought had two u shaped hangers meant for larger sledge hammers that I wedged between the two aluminum bars I mounted on the L brackets. I use them to grab the towel holder and it hangs pretty stable. I am able to open the ball valve on the output without having to hold the pump in place.

For cooling, I fill my MLT/Herms pot with ice I made in Tupperware containers that fits inside the coil and run the plate chiller inline before the MLT. I reused the hoses that came with the immersion chiller to hook up the plate chiller to my sink and added some camlock quick disconnects for the wort side. I cooled 7 gals from boiling to 60 degrees in 15 minutes with my test the other night.

Pump.jpg


Pump hanger view.jpg


Plate Chiller.jpg
 
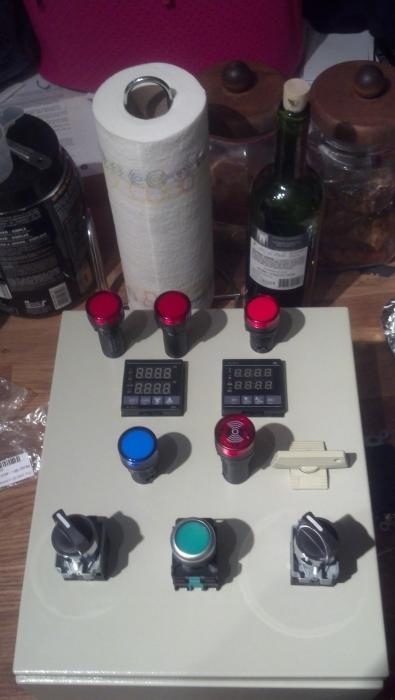
I haven't fully finished my control panel yet. I still need to paint it ( I found some royal blue hammered finish spray paint that is going to look killer on this beast), but it works extremely well. I'm thinking about doing something really stupid and painting a set of white racing stripes vertically down the middle, but I haven't made up my mind yet.

Above the PID and Timer, I placed LED lights that will light up when an alarm state is reached. The PID has a high temp and low temp alarm output, so I split that into two RED LEDs for a more useful alarm output. The timer also has an alarm output that I ran to an LED above it.

Below the PID and Timer is my Blue ELEMENT ON LED and my alarm buzzer.

Below those is my pump switch. The switch lights up green when the pump is on so I didn't need another LED light for that.

Along the bottom I have two switches that control the alarm output to the buzzer. The left one controls the PID and the right one controls the Timer. Since the buzzer is highly annoying and freaks my dog out, I wired it so that when an alarm state is reached the corresponding LED will light up but the buzzer will only sound if the switch is on.

Control panel installed.jpg


Control Panel in operation.jpg
 
It's crazy to see this thing finished as I've had it running around in my head for 9 months in some version or another. I haven't brewed with it yet (I'm planning a Belgian White for this Sunday), but I've tested every component and it works very well. I'm hoping for the best as this will be my first all-grain brew (I've been partial mashing for a little under a year now) and first full wort boil.

During mashing, the PID holds the water within roughly a degree of what I set the PID to. The whirlpool when running through the HERMS coil is a little weak because of the 3/8" tubing causing a bit of a bottleneck (everything else is 1/2"), but overall I'm very pleased with how it works. :D
 
First brew on it went very well with the minor exception of completely clogging my false bottom an plate chiller. Not the rig's fault, I had intended to use and in fact purchased a few extra muslin bags for my hops, chamamoile and coriander on the Belgian wit. However, I tossed the first oz of hops in without thinking and then told myself to just go with it because "how bad could it be"?

Otherwise, it worked better than I had hoped. Controller kept the mash within a degree of set point. Boil went beautifully and other than trying to cool the wort through a few OZs of sludge. I highly recommend hop/ spice bags for use with a similar setup.:mug:
 
Are you still using this system? If so, any lessons you would offer to others pondering a similar setup?
 
Back
Top