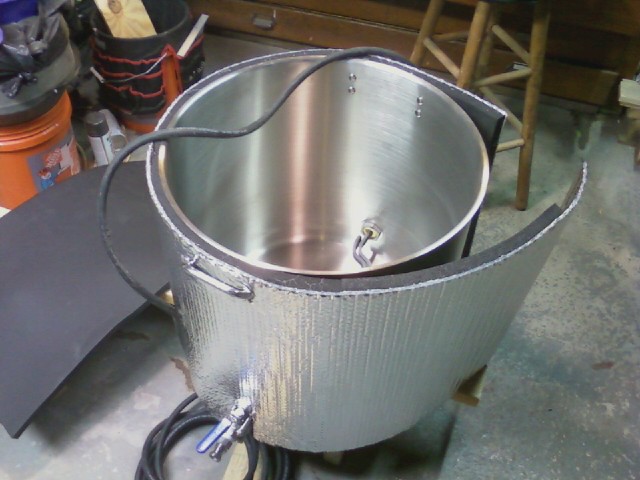
A note to myself - R4.3 for 1'' of reflectix and the high temp wool. (will post some shots later of my uber insulated lids later).
So I bought some of the mcmaster 1'' thick high temp wool, 1/2 inch foam rubber, 3/4 inch foam rubber and heck I had to get some more reflectix to preserve shiny on a budget. Plan is to use:
HLT: (9349K3)
3/4'' foam rubber +
3M contact adhesive 80 + reflectix
MT: 1'' high temp wool + 3M contact adhesive 80 + reflectix
BK: 9328K41(9349K2)
1/2'' foam rubber + 3M contact adhesive 80 + reflectix
All the lids will get 1'' high temp wool backed with reflectix. This should protect the reflectix from early break down and also help increase the r value of the insulation that I am adding. I have already put the high temp wool on the lids and the foam rubber on the MT. Will be using those this weekend and with any luck some photos and some results. I have already brewed with just the lids done, and there was a noticeable difference.
Overall goal here will be to, eventually, test the capability for the 5500w elements to boil X volume in a well insulated pot.
The 3M 80 Spray works VERY well on the reflectix and foam rubber, will report back on the fiberglass to the reflectix. I tried to separate a test piece of the foam rubber and the reflectix and the foam rubber ripped instead of peeling. The adhesive has a heat tolerance of "over 200F", which it should never see since the foam rubber itself should never get that hot.
I wanted to try the various materials and see how they stack up against each other. The HLT and MT should be well insulated to help the mash and heat retention processes they support. Where the BK needs moderate insulation that is removable for chilling after a batch. I hope to accomplish this with hook and loop.
Fiberglass:
Pros - works really well. Has 1200operational temp. Probably all you would ever need for insulation value in a brewing situation. CHEAP!
Cons - needs to be sealed up so particles don't float into your brew. So you need to in the least buy reflectix, or flashing, etc. and seal it up with aluminum hvac tape. Might not stand up to add removal from the pot.
Foam Rubber:
Pros - Flexible and could be put on and taken off repeatedly with no wear issues, can stand up to required boiled temps (be in contact with kettle)
Cons - somewhat expensive (vs. fiberglass).
Jury is still out on how well it insulates... though I am sure it will work well, especially in the 3/4-1'' sizes.
Reflectix:
Pros - compact, water resistant, flexible, shiny, moderate cost. Good to use as a backer for foam rubber or fiberglass.
Cons -rated to no more than 180F operational use, will break down quickly over time.
UPDATE FROM TESTING
FINAL CONCLUSIONS:
1. For ebrewers, in general the foam rubber is the way to go (3/4''-1''). For my kettles the foam rubber in the 3/4'' size performed very well. I might consider going up to the 1'' inch for my MT when I replace the fiberglass. I do think at this point the insulation returns will be somewhat diminished as you increase in size after that (you get your best bang for buck with 3/4'' to 1'').
2. While the fiber glass works very well from an insulation perspective, it needs a lot of protection to stand up to the rigors of brewing, including an accidental puncture of the reflectix, etc. I would recommend using it for megapot style recessed lids at the most. Using it for the sidewall insulation is a PITA when compared to the ease of use/installation of the foam rubber.


