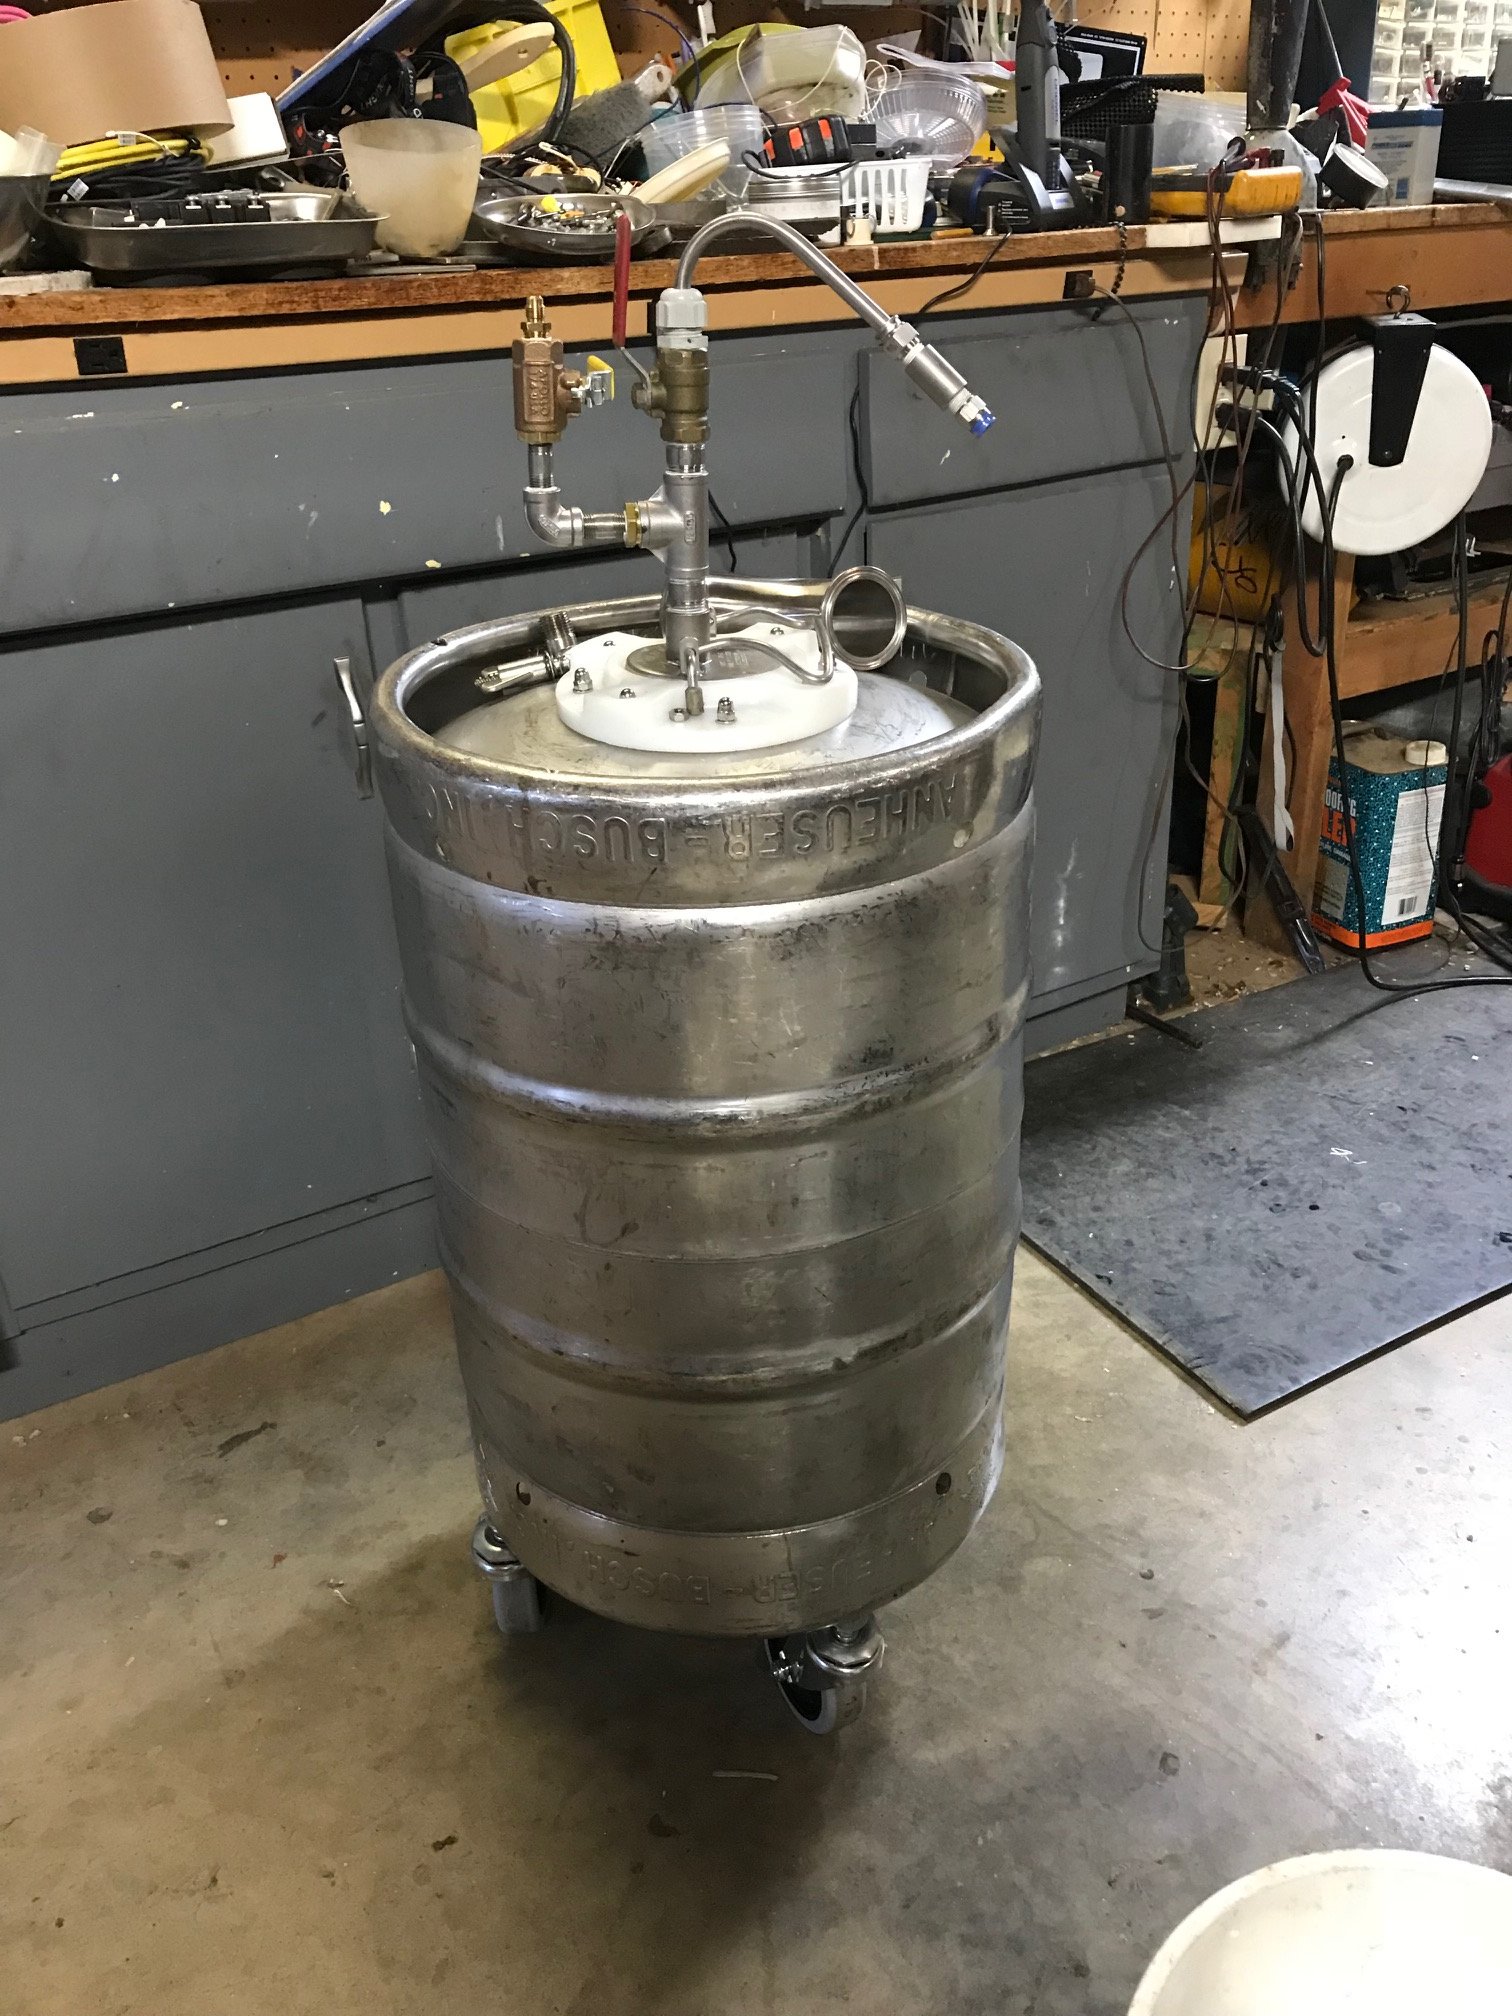
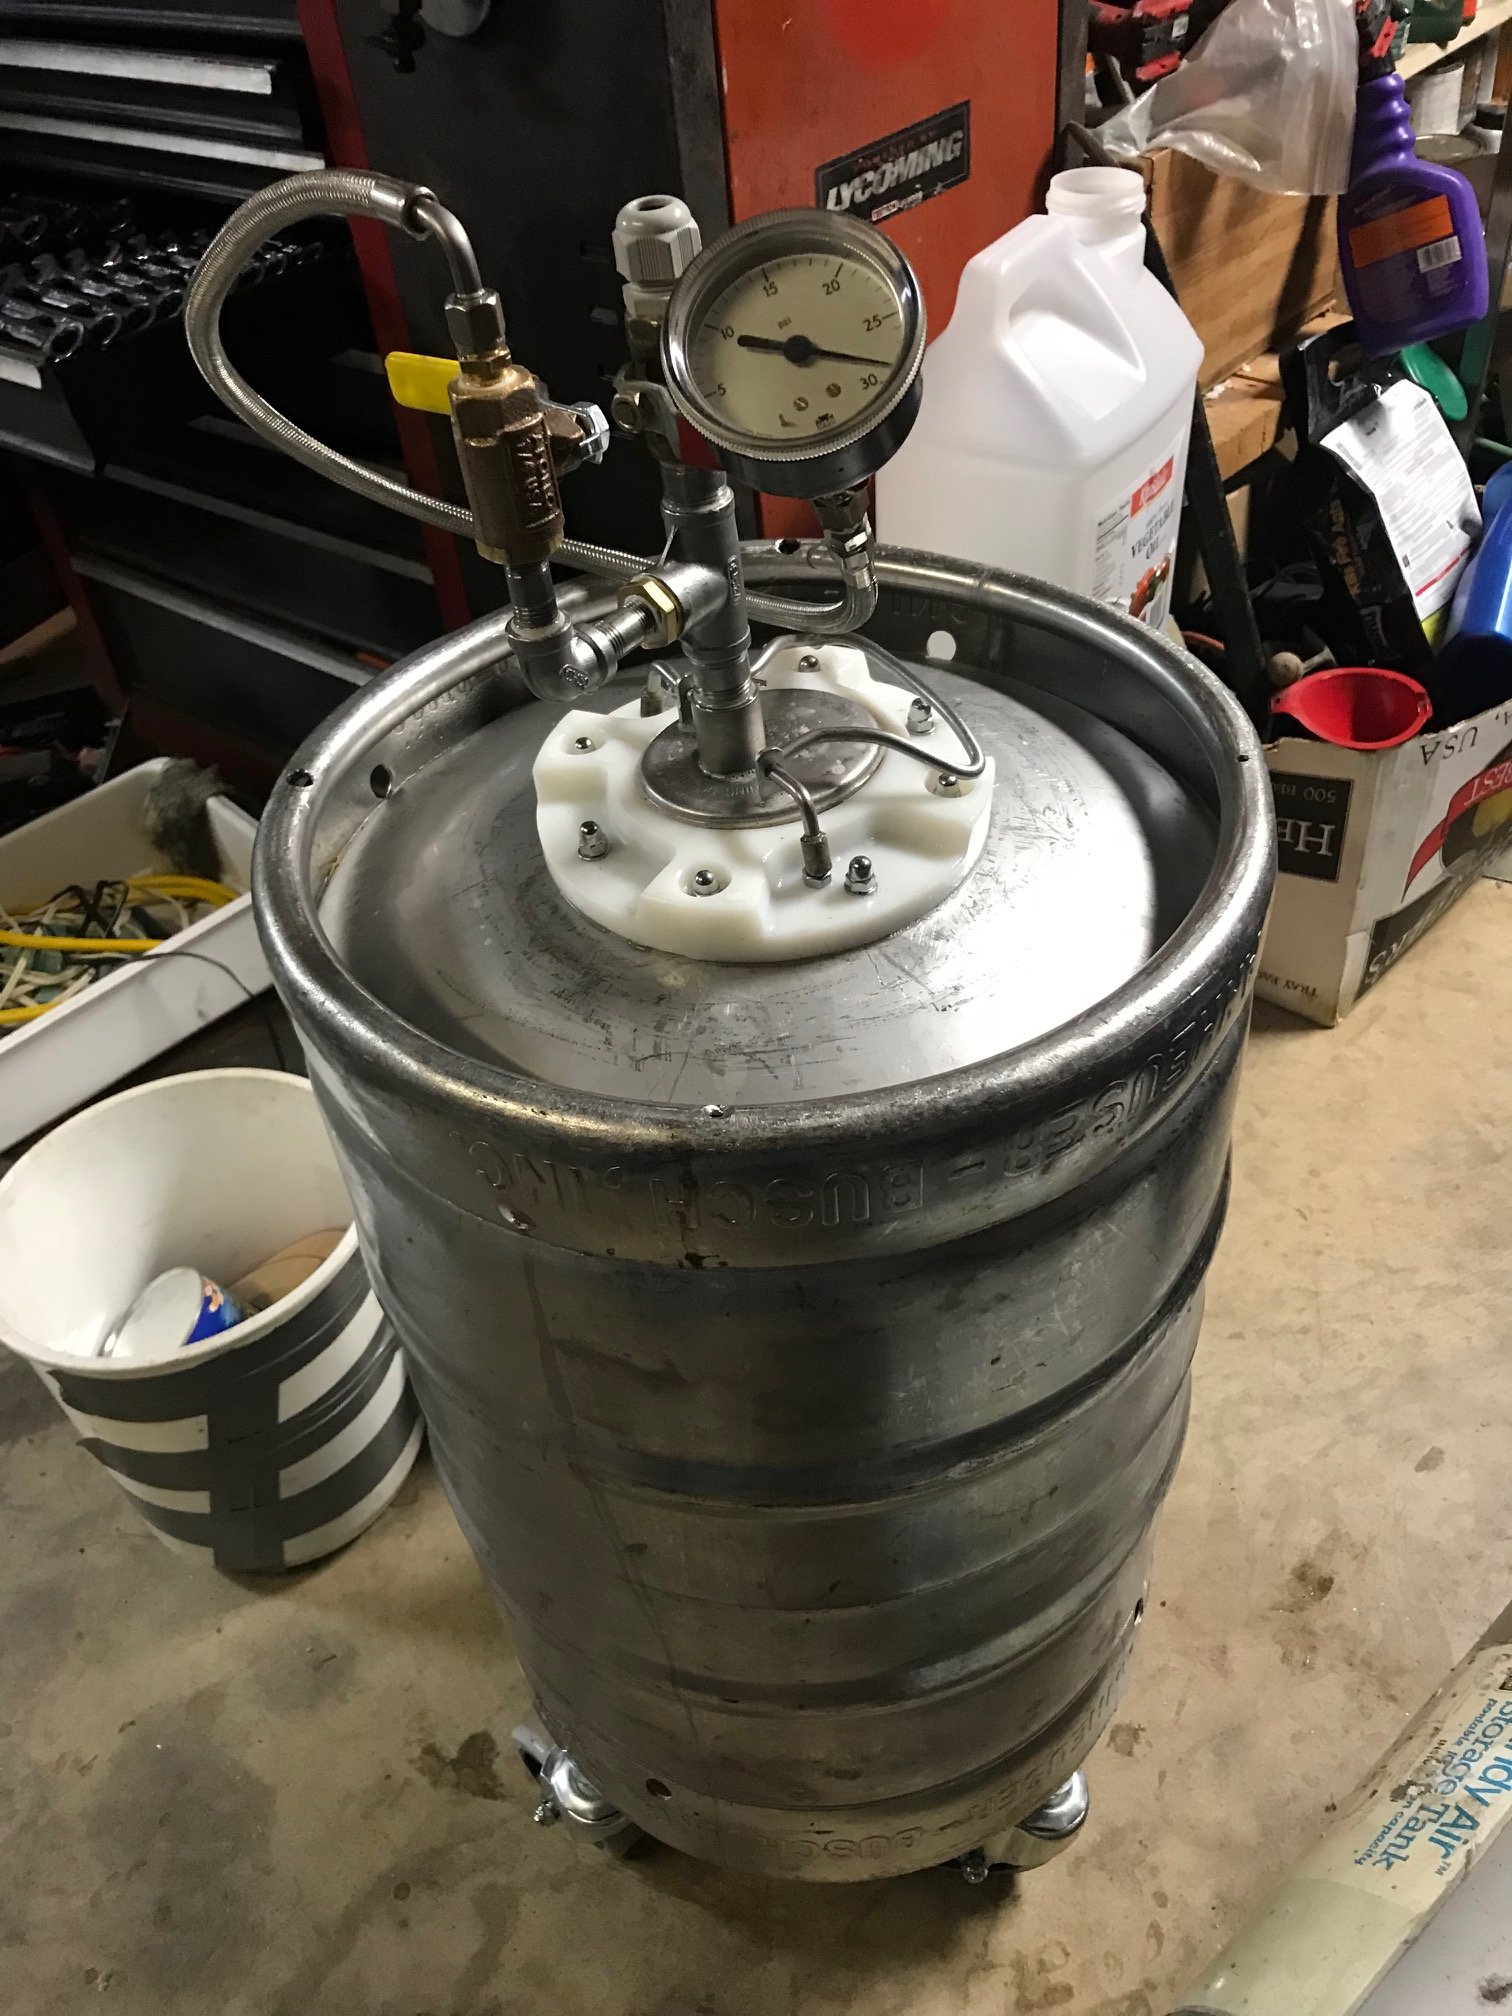
At last I have all of the pieces for my Fermenter.
The goal is to ferment in SS vs Plastic buckets, ferment under pressure, pressure transfer to keg.
I am not really driving for Low O2 yet but it is on my mind for the future.
I hope to brew this weekend and split the wort to this fermenter and a plastic bucket to compare the results.
Take a look and see if I am way out in left field with this.
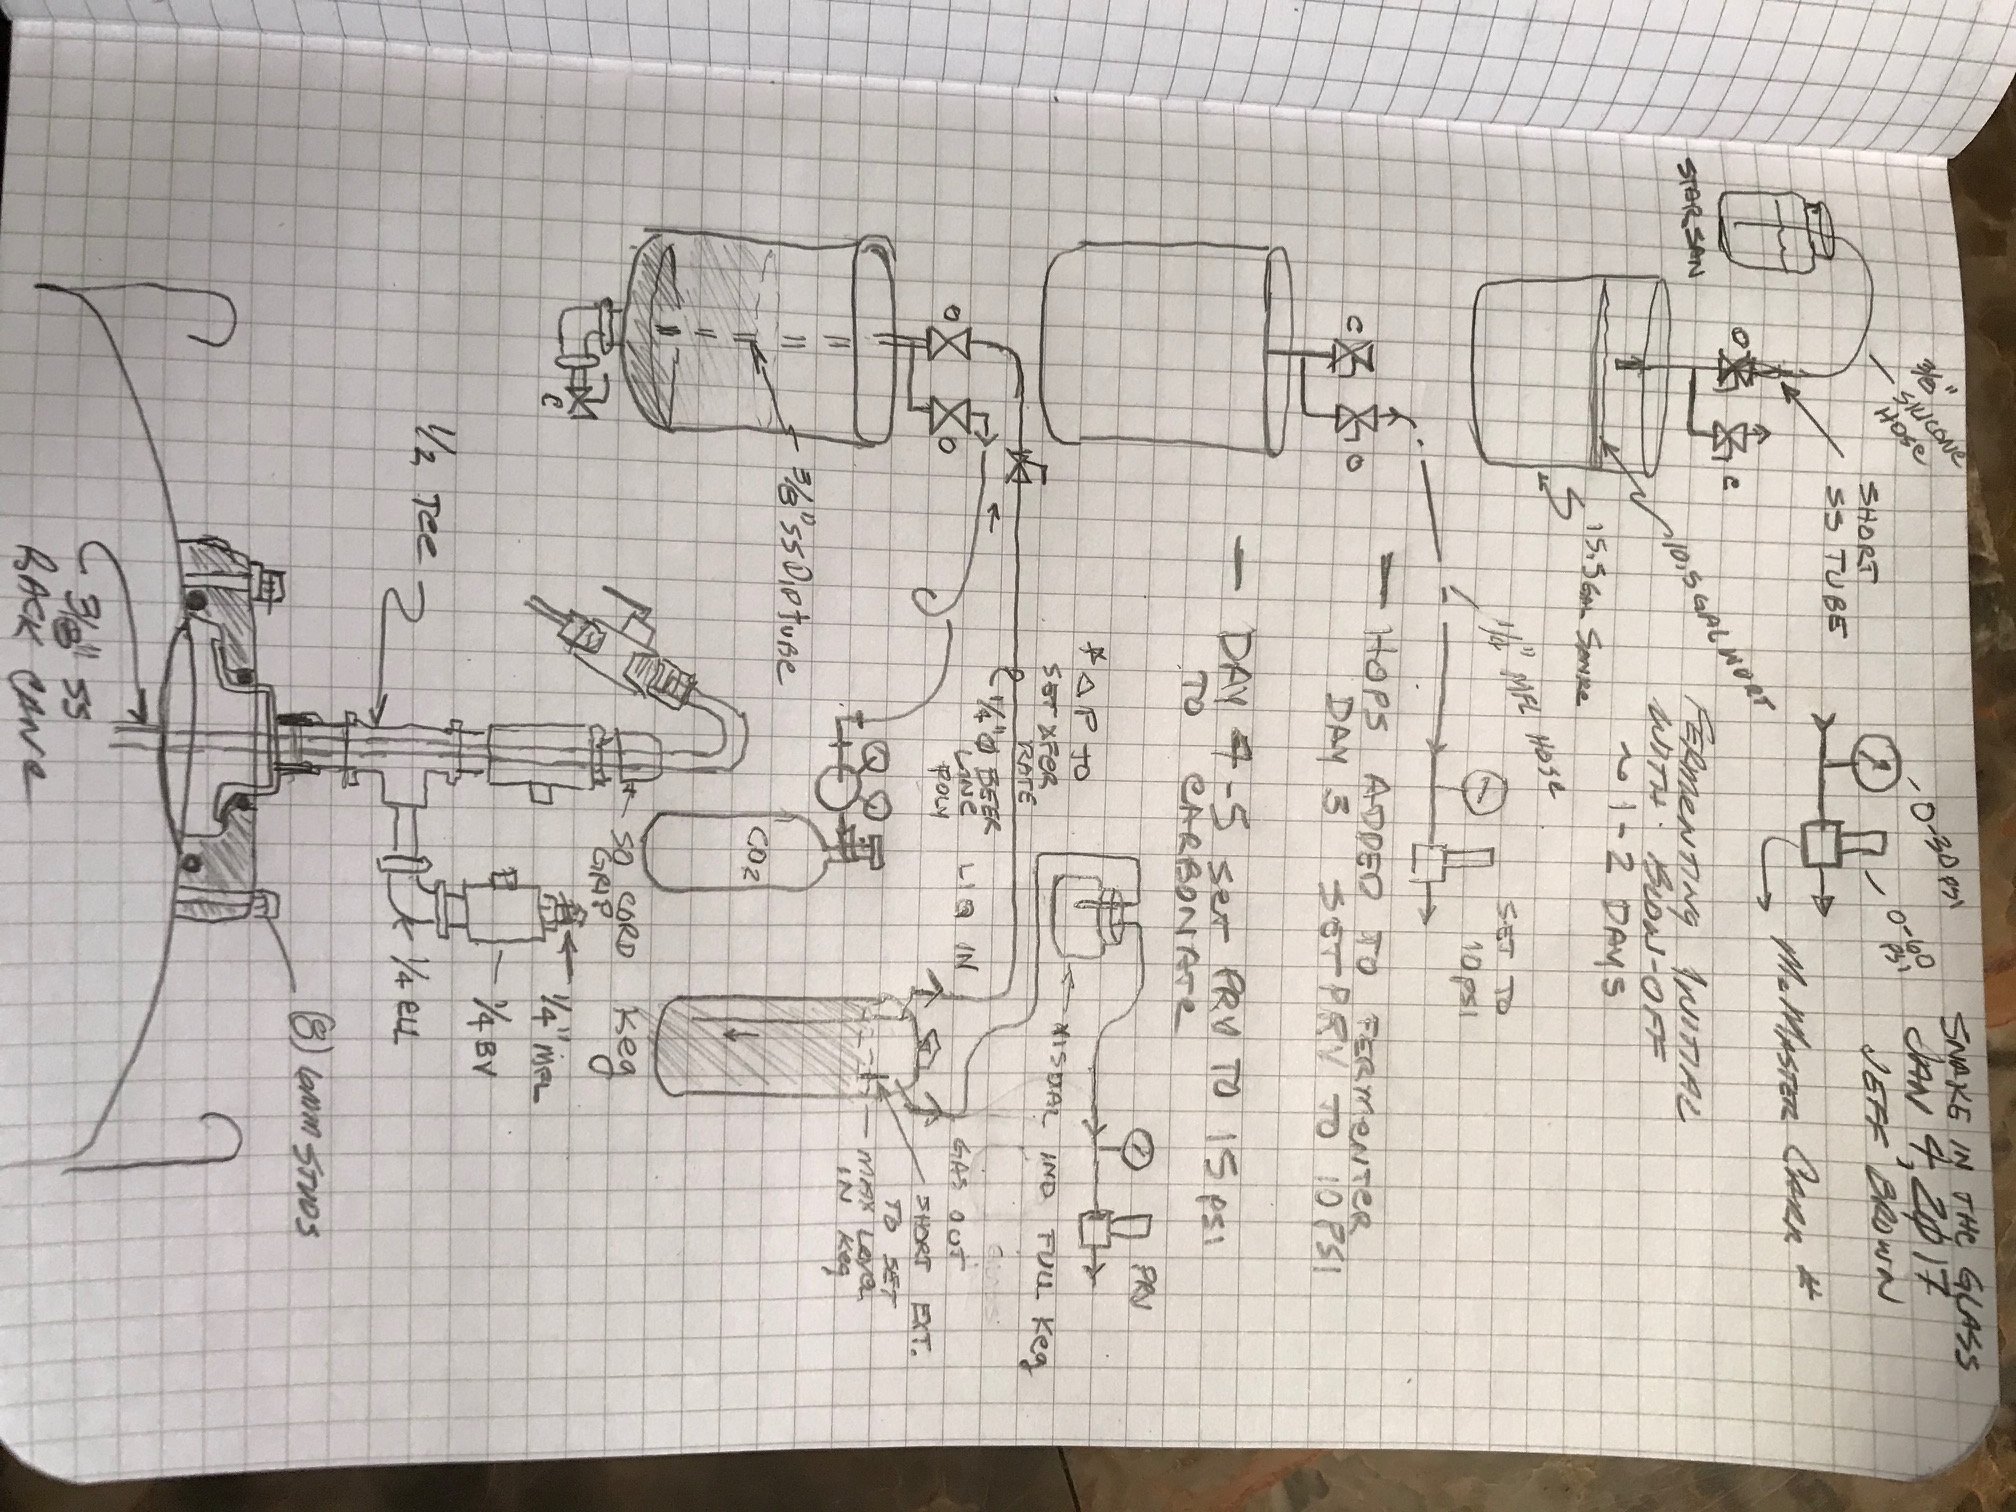
My diagram and pix are below.
The PRV valve is from McMaster-Carr #99045K11 0.5-60psi x 1/8" fpt
The piece in the top of the keg for the 3/8" ss racking tube is a poly cord grip x 1/2 mpt that works and seals great. The drain is a 2" tri clamp cap with a thrd nipple welded on for now.
the racking tube will be inserted, sealed, then open the ball valve and lower to within ~ 1-2" of the cake. Connect the CO2 tank to the 1/4" bv and connect the keg gas line to PRV and use the pressure differential to transfer slowly into the keg. Plan to remove the valve and fill the keg thru the dip tube.
I have it pressurized to 30 psi gonna leave it overnite.
Fermenting plan: Red ipa with either SO-5 'SO-4 or T-58 IG 1.075 FG 1.017
1-2 days open blow off to starsan jar until fermentation slows.
day 3 add dry hops and set to ~7 psi.
day 5 crank pressure to 15 psi and leave until finished or 5 days max on hops.
day 7 hopefully will be finished, cold crash and transfer to keg with gelatin.
ref for 48 hrs and tap.
Any insights or suggestions re dry hopping or clarifing with gelatin are welcome as well as pressure settings that differ from my plan.
Thanks in advance
jbrown57


