I had this sparge arm made.
https://www.homebrewtalk.com/photo/sparge-arm-62865.html
The picture here shows it after the mashtun was drained but the way I use it is..
Once I've doughed in I select a length of tube so the plate is at the same as the wort level (I have several lengths of 3/4" silicon tube). I use the sparge arm like this for vorlaufing and then fly sparging. For the fly sparge I trickle in 78-80deg c sparge water (march pump) and at the same flow rate transfer into the kettle. My last brew took a little of 30mins to transfer 26.5L. After a few mins the wort is clear on top and wort the level is about 1" above the grain bed.
The design idea came from reading how-to-brew in which Palmer states you should avoid aerating hot wort;
"You should not aerate when the wort is hot, or even warm. Aeration of hot wort will cause the oxygen to chemically bind to various wort compounds. Over time, these compounds will break down, freeing atomic oxygen back into the beer where it can oxidize the alcohols and hop compounds producing off-flavors and aromas like wet cardboard or sherry-like flavors. The generally accepted temperature cutoff for preventing hot wort oxidation is 80°F. Oxidation of your wort can happen in several ways. The first is by splashing or aerating the wort while it is hot."
So my thinking was having the plate at the same level as the wort meant no splashing occurs. But I'm wondering if I'm limiting the rinse by only introducing rinse water into the middle? and also perhaps there's more risk of channeling?
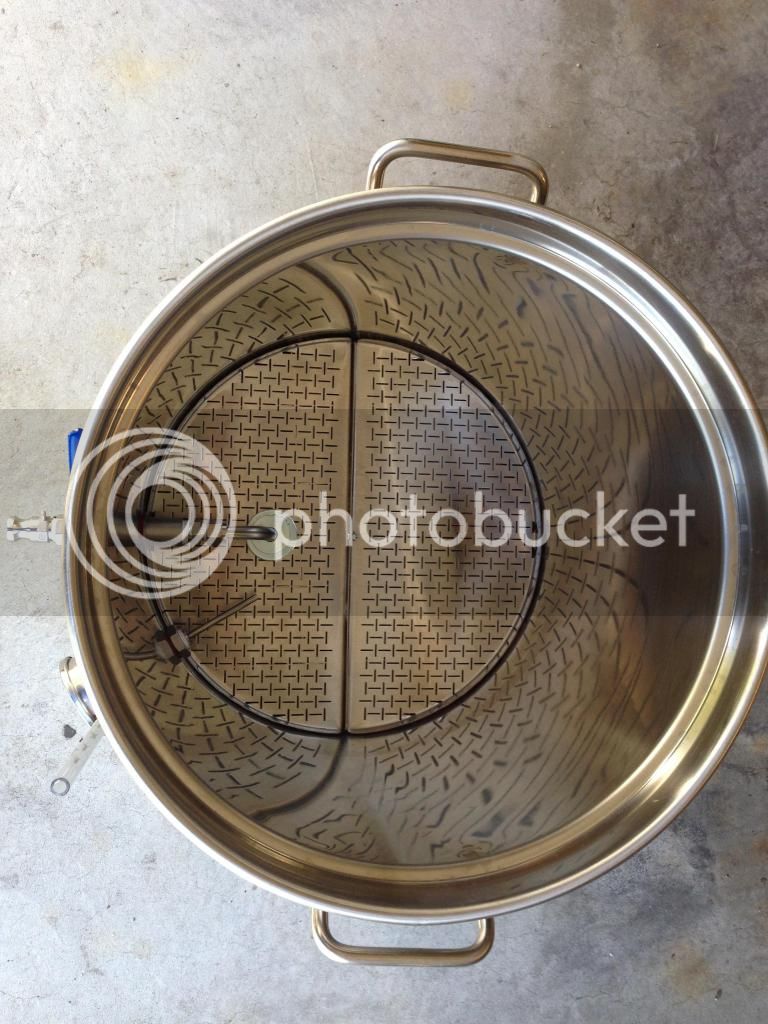
Also. Has anyone else used a PICO false bottom from homebrewing.org? I'm using a modified version (modified means it has a hole in it for the pick-up pipe and a scallop cut out of the edge so it would fit under the weld nipple in the mashtun - which unfortunately caused the FB half to warp slightly)
Here is a pic of the pico FB half (before I lowered it).
https://www.homebrewtalk.com/photo/mashtun-pickup-61443.html
Here is a pic of it lowered and how its being used now. (you can see the scallop I cut out)
https://www.homebrewtalk.com/photo/lowered-false-bottom-62864.html
The reason for all this is I'm trying to get to the bottom of why my brew-house efficiency is so poor. I previously started a thread on poor efficiency in the beginners forum "Why is my efficiency so low" so I know the nuts and bolts of it - this thread is to hopefully identify any issues with my sparge arm and or FB.
Any wisdom, thoughts, suggestions..?
https://www.homebrewtalk.com/photo/sparge-arm-62865.html
The picture here shows it after the mashtun was drained but the way I use it is..
Once I've doughed in I select a length of tube so the plate is at the same as the wort level (I have several lengths of 3/4" silicon tube). I use the sparge arm like this for vorlaufing and then fly sparging. For the fly sparge I trickle in 78-80deg c sparge water (march pump) and at the same flow rate transfer into the kettle. My last brew took a little of 30mins to transfer 26.5L. After a few mins the wort is clear on top and wort the level is about 1" above the grain bed.
The design idea came from reading how-to-brew in which Palmer states you should avoid aerating hot wort;
"You should not aerate when the wort is hot, or even warm. Aeration of hot wort will cause the oxygen to chemically bind to various wort compounds. Over time, these compounds will break down, freeing atomic oxygen back into the beer where it can oxidize the alcohols and hop compounds producing off-flavors and aromas like wet cardboard or sherry-like flavors. The generally accepted temperature cutoff for preventing hot wort oxidation is 80°F. Oxidation of your wort can happen in several ways. The first is by splashing or aerating the wort while it is hot."
So my thinking was having the plate at the same level as the wort meant no splashing occurs. But I'm wondering if I'm limiting the rinse by only introducing rinse water into the middle? and also perhaps there's more risk of channeling?
Also. Has anyone else used a PICO false bottom from homebrewing.org? I'm using a modified version (modified means it has a hole in it for the pick-up pipe and a scallop cut out of the edge so it would fit under the weld nipple in the mashtun - which unfortunately caused the FB half to warp slightly)
Here is a pic of the pico FB half (before I lowered it).
https://www.homebrewtalk.com/photo/mashtun-pickup-61443.html
Here is a pic of it lowered and how its being used now. (you can see the scallop I cut out)
https://www.homebrewtalk.com/photo/lowered-false-bottom-62864.html
The reason for all this is I'm trying to get to the bottom of why my brew-house efficiency is so poor. I previously started a thread on poor efficiency in the beginners forum "Why is my efficiency so low" so I know the nuts and bolts of it - this thread is to hopefully identify any issues with my sparge arm and or FB.
Any wisdom, thoughts, suggestions..?


![Craft A Brew - Safale S-04 Dry Yeast - Fermentis - English Ale Dry Yeast - For English and American Ales and Hard Apple Ciders - Ingredients for Home Brewing - Beer Making Supplies - [1 Pack]](https://m.media-amazon.com/images/I/41fVGNh6JfL._SL500_.jpg)


 ....creature of habit.