• Please visit and share your knowledge at our sister communities:
  • If you have not, please join our official Homebrewing Facebook Group!

    Homebrewing Facebook Group

Tippy -single tier brew stand

Homebrew Talk

Help Support Homebrew Talk:

This site may earn a commission from merchant affiliate links, including eBay, Amazon, and others.

Leblais

Well-Known Member
Joined
Aug 30, 2006
Messages
157
Reaction score
7
Location
Hebron
I am currently trying to design a single tier brew stand that allows for 2 of the converted kegs to tip (MLT and Boil Kettle. I don't see a point for the HLT to tip), so that I can clean them easily. My father in law (lets call him Ed) can weld and has some scrap stainless etc, but I am willing to purchase things as needed.

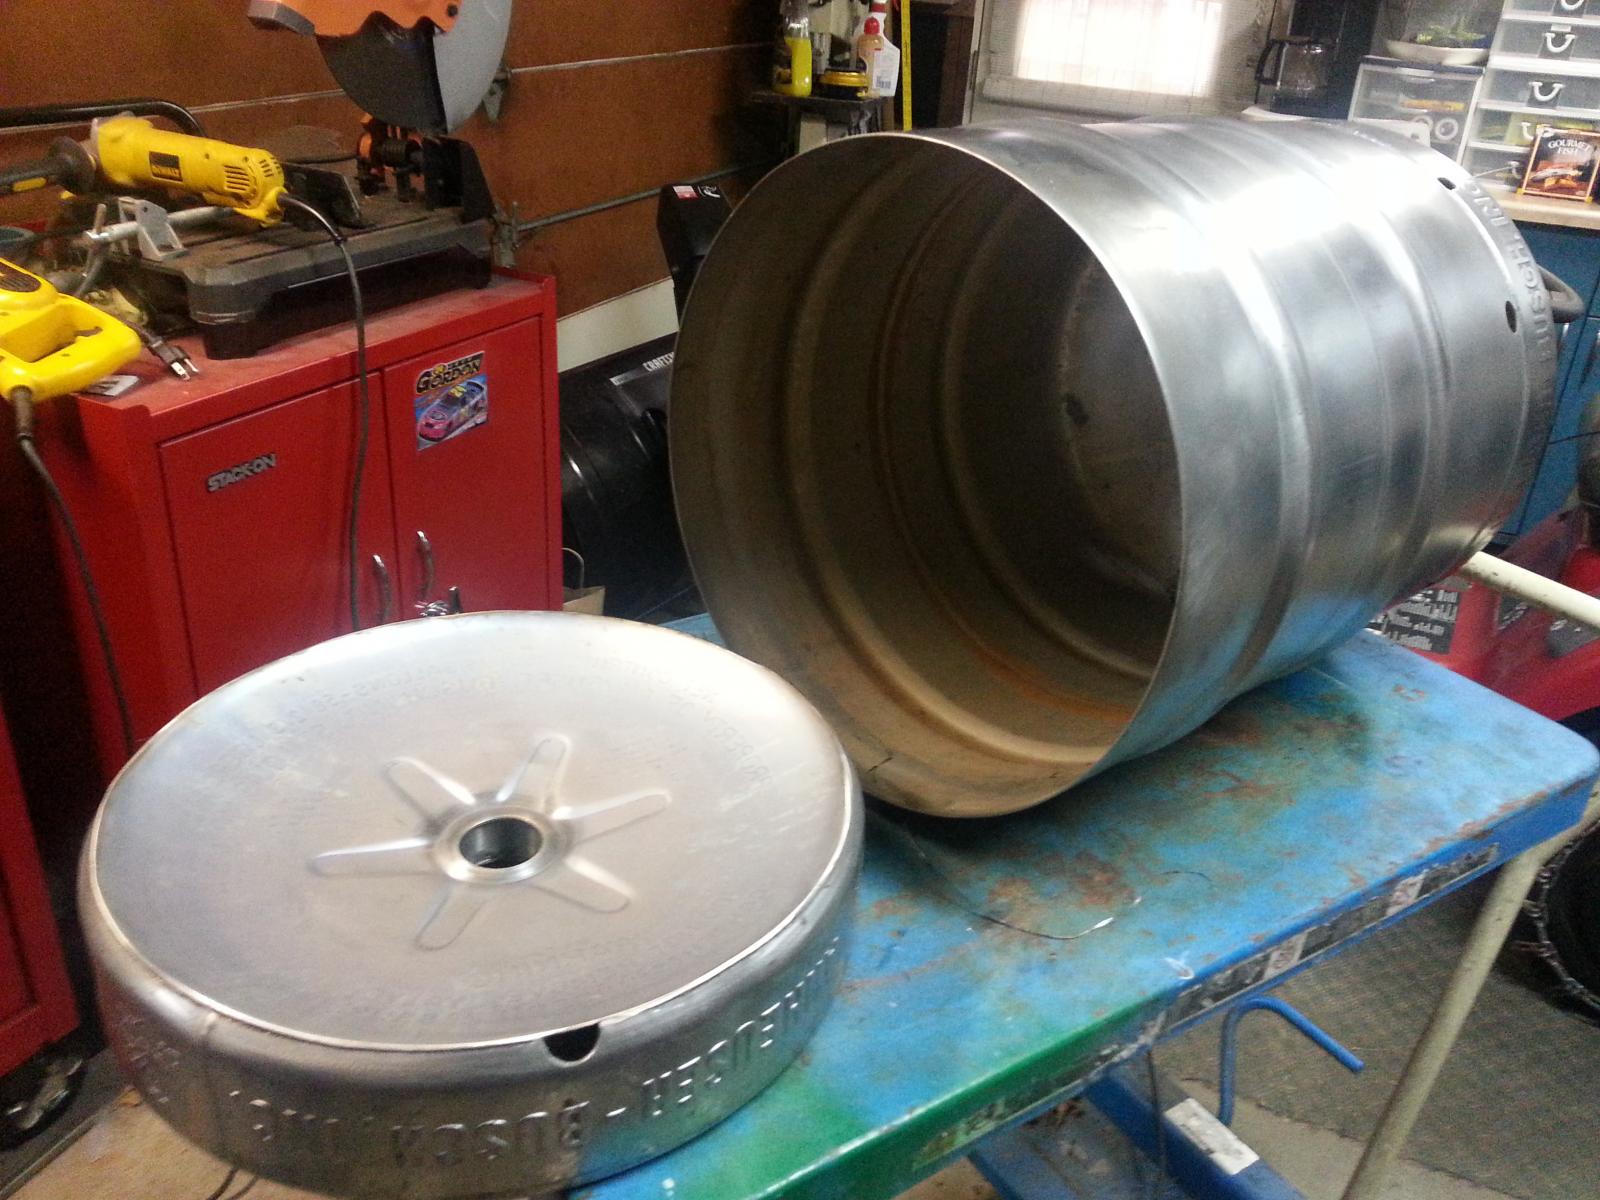
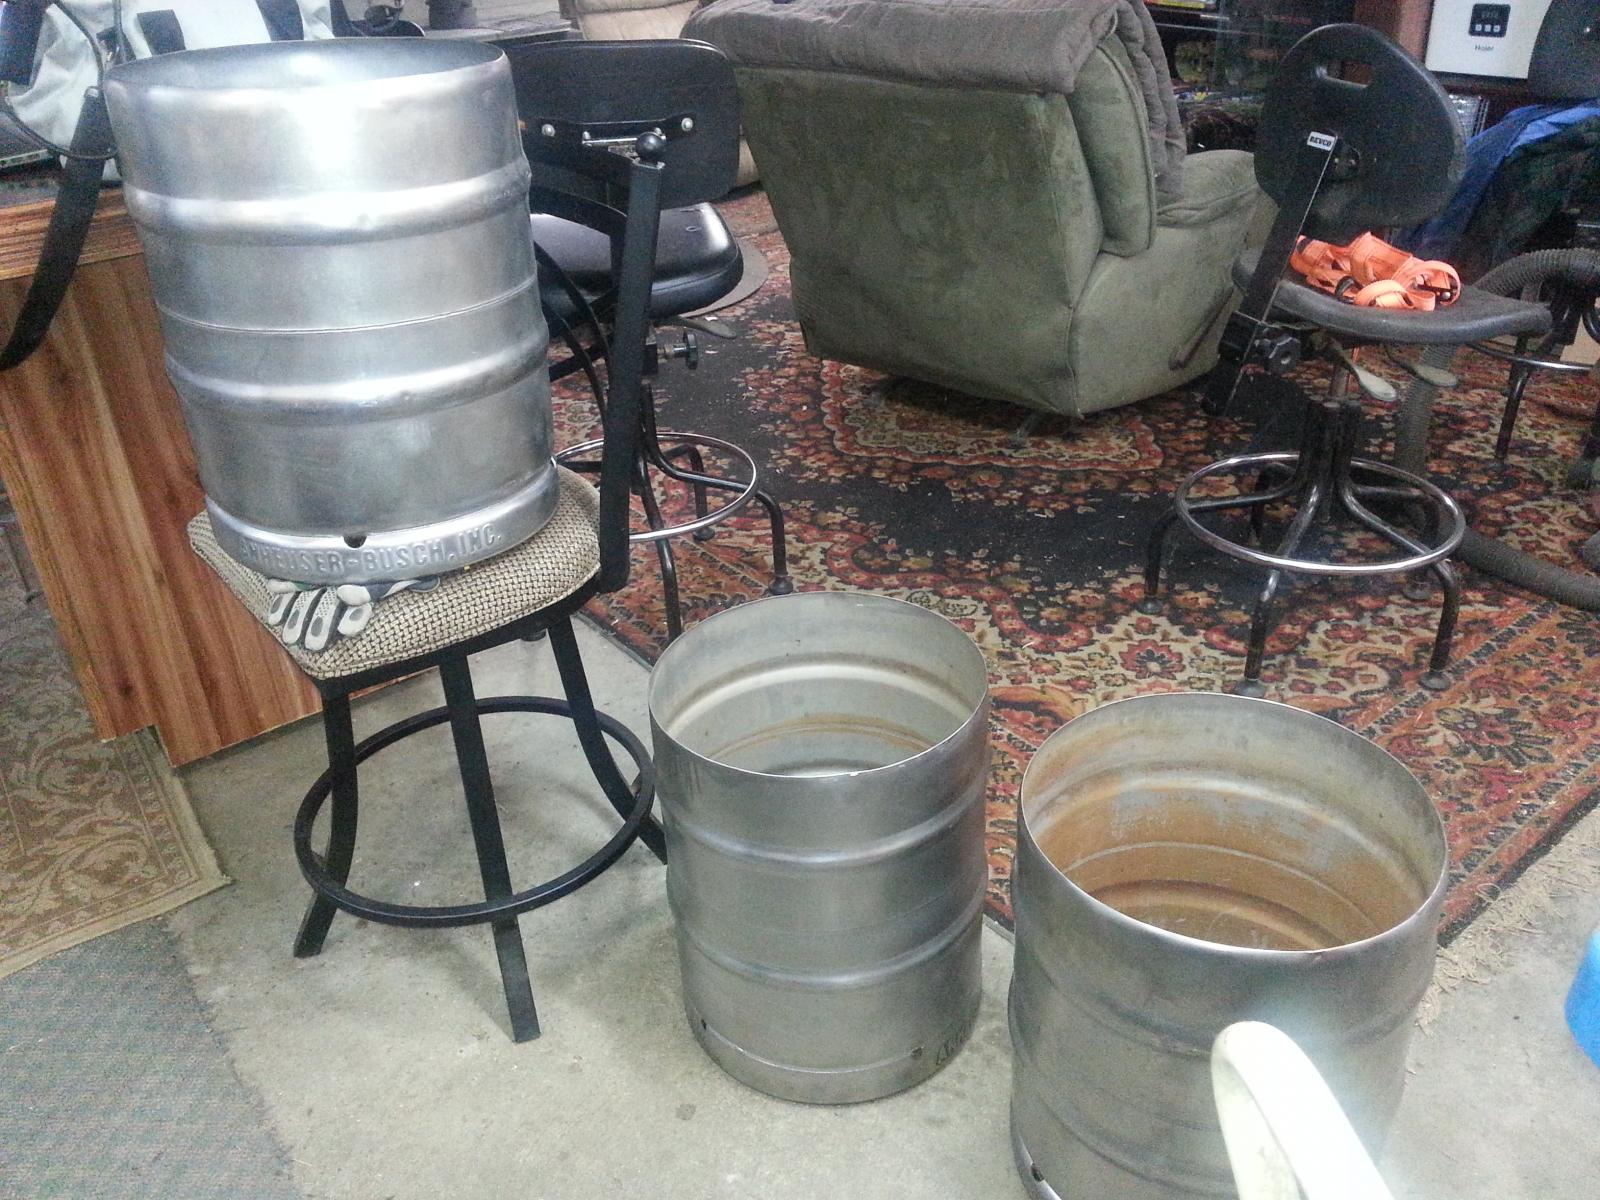
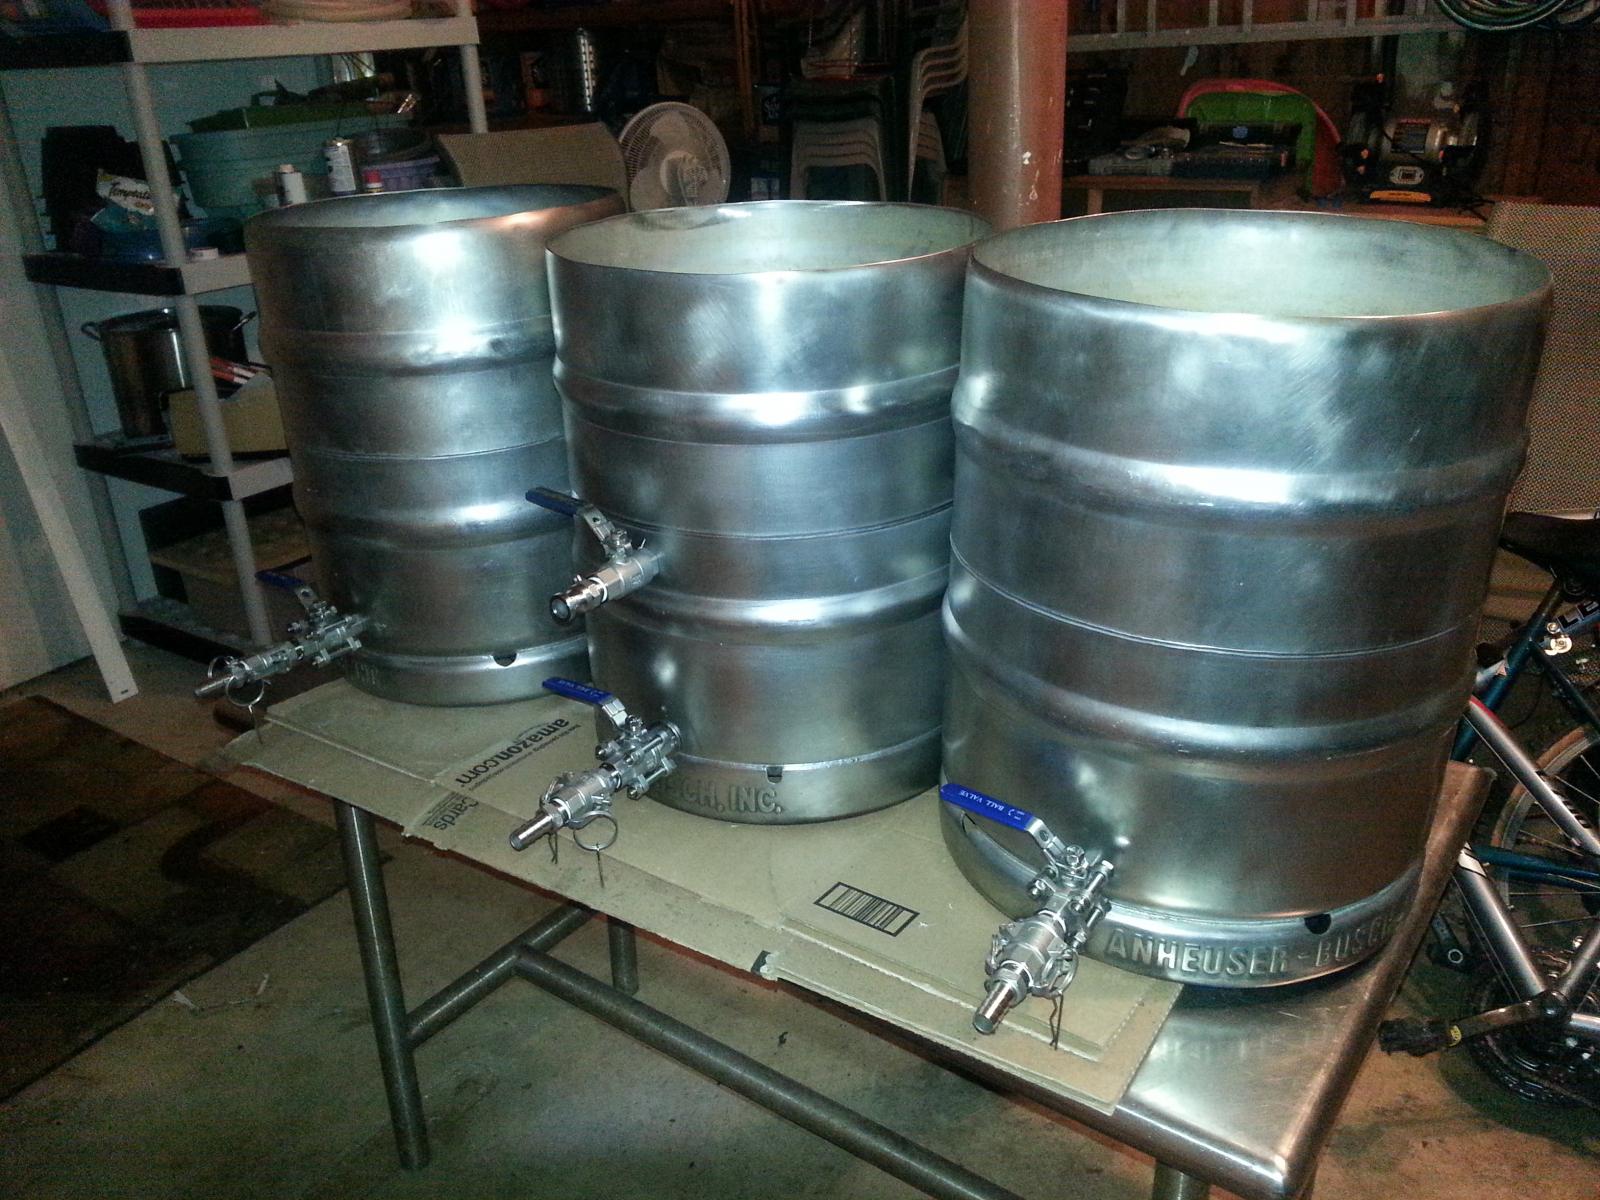
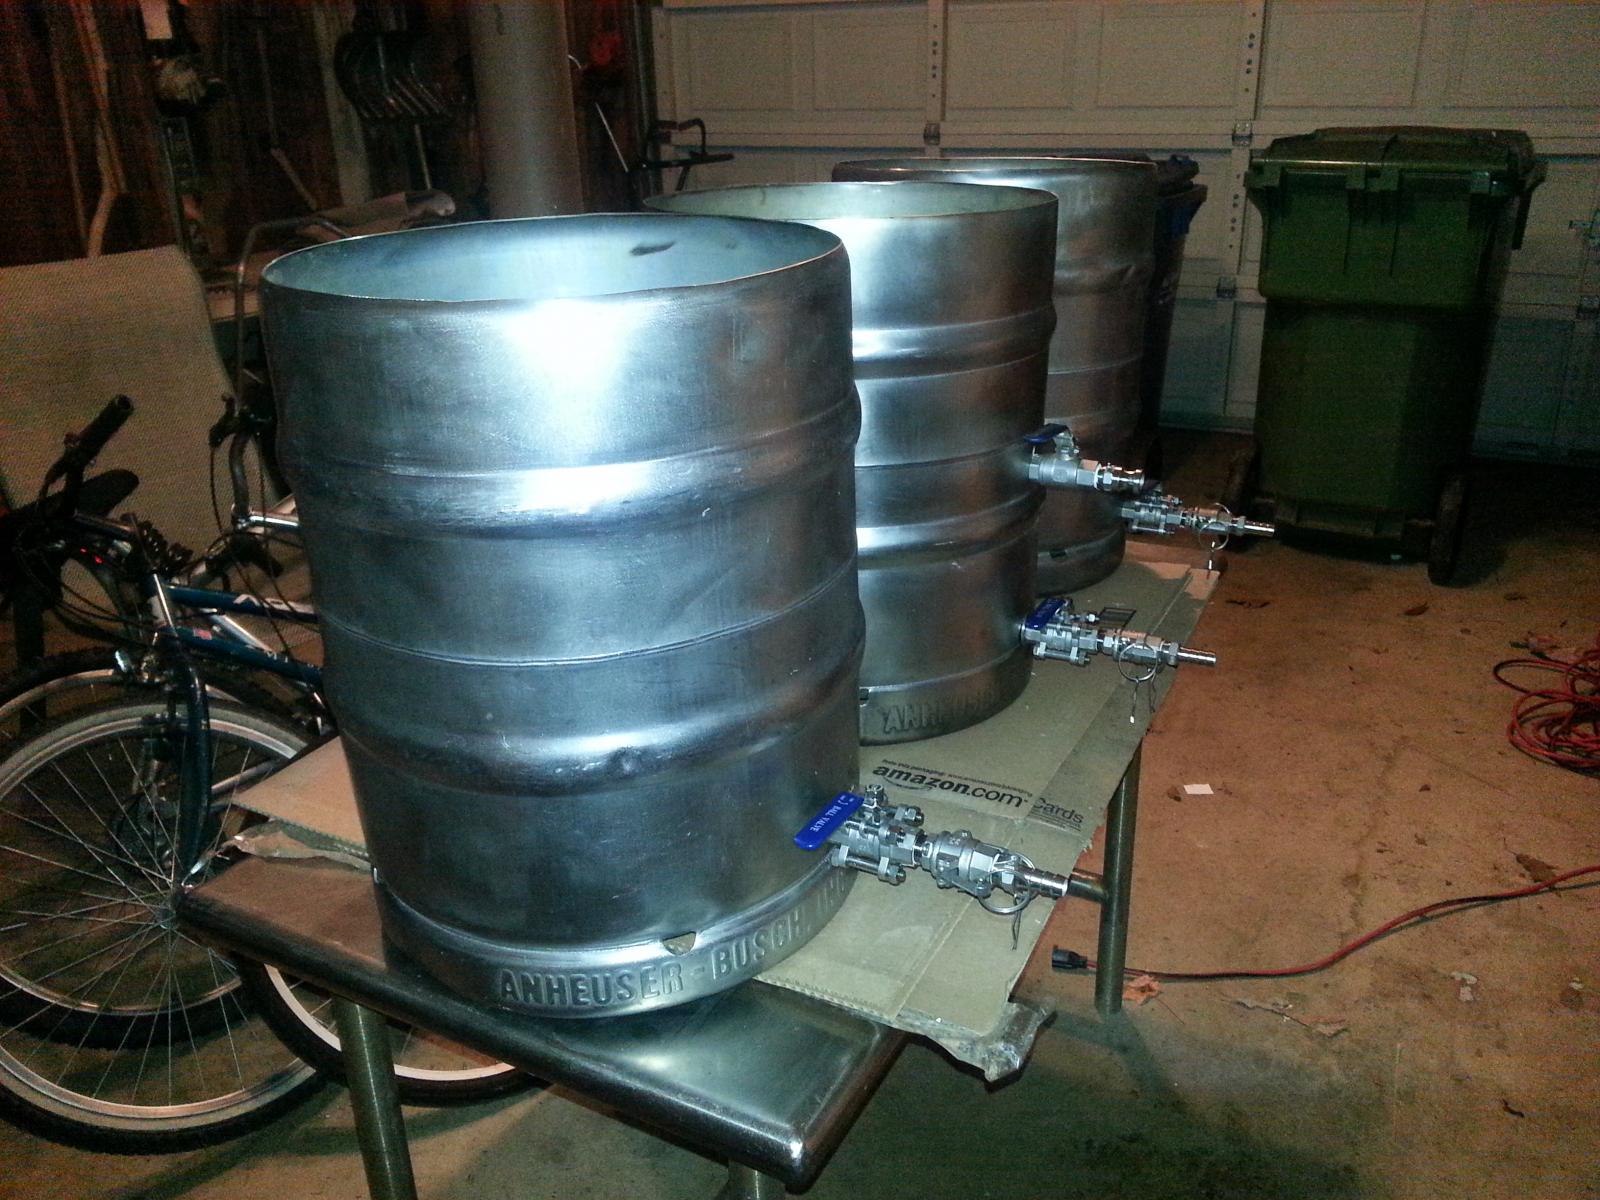
My Keggles will have the tops completely taken off, as I will be able to tip them I wont need to lift them off the stand, and it will make it MUCH easier to clean, which is the goal.

I plan to purchase 3 100,000 BTU burners under the keggles (3, obviously) and I have a chugger pump with hose and stainless fittings. I currently batch sparge and I plan to incorporate a recirculating mash with this set up and most likely, eventually, switch to fly sparging.

Ed thinks the best (or easiest) way to make them tippy is to weld a bar a little lower than halfway down the kegs (on each side) and to let them perch on a on a horizontal bar (with supports). Since they will be "floating" then the burners would need to be adjustable to swing or lower out of the way of the tipping keg.

I was thinking that just making a hinged bottom would be easier and give you better control to dump (as it will swing out and away from the stand) not to mention be more stable.

For those of you who have tippy stands (or even those who dont) can you lend some of your experience or knowledge here?

If anyone has any diagrams, build plans etc., they are always welcome to post so I can have something to start with and improve if necessary, or simply copy if it seems to be a "perfect" build.
 
Yeah... I think that will start a discussion tomorrow, when we cut off the entire tops of the kegs! Thanks!
 
....when we cut off the entire tops of the kegs! Thanks!

Sounds like your off to a good start w/ the keggles.

Since your planning on pumps, perhaps "clean in place" is an option as well, at least for the boil kettle, and perhaps the MT as well?

At the risk of sounding like I'm pushing my own products, perhaps a bag in the MT to lift the grain out and CIP all the kettles. CIP would mean cutting the current bottoms off the kegs rather than the tops. I haven also wondered if the sanke opening in a keg would permit flushing the grain out of the MT CIP, if the FB or bag or any lautering device is first removed. Everytime I lug spent grain to the compost pile I dream of using a sewage / solids pump to pump a mash slurry direct to the compost pile via hard line...just a dream :)

Sounds like a great F/S project, have fun I'm jealous :mug:
 
Already started--
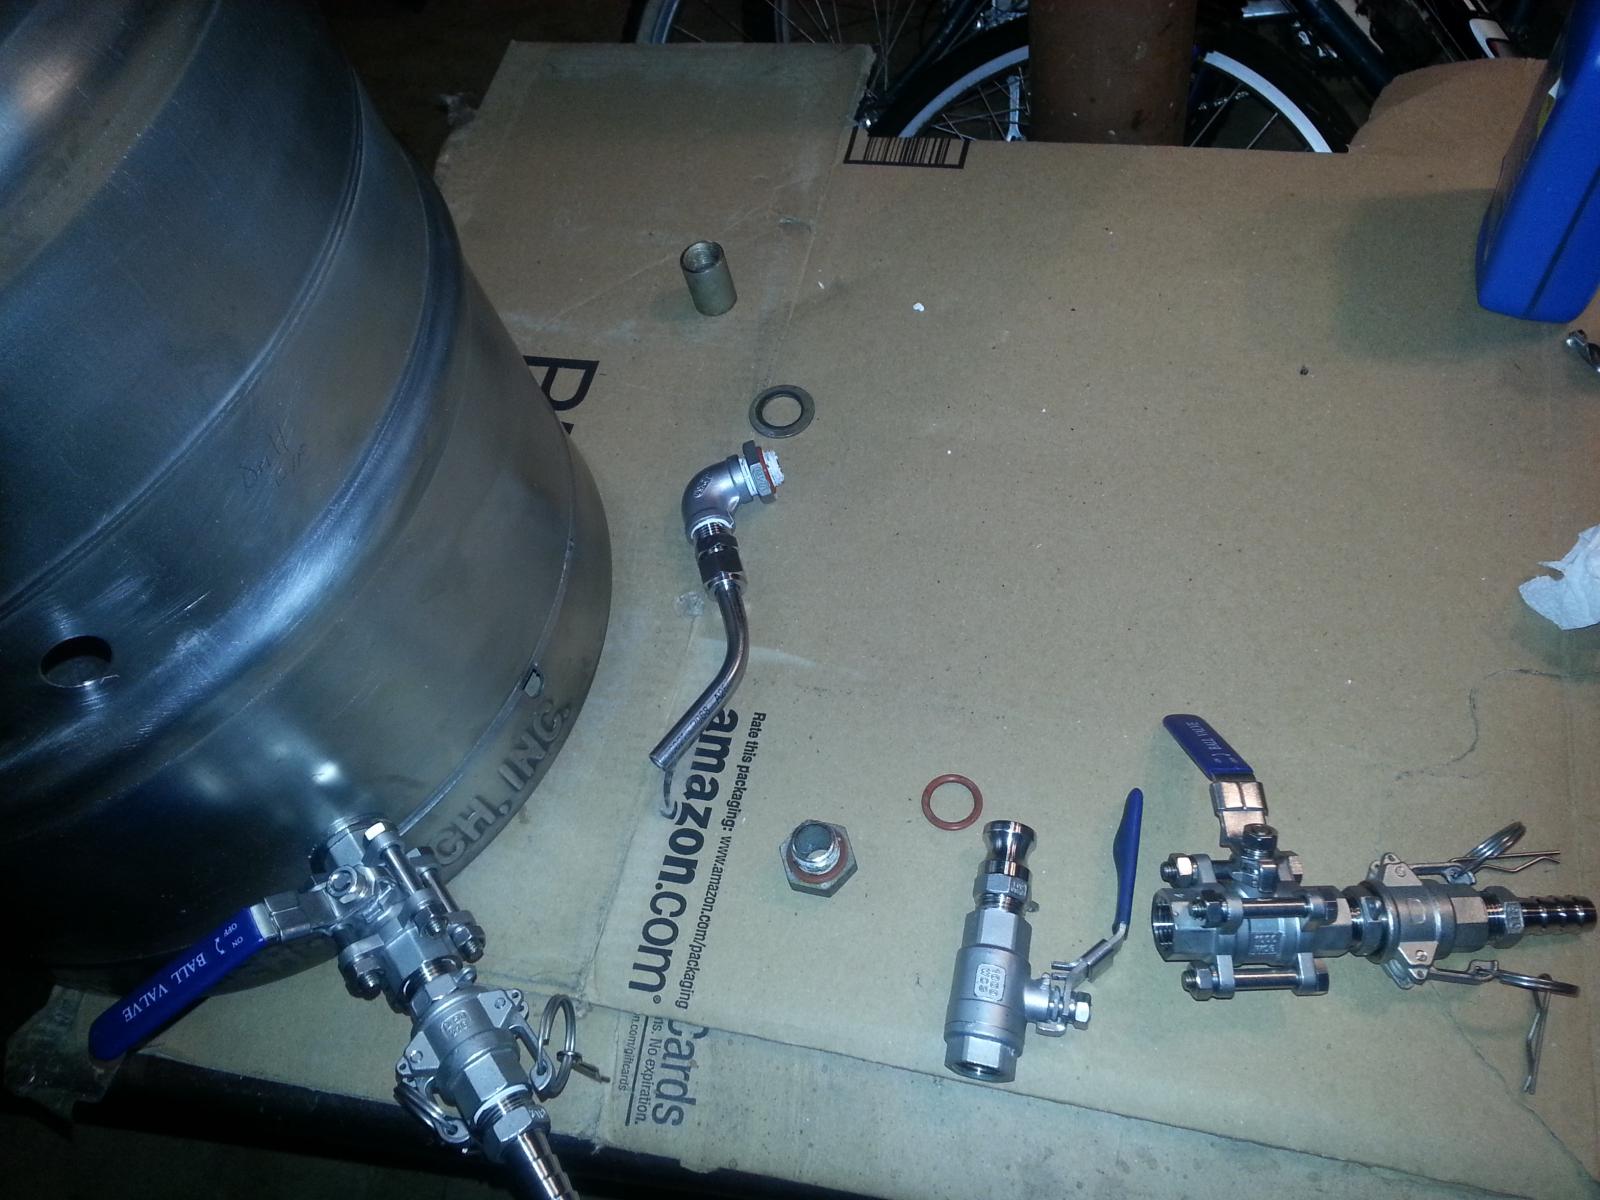
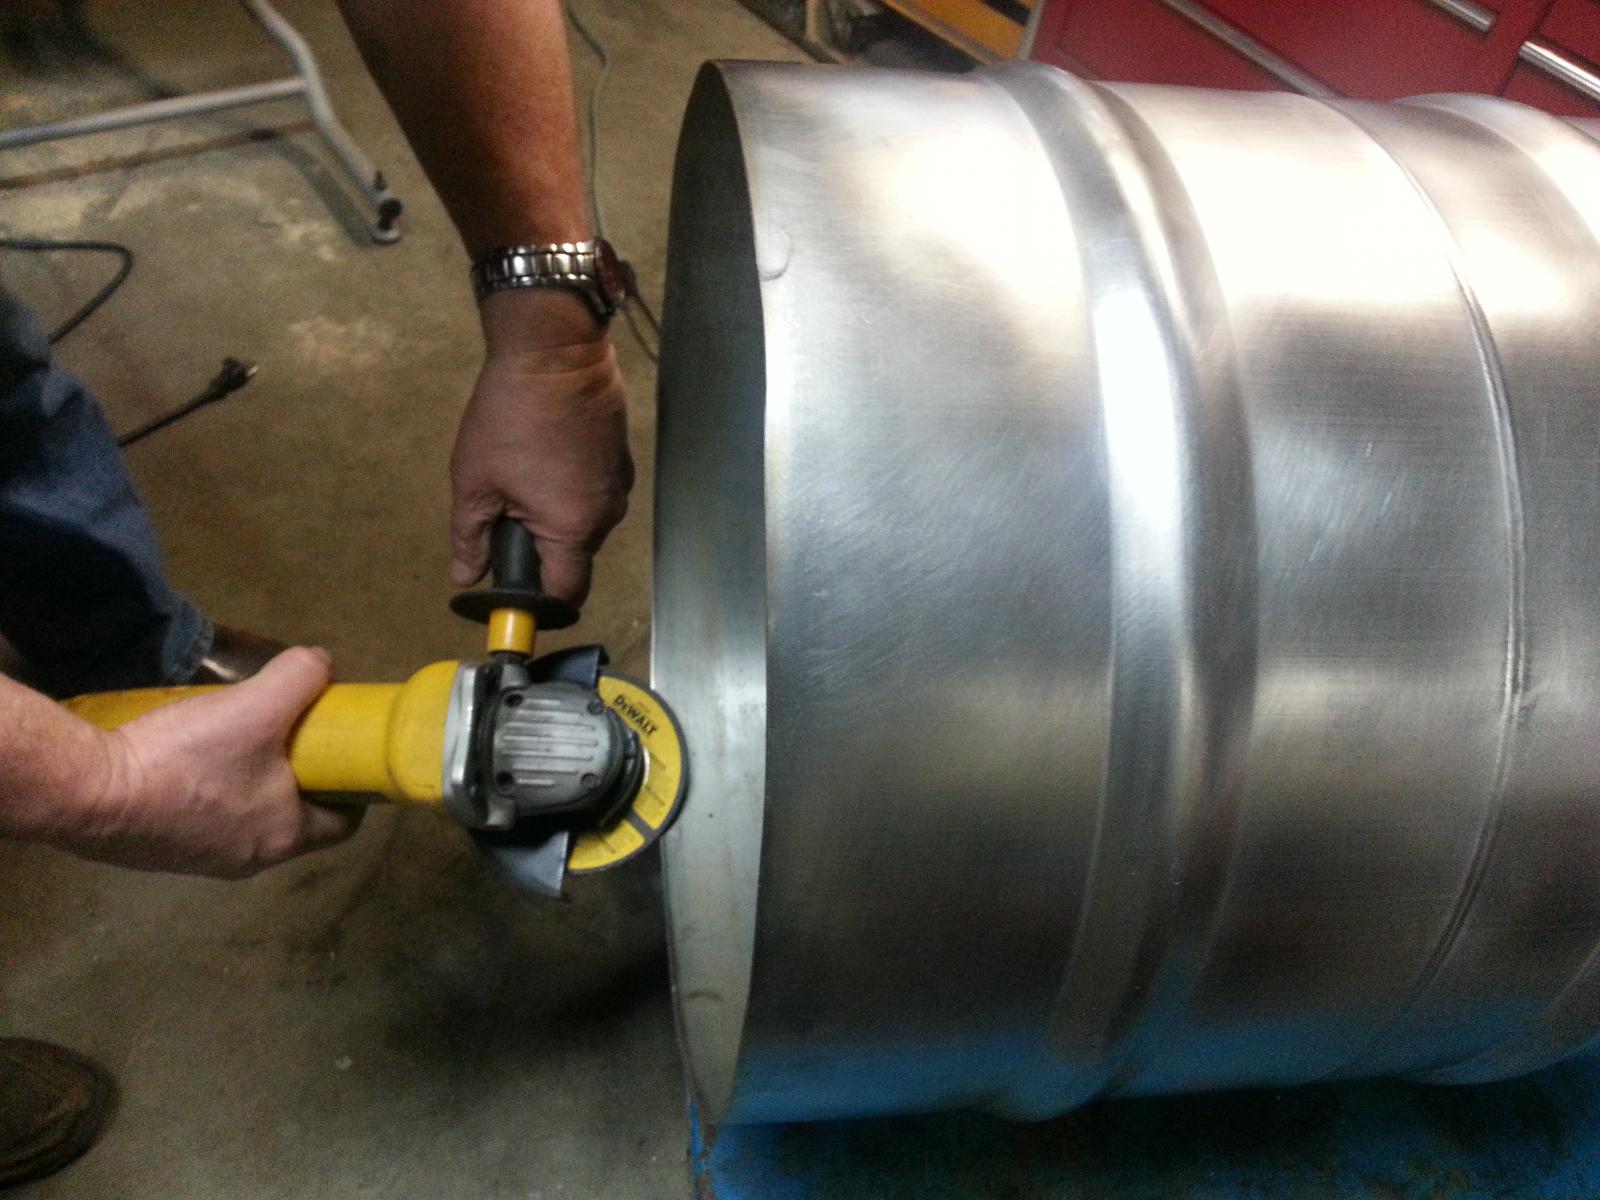
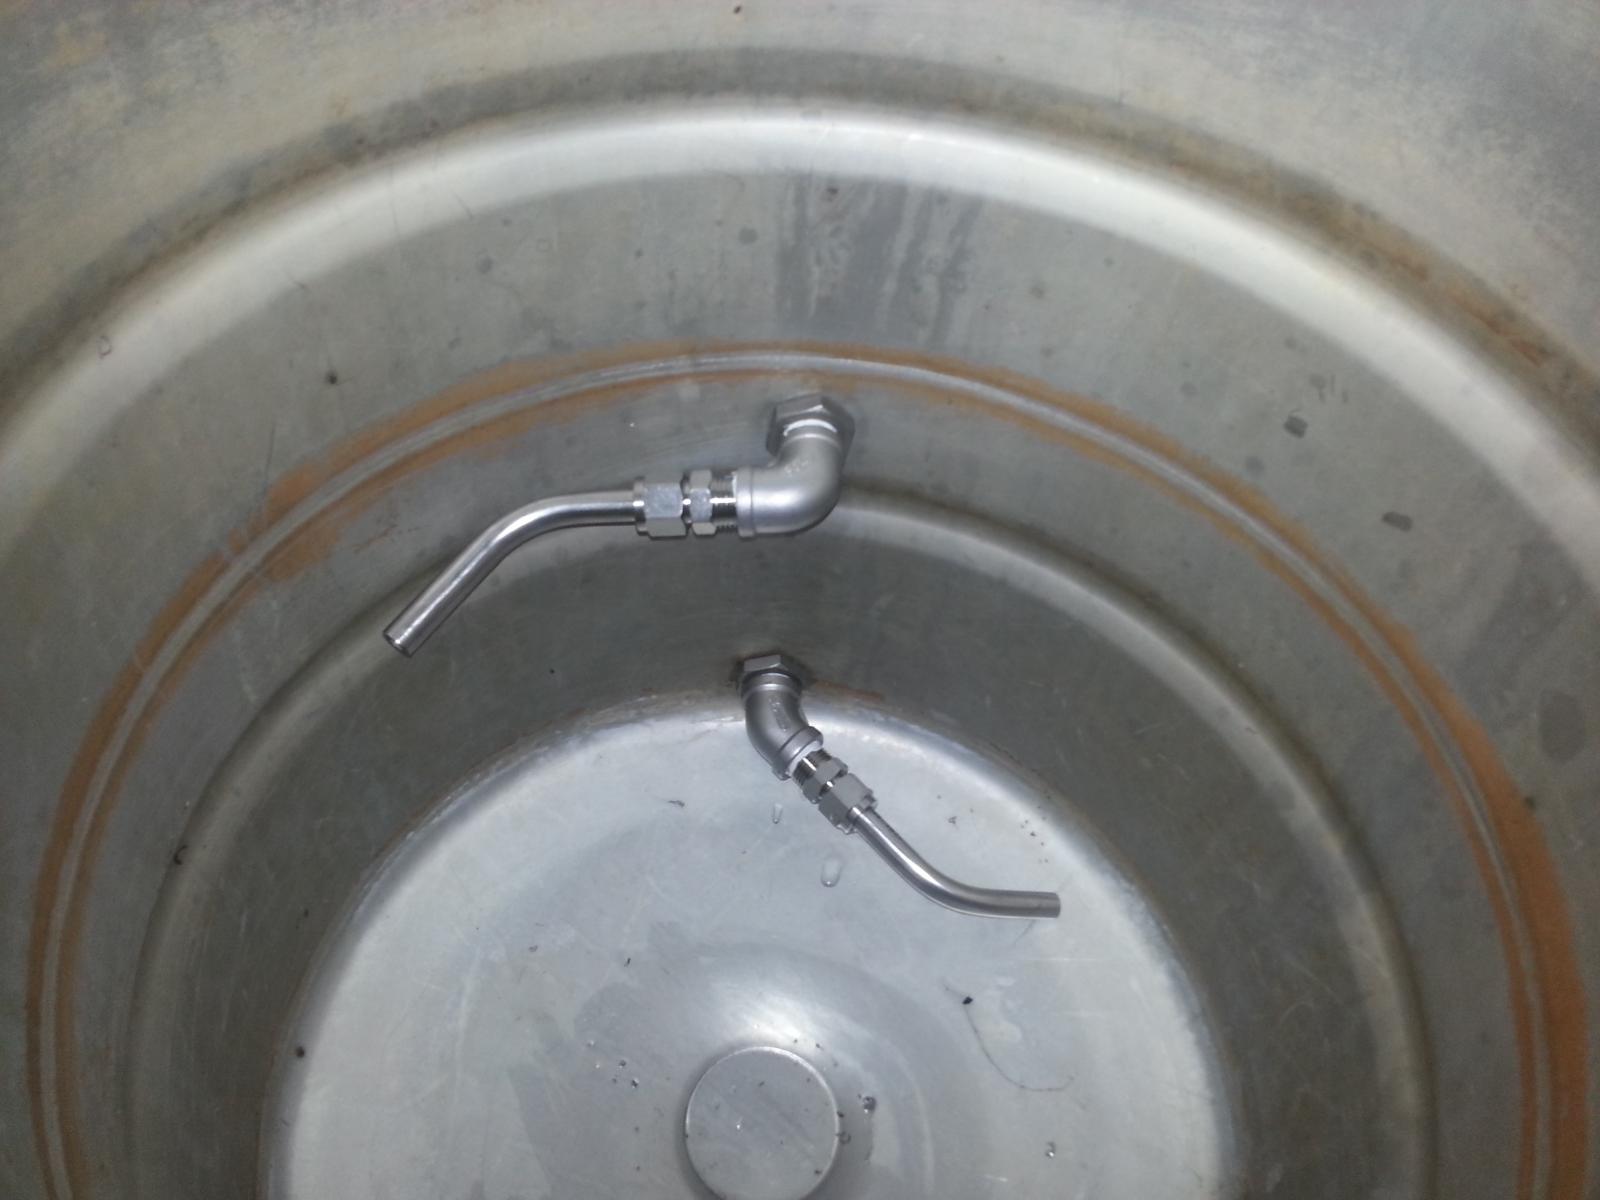
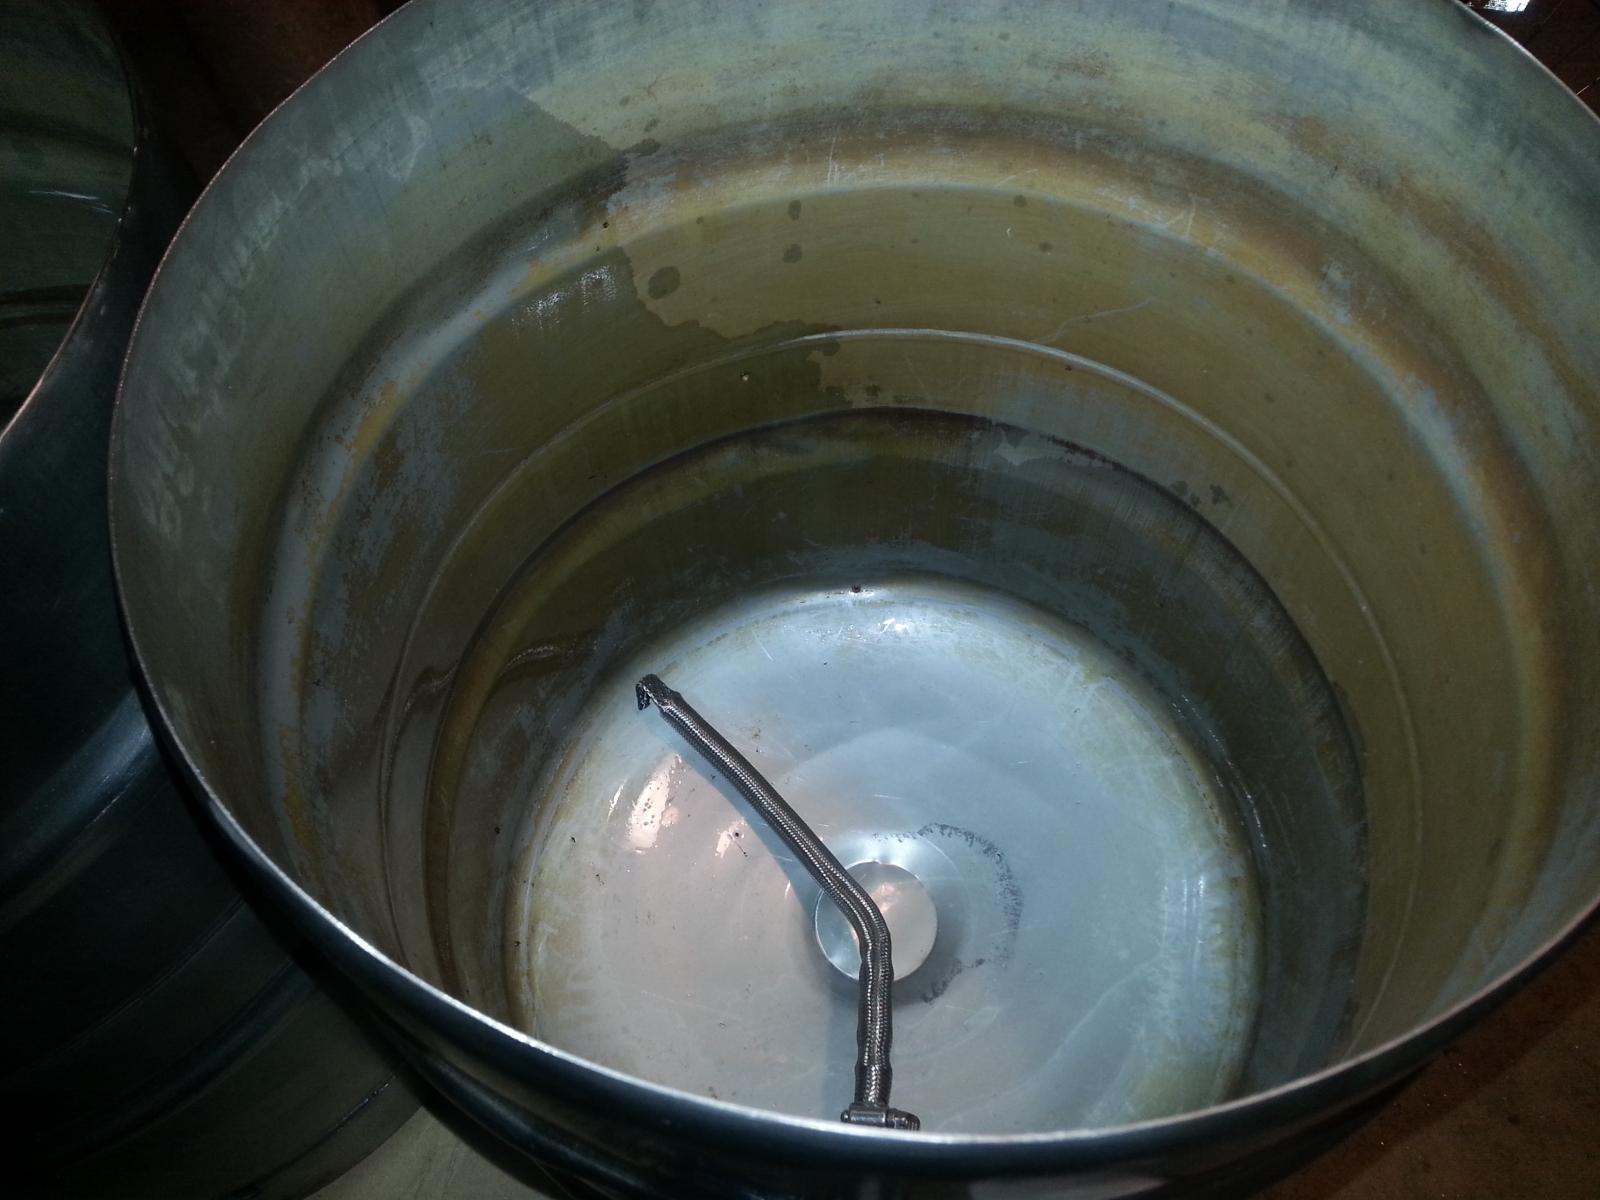
Here is the progress of the kettles so far

20150120_144239.jpg


20150120_131525.jpg


20150121_144542.jpg


20150120_144344.jpg


20150121_152105.jpg


20150121_152125.jpg


20150121_145038.jpg


20150121_152111.jpg
 
Also, we have put in a lot of thought to it and the way we are thinking is best to get it going, using what we have and buying as little as possible, is to start with a factory grade stainless steel table as the base and welding 3 stainless 1 1/2 inch stainless angle iron (or square) posts onto it. The table legs are going to come off and be replaced by casters.

The posts will approx 30" tall with a hole towards the top of them. The Keggles will have welded stainless sleeves on either side. A stainless bar will connect the post to the keggles, which will be only supported by the side sleeves , the bar and the posts. (no lower support or contact)

These burners will be fastened to either the posts, a separate post or a front "shelf" that i have not yet described yet.

http://www.agrisupply.com/banjo-burner-and-stand/p/83715/&sid=&eid=/


The burners will be adjustable (so they are able to get out of the way from the swinging kegs and so that I can find the ideal heating distance). The keg tops will be used as heat shields (why waste them!) , to protect whatever devices will be attached to the kegs.

I guess until it is plumbed (much later, if ever), I will need to use the braided steel hose and regulator sets that come with the burners. Meaning that I will need 3 tanks of propane to use this set up.... I have 4 anyway, but still kinda stinks.

We cut the tops completely off so that they are easy to clean. And YES, although the keggles will be removable, they will be meant to be cleaned IN PLACE and not moved more than the tipping action that they will get.

Any other ideas or fixes I should try to engineer before we start?
 
If you need a quick cheap mashtun lid a 16" plastic pot base from depot fits in perfectly. Take some tubing and cut a straight line down the length and wrap around the top of the keg lip and put the base in. Seals it up nice and tight, I only had a 1-2 deg loss with this.

Thought I would share the progress on our setup, we are on the same track :) This is our 3 keggle build out thread and link to album


Here is a video
 
Last edited by a moderator:
That is pretty sweet ! That was a similar "tippy" design I had in my head originally, but since we are trying to do this "on the cheap", with items we already had, we opted to go the other route.

That's a great idea about the plastic pot base-- thanks! I really want to get some stainless lids (thinking about making them out of pizza pans) but until then, plastic may be the way to go!
 
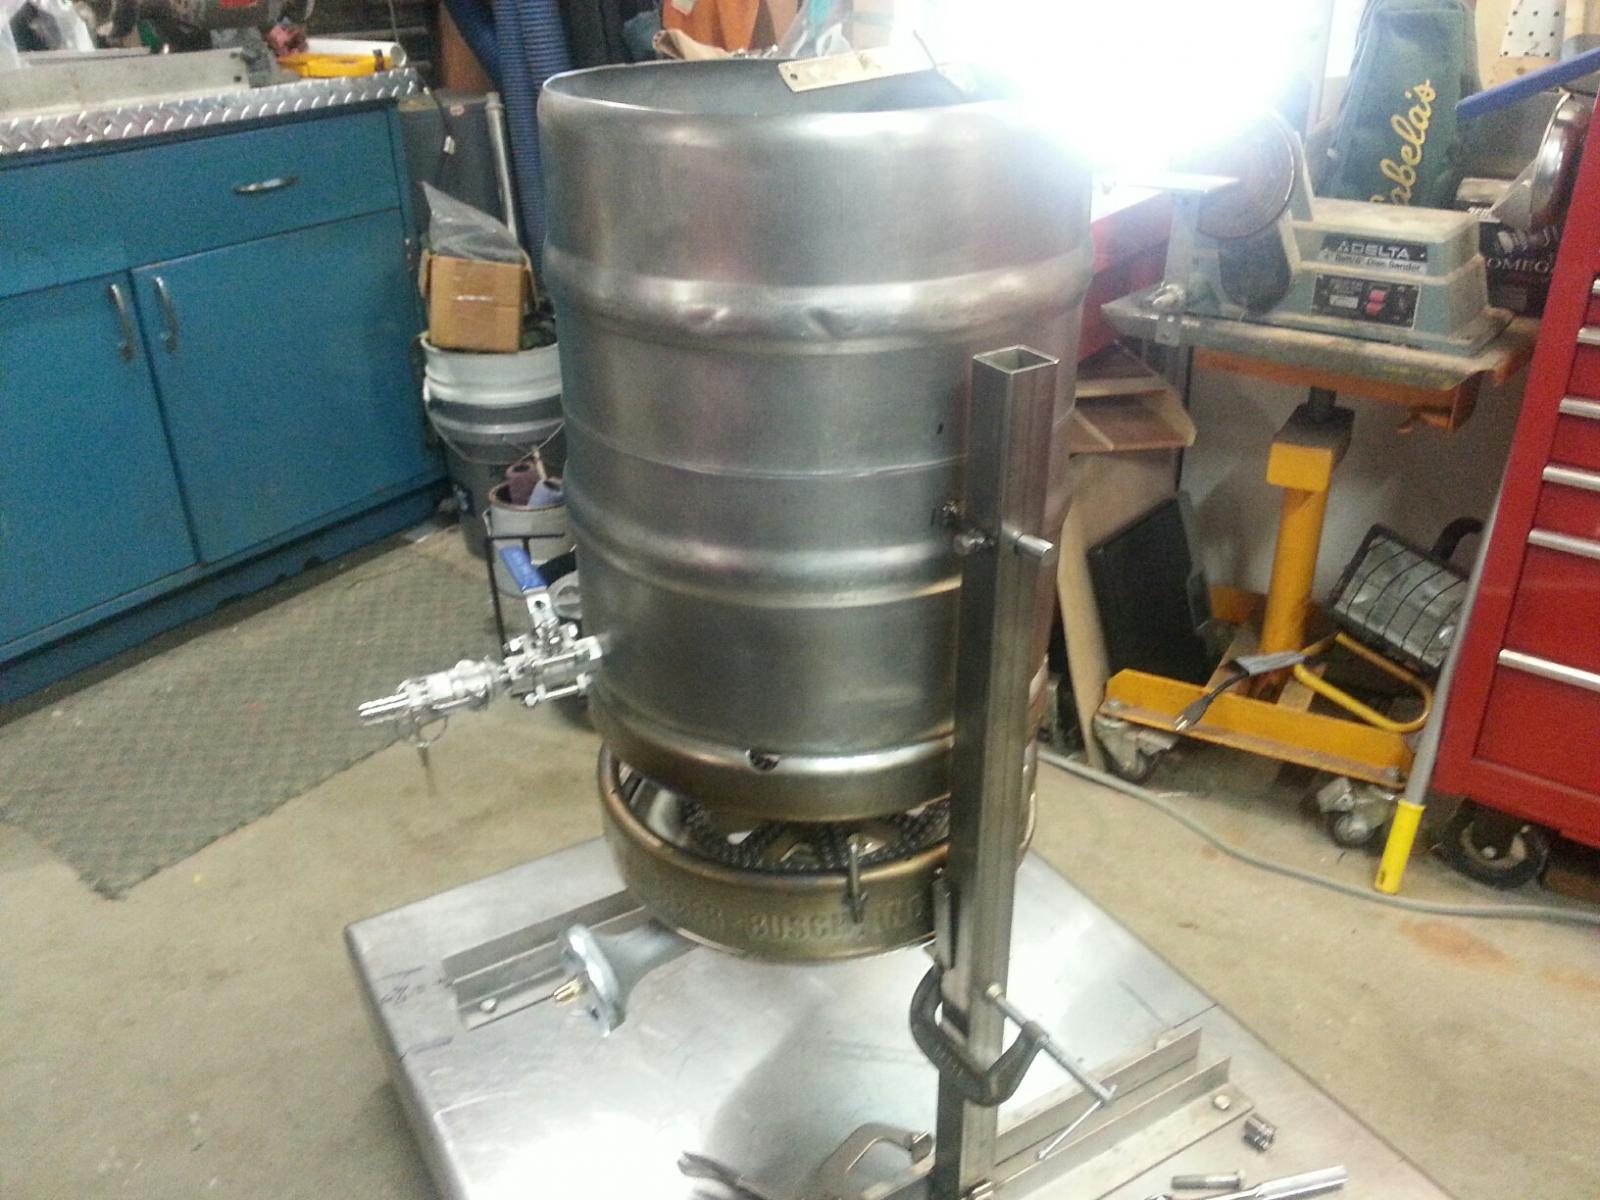
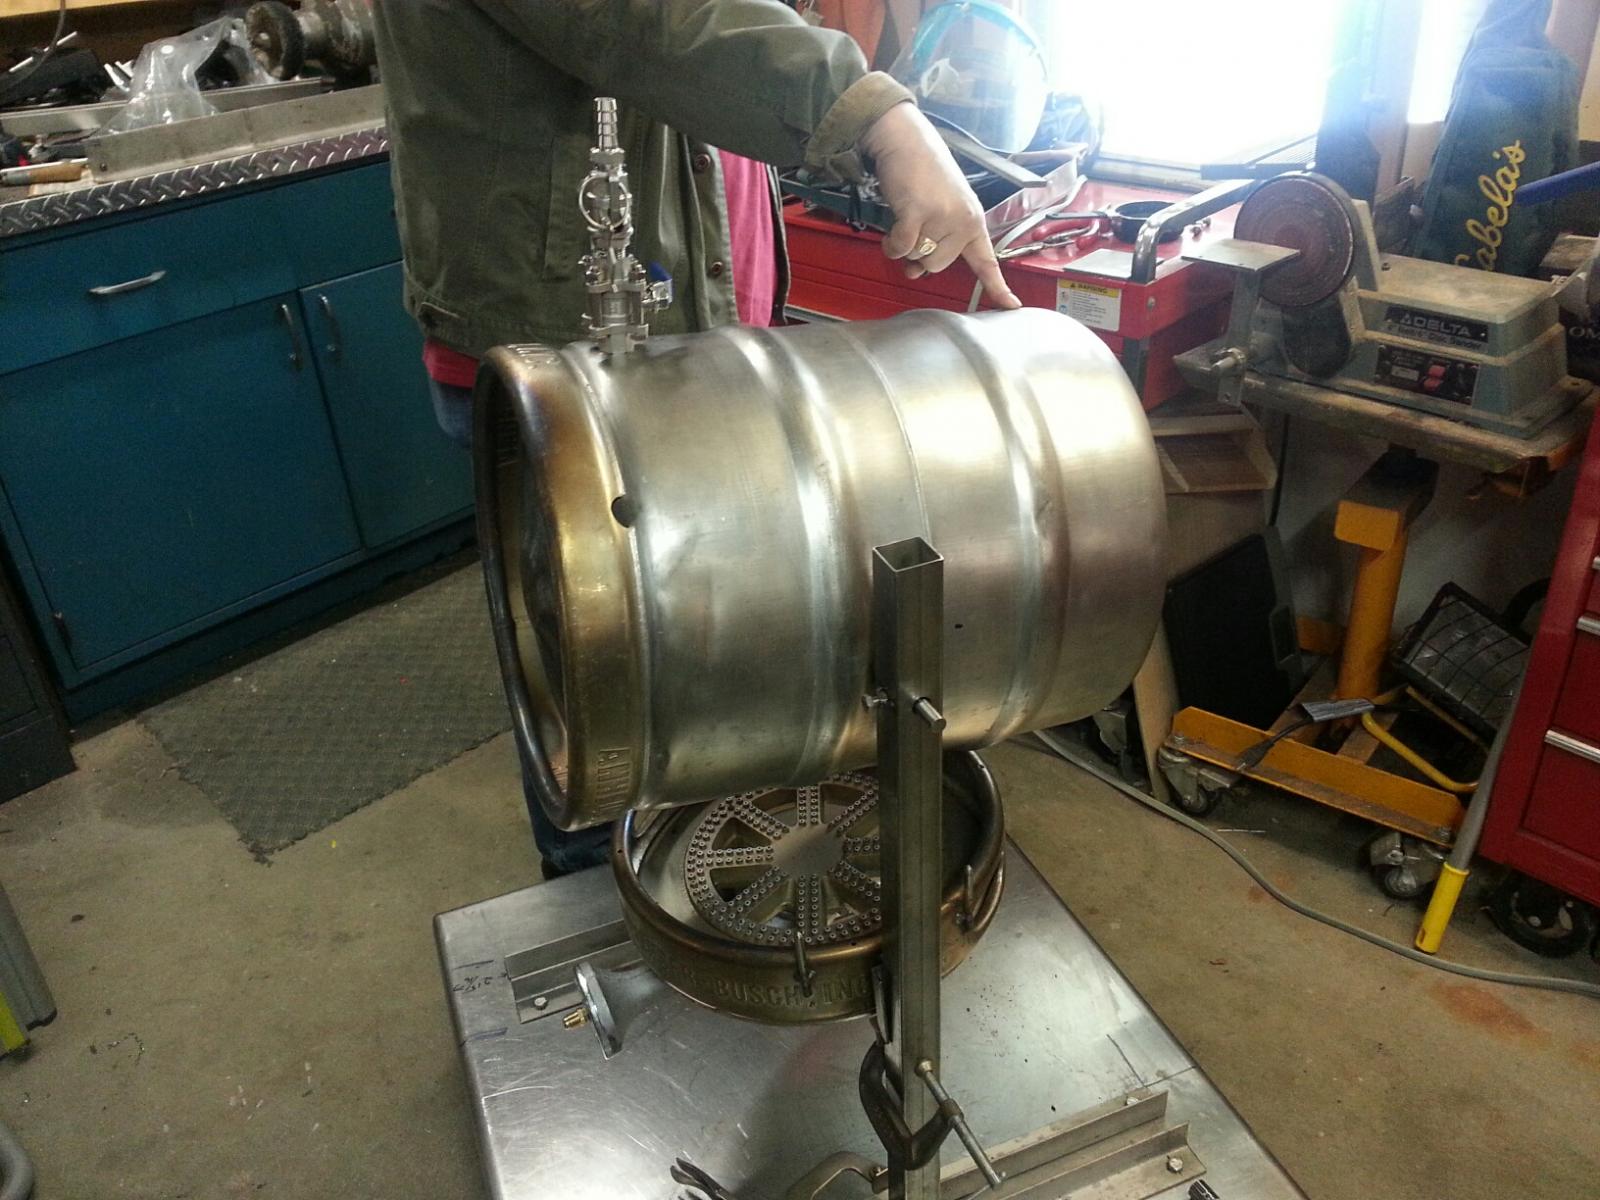
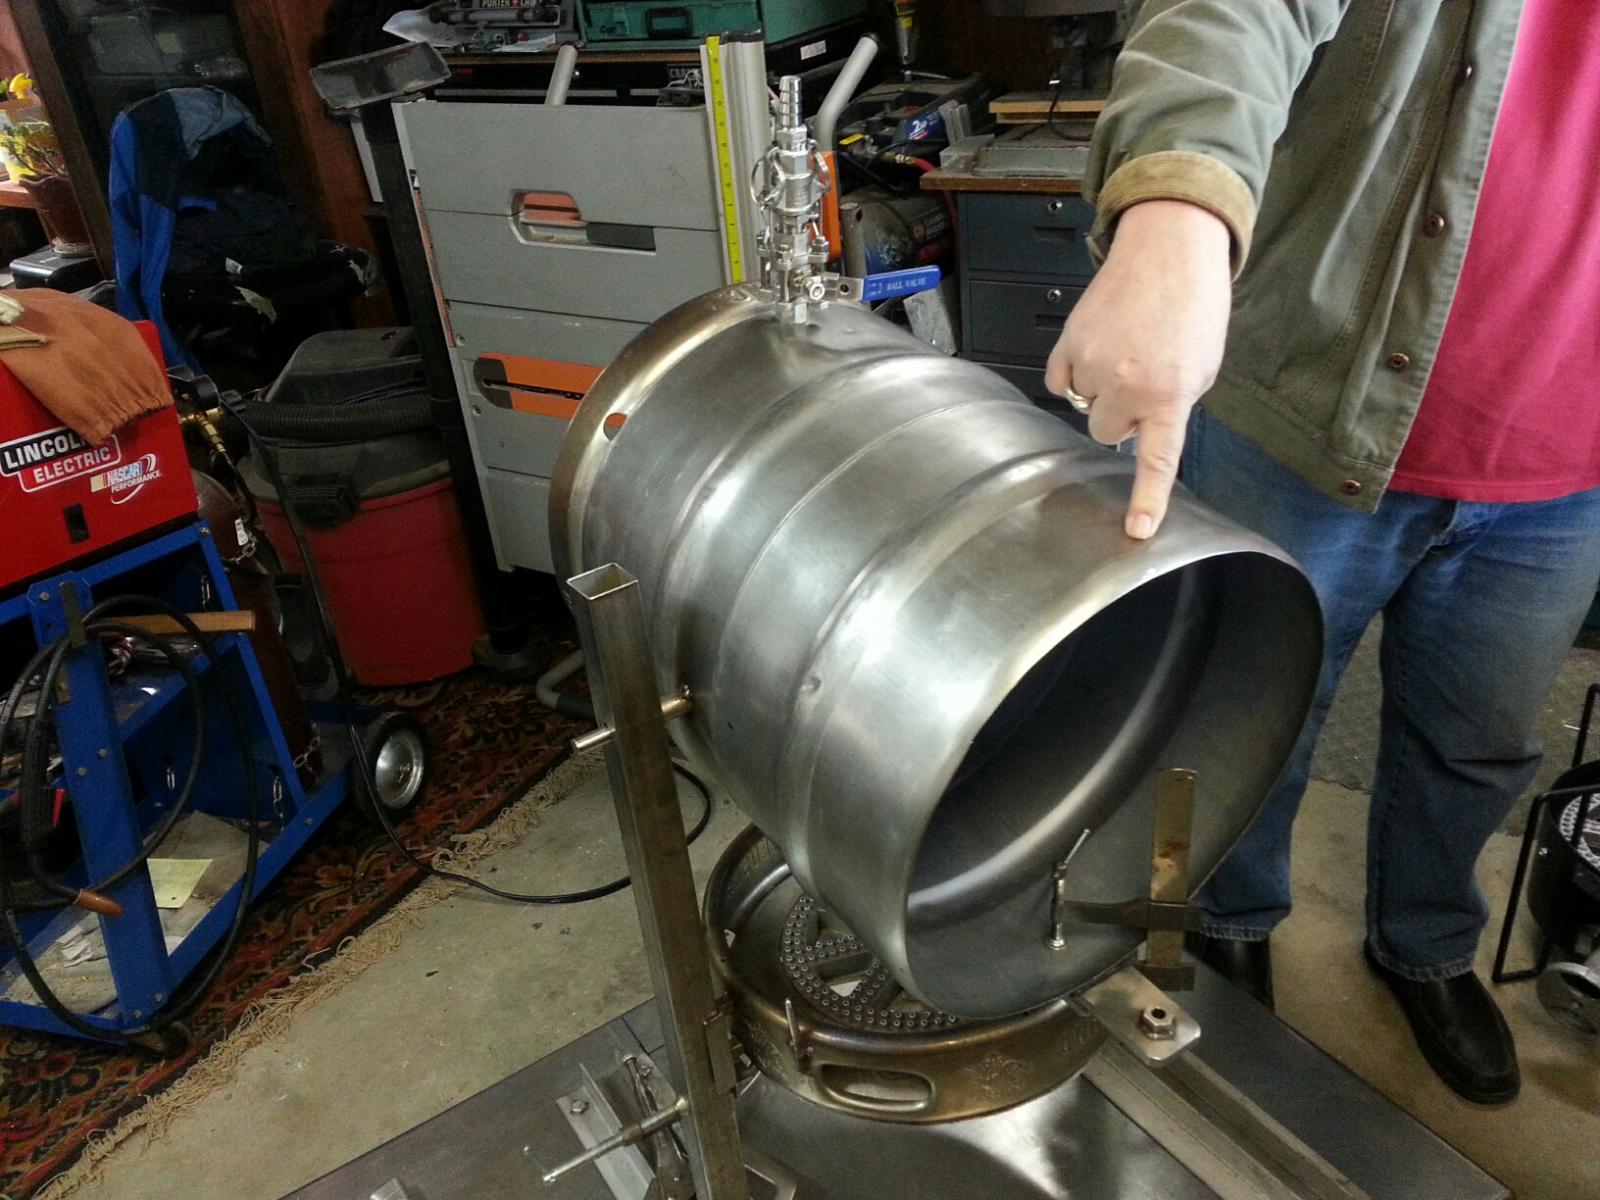
Just wanted to post some updates! Again, any and all thoughts, ideas and questions about it are welcome!

first tippy.jpg


fisrt tippy 3 - tipped.jpg


first tippy 4 -easy tip.jpg
 
The burner height will be adjustable so I can achieve the best possible distance from the flame as well as to get it out of the way of the tipping converted keg.
 
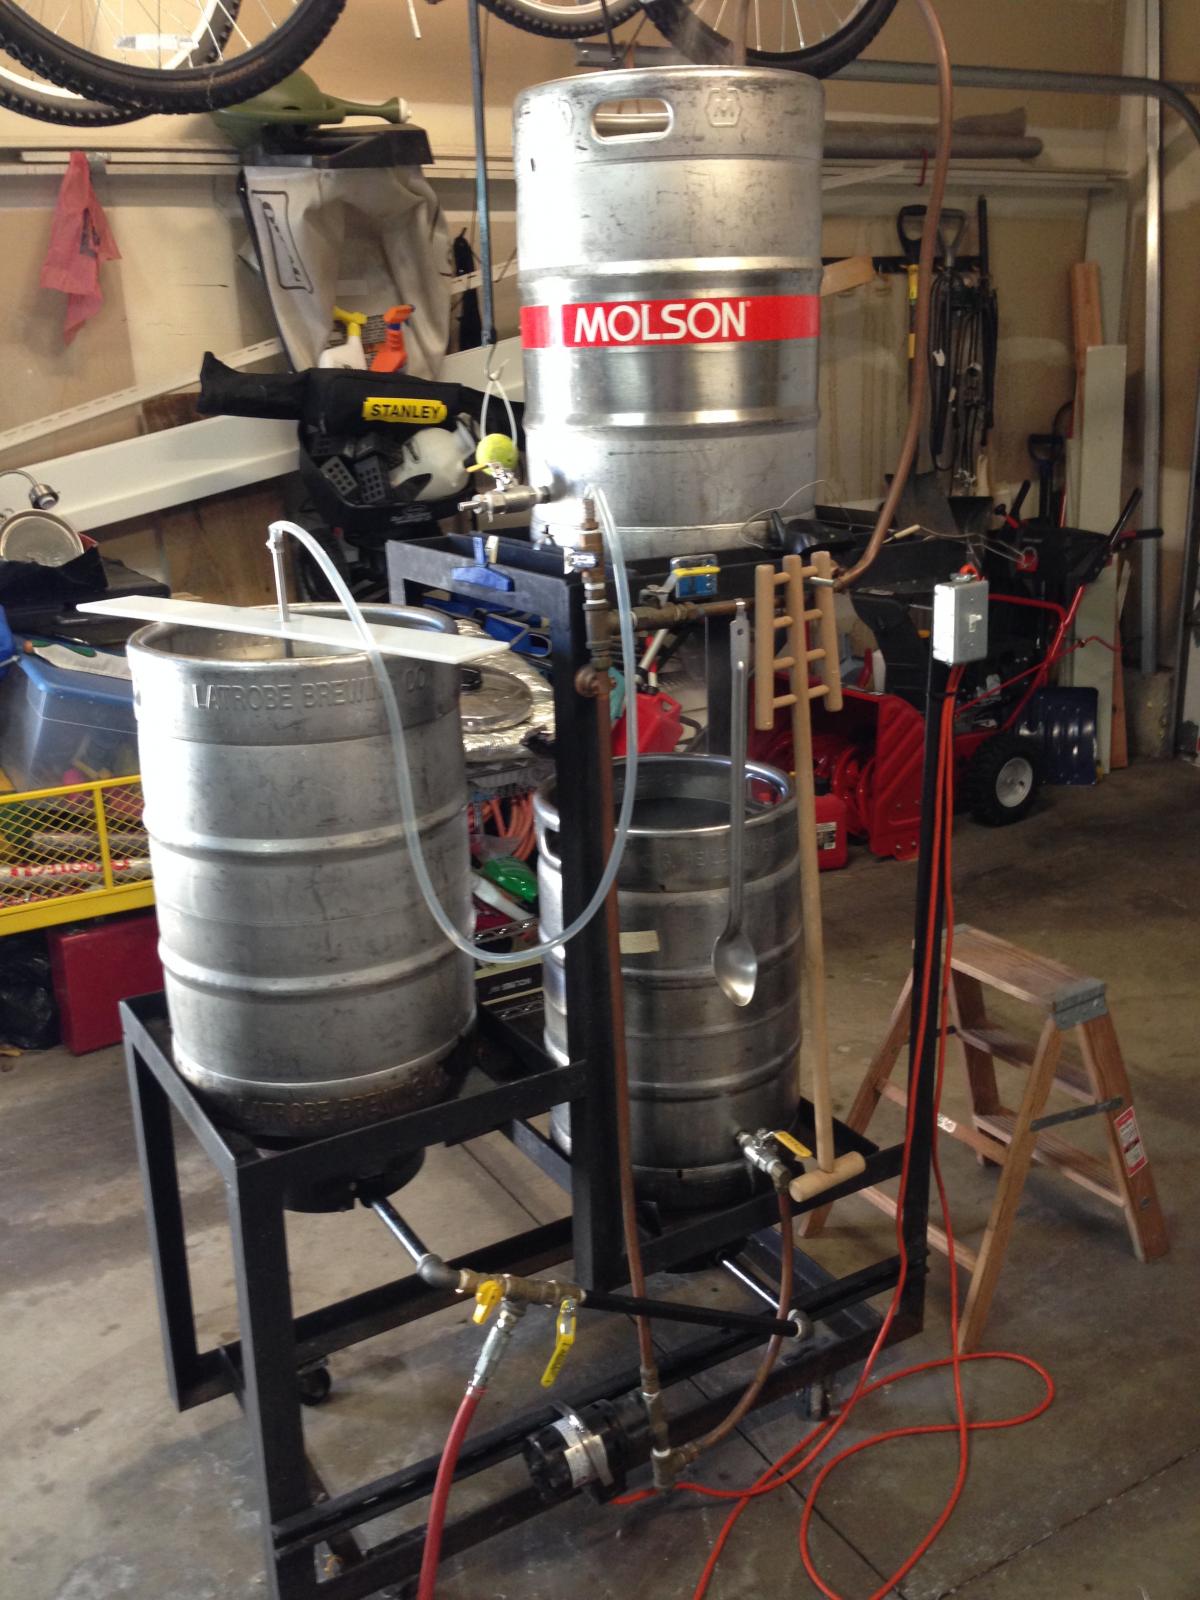
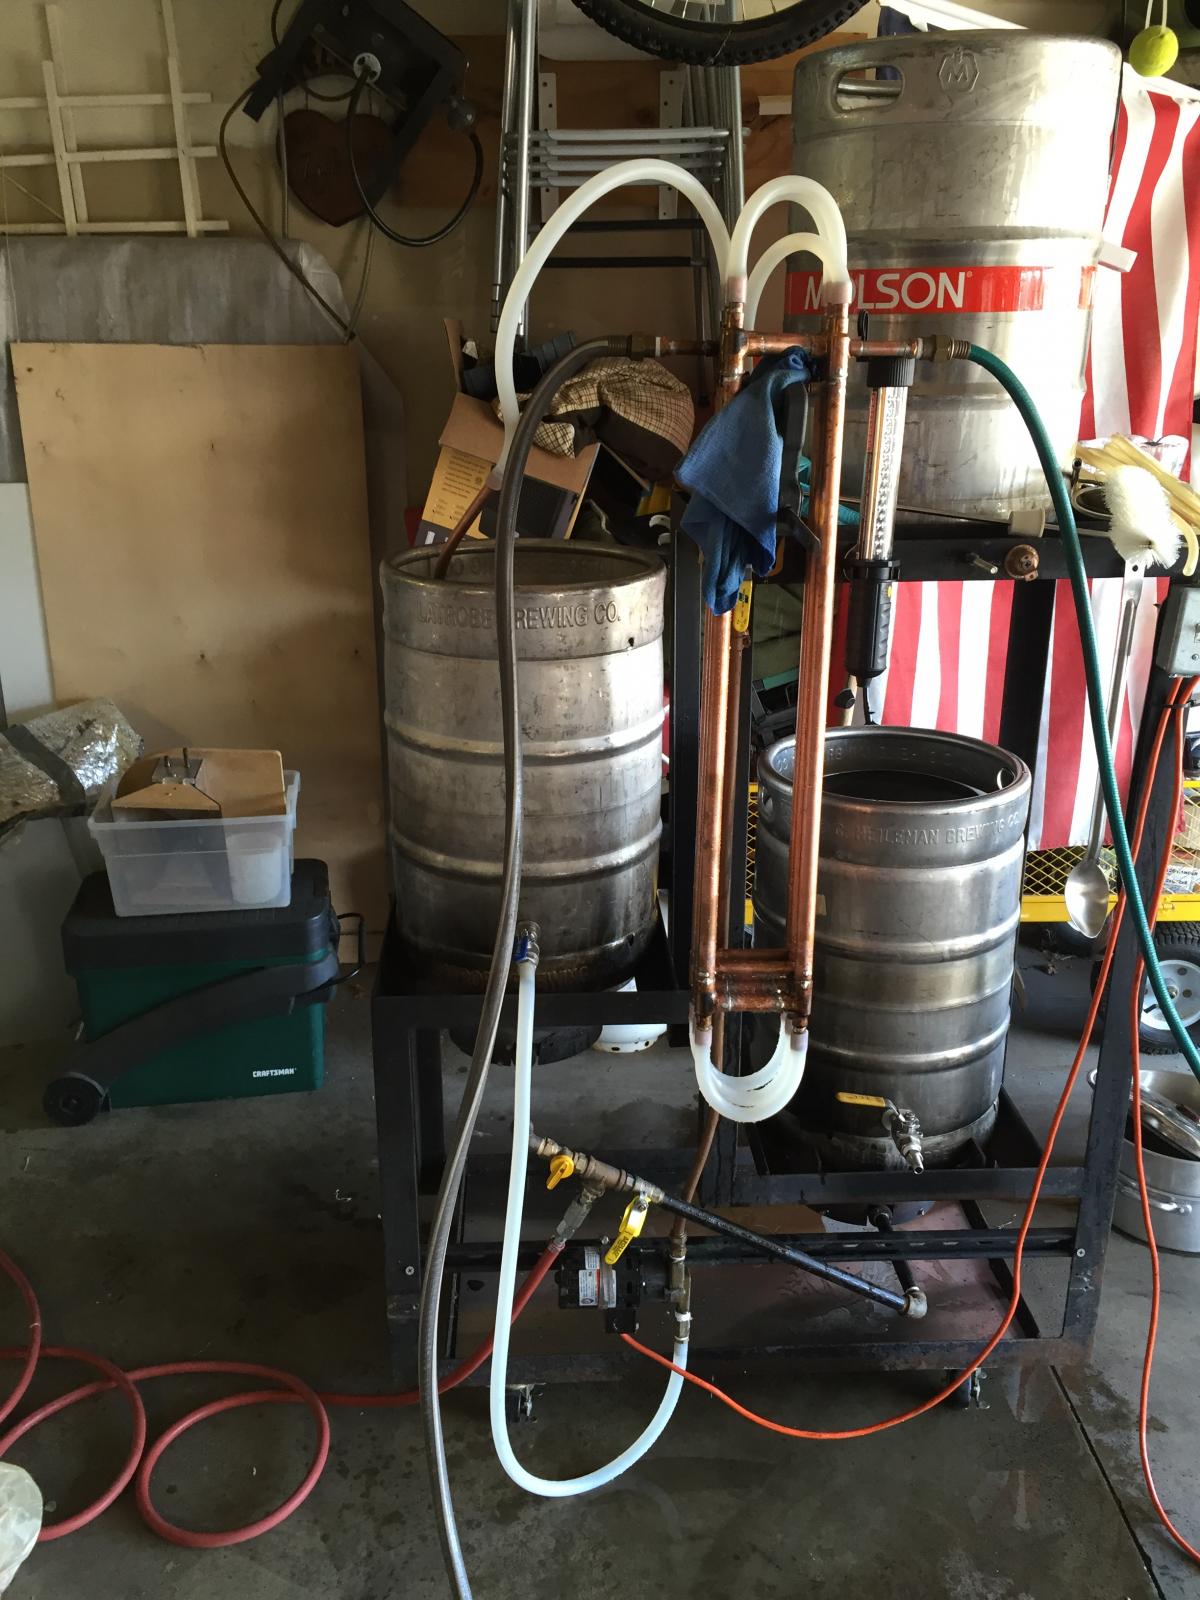
You got to love the "Tippy". Years ago I saw the "tippy dump" system on the more beer website and decided it was a great idea and using just a picture from the website, made one myself. I really liked the idea of the single tier but I liked the idea of the space saving even better since i was using a pump anyway. The top mash tun tips right into a garbage can/bag. I've added / modified a few things since this picture (Cleanable counter flow chiller, whirlpool arm, etc.) but overall the design is unchanged. Its of wheels to be easily moved around. It's also natural gas with quick disconnects with about a 15-20 foot line.

2013-12-28 08.26.17.jpg
 
Love the idea of quickly dumping the mash, but what do you dump it into?

The grain is about 150 degrees, and still pretty wet.

I'm trying to decide if I want to do the same.
 
Once I mash out I take the tubing and just let it slowly drain into a bucket I hang on the side of the system. When it drains slow like that it surprisingly gets out most if not all liquid. I leave it in the mash tun until my boil is almost complete then tip it into a garbage can with a hefty bag in it. Never had any issues. It's about 24 pounds of malt dry so I assume it's twice as much wet.
 
It's about 24 pounds of malt dry so I assume it's twice as much wet.

I don't know about you, but my garbage men would be pissed/refuse to pick that stuff up (yes, I don't have the autoloader service, part of my township taxes). Luckily I have a bunch of self sustaining people in my neighborhood, one post for "free chicken feed" and they all come running with buckets!
 
I don't know about you, but my garbage men would be pissed/refuse to pick that stuff up (yes, I don't have the autoloader service, part of my township taxes). Luckily I have a bunch of self sustaining people in my neighborhood, one post for "free chicken feed" and they all come running with buckets!

We have those big one yard dumpster type containers so the garbage men never touch it. I've put two spent grain dumpings in there before and never had a complaint.
 
I just noticed that you used the top of the keg cut off to hold the burner! Nice touch!

Thanks... We are trying to not waste anything. Stainless is expensive! It is just about done now... Only problem we are having is with some of the weldless fittings leaking (from bargainfittings.com) but I will play with those and the fact that the flame gets messed up when it is put into position. I am assuming that there is not enough air getting in from the bottom... We tried to drill holes on the bottom lip of the keg, but it didnt help (the flames stayed lazy and licked up the side of the keg) so we ended up welding on some washers to cover them back up :( Perhaps we can just leave a little more of a gap and/or drill holes in the bottom of the burner holder. We will see... I will share more pics when the unit gets to my house on EASTER!
 
You got to love the "Tippy". Years ago I saw the "tippy dump" system on the more beer website and decided it was a great idea and using just a picture from the website, made one myself. I really liked the idea of the single tier but I liked the idea of the space saving even better since i was using a pump anyway. The top mash tun tips right into a garbage can/bag. I've added / modified a few things since this picture (Cleanable counter flow chiller, whirlpool arm, etc.) but overall the design is unchanged. Its of wheels to be easily moved around. It's also natural gas with quick disconnects with about a 15-20 foot line.


Any chance you could take a pic of your sparge arm? I have always been a batch sparger but now that I got the PICO false bottom (which has like 1-2 gallons of liquid under it, not touching the grains), I think I will NEED to fly sparge .... I only have 1 pump right now though, so that will make things a little harder I guess (since I went with a single tier) Not sure how I am going to do that now that I think of it... Any suggestions?
 
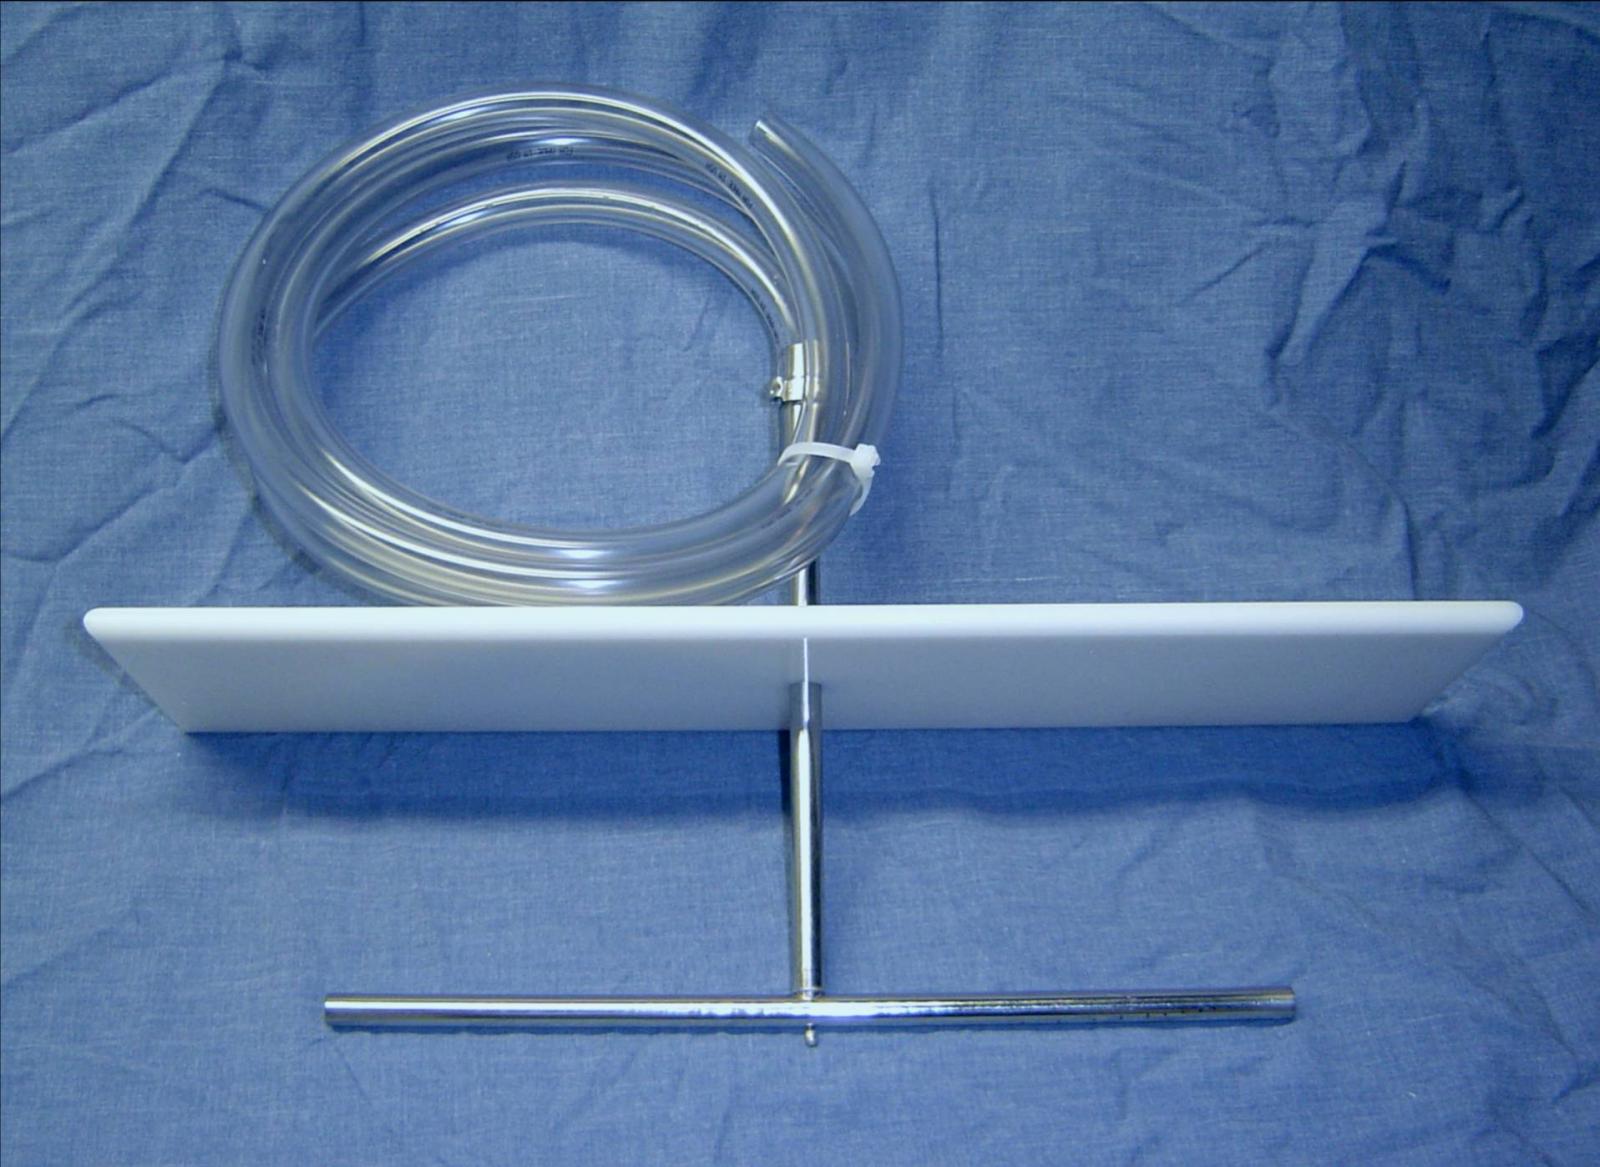
The sparge arm is actually just sitting in my boil kettle in the picture. Here is what I use. When liquid is pumped into it, the holes on the bottom make it spin and rain on the grain bed. I only have one pump also. I switch what and where liquid is pumped with the valves on each kettle and moving a tube if need be. I can boil in the bottom, pump to the top for mashing, open the valve on my boil kettle and chill 14 gallons in about 12 minutes in the kettle while whirl pooling with my home made whirl pool arm. Just yank the tubing off the home made cleanable counter flow chiller and I can clean inside the chiller and soak it in star san one end at a time if needed

Sparge arm.jpg


2015-03-14 15.10.20.jpg
 
The sparge arm is actually just sitting in my boil kettle in the picture. Here is what I use. When liquid is pumped into it, the holes on the bottom make it spin and rain on the grain bed. I only have one pump also. I switch what and where liquid is pumped with the valves on each kettle and moving a tube if need be. I can boil in the bottom, pump to the top for mashing, open the valve on my boil kettle and chill 14 gallons in about 12 minutes in the kettle while whirl pooling with my home made whirl pool arm. Just yank the tubing off the home made cleanable counter flow chiller and I can clean inside the chiller and soak it in star san one end at a time if needed

Yeah , I will need to build a sparge arm... how did you attach the bottom pipe to the top one? Is the height adjustable?
You are able to fly sparge with one pump because you drain with gravity, right?
I mean when you fly sparge you are supposed to keep the water just above the grain bed and drain at at the same time. So, since i cant use gravity to drain I either can drain or i can sparge, not both. Unless I am not understanding something quite right here, or someone has a solution that I am not thinking of
 
I heat water in the lower, pump to the top which is m mash tun, sparge with water from the lowest kettle using the pump and gravity takes in into the boil kettle (middle).
 
I heat water in the lower, pump to the top which is m mash tun, sparge with water from the lowest kettle using the pump and gravity takes in into the boil kettle (middle).

Yeah... I cant do that, since mine is single tier... Ohh well...
 
Did you purchase that sparge arm pre-made? It looks like its a pic from a store or something
 
OP, you had said that you were going to use 3 tanks of propane why don't you just build a gas manifold? They can be made from 1/2" black pipe and brass fittings from the Depot. I built a 3 tier and made one for about $100 after buying a 20psi regulator. When that one breaks I'm buying a 30psi one.
 
OP, you had said that you were going to use 3 tanks of propane why don't you just build a gas manifold? They can be made from 1/2" black pipe and brass fittings from the Depot. I built a 3 tier and made one for about $100 after buying a 20psi regulator. When that one breaks I'm buying a 30psi one.

To be honest I am not really sure how to do it and I already have 3 30 psi regulators with hoses. I would like to eventually get to that point, but I wanted to have a good amount of control over the burners and , again, I am not sure how to handle gas with pipe/fittings/pressure/etc and how it all fits together.

Also, maybe I am wrong here, but wouldnt the tank freeze with nearly 300,000 btus being pulled of a single tank?

I'll post some picks of my set up to get you thinking.

And as far as the tank freezing, it is rare that you will have all 3 going at the same time. The only time I have 2 going at once is when I start heating up my sparge water and I need to bring the temp up on my mash.

View attachment ImageUploadedByHome Brew1427983128.309037.jpgView attachment ImageUploadedByHome Brew1427983169.646231.jpgView attachment ImageUploadedByHome Brew1427983192.202004.jpgView attachment ImageUploadedByHome Brew1427983213.086016.jpgView attachment ImageUploadedByHome Brew1427983233.623080.jpg

Edit: I have had my tank freeze but it usually only happens when it's cold out an almost empty, at that point I just put the tank in a bucket of warm water and it works fine.
 
To be honest I am not really sure how to do it and I already have 3 30 psi regulators with hoses. I would like to eventually get to that point, but I wanted to have a good amount of control over the burners and , again, I am not sure how to handle gas with pipe/fittings/pressure/etc and how it all fits together.

Also, maybe I am wrong here, but wouldnt the tank freeze with nearly 300,000 btus being pulled of a single tank?

You very rarely are running all three burners. But yes, the tank will freeze up if running all three full bore.

But assembling a manifold isn't too hard. Like Transamguy77 said, you can assemble it from fittings at the Blue or Orange store. Nothing to daunting.

Edit: started typing this up and got sidetracked. Didn't see Transamguy77 reply. I didn't go the full 1/2" ID pipe, and used something called a flow control for each burner.

http://www.ebay.com/itm/PARKER-Bras...374?pt=LH_DefaultDomain_0&hash=item46370e9196

For the single tier, just sections of the pipe, with a "T" for the first two burners, an elbow for the last. Place the flow controls on top of both T's and the Elbow at the end, then short runs of tubing out the other end to the burner. hook up one of your 30psi regulartors to the opposite end of the pipe from the elbow, and you're golden pony boy...

now that is the kind of info I need... step by step THANKS! I may attempt this in the future... once I feel a little more confident. Not sure about those reducers etc though
 
Back
Top